Skip to content
  • MySensors
  • OpenHardware.io
  • Categories
  • Recent
  • Tags
  • Popular
Skins
  • Light
  • Brite
  • Cerulean
  • Cosmo
  • Flatly
  • Journal
  • Litera
  • Lumen
  • Lux
  • Materia
  • Minty
  • Morph
  • Pulse
  • Sandstone
  • Simplex
  • Sketchy
  • Spacelab
  • United
  • Yeti
  • Zephyr
  • Dark
  • Cyborg
  • Darkly
  • Quartz
  • Slate
  • Solar
  • Superhero
  • Vapor

  • Default (No Skin)
  • No Skin
Collapse
Brand Logo
  1. Home
  2. Troubleshooting
  3. Need some help on how to burn a sketch with SlimNode and 1MHz Bootloader

Need some help on how to burn a sketch with SlimNode and 1MHz Bootloader

Scheduled Pinned Locked Moved Troubleshooting
12 Posts 3 Posters 2.7k Views 2 Watching
  • Oldest to Newest
  • Newest to Oldest
  • Most Votes
Reply
  • Reply as topic
Log in to reply
This topic has been deleted. Only users with topic management privileges can see it.
  • sundberg84S Offline
    sundberg84S Offline
    sundberg84
    Hardware Contributor
    wrote on last edited by
    #2

    Not exactly - but looks like some sort of library error.
    Might want to try to reinstall Arduino IDE and the libraries.

    Controller: Proxmox VM - Home Assistant
    MySensors GW: Arduino Uno - W5100 Ethernet, Gw Shield Nrf24l01+ 2,4Ghz
    MySensors GW: Arduino Uno - Gw Shield RFM69, 433mhz
    RFLink GW - Arduino Mega + RFLink Shield, 433mhz

    D 1 Reply Last reply
    0
    • sundberg84S sundberg84

      Not exactly - but looks like some sort of library error.
      Might want to try to reinstall Arduino IDE and the libraries.

      D Offline
      D Offline
      drock1985
      wrote on last edited by
      #3

      @sundberg84

      Well, I got the sketch to compile. Had some folders I needed to make and put some files in.

      Not I can't seem to get the sketch to flash to the chip. I'm using a FTDI232 adapter but get sync errors.

      My Projects
      2 Door Chime Sensor
      Washing Machine Monitor

      1 Reply Last reply
      0
      • sundberg84S Offline
        sundberg84S Offline
        sundberg84
        Hardware Contributor
        wrote on last edited by sundberg84
        #4

        @drock1985 - Good!
        How do you power the arduino (pro mini, atmega chip or what?)? Any circuit involved?

        If its the same as initial post, you need a ISP programmer. Ftdi needs a bootloader to burn the sketch.

        Controller: Proxmox VM - Home Assistant
        MySensors GW: Arduino Uno - W5100 Ethernet, Gw Shield Nrf24l01+ 2,4Ghz
        MySensors GW: Arduino Uno - Gw Shield RFM69, 433mhz
        RFLink GW - Arduino Mega + RFLink Shield, 433mhz

        1 Reply Last reply
        0
        • D Offline
          D Offline
          drock1985
          wrote on last edited by
          #5

          Hi @sundberg84

          The bootloader burned just fine using an Arduino as the ICSP. I am using a 3.3v ftdi to program the sketch, but that is what's giving me the sync errors.

          My Projects
          2 Door Chime Sensor
          Washing Machine Monitor

          1 Reply Last reply
          0
          • sundberg84S Offline
            sundberg84S Offline
            sundberg84
            Hardware Contributor
            wrote on last edited by
            #6

            @drock1985 - so you need to verify you got the right settings for that and also selected the right board in the IDE.

            Controller: Proxmox VM - Home Assistant
            MySensors GW: Arduino Uno - W5100 Ethernet, Gw Shield Nrf24l01+ 2,4Ghz
            MySensors GW: Arduino Uno - Gw Shield RFM69, 433mhz
            RFLink GW - Arduino Mega + RFLink Shield, 433mhz

            D 1 Reply Last reply
            0
            • sundberg84S sundberg84

              @drock1985 - so you need to verify you got the right settings for that and also selected the right board in the IDE.

              D Offline
              D Offline
              drock1985
              wrote on last edited by
              #7

              @sundberg84

              I'll have to look into it a little bit more then. First time ever using a bare Atmega chip and the Optibootloader. Thanks again.

              My Projects
              2 Door Chime Sensor
              Washing Machine Monitor

              1 Reply Last reply
              0
              • sundberg84S Offline
                sundberg84S Offline
                sundberg84
                Hardware Contributor
                wrote on last edited by
                #8

                @drock1985 - if you are using Optiboot check this out:

                https://www.openhardware.io/view/33/Various-bootloader-files-based-on-Optiboot-62

                Controller: Proxmox VM - Home Assistant
                MySensors GW: Arduino Uno - W5100 Ethernet, Gw Shield Nrf24l01+ 2,4Ghz
                MySensors GW: Arduino Uno - Gw Shield RFM69, 433mhz
                RFLink GW - Arduino Mega + RFLink Shield, 433mhz

                D 1 Reply Last reply
                0
                • sundberg84S sundberg84

                  @drock1985 - if you are using Optiboot check this out:

                  https://www.openhardware.io/view/33/Various-bootloader-files-based-on-Optiboot-62

                  D Offline
                  D Offline
                  drock1985
                  wrote on last edited by
                  #9

                  @sundberg84

                  Hi,

                  I actually downloaded that package and am (attempting) to use it. I had to create a couple of folders for it to compile the sketches (can't remember their names, on a different computer).

                  I'll keep checking into it. Any ideas?

                  My Projects
                  2 Door Chime Sensor
                  Washing Machine Monitor

                  GertSandersG 1 Reply Last reply
                  0
                  • sundberg84S Offline
                    sundberg84S Offline
                    sundberg84
                    Hardware Contributor
                    wrote on last edited by
                    #10

                    Nope - cant help you more, not familiar with this bootloader - but you could talk to @GertSanders (author).

                    Controller: Proxmox VM - Home Assistant
                    MySensors GW: Arduino Uno - W5100 Ethernet, Gw Shield Nrf24l01+ 2,4Ghz
                    MySensors GW: Arduino Uno - Gw Shield RFM69, 433mhz
                    RFLink GW - Arduino Mega + RFLink Shield, 433mhz

                    1 Reply Last reply
                    0
                    • D drock1985

                      @sundberg84

                      Hi,

                      I actually downloaded that package and am (attempting) to use it. I had to create a couple of folders for it to compile the sketches (can't remember their names, on a different computer).

                      I'll keep checking into it. Any ideas?

                      GertSandersG Offline
                      GertSandersG Offline
                      GertSanders
                      Hardware Contributor
                      wrote on last edited by
                      #11

                      @drock1985

                      From the earlier compile warnings I think you should do a clean install of the IDE 1.6.8
                      The warnings show "leftovers" from earlier versions and this results in the warnings you see.

                      Also do not just backup and recopy your older libraries, but use the library manager in the IDE to get the latest versions.

                      Then add your older sketches back to the new sketches directory (I would really advise to start clean).

                      I have added a ZIP file which is the compressed version of my subdirectory of boards and boot loaders.

                      This needs to be unpacked in the sketches directory in a folder called "hardware"

                      .0_1461177747340_Screen Shot 2016-04-20 at 20.42.16.png

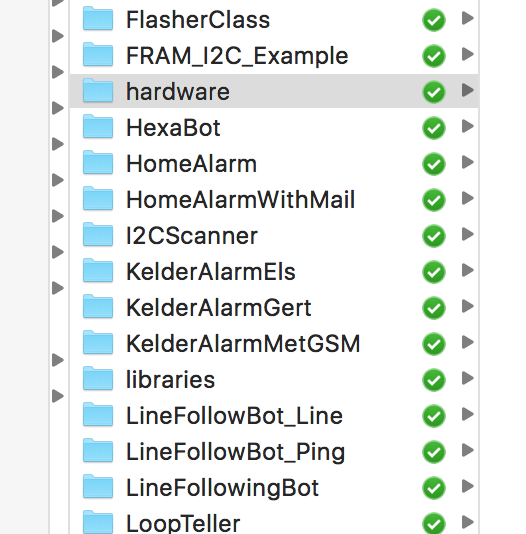
                      The detail (after unpacking would be like this:

                      0_1461177879118_Screen Shot 2016-04-20 at 20.43.48.png

                      0_1461177891459_Screen Shot 2016-04-20 at 20.44.04.png

                      So the ZIP below needs to be expanded inside the "hardware" directory of the sketches folder.

                      0_1461177773326_atmega328p.zip

                      After that I would do another attempt to write the boot loader and then try with the FTDI on a different COM port or USB interface.

                      1 Reply Last reply
                      2
                      • D Offline
                        D Offline
                        drock1985
                        wrote on last edited by
                        #12

                        Hi @GertSanders

                        Thanks for the help. Finally had some time yesterday to mess around and started fresh with the .zip you included. Works like a dream now. I had to disable BOD to flash @ 1MHz; but it works flawlessly. Thank you so much again.

                        My Projects
                        2 Door Chime Sensor
                        Washing Machine Monitor

                        1 Reply Last reply
                        0
                        Reply
                        • Reply as topic
                        Log in to reply
                        • Oldest to Newest
                        • Newest to Oldest
                        • Most Votes


                        10

                        Online

                        11.7k

                        Users

                        11.2k

                        Topics

                        113.1k

                        Posts


                        Copyright 2025 TBD   |   Forum Guidelines   |   Privacy Policy   |   Terms of Service
                        • Login

                        • Don't have an account? Register

                        • Login or register to search.
                        • First post
                          Last post
                        0
                        • MySensors
                        • OpenHardware.io
                        • Categories
                        • Recent
                        • Tags
                        • Popular