Everything nRF52840
-
@NeverDie , you got it right, mine has the advantage of being self holding, which is quite an advantage if you want to debug, I tried, to debug in the past using the keyboard with only one hand, not very efficient :)
As you can see, the one in the left side, is holding by itself, it does not has the cables soldered though, the one on the right is my first iteration, but the side holders are weak and broke with time.
It is true that the fact of picking the two side points, it makes it self aligning.
The blue versions are the newer ones, where you can slide it in with the pogo pins stretched out, and then you press it in and lock the open space in the bottom with that small blue little thingie that we see unused and free in the middle version. So no rubber band required, all is static mechanics.
Both middle and left versions are available, the middle version requires glue to fix the pogo pins in the printed shell after being inserted the first time but makes soldering the wires on top easier. The left one has a roof holding the pogo pins but they're harder to access for soldering the debug wires in them and also printing is with slightly more debris given the complex bridging.
One way or the other, this managed to get me a self-standing pogo pin adapter of an already existing board. Indeed if you design your own, you can think of those you linked, but if you're short of space, you can also fallback on such custom 3d printed solutions.
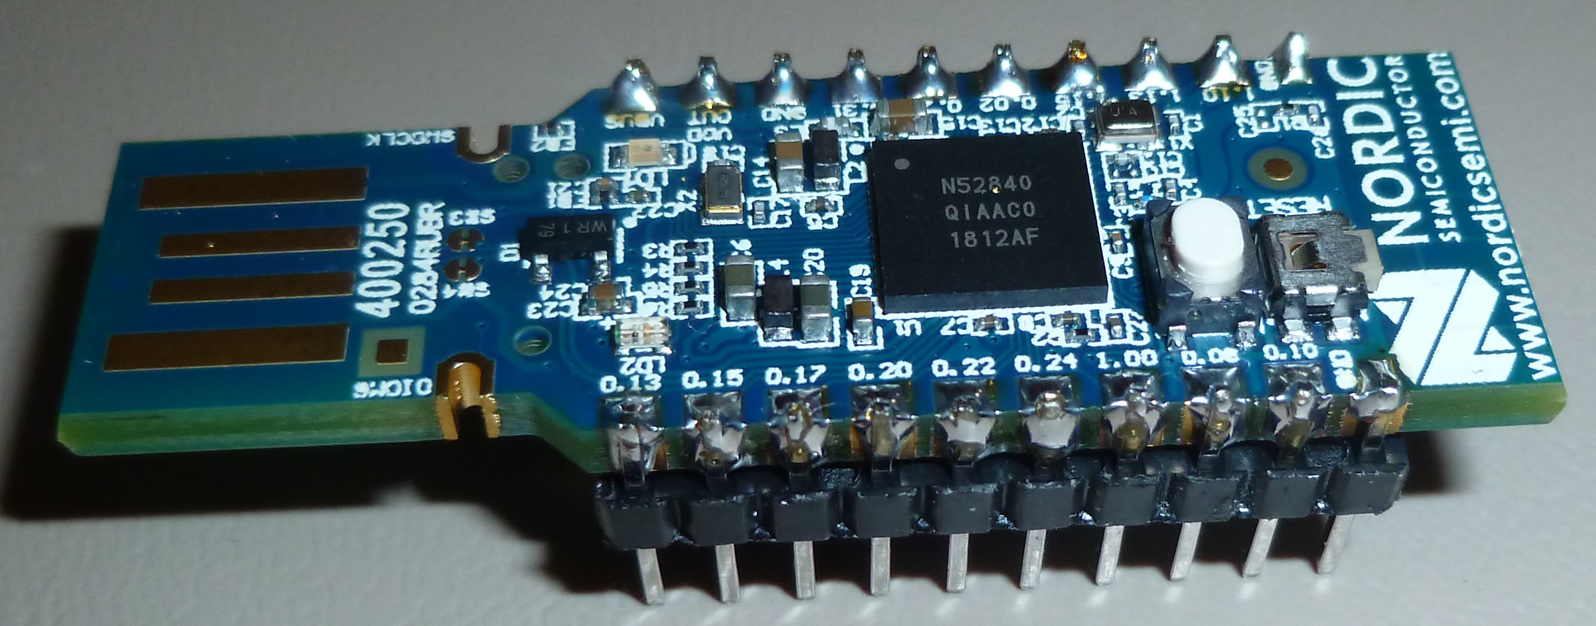
This nRF52840 usb dongle is an amazingly powerful board and so cheap, that I'm confused why Nordic did not made the debug for it simpler, feels like they prefer to sell the dev kit for prototyping, but they don't know how hobbyist like to prototype on the final cheap product. I could afford 5 of them to experiment with some mesh protocols.So if you have access to 3d printing and would like to give it a try, I'll stay around and help if needed, also if you have improvement suggestions, I struggle with fusion360 till I get things done.
-
@NeverDie , you got it right, mine has the advantage of being self holding, which is quite an advantage if you want to debug, I tried, to debug in the past using the keyboard with only one hand, not very efficient :)
As you can see, the one in the left side, is holding by itself, it does not has the cables soldered though, the one on the right is my first iteration, but the side holders are weak and broke with time.
It is true that the fact of picking the two side points, it makes it self aligning.
The blue versions are the newer ones, where you can slide it in with the pogo pins stretched out, and then you press it in and lock the open space in the bottom with that small blue little thingie that we see unused and free in the middle version. So no rubber band required, all is static mechanics.
Both middle and left versions are available, the middle version requires glue to fix the pogo pins in the printed shell after being inserted the first time but makes soldering the wires on top easier. The left one has a roof holding the pogo pins but they're harder to access for soldering the debug wires in them and also printing is with slightly more debris given the complex bridging.
One way or the other, this managed to get me a self-standing pogo pin adapter of an already existing board. Indeed if you design your own, you can think of those you linked, but if you're short of space, you can also fallback on such custom 3d printed solutions.
This nRF52840 usb dongle is an amazingly powerful board and so cheap, that I'm confused why Nordic did not made the debug for it simpler, feels like they prefer to sell the dev kit for prototyping, but they don't know how hobbyist like to prototype on the final cheap product. I could afford 5 of them to experiment with some mesh protocols.So if you have access to 3d printing and would like to give it a try, I'll stay around and help if needed, also if you have improvement suggestions, I struggle with fusion360 till I get things done.
@wassfila Nicely engineered!
BTW, if I'm not mistaken, Adafruit's bootloader ( https://learn.adafruit.com/introducing-the-adafruit-nrf52840-feather/update-bootloader ) should work on these dongle boards as well. I suspect the way it may works is:
0. Install the booloader as per the instructions in the link above. Thereafter,- Plug the dongle into the usb port on your pc, whereupon lit's treated like a virtual hard drive.
- Drag the binary you want to upload to the virtual drive icon on the PC
- Reboot to finish, and that launches your program.
Anyone tried it? If so, is that a correct summation?
-
@wassfila Nicely engineered!
BTW, if I'm not mistaken, Adafruit's bootloader ( https://learn.adafruit.com/introducing-the-adafruit-nrf52840-feather/update-bootloader ) should work on these dongle boards as well. I suspect the way it may works is:
0. Install the booloader as per the instructions in the link above. Thereafter,- Plug the dongle into the usb port on your pc, whereupon lit's treated like a virtual hard drive.
- Drag the binary you want to upload to the virtual drive icon on the PC
- Reboot to finish, and that launches your program.
Anyone tried it? If so, is that a correct summation?
@NeverDie i can speak for arduino side im not sure how it works for CircuitPython. virtual hard drive part is only true if there was a bootloader prior to update. im not sure how nordic ships their dongles but i think they dont install adafruit bootloader inside of them :) so you need a fresh bootloader install and it is easy but you need jlink for that. after connecting your jlink to nrf52 open the arduino from menu find jlink for adafruit nrf52 and then just simply click install bootloader and voila it works with arduino.
but then again that usb dongle wont work seamlessly with adafruit bootloader because im sure adafruit has different pin maps you just need to check their pins from variants file and match them on paper to the dongle so when you write your code you know which ones to use, unless theres a seperate variants file specifically made for this dongle.
Hello! It looks like you're interested in this conversation, but you don't have an account yet.
Getting fed up of having to scroll through the same posts each visit? When you register for an account, you'll always come back to exactly where you were before, and choose to be notified of new replies (either via email, or push notification). You'll also be able to save bookmarks and upvote posts to show your appreciation to other community members.
With your input, this post could be even better 💗
Register Login