Hello!
Let me introduce simple project - MySensors control for IKEA Varv lamp. http://www.ikea.com/us/en/catalog/products/70280709/
Used hardware:
- Arduino Pro Mini 5v
- nrf24L01+ module
- solid state relay https://www.aliexpress.com/item/5v-1-Channel-OMRON-SSR-G3MB-202P-Solid-State-Relay-Module/32545508200.html
- 5V to 3.3V converter based on LM1117 https://www.aliexpress.com/item/LM1117-AMS1117-4-5-7V-turn-3-3V-DC-DC-Step-down-Power-Supply-Module-For/32588261370.html
- piece of prototype board, wires, etc
Disassemble lamp: remove shade, disassemble bulb holder to get access to switch and wiring, remove cover from base (note four screws hidden under rubber pads)
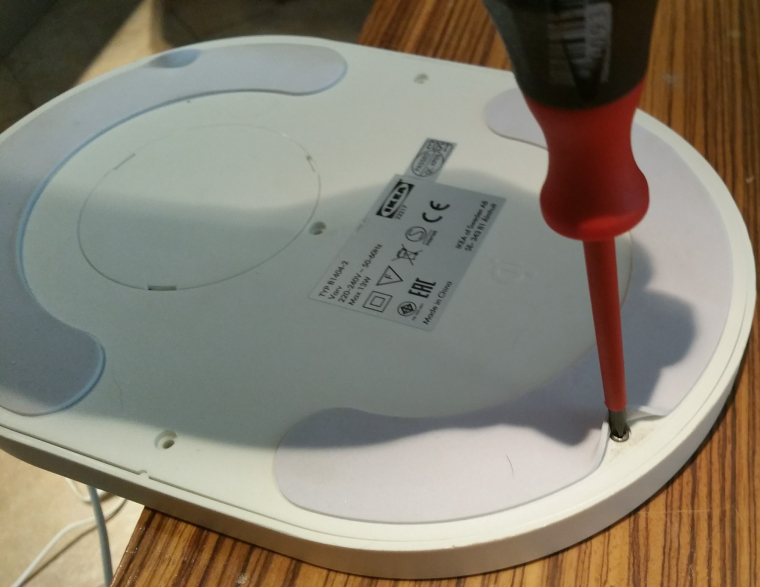
and get access to internals
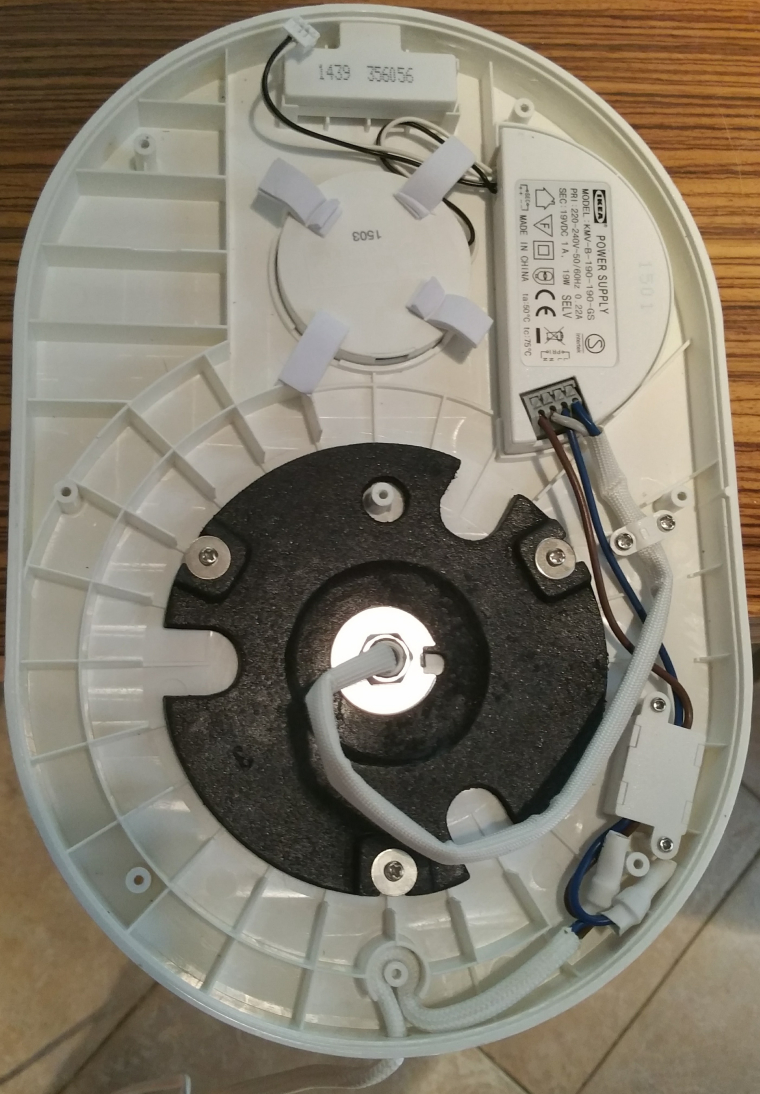
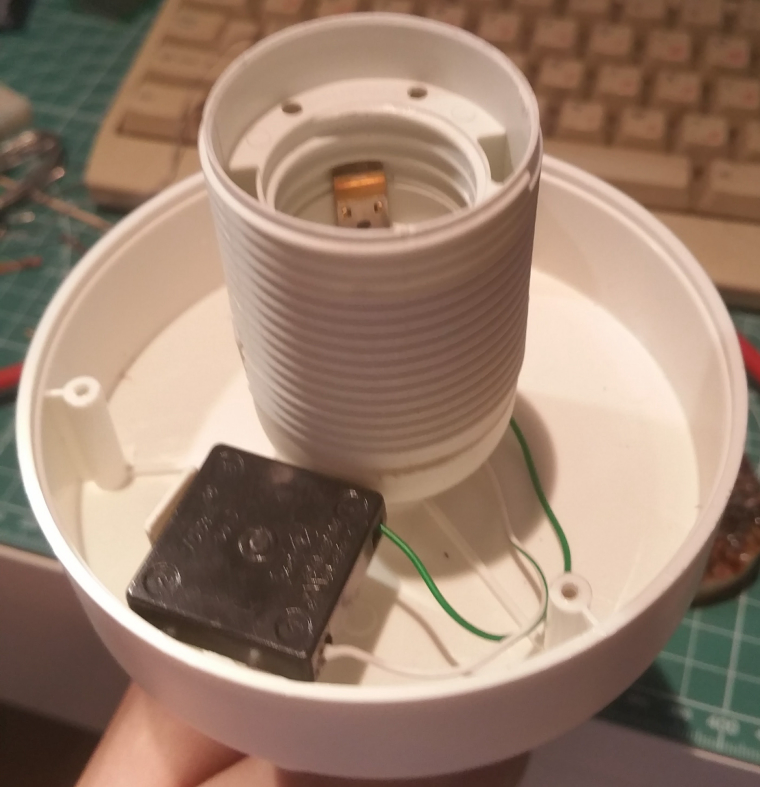
Remove mains wires from switch, connect it directly to lamp bulb holder, connect additional wires to switch to use it wits MySensors and route new wires throw pipe stand to bottom part
Open cover of usb charger (be careful and do not damage the board)
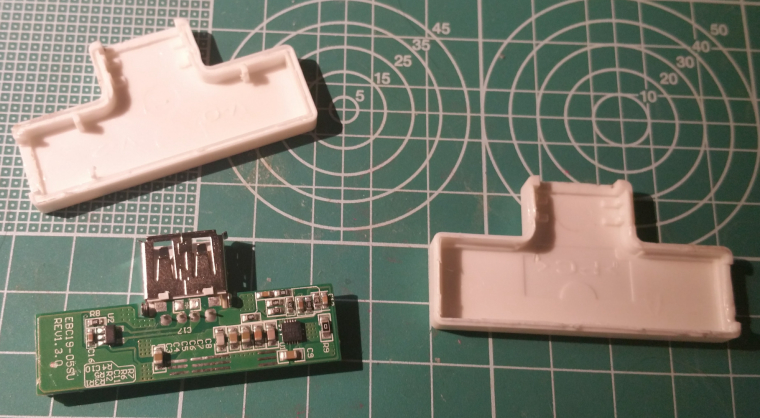
solder wires for powering arduino to usb ground and +5v
Connection between nrf24L01+ and arduino pretty standard, i use piece of prototyping board to hold radio module and voltage converter together. This sub-assembly and arduino pro mini fits perfectly into base of lamp, just cut a little for wires pass freely.
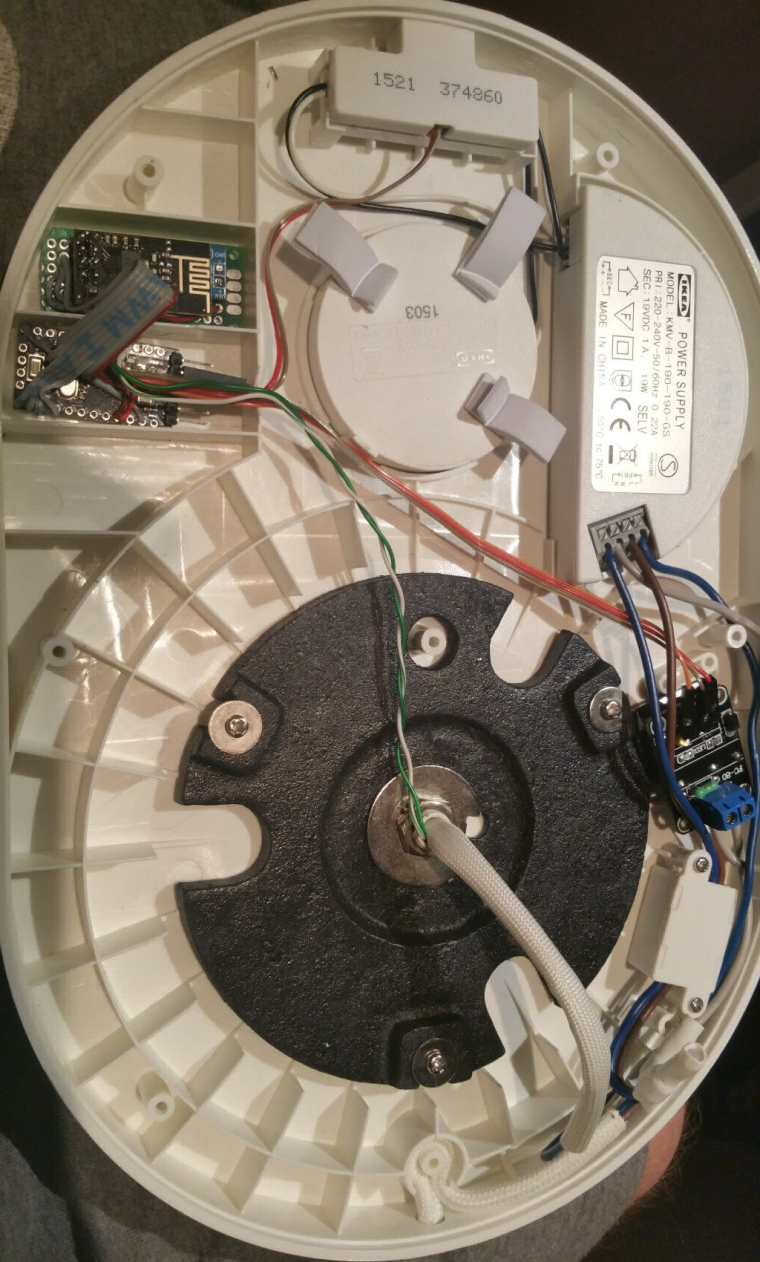
Relay module little modified to fit into lamp base - relay de-soldered, pins bend to 90 degree and relay soldered from other side of board, terminals for control signals replaced with pin connectors.
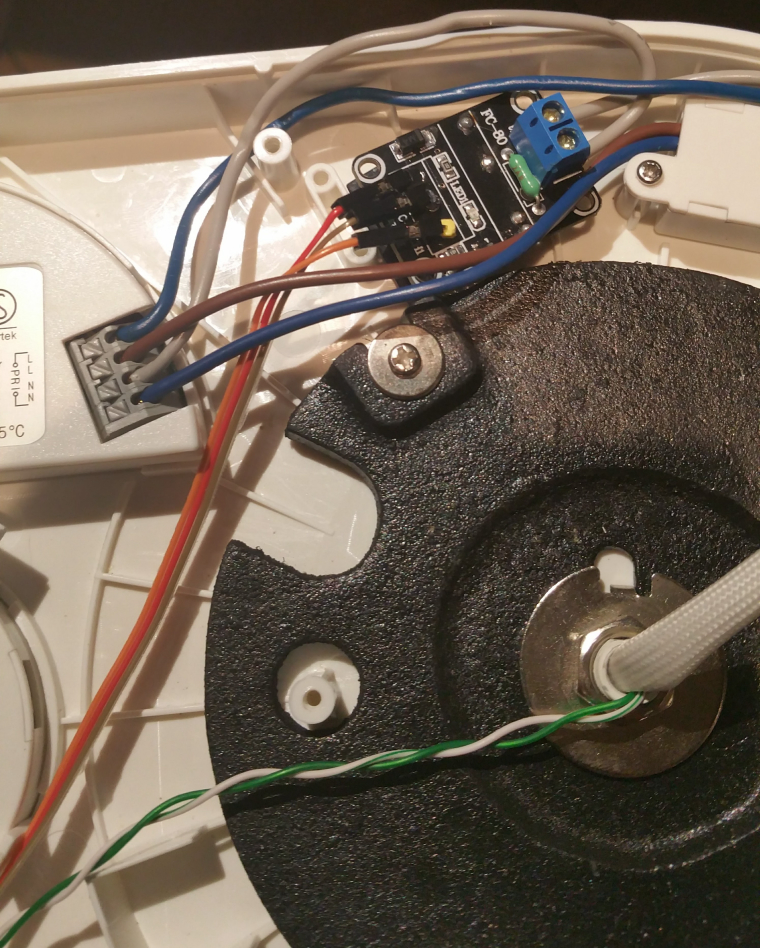
Relay connected to arduino pin 3, switch to pin 4 .
Because this project should have a wife compatibility mode :) switch was used not as on/off switch, but as a trigger, lamp switch state on switch change, not on switch position.
Comments and suggestion is welkomed, and sorry for my not-so-good English.
Successfully used over a week in my home, using OpenHab2 and ethernet gateway.
Code, if somebody interest, here
0_1504119175102_IkeaLamp.ino