Using an Arduino Uno as ISP for programming 5V and 3.3V boards without soldering the needed connections
-
I needed a programmer quickly and because ordering one, would take too much time, I went the way of using an Arduino as ISP.
Programming another Uno, for example, is not difficult, you will find tutorials all over the net. The Uno's have soldered connectors, so you can use Dupont cables to do the needed connections.
If you have a Pro Mini 3.3V 8MHz, it is more complicated- problem of 5V (UNO) versus 3.3V (Pro Mini)
In some forum posts you can read that you can program a 3.3V one with 5V because the used chip is the same. Oké, that is maybe true, but what if you want to reprogram a Pro Mini with other connected 3.3V only hardware? - how to connect the needed cables if you don't want to solder? (de-soldering a header is not one of my favorite activities, neither cleaning the solder holes ;-) )
One solution I found when Googling was this one: https://create.arduino.cc/projecthub/user3330224/programming-the-arduino-pro-mini-without-soldering-pins-7d033d from Ruben Zilzer.
I printed his 'clothes pins', but the problem are the used header pins. You must put solder on it to make sure that the connection is done. This must be done very accurately, because all pins must make good contact with the board. If you have one of them that has a lower soldering than the others, these others don't make contact and it doesn't work properly. :-(
Imagine, to program a Pro Mini I used another Pro Mini, so in total 4 clothes pins.
I've done my best but I didn't manage to have each time a good contact between the 2 Arduino's.
Conclusion: a good idea, but unfortunately not reliable.So, I searched the internet further on, but didn't find a reliable solution...
Until suddenly I remembered a very old, I think Elektor?, project, to build your own digital scope. Times when buying such a thing was outside everyone's personal budget.
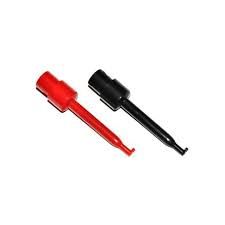
Mini measuring clips were used to connect the scope to the DUT thing.

If I used these clips to do the connections?
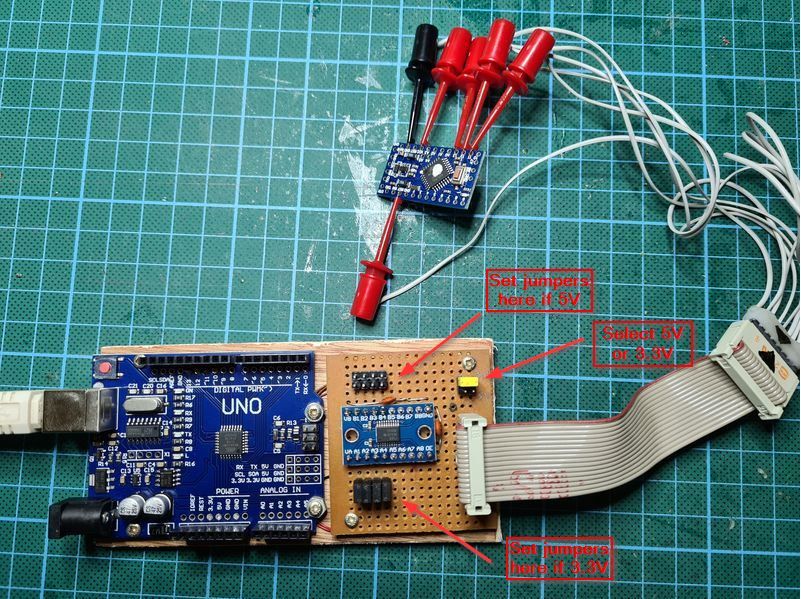
I even found back this old project and could re-use the existing measure clips together with the flat cable, a profound stroke of luck :-)

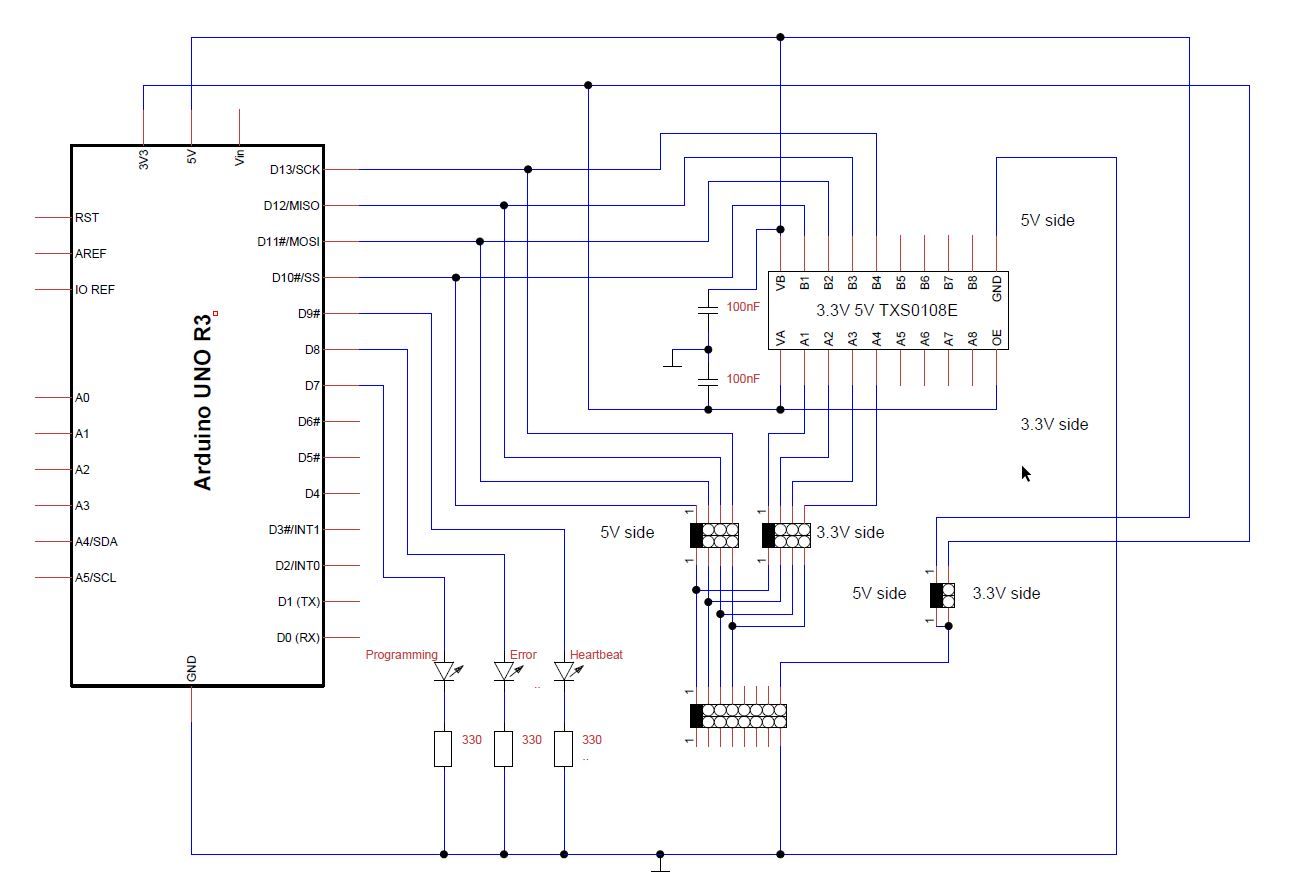
To solve the 5V to 3.3V problem, I did use the 8-Bit Bidirectional Voltage-Level Shifter TXS0108E. To make it configurable, I used jumpers.
See the following diagram

With the jumpers you select the needed voltage to program the target board.
Because I used an Uno as programmer, I can simple connect the Uno to the computer via the build in USB connector. No USB-to-TTL programmer needed when using another Pro Mini to program a Pro Mini to avoid the voltage problem, with the used mini measuring clips I can program other Arduino boards, etc...Don't forget to uncomment #define USE_OLD_STYLE_WIRING in the ArduinoISP sketch in the examples to use the 'old style' connection like I did in my schema.
Edit 2020-11-24
(Re)Programming a Pro Mini with already connected hardware like a radio RFM69HW who uses also the pins D11(SCK), D12(MISO), D13(MOSI), can interfere with the ISP programmer. In one case, the Pro Mini was not correctly identified as a 328 device: “Yikes! Invalid device signature”.
The solution in that case, is to disconnect temporarily the external hardware.Maybe this can help other people struggling with the same problem... :-)
- problem of 5V (UNO) versus 3.3V (Pro Mini)
-
I stumbled onto another solution to program without soldering a Pro Mini, namely using spring loaded pins.
See the topic of @Joost : https://www.openhardware.io/view/772/Minimal-LiPo-powered-Arduino-Pro-Mini-RFM95-MySensors-node
"Also to be seen on the pictures is a programming adapter for an Arduino Pro Mini with spring loaded pins, as I do not want to solder the serial pins on the Arduino (due to size requirements)."Of course it is just a solution to program the Pro Mini with a USB-to-TTL programmer!
-
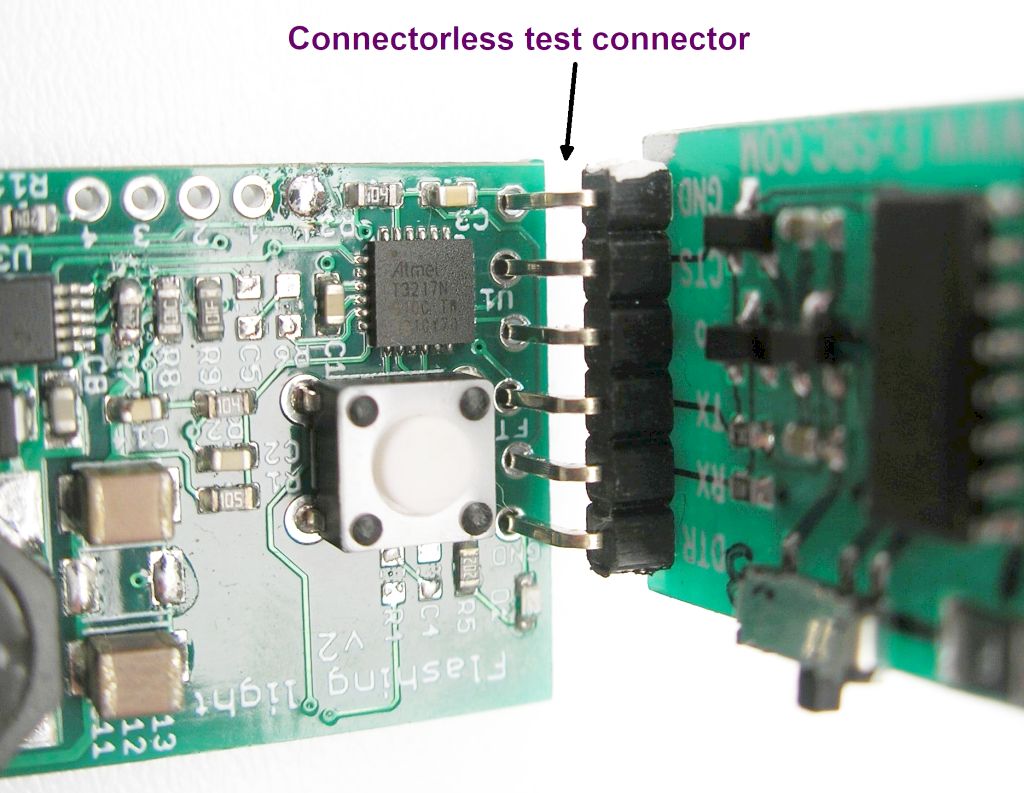
Another way is to align the header pins landing pattern in a zig-zag so as to make a temporary solderless connection held in place by the spring tension of the misaligned header pins:

I've tried it and it works, but because of the wear on the through-hole plating it's not really appropriate for frequent use. For a once-and-done setup though it seems to work just fine. For instance, Ideally you'd install a wireless bootloader just once and then from then on you don't need a physical connection.
