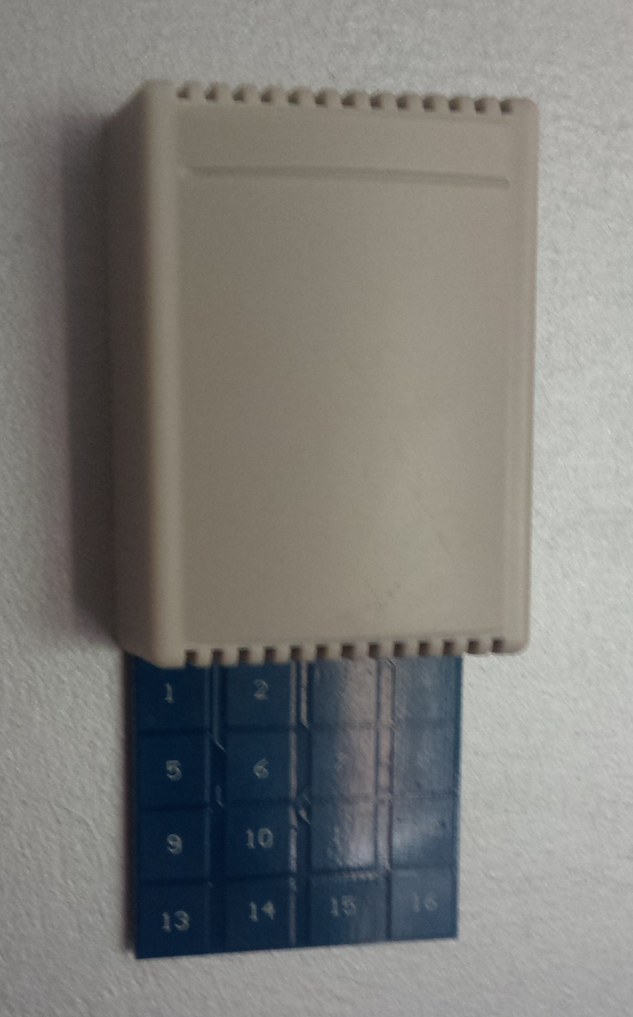
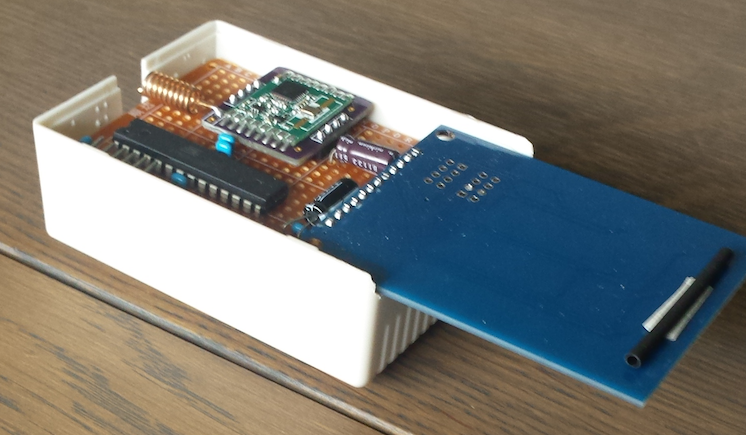
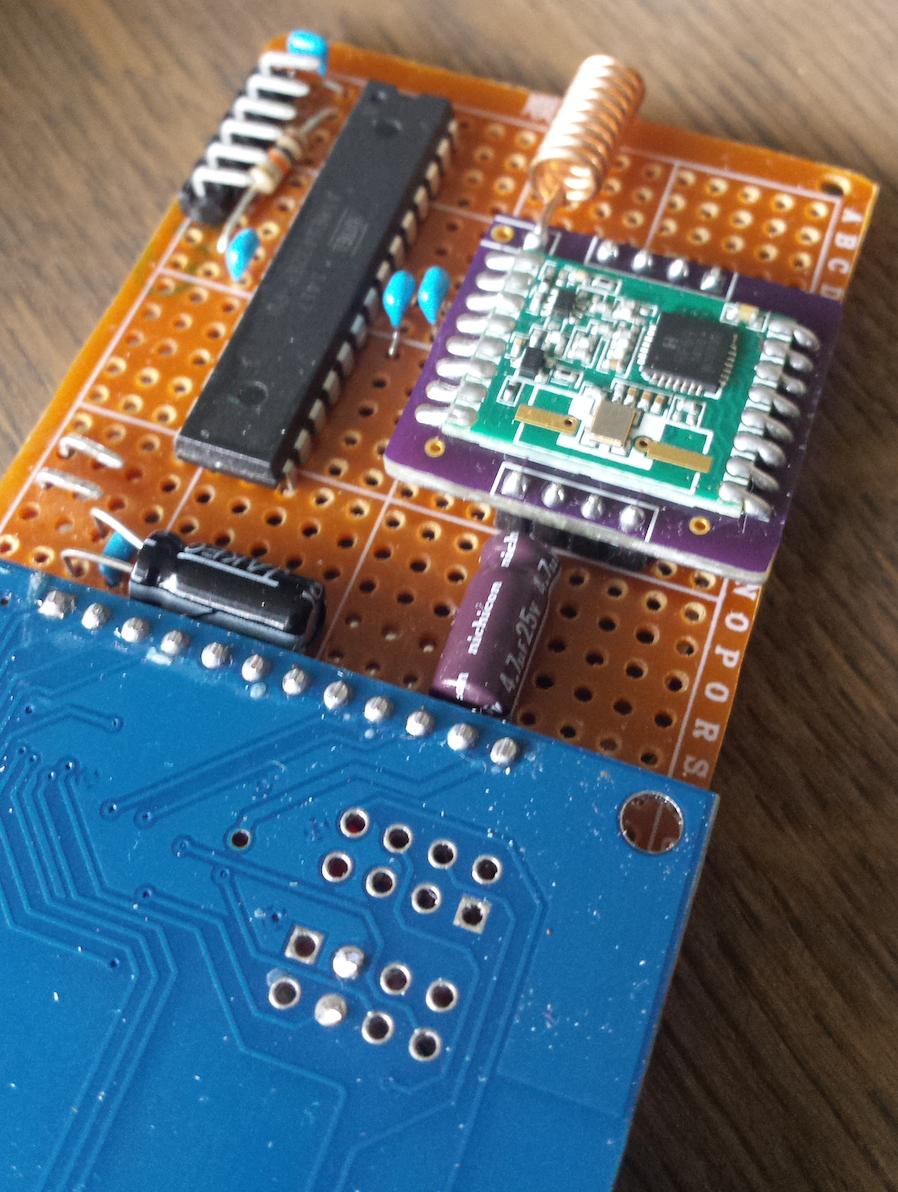
Slim Node scene controller/ keypad
-
Inspired by the Battery button sensor, a look at "how low can you go"
Not much more than a standard 16 key touchpad and the ever popular slim node.
Have it sleep on interrupt only (no timer delay)
DVint = sleep(DV_int, FALLING, 0); // sleep, node wakes up on key interrupt (sleep returns int number)and it will last for years on a coin cell. i.e.
250mAh battery ; 50 keypresses a day ; results in > 7 year battery life!Now thinking on which housing to use.. I wish I had the skills for something like this :disappointed: .
-
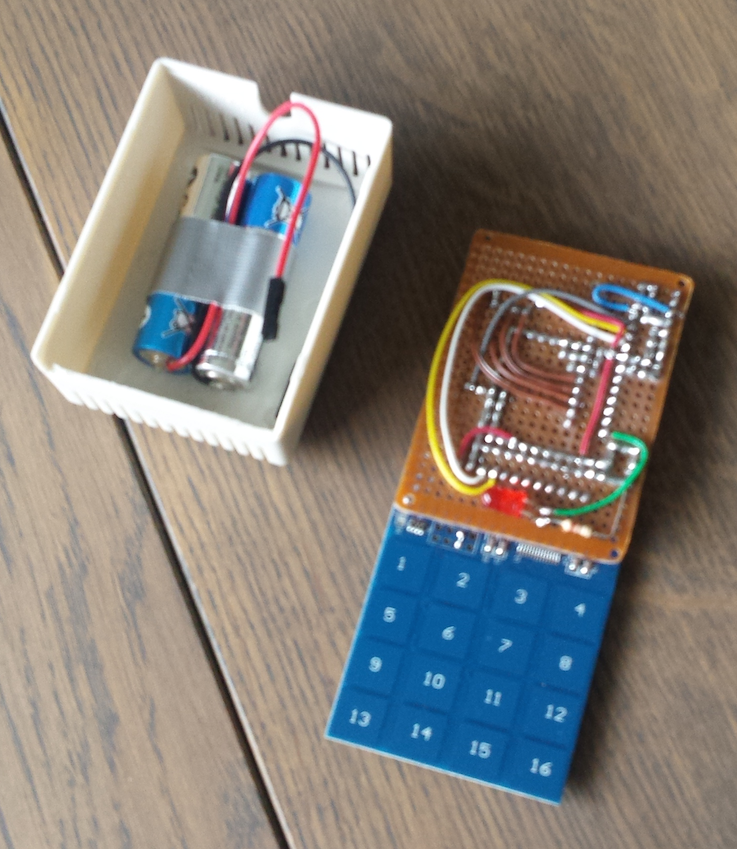
Completed the design... not a beauty but functional. Expected lifetime with the battery > 50 yrs (2.2 uA, completely theoretical. Batteries aren't of that quality )
. The bi-color LED was added to show the on/off state when toggling a scene. (and because @GertSanders likes flashing led's :grinning: )
-
-
hi @AWI
This looks great, and i've been exploring the same thing too. Would you please explain how the keypad works with the Slim Node and sleep node? Would you be able to post your code please?
Again, great project and love the idea :)
@drock1985 Sure, to summarize what is in the code: The TP229 can work with a serial protocol. When a key is pressed the serial data line pulses low. This generates an interrupt that wakes the processor. From there on the data is read by clocking the SCL input and reading the key status from the SDA output.
/** * The MySensors Arduino library handles the wireless radio link and protocol * between your home built sensors/actuators and HA controller of choice. * The sensors forms a self healing radio network with optional repeaters. Each * repeater and gateway builds a routing tables in EEPROM which keeps track of the * network topology allowing messages to be routed to nodes. * * Created by Henrik Ekblad <henrik.ekblad@mysensors.org> * Copyright (C) 2013-2015 Sensnology AB * Full contributor list: https://github.com/mysensors/Arduino/graphs/contributors * * Documentation: http://www.mysensors.org * Support Forum: http://forum.mysensors.org * * This program is free software; you can redistribute it and/or * modify it under the terms of the GNU General Public License * version 2 as published by the Free Software Foundation. * ******************************* * * REVISION HISTORY * Version 1.0 - PeteWill * 1.1 - AWI * 20150212 1.2 - AWI - Moved to development (1.6) and added support for 16 pad keyboard * * DESCRIPTION * A simple scene controller for use with MySensors. 16 button/ scene * low power interrupt driven * utilizes the interrupt feature on ttp299 to wake node and send */ // MySensor definitions (1.6) // Enable debug prints to serial monitor //#define MY_DEBUG #define MY_RADIO_NRF24 // Enable and select radio type attached #define MY_NODE_ID 56 // #define MY_RF24_CE_PIN 7 // Ceech board, 3.3v (7,8) (pin default 9,10) // #define MY_RF24_CS_PIN 8 // #define DESTINATION_NODE 51 // node to send info(default 0 = gateway) #define MY_BAUD_RATE 9600 #include <SPI.h> #include <MySensor.h> #define SN "Scene Controller" #define SV "1.2" const byte KEYPAD_CHILD_ID = 0 ; // child ID for node keypad (could also be multiple childs for each key) MyMessage scene_on(KEYPAD_CHILD_ID, V_SCENE_ON); MyMessage scene_off(KEYPAD_CHILD_ID, V_SCENE_OFF); // Pin definitions (Serial Data on interrupt pin to wake up) const int SDA_pin = 2 ; // DataValid (=key pressed) pin goes there const int DV_int = SDA_pin - 2 ; // DataValid interrupt on pin 3 => 1 const int OnLedPin = 4 ; const int OffLedPin = 5 ; // const unsigned long SLEEP_TIME = 3600000 ; // sleep for an hour (avoid use for deep sleep) volatile boolean DVint = false ; // interrupt flag, set by interrupt const int SCL_pin = 3 ; // keypad clock pin const int keyboardSize = 8 ; // number of keys on keyboard boolean keyState[keyboardSize] ; // hold current keystate (store in EEPROM) void setup(){ // Serial.begin(9600) ; sendSketchInfo(SN, SV); present(KEYPAD_CHILD_ID, S_SCENE_CONTROLLER, "keypad" ); pinMode(SDA_pin,INPUT); // Data Valid (interrupt) pinMode(SCL_pin, OUTPUT); digitalWrite(SCL_pin, HIGH); pinMode(OnLedPin, OUTPUT) ; pinMode(OffLedPin, OUTPUT) ; for (int i=0 ; i < keyboardSize; i++){ // load last Scenestates from EEPROM keyState[i] = loadState(i) ; } } // loop only if interrupt, else sleep void loop(){ // if interrupt get a key value and send to MySensosrs network and store in EEPROM DVint = sleep(DV_int, FALLING); // sleep, node wakes up on key interrupt, (sleep returns int number) Serial.print("Key pressed or time trigger: "); Serial.println(DVint); if (DVint == 0){ // test if there was a key interrupt (0) fetchData(); // if so fetch key states (values in global keyState[]) for(int i = 0 ; i < keyboardSize; i++){ // perform action for all keys pressed if (keyState[i]){ // toggle from lastState in EEPROM if press saveState(i, (boolean)loadState(i)?false:true); // save new state to EEPROM flashLed(loadState(i)) ; // flash on/off led resp. send(loadState(i)?scene_on.set(i):scene_off.set(i)); // set the Scene On or Off Serial.print("key: "); Serial.print(i + 1 ); Serial.print(" state: "); Serial.println(loadState(i)); } } sleep(1000); // only one key per second } } // fetch serial data, store in keyState int fetchData(){ digitalWrite(SCL_pin, LOW); // get first bit delayMicroseconds(100); // allow for stable input digitalWrite(SCL_pin, HIGH); for(int i = 0; i < keyboardSize; i++){ // read all keys keyState[i] = (digitalRead(SDA_pin) == LOW) ; // set key if pressed digitalWrite(SCL_pin, LOW); // get first bit delayMicroseconds(100); // allow for stable input digitalWrite(SCL_pin, HIGH); delayMicroseconds(100); } } void flashLed(boolean state){ digitalWrite(OnLedPin, state?HIGH:LOW); digitalWrite(OffLedPin, state?LOW:HIGH); wait(100); digitalWrite(OnLedPin, LOW); digitalWrite(OffLedPin, LOW); } -
Hi AWI,
Real nice design with all the small hardware. I have a tip for you on how you can make a very simple custom design membrane keypad.
I used to work with POS scales. Most of the older designs had membrane keyboards. We fitted custom designs with the customers SKU's just by printing a new keyboard on plain paper. Then we used Sticky Laminating slides like these to seal the design and paste it to your keyboard.
These sheets should not cost more than 1~2 $ per A4 sheet. Cold seal versions should be available, but most work with a machine. These machines van be found for approx 20,- $
This way you should be able to build any custom layout if you have the MSpaint skills!
-
Hi AWI,
Real nice design with all the small hardware. I have a tip for you on how you can make a very simple custom design membrane keypad.
I used to work with POS scales. Most of the older designs had membrane keyboards. We fitted custom designs with the customers SKU's just by printing a new keyboard on plain paper. Then we used Sticky Laminating slides like these to seal the design and paste it to your keyboard.
These sheets should not cost more than 1~2 $ per A4 sheet. Cold seal versions should be available, but most work with a machine. These machines van be found for approx 20,- $
This way you should be able to build any custom layout if you have the MSpaint skills!
@Kristiaan-Nugteren Thanks, I will give it a try. I have all the ingredients laying around..
-
@AWI Hello, did you set something (jumper) to reduce the power consumption ? Did you removed the LED on the keyboard ?
I measured the power consumption at something close to 1.3mA. Really far to your 2.2uA !David.
@carlierd Hi David, sorry for being not complete. To be sure I just made taken some new measurements. I killed the D1 led and you should connect the P1/3 jumper for 16 key operation (see below in picture)
if you do so the current goes down from a few mA to a few uA (depends on voltage) This measurement is with 3.0V
Please shout if you don't manage to get it like this.
-
Hello @AWI !
For an unknown reason I missed your reply. Thanks. I wait the week-end to test it.
I spent several hours on the net to find a "soft" solution. I think that it's very strange to add a led on this circuit. As the component's consumption is very low, a solution to disable the led in a proper way allows to use it in battery solution.
David.
-
@carlierd Hi David, sorry for being not complete. To be sure I just made taken some new measurements. I killed the D1 led and you should connect the P1/3 jumper for 16 key operation (see below in picture)
if you do so the current goes down from a few mA to a few uA (depends on voltage) This measurement is with 3.0V
Please shout if you don't manage to get it like this.
@AWI
Led removed and power consumption really low but not stable ! I measure with my uCurrent a consumption between 1.8uA and 2.5. And sometimes some pikes close to 9 or 15 uA. It seems to be every 8 seconds (link to arduino wake-up ?).
Not a real issue as it's very low.I will now work on the package :)
David.
-
@AWI
Led removed and power consumption really low but not stable ! I measure with my uCurrent a consumption between 1.8uA and 2.5. And sometimes some pikes close to 9 or 15 uA. It seems to be every 8 seconds (link to arduino wake-up ?).
Not a real issue as it's very low.I will now work on the package :)
David.
@carlierd Good news! The "8 second wakeup" of the arduino should only occur in a "timed sleep". not if you only specify interrupt. The keypad driver is behaving rather unexpected and is very sensitive but if you leave it for a while (on battery power) it will calm down..:sleepy:
-
@carlierd Good news! The "8 second wakeup" of the arduino should only occur in a "timed sleep". not if you only specify interrupt. The keypad driver is behaving rather unexpected and is very sensitive but if you leave it for a while (on battery power) it will calm down..:sleepy:
-
Hello !
I was inspired by your post and adapt your code to my needs:
- Scene controller on key 10, 11, 12, 13, 14, 15 and 16 (7 scenes possible)
- 4 digit code send as VAR_1 if 4 keys between 1 and 9 have been pushed one after one within 2 seconds
For fun I added a buzzer and a final song is played in case the code is sent.
No control of the code in the sensor, it will be done in the controller (Jeedom).The code if someone is interested:
/**
 * The MySensors Arduino library handles the wireless radio link and protocol
 * between your home built sensors/actuators and HA controller of choice.
 * The sensors forms a self healing radio network with optional repeaters. Each
 * repeater and gateway builds a routing tables in EEPROM which keeps track of the
 * network topology allowing messages to be routed to nodes.
 *
 * Created by Henrik Ekblad <henrik.ekblad@mysensors.org>
 * Copyright (C) 2013-2015 Sensnology AB
 * Full contributor list: https://github.com/mysensors/Arduino/graphs/contributors
 *
 * Documentation: http://www.mysensors.org
 * Support Forum: http://forum.mysensors.org
 *
 * This program is free software; you can redistribute it and/or
 * modify it under the terms of the GNU General Public License
 * version 2 as published by the Free Software Foundation.
 *
 *
 * Code modified from AWI
 * (http://forum.mysensors.org/topic/3128/slim-node-scene-controller-keypad)
 *
 * Buzzer code from Sparkfun
 * (SparkFun Inventor's Kit / Example sketch 11)
 *
 */

/**************************************************************************************/
/* Keyboard sensor.                                                                   */
/*                                                                                    */
/* Version     : 1.5.10                                                                */
/* Date        : 17/04/2016                                                           */
/* Modified by : David Carlier                                                        */
/**************************************************************************************/
/*                                ---------------                                     */
/*                            RST |             |  A5                                 */
/*                            RX  |             |  A4                                 */
/*                            TX  |   ARDUINO   |  A3                                 */
/*     RFM69 (DIO0) --------- D2  |     UNO     |  A2                                 */
/*     Keyboard SDA --------- D3  |             |  A1                                 */
/*     Keyboard SCL --------- D4  | ATMEGA 328p |  A0                                 */
/*              +3v --------- VCC |             | GND --------- GND                   */
/*              GND --------- GND |  8MHz int.  | REF                                 */
/*                            OSC |             | VCC --------- +3v                   */
/*                            OSC |             | D13 --------- RFM69 (SCK)           */
/*                            D5  |             | D12 --------- RFM69 (MISO)          */
/*                            D6  |             | D11 --------- RFM69 (MOSI)          */
/*                            D7  |             | D10 --------- RFM69 (NSS)           */
/*              LED --------- D8  |             |  D9 --------- Buzzer                */
/*                                ---------------                                     */
/*                                                                                    */
/* +3v = 2*AA                                                                         */
/*                                                                                    */
/**************************************************************************************/

#include <SPI.h>
#include <MySensor.h>
#include <MyTransportRFM69.h>
#include <MySigningAtsha204Soft.h>

//Constants for MySensors
#define SKETCH_NAME           "Keyboard Sensor"
#define SKETCH_VERSION        "1.5.10"
#define CHILD_ID_DIGICODE     0
#define KEYPAD_ID_SCENE       1
#define CHILD_ID_VOLTAGE      2
#define SDA_PIN               3
#define SCL_PIN               4
#define LED_PIN               8
#define BUZZER_PIN            9
#define BUZZ_FREQ_KEY         350
#define BUZZ_TIME_KEY         100
#define BUZZ_FREQ_ERROR       75
#define KEYBOARD_SIZE         16
#define MAX_SCENE             7
#define BATTERY_FULL          3143    // 2xAA usually gives 3.143V when full
#define BATTERY_ZERO          2340    // 2.34V limit for 328p at 8MHz

//Length must equal the total number of notes and spaces
const byte songLength = 18;

//Notes is an array of text characters corresponding to the notes
//in your song. A space represents a rest (no tone)
char notes[] = "cdfda ag cdfdg gf "; // a space represents a rest

//Beats is an array of values for each note and rest.
//A "1" represents a quarter-note, 2 a half-note, etc.
//Don't forget that the rests (spaces) need a length as well.
int beats[] = {1,1,1,1,1,1,4,4,2,1,1,1,1,1,1,4,4,2};

//The tempo is how fast to play the song.
//To make the song play faster, decrease this value.
int tempo = 113;

//Misc. variables
unsigned long WAITING_TIME = 2000; //Waiting time for key pressing
boolean keyState[KEYBOARD_SIZE];

//Construct MySensors library
MySigningAtsha204Soft signer;
MyHwATMega328 hw;
MyTransportRFM69 transport;
MySensor node(transport, hw, signer);
MyMessage msgCode(CHILD_ID_DIGICODE, V_VAR1);
MyMessage msgSceneOn(KEYPAD_ID_SCENE, V_SCENE_ON);
MyMessage msgSceneOff(KEYPAD_ID_SCENE, V_SCENE_OFF);
MyMessage msgVolt(CHILD_ID_VOLTAGE, V_VOLTAGE);

/**************************************************************************************/
/* Initialization                                                                     */
/**************************************************************************************/
void setup()
  {
  //Get time (for setup duration)
  #ifdef DEBUG
    unsigned long startTime = millis();
  #endif

  //Setup buzzer and LED pins
  pinMode(BUZZER_PIN, OUTPUT);
  pinMode(LED_PIN, OUTPUT);
  blinkLedFastly(3);

  //Set keyboard pin
  pinMode(SDA_PIN,INPUT);
  pinMode(SCL_PIN, OUTPUT);
  digitalWrite(SCL_PIN, HIGH);

  //Start MySensors and send the Sketch Version Information to the Gateway
  node.begin();
  node.sendSketchInfo(SKETCH_NAME, SKETCH_VERSION);

  //Register all sensors
  node.present(CHILD_ID_DIGICODE, S_CUSTOM);
  node.present(KEYPAD_ID_SCENE, S_SCENE_CONTROLLER);
  node.present(CHILD_ID_VOLTAGE, S_MULTIMETER);

  //Load last Scenestates from EEPROM (7 scenestates available)
  for (int i = 0 ; i < MAX_SCENE; i++)
    {
    keyState[i] = node.loadState(i);
    #ifdef DEBUG
      Serial.print(" "); Serial.print(keyState[i]);
    #endif
    }

  //Setup done !
  blinkLedFastly(3);

  //Print setup debug
  #ifdef DEBUG
    int duration = millis() - startTime;
    Serial.println("");
    Serial.print("[Setup duration: "); Serial.print(duration, DEC); Serial.println(" ms]");
  #endif
  }

/**************************************************************************************/
/* Main loop                                                                          */
/**************************************************************************************/
void loop()
  {
  //Sleep, node wakes up on key interrupt
  byte interuptionType = node.sleep(SDA_PIN - 2, FALLING);

  //Verify if a key was pressed
  if (interuptionType == 0)
    {
    return;
    }

  //Get time (for a complete loop)
  #ifdef DEBUG
    unsigned long startTime = millis();
  #endif

  //Get first digit
  byte key = getKeyPressed();
  tone(BUZZER_PIN, BUZZ_FREQ_KEY, BUZZ_TIME_KEY);

  //Check validity
  if (key == 0)
    {

    Serial.print("bah si !");
    Serial.println(interuptionType);

    blinkLedFastlyAndBuzz(3);
    return;
    }

  //Inform user that key is valid
  blinkLedFastly(1);
  int digicode = key * 1000;

  //Check if key corresponds to a scene touch or a code
  if (key > 9)
    {
    //Update scene state
    node.saveState(key - 10, (boolean)node.loadState(key - 10)?false:true);

    //Report data to the gateway
    long voltage = getVoltage();
    node.send(node.loadState(key - 10)?msgSceneOn.set(key - 10):msgSceneOff.set(key - 10));
    node.send(msgVolt.set(voltage / 1000.0, 3));
    int batteryPcnt = round((voltage - BATTERY_ZERO) * 100.0 / (BATTERY_FULL - BATTERY_ZERO));
    if (batteryPcnt > 100) {batteryPcnt = 100;}
    node.sendBatteryLevel(batteryPcnt);

    //Print debug
    #ifdef DEBUG
      Serial.print("Scene ");
      Serial.print(key - 10);
      Serial.print(": ");
      Serial.print((boolean)node.loadState(key - 10)?" 1 ":" 0 ");
      Serial.print("   ");
      Serial.print(voltage / 1000.0);
      Serial.print(" v");
      int duration = millis() - startTime;
      Serial.print("   ");
      Serial.print("["); Serial.print(duration, DEC); Serial.println(" ms]");
      Serial.flush();
    #endif
    }
  else
    {
    //Wait for next key pressed or WAITING_TIME without action
    interuptionType = node.sleep(SDA_PIN - 2, FALLING, WAITING_TIME);

    //Verify if a key was pressed
    if (interuptionType == 0)
      {
      blinkLedFastlyAndBuzz(3);
      return;
      }

    //Get second digit
    key = getKeyPressed();
    tone(BUZZER_PIN, BUZZ_FREQ_KEY, BUZZ_TIME_KEY);

    //Check validity
    if (key == 0 || key > 9)
      {
      blinkLedFastlyAndBuzz(3);
      node.sleep(1000);
      return;
      }

    //Inform user that key is valid
    blinkLedFastly(1);
    digicode = digicode + key * 100;

    //Wait for next key pressed or WAITING_TIME without action
    interuptionType = node.sleep(SDA_PIN - 2, FALLING, WAITING_TIME);

    //Verify if a key was pressed
    if (interuptionType == 0)
      {
      blinkLedFastlyAndBuzz(3);
      return;
      }

    //Get third digit
    key = getKeyPressed();
    tone(BUZZER_PIN, BUZZ_FREQ_KEY, BUZZ_TIME_KEY);

    //Check validity
    if (key == 0 || key > 9)
      {
      blinkLedFastlyAndBuzz(3);
      node.sleep(1000);
      return;
      }

    //Inform user that key is valid
    blinkLedFastly(1);
    digicode = digicode + key * 10;

    //Wait for next key pressed or WAITING_TIME without action
    interuptionType = node.sleep(SDA_PIN - 2, FALLING, WAITING_TIME);

    //Verify if a key was pressed
    if (interuptionType == 0)
      {
      blinkLedFastlyAndBuzz(3);
      return;
      }

    //Get fourth digit
    key = getKeyPressed();
    tone(BUZZER_PIN, BUZZ_FREQ_KEY, BUZZ_TIME_KEY);

    //Check validity
    if (key == 0 || key > 9)
      {
      blinkLedFastlyAndBuzz(3);
      node.sleep(1000);
      return;
      }

    //Inform user that key is valid
    blinkLedFastly(1);
    digicode = digicode + key;

    //Report data to the gateway
    long voltage = getVoltage();
    node.send(msgCode.set(digicode));
    node.send(msgVolt.set(voltage / 1000.0, 3));
    int batteryPcnt = round((voltage - BATTERY_ZERO) * 100.0 / (BATTERY_FULL - BATTERY_ZERO));
    if (batteryPcnt > 100) {batteryPcnt = 100;}
    node.sendBatteryLevel(batteryPcnt);

    //Print debug
    #ifdef DEBUG
      Serial.print("Complete code: ");
      Serial.print(digicode);
      Serial.print("   ");
      Serial.print(voltage / 1000.0);
      Serial.print(" v");
      int duration = millis() - startTime;
      Serial.print("   ");
      Serial.print("["); Serial.print(duration, DEC); Serial.println(" ms]");
      Serial.flush();
    #endif

    //Play final song instead of sleeping
    playFinalSong();
    }

  //Wait to avoid false interruption
  node.sleep(1000);
  }

/**************************************************************************************/
/* Allows to play the final song.                                                     */
/**************************************************************************************/
void playFinalSong()
  {
  //Declare local variables
  int i, duration;

  // step through the song arrays
  for (i = 0; i < songLength; i++)
    {
    // length of note/rest in ms
    duration = beats[i] * tempo;

    // is this a rest?
    if (notes[i] == ' ')
      {
      delay(duration);            // then pause for a moment
      }
    else                          // otherwise, play the note
      {
      tone(BUZZER_PIN, frequency(notes[i]), duration);
      delay(duration);            // wait for tone to finish
      }
    delay(tempo/10);              // brief pause between notes
    }
  }

/**************************************************************************************/
/* takes a note character (a-g), and returns the corresponding frequency in Hz        */
/* for the tone() function.                                                           */
/**************************************************************************************/
int frequency(char note)
  {
  //Declare local variables
  int i;
  const int numNotes = 8;  // number of notes we're storing

  // The following arrays hold the note characters and their
  // corresponding frequencies. The last "C" note is uppercase
  // to separate it from the first lowercase "c". If you want to
  // add more notes, you'll need to use unique characters.

  // For the "char" (character) type, we put single characters
  // in single quotes.

  char names[] = { 'c', 'd', 'e', 'f', 'g', 'a', 'b', 'C' };
  int frequencies[] = {262, 294, 330, 349, 392, 440, 494, 523};

  // Now we'll search through the letters in the array, and if
  // we find it, we'll return the frequency for that note.

  for (i = 0; i < numNotes; i++)  // Step through the notes
    {
    if (names[i] == note)         // Is this the one?
      {
      return(frequencies[i]);     // Yes! Return the frequency
      }
    }
  return(0);  // We looked through everything and didn't find it,
              // but we still need to return a value, so return 0.
  }

/**************************************************************************************/
/* Allows to get the pressed key.                                                     */
/**************************************************************************************/
byte getKeyPressed()
  {
  //Get first bit
  digitalWrite(SCL_PIN, LOW);
  delayMicroseconds(100);
  digitalWrite(SCL_PIN, HIGH);

  //Read all keys
  for(int i = 0; i < KEYBOARD_SIZE; i++)
    {
    keyState[i] = (digitalRead(SDA_PIN) == LOW);
    digitalWrite(SCL_PIN, LOW);
    delayMicroseconds(100);
    digitalWrite(SCL_PIN, HIGH);
    delayMicroseconds(100);
    }

  //Read keyboard table to find the pressed key
  byte keyPressed = -1;
  for(int i = 0 ; i < KEYBOARD_SIZE; i++)
    {
    if (keyState[i])
      {
      keyPressed = i;
      }
    }

  //Return the result
  return (keyPressed + 1);
  }

/**************************************************************************************/
/* Allows to fastly blink the LED.                                                    */
/**************************************************************************************/
void blinkLedFastly(byte loop)
  {
  byte delayOn = 150;
  byte delayOff = 150;
  for (int i = 0; i < loop; i++)
    {
    blinkLed(LED_PIN, delayOn);
    delay(delayOff);
    }
  }

/**************************************************************************************/
/* Allows to fastly blink the LED and to play a sound on the buzzer.                  */
/**************************************************************************************/
void blinkLedFastlyAndBuzz(byte loop)
  {
  byte delayOn = 150;
  byte delayOff = 150;
  for (int i = 0; i < loop; i++)
    {
    blinkLed(LED_PIN, delayOn);
    tone(BUZZER_PIN, BUZZ_FREQ_ERROR, delayOff);
    delay(delayOff);
    }
  }

/**************************************************************************************/
/* Allows to blink a LED.                                                             */
/**************************************************************************************/
void blinkLed(byte pinToBlink, int delayInMs)
  {
  digitalWrite(pinToBlink,HIGH);
  delay(delayInMs);
  digitalWrite(pinToBlink,LOW);
  }

/**************************************************************************************/
/* Allows to get the real Vcc (return value in mV).                                   */
/* http://provideyourown.com/2012/secret-arduino-voltmeter-measure-battery-voltage/   */
/**************************************************************************************/
long getVoltage()
  {
  ADMUX = (0<<REFS1) | (1<<REFS0) | (0<<ADLAR) | (1<<MUX3) | (1<<MUX2) | (1<<MUX1) | (0<<MUX0);
  delay(50);  // Let mux settle a little to get a more stable A/D conversion
  //Start a conversion
  ADCSRA |= _BV( ADSC );
  //Wait for it to complete
  while (bit_is_set(ADCSRA, ADSC));

  //Compute and return the value
  uint8_t low  = ADCL;                  // must read ADCL first - it then locks ADCH
  uint8_t high = ADCH;                  // unlocks both
  long result = (high << 8) | low;
  result = 1125300L / result;           // Calculate Vcc (in mV); 1125300 = 1.1*1023*1000
  return result;                        // Vcc in millivolts
  }
David.
-
Hi @AWI
I decided to try and build your keypad but I am running into some compile errors with the code you have listed above. I see that in the description you moved to 1.6; but do you still have the code for 1.5? Haven't made the switch over yet and would like to see if these 16 key keypads I have will do what I am hoping.
Thanks,
@drock1985 I haven't made it in the production version but it should not be to much work. I can do it for you (untested) if I have a spare minute left..
-
@drock1985 I haven't made it in the production version but it should not be to much work. I can do it for you (untested) if I have a spare minute left..
-
@drock1985 Here you are..as mentioned in my previous post untested and I have commented most of the "development code"
https://codebender.cc/sketch:292642 -
Hello,
Some pictures of my scene controller inspired by this post ! I modified the original sketch to have two functions: keyboard for my alarm (from key 1 to 9) and scene controller (from key 10 to 16). Thanks @awi for the idea and the original sketch !


David.
