MYSBootloader 1.3.0-beta.3
-
Hello,
can the bootloader also be used on an Atmega32U4? After programming, the Atmega is no longer recognized by the Usb port of the PC. Should programming via the IDE (Arduino, PlatformIO) still be possible or will it only work via MyController?@mafe I don't have experience with FOTA, but this part of the documentation might help:
The MySensors master branch does not support upload through ftdi / serial (but the development branch does).
But I don't think MYSBootloader has support for Atmega32U4 at all.
-
Thanks for your answer!
Sorry, I forgot to mention that I want to do FOTA via an MQTT gateway. Is that working at all right now?@mafe said in MYSBootloader 1.3.0-beta.3:
imenticato di dire che voglio fare FOTA tramite un gateway MQTT. Sta f
If I understand OTA well with an MQTT gateway it is not possible. This at least using MYSBootloader
-
Hello, in one of the devices on mega2560 I want to use MYSBootloader for FOTA. Is this even possible for mega2560?
I changed the MYSBootloader sources for mega2560, the update is on, but it is looping (i.e. it reaches 100% and starts again), I think that the problem is in calculating the CRC of the firmware and I need to fix the static uint16_t calcCRCrom (const uint16_t len) function, but I have lack of knowledge, as I'm not a programmer, but just an amateur. Can someone help or suggest?P.S. Sorry for my english, it's all google translate
-
Hi, have been using myscontroller more than a year now and at some point i couldn't use OTA on devices, all the sensor data is coming in nicely. I don't know if it was due to updated arduino or i messed up something in my doards.txt or something else...
So question is if someone can give me versions/links to working solution?
https://github.com/mysensors/MySensorsBootloaderRF24/tree/development doesn't work.I'm using ProMini 16Mhz with external oscillator. Arduino is 1.8.13, MySensors 2.2.2,
Myscontroller 1.0.0beta:b3316. -
That's the problem, i don't know what exactly happened/caused this. That's why i'm asking for working solutions/versions so i can try to trace back what might be wrong with my setup.
Also now i remembered that i had to renew gateway with esp8266 since previous broke down. I don't know for sure that i had previously ota feature for gateway enabled.
GW sketch:// Enable debug prints to serial monitor #define MY_DEBUG // kui lae peale ei jõua #define MY_SIGNING_WEAK_SECURITY //!< Nodes that present themselves as not requiring signing or whitelisting will be cleared of this requirement at the receiving end. //#define MY_DEBUG_VERBOSE_SIGNING //!< Enable signing related debug prints to serial monitor //#define MY_SIGNING_SOFT //!< Software signing //#define MY_SIGNING_REQUEST_SIGNATURES // Enable this if you want destination node to sign all messages sent to this node. //#define MY_SIGNING_SOFT_RANDOMSEED_PIN A0 //!< Unconnected analog pin for random seed #define MY_RADIO_RF24 #define MY_GATEWAY_ESP8266 #define MY_WIFI_SSID "hidden" #define MY_WIFI_PASSWORD "hidden" // Enable MY_IP_ADDRESS here if you want a static ip address (no DHCP) #define MY_IP_ADDRESS hidden //#define MY_CONTROLLER_URL_ADDRESS "my.controller.org" #define MY_HOSTNAME "hidden" // If using static ip you need to define Gateway and Subnet address as well #define MY_IP_GATEWAY_ADDRESS hidden #define MY_IP_SUBNET_ADDRESS hidden // The port to keep open on node server mode #define MY_PORT hidden // How many clients should be able to connect to this gateway (default 1) #define MY_GATEWAY_MAX_CLIENTS 2 #include <ArduinoOTA.h> #include <MySensors.h> void setup() { Serial.begin(115200); // Setup locally attached sensors ArduinoOTA.onStart([]() { Serial.println("ArduinoOTA start"); }); ArduinoOTA.onEnd([]() { Serial.println("\nArduinoOTA end"); }); ArduinoOTA.onProgress([](unsigned int progress, unsigned int total) { Serial.printf("OTA Progress: %u%%\r", (progress / (total / 100))); }); ArduinoOTA.onError([](ota_error_t error) { Serial.printf("Error[%u]: ", error); if (error == OTA_AUTH_ERROR) { Serial.println("Auth Failed"); } else if (error == OTA_BEGIN_ERROR) { Serial.println("Begin Failed"); } else if (error == OTA_CONNECT_ERROR) { Serial.println("Connect Failed"); } else if (error == OTA_RECEIVE_ERROR) { Serial.println("Receive Failed"); } else if (error == OTA_END_ERROR) { Serial.println("End Failed"); } }); ArduinoOTA.begin(); } void presentation() { sendSketchInfo("GW", "1"); // Present locally attached sensors here } void loop() { // Send locally attached sensors data here ArduinoOTA.handle(); }I remember when i got it first working year(s) ago i tried also different bootloaders, fiddled with fuse settings and eventually got it working perfectly, but now (since i've updated arduino) maybe my board settings are incorrect.
-
Well found the problem.
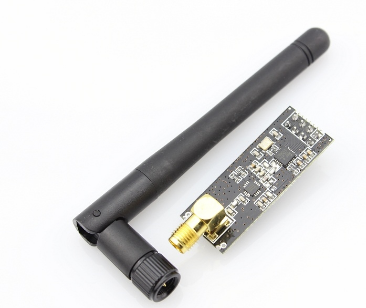
I had also changed gw nrf module to NRF24L01+PA+LNA 2.4GHz:
 and it seems to be the issue.
Although regular traffic monitoring etc is working ok.
Changed back to usual nrf24l01+ module and updates are working again.
Both variants are ali merchandise. -
Well found the problem.
I had also changed gw nrf module to NRF24L01+PA+LNA 2.4GHz:
and it seems to be the issue.
Although regular traffic monitoring etc is working ok.
Changed back to usual nrf24l01+ module and updates are working again.
Both variants are ali merchandise. -
@iguaan Try to set MY_RF24_PA_LEVEL to RF24_PA_MIN on gateway then use NRF24L01+PA+LNA module - in my case the OTA begin work perfect!
@cabat said in MYSBootloader 1.3.0-beta.3:
@iguaan Try to set MY_RF24_PA_LEVEL to RF24_PA_MIN on gateway then use NRF24L01+PA+LNA module - in my case the OTA begin work perfect!
Well finally got time to try it out and it worked like a charm, thank you!
Also no problem with a node that is about 1,5m away from GW.
LOW also worked, but OTA was slow. -
Hello,
I've been coming to this forum for a long time, and this is my first time posting.
I have a node, that has a DFPLAYER (mp3) and it works with the stock arduino (nano) bootloader. When I burn MYSBootloader 1.3.0, the node continuously restarts every 20 seconds. It stops at "Enable to begin" and restarts.
The library I use for the DFplayer is "SoftwareSerial". The problem would not come from there?#define MY_DEBUG #define MY_NODE_ID 19 #define MY_REPEATER_FEATURE #define NODE_NAME "Door Bell" #define NODE_VERSION "1.0" #define MY_RADIO_RF24 #include <MySensors.h> #include <Wire.h> #include "SparkFunHTU21D.h" #include "SoftwareSerial.h" #include "DFRobotDFPlayerMini.h" //For DFPlayer #define RX_PIN 8 #define TX_PIN 7 // Id of the sensor child #define TEMP_ID 1 #define HUM_ID 2 #define BELL_ID 3 #define SOUND_ID 4 #define VOLUME_ID 5 #define EQ_ID 6 unsigned long delay_wait = 300000; //5mn float lastTemp = 0.0; byte lastHum = 0; bool boot = 1; String eq = "Pop"; byte volume = 2; //Set volume value. From 0 to 30 int count = 0; //Create an instance of the object HTU21D myHumidity; SoftwareSerial mySoftwareSerial(RX_PIN, TX_PIN); // RX, TX DFRobotDFPlayerMini myDFPlayer; void printDetail(uint8_t type, int value); // Initialize general message MyMessage msgT(TEMP_ID, V_TEMP); MyMessage msgH(HUM_ID, V_HUM); MyMessage msgB(BELL_ID, V_ARMED); MyMessage msgS(SOUND_ID, V_VAR1); MyMessage msgV(VOLUME_ID, V_VAR2); MyMessage msgEQ(EQ_ID, V_VAR3); void before() { // Optional method - for initialisations that needs to take place before MySensors transport has been setup (eg: SPI devices). } void setup() { myHumidity.begin(); mySoftwareSerial.begin(9600); Serial.println(F("Initializing DFPlayer ... (May take 3~5 seconds)")); if (!myDFPlayer.begin(mySoftwareSerial)) { //Use softwareSerial to communicate with mp3. Serial.println(F("Unable to begin:")); Serial.println(F("1.Please recheck the connection!")); Serial.println(F("2.Please insert the SD card!")); while (true) { delay(0); // Code to compatible with ESP8266 watch dog. } } Serial.println(F("DFPlayer Mini online.")); //read and send EQ setting myDFPlayer.EQ(DFPLAYER_EQ_POP); send(msgEQ.set(eq.c_str())); //read and send EQ setting wait(250); //read and send current volume myDFPlayer.volume(volume); byte vol = round(volume / 0.3); send(msgV.set(vol)); wait(250); myDFPlayer.playMp3Folder(1); //play specific mp3 in SD:/MP3/0001.mp3; File Name(0~65535) } void presentation() { // Send the sketch version information to the gateway and controller sendSketchInfo(NODE_NAME, NODE_VERSION); // Register all sensors to gw (they will be created as child devices) present(TEMP_ID, S_TEMP); present(HUM_ID, S_HUM); present(BELL_ID, S_CUSTOM); present(SOUND_ID, S_CUSTOM); present(VOLUME_ID, S_CUSTOM); present(EQ_ID, S_CUSTOM); } void loop() { static unsigned long timer = millis(); if (millis() - timer > delay_wait) { float humd = myHumidity.readHumidity(); float temp = myHumidity.readTemperature(); Serial.print(" Temperature:"); Serial.print(temp, 1); Serial.print("C"); Serial.print(" Humidity:"); Serial.print(humd, 1); Serial.println("%"); if (lastTemp != temp) { send(msgT.set(temp, 1)); lastTemp = temp; } byte H = round(humd); if (lastHum != H) { send(msgH.set(H)); lastHum = H; } timer = millis(); } if (myDFPlayer.available()) { printDetail(myDFPlayer.readType(), myDFPlayer.read()); //Print the detail message from DFPlayer to handle different errors and states. } } void printDetail(uint8_t type, int value) { switch (type) { case TimeOut: Serial.println(F("Time Out!")); break; case WrongStack: Serial.println(F("Stack Wrong!")); break; case DFPlayerCardInserted: Serial.println(F("Card Inserted!")); break; case DFPlayerCardRemoved: Serial.println(F("Card Removed!")); break; case DFPlayerCardOnline: Serial.println(F("Card Online!")); break; case DFPlayerUSBInserted: Serial.println("USB Inserted!"); break; case DFPlayerUSBRemoved: Serial.println("USB Removed!"); break; case DFPlayerPlayFinished: Serial.print(F("Number:")); Serial.print(value); Serial.println(F(" Play Finished!")); send(msgB.set(false)); break; case DFPlayerError: Serial.print(F("DFPlayerError:")); switch (value) { case Busy: Serial.println(F("Card not found")); break; case Sleeping: Serial.println(F("Sleeping")); break; case SerialWrongStack: Serial.println(F("Get Wrong Stack")); break; case CheckSumNotMatch: Serial.println(F("Check Sum Not Match")); break; case FileIndexOut: Serial.println(F("File Index Out of Bound")); break; case FileMismatch: Serial.println(F("Cannot Find File")); break; case Advertise: Serial.println(F("In Advertise")); break; default: break; } break; default: break; } } void receive(const MyMessage &message) { // We only expect one type of message from controller. But we better check anyway. if (message.type == V_VAR1) { int num = message.getInt(); myDFPlayer.playMp3Folder(num); //play specific mp3 in SD:/MP3/0001.mp3; File Name(0~65535) send(msgB.set(true)); } if (message.type == V_VAR2) { byte vol = round(message.getByte() * 0.3); // 0~100% to 0~30 myDFPlayer.volume(vol); //Set volume value (0~30) Serial.print("Set volume : "); Serial.println(vol); } if (message.type == V_VAR3) { byte req = message.getByte(); Serial.print("Equalizer : "); switch (req) { case 1: myDFPlayer.EQ(DFPLAYER_EQ_NORMAL); Serial.println("Normal"); eq = "Normal"; break; case 2: myDFPlayer.EQ(DFPLAYER_EQ_POP); Serial.println("Pop"); eq = "Pop"; break; case 3: myDFPlayer.EQ(DFPLAYER_EQ_ROCK); Serial.println("Rock"); eq = "Rock"; break; case 4: myDFPlayer.EQ(DFPLAYER_EQ_JAZZ); Serial.println("Jazz"); eq = "Jazz"; break; case 5: myDFPlayer.EQ(DFPLAYER_EQ_CLASSIC); Serial.println("Classic"); eq = "Classic"; break; case 6: myDFPlayer.EQ(DFPLAYER_EQ_BASS); Serial.println("Bass"); eq = "Bass"; break; default: break; } send(msgEQ.set(eq.c_str())); } }Thanks Google for the translation :)
-
Hello,
I've been coming to this forum for a long time, and this is my first time posting.
I have a node, that has a DFPLAYER (mp3) and it works with the stock arduino (nano) bootloader. When I burn MYSBootloader 1.3.0, the node continuously restarts every 20 seconds. It stops at "Enable to begin" and restarts.
The library I use for the DFplayer is "SoftwareSerial". The problem would not come from there?#define MY_DEBUG #define MY_NODE_ID 19 #define MY_REPEATER_FEATURE #define NODE_NAME "Door Bell" #define NODE_VERSION "1.0" #define MY_RADIO_RF24 #include <MySensors.h> #include <Wire.h> #include "SparkFunHTU21D.h" #include "SoftwareSerial.h" #include "DFRobotDFPlayerMini.h" //For DFPlayer #define RX_PIN 8 #define TX_PIN 7 // Id of the sensor child #define TEMP_ID 1 #define HUM_ID 2 #define BELL_ID 3 #define SOUND_ID 4 #define VOLUME_ID 5 #define EQ_ID 6 unsigned long delay_wait = 300000; //5mn float lastTemp = 0.0; byte lastHum = 0; bool boot = 1; String eq = "Pop"; byte volume = 2; //Set volume value. From 0 to 30 int count = 0; //Create an instance of the object HTU21D myHumidity; SoftwareSerial mySoftwareSerial(RX_PIN, TX_PIN); // RX, TX DFRobotDFPlayerMini myDFPlayer; void printDetail(uint8_t type, int value); // Initialize general message MyMessage msgT(TEMP_ID, V_TEMP); MyMessage msgH(HUM_ID, V_HUM); MyMessage msgB(BELL_ID, V_ARMED); MyMessage msgS(SOUND_ID, V_VAR1); MyMessage msgV(VOLUME_ID, V_VAR2); MyMessage msgEQ(EQ_ID, V_VAR3); void before() { // Optional method - for initialisations that needs to take place before MySensors transport has been setup (eg: SPI devices). } void setup() { myHumidity.begin(); mySoftwareSerial.begin(9600); Serial.println(F("Initializing DFPlayer ... (May take 3~5 seconds)")); if (!myDFPlayer.begin(mySoftwareSerial)) { //Use softwareSerial to communicate with mp3. Serial.println(F("Unable to begin:")); Serial.println(F("1.Please recheck the connection!")); Serial.println(F("2.Please insert the SD card!")); while (true) { delay(0); // Code to compatible with ESP8266 watch dog. } } Serial.println(F("DFPlayer Mini online.")); //read and send EQ setting myDFPlayer.EQ(DFPLAYER_EQ_POP); send(msgEQ.set(eq.c_str())); //read and send EQ setting wait(250); //read and send current volume myDFPlayer.volume(volume); byte vol = round(volume / 0.3); send(msgV.set(vol)); wait(250); myDFPlayer.playMp3Folder(1); //play specific mp3 in SD:/MP3/0001.mp3; File Name(0~65535) } void presentation() { // Send the sketch version information to the gateway and controller sendSketchInfo(NODE_NAME, NODE_VERSION); // Register all sensors to gw (they will be created as child devices) present(TEMP_ID, S_TEMP); present(HUM_ID, S_HUM); present(BELL_ID, S_CUSTOM); present(SOUND_ID, S_CUSTOM); present(VOLUME_ID, S_CUSTOM); present(EQ_ID, S_CUSTOM); } void loop() { static unsigned long timer = millis(); if (millis() - timer > delay_wait) { float humd = myHumidity.readHumidity(); float temp = myHumidity.readTemperature(); Serial.print(" Temperature:"); Serial.print(temp, 1); Serial.print("C"); Serial.print(" Humidity:"); Serial.print(humd, 1); Serial.println("%"); if (lastTemp != temp) { send(msgT.set(temp, 1)); lastTemp = temp; } byte H = round(humd); if (lastHum != H) { send(msgH.set(H)); lastHum = H; } timer = millis(); } if (myDFPlayer.available()) { printDetail(myDFPlayer.readType(), myDFPlayer.read()); //Print the detail message from DFPlayer to handle different errors and states. } } void printDetail(uint8_t type, int value) { switch (type) { case TimeOut: Serial.println(F("Time Out!")); break; case WrongStack: Serial.println(F("Stack Wrong!")); break; case DFPlayerCardInserted: Serial.println(F("Card Inserted!")); break; case DFPlayerCardRemoved: Serial.println(F("Card Removed!")); break; case DFPlayerCardOnline: Serial.println(F("Card Online!")); break; case DFPlayerUSBInserted: Serial.println("USB Inserted!"); break; case DFPlayerUSBRemoved: Serial.println("USB Removed!"); break; case DFPlayerPlayFinished: Serial.print(F("Number:")); Serial.print(value); Serial.println(F(" Play Finished!")); send(msgB.set(false)); break; case DFPlayerError: Serial.print(F("DFPlayerError:")); switch (value) { case Busy: Serial.println(F("Card not found")); break; case Sleeping: Serial.println(F("Sleeping")); break; case SerialWrongStack: Serial.println(F("Get Wrong Stack")); break; case CheckSumNotMatch: Serial.println(F("Check Sum Not Match")); break; case FileIndexOut: Serial.println(F("File Index Out of Bound")); break; case FileMismatch: Serial.println(F("Cannot Find File")); break; case Advertise: Serial.println(F("In Advertise")); break; default: break; } break; default: break; } } void receive(const MyMessage &message) { // We only expect one type of message from controller. But we better check anyway. if (message.type == V_VAR1) { int num = message.getInt(); myDFPlayer.playMp3Folder(num); //play specific mp3 in SD:/MP3/0001.mp3; File Name(0~65535) send(msgB.set(true)); } if (message.type == V_VAR2) { byte vol = round(message.getByte() * 0.3); // 0~100% to 0~30 myDFPlayer.volume(vol); //Set volume value (0~30) Serial.print("Set volume : "); Serial.println(vol); } if (message.type == V_VAR3) { byte req = message.getByte(); Serial.print("Equalizer : "); switch (req) { case 1: myDFPlayer.EQ(DFPLAYER_EQ_NORMAL); Serial.println("Normal"); eq = "Normal"; break; case 2: myDFPlayer.EQ(DFPLAYER_EQ_POP); Serial.println("Pop"); eq = "Pop"; break; case 3: myDFPlayer.EQ(DFPLAYER_EQ_ROCK); Serial.println("Rock"); eq = "Rock"; break; case 4: myDFPlayer.EQ(DFPLAYER_EQ_JAZZ); Serial.println("Jazz"); eq = "Jazz"; break; case 5: myDFPlayer.EQ(DFPLAYER_EQ_CLASSIC); Serial.println("Classic"); eq = "Classic"; break; case 6: myDFPlayer.EQ(DFPLAYER_EQ_BASS); Serial.println("Bass"); eq = "Bass"; break; default: break; } send(msgEQ.set(eq.c_str())); } }Thanks Google for the translation :)
@Trand Do you mean that it stops at "Unable to begin"?? I don't see "Enable" in there.
If it's "Unable" then I would suspect that you don't have it wired up correctly. Are you sure about the RX_PIN and TX_PIN? If it were me, I would double check them again. And then swap them in the code after double checking them, just in case.
If there's absolutely no doubt that you have the correct wires connected, do you also have a ground wire connected between the Arduino and the DFplayer? Finally, are you sure that 9600 is a good speed to communicate with the DFplayer? (I have no experience with this module, so these are just general troubleshooting ideas.)
-
@Trand Do you mean that it stops at "Unable to begin"?? I don't see "Enable" in there.
If it's "Unable" then I would suspect that you don't have it wired up correctly. Are you sure about the RX_PIN and TX_PIN? If it were me, I would double check them again. And then swap them in the code after double checking them, just in case.
If there's absolutely no doubt that you have the correct wires connected, do you also have a ground wire connected between the Arduino and the DFplayer? Finally, are you sure that 9600 is a good speed to communicate with the DFplayer? (I have no experience with this module, so these are just general troubleshooting ideas.)
@ejlane Thank you for your answer. I don't think I have any connection problem, it's soldered on a PCB and it works with the original NANO Bootloader. The speed 9600 is the one given in the example of the library, and I think that the problem comes from SoftwarSerial... I continue to search.
-
@ejlane Thank you for your answer. I don't think I have any connection problem, it's soldered on a PCB and it works with the original NANO Bootloader. The speed 9600 is the one given in the example of the library, and I think that the problem comes from SoftwarSerial... I continue to search.
@Trand Well, sorry, but nothing else comes to mind. If you have a scope or logic analyzer then you need to watch the actual signals on the wires and see what is happening.
If you don't, then you should pick up a cheap logic analyzer. You can get one for $10 and it's invaluable for tracking down things like this. I don't know where you are based, but I see them on Aliexpress all the time.
Hello! It looks like you're interested in this conversation, but you don't have an account yet.
Getting fed up of having to scroll through the same posts each visit? When you register for an account, you'll always come back to exactly where you were before, and choose to be notified of new replies (either via email, or push notification). You'll also be able to save bookmarks and upvote posts to show your appreciation to other community members.
With your input, this post could be even better 💗
Register Login