Bootloading a barebones arduino
-
For a "known good" starting point, you could pop the DIP atmega328p out of an arduino uno and practice burning your bootloader into that on a breadboard. If it gives you the same guff, then you know it's your procedure and not the chip that's at fault. Anyhow, as there's not really much that can go wrong, my WAG is that, based on @alphaHotel 's earlier comments requesting a reset-pin breakout (now baked into Version 3.0), it might have something to do with either the means or the assumptions under which your burner is accessing the reset pin.
Myself, I burn the bootloader and fuses in one of those spring-steel clamshell chip holders:
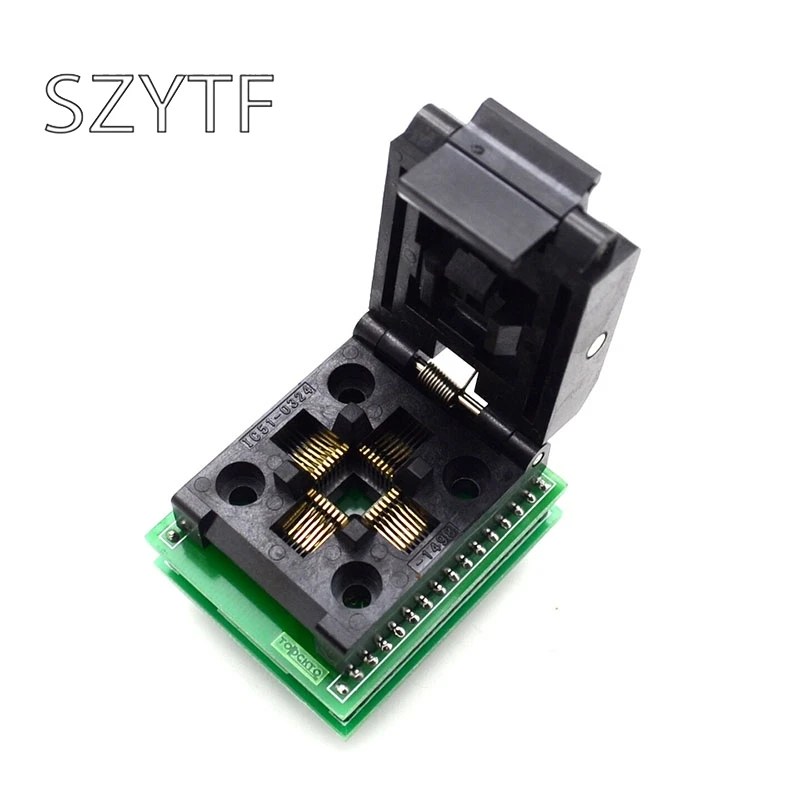
before soldering it onto the board, so I can't say that I've already done what you are attempting to do. IIRC, they cost only something like $10, but I do understand that simply knowing that doesn't really help you in the moment if you don't have one on hand already and you simply want to push forward with what you've got.@NeverDie said in Bootloading a barebones arduino:
For a "known good" starting point, you could pop the DIP atmega328p out of an arduino uno and practice burning your bootloader into that on a breadboard. If it gives you the same guff, then you know it's your procedure and not the chip that's at fault. Anyhow, as there's not really much that can go wrong, my WAG is that, based on @alphaHotel 's earlier comments requesting a reset-pin breakout (now baked into Version 3.0), it might have something to do with either the means or the assumptions under which your burner is accessing the reset pin.
I've got some DIP 328's. Good Idea. I'll try that. Your V1 board has access to Reset. I used an alligator pin to clamp on to the mcu side of the reset switch. So far, I have connected that to the RST pin of the USBasp.
-
@Larson
I'm impressed about how much you have done here. I have a suggestion though I will readily admit to being ignorant about a lot of things.I have programed Arduino Nano's using the Arduino IDE ISP function. I had some with an old boot loader and some I just needed a touch more space. The programmed Arduino's are functioning as expected, so I don't think there's a problem.
I used this Arduino page and this youtube video to guide me how to program the Nanos. These tell you that you use another Arduino to function as the ISP and how to fashion a cable. (Judging from the discussion here, I'm sure this is not a problem for you.)
My question is, would this work to program a raw Atmega328p chip?
OSD
@OldSurferDude said in Bootloading a barebones arduino:
I have programed Arduino Nano's using the Arduino IDE ISP function. I had some with an old boot loader and some I just needed a touch more space. The programmed Arduino's are functioning as expected, so I don't think there's a problem.
I think I've read that Uploading Using Programmer will install your program, but NOT the bootloader so you end up with a little more room... but no bootloader for the next USART attempted reprogramming.
@OldSurferDude said in Bootloading a barebones arduino:
My question is, would this work to program a raw Atmega328p chip?
Yes, I think that is the aim: turn one 328 into an ISP programmer so that it can 'burn' another 328 via the ICSP connectors. And by 'burn' I mean either the bootloader program, or any other program of your choosing.
-
Well done, forging ahead, @Larson. I wouldn't jump straight to trying to program a bootloader just yet though, we need to finish confirming communication with the chip and then if/when we get that going, look at how the fuses are set.
Looking at your post here, I believe you got these 328p's from Aliexpress (or similar). Did the listing indicate whether there was a bootloader or not? Bare chips, should be factory set to operate on the internal 8MHz oscillator, so that shouldn't be the problem. How many did you buy?
Based on your results above, at this point, it would seem that one of the following conditions exists:
- There are solder bridges (shorts) somewhere - need to test with a MM in continuity mode, each pin with all other pins. Some should be connected (GNDs for example), but most should not.
- The connections from your USBasp to the chip are incorrect. Again, you should be able to check this with a multimeter in continuity mode.
- The chip is dead. (Long live the chip.)
- The fuses are set to require an external crystal that doesn't exist. I just tested this by setting the fuses on my minimal 328P setup (see picture below). The result of which is that I now get the same error that you are getting. This is not likely the case for you but it is a possibility.
Here's a pic I just did checking continuity between the MISO contact on the USBasp and the corresponding chip pin on a minimal setup 328P for reference. Disregard that my multimeter is indicating no continuity, (my son took the picture at a bad time as I was making/breaking contact), you'll get the point of the shot though.
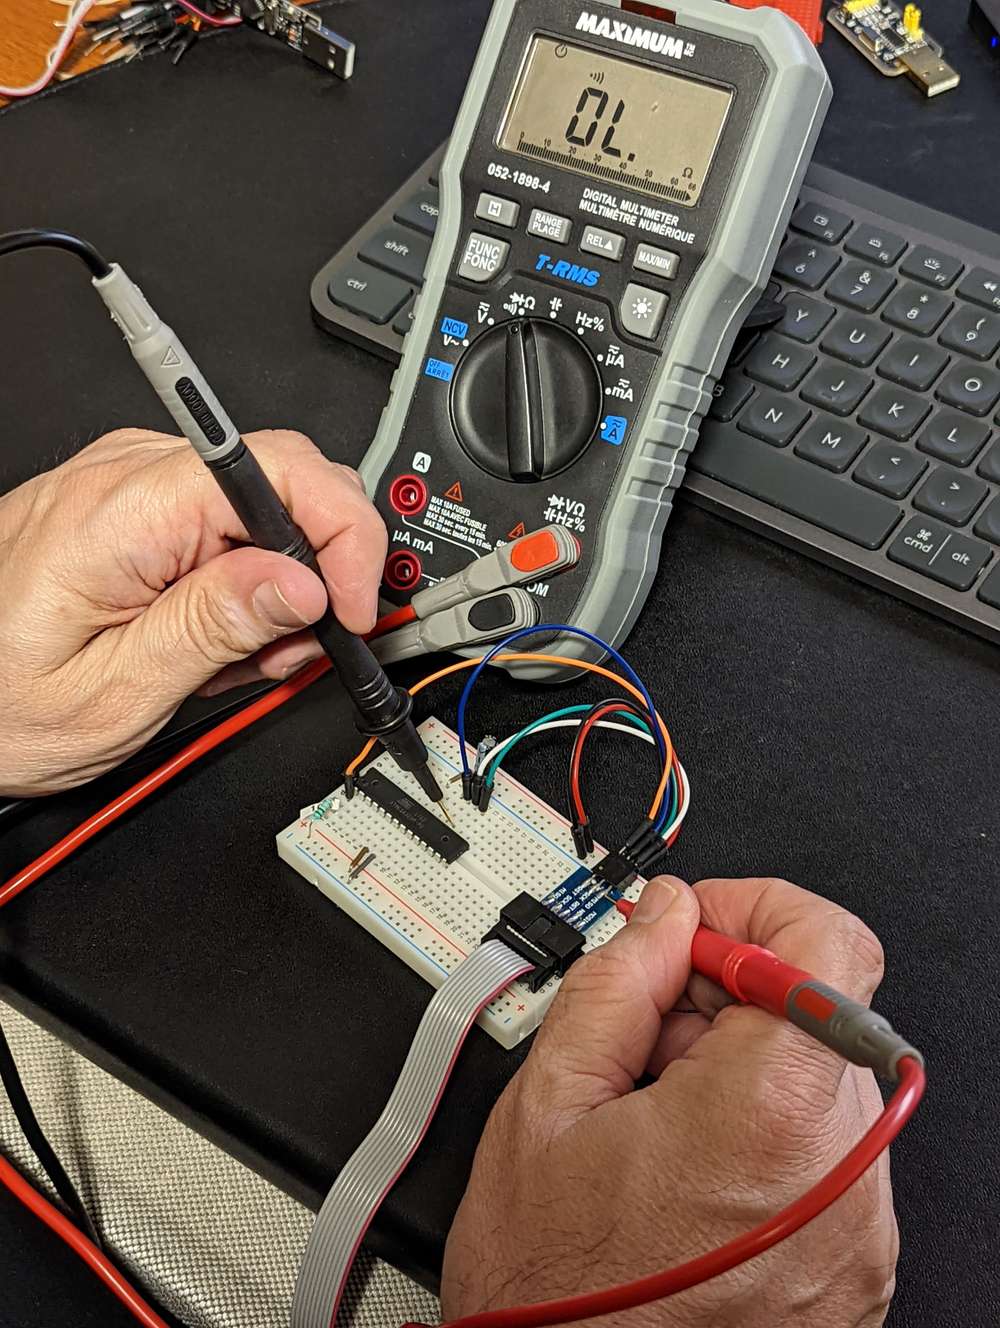
Also, take a close-up picture of the board/chip and post it here for us to see what you've got going on.
Carry on.
AH
EDIT: to add the 4th possible condition.
@alphaHotel said in Bootloading a barebones arduino:
I believe you got these 328p's from Aliexpress (or similar). Did the listing indicate whether there was a bootloader or not? Bare chips, should be factory set to operate on the internal 8MHz oscillator, so that shouldn't be the problem. How many did you buy?
Thanks for your post. I bought 5 of these 328s's from https://www.aliexpress.com/item/3256802836313338.html?spm=a2g0o.order_detail.0.0.3f26f19cw3rLj0. Just reviewed the page and there is no mention of bootloader. I presume these are not bootloaded, but that wouldn't stop me from trying a good-old-fashioned Blink program via the USART port.
I checked for continuity bridges on adjacent pins. I'll do that again for regional pins. Earlier I found that detected bridges were visually evident. I now look closely, then test. I can't check USBasp connections enough - I'll do that again. Dead chip? Well, it could be thermally abused given my caveman skill. Fuse settings? Manufactures probably have to make assumptions on this and the prevailing one would probably be for a 16 Mhz crystal.
Sure, I'll take a picture and post. It is a rat's nest at the moment so I'm first going to solder on headers to make things clearer/cleaner to see.
Thanks again for the abundant help!
-
@Larson I just had an idea that might help you. If you have the Version 1.0 board, then before installing the capacitor on DTR, do a solder bridge across it instead. By doing that the DTR in will be directly connected to the reset pin on your chip, and you can use the DTR pin to gain access to the reset pin on the atmega328p. When you're all done with programming the chip and then later want to switch to using an FTDI to upload your scripts, then at that point you melt the solder bridge and install the capacitor.
Actually, the same would hold true on an Arduino Pro Mini, so if you wanted yet another possible way to practice on a "known good" platform, you could desolder the DTR capacitor, do a solder bridge, and you'd be all set to practice programming the atmega328p chip on it by using the DTR pin on the Arduino Pro Mini as the reset pin during your programming exercise. i.e. you'd solder bridge across capacitor C2 in this Arduino Pro Mini schematic:
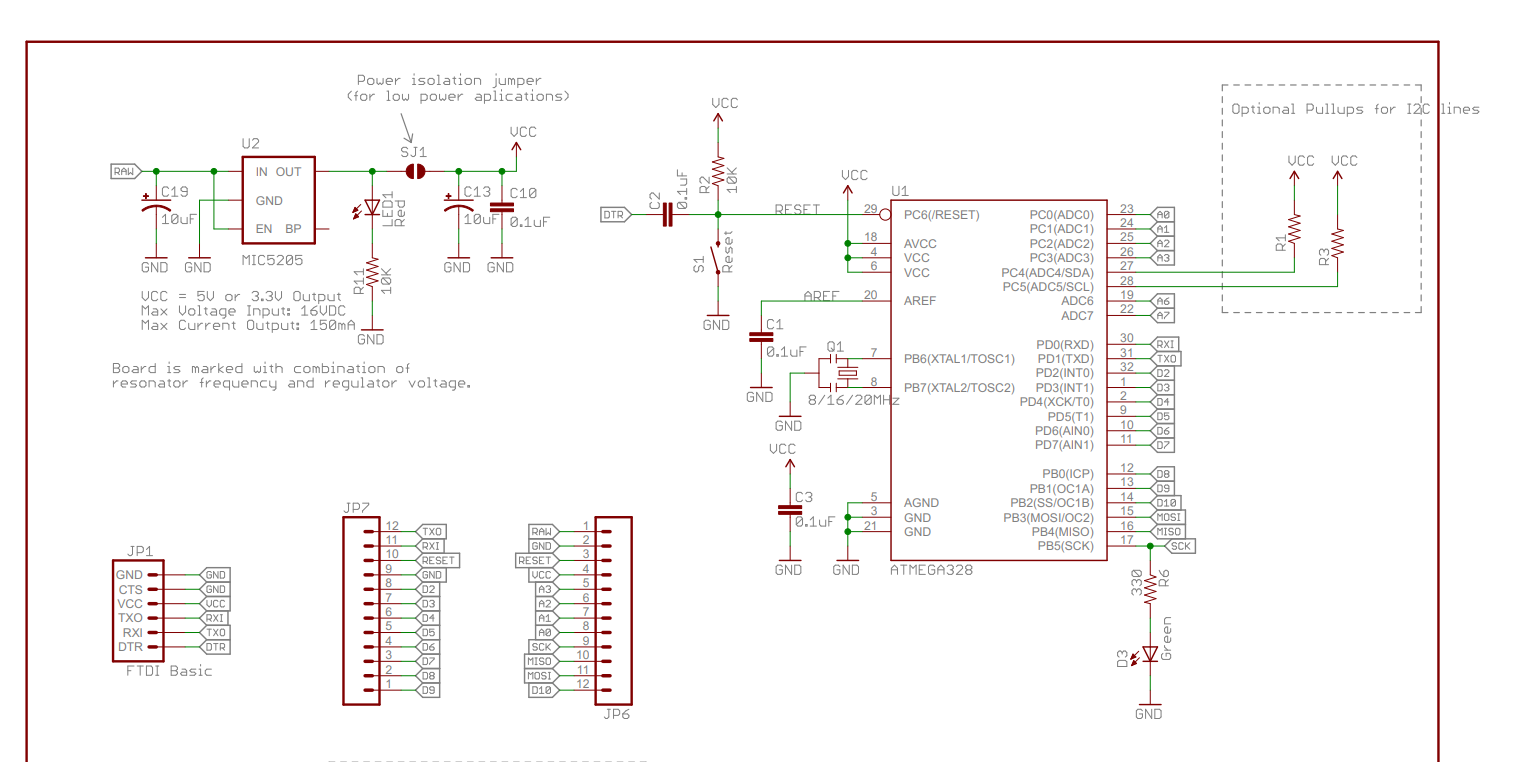
https://cdn.sparkfun.com/datasheets/Dev/Arduino/Boards/Arduino-Pro-Mini-v14.pdf@NeverDie said in Bootloading a barebones arduino:
I just had an idea that might help you.
Thanks for the thoughts. I have pretty direct access to the 328p's reset pin now by alligatoring on to the 328p's side of the reset switch. But... If I needed to connect DTR to Reset I think I would leave the capacitor in place and jumper from Reset to DTR. Soldering those capacitors into place is something I really don't want to relive.
@NeverDie said in Bootloading a barebones arduino:
Actually, the same would hold true on an Arduino Pro Mini,
For a known good platform, I've been using the Nano because it has the ICSP direct access to reset. But I see where you were going with the ProMini. Looking at the schematic you attached, I see that direct access to reset exists on JP7, pin 10. That would do it, wouldn't it?
-
@NeverDie said in Bootloading a barebones arduino:
I just had an idea that might help you.
Thanks for the thoughts. I have pretty direct access to the 328p's reset pin now by alligatoring on to the 328p's side of the reset switch. But... If I needed to connect DTR to Reset I think I would leave the capacitor in place and jumper from Reset to DTR. Soldering those capacitors into place is something I really don't want to relive.
@NeverDie said in Bootloading a barebones arduino:
Actually, the same would hold true on an Arduino Pro Mini,
For a known good platform, I've been using the Nano because it has the ICSP direct access to reset. But I see where you were going with the ProMini. Looking at the schematic you attached, I see that direct access to reset exists on JP7, pin 10. That would do it, wouldn't it?
@Larson said in Bootloading a barebones arduino:
Looking at the schematic you attached, I see that direct access to reset exists on JP7, pin 10. That would do it, wouldn't it?
You're right! I forgot about that pin. So on a pro-mini you would have easy-peasy access to the reset pin from the get-go. For that matter same thing on the Arduino Uno R3. You wouldn't need to pop out the DIP chip. You could practice programming it in-situ if you wanted to.
-
Well done, forging ahead, @Larson. I wouldn't jump straight to trying to program a bootloader just yet though, we need to finish confirming communication with the chip and then if/when we get that going, look at how the fuses are set.
Looking at your post here, I believe you got these 328p's from Aliexpress (or similar). Did the listing indicate whether there was a bootloader or not? Bare chips, should be factory set to operate on the internal 8MHz oscillator, so that shouldn't be the problem. How many did you buy?
Based on your results above, at this point, it would seem that one of the following conditions exists:
- There are solder bridges (shorts) somewhere - need to test with a MM in continuity mode, each pin with all other pins. Some should be connected (GNDs for example), but most should not.
- The connections from your USBasp to the chip are incorrect. Again, you should be able to check this with a multimeter in continuity mode.
- The chip is dead. (Long live the chip.)
- The fuses are set to require an external crystal that doesn't exist. I just tested this by setting the fuses on my minimal 328P setup (see picture below). The result of which is that I now get the same error that you are getting. This is not likely the case for you but it is a possibility.
Here's a pic I just did checking continuity between the MISO contact on the USBasp and the corresponding chip pin on a minimal setup 328P for reference. Disregard that my multimeter is indicating no continuity, (my son took the picture at a bad time as I was making/breaking contact), you'll get the point of the shot though.

Also, take a close-up picture of the board/chip and post it here for us to see what you've got going on.
Carry on.
AH
EDIT: to add the 4th possible condition.
@alphaHotel said in Bootloading a barebones arduino:
Also, take a close-up picture of the board/chip and post it here for us to see what you've got going on.
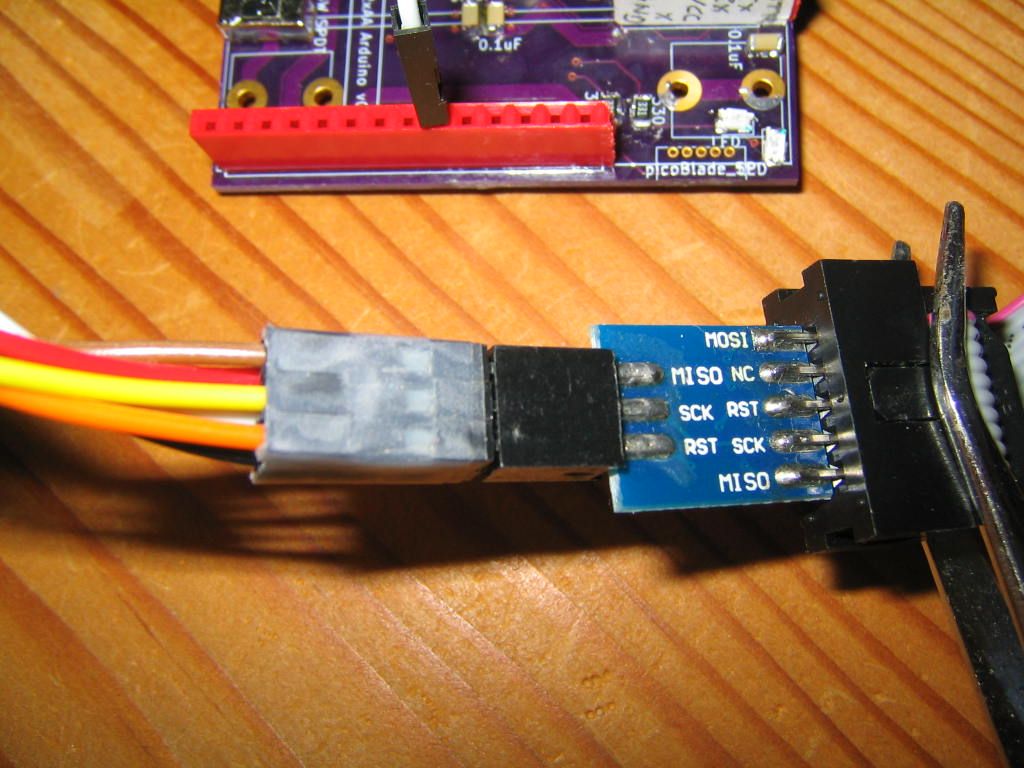
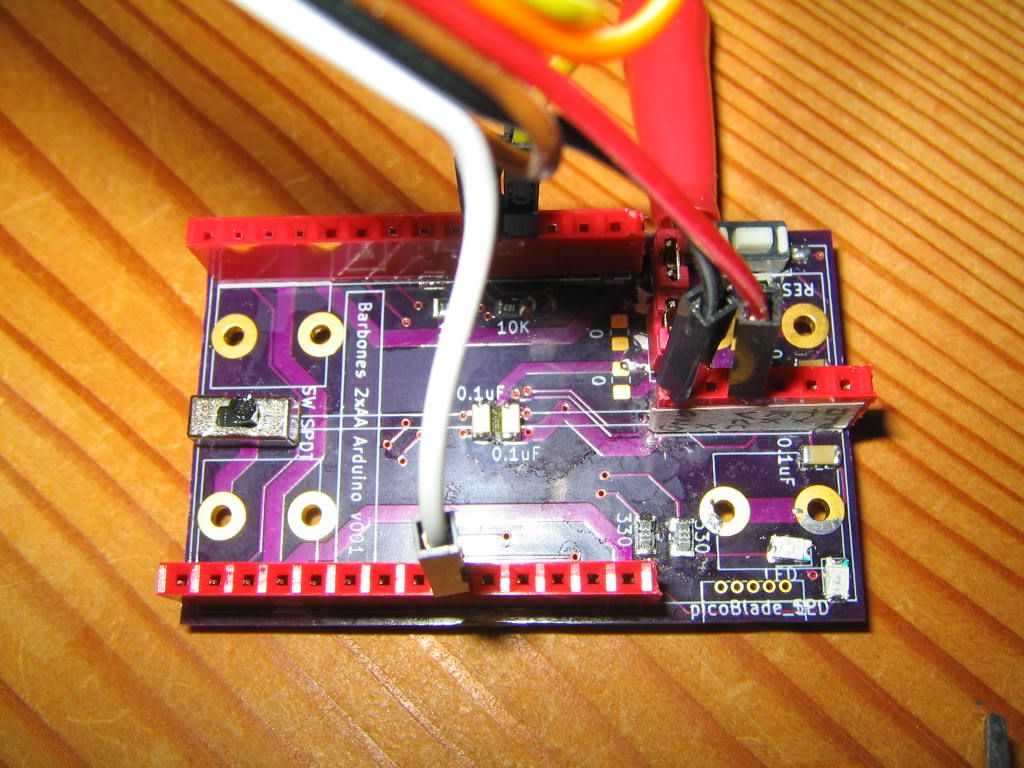
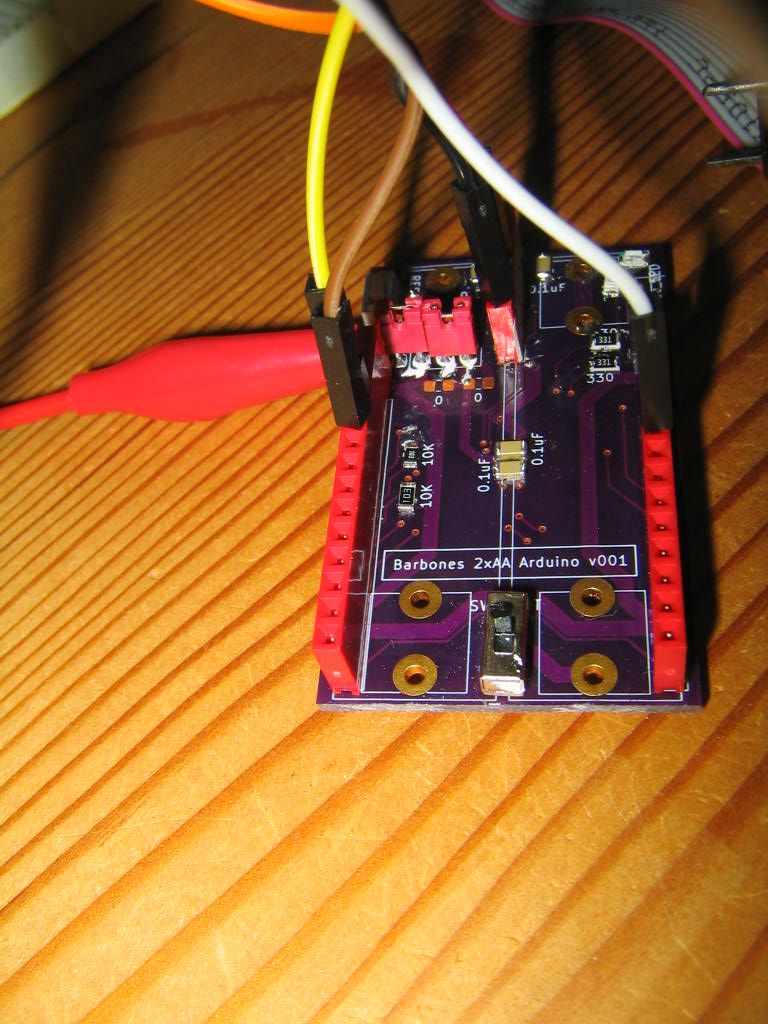
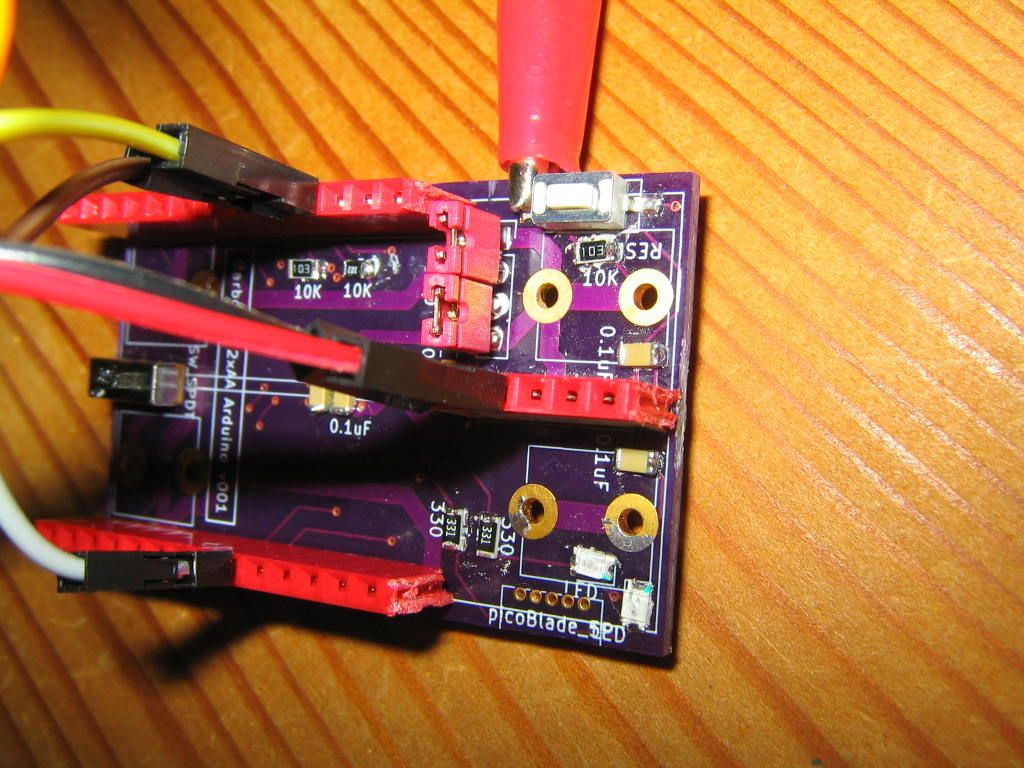
Pictures are below. I should add that the ICSP 2x3 cable coloring is:
Black - GND
White - MOSI
Red - VCC
Brown - MISO
Yellow - SCK
Orange - RESET alligatored to bottom of switch.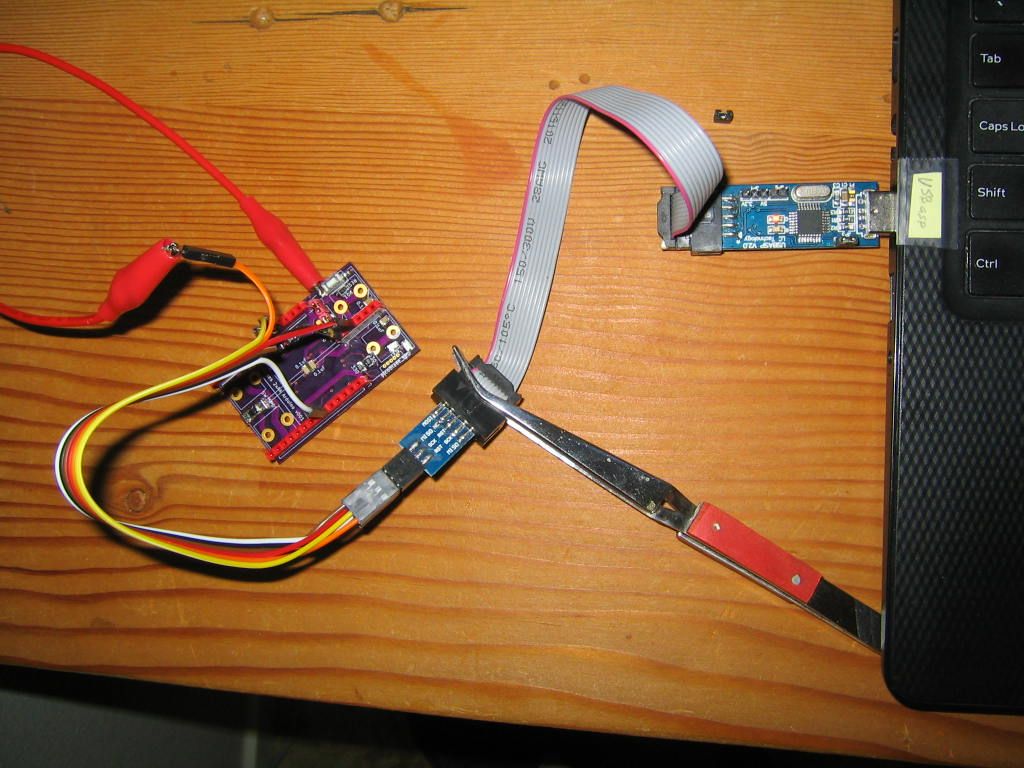
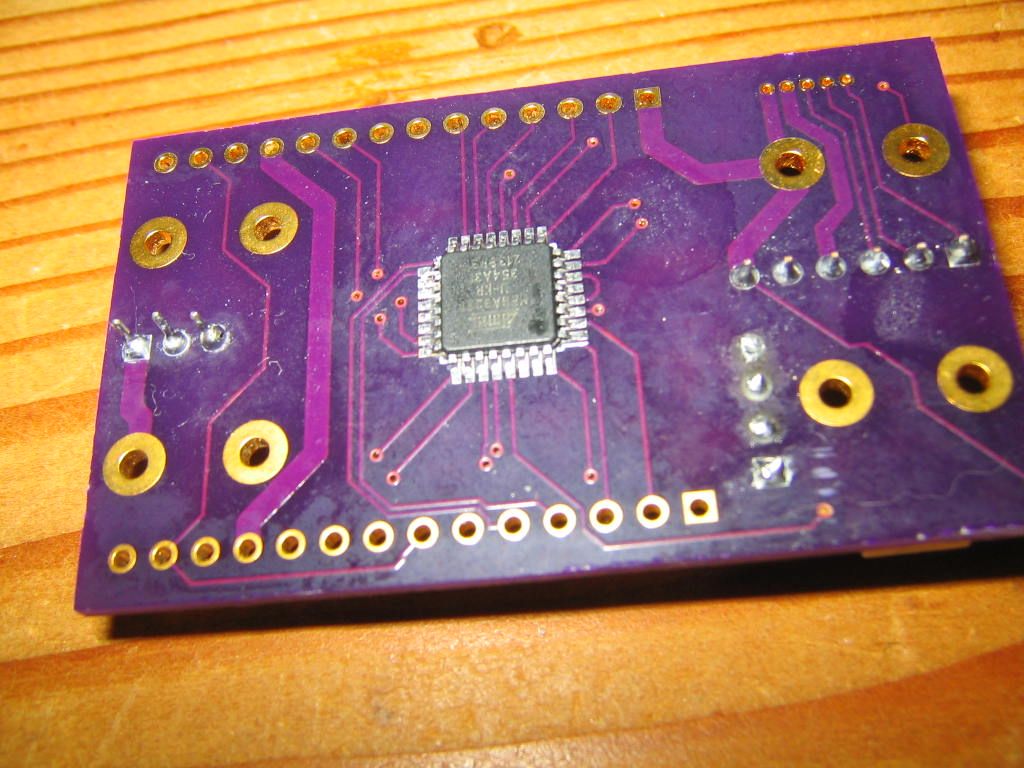
-
@alphaHotel said in Bootloading a barebones arduino:
I believe you got these 328p's from Aliexpress (or similar). Did the listing indicate whether there was a bootloader or not? Bare chips, should be factory set to operate on the internal 8MHz oscillator, so that shouldn't be the problem. How many did you buy?
Thanks for your post. I bought 5 of these 328s's from https://www.aliexpress.com/item/3256802836313338.html?spm=a2g0o.order_detail.0.0.3f26f19cw3rLj0. Just reviewed the page and there is no mention of bootloader. I presume these are not bootloaded, but that wouldn't stop me from trying a good-old-fashioned Blink program via the USART port.
I checked for continuity bridges on adjacent pins. I'll do that again for regional pins. Earlier I found that detected bridges were visually evident. I now look closely, then test. I can't check USBasp connections enough - I'll do that again. Dead chip? Well, it could be thermally abused given my caveman skill. Fuse settings? Manufactures probably have to make assumptions on this and the prevailing one would probably be for a 16 Mhz crystal.
Sure, I'll take a picture and post. It is a rat's nest at the moment so I'm first going to solder on headers to make things clearer/cleaner to see.
Thanks again for the abundant help!
@Larson said in Bootloading a barebones arduino:
Manufactures probably have to make assumptions on this and the prevailing one would probably be for a 16 Mhz crystal.
If it's straight from the factory, the fuses will be set to use the internal oscillator and there will be no bootloader.
Looking at your pictures, the chip is well aligned and in the correct orientation. If you're confident in your connections and the USBasp is working well with the Nano but not this chip, then I suspect that the chip was destroyed while being soldered. The fuses-set-for-external-clock possibility is very unlikely and probably not worth the effort to try to test/debug/rectify.
[Side note @NeverDie: I see that you used D20 and D21 to control the LEDs on board. You might want to make a note on the OpenHardware.io page that users will need to utilize either direct Port B manipulation or MCUDude's MiniCore to control those and no crystal can be added to this board (unless you hack the LED and resistor pads to do it).]
@Larson, as you have a few more of those chips, I'd suggest putting this one aside for now and trying again (I'm assuming you have at least 2 other copies of V001 boards as OSHpark tends to sell them in 3-packs). If you want to hold off for a bit to wait for that cool clamshell thing, you might also want to consider ordering the V003 boards while you wait so as to avoid the problem with the traces under the battery holders.
AH
-
@Larson said in Bootloading a barebones arduino:
Manufactures probably have to make assumptions on this and the prevailing one would probably be for a 16 Mhz crystal.
If it's straight from the factory, the fuses will be set to use the internal oscillator and there will be no bootloader.
Looking at your pictures, the chip is well aligned and in the correct orientation. If you're confident in your connections and the USBasp is working well with the Nano but not this chip, then I suspect that the chip was destroyed while being soldered. The fuses-set-for-external-clock possibility is very unlikely and probably not worth the effort to try to test/debug/rectify.
[Side note @NeverDie: I see that you used D20 and D21 to control the LEDs on board. You might want to make a note on the OpenHardware.io page that users will need to utilize either direct Port B manipulation or MCUDude's MiniCore to control those and no crystal can be added to this board (unless you hack the LED and resistor pads to do it).]
@Larson, as you have a few more of those chips, I'd suggest putting this one aside for now and trying again (I'm assuming you have at least 2 other copies of V001 boards as OSHpark tends to sell them in 3-packs). If you want to hold off for a bit to wait for that cool clamshell thing, you might also want to consider ordering the V003 boards while you wait so as to avoid the problem with the traces under the battery holders.
AH
@alphaHotel said in Bootloading a barebones arduino:
I'd suggest putting this one aside for now and trying again (I'm assuming you have at least 2 other copies of V001 boards as OSHpark tends to sell them in 3-packs).
Thanks again. I will put this aside for a while... eldercare calls anyway. I'm going to order V3 boards and maybe have them fabricated too. The last picture is of the second OSHPark board and second 328p. So I'm down to three 328p's.
I am indebted to this community and I thank everyone for the gracious help.
-
@OldSurferDude said in Bootloading a barebones arduino:
I have programed Arduino Nano's using the Arduino IDE ISP function. I had some with an old boot loader and some I just needed a touch more space. The programmed Arduino's are functioning as expected, so I don't think there's a problem.
I think I've read that Uploading Using Programmer will install your program, but NOT the bootloader so you end up with a little more room... but no bootloader for the next USART attempted reprogramming.
@OldSurferDude said in Bootloading a barebones arduino:
My question is, would this work to program a raw Atmega328p chip?
Yes, I think that is the aim: turn one 328 into an ISP programmer so that it can 'burn' another 328 via the ICSP connectors. And by 'burn' I mean either the bootloader program, or any other program of your choosing.
@Larson, you got me thinking and I reviewed the Arduino page on boot loading. It is pretty clear that the Arduino IDE can either load a program or a bootloader. The bootloader code that will reside on the target is part of the Arduino IDE. One only needs to select the Arduino type.
On another note, I was thinking about trying this myself. I went to the link from which you ordered your ATmeg328P and found that the delivered cost (to the USA) was about the same as the delivered price for an Arduino Nano knockoff with bootloader already programmed. I add this information because there are those among us that do not have the skill and experience to do what you are doing.
Personally, I think what you're doing is pretty awesome and I wish you success.
OSD
-
@Larson, you got me thinking and I reviewed the Arduino page on boot loading. It is pretty clear that the Arduino IDE can either load a program or a bootloader. The bootloader code that will reside on the target is part of the Arduino IDE. One only needs to select the Arduino type.
On another note, I was thinking about trying this myself. I went to the link from which you ordered your ATmeg328P and found that the delivered cost (to the USA) was about the same as the delivered price for an Arduino Nano knockoff with bootloader already programmed. I add this information because there are those among us that do not have the skill and experience to do what you are doing.
Personally, I think what you're doing is pretty awesome and I wish you success.
OSD
@OldSurferDude said in Bootloading a barebones arduino:
...you got me thinking...
This forum is built for that.
Thank you for posting and the link to Arduino Bootloaders. I read that again. In summary of my reading, and in my own words: Bootloaders are the gravel under pavement. So I pose this as a question: If one uses "Sketch/Upload Using Programmer" it will load the program without the bootloader, right? Is that your understanding? Kind of like all pavement, no gravel.
Over several of these exercises bootloading and programming with ICSP's using the Arduino IDE I've noticed that once a program is loaded with the ICSP using "Sketch/Upload Using Programmer", no further USB-TTL (USART) programming can occur until "Tools/Burn Bootloader" is subsequently executed. So in my limited experience, the bootloader is the gateway to normal USART programming. Too many words... I know. But the nice thing about the link you provide is that the Bootloader program is only 512 bytes. So one shouldn't fret over economizing over space.
@OldSurferDude said in Bootloading a barebones arduino:
...skill and experience...
I assume the skill that is required to remove the bootloaded 328P's from the Nano is a higher challenge. Soldering a new chip, as I did, has to be easy-peasy compared to removing and resoldering an existing chip. As it was, I think I killed my new chips because of the soldering & bridge removal. More on that to come in my next post.
@OldSurferDude said in Bootloading a barebones arduino:
...pretty awesome and I wish you success
Kind of you. At this point, I'm kind of a dog with a bone. Given the contributions of NeverDie, AlphaHotel and others, I just have to press on or all the time & effort is for not. Perhaps the dialog is of use to others.
-
Well done, forging ahead, @Larson. I wouldn't jump straight to trying to program a bootloader just yet though, we need to finish confirming communication with the chip and then if/when we get that going, look at how the fuses are set.
Looking at your post here, I believe you got these 328p's from Aliexpress (or similar). Did the listing indicate whether there was a bootloader or not? Bare chips, should be factory set to operate on the internal 8MHz oscillator, so that shouldn't be the problem. How many did you buy?
Based on your results above, at this point, it would seem that one of the following conditions exists:
- There are solder bridges (shorts) somewhere - need to test with a MM in continuity mode, each pin with all other pins. Some should be connected (GNDs for example), but most should not.
- The connections from your USBasp to the chip are incorrect. Again, you should be able to check this with a multimeter in continuity mode.
- The chip is dead. (Long live the chip.)
- The fuses are set to require an external crystal that doesn't exist. I just tested this by setting the fuses on my minimal 328P setup (see picture below). The result of which is that I now get the same error that you are getting. This is not likely the case for you but it is a possibility.
Here's a pic I just did checking continuity between the MISO contact on the USBasp and the corresponding chip pin on a minimal setup 328P for reference. Disregard that my multimeter is indicating no continuity, (my son took the picture at a bad time as I was making/breaking contact), you'll get the point of the shot though.

Also, take a close-up picture of the board/chip and post it here for us to see what you've got going on.
Carry on.
AH
EDIT: to add the 4th possible condition.
@alphaHotel said in Bootloading a barebones arduino:
Here's a pic I just did checking continuity between the MISO contact on the USBasp and the corresponding chip pin on a minimal setup 328P for reference.
Motivated by your picture, today I breadboarded a 28 pin DIP 328 and bootloaded, programmed, and even set fuses successfully. That I could do that with my DIP, I think it is proven that I melted my barebones mounted 32 pin SMD. The fun part was using the default fuses and a 16 MHz crystal to make the LED blink (A5, pin 28). When removing the crystal, the blinking stopped. Perfect, it didn't work as expected. Fuses need to be reset. Using what you and @NeverDie taught me I could do this:
First, I discovered the default settings using CMD window and the command: "avrdude -c USBasp -p m328p”
That gives (E:FD, H:DA, L:FF).
Second, I reset the existing fuses (seeking confirmation) with the command: "avrdude -c USBasp -p m328p -U lfuse:w:0xff:m -U hfuse:w:0xda:m -U efuse:w:0xfd:m"
Third, I reset the fuses with "avrdude -c USBasp -p m328p -U lfuse:w:0xc2:m -U hfuse:w:0xdc:m -U efuse:w:0xff:m" based on the Gammon site @NeverDie sent me to.
Then I pulled the crystal... and a thing of beauty ... it worked: led blinking, as expected.This is proof, to me, that the barebones solder job I did cooked the chip.
I leave this post if it is of use to others, and in gratitude.
-
@OldSurferDude said in Bootloading a barebones arduino:
...you got me thinking...
This forum is built for that.
Thank you for posting and the link to Arduino Bootloaders. I read that again. In summary of my reading, and in my own words: Bootloaders are the gravel under pavement. So I pose this as a question: If one uses "Sketch/Upload Using Programmer" it will load the program without the bootloader, right? Is that your understanding? Kind of like all pavement, no gravel.
Over several of these exercises bootloading and programming with ICSP's using the Arduino IDE I've noticed that once a program is loaded with the ICSP using "Sketch/Upload Using Programmer", no further USB-TTL (USART) programming can occur until "Tools/Burn Bootloader" is subsequently executed. So in my limited experience, the bootloader is the gateway to normal USART programming. Too many words... I know. But the nice thing about the link you provide is that the Bootloader program is only 512 bytes. So one shouldn't fret over economizing over space.
@OldSurferDude said in Bootloading a barebones arduino:
...skill and experience...
I assume the skill that is required to remove the bootloaded 328P's from the Nano is a higher challenge. Soldering a new chip, as I did, has to be easy-peasy compared to removing and resoldering an existing chip. As it was, I think I killed my new chips because of the soldering & bridge removal. More on that to come in my next post.
@OldSurferDude said in Bootloading a barebones arduino:
...pretty awesome and I wish you success
Kind of you. At this point, I'm kind of a dog with a bone. Given the contributions of NeverDie, AlphaHotel and others, I just have to press on or all the time & effort is for not. Perhaps the dialog is of use to others.
@Larson said in Bootloading a barebones arduino:
I assume the skill that is required to remove the bootloaded 328P's from the Nano is a higher challenge. Soldering a new chip, as I did, has to be easy-peasy compared to removing and resoldering an existing chip.
Honestly, you'll be surprised how easy it is to desolder a 328P if you use enough Chipquik. You basically lower the melting point to where all 32 pins are in liquid metal all at the same time, and then you just push it aside. I'm sure there are other techniques as well that don't rely on Chipquik, but this method is very easy. If it's still sticking, melt more Chipquik onto the pads and keep everything heated until the whole thing is swimming in liquid chipquik. If you follow that heuristic, you can't fail.
-
@Larson said in Bootloading a barebones arduino:
I assume the skill that is required to remove the bootloaded 328P's from the Nano is a higher challenge. Soldering a new chip, as I did, has to be easy-peasy compared to removing and resoldering an existing chip.
Honestly, you'll be surprised how easy it is to desolder a 328P if you use enough Chipquik. You basically lower the melting point to where all 32 pins are in liquid metal all at the same time, and then you just push it aside. I'm sure there are other techniques as well that don't rely on Chipquik, but this method is very easy. If it's still sticking, melt more Chipquik onto the pads and keep everything heated until the whole thing is swimming in liquid chipquik. If you follow that heuristic, you can't fail.
@NeverDie said in Bootloading a barebones arduino:
Honestly, you'll be surprised how easy it is to desolder a 328P if you use enough Chipquik
I"ll give it a go. What can I lose? Good excuse to use my Chipquick kit that arrived some time ago. I'm going to use my heavier iron. I won’t reinstall another 328P until the clam shell device arrives.
-
@Larson said in Bootloading a barebones arduino:
I assume the skill that is required to remove the bootloaded 328P's from the Nano is a higher challenge. Soldering a new chip, as I did, has to be easy-peasy compared to removing and resoldering an existing chip.
Honestly, you'll be surprised how easy it is to desolder a 328P if you use enough Chipquik. You basically lower the melting point to where all 32 pins are in liquid metal all at the same time, and then you just push it aside. I'm sure there are other techniques as well that don't rely on Chipquik, but this method is very easy. If it's still sticking, melt more Chipquik onto the pads and keep everything heated until the whole thing is swimming in liquid chipquik. If you follow that heuristic, you can't fail.
@NeverDie said in Bootloading a barebones arduino:
Honestly, you'll be surprised how easy it is to desolder a 328P if you use enough Chipquik.
Before undoing my solder job on the barebones, I had to try again. I think my problem is solved. The short story is that the chips I bought are looking for a clock. (See This is a symptom of the target chip's clock not running.) Once I gave the chip a clock (thanks AlphaHotel for the insight of LED driver pins 20/21 hack) wala ... I'm now talking to the chip in CMD terminal. More to come.
DogWithABone
-
@OldSurferDude said in Bootloading a barebones arduino:
...you got me thinking...
This forum is built for that.
Thank you for posting and the link to Arduino Bootloaders. I read that again. In summary of my reading, and in my own words: Bootloaders are the gravel under pavement. So I pose this as a question: If one uses "Sketch/Upload Using Programmer" it will load the program without the bootloader, right? Is that your understanding? Kind of like all pavement, no gravel.
Over several of these exercises bootloading and programming with ICSP's using the Arduino IDE I've noticed that once a program is loaded with the ICSP using "Sketch/Upload Using Programmer", no further USB-TTL (USART) programming can occur until "Tools/Burn Bootloader" is subsequently executed. So in my limited experience, the bootloader is the gateway to normal USART programming. Too many words... I know. But the nice thing about the link you provide is that the Bootloader program is only 512 bytes. So one shouldn't fret over economizing over space.
@OldSurferDude said in Bootloading a barebones arduino:
...skill and experience...
I assume the skill that is required to remove the bootloaded 328P's from the Nano is a higher challenge. Soldering a new chip, as I did, has to be easy-peasy compared to removing and resoldering an existing chip. As it was, I think I killed my new chips because of the soldering & bridge removal. More on that to come in my next post.
@OldSurferDude said in Bootloading a barebones arduino:
...pretty awesome and I wish you success
Kind of you. At this point, I'm kind of a dog with a bone. Given the contributions of NeverDie, AlphaHotel and others, I just have to press on or all the time & effort is for not. Perhaps the dialog is of use to others.
@Larson said in Bootloading a barebones arduino:
once a program is loaded with the ICSP using "Sketch/Upload Using Programmer", no further USB-TTL (USART) programming can occur until "Tools/Burn Bootloader" is subsequently executed.
That is exactly right! Once you have all the wiring (I made up a wire harness for just that purpose) the processes are equally easy.
-
@NeverDie said in Bootloading a barebones arduino:
Honestly, you'll be surprised how easy it is to desolder a 328P if you use enough Chipquik.
Before undoing my solder job on the barebones, I had to try again. I think my problem is solved. The short story is that the chips I bought are looking for a clock. (See This is a symptom of the target chip's clock not running.) Once I gave the chip a clock (thanks AlphaHotel for the insight of LED driver pins 20/21 hack) wala ... I'm now talking to the chip in CMD terminal. More to come.
DogWithABone
@Larson said in Bootloading a barebones arduino:
I'm now talking to the chip in CMD terminal.
Well done! Let us know how it goes from here.
AH
-
@alphaHotel and @NeverDie
It has been a long journey. Since being able to hack my barebones with an external clock onto the D20 and D21 nets, I’ve been able to talk to my barebones MCU in CMD window and Arduino IDE. Once talking, then I could bootload using internal crystal. But the major breakthrough today was trying to get the LEDs blinking. That brought me back to post 110 of https://forum.mysensors.org/topic/11917/anyone-using-tried-the-e28-2g4m27s-2-4ghz-lora-sx1280-27db-module/110?_=1659129333013. And here I re-learn that I’ve been on the wrong path along. After installing MCUDude in board manager, bootloading, and reprogramming (USART via USB-TTL) my LEDs are blinking away.
But along the way I’ve learned a couple of things:
- The barebones Atmega 328P running without an external clock can’t exactly keep up with the IDE’s baud rate of 9600. Clock accuracy, I’m told, is the cost of using the low-power internal clock setting. So after some iterative looping, I’ve discovered that coding Serial.begin (8800) works on one board, and Serial.begin(9000) works on the other. Your chip will probably be different.
- To make the crystal hack noted above, I had unsoldered the two resistors on one of my barebones. On my second board, I simply held the crystal against the resistor base (facing D20, D21) while resetting fuses to internal clock setting; it worked.
- Before finding MCUDude, I had made edits to Board.txt file and copied one of the Pro Mini boards, renamed it, re-fused it, and that worked do. But as mentioned, the LED’s didn’t.
I have been around the block a coupe of times with these boards and learned a bunch. Soon, I hope to actually mount a radio which originally looked like it would be fast work.
Thank you to the contributors and readers of this post. For me, this forum has become a great source of discussion and documentation for my own record.
@Larson said in Bootloading a barebones arduino:
The barebones Atmega 328P running without an external clock can’t exactly keep up with the IDE’s baud rate of 9600. Clock accuracy, I’m told, is the cost of using the low-power internal clock setting. So after some iterative looping, I’ve discovered that coding Serial.begin (8800) works on one board, and Serial.begin(9000) works on the other. Your chip will probably be different.
Something is amiss then. Maybe you're running with very long wires? I can't remember having problems running UART at 115200 baud without a crystal, and that's true across many atmega328p's and across many different boards. For sure I've never had a problem at 9600 baud.
Are you using either an official FTDI or a CP2102? Either of those works great. The cheap UART alternative chips which aren't those might be a problem problem though. I avoid those.
-
@Larson said in Bootloading a barebones arduino:
The barebones Atmega 328P running without an external clock can’t exactly keep up with the IDE’s baud rate of 9600. Clock accuracy, I’m told, is the cost of using the low-power internal clock setting. So after some iterative looping, I’ve discovered that coding Serial.begin (8800) works on one board, and Serial.begin(9000) works on the other. Your chip will probably be different.
Something is amiss then. Maybe you're running with very long wires? I can't remember having problems running UART at 115200 baud without a crystal, and that's true across many atmega328p's and across many different boards. For sure I've never had a problem at 9600 baud.
Are you using either an official FTDI or a CP2102? Either of those works great. The cheap UART alternative chips which aren't those might be a problem problem though. I avoid those.
@NeverDie said in Bootloading a barebones arduino:
Something is amiss then.
Probably true, and thank you for your commenting.
I think all my USB-TTL converters are based on cheapo CH340G chips. But, to date, except for my blunders, I've not had a mismatch between the SW and FW baud rate that is so slight and I'm using the same wire length and converter as before(cheap & near, pluggable wire).
I think I misstated the idea that that the bare bones "can't exactly keep up". The reverse is the case: the barebones MCU is faster than the IDE/USB-TTL combo. None-the-less, the timing is off so that Serial.print yeilds some ASCII characters instead of numbers. Incrementally changing the baud rate in the loop enabled me to test different rates. And what the serial monitor in the IDE thinks is 9600 baud, it is best expressed when the chip hits a baud rate of about 9000. Make sense? I'm imagining that the same is true if I were at 115,200, only relatively higher.
In development, as I am, I always default to 9600 until I gain some confidence. Sometimes going slow is the source of my problem when chips are going so fast.
-
I think I know what you mean. On the nRF52805, one of the nominal UART Tx baud rates is 921,600, but the datasheet states that the "actual" baudrate at that setting is 941,176, so I set my terminal emulator to that, the actual baud, rather than the nominal rate. I don't ever remember encountering that kind of distinction on the atmega328p, but maybe there are some that I've just never run across. At slower speeds it's probably more forgiving. There's also the issue of hardware flow control, but it often isn't used by some link in the chain, which ruins it.
