Sleeping while waiting for double click (delayed sleep)
-
Hi,
I want one "taster" button to controll the lights. When use clicks on the button, node wakes up and sends a click message.
Now I want to have a doubleClick as well, which means that node needs to wait a predefined time and if another click is detected, then a doubleClick action is sent instead.
I manage to make this work with the help of OneButton library http://www.mathertel.de/Arduino/OneButtonLibrary.aspx and it works awesome, much better then some other solutions or custom code.Now the trick is, how to delay going to sleep when the node wakes up?
Meaning, I click the button, node wakes and waits for 1-2-3 seconds, meanwhile it is waiting for second click, and if no button action is detected, only then go to sleep.
Basically I need some sort of counter around the Sleep function or something?This is the code in the loop (very simple actually)
void loop() { // keep watching the push buttons: button1.tick(); button2.tick(); // Sleep until something happens with the sensor **//HERE would the if/wait go** sensor_node.sleep(LIGHT_SWITCH_PIN-2, CHANGE, SECOND_LIGHT_SWITCH_PIN-2, CHANGE, 0); } // loop // This function will be called when the button1 was pressed 1 time (and no 2. button press followed). void click1() { Serial.println("Button 1 click."); sensor_node.send(msg.set(HIGH)); } // click1 // This function will be called when the button1 was pressed 2 times in a short timeframe. void doubleclick1() { Serial.println("Button 1 doubleclick."); sensor_node.send(msg.set(HIGH)); } // double -
Hi,
I want one "taster" button to controll the lights. When use clicks on the button, node wakes up and sends a click message.
Now I want to have a doubleClick as well, which means that node needs to wait a predefined time and if another click is detected, then a doubleClick action is sent instead.
I manage to make this work with the help of OneButton library http://www.mathertel.de/Arduino/OneButtonLibrary.aspx and it works awesome, much better then some other solutions or custom code.Now the trick is, how to delay going to sleep when the node wakes up?
Meaning, I click the button, node wakes and waits for 1-2-3 seconds, meanwhile it is waiting for second click, and if no button action is detected, only then go to sleep.
Basically I need some sort of counter around the Sleep function or something?This is the code in the loop (very simple actually)
void loop() { // keep watching the push buttons: button1.tick(); button2.tick(); // Sleep until something happens with the sensor **//HERE would the if/wait go** sensor_node.sleep(LIGHT_SWITCH_PIN-2, CHANGE, SECOND_LIGHT_SWITCH_PIN-2, CHANGE, 0); } // loop // This function will be called when the button1 was pressed 1 time (and no 2. button press followed). void click1() { Serial.println("Button 1 click."); sensor_node.send(msg.set(HIGH)); } // click1 // This function will be called when the button1 was pressed 2 times in a short timeframe. void doubleclick1() { Serial.println("Button 1 doubleclick."); sensor_node.send(msg.set(HIGH)); } // double@dakipro change the 0 in sleep to 1000 to only sleep one second. That way the node will wake and check the ticks.
The return value of sleep determines if it was waken up by button or timer.
You can add an if clause to sleep 0 (=no timer) again after the 3 seconds have passed, to save battery.
-
Thanks, i managed to fix it with a hardware "Another debouncer" from this page
http://playground.arduino.cc/Main/RotaryEncodersHere is the code that supports click, double click as well as hold (not the prettiest code but hey... works for now :) )
/*
 This is a sample sketch to show how to use the OneButtonLibrary
 to detect click events on 2 buttons in parallel.
 The library internals are explained at
 http://www.mathertel.de/Arduino/OneButtonLibrary.aspx

 Setup a test circuit:
 * Connect a pushbutton to pin A1 (ButtonPin) and ground.
 * Connect a pushbutton to pin A2 (ButtonPin) and ground.
 * The Serial interface is used for output the detected button events.

 The Sketch shows how to setup the library and bind 2 buttons to their functions.
 In the loop function the button1.tick and button2.tick functions have to be called as often as you like.
 */

// 01.03.2014 created by Matthias Hertel
// ... and working.

/* Sample output:

Starting TwoButtons...
Button 1 click.
Button 2 click.
Button 1 doubleclick.
Button 2 doubleclick.
Button 1 longPress start
Button 1 longPress...
Button 1 longPress...
Button 1 longPress...
Button 1 longPress stop
Button 2 longPress start
Button 2 longPress...
Button 2 longPress...
Button 2 longPress stop
*/

#include <MySensor.h>
#include <SPI.h>
#include <Vcc.h>                                    // library for internal reference Vcc reading


// Reference values for ADC and Battery measurements
const float VccMin          = 1.0*2.5 ;             // Minimum expected Vcc level, in Volts. Example for 1 rechargeable lithium-ion.
const float VccMax          = 1.0*3.0 ;             // Maximum expected Vcc level, in Volts.
//const float VccMin        = 2.0*0.6 ;             // Minimum expected Vcc level, in Volts. for 2xAA Alkaline.
//const float VccMax        = 2.0*1.5 ;             // Maximum expected Vcc level, in Volts.for 2xAA Alkaline.
const float VccCorrection   = 3.30/3.42 ;           // Measured Vcc by multimeter divided by reported Vcc
Vcc vcc(VccCorrection);                             // instantiate internal voltage measurement lib

int oldBatteryPcnt = 0;


#define SKETCH_NAME "DoubleLightClickSwitch"
#define SKETCH_MAJOR_VER "2"
#define SKETCH_MINOR_VER "0"


#define LIGHT_SWITCH_PIN 2   // Arduino Digital I/O pin for button/reed switch
#define SECOND_LIGHT_SWITCH_PIN 3 // Arduino Digital I/O pin for button/reed switch
int BATTERY_SENSE_PIN = A0;  // select the input pin for the battery sense point

#define PRIMARY_CHILD_ID 3
#define SECONDARY_CHILD_ID 4

#if (LIGHT_SWITCH_PIN < 2 || LIGHT_SWITCH_PIN > 3)
#error LIGHT_BUTTON_PIN must be either 2 or 3 for interrupts to work
#endif
#if (SECOND_LIGHT_SWITCH_PIN < 2 || SECOND_LIGHT_SWITCH_PIN > 3)
#error SECONDARY_BUTTON_PIN must be either 2 or 3 for interrupts to work
#endif
#if (LIGHT_SWITCH_PIN == SECOND_LIGHT_SWITCH_PIN)
#error LIGHT_BUTTON_PIN and BUTTON_PIN2 cannot be the same
#endif
#if (PRIMARY_CHILD_ID == SECONDARY_CHILD_ID)
#error PRIMARY_CHILD_ID and SECONDARY_CHILD_ID cannot be the same
#endif

MySensor sensor_node;

// Change to V_LIGHT if you use S_LIGHT in presentation below
MyMessage msg(PRIMARY_CHILD_ID, V_TRIPPED);
MyMessage msg2(SECONDARY_CHILD_ID, V_TRIPPED);

#include "OneButton.h"

// Setup a new OneButton on pin A1.
OneButton button1(LIGHT_SWITCH_PIN, true);
// Setup a new OneButton on pin A2.
OneButton button2(SECOND_LIGHT_SWITCH_PIN, true);

unsigned long previousMillis = 0;        // will store last time LED was updated
unsigned long currentMillis = 0;        // will store last time LED was updated
// constants won't change :
const long interval = 10000;           // interval at which to sleep (milliseconds)

// setup code here, to run once:
void setup() {

	sensor_node.begin(NULL, 31); // Light switches are nodes 30+

	// Setup the buttons
	pinMode(LIGHT_SWITCH_PIN, INPUT);
	pinMode(SECOND_LIGHT_SWITCH_PIN, INPUT);

	// Activate internal pull-ups
	digitalWrite(LIGHT_SWITCH_PIN, HIGH);
	digitalWrite(SECOND_LIGHT_SWITCH_PIN, HIGH);

	// Send the sketch version information to the gateway and Controller
	sensor_node.sendSketchInfo(SKETCH_NAME, SKETCH_MAJOR_VER"."SKETCH_MINOR_VER);

	// Register binary input sensor to sensor_node (they will be created as child devices)
	// You can use S_DOOR, S_MOTION or S_LIGHT here depending on your usage.
	// If S_LIGHT is used, remember to update variable type you send in. See "msg" above.
	sensor_node.present(PRIMARY_CHILD_ID, S_DOOR);
	sensor_node.present(SECONDARY_CHILD_ID, S_DOOR);

	// link the button 1 functions.
	button1.attachClick(click1);
	button1.attachDoubleClick(doubleclick1);
	button1.attachLongPressStart(longPressStart1);
	button1.attachLongPressStop(longPressStop1);
	button1.attachDuringLongPress(longPress1);

	// link the button 2 functions.
	button2.attachClick(click2);
	button2.attachDoubleClick(doubleclick2);
	button2.attachLongPressStart(longPressStart2);
	button2.attachLongPressStop(longPressStop2);
	button2.attachDuringLongPress(longPress2);

} // setup


// main code here, to run repeatedly:
void loop() {
	currentMillis = millis();

	// keep watching the push buttons:
	button1.tick();
	button2.tick();


	int batteryPcnt = vcc.Read_Perc(VccMin, VccMax, true);

	if (oldBatteryPcnt != batteryPcnt) {
		// Power up radio after sleep
		sensor_node.sendBatteryLevel(vcc.Read_Perc(VccMin, VccMax, true));

		oldBatteryPcnt = batteryPcnt;
	}


	// Sleep until buttons pressed

	if (currentMillis - previousMillis >= interval) {
		Serial.println("we go sleep");
		previousMillis = currentMillis;

		sensor_node.sleep(LIGHT_SWITCH_PIN-2, CHANGE, SECOND_LIGHT_SWITCH_PIN-2, CHANGE, 0);
	}
} // loop

// ----- button 1 callback functions

// This function will be called when the button1 was pressed 1 time (and no 2. button press followed).
void click1() {
	Serial.println("Button 1 click.");
	sensor_node.send(msg.set(HIGH));
	previousMillis = millis(); //this is somehow buggy, so it becomes a feature
} // click1


// This function will be called when the button1 was pressed 2 times in a short timeframe.
void doubleclick1() {
	Serial.println("Button 1 doubleclick.");
	sensor_node.send(msg.set(HIGH));
	previousMillis = millis(); //this is somehow buggy, so it becomes a feature
} // doubleclick1


// This function will be called once, when the button1 is pressed for a long time.
void longPressStart1() {
	Serial.println("Button 1 longPress start");
} // longPressStart1


// This function will be called often, while the button1 is pressed for a long time.
void longPress1() {
	Serial.println("Button 1 longPress...");
} // longPress1


// This function will be called once, when the button1 is released after beeing pressed for a long time.
void longPressStop1() {
	Serial.println("Button 1 longPress stop");
	sensor_node.send(msg.set(HIGH));
	previousMillis = millis(); //this is somehow buggy, so it becomes a feature
} // longPressStop1


// ... and the same for button 2:

void click2() {
	Serial.println("Button 2 click.");
	sensor_node.send(msg2.set(HIGH));
	previousMillis = millis(); //this is somehow buggy, so it becomes a feature

} // click2


void doubleclick2() {
	Serial.println("Button 2 doubleclick.");
	sensor_node.send(msg2.set(HIGH));
	previousMillis = millis(); //this is somehow buggy, so it becomes a feature
} // doubleclick2


void longPressStart2() {
	Serial.println("Button 2 longPress start");
} // longPressStart2


void longPress2() {
	Serial.println("Button 2 longPress...");
} // longPress2

void longPressStop2() {
	Serial.println("Button 2 longPress stop");
	sensor_node.send(msg2.set(HIGH));
	previousMillis = millis(); //this is somehow buggy, so it becomes a feature
} // longPressStop2


// End
e
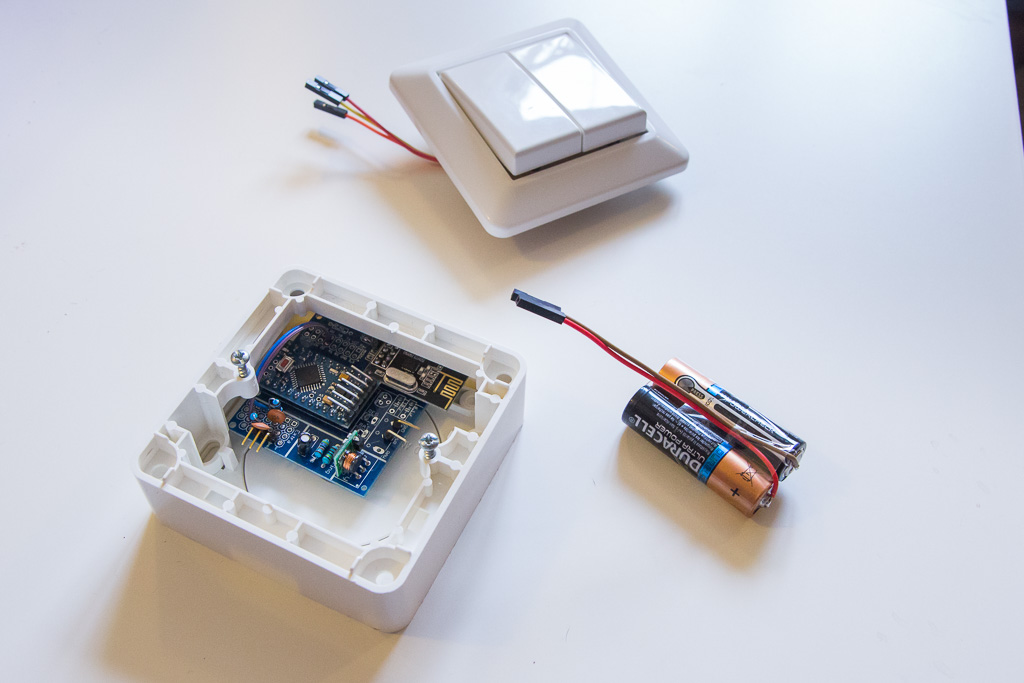
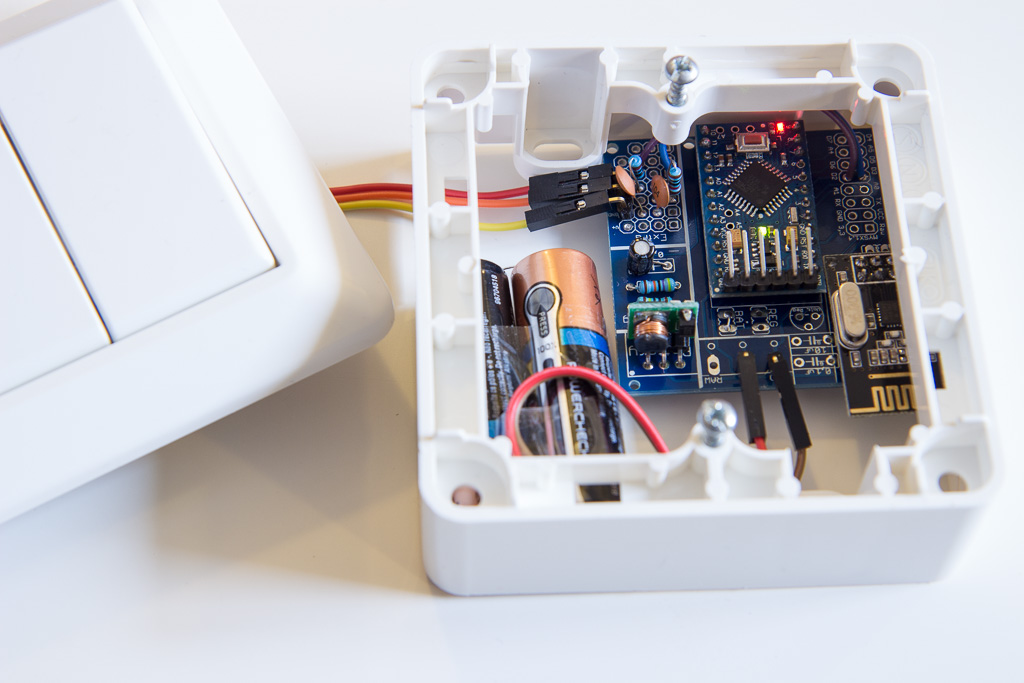
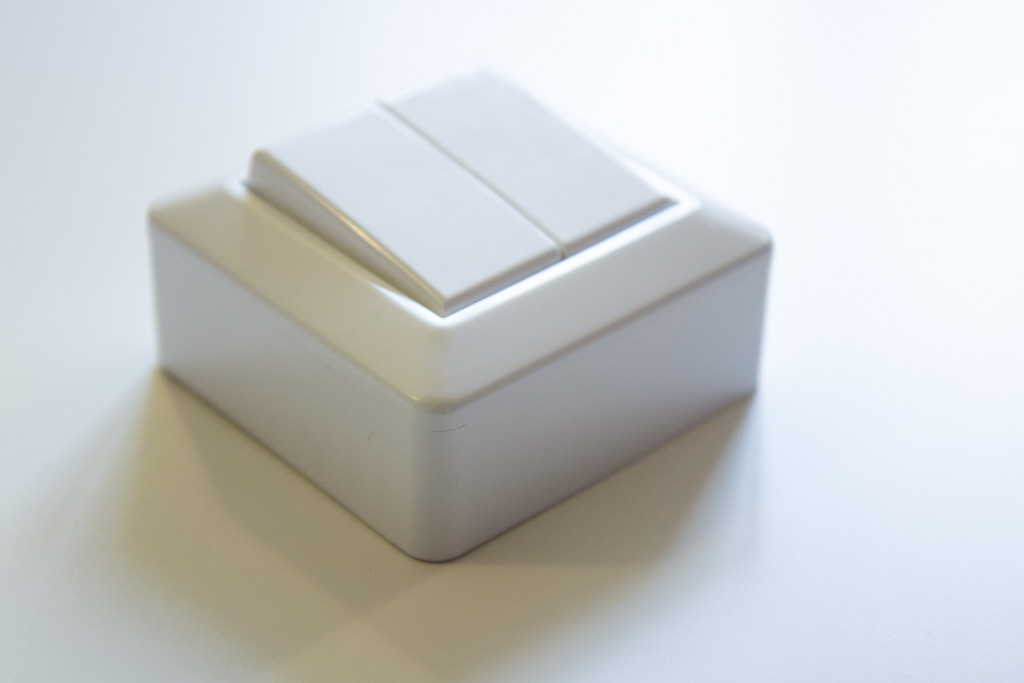
Here are some photos of the switch


(I know I should not just solder the batteries directly, but... i've done it several times before and none of them complained (duracells take 3-4s with a cheap soldering iron and hold very nice)
Board is the fantastic Easy/Newbie that warms my hart each time I use it
https://www.openhardware.io/view/4/EasyNewbie-PCB-for-MySensorsThe switch is not the smallest one (nexa's are waaay more pretier and slimmer) but for what I want to make next, I think MySensors version could work fine.
What would be the best way now to send double click, and eventually "hold" action?
Code can send events on "Button 1 longPress start" and it can send code all the way while you hold the button like bunch of
"
Button 1 longPress...
Button 1 longPress...
Button 1 longPress...
"
and it can send code as "Button 1 longPress stop"Should I register 4 more CHILD_ID maybe on the switch, and then send CHILD_ID 1 on click, CHILD_ID 2 on double click, CHILD_ID 3 on hold and similar for second button?
-
Any suggestions on how to "properly" send click, doubleclick and hold actions?
As different logical switches i guess?@dakipro I'd define and present a child to the gateway for each type of press. Because it's what your doing basically. You have on button that acts as different buttons.
But it'll be tricky. How do you reset each individual child after it's action is reset?
-
Thanks, I will most likely do it like you are suggesting.
About reset, you mean setting it to "off" state after click or?
The code above sends only one action per press, so it is either as "click", or a "double click" or a "hold released" (you can even send a "hold started" and "I'm holding...I'm holding...I'm holding...I'm holding..." events, but I do not need them for now). All the logic about counting etc is nicely handled by the OneButtonLibrary, it works much much better then the other solutions I found on the net (I even started writing my own logic, but being somewhat "experienced" developer I figured that someone has allready tested it better then me, and I was right :) )I use domoticz as controller and it has option for the "contact" type of switch, which gets triggererd each time I press the button/send the ON state.
It works nice so far, so I wasn't going much into details about hows and whys :)
