💬 Various bootloader files based on Optiboot 6.2
-
@GertSanders Okey, I almost got it! I am stuck on compiling the sketch. It says "pins_arduino.h" is missing. Apparently I need a folder called "28PinBoard" with a file "pins_arduino.h" in it. Wich one can I use for this project?
Drop this ZIP (unpack it there) into your "hardware" directory. You should find a "hardware" directory in the Sketches directory, then restart the Arduino IDE.
It should find a complete set of boot loaders for the 28 pin and 32 pin versions.
0_1463253058014_atmega328p.zip
You will need to check that the directory is unpacked with all subdirectories. The directory name will be "atmega328p".
-
@GertSanders My personal observations - some chips are more temperamental than the others. I recently tried to upload the sketch (8Mhz internal clock) and it failed a few times. Then I reflashed Optiboot and used the external clock (8Mhz external clock) and this cured the issue. With other chips I did not have this problem.
Indeed, the internal oscillator on some atmega328's is a bit off from 8MHz and enough so that higher speed transmission of sketches can give a problem.
-
@GertSanders thanks for this bootloader pack. After one day of trying I was still unable to upload scetches to atmega burned with bootloader 8Mhz image to atmeg328 - 28 pin DIL from this: https://forum.mysensors.org/topic/3018/tutorial-how-to-burn-1mhz-8mhz-bootloader-using-arduino-ide-1-6-5-r5/1 tutorial.
With your 0_1463253058014_atmega328p.zip pack unzipped to "hardware" directory worked like a charm. -
@GertSanders : Ive downloaded the files and boards.txt. I noticed you've made a distinction between the 28p DIP and the 32p TQFP. But in the boards.txt I can find no differences besides that the high fuse bits are global for the 28p version and individual (but all the same!) for the 32p version.
Does that have a reason? -
@GertSanders : Ive downloaded the files and boards.txt. I noticed you've made a distinction between the 28p DIP and the 32p TQFP. But in the boards.txt I can find no differences besides that the high fuse bits are global for the 28p version and individual (but all the same!) for the 32p version.
Does that have a reason?@DavidZH
No particular reason, I did not spend as much effort in defining the options for the 32-pin package as I did for the 28-pin package.
When my free time becomes mine again, I will be able to take this up again. For now I have to be content with a relatively short online presence every week. -
@DavidZH
No particular reason, I did not spend as much effort in defining the options for the 32-pin package as I did for the 28-pin package.
When my free time becomes mine again, I will be able to take this up again. For now I have to be content with a relatively short online presence every week.@GertSanders
No worries! It just caught my eye and was wondering. I'll keep an eye on this as I'm finalising my node network and have to choose a bootloader about now. -
@GertSanders I am finally getting around to trying some of these bootloaders. Thanks for making them! Would you mind posting the latest .zip file to the openhardware site? I started with those files and was getting the same errors as others mentioned. As I got further down this thread I noticed I was missing some files. :)
Thanks again for making these! -
The site will still unpack zips and extract the content. I could disable this, but it would make it harder to upload large projects.
Like @GertSanders propose, allowing (and not uppacking) rar-files might be a better solution.
-
I have added my atmega328 directory in a RAR file and uploaded it to the site.
This compressed file contains a directory structure that contains all bootloaders I use, and the extra files needed to make most of those available from the Arduino IDE.
To use it:
Close the Arduino IDE
Unpack the RAR file
Open the IDEThis compressed file needs to be unpacked inside the "hardware" directory which sits inside the Arduino Sketches directory. If you do not have a "hardware" directory inside the Arduino Sketches directory, then you need to make this first.
Then go inside the "hardware" directory and there unpack the RAR file.My directory structure looks like this:
[Arduino] [hardware] [atmega328p] [avr] [bootloaders] [myoptiboot] ... all the HEX files ... [variants] [28PinBoard] pins_arduino.h [32PinBoard] pins_arduino.h [40PinBoard] pins_arduino.h [44PinBoard] pins_arduino.h boards.txt platform.txt -
I'm finally managing to update my Arduino IDE and would like to ask how you have your boards.txt setup. Do you have your boards.txt file that is zipped up in your config zip file just located in the avr folder without running the default boards.txt file or are we supposed to merge your boards file with the original one? Back when i was developing my own boards, i seem to remember just running your board file without any of the default files....
Is this correct or do we merge them?
-
@GertSanders Awesome, thank you for uploading it as a .rar!!! So easy now :)
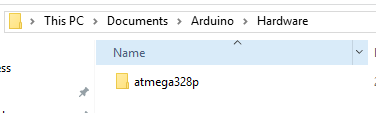
@Samuel235 You should be able to just copy the entire folder from the .rar file into your Arduino folder. I had to create a "Hardware" folder as it didn't exist. I'm on Windows 10 and it looks like this:
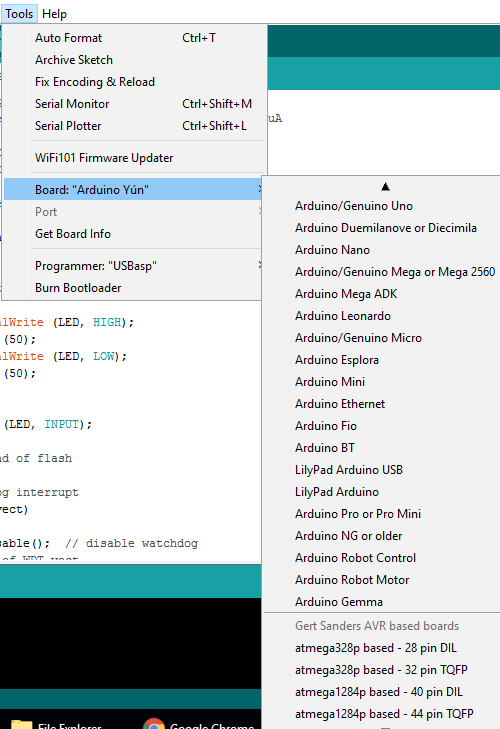
After closing/re-opening the Arduino IDE it looks like this:
-
The boards .txt and platform.txt files are not complete yet, and I still need to check and change the pins_arduino.h boards for the 40 and 44 pin atmega's. That is still on my to do list, but the structure is there already. I'm still learning from other hardware deployments how to define this in a practical way. Hopefully by sharing this will be improved.
-
@petewill - I do that, however i do already have the hardware folder (and its a clean install of windows and arduino IDE) and then inside the hardware folder i have the boards.txt file (the default one, the list that shows in the IDE without installing gertsanders'. So, i either need to put the new one in there and rename the old or to merge the two together.
Or am i getting this completely wrong some how?
EDIT: It was a mistake on my own part but will leave this comment here for anyone to see and to not make the same mistake as myself:
I was attempting to put it inside of the "arduino" folder that was inside of the hardware folder. My own fault XD
-
This post is deleted!
-
I'm slightly confused here...
I'm using a arduino nano, hooked it up to avrdude and read the fuses as Low:FF, High:DA, Extended:05. I then burn new fuses of Low:FF, High:DE and Extended:07. Burnt fine, so i go into arduino IDE and select the bootloader for 32pin, TQFP, 8MHz external crystal 38K4 D13 and then burn bootloader. I get a little warning but that is only because of the new IDE issues with extended bits ("You probably want to use 0xfd instead of 0x05 (double check with your datasheet first)."). But now the LED on the nano is blinking rapid then stop, then blinking rapid and then stop. I can't upload a sketch to the nano either now. I can however burn the old bootloader back on and upload like normal. What could be the issue here?
It almost seems like there is something wrong with the bootloader as it is uploading to it but the LED is blinking weirdly. May not be the bootloader itself, could just be some corruption as it gets uploaded....
@Samuel235
If you are using a nano, what crystal is mounted on it ? Fast flashing indicates the processor is running faster then the expected 8MHz (expected by the timing routines of the bootloader). Could it be a 16MHz model ?
In that case you could try to upload a sketch at a higher speed: 76K8 baud.
Or you can try to load the bootloader for 16MHz/D13 (which in effect is the standard bootloader of an Arduino). -
I'm slightly confused here...
I'm using a arduino nano, hooked it up to avrdude and read the fuses as Low:FF, High:DA, Extended:05. I then burn new fuses of Low:FF, High:DE and Extended:07. Burnt fine, so i go into arduino IDE and select the bootloader for 32pin, TQFP, 8MHz external crystal 38K4 D13 and then burn bootloader. I get a little warning but that is only because of the new IDE issues with extended bits ("You probably want to use 0xfd instead of 0x05 (double check with your datasheet first)."). But now the LED on the nano is blinking rapid then stop, then blinking rapid and then stop. I can't upload a sketch to the nano either now. I can however burn the old bootloader back on and upload like normal. What could be the issue here?
It almost seems like there is something wrong with the bootloader as it is uploading to it but the LED is blinking weirdly. May not be the bootloader itself, could just be some corruption as it gets uploaded....
@Samuel235
It also seems the nano is in a reset loop. I'm at work so I can not check my Mac for the fuse settings I use. -
@Samuel235
If you are using a nano, what crystal is mounted on it ? Fast flashing indicates the processor is running faster then the expected 8MHz (expected by the timing routines of the bootloader). Could it be a 16MHz model ?
In that case you could try to upload a sketch at a higher speed: 76K8 baud.
Or you can try to load the bootloader for 16MHz/D13 (which in effect is the standard bootloader of an Arduino).@GertSanders Soon as i say the fast flashing I instantly thought that its running quicker than needed, but i had no idea about the resetting that you have pointed out, so thanks for pointing that one out. The reason i didn't even bother trying the 16MHz settings in fuses would be that because when i read the fuses of the arduino before i did anything, it indicated that it was running with fuses of 8MHz and the blink sketch was perfectly timed on those settings.... Could it be a miss read on the fuse settings maybe? Should i read at a slower speed when using avrdude?
The crystal is so small on the nano and i can't even see the engraving with a microscope properly either.
I can confirm that the 16MHz bootloader is working perfectly on this nano. Thanks.
Hello! It looks like you're interested in this conversation, but you don't have an account yet.
Getting fed up of having to scroll through the same posts each visit? When you register for an account, you'll always come back to exactly where you were before, and choose to be notified of new replies (either via email, or push notification). You'll also be able to save bookmarks and upvote posts to show your appreciation to other community members.
With your input, this post could be even better 💗
Register Login