CNC PCB milling
-
@sundberg84 well, I've my own PCB UV exposure toolset at home as well, so I can create PCBs both with CNC isolation routing or with photo transfer and etching. depending on the need I can choose the right toolset.
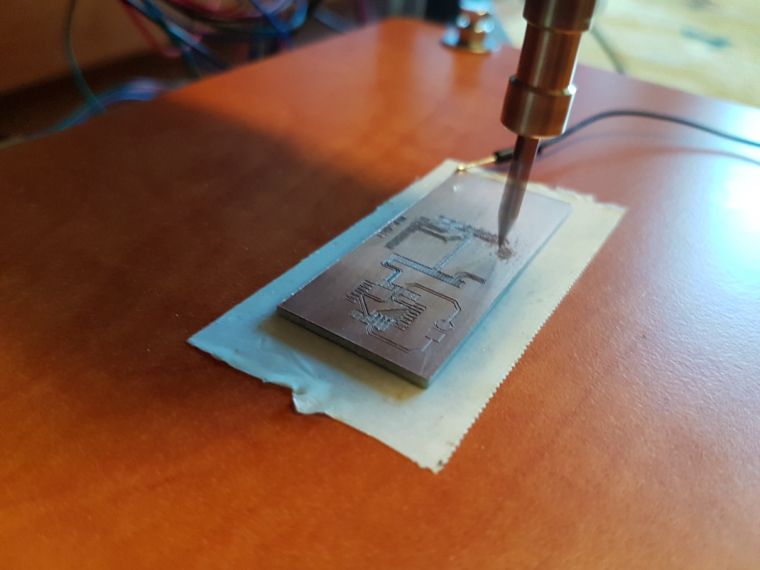
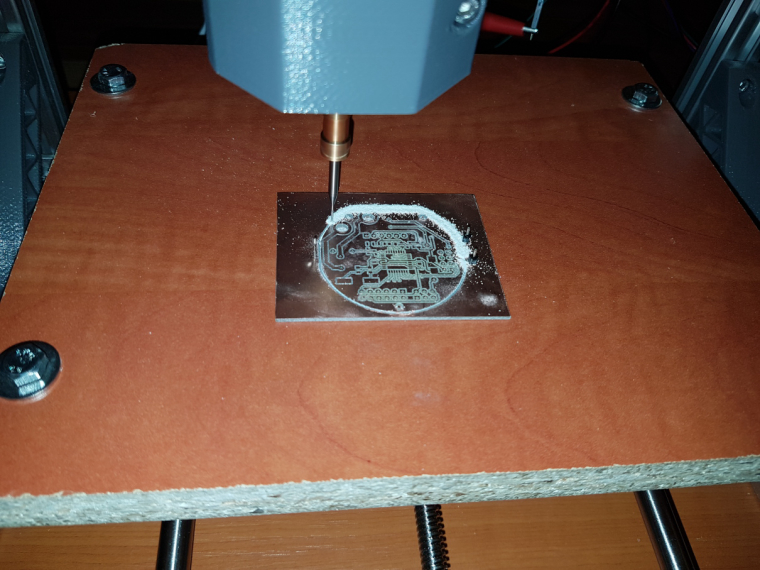
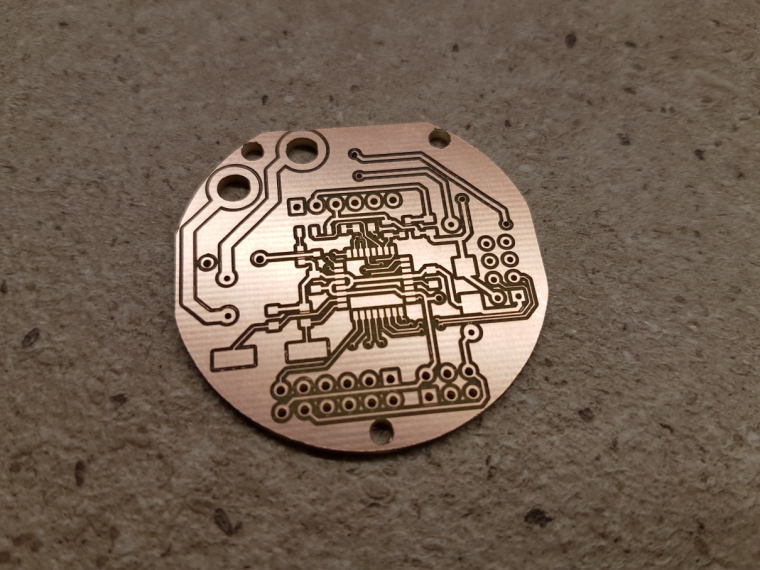
CNC has some advantages, e.g. no chemicals are necessary; you can easily create (mill) any PCB outline, drilling or hole milling is quick and precise. I managed to create nice 6mil tracks with 6mil isolation without any issue.
on the other hand the UV exposure version works very well, but due to my printing limitations I managed to go down until 8-10mil traces only. it is also harder to cut and drill the PCBs, or you have to manage to make the proper alignment and set correct reference points for the CNC. but, if you have to remove a lot of copper, then it could be much more efficient compared to CNC isolation routing.this small CNCs are pretty cheap. this version has 24x18cm effective work space, which is more than enough for most of the projects. it is also possible to replace the spindle with laser module, so you can use it for laser engraving. I bought this for cca 165 EUR...
raw PCBs are basically cheap, and I also prefer to have the first results for cheap and without waiting weeks for PCB delivery. so, I create my prototypes at home, test them, and as soon as the given project is ready to "release" (and if it necessary), then I order the design from a professional PCB fab.
as you see from the pictures above, I had to create couple of designs to properly adjust the mount holes and the PCB outline, I also enhanced the circuit itself, so it was definitely much more cheaper and faster to do all of this at home instead of ordering a set of PCBs for each revision.
so, long story short, I think it is a good investment :)
@andrew said in What did you build today (Pictures) ?:
I bought this for cca 165 EUR...
That's a great price. Where can I buy it? Since you're getting good results with yours....
Also, are you happy with it, or now that you've used it or is there a different one you wish you had gotten instead?
-
@andrew said in What did you build today (Pictures) ?:
I bought this for cca 165 EUR...
That's a great price. Where can I buy it? Since you're getting good results with yours....
Also, are you happy with it, or now that you've used it or is there a different one you wish you had gotten instead?
@neverdie just search for "cnc 2418" on ebay and you can find a lot. almost all of these are Chinese stuff, but works without any issue. based on your needs you can find bigger or smaller versions, such as cnc 1610 or cnc 3020.
the chosen one should be USB connected and GRBL firmware controlled (check it in the description), so you can use it with open source tools, such as bCNC (https://github.com/vlachoudis/bCNC), chilipeppr (chilipeppr.com/grbl). for isolation milling you should use flatcam (http://flatcam.org/) for the G code preparation based on the gerber and drill files exported from KiCAD/eagle/etc.
drill sets, milling bit sets and engraving bit sets could be ordered from China for couple of bucks only.
e.g.:- drill bits: https://www.aliexpress.com/item/Free-Shipping-10-Pcs-0-3mm-1-2mm-Import-Carbide-PCB-Drill-Bits-Print-Circuit-Board/32717739217.html
- carving bits https://www.aliexpress.com/item/New-10pcs-New-Mini-PCB-wood-drill-Bits-Tungsten-Steel-Carbide-PCB-CNC-drill-Bit-Milling/32702792947.html
- milling bits https://www.aliexpress.com/item/10Pcs-Set-1-8-0-8-3-175mm-Drill-Bits-Engraving-Cutter-Rotary-PCB-CNC-End/32774556522.html
-
@sundberg84 well, I've my own PCB UV exposure toolset at home as well, so I can create PCBs both with CNC isolation routing or with photo transfer and etching. depending on the need I can choose the right toolset.
CNC has some advantages, e.g. no chemicals are necessary; you can easily create (mill) any PCB outline, drilling or hole milling is quick and precise. I managed to create nice 6mil tracks with 6mil isolation without any issue.
on the other hand the UV exposure version works very well, but due to my printing limitations I managed to go down until 8-10mil traces only. it is also harder to cut and drill the PCBs, or you have to manage to make the proper alignment and set correct reference points for the CNC. but, if you have to remove a lot of copper, then it could be much more efficient compared to CNC isolation routing.this small CNCs are pretty cheap. this version has 24x18cm effective work space, which is more than enough for most of the projects. it is also possible to replace the spindle with laser module, so you can use it for laser engraving. I bought this for cca 165 EUR...
raw PCBs are basically cheap, and I also prefer to have the first results for cheap and without waiting weeks for PCB delivery. so, I create my prototypes at home, test them, and as soon as the given project is ready to "release" (and if it necessary), then I order the design from a professional PCB fab.
as you see from the pictures above, I had to create couple of designs to properly adjust the mount holes and the PCB outline, I also enhanced the circuit itself, so it was definitely much more cheaper and faster to do all of this at home instead of ordering a set of PCBs for each revision.
so, long story short, I think it is a good investment :)
Ver nice @andrew
Would you mind sharing your process for milling the pcbs? A friend bought a similar cnc and so far we've not found a process that's reliable and produces consistent results.
Edit: nevermind, you just shared it in the post above :) Thanks!
-
Ver nice @andrew
Would you mind sharing your process for milling the pcbs? A friend bought a similar cnc and so far we've not found a process that's reliable and produces consistent results.
Edit: nevermind, you just shared it in the post above :) Thanks!
@mfalkvidd yes, there are some details in my previous post, but it needs a little bit more :)
proper and precise building and calibration of the cnc is essential. the right values should be discovered for various parameters, then with a sw like flatcam you should create an isolation routing path G code, which will be sent to the CNC with a G code sender tool (e.g. bCNC).as PCBs are not flat, for fine traces the autoleveling process and the related G code adjustment is pretty important. the tools are supporting this, you just have to use it.
-
It would be great if there was a super detailed how-to on this. My fear is that it would take me 100 hours to figure out how to make it work well enough or else I'd get stuck like mfalkvidd. But if someone has already figured that out and posted a "no brains required" demo of what to do exactly, then it's a whole different story. Of course, I don't know if anyone is motivated to do that, or whether some kind of quid pro quo could be arranged to make it worth their while.
-
On the other hand, it's less than the cost of a good power drill, so I guess it's worth taking a flyer on it.
-
It would be great if there was a super detailed how-to on this. My fear is that it would take me 100 hours to figure out how to make it work well enough or else I'd get stuck like mfalkvidd. But if someone has already figured that out and posted a "no brains required" demo of what to do exactly, then it's a whole different story. Of course, I don't know if anyone is motivated to do that, or whether some kind of quid pro quo could be arranged to make it worth their while.
@neverdie indeed, unfortunately it is not straight forward every time. it also took me a while to discover the possibilities and fine tune the results.
although I'm not an expert, I'll try to create a howto on the topic. it is on my todo list, together with some write-up on my other electronics and hacking projects. :) -
@neverdie indeed, unfortunately it is not straight forward every time. it also took me a while to discover the possibilities and fine tune the results.
although I'm not an expert, I'll try to create a howto on the topic. it is on my todo list, together with some write-up on my other electronics and hacking projects. :)@andrew I'm looking forward for any input or ideas from your side on how to setup something like this.
-
@sundberg84 well, I've my own PCB UV exposure toolset at home as well, so I can create PCBs both with CNC isolation routing or with photo transfer and etching. depending on the need I can choose the right toolset.
CNC has some advantages, e.g. no chemicals are necessary; you can easily create (mill) any PCB outline, drilling or hole milling is quick and precise. I managed to create nice 6mil tracks with 6mil isolation without any issue.
on the other hand the UV exposure version works very well, but due to my printing limitations I managed to go down until 8-10mil traces only. it is also harder to cut and drill the PCBs, or you have to manage to make the proper alignment and set correct reference points for the CNC. but, if you have to remove a lot of copper, then it could be much more efficient compared to CNC isolation routing.this small CNCs are pretty cheap. this version has 24x18cm effective work space, which is more than enough for most of the projects. it is also possible to replace the spindle with laser module, so you can use it for laser engraving. I bought this for cca 165 EUR...
raw PCBs are basically cheap, and I also prefer to have the first results for cheap and without waiting weeks for PCB delivery. so, I create my prototypes at home, test them, and as soon as the given project is ready to "release" (and if it necessary), then I order the design from a professional PCB fab.
as you see from the pictures above, I had to create couple of designs to properly adjust the mount holes and the PCB outline, I also enhanced the circuit itself, so it was definitely much more cheaper and faster to do all of this at home instead of ordering a set of PCBs for each revision.
so, long story short, I think it is a good investment :)
@andrew said in CNC PCB milling:
it is also possible to replace the spindle with laser module,
Speaking of this, I read that you can black spray paint your copper clad PCB material and then laser ablate the copper you want to remove. I don't know what kind of wattage would be required to do that though. However, I imagine you could maybe get finer mil isolation widths doing it that way? I think there might even be some youtube videos on it.
-
@andrew said in CNC PCB milling:
it is also possible to replace the spindle with laser module,
Speaking of this, I read that you can black spray paint your copper clad PCB material and then laser ablate the copper you want to remove. I don't know what kind of wattage would be required to do that though. However, I imagine you could maybe get finer mil isolation widths doing it that way? I think there might even be some youtube videos on it.
@neverdie it depends on your laser focus and spot size.
to my "taste" that black spray solution is pretty rudimentary. you can use a small power laser (or stronger lasers with pwm control, which is basically a feature for a lot of cnc controller board as well) with photoresist pcb instead.
you can buy single or double pcbs with photoresist layer pre-applied, but you can do it at home as well with spray or with dry film. -
@neverdie it depends on your laser focus and spot size.
to my "taste" that black spray solution is pretty rudimentary. you can use a small power laser (or stronger lasers with pwm control, which is basically a feature for a lot of cnc controller board as well) with photoresist pcb instead.
you can buy single or double pcbs with photoresist layer pre-applied, but you can do it at home as well with spray or with dry film.@andrew Do you mean just removing the photoresist with the laser (not so interesting), or the underlying copper as well?
Anyhow, I'm thinking it might avoid the leveling issue, since maybe the laser wouldn't be as sensitive to non-flatness? Or, is that where the "focus" comes into play, and so it still has to be considered?
-
OK, so at Jack's store, I can get one, with FedEx delivery, for <$200.
https://www.aliexpress.com/item/cnc-2418-2500mw-laser-cnc-engraving-machine-Pcb-Milling-Machine-Wood-Carving-machine-diy-mini-cnc/32796872554.html?spm=2114.search0204.3.10.BfG38n&ws_ab_test=searchweb0_0,searchweb201602_4_10152_10065_10151_10344_10068_5000016_10130_10345_10324_10342_10547_10325_10343_51102_10546_10340_5060016_10341_10548_10545_5130016_10541_10084_10083_10307_5690016_10539_5080015_10312_10059_10313_10314_10534_100031_10604_10603_10103_10605_10594_10596_10142_10107,searchweb201603_14,ppcSwitch_4_ppcChannel&algo_expid=b73f1c65-7df2-402a-9bea-c6b351741fac-1&algo_pvid=b73f1c65-7df2-402a-9bea-c6b351741fac&rmStoreLevelAB=0 -
@andrew Do you mean just removing the photoresist with the laser (not so interesting), or the underlying copper as well?
Anyhow, I'm thinking it might avoid the leveling issue, since maybe the laser wouldn't be as sensitive to non-flatness? Or, is that where the "focus" comes into play, and so it still has to be considered?
@neverdie just to make the necessary uv exposure to the photoresist layer, then you still have to develop and etch it (see: https://www.youtube.com/watch?v=4SNkzoOvoD8 ).
with strong lasers you can eliminate the copper as well (see https://www.youtube.com/watch?v=dZYVda4fC4k), but those are not in the hobby category. -
OK, so at Jack's store, I can get one, with FedEx delivery, for <$200.
https://www.aliexpress.com/item/cnc-2418-2500mw-laser-cnc-engraving-machine-Pcb-Milling-Machine-Wood-Carving-machine-diy-mini-cnc/32796872554.html?spm=2114.search0204.3.10.BfG38n&ws_ab_test=searchweb0_0,searchweb201602_4_10152_10065_10151_10344_10068_5000016_10130_10345_10324_10342_10547_10325_10343_51102_10546_10340_5060016_10341_10548_10545_5130016_10541_10084_10083_10307_5690016_10539_5080015_10312_10059_10313_10314_10534_100031_10604_10603_10103_10605_10594_10596_10142_10107,searchweb201603_14,ppcSwitch_4_ppcChannel&algo_expid=b73f1c65-7df2-402a-9bea-c6b351741fac-1&algo_pvid=b73f1c65-7df2-402a-9bea-c6b351741fac&rmStoreLevelAB=0 -
@neverdie this is exactly the same as mine, even better, it has er11 bit mount on the spindle, which I just ordered for mine. I ordered mine from EU (it is still Chinese) to avoid the issues with the custom, but from China it is cheaper.
@andrew Are you milling regular FR4? When last I looked into this, TheOtherMill recommended something a little different (don't remember what now, but I think it was some kind of coper cladded plastic substrate rather fiberglass). Not sure why. Maybe it's easier on the milling bits or something.
-
@andrew Are you milling regular FR4? When last I looked into this, TheOtherMill recommended something a little different (don't remember what now, but I think it was some kind of coper cladded plastic substrate rather fiberglass). Not sure why. Maybe it's easier on the milling bits or something.
@neverdie yes, I use standard FR4. if I remember correctly, I read some articles which sad that other PCB types could be more flatter (but the inaccurate flatness could be handled with the autoleveling) and those might not "eat" the carving bits that much. unfortunately I don't have experience with other types but FR4 PCBs.
-
Well, I'm sold. I just ordered one. @andrew I hope you're still around after it arrives. :)
@neverdie I'll be here :)
you'll love the stuff, I bet for it.in the meantime I'll try to finish a howto on the cnc assembly/setup and on other tricks, such as firmware upgrade (which is not officially documented).
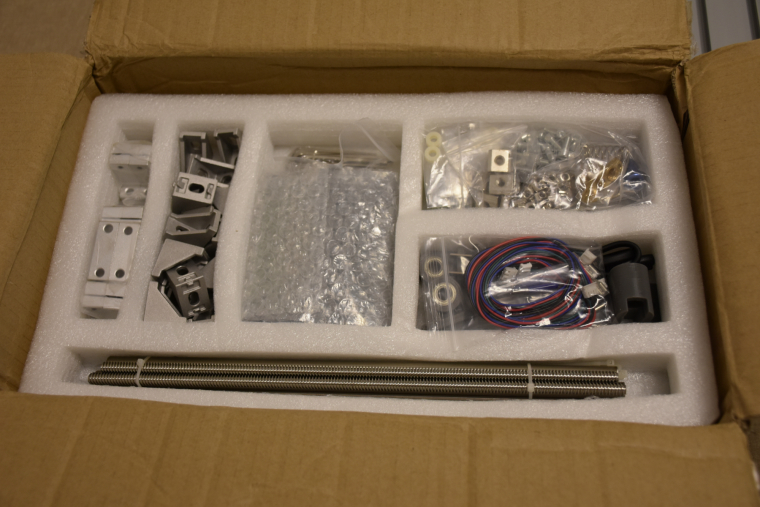
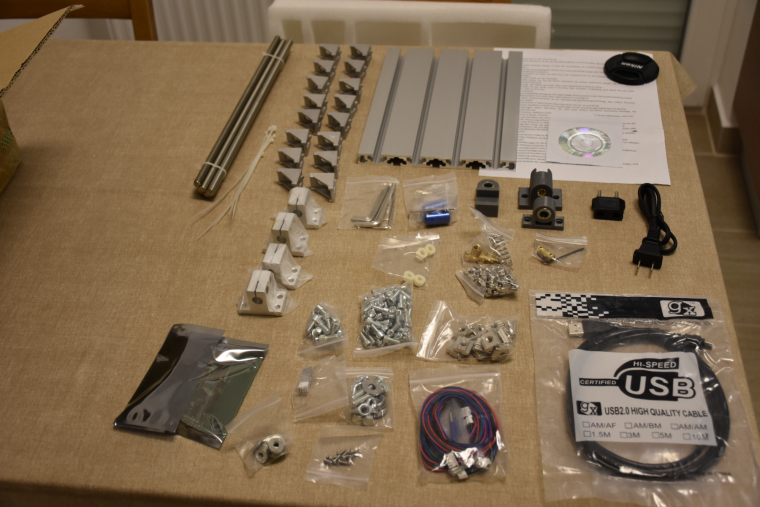
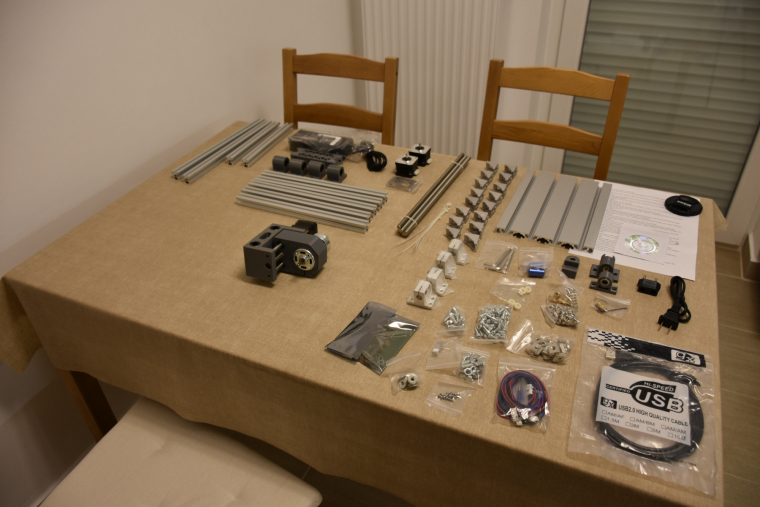
I received the pack like the pics below, it took me two nights to assemble it.
I would recommend not to use the provided SW pack. or maybe just in a dedicated VM, without internet connection... who knows...