CNC PCB milling
-
I also received model 6, which is the variety pack that includes a 10 degree bit with a 0.1mm angle. Should I give it a try? I've read that they're prone to create flying shrapnel. Anyone here have experience with them? If it doesn't blow up, it might be just the ticket for doing this cut.
-
I just now tried the Model 10:
Rougher edges, but it didn't decimate the pads as badly as the model 20. -
Merry Christmas, @executivul
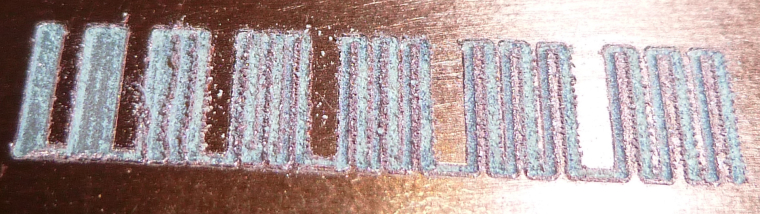
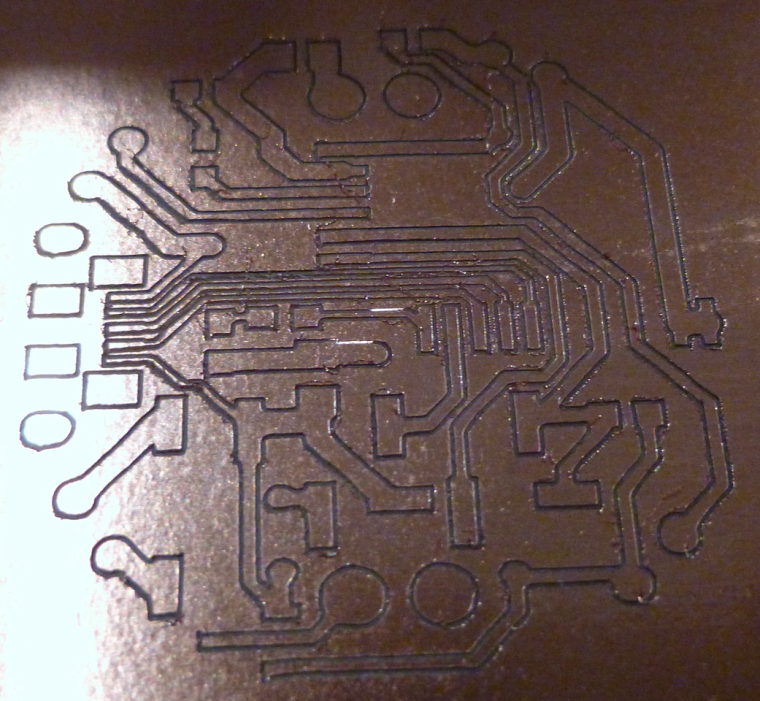
Here is the output of your script using a Model 20 bit:
-
Merry Christmas, @executivul
Here is the output of your script using a Model 20 bit:
@neverdie Marry Christmas!
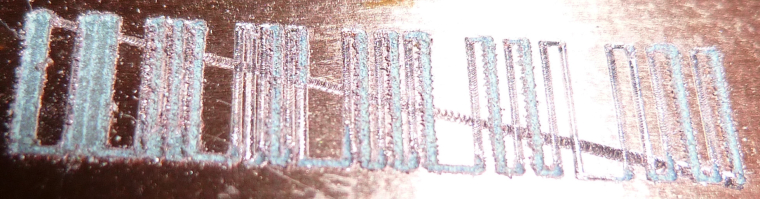
What feedrate did you use? (F parameter) and what engraving depth? (G01 Z-0.1?)
The jagged edges make me believe your feedrate is a bit high for the used rpm. You can run the first gcode to determine the best feedrate, or just use something low like 200mm/min and maybe a little deeper engraving.
It seems that your engraving is about 0.25mm wide, the 0.1mm is clear, 0.2mm is clear, 0.3mm is partially clear, from 0.4mm onwards you see the spacing between passes. -
@neverdie Marry Christmas!
What feedrate did you use? (F parameter) and what engraving depth? (G01 Z-0.1?)
The jagged edges make me believe your feedrate is a bit high for the used rpm. You can run the first gcode to determine the best feedrate, or just use something low like 200mm/min and maybe a little deeper engraving.
It seems that your engraving is about 0.25mm wide, the 0.1mm is clear, 0.2mm is clear, 0.3mm is partially clear, from 0.4mm onwards you see the spacing between passes.@executivul said in CNC PCB milling:
G01 Z-0.1
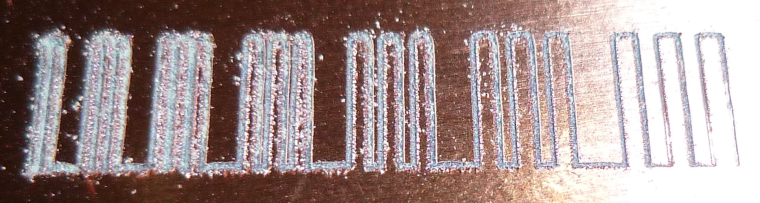
I did it again with F200 this time:
Doesn't look like the autoleveling is working so well, even though I had it probe every 2mm.
I think I may try covering 100% of the back of the pcb with tape. Maybe spacing it out has created this kind of artifact.
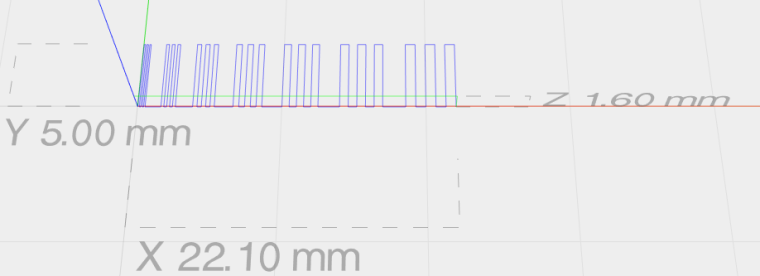
Not that it matters, but here's how it looks in ChiliPeppr:
-
@executivul said in CNC PCB milling:
G01 Z-0.1
I did it again with F200 this time:
Doesn't look like the autoleveling is working so well, even though I had it probe every 2mm.
I think I may try covering 100% of the back of the pcb with tape. Maybe spacing it out has created this kind of artifact.
Not that it matters, but here's how it looks in ChiliPeppr:
-
Here it is again, after I modified @executivul script to be F200:
-
Here's something I've noticed. Before running the auto-leveling, I run a test probe and then zero everything out when it makes contact. After running auto-leveling, if I run the test probe again, it generally reads about 0.05 higher than where I zeroed it out after the first test probe before the auto-leveling. Meaning?
-
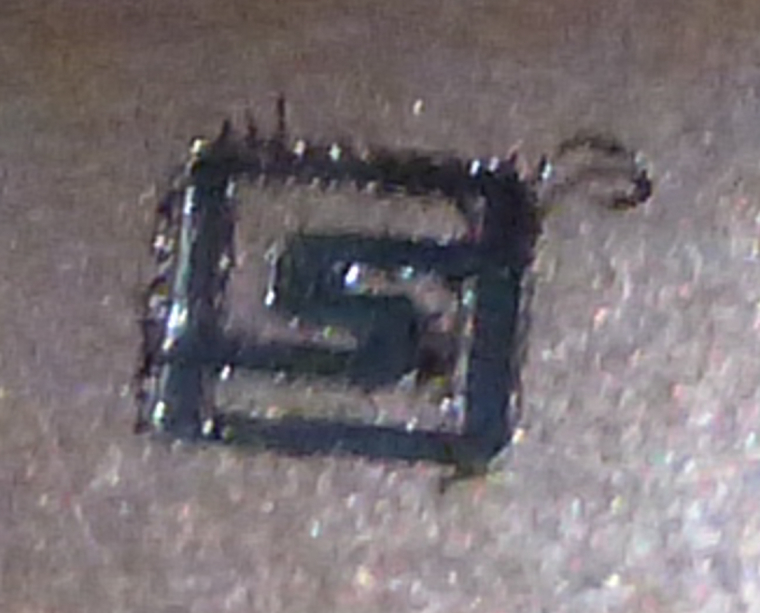
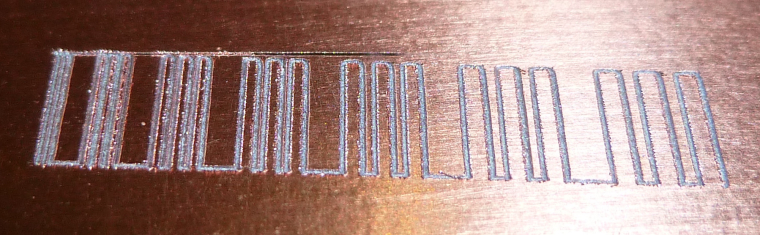
Wow! Here's Jack's bit at a cutting depth of 0.05 and a feedrate of 200:
Seems to blow away the Aliexpress Model 20.
-
Anyhow, I'm not sure what all this means, but 6mil isolation milling seems like a stretch, unless there's more that I can do to get there.
What's a conservative number for mill isolation that I can count on getting without having to fuss over it? @executivul was getting 8mil. @andrew was getting 6 mill. So, maybe I can bank on getting 12 mill for sure without much effort such that it "just works"?
-
@NeverDie
The last bit tested is under 0.1mm wide. WOW!
Remember to:
-pre run: set the autolevel probe limits and a speed of 25mm/s
-run the probing: and DON'T redo Z probing after autolevel, it messes things up, use the same bit for probing and engraving.
-post run: "send autoleveled gcode to workspace"
Go slower, 100-150mm/min, afterall you don't need 6mil traces for a huge board so time is not an issue here.PS. try some water/shampoo mix, it kinda' helps with engraving, cooling, lube, I don't know.
PPS. I've moved to opencncpilot lately (last 2 boards), free on github, a short tut on the tube, it has a great feature that is to break long moves in 5mm segments, works better for bowed/wavy boards.
@executivul Do you cut everything in one pass, or do you use multiple passes (each pass at a deeper depth)? Flatcam supports multiple passes, though I have been using only 1 pass.
-
@NeverDie
The last bit tested is under 0.1mm wide. WOW!
Remember to:
-pre run: set the autolevel probe limits and a speed of 25mm/s
-run the probing: and DON'T redo Z probing after autolevel, it messes things up, use the same bit for probing and engraving.
-post run: "send autoleveled gcode to workspace"
Go slower, 100-150mm/min, afterall you don't need 6mil traces for a huge board so time is not an issue here.PS. try some water/shampoo mix, it kinda' helps with engraving, cooling, lube, I don't know.
PPS. I've moved to opencncpilot lately (last 2 boards), free on github, a short tut on the tube, it has a great feature that is to break long moves in 5mm segments, works better for bowed/wavy boards.
@executivul
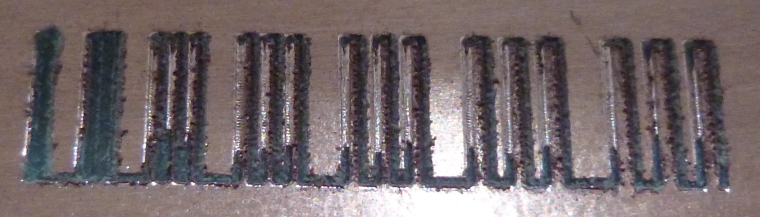
Thanks for the tips. Here is Jack's bit again, this time at F100. Even better!
-
Here are Jack's etching bits: https://www.aliexpress.com/store/product/Freeshipping-10pcs-3-175mm-Flat-Bottom-CNC-wood-Router-machine-Tools-Cutting-Bits-Carving-V-Shape/424291_32718430291.html?spm=2114.12010612.0.0.6cc36820P3WAXu
It says 30 degree angle and 0.1mm tip. -
Time to see whether this machine can cut the mustard or not. I just did a 5mm autoleveling on the following:
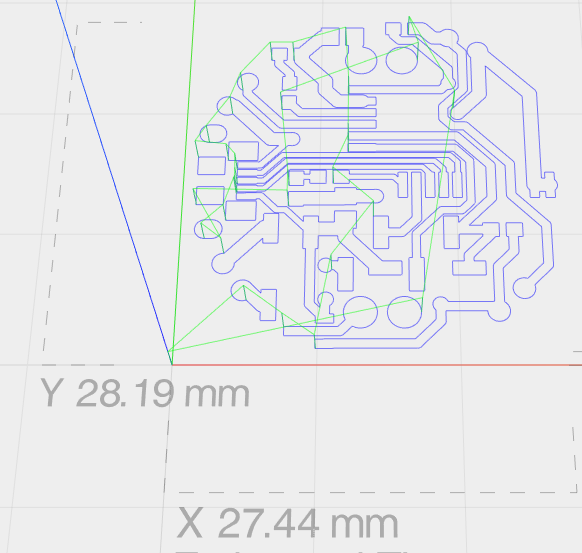
and now I'll try cutting it using Jack's bit.
-
Here's the result:
The above was cut at a depth of z=-0.1, and still not all the paths cut completely through. Yet, In the middle one of the traces got obliterated.I'm afraid I'm unlikely to make it work at the resolution that I'm able get from the fab. It's close, but no cigar. So I think it's better suited for earlier prototyping work that's not so optimized for space. For that it might be very handy. Then I can both cut deeper and also not worry about trace obliteration.
-
By the way, do any of the programs have built-in verification after the cutting, where it can probe to verify that the trace is throughly cut (i.e. no continuity with ground)? Seems like it should be easy to do, at least in theory, by using a method similar to the probing for auto-leveling, except probing each track instead.
@neverdie Congrats for your result, I use a "copper pour" all over the board, that makes it pass at least 2 times, once for the track and once for the pour isolation. I never mess with flatcam's multiple passes, but I believe you can get the same results. What you see in the middle are copper "silvers" that is copper left behind between traces.
From the last picture of the width test is seems your bit is engraving 0.1mm wide.
Try to use OpenCNCPilot instead of Chillipeppr and set the lines to be split at 1-2mm lengths and probing each 2-3mm. That should make the engraving depth more uniform.
I see a couple copper flakes, maybe go even slower than 100? And give it a light sandpaper with 1000 grit or a scotchbrite sponge and some abrasive detergent for dishes? -
@neverdie Congrats for your result, I use a "copper pour" all over the board, that makes it pass at least 2 times, once for the track and once for the pour isolation. I never mess with flatcam's multiple passes, but I believe you can get the same results. What you see in the middle are copper "silvers" that is copper left behind between traces.
From the last picture of the width test is seems your bit is engraving 0.1mm wide.
Try to use OpenCNCPilot instead of Chillipeppr and set the lines to be split at 1-2mm lengths and probing each 2-3mm. That should make the engraving depth more uniform.
I see a couple copper flakes, maybe go even slower than 100? And give it a light sandpaper with 1000 grit or a scotchbrite sponge and some abrasive detergent for dishes?@executivul Thanks!
For the convenience of others reading this thread, here's a quick youtube:
https://www.youtube.com/watch?v=XDCu3cgOjCYI'm surprised to learn that not all auto levelers do it that way, because it seems like the only right way to do it. I'll give it a try.