Everything nRF52840


  • Hardware Contributor

    @NeverDie they have sort of equivalent for processing IOs, sensors, i2c etc without waking up the mcu. it's called Sensor Controller (accessible by code or they also provide a small ide for it).
    about LORA I've never been really interested in it, I prefer to have my own "micro" network than being a part of a larger network. I would also prefer narrowband.
    Sure if you use LORA nodes, maybe narrowband is maybe not the best bet for you. in some cases, widespectrum LORA can have range issues, not heard, when narrowband is used (they made a video+appnote about coexistence)
    My need is subghz for long range reliable delivery + BLE for shorter range stuff.., using one broadband antenna or two differents of any kind, to be able to use a module or a bare ic (sometimes a module doesn't fit well in design regarding placement of the module or the antenna orientation&keepout area, so with two modules it's "worse"), and I've been very disappointed to see Nordic changed its mcu footprint (needs premium pcb, and more soldering care). That's why TI picked my curiosity (it ticked all my checkboxes, all in one).
    But you're right if you feel more confortable with nrf, it's nice mcus too. Both needs some work anyway (one mcu needs BLE/MySensors, the other needs to get its dualmode compatible with MySensors messages&serial api)


  • Hero Member

    @scalz I found this: https://training.ti.com/simplelink-academy-introduction-sensor-controller , which says:

    Also, the sensor controller has not any direct interface to the radio or system flash.


  • Hardware Contributor

    @NeverDie yes. SC is also accessible from app, it can be independant. If goal would be for sort of lowpower listenmode, there are code examples too, not the goal of SC, sure (no link with rf). I don't think I tried it, but will take a look once I've other stuff ok.
    I guess, even if PPI doesn't wake up mcu, the task function with a timer still uses somes power.

    Maybe you should keep on nrf if you feel more familiar with these. Truth is I have played too with it, but I stopped on my side, a while ago..and started to take a look at TI (so I could say I'm as familiar or maybe "more" with TI now,..). And perhaps, I already said it, but I'm not interested to pay 12$ for bt840f (limited accessible IOs), or less money but with 840 ceramic antenna. When for the same price I can assemble myself a dualband mcu and pick antennas I need. Like people says, pick what fits best your needs (and the application) 🙂


  • @scalz regarding LoRA (RFM95), I think you might confuse LoRa with LoRaWAN. LoRa is a protocol and you can have your own "mico network" (so do I). It is the most efficient and easy to use 868MHz radio (in my opinion) and has long range and high energy efficiency and cost is low (a little bit more than RFM69).
    The nRF52840 has a good amount of Flash/RAM (1MB/256kB) and good sleep current even keeping RTC and RAM up or even using radio Rx.

    But the TI MCU's like the CC1352P is certainly a very interesting new candidate and it look very very promising with it's BLE 5.0, ZigBee AND 868MHz radio. And I like the SC coprocessor. No doubt that look very attractive. Thus I ordered the CC1352P1 Lunchpad. But that seem to be the only available option to get this MCU and this is for learning purposes only.
    When I look at the TI product page it says Status: PREVIEW, no stock: http://www.ti.com/product/CC1352P/samplebuy
    I have also seen anounced prices with 10 US$ for the chip itself.
    Not sure when it will be really available, get a reasonable price and modules offered (such as for any other MCU's like nRF52).
    Same story for the CC2652R, also in PREVIEW.
    If you have sources or even PCB's (designed by you) for this MCU's, I would be eager to order and test it.


  • Hardware Contributor

    @heinzv
    yes you're right about lora, and that they're using some juice too 😉 (they can even be compatible with a rfm69 when you take a look at the datasheet. TI's too though).
    I know about nrf52840 power modes, I just replied about PPI feature (depending what you implement, it can't be completely free).
    About Ti mcus, they are new and available at their store only. about sharing my work.. when I'll get time. for the moment I'm very busy (with my job too). In the meantime, you still can play with their devboard and try their courses, or energia.


  • @scalz and @NeverDie today I got my nRF52840 dongles (6 pieces) as well as the TI CC1352P1 launchpad. Now the fun will begin (latest at the weekend)
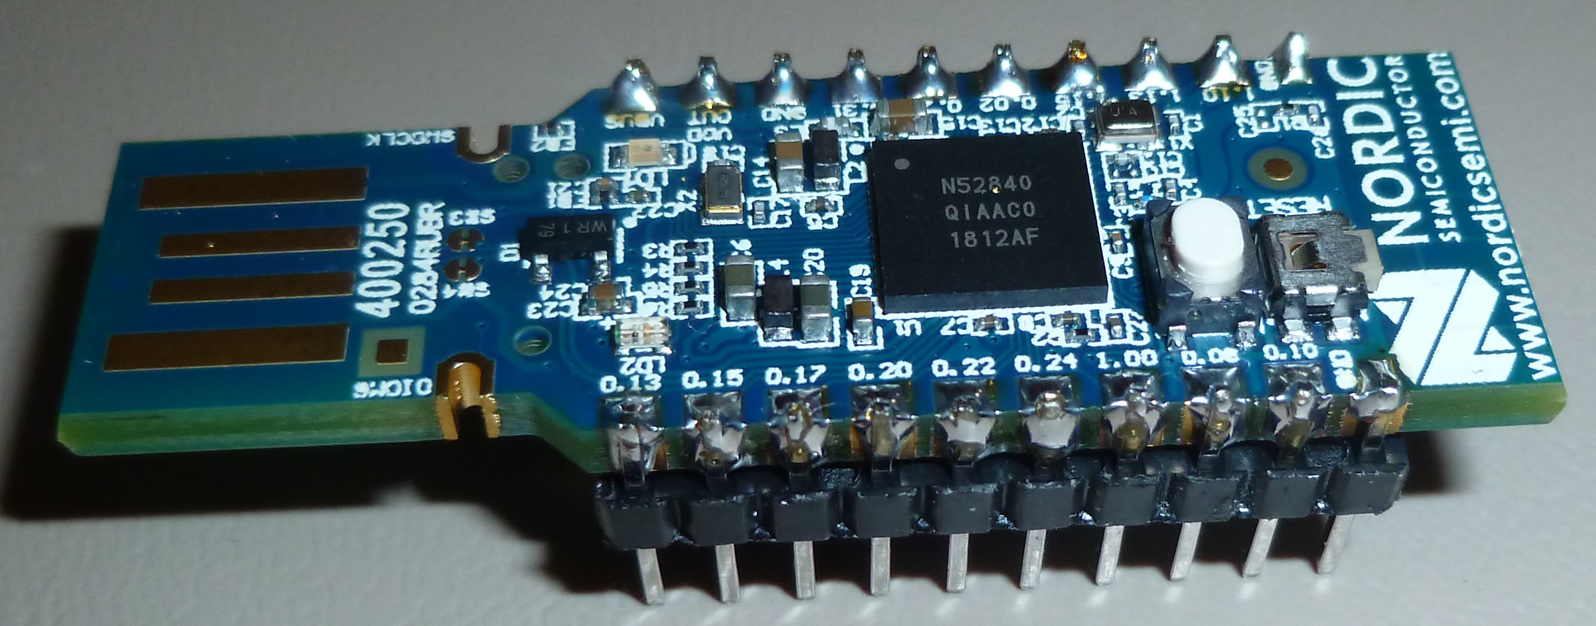
    See the picture below (the dongle in blue and the launchpad in red).
    If you have already some more code to share for testing (send/receive, I2C sensor read etc.) please post it (some code was postetd by NeverDie) other wise I'm looking at the Nordic pages, they provide a lot of examples (I will probably use/try Segger).
    For the TI part, I only have one launchpad, so I have to verify, if I can use BLE 5.0 to communicate with my mobile or between TI CC1352 and nRF52 ...
    Not sure if the TI can also communicate with the CC1101 at 868MHz (using the Sub 1GHz capabilities) using the same modem settings. So a lot to find out.

    0_1537985700337_20180926_192428.jpg


  • Hero Member

    @heinzv Please do keep us posted with your impressions as you develop them.

    I found out that Nordic does have OTA firmware updates, though it looks rather laborioius to set up: https://devzone.nordicsemi.com/b/blog/posts/getting-started-with-nordics-secure-dfu-bootloader

    Maybe it's easier with TI (?).


  • @NeverDie okay, a very first testing yesterday late-night when setting up the Segger / nRF52(840) tool chain and a very quick dongle testing
    I used the nRFconnect and uploaded all 5 demo/test applications which worked. No big achievement but just a very basic testing (maybe not even worth to mention)
    Here is the result of the BLE app test: I did the BLE scan with the dongle and it found some devices around such as the BLE WiT power plug with the energy meter. Thene I did the oposite and installed the nRF connect on the Android Galaxy S8 phone and scanned for the nRF dongle.
    Attached the two results (one from the dongle and one from the mobile phone)
    As you see the Galaxy S8 finds all BLE WiT smart plugs in the flat (also the ones which are in other rooms) while the nRF dongle sees only the one which is close in the same room.
    I would assume, that the Galaxy S8 has a much better BLE antenna than the dongle (which has almost no antenna), but what I interpret the RSSI, the dongle reports a better signal strength of the WiT powermeter in the room?!

    0_1538065815526_nRFconnect_52840_dongle_BLE_test.jpg
    0_1538066404117_Screenshot_20180926-220727_nRF Connect_small.jpg

    Today I received also the breakout PCB's for the nRF52832, thus I'll probably try to do a sender/receiver test with them using one as mySensors Gateway and one as mySensors Node (both in nRF24 mode). Not sure if the compile/build will work, because I have to also provide the proper pin-map (as the E73 module is not mapped in the Arduino IDE).


  • Hero Member

    @heinzv Regarding, the dongle, its antenna seems to be highly directional, so that may play a factor in what you are observing.


  • Hero Member

    Found these relatively inexpensive TI modules:
    https://www.ebay.com/itm/REYAX-RYB080I-BT-4-2-5-0-Bluetooth-module-BLE-TI-CC2640R2F-Antenna-AT-Command/183413364598?hash=item2ab449d776:g:dOEAAOSwOZtbRu7A

    that presumably are compatible, at some level, with ti's cc2640R2F launchpad

    Also, I found the info on how to do the OAD (over the air download): http://dev.ti.com/tirex/content/simplelink_cc2640r2_sdk_1_30_00_25/docs/blestack/ble_sw_dev_guide/html/oad/oad.html

    Regarding the Nordic gear, I'm hoping that micropython, if installed, might prove to be easiest for OTA updates, since, in theory, a micropython app should be able to update itself through its inherent REPL process. It turns out that maybe because of the BBC micro bit, micropython runs on the nRF51. In general, though, it seems like the ESP8266 has a lot more micropython support.


  • @NeverDie I'm still at the basics (where you have been probably one year ago). I have now soldered my nRF52832 modules (the E73...B from EBYTE) to the breakout boards and tried to find the best way to program and flash them.
    I started with Segger Studio and with ST-Link upgraded to Black Magic Probe but as far as I have understood it supports only their own J-Link HW for flashing (at least the J-Link EDU is required). I also converted a ST-Link Dongle to a J-Link dongle but that can only flash STM MCU's (license restrictions).

    I have then tried to use Aruino Studio with all 3 dongle types (Black Magic, J-Link and ST-Link). I was only successful by using ST-Link. It does flashes the sketches and it runs (just used a simple blink example for flash testing).
    But using the ST-Link (V2), there is no serial devices and thus no Serial Windows for log output (Serial.println()).
    I've also tried to use the Black Magics with the GDB but it did not work either and I found it also not convinient with the commandline.

    So what are you using for flashing with Arduino Studio (with it's limited nRF52 support) and flashing with Segger Studio an what are you using for debugging and logging (print lines to output/serial ...)?


  • @heinzv For the NRF52832, try using the MySensors MyBoardNRF5 board type. In MyBoardNRF5.h, there is a section for the serial interface. Set PIN_SERIAL_TX to the pin you want to get serial output from. Set PIN_Serial_RX to some unused pin. It isn't used anyway. (A tip I got from @NeverDie).
    I like the Black Magic Probe because it has both the SWD and Serial in one device, but you could program with the ST-Link and listen to Serial with an FTDI. I hear J-Link is the best, but have not used it. Might try it now that I know there is an educational version.


  • Hero Member

    @heinzv I use the Nordic development kit for flashing. At least for me, it's the easiest.


  • Hardware Contributor

    @neverdie said in Everything nRF52840:

    @heinzv I use the Nordic development kit for flashing. At least for me, it's the easiest.

    Same here. NFR52 DK, works perfectly with Segger ES and I just do drag & drop of the compiled file to the virtual drive of the DK when using Arduino.


  • @neverdie and @Nca78 thanks for the quick response, I have ordered the nRF52840 DK from Nordic (via Mouser). That works with Segger and also with Arduino Studio too (for the simple and existing 52832 projects like mySensors)?
    And fo the Arduino Studio (or VS Code) is there a serial terminal for debug output too?
    How to you flash then the bare nRF52 modules which have only the SWD interface (I have plenty of them)?

    @nagelc I have again tried my Black Magic Probe Dongle with Arduino IDE, but it does not yet work for me (maybe I still have not understood it). In Arduino Studio I have tge GDB serial port but neither the upload works properly nor I have understood how to use it with the GDB debug window.

    I attach the devices (Windows 10) and the output from Arduino IDE. Maybe you can give me further hints:

    0_1538297328202_BMP_COM_devices.jpg
    0_1538297341028_BMP_USB_devices.jpg

    I used a simple blink sketch which works with ST-LInk V2 upload but not with BMP. Here is the output from the upload:

    Sketch uses 3600 bytes (0%) of program storage space. Maximum is 409600 bytes.
    Target voltage: unknown
    Remote debugging using \.\COM58
    Available Targets:
    No. Att Driver
    1 Nordic nRF52
    2 Nordic nRF52 Access Port
    Attaching to Remote target
    0x00000ad0 in ?? ()
    Reading symbols from nRF52832_Blink.ino.elf...done.
    Loading section .text, size 0xe10 lma 0x1c000
    Loading section .ARM.exidx, size 0x8 lma 0x1ce10
    Loading section .data, size 0x74 lma 0x1ce18
    Start address 0x1c5fc, load size 3724
    Transfer rate: 26 KB/sec, 620 bytes/write.
    Temporary breakpoint 1 at 0x1cb4c: file D:\mcdev\arduino\portable\packages\sandeepmistry\hardware\nRF5\0.6.0\cores\nRF5\main.cpp, line 28.
    Starting program: C:\Users\internet\AppData\Local\Temp\arduino_build_189520\nRF52832_Blink.ino.elf
    Note: automatically using hardware breakpoints for read-only addresses.
    An error occurred while uploading the sketch


  • Hero Member

    @heinzv I haven't ever used BMP, but I'm guessing that maybe you need to bulk erase your target device first. That would remove any read-only protection. If so, you only need to do it once. After that, it should upload OK.


  • @neverdie I can do upload with the standard ST-Link V2 Dongle on the same bare E73 module but for the BMP it is read-only?
    How do you flash the bare modules (not the DK)?


  • Hero Member

    @heinzv said in Everything nRF52840:

    @neverdie I can do upload with the standard ST-Link V2 Dongle on the same bare E73 module but for the BMP it is read-only?
    How do you flash the bare modules (not the DK)?

    Not sure I understand your question. I can flash bare modules using the DK. I'll let others comment how they do it without using the DK, as that's about all I know. One final tip though: Generally it's important to power your target module independently of whatever programmer you're using. For instance, on the DK, it will detect the voltage level on the target and adjust accordingly, but it isn't meant to power the target.


  • @neverdie To my first statement: I was just wondering why I can upload sketches with teh ST-Link V2 dongle (but no serial output/debug windows) but the BMP might face read-only protection (I thin kthe upload script should have some kind of mass erase before upload)?
    Regarding my question: I think I you understood my question right and I also read the nRF DK features and it says it features a SEGGER J-Link OB Debugger with debug out functionality. So I guess it's a flasher/debugger not only for it's on-board nRF52840 MCU but also for external nRF modules connected to the DK right?

    Are you're also using the DK with the Arduino IDE (though with restrictions like no full nRF52840 support) and the mySensors project?

    Meanwhile I'm exploring the nRF52840 USB dongles. And maybe I'll get along with the BMP modules and understand how the work with the Arduino IDE (so far I spent many hours with Google und no success).


  • Plugin Developer

    The easiest way to get started with NRF5 might actually be the BBC Micro:bit 🙂


  • Hero Member

    @heinzv said in Everything nRF52840:

    Regarding my question: I think I you understood my question right and I also read the nRF DK features and it says it features a SEGGER J-Link OB Debugger with debug out functionality. So I guess it's a flasher/debugger not only for it's on-board nRF52840 MCU but also for external nRF modules connected to the DK right?

    Right.

    Are you're also using the DK with the Arduino IDE (though with restrictions like no full nRF52840 support) and the mySensors project?

    Not presently. I made a weak attempt recently but something is broken (probably on my end) to where I couldn't get it to compile anymore, whereas previously I could. So, I decided to see what else was available, which led me to mbed, and then now to SES, which has no trouble compiling. As long as I can directly manipulate the nRF52 registers and have access to serial output for debugging, I can do pretty much do whatever I need to do.


  • Hero Member

    @alowhum said in Everything nRF52840:

    The easiest way to get started with NRF5 might actually be the BBC Micro:bit 🙂

    Yes! From what I can tell, a lot of development work has gone into the micro bit to make it easily programmable using any of a handful of different languages including C, C++, and micropython. Apparently it's somehow possible to do a hybrid of C and micropython, where the time sensitive parts can be written in C/C++ and the rest in micropython. Not sure how that works exactly, but it sounds interesting.

    Originally I thought the BBC micro bit was purely a toy, but when I saw it could scroll text across its 5x5 matrix of LED's I realized that it could be more than that. Very clever!

    You can also program the microbit using the Arduino IDE:
    https://learn.adafruit.com/use-micro-bit-with-arduino

    My hope is that somewhere there's an easy-to-use way to:

    1. Do OTA updates.
    2. Interface with bluetooth.

    It seems there may be a way to OTA update the micro bit, probably from a bluetooth phone:
    https://phwallen.github.io/microbit-swift/

    What I'd prefer, obviously, is doing the OTA update from a computer (maybe using a dongle of some kind?) If that were possible, then nRF51 modules are so cheap you could imagine putting them in almost anything, even if it's to control a different kind of radio.

    https://www.aliexpress.com/item/nRF51822-04-BLE-4-0-Mini-AT-Command-WIFI-Wireless-Bluetooth-Module-TTL-Slave-Low-Power/32840163615.html?spm=2114.search0104.3.1.12f72932SZIor6&ws_ab_test=searchweb0_0,searchweb201602_2_10065_10068_10130_10547_10546_10059_10884_10548_315_10545_10887_10696_100031_10084_531_10083_10103_10618_10307_449,searchweb201603_60,ppcSwitch_0&algo_expid=1b57e3dd-d427-4abc-81b4-4ecb74b14cbd-0&algo_pvid=1b57e3dd-d427-4abc-81b4-4ecb74b14cbd&transAbTest=ae803_4&priceBeautifyAB=0


  • @heinzv I'm running a different sketch, but I get almost the same output as you except at the end: instead of "An error occured . . .":

    Note: automatically using hardware breakpoints for read-only addresses.
    
    Temporary breakpoint 1, main ()
        at D:\carln\Documents\Arduino\libraries\MySensors/hal/architecture/NRF5/MyMainNRF5.cpp:23
    23	{
    
    Program complete!
    

    There are a couple of differences.
    " Sketch uses 17856 bytes (3%) of program storage space. Maximum is 524288 bytes."
    Not sure why my maximum storage space would be higher than yours.
    "Start address 0x2fa0, load size 18080"
    Different sketch, so I would not expect the load size to match, but not sure why the Start address would be different.

    On the Arduino Tools tab, are you selecting Bootloader/SD: None?


  • @nagelc Thanks for your response and trying to get me further.
    I'm trying to get you as much infos as possible:
    I made a couple of screenshots and picture of my environment. Maybe that helps to trace down to the problem.
    I followed exactly the instructions from sanseeps Arduino/nRF5 configuration/installation.
    Uploading the bkink example with the ST-Link V2 works, but there is no serial print, no debug, thus I'm trying the BMP way.

    Here some setttings from my Arduino IDE (Tools section)
    0_1538340519482_Arduino_nRF52_Tools_1.jpg
    0_1538340524669_Arduino_nRF52_Tools_2.jpg

    Here are my different BMP modules I have used
    0_1538341046798_BMP-Modules.jpg
    and the COM devices in Win 10
    0_1538341107671_WIn10_COM_devices.jpg
    I have tried all kind of driver (using Zadik 2.4), but WInUSB, lisbusbK, libusb ... they all create USB devices only but no COM devices, which Arduino IDE does not "like") only the usbser driver gives me COM devices

    and the target device I'm using (which works, when I load the sketch with the ST-Link and select ST-Link in Arduino IDE)
    0_1538341217241_nRF52832_Modul.jpg


  • @neverdie good discussion, but in order to get my desired solution which is sensor nodes with E-Paper and working with OpenHAB I need I either get the nRF52 modules running with mySensors (ideally just using the Arduino porject and IDE) using the nRF option (I think there is some initial nRF5 support) and using the older nRF24 protocol, or using LoRa with an RFM95 module (which is also supported) or I switch completly to Segger and make a ZigBee V3.0 solution (requiring a ZigBee gateway for OpenHAB). With my new Philips Hue HW version and the new SW firmware upgrade. It is claiming to support ZigBee V3.0 devices which includes also Temp/Hum sensors.

    I'm also looking forward for the solution from berkseo where he does exactly that with and nRF52, but that seem to take some time to make it available.
    https://www.openhardware.io/view/629/Temperature-and-humidity-sensorverNRF52832E-Ink-display#tabs-instructions


  • Hero Member

    @heinzv Fair enough.

    Probably soon I'll take a crack at doing an OTA DFU with an nRF52840. The good news is that Nordic is reasonably responsive to questions with about a 24 hour turnaround, so that means any sticking points should be resolvable. Failing that I may try writing my own basic OTA uploader.


  • @heinzv For Softdevice, pick None. MySensors doesn't use the Softdevices and I don't think you want it for Generic NRF52 either.
    The Low Frequency Clock depends on your board. If it has an external crystal outside the NRF 52, use Crystal Oscillator. Otherwise pick RC Oscillator to use the internal oscillator.
    Your BMP ports look correct. In your setup, 58 for the programmer. Use the UART port , 51, to listen to serial debug.
    The Black Magic Firmware Upgrade is for use with DFU Util to upgrade the firmware on the probe. I'm not sure what the Trace Capture is.


  • @nagelc I have tested both w/ and w/o softdevice, it doesnt make a difference but yes I'll remove it again.
    My boards (the E73 module) have an external 32kHz crystal osci for RTC.
    In Arduino, you can only select one port. If COM58 is set (for the programmer) then it would open the serial monitor also on that port. However I have tried to use port 51 with another terminal (putty) and it does not connect (I've tried with different baud rates).
    I'm not sure but I think (and read) that the second port is only for the SW update of the BMP and not for debugging. Debugging is most likely also on port 58 but for the GDB and not for Arduino, but if it is used (initiated) via Arduino, I could not connect to GDB with a command terminal, so I think the programm has to be started with the command windows and GDB. I've also tested that from that direction and was also not succesfull (I spnt many hours with Google and BMP docu and GDB).
    I also don't know how to use the non COM (USB only) devices like the "Trace Capture" as thery are not visible/offered in Arduiono IDE.

    You're using BMP with Arduino IDE? How are you doing the serial output?
    How can you used two different ports in Arduino (there is only one port setting)?


  • @heinzv Yes. I'm using with Arduino IDE, but I connect a terminal program (TerraTerm) to the UART com port. You need to do more setup to get the serial out from NRF52832. The easiest way is to use the MyBoardNRF5 board type to select a pin to be TX. But that is a bit much for a blink sketch.
    There is yet another usb driver for the Trace and Firmware Update ports. I forget how that is loaded (zadig I think), but you can safely ignore it.
    Seems like your setup should just work uploading the sketch on your COM58.

    For the GDB connection. There is a syntax difference for ports higher than 9. Try this. I had it in my notes, but haven't tried it since my ports are less than 9.

    "target extended-remote \.\com58"


  • @nagelc So everything works now with the BMP using the MyBoardNRF5. At least it supports the nRF52832 (if I'm lucky also the nRF52840) but I started with my barebone 832 modules.
    So it upload the sketch and it does also reset and start.
    I could also do the connection to the second serial port now with Terra Term and get the Serial.println. Cool.
    The secret was, that I created another BMP for my blackpills (I did a couple of tweaks) and connect now the HW serial of the nRF52 to the BMP serial (UART2) and it forwards it via the USB of the BMP to the COM port.

    The output looks now like yours when I do an upload:
    WARNING: Spurious .ci folder in 'MySensors' library
    WARNING: Spurious .mystools folder in 'MySensors' library
    Build options changed, rebuilding all
    Sketch uses 3720 bytes (0%) of program storage space. Maximum is 524288 bytes.
    Remote debugging using \.\COM58
    Target voltage: unknown
    Available Targets:
    No. Att Driver
    1 Nordic nRF52
    2 Nordic nRF52 Access Port
    Attaching to Remote target
    0x00000ae0 in ?? ()
    Reading symbols from nRF52832_Blink.ino.elf...done.
    Loading section .text, size 0xe88 lma 0x0
    Loading section .ARM.exidx, size 0x8 lma 0xe88
    Loading section .data, size 0x74 lma 0xe90
    Start address 0x5f8, load size 3844
    Transfer rate: 27 KB/sec, 640 bytes/write.
    Temporary breakpoint 1 at 0xbc4: file D:\mcdev\arduino\portable\packages\sandeepmistry\hardware\nRF5\0.6.0\cores\nRF5\main.cpp, line 28.
    Starting program: C:\Users\internet\AppData\Local\Temp\arduino_build_913185\nRF52832_Blink.ino.elf
    Note: automatically using hardware breakpoints for read-only addresses.

    Temporary breakpoint 1, main ()
    at D:\mcdev\arduino\portable\packages\sandeepmistry\hardware\nRF5\0.6.0\cores\nRF5\main.cpp:28
    28 {

    Program complete!

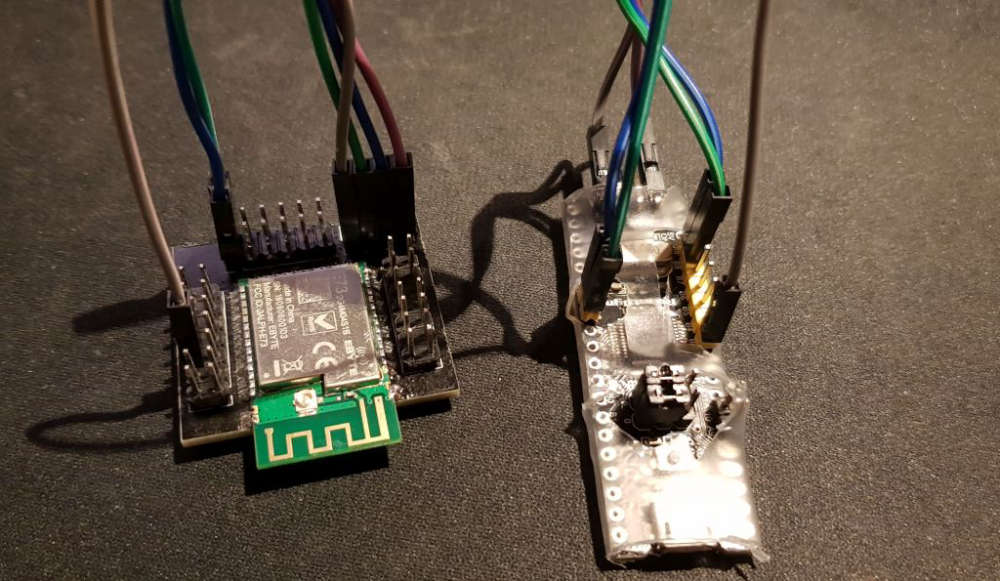
    Here is the picture of my BMP and the nRF module:
    0_1538432250904_BMP-and-nRF52.jpg


  • My nRF52832 moduls with MySensors in nRF24 mode seem to work, I have to start another node acting als Gateway and see if they communicate and what distance can be reached in the nRF24 mode.


    | / |_ / | ___ _ __ ___ ___ _ __ ___
    | |/| | | | _
    \ / _ \ _ \/ __|/ _ \|
    _/ __|
    | | | | |
    | || | / | | _ \ _ | | _
    |
    | |
    |_
    , |/ ___|| ||/_/|| |/
    |
    __/ 2.3.1-beta

    24 MCO:BGN:INIT NODE,CP=RNNNN---,VER=2.3.1-beta
    28 TSM:INIT
    30 TSF:WUR:MS=0
    31 TSM:INIT:TSP OK
    33 TSM:FPAR
    40 TSF:MSG:SEND,255-255-255-255,s=255,c=3,t=7,pt=0,l=0,sg=0,ft=0,st=OK:
    2048 !TSM:FPAR:NO REPLY
    2050 TSM:FPAR
    2057 TSF:MSG:SEND,255-255-255-255,s=255,c=3,t=7,pt=0,l=0,sg=0,ft=0,st=OK:
    4064 !TSM:FPAR:NO REPLY
    4066 TSM:FPAR
    4073 TSF:MSG:SEND,255-255-255-255,s=255,c=3,t=7,pt=0,l=0,sg=0,ft=0,st=OK:
    6081 !TSM:FPAR:NO REPLY
    6083 TSM:FPAR
    6090 TSF:MSG:SEND,255-255-255-255,s=255,c=3,t=7,pt=0,l=0,sg=0,ft=0,st=OK:
    8098 !TSM:FPAR:FAIL
    8099 TSM:FAIL:CNT=1
    8101 TSM:FAIL:DIS
    8103 TSF:TDI:TPD
    18105 TSM:FAIL:RE-INIT
    18107 TSM:INIT
    18108 TSM:INIT:TSP OK
    18110 TSM:FPAR
    18117 TSF:MSG:SEND,255-255-255-255,s=255,c=3,t=7,pt=0,l=0,sg=0,ft=0,st=OK:
    20125 !TSM:FPAR:NO REPLY
    20127 TSM:FPAR
    20134 TSF:MSG:SEND,255-255-255-255,s=255,c=3,t=7,pt=0,l=0,sg=0,ft=0,st=OK:
    22142 !TSM:FPAR:NO REPLY
    22144 TSM:FPAR
    22151 TSF:MSG:SEND,255-255-255-255,s=255,c=3,t=7,pt=0,l=0,sg=0,ft=0,st=OK:
    24159 !TSM:FPAR:NO REPLY
    24161 TSM:FPAR
    24168 TSF:MSG:SEND,255-255-255-255,s=255,c=3,t=7,pt=0,l=0,sg=0,ft=0,st=OK:
    26176 !TSM:FPAR:FAIL
    26177 TSM:FAIL:CNT=2
    26179 TSM:FAIL:DIS
    26181 TSF:TDI:TPD


  • Hero Member

    I built the micropython firmware for running on the nRF52840:

    Here's the proof:

    MicroPython v1.9.4-623-g34af10d2e on 2018-10-05; PCA10056 with NRF52840
    Type "help()" for more information.
    >>> 1+1
    2
    >>>
    

    You can download it from here: https://forum.micropython.org/viewtopic.php?f=2&t=5348


  • Hero Member

    So, the idea for doing OTA code updates is simple enough: you transmit each line of code and the target assembles it into a string. Then the target executes the string, which updates the code on the target. QED

    Here's a notional example of what I mean:

    >>> simpleCode="def j(x): return x**2"
    >>> simpleCode
    'def j(x): return x**2'
    >>> exec(simpleCode)
    >>> j(5)
    25
    >>>
    

    You can use whatever radio transport you want, including Nordic's "proprietary radio" that we are all familiar with. There's no reliance on bluetooth or Nordic's DFU. 🙂


  • @NeverDie great job! I'll definity try it on my holyiot bare modules, but I'm still fighting with the flashing via either the Nordic DK and/or ST-Link v2SO far I was not successfull (I only got it to run with Arduino IDE and BMP, but that is not usable in that case). DK seem not recognize my external nRF52840 and the ST-Link wants some address ranges so I'm trying to get it run with openocd, but that also returns errors. So I'm stuck and wasting many evenings/nights (with Google).


  • Hero Member

    @heinzv Using the DK should be easy. If you want to post how you're wiring your connections to the target, maybe I could help you identify what mistake you are making. Or, if you prefer, you could post to the Nordic support forum, as they would be obligated to help since it's a Nordic product. Or, better yet, do both, because then you'll at least get the ball rolling with Nordic in case you have a defective DK (unlikely, but who knows).


  • @NeverDie thanks for the hints/offer:
    I have connected to the nRF52840 DK via the P20 connector
    Here is the wiring setup

    VDD---> VTG of P20 in DK board
    SWDIO--> SWDIO of external board
    SWDCLK-->SWDCLK of external Baord
    GND DETECT--> GND of external Board
    GND--> GND of external baord.


  • Hero Member

    @heinzv How is it that you are powering the target?


  • @neverdie I admit that I also powered the module via the DK because it takes less than 20mA. I used this connection description: 0_1538973615073_nRF52_DK_0005.layout.png
    But I'll try to use a complete an external PS next time and see if it makes a difference.


  • Hero Member

    @heinzv Nice picture. Hmmmm..... Seems like your wiring should work. Maybe try VDDnRF instead of VDD? I'm not sure what the difference is, but I think that may have been what I used most recently.

    Are you dragging the hex file to the virtual drive on the PC to upload it to the target? If so, what exactly happens when you do? It should be as simple as that.

    I'm using Windows 10. What about you? Not sure if the version of Windows has anything to do with it.

    It appears that you are using the nRF52832 DK. Correct? What exactly is the target that you are trying to upload to?

    One way or another we'll get this thing solved for you. 😉


  • @NeverDie thanks, appreciate your help as you are far ahead.
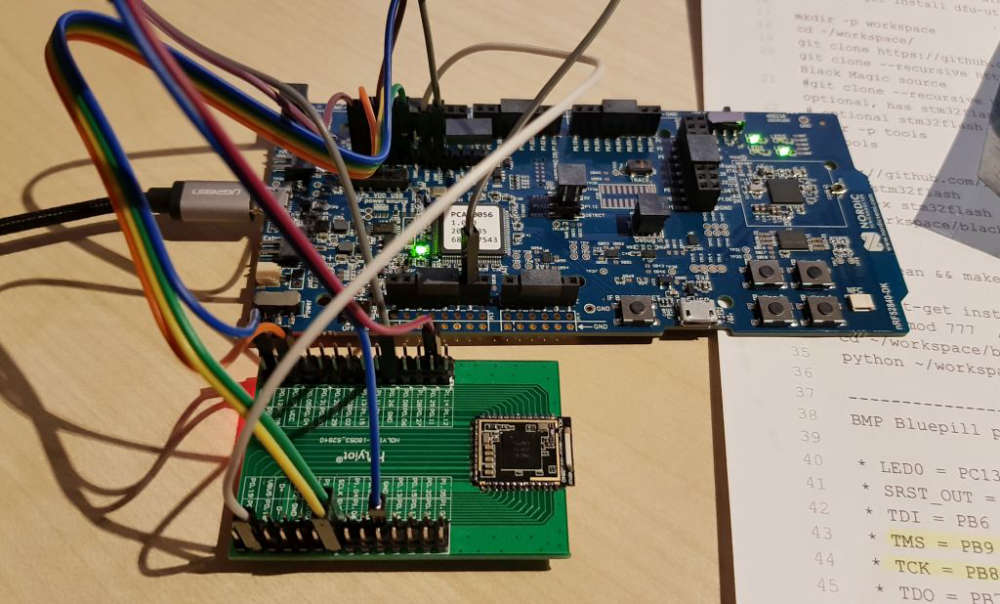
    Here is my update: I have build 4 nRF52832 boards with the E73 EBYTE modules and two nRF52840 board with the tiny holyiot modules (see picts below).
    It seems that by using the wiring shown in my last post, I can flash the 840 boards. I'll also try again one of the working 832 boards later (I'm in business trip the next few days).
    But I have a couple of questions to you:
    1.) I don't know how to identify which MCU will be flashed. I only see the J-Link adapter in Segger or the board with the Segger Serial in nRFgo Studio. How can I know, that I'm not flashing the DK onboard MCU? Where is this shown, indicated where the flashing will go? That is strange to me. Another example is my sel build Black Magic Probe: It shows which devices are connected to it and you can select one (if multiple are shown in a select - select target 1,2 ...)
    2.) How can I make use of any bootloader (DFU, Serial, USB, OTA, ANT etc.) so that flashing with the DK is not always required? I have not found a good way so far to flash any useful bootloader (I have tried some of the examples). The onyl one which creates a serial devices is the example for the PCA100059 (the USB dongle) which shows a serial device: nRF52 SDFU USB (COM75). HOw to make use of that (I have tried all of the offered programmer als oin Arduino IDE but could not upload/flash my blink sketch)
    3.) How to you flash the USB dongle beside using the nRFconnect which requires the compiled image?
    Are you also soldering the SWD pins and use them with the Segger and the DK?
    4.) When I flashed your micropython (or circuitpython?) for the 840 (my board). How to I connect and use it? My 840 boards have it's own USB port (see topic 2, which shows the nRF52 SDFU port when I flash the one bootloader). When I flash the MP, the ports are gone (how to connect via USB, Serial, Terminal etc.)?

    I've also tried a couple of other things like a DFU bootloader with a S140 softdevice (as it was recommended by Nordic) but was not sucessful to combine them (the S140 was flashed, but then?)

    I have many more questions but I hope we can sort out some of the 1-4. I hope I have described them so that you can follow my thoughts and questions 🙂

    0_1539030863337_nRF840_DFU port.jpg

    nrf52840 on DK
    0_1539031116269_nRF52840_on_DK.jpg

    nRF52832 on BMP
    0_1539031158683_nRF52832_on_BMP.jpg


  • Hero Member

    @heinzv said in Everything nRF52840:

    @NeverDie thanks, appreciate your help as you are far ahead.
    Here is my update: I have build 4 nRF52832 boards with the E73 EBYTE modules and two nRF52840 board with the tiny holyiot modules (see picts below).
    It seems that by using the wiring shown in my last post, I can flash the 840 boards. I'll also try again one of the working 832 boards later (I'm in business trip the next few days).
    But I have a couple of questions to you:
    1.) I don't know how to identify which MCU will be flashed. I only see the J-Link adapter in Segger or the board with the Segger Serial in nRFgo Studio. How can I know, that I'm not flashing the DK onboard MCU? Where is this shown, indicated where the flashing will go? That is strange to me. Another example is my sel build Black Magic Probe: It shows which devices are connected to it and you can select one (if multiple are shown in a select - select target 1,2 ...)

    If it's wired corectly, then only the external board gets flashed.

    2.) How can I make use of any bootloader (DFU, Serial, USB, OTA, ANT etc.) so that flashing with the DK is not always required? I have not found a good way so far to flash any useful bootloader (I have tried some of the examples). The onyl one which creates a serial devices is the example for the PCA100059 (the USB dongle) which shows a serial device: nRF52 SDFU USB (COM75). HOw to make use of that (I have tried all of the offered programmer als oin Arduino IDE but could not upload/flash my blink sketch)

    I don't know.

    3.) How to you flash the USB dongle beside using the nRFconnect which requires the compiled image?
    Are you also soldering the SWD pins and use them with the Segger and the DK?

    Yes.

    4.) When I flashed your micropython (or circuitpython?) for the 840 (my board). How to I connect and use it? My 840 boards have it's own USB port (see topic 2, which shows the nRF52 SDFU port when I flash the one bootloader). When I flash the MP, the ports are gone (how to connect via USB, Serial, Terminal etc.)?

    So far I've only flashed MP to the 832 and 840 DK's. In those instances, you can do serial IO over the USB connection using putty or similar terminal.

    I've also tried a couple of other things like a DFU bootloader with a S140 softdevice (as it was recommended by Nordic) but was not sucessful to combine them (the S140 was flashed, but then?)

    I have many more questions but I hope we can sort out some of the 1-4. I hope I have described them so that you can follow my thoughts and questions 🙂


  • Howdy y'all first off thanks @NeverDie for this thread, I spent a good time lurking at these NRF52 posts and learned and re-learned a few things here and there.

    I've built an E73 NRF52832 PCB and successfully did a blink using Espruino and Adafruit's Bluefruit FW for Arduino and just noticed the $10 CAD E73-2G4M08S1C (NRF52840) back in-stock (as of October 8). I am in the process of designing a pcb board layout for it but in the meantime thought that the community might find the following useful if you plan on designing/using these modules:

    1. E73-2G4M08S1C and other footprints in the same 'family' are readily available in Altium Designer format here: http://www.cdebyte.com/en/data-download.aspx?id=356&pid=202

    2. Library.io allows you to convert '.pcblib' / altium files to an Eagle Library format, you just need to specify the Symbol and Package, from here you can convert to KiCad or similar I'd reckon but have not used KiCad enough to verify this. This saved me a lot of time.

    In case someone was wondering: I've had no issues using the J-Link Edu Mini with the NRF52832, will update here when I get to the NRF52840.

    Just starting my own NRF journey and thought to add this here in case someone is looking for E73 module specifics WRT NRF52832/NRF52840 .


  • Big thanks to @sandeepmistry, @lpercifield, @jeremypoulter and all others contributing to the NRF Arduino development effort. I have borrowed a lot and forked off another project for adding support for the NRF52840 dongle (PCA10059). If you are using PlatformIO and have access to a NRF52840 you can take it for a spin here PCA10059. I have tested UART, TWIM, SPIM and the BLE Led toggle example works.


  • Hero Member

    @redferne Thanks for your post. How are you liking PlatformIO? Does PlatformIO have full support, with all the extra pin names etc., for the nRF52840?


  • @NeverDie I never liked the Arduino IDE, so I think PlatformIO is next logical step, it is very easy to get going and it opens up for advanced usage. Your own choice of editor, has great debugging capabilities with VSCode integration.

    If you build the PCA10059 example I linked you should have GPIO (digital) access to all 47 pins. I've made it simple in the pca10059 variant so that D0 (0) is p0.00 -> D47 (47) is p1.15.

    Some external pins on the dongle which I have tested:
    Serial pins RX->P1.10, TX->P1.13
    I2C, TWIM, Wire on pins CLK->P0.29, SDA->P0.31
    SPI here MISO->P0.13, MOSI->P0.15, CLK->P0.17, CS->P0.22


  • @redferne thanks for your effort spent to support nRF52840 for VS Code/Platform.io. I'll certaily give it a try. The good thing with platform.io is that it's easier to use/import existing arduino (ino) projects than in e.g. Segger Studio which only supports licensed J-Link flash/debug adapters.

    Two questions:
    1.) Does your "port" support also the 15.2 SDK features of the 840 (Softdevice S140, BLE 5.0 long range, ZigBee, Thread ...)
    2.) What flash method is supprted/used or you're using? Just plug the USB dongle in and it can be uploaded?

    Oh, a third question: If I use bare nrf840 Modules, what flash adapter/mode would you recommend or have you tested (I have the 840 DK board, a ST-Link v2 and a Balc Magic Probe adapter)?


  • Hero Member

    @nc78 Earlier you had asked about vendors for the dongle. I found an alternative dongle that ships from China:
    https://www.tindie.com/products/Zelin/nrf52840-micro-dev-kit-usb-dongle/
    Price is very similar. I like it better than the Nordic dongle, because it exposes pins P0.06 and P0.08, which are used by the DK for UART communications.


  • @heinzv

    1. It does use the S140 v6.1.0 Softdevice, however I have only "ported"/test the most basic SDK 15.2 BLE feature of @sandeepmistry BLEPheriphal BLEPeripheral. The example shows as BLEService and Read/Writeable BLECharCharacteristic used to toggling the onboard LED. I was hoping we could get more developers involved and "port" the missing pieces, if there's interrest. My main focus was just to get something Arduino-like running using PlatformIO build system on the cheap (~$10) NRF52840 dongle.

    2. I have tested Black Magic Probe (Bluepill) and JLink Mini on the PCA10059 with great success. It also possible to use the nrfutil to create a dfu.zip. The Nordic Open DFU Bootloader (which is pre-flashed on PCA10059) allows easy programming without soldering, just plug-in USB.

    First get and install the nrfutil from here

    1. Linux environment example, first build the PCA10059 example project:
    pio run -e ble
    
    1. Generate a dfu.zip including the softdevice:
    nrfutil pkg generate --hw-version 52 --debug-mode --sd-req 0x00 --sd-id 0xAE --application .pioenvs/ble/userfirmware.hex --softdevice ~/.platformio/packages/framework-arduinonordicnrf5/cores/nRF5/SDK/components/softdevice/s140/hex/s140_nrf52_6.1.0_softdevice.hex dfu.zip
    
    1. Plugin the PCA10059 dongle in a USB port. Make sure that the Bootloader is executing by checking the RED led, should be "breathing". Else press the reset button. Now flash the new firmware, here the dongle was enumerated as ACM3.
    nrfutil dfu usb-serial --package dfu.zip --port /dev/ttyACM3
    

    ... and Bob's your uncle 😸


  • Hardware Contributor

    @neverdie said in Everything nRF52840:

    @nc78 Earlier you had asked about vendors for the dongle. I found an alternative dongle that ships from China:
    https://www.tindie.com/products/Zelin/nrf52840-micro-dev-kit-usb-dongle/
    Price is very similar. I like it better than the Nordic dongle, because it exposes pins P0.06 and P0.08, which are used by the DK for UART communications.

    Thank you for the link, it looks like an interesting dongle. But after asking for a quote at Arrows and giving up (looked like a big mess to get items shipped here as it cannot be included in another order and they would only deliver in US), I realized that they now have them in stock.
    So I bought 2 at 9.5$ each + 12% discount on the website, so less than 8.5$ each and as I bought other items (including BT840 modules) I have free express shipping too. Cheapest price + free express shipping, I think it's called "having it both ways" 😉 So I'll be able to join the little nrf52840 club next week.


  • @redferne wow and thanks again for your fast and complte/detailed answer.
    I like especially

    • that you already started to use/support softdevices S140 and thus BLE 5.0, thread and Zigbee is "potentially" available
    • that you also succesfully use Black Magic Probe, as I also wante to use it because it works in Arduino IDE and Platform.io and it supports also an UART Port to communicate (I also use Blue/Blackpill BMP's)

    It would be great if it would be posssible (if not already) to use BLE 5.0 with the long range feature (that is not supported by the older S132 or nRF52832). Zigbee would be also great. But not sure what of the features (for a reliable longer indoor range) would be usable from within the MySensors project (beside using the nRF52 as/with the nRF24 proticol).


  • One interesting thing I stumbled upon:

    https://github.com/insane-adding-machines/unicore-mx

    UniCore-MX | Universal Core for ARM Cortex-M0/0+/3/4/7/X

    Supports nRF51/52


  • Hardware Contributor

    This post is deleted!

  • Hero Member

    @uhrheber said in Everything nRF52840:

    One interesting thing I stumbled upon:

    https://github.com/insane-adding-machines/unicore-mx

    UniCore-MX | Universal Core for ARM Cortex-M0/0+/3/4/7/X

    Supports nRF51/52

    I looked at the link, but I can't figure out what problem it's solving. What's the headline on that?


  • @redferne I was trying to get your platform and board extention as wellas the BLE library added to platformio, but got stuck afetr many many hours and many attempts (too much to add all the problems in one post). I'm using platformio with Windows 10 (I guess you use it with Linux/Ubuntu and also with a couple of command line tools)

    I was trying to install this two:
    https://github.com/Redferne/arduino-nRF5
    Redferne/arduino-BLEPeripheral

    I was trying to build a couple of simple examples and also the

    C:\users\internet.platformio\lib\BLEPeripheral\src\BLEBondStore.cpp:11:12: fatal error: nrf_soc.h: No such file or directory

    and
    C:\users\internet.platformio\lib\BLEPeripheral\src/BLEPeripheral.h:136:5: error: 'nRF52840' does not name a type; did you mean 'NRF52840'?

    and all other following errors are probably the result of the above ones.

    Any hints?

    Another question: How to define/declare the usage of the S140 softdevice in the project?
    Using the PlatformIO IDE, not the command line.


  • Hero Member

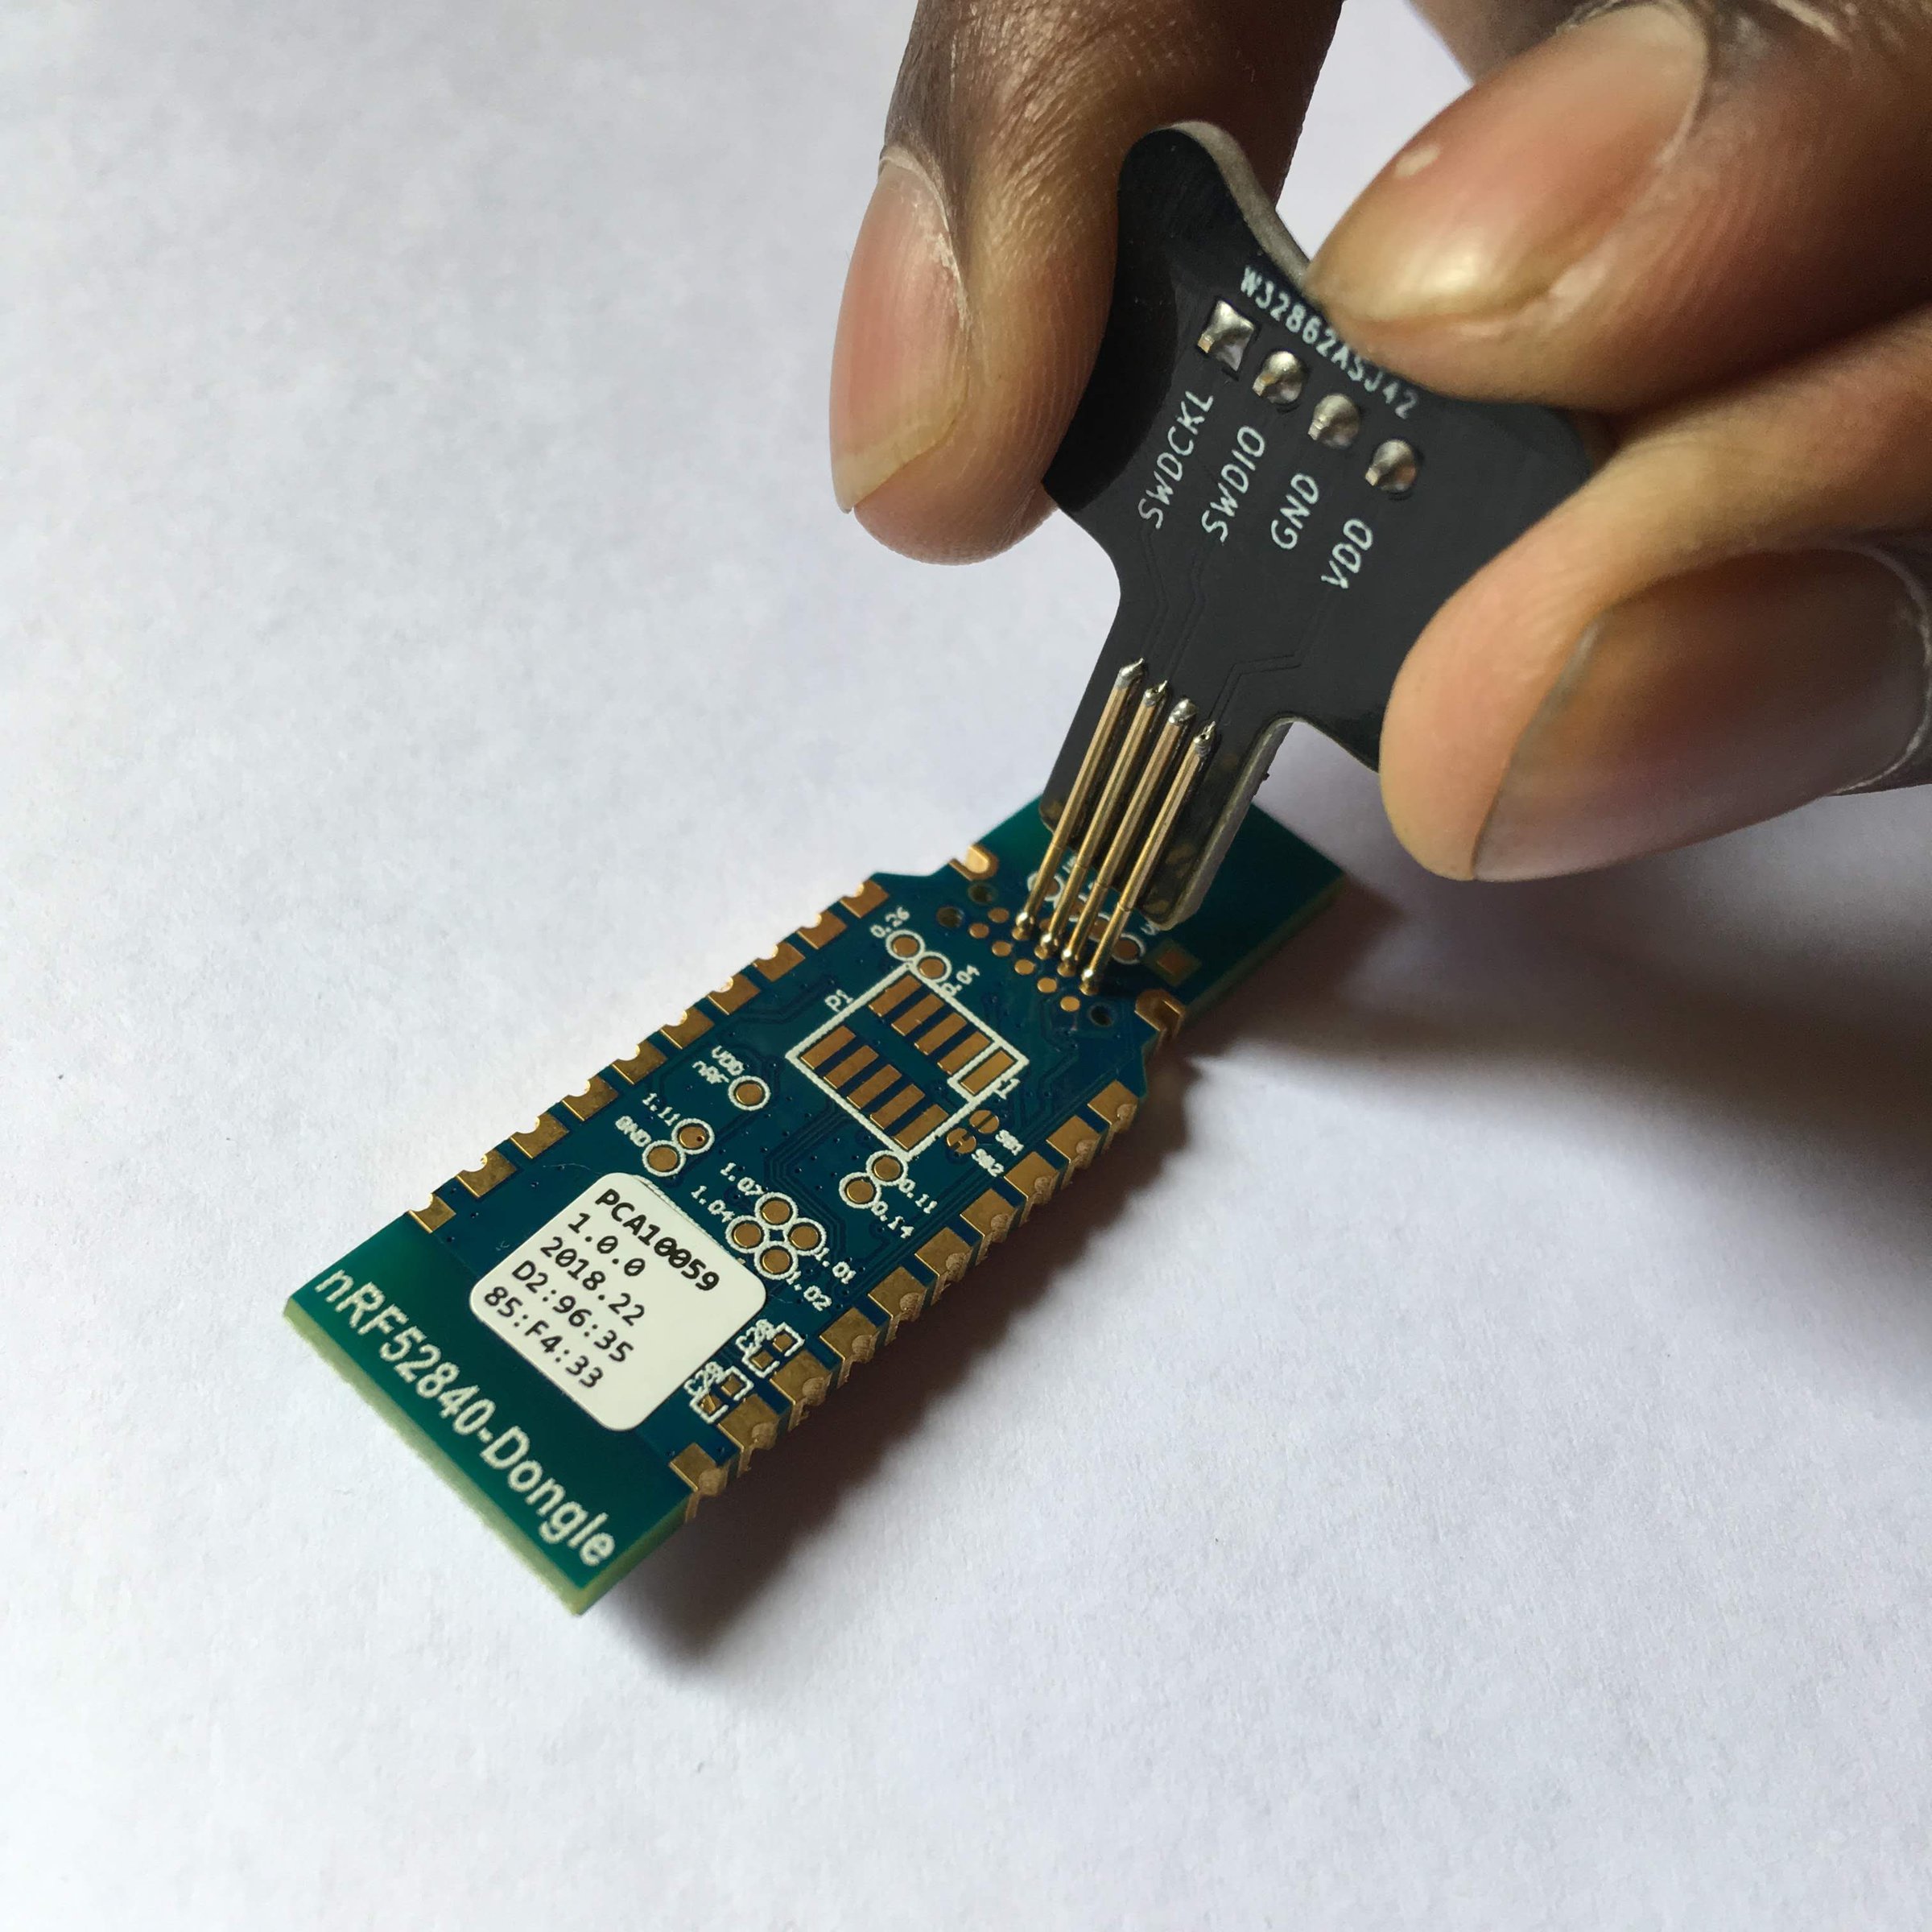
    As pointed out by @reinhold, here's a handy tool for programming your nRF52840 dongle, and possibly other nRF52 projects too:
    alt text
    https://www.tindie.com/products/ElectronutLabs/pogoprog-model-c-pogo-pin-programmer-swd-2-pack/

    I think I'd like it better if it could somehow latch itself to the board, though, so that I could also get debugging information hands free without having to continually press the tool up against the board.


  • @heinzv I'm sorry if I was unclear. I have only updated and tested one example which is the PCA10059 It should build without errors, but you might need to specify build type as "ble" or "dongle" as per the readme.

    To enable the NRF52840 support use these flags:

    -DNRF52 -DNRF52840 -DNRF52840_XXAA
    

    and if building with the BLE Peripheral library and Softdevice S140 add:

    -DNRF52 -DNRF52840 -DNRF52840_XXAA -DNRF52_S140
    

  • Hero Member

    I have basic radio code now working in micropython: https://github.com/rabbithat/micropython_nRF52840/blob/master/README.md

    So, I'm inching closer toward being able to do OTA code updates. 😃


  • Plugin Developer

    @neverdie Does this also mean we're slightly closer to a MySensors implementation in MicroPython?


  • Hero Member

    @alowhum said in Everything nRF52840:

    @neverdie Does this also mean we're slightly closer to a MySensors implementation in MicroPython?

    Theoretically. 😉


  • Hero Member

    By the way, I have it now to where you can send long strings (up to 255 characters if so desired) in a single packet from one node to another using micropython: https://github.com/rabbithat/Micropython_nRF52840_send

    So, it's starting to get useful. I expect OTA code updates should be within range fairly soon. Since it's all written in micropython, I'll be able OTA update even the radio code as well, which is slick. 😎


  • Plugin Developer

    Very cool!


  • Hero Member

    I have my first pass on nRF52840 OTA updates working with micropython. So, proof of concept works. 😄 I feel I should improve the code a bit before posting it though. I should probably add a hash function like MD5 or SHA256 to make sure the transmitted update is valid before making it go live.


  • @neverdie YAY for transport-agnostic mysensors-python-edition!


  • @neverdie would this also be usable for the nrf52832? (Not asking for an ETA here :))


  • Hi,

    I've recently purchased a couple of the nrf52840 dongles and was searching web for ways to flash them and came across this post. I am a complete NOOB with this stuff, so I've found the information here really useful, so thanks to all who have contributed.

    During my searches, I can across this; HOME SMART MESH (https://www.homesmartmesh.com/). It seems very similar to what MySensors is doing, but geared towards nrf5 hardware. Was wondering if you had seem this before, or had any thoughts on the project re: pros and cons?


  • @wormhole I took a quick look at this HomeSmartMesh project and it's certainly interesting.
    However, the MySensors project is more mature, has a large community, supports more MCU's and sensors and many HW projects are using/supporting it. It also supports nRF51 and nRF52 MCU's already to a certain extent (I guess using the internal nRF24 radio protocol and external RF chips like RFM69/95).
    Beside that, it supports also a couple of home automations suite like FEHM, OpenHAB etc.
    I'm currently on OpenHAB 2.3 using the MySensors Gateway for OpenHAB.
    I think it would be rather a good idea, that we get the new nRF52840 features and RF protocols supported by MySensors (such as the BLE 5.0 with the long range feature).
    We had already the discussions on IEEE 802.15.4 / Thread / Zigbee which are also great for home automation. The question was also, if we can/should include it in MySensors or are these competing technology stacks to MySensors.
    I personally like the MySensors project, because it project a good development infrastructure with a lot of supported/preconfigures sensors which makes it quite easy to creates sensor nodes..
    Now we are exploring how to best integrate and use the nRF52840 boards. NeverDie seem to be quite ahead of us and exploring also micropython option (not sure how far that fits into the MySensors concept 🙂


  • Hero Member

    I now have working OTA update code for micropython programs on the nRF52840. I posted it on github: https://github.com/rabbithat/NRF52840_MicroPython_OTA_Updates

    😎


  • @neverdie You are a hero 🙂 Now the question is of course what comes next? Do you see any chance to get some of the findings implemented into the MySensors project? or will it be a completly new nRF52840 thread/story? Like using ZigBee or BLE 5.0 long range (remember the discussion we had with @scalz if it makes sense to use MySensors aor use a full standard stack like ZigBee or BLE 5.0).
    What are your thoughts and plans? Best option to build sensor nodes/actors with nRF52840?


  • Hero Member

    @heinzv said in Everything nRF52840:

    @neverdie You are a hero 🙂 Now the question is of course what comes next? Do you see any chance to get some of the findings implemented into the MySensors project? or will it be a completly new nRF52840 thread/story? Like using ZigBee or BLE 5.0 long range (remember the discussion we had with @scalz if it makes sense to use MySensors aor use a full standard stack like ZigBee or BLE 5.0).
    What are your thoughts and plans? Best option to build sensor nodes/actors with nRF52840?

    Well, as the saying goes, Rome wasn't built in day. I think there's no doubt that MySensors could be built using MicroPython, but right now there is no Rome and there's barely even a camp site. It's all just green fields and a few scattered tents. Also, I am just one person, and this is still early days. My near-term plan is to improve the OTA code to make it faster and more efficient. Right now, perhaps ironically, maybe the only reason to prefer Micropython over C is the existence of this OTA code. If someone writes an OTA bootloader for the nRF52840 in C, maybe that reason goes away. I might have done that instead, but this seemed a shorter path to getting an OTA.

    In the end, programming the nRF52840 is, at this stage, almost like writing micro code. In other words, it almost doesn't matter which language you pick (provided it has an OTA updater), because the focus ends up being the same: fiddling with the registers and programming the PPI in order to get the highest efficiency.


  • @neverdie sure, I did not epect Rome to be built in one day by one person 🙂 I was just curiuos in which direction you're heading.
    If the OTA feature is one of the key features, I was thinking of using a couple of information provided by Nordic such as as details on the OTA/flashing process of the nRF52 as well as the OTA DFU bootloader example provided as part of the 15.2 SDK.

    OTA/Flash process
    https://infocenter.nordicsemi.com/index.jsp?topic=%2Fcom.nordic.infocenter.sdk52.v0.9.0%2Fbledfu_architecture.html
    http://infocenter.nordicsemi.com/index.jsp?topic=%2Fcom.nordic.infocenter.tools%2Fdita%2Ftools%2FnRF_Connect%2FnRF_Connect_DFU.html

    OTA/Flash sources in C/C++
    Just a few thoughts (I have to investiage) if we could use the sequence from the bootloader examples and they used libs for receiving data/code and initialized the flash process using the provided libraries
    nRF5_SDK_15.2.0\components\libraries\bootloader
    here I see in the dfu sub-dir the required function to observer, receiver and flash code

    There a multiple examples how the code is transfered: via USB/serial, BLE/Zigbee, ANT ... and I guess we could use also the nRF24 protocol. Also encryption functions are available in the samples (secure dfu bootloader).

    We need to derive, what nee to be done on the sender side to start to set the target to dfu mode and initiate the code transfer. Maybe that is also a tricky task.

    Do you see that this approach can work and could be added to own C/C++ sketches and thus also added the MySensors project (of coure we need to include and use the required nRF52 libs for dfu)?


  • Hero Member

    I don't doubt that it can be done. The amount of effort? It could be a little or a lot. I just don't know.


  • Hero Member

    By the way, I now have the micropython code in a state where it is more easily demoed: https://github.com/rabbithat/NRF52840_MicroPython_OTA_Updates

    Rather than continuing to post here about it, I'll just make future updates there. So, if anyone here is interested in it, you may want to check the github repository from time to time. 🖖


  • Plugin Developer


  • @NeverDie Thanks for your time and good work! 👍
    I was thinking on start fiddling with the nrf52, but after the reading I don't know if I would handle it.


  • Hero Member

    I tried platformio and indeed it seems very nice. It supports the nRF52840.


  • Hero Member

    @sergio-rius Assuming they're connected, I'd like to say yes, but I don't know how they're wired, so if that's all there is to go on... it's a cat in a bag.


  • Hero Member

    For those who haven't yet tried it, platformio has an "arduino" mode where it can program an nRF52840 very much along the lines that you would an arduino. Since it supports the nRF52840, I'd say it's a natural upgrade from the Sandeep Mistry library, which you don't really need to use anymore if you don't want to (though maybe it's still relevant for mySensor's compatability). At least to me, platformio seems much easier to use and much less of a learning curve than Segger Embedded Systems, Eclipse, or MBed. For anyone used to Arduino, it will seem very familiar.


  • Hero Member

    Has anyone been able to send a packet with a payload of greater than 85 bytes using an nRF52832/nRF52840? According to the datasheet, a 255 byte payload should be possible. Yet, even if I set MAXLEN to 255, the payload seems to be truncated at 85 bytes. So, I'm curious as to why I'm not able to get a larger payload transmitted, and thus I'm wondering whether anyone else here has succeeded at it.

    Anyone?


  • Sorry for cross-posting.

    I started with nRF52 a few days ago. I have the Nordic nRF52 SDK board (PCA10056) with a nRF52840 operational as a MySensors serial gateway together with Home Assistant on a RaspberryPI (with Hass.io). I am using the Arduino nRF5 and the sandeepmistry nRF5 board libraries.

    Some issues:
    - It looks like it only works in debug mode. But in debug mode, both debug messages and gateway messages appear on the usb port. Homes Assistant is not confused by the debug messages.
    - Leds are not working.
    - The programmer on the Arduino IDE is not working for me ("No J-Link" error, while there is a J-Link interface available), so I export a HEX fle form Arduino IDE and program the board with the nRFConnect tool from Nordic.

    In order to solve the issues above, I installed the Segger environment. With the board you get a free license from Nordic and you can do some fancy debugging. I also looked at Keil but that is a no-go for me. With Segger, I can upload a simple Blink example from Nordic to the board an debug it. I am now struggling with importing the MySensors library sources in Segger. If someone did this before, please let me know (!). Once this is done, I can debug the code on the hardware. May be I could fix the issues, like non blinking leds, by inspecting the code and watch for configuration issues of the ports (the addressing of the ports seems to be OK). But being able to debug would be a big plus in future development.

    Off course, once the gateway is working with blinking leds, I want to replace the development board with something cheaper from E-Bay et al. I want to give this one a try:
    https://www.aliexpress.com/item/Nordic-nRF52840-module-Bluetooth-low-energy-long-range-500-meters-bluetooth-5-0-PCB-IPX-Antenna/32953759053.html
    The plus of this board is that you can use an external 2.4 Ghz antenna. And it has the newest 52840. If you are creating a gateway, I suppose your budget will not depend on $3 price difference.

    Once all that is done, I want to turn my Nordic Thingy (https://www.nordicsemi.com/eng/Products/Nordic-Thingy-52) into a MySensors device. Seems like doable. But someone has to do it.


  • @neverdie Bluetooth and zigbee have different scopes and different business models. Zigbee is targeting automation networks such as devices that are permanently available and collecting in a server, while Bluetooth is only user centric in its pairing mechanism (it's funning those bluetooth devices that collect a certain amount of data locally for download with the user's phone, they are not scalable for big systems). Zigbee is evolving towards more structured networks capabilities and I predict that the Thread is sooner or later going to replace Zigbee without users loosing functional products as the alliance is already preparing a common zigbee and Thread top layer (dot dot) that would provide a smooth transition. Thread will provide a standardised routing between the sensors local network and the internet, and that is very competitive compared to any Bluetooth or zigbee solution where every one has to reinvent the wheel for a different way of mapping the local network to global, vendor specific or custom gateways would finally tend to disappear. Even if you do not want your sensor to be shared with the world, the smooth transition from low power wireless network to ethernet (and the raspr) is something I would apreciate. Now add to that the MQTT-SN that is designed for low power wireless networks, and you get an out of the box MQTT layer for your low power wireless sensor. I do not know, but if I would bet, I'd bet on that to gain interest in the future.
    And by the way, I do not think that these fancy standards compete with MySesnors, because the SW that is simple and you know is 100 times more practicle to work with, port and adapt to corner cases than a huge stack such as BT or zigbee.


  • Hero Member

    @wassfila Who knows?The nRF52 chips are multi-protocol, which I suppose is one way to hedge your bets. Thread is one of them.


  • Hero Member

    As of today, uLisp now works on the nRF52840. I posted a repository and build instructions on github: https://github.com/rabbithat/uLisp_nRF52840 I have moved from uPython to uLisp to facilitate over-the-air code upates.


  • Hero Member

    An interesting benchmark I just did on the nRF52840: I'm able to transmit (and receive) the entire Declaration of Indepdence (roughly 8KB of text) in under 35 milliseconds. So, with that as a reference, I expect OTA code updates can be fairly low power. 🙂


  • @neverdie On platformio, what do you use for programming? A black magic probe?

    And about the 255 payload, have you looked for a wrong sized variable or type? If you want me to give it a go on visual studio+resharper just send me a sample. I still don't have a programmer and still haven't received my nrfs so I would only look for programming errors.


  • Hero Member

    @sergio-rius

    I use the nrf52840-DK as the programmer.

    Regarding the 255 payload, I'm able to get it if I send static length payloads, so that's what I'm doing now. However, variable length acts very strangely in that the maximum length before truncation seems to vary depending upon what the actual payload content is. It's 100% repeatable for the same payload content, but changing the content generally leads to a different maximum length. So, I'm not sure what's up with that. It definitely shouldn't be that way.


  • @neverdie Does it have compression or checksum of the payload? I'm not used to that library, but it seems some processing is done. First try with plain repeating characters or numbers to discard encoding issues.


  • Plugin Developer


  • Hero Member

    @alowhum Thanks. Not sure if you saw this: https://forum.mysensors.org/topic/9889/anyone-here-tried-mercrisp-forth-for-programming-arm-cortex-m-i-e-blue-pill-nrf5-stm32-etc

    Looks as though there will be a mecrisp-stellaris FORTH release for the nRF52840 within about a week, or maybe sooner. Because of its built-in optimizing compiler to native machine code, I'll probably settle on mecrisp-stellaris.


  • Plugin Developer

    Yes I saw it. Very hardcore.


  • Hero Member

    You can now run mecrisp-stellaris FORTH on the nRF52840-DK: https://github.com/rabbithat/FORTH_NRF52840-DK

    🙂


  • @NeverDie did You compared somehow the range of the nrf52840 dongle with other nrf52840/nrf52832/nrf51822 modules ? I'm asking because after first test it appears that the nrf52840 dongle has worse range than core51822 module using the same radio settings.


  • Hero Member

    @rozpruwacz No, I hadn't noticed that. Do note though that you can increase the tx power on the nRF52840 dongle to 8db, whereas 4db is the max for the nRF51822.


  • @neverdie said in Everything nRF52840:

    @rozpruwacz No, I hadn't noticed that. Do note though that you can increase the tx power on the nRF52840 dongle to 8db, whereas 4db is the max for the nRF51822.

    Yes, but with the same settings I would expect at least the same range. I will keep testing.


  • Hero Member

    @rozpruwacz The nRF52840 chip itself should be better because of its greater receive sensitivity.You didn't say exactly what you're comparing it against (aside from it being an nRF51822), but the dongle has a smallish antenna and a small ground plane. Usually those don't have as good a range. It's one of the trade-offs that comes with smaller size. It may also be more directional that what you're expecting, so try rotating it and see if that makes a difference.


  • @neverdie i'm comparing it with core51822 module which also has pcb antenna


  • Hero Member

    I just now posted a much easier mecrisp-starellis FORTH for the nRF52840-DK: https://github.com/rabbithat/nRF52840-DK_easy/blob/master/README.md

    On this one, all you need do is upload the hex file located in that repository and you're done. 🙂


  • @neverdie interesting research and ideas. Have you tried to get BLE 5.0 running (the S140 SD) or using the nrf52840 radio features (best with long range) so that we can consider a sensor node/actor and does the sleep properly work? There are some basic features which have to work before switching the development/runtime env.


  • Hero Member

    @heinzv

    I haven't been working on that per se, but I do have a REPL over radio working: https://github.com/rabbithat/nRF52_wireless_Forth_REPL
    which can also be used for doing OTA code updates.


  • @NeverDie You doing a great research! I have quickly checked your REPL code and the radio lib.
    So you have implemented a OSI Layer 3+4 (Transport Layer with IP/TCP Stack).
    I'm wondering if/how this can be used to complay to BLE 5.0 (long range), ZigBee and Threads which the new Nordic SDK (Zigbee and Threads 2.0) offers? Are they also using the Softdevice S140 (6.1) libs or ...?
    There is a ZigBee OTA update example provided by Nordic (but I have not yet enogh time to test it).
    Currently, I'm still using MySensors and the NRF5_ESP (Nordic private) protocol which works. IT would be also interesting to use a more industry standard protocol like ZigBee or THREADS which seem to be also supported by OpenHAB.
    I'll certainly do further investigations in this direction. I have tried to test it with Segger Embedded studio and also with IAR Studio for ARM (the second requires some newer 32Bit version libs from Nordic and an internat request for that was raised already). Segger works fine with the J-Link adapters.


Log in to reply
 

Suggested Topics

  • 87
  • 3
  • 5
  • 8
  • 1
  • 2

100
Online

11.5k
Users

11.1k
Topics

112.7k
Posts