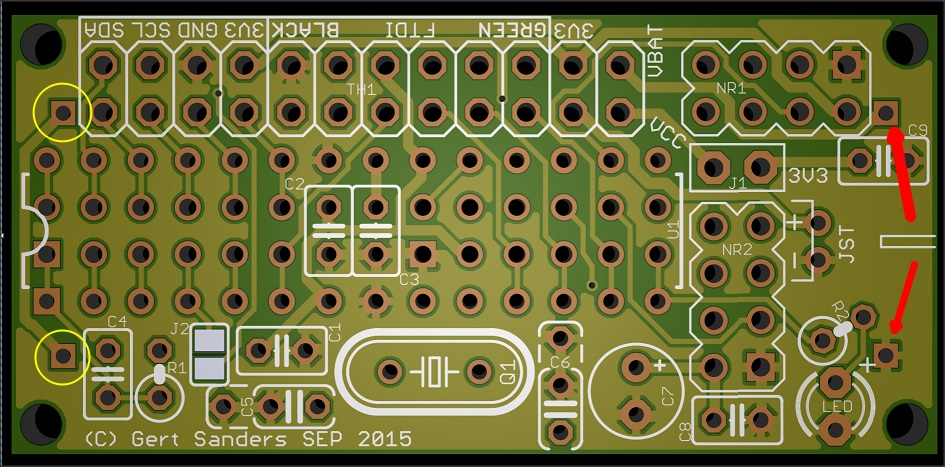
My own board (50mm x 30mm)


  • Hardware Contributor

    @gloob if you power via a 3V3 FTDI interface, then you only need to close jumper 1 to connect the Vcc corcuit with the 3V3 circuit.


  • @GertSanders
    Thanks for your support. I have now the serial gateway sketch running and output of the arduino seems good:

    0;0;3;0;9;gateway started, id=0, parent=0, distance=0
    0;0;3;0;14;Gateway startup complete.
    

    I will now order some Si7021 sensors and continue my testing.

    Can I use the following sensors:

    Si7021 Industrial High Precision Humidity Sensor I2C Interface for Arduino


  • Hardware Contributor

    @gloob I'm using the same sensors for Temperature and Humidity. The pinout of these boards is what I based my pinout on my red board on. (3V3, GND, SCL, SDA). I'm using now 5 of these.


  • Ok, after a few long days I managed to burn the bootloader. For those who are struggling with the same problem please note the following:

    1. Use Nick Gammon's website and optiboot bootloader (512kb only). I had a standard ATmegaBOOT_168_atmega328_pro_8MHz_hex (Lilypad 8 MHz loader) and could not make it work with 3.3.v.
    2. Important: the 2048kb bootloader's (Lilypad 8MHz) address is 0x7800. For the optiboot (512Kb) you need to change it for 0x7E00. Now everything works fine - I just need now to change fuses to make sure the voltage can go down below 2V.

    @GertSanders I wonder what sketches do you use with this board? it is nice to have Si7021 (it is pin-for-pin for your board) for temp and humidity.


  • Hardware Contributor

    @alexsh1 I make my own sketches, the one for my board with SI7021 is used most in my house. I also have a repeater, a GSM node, a sleeper node which wakes up when switches are tripped (basis for upcoming door sensor node). I work with the development version of the library (1.6.0-beta) of Mysensors

    I added my Temp/Hum sketch as inspiration: TEMPNODESI7021.ino


  • Interesting
    @GertSanders GSM node? is it a standalone or you have it hooked up to this node?
    I have a GSM node connected to a couple of SSRs to control water heating - sadly this is not connected to MySensors


  • Hardware Contributor

    @alexsh1 It is based on my AC capable board, is a normal atmega328p board, but with a SIM800L mounted on it. This module allows me to send and receive SMS's, and I use one of the digital output pins to control a waterpump. I have a second AC based board ready which will be my MySensors SMS gateway. This means it will be able to receive V_TEXT and send that to the default GSM number as a SMS. It should be possible to receive SMS and send that as V_TEXT to other nodes, but so far I have not started the design of the second sketch yet.

    1447344753891-img_7575.jpg

    You see it here also (top right) with the relay module and the white AC-DC converter connected.

    1447344662709-img_7579.jpg

    Side view:

    1447344891388-img_7582.jpg


  • @GertSanders
    Do you have a source or shop for the AAA battery holder with solder pins? I did only find some for AA batteries.


  • @GertSanders said:

    @alexsh1 It is based on my AC capable board, is a normal atmega328p board, but with a SIM800L mounted on it. This module allows me to send and receive SMS's, and I use one of the digital output pins to control a waterpump. I have a second AC based board ready which will be my MySensors SMS gateway. This means it will be able to receive V_TEXT and send that to the default GSM number as a SMS. It should be possible to receive SMS and send that as V_TEXT to other nodes, but so far I have not started the design of the second sketch yet.

    I only have 1-2 high current (3kWh at 240V resistive load) devices at home and I am already controlling them as well my internet router (remote reboot if no internet) via SMS. At this stage I need a larger property to expand my home automation lol 😆 😆 😆


  • @gloob said:

    @GertSanders
    Do you have a source or shop for the AAA battery holder with solder pins? I did only find some for AA batteries.

    Would you mind me asking why you'd need AAA batteries? Much less capacity and the holder is not much smaller. I have been using Eneloop AA rechargable lithium batteries (http://www.ebay.co.uk/itm/4pcs-1-5V-AA-2200mWh-Lithium-li-ion-Rechargeble-Battery-4-PORTS-AA-charger-/272027421169?hash=item3f561909f1:g:r9AAAOSwMTZWSFHz) and they are holding up really well. The advantage is that they hold 1.5V almost until they are discharged unlike NiMh


  • Hardware Contributor

    @gloob I got my AAA holders from Aliexpress.


  • Hardware Contributor

    Indeed, those 👍


  • Do you have an idea how long a temperature sensor will run on 2 AAA batteries?


  • Hardware Contributor

    @gloob Not yet, some of mine have been running for 2months with a voltage drop of less then 1%


  • IMG_2229.JPG

    My board waiting for a sensor from China


  • @alexsh1
    How did you connect the battery? Did you solder it directly to the board?


  • Hardware Contributor

    @gloob There are two connections on the board to allow soldering the battery holder. Both the AA and AAA versions I use have the same pin spacing (seems standard), so you can use an AA battery holder as @alexsh1 does, or an AAA as I have.

    http://forum.mysensors.org/uploads/files/1446751714416-image.jpeg

    The red arrows show where the batteryholder pins should go. If you have individual AAA battery holders, then the pins surrounded by yellow circle are also used to connect the batteries in series. If the battery holder holds 2 batteries, then only the pins pointed to by red arrows are used.

    batteryholderconnections.jpg

    The PLUS sign next the the pin on the lower right of the above image is for the LED, the polarity of the pins from the battery is marked on the silkscreen of the bottom side. Looking at it from the top side, the pin above right is for Positive, the pin on below right is for Negative (or GND).

    Jumper J2 is to connect the IRQ pin from the NRF24 to pin 2 (INT0) of the atmega328. You could also use that to connect a switch between the top jumper pad (connected to pin 2) and the extra ground pin of C5, to use with a doorswitch. I have used this with the internal pull up, but that would not be very good for the battery-use. It is better to use a 1MOhm pull up resistor wich can also be connected using the extra hole connected to pin 2 and Vcc


  • @gloob @GertSanders is spot on! I only have 1.5V AA rechargeable lithium batteries so the choice of the battery holder is obvious.


  • Just ordered a batch from DirtyPcb so the journey is just beginning!.
    Doubt i will need a whole batch so if anyone requires a couple in the uk let me know.


  • @GertSanders said:

    @alexsh1 I completely switched off the BoD in my fuse settings, this saves the battery even more. I found that the processor kept working down to around 1,64V. Even my NRF24 worked to that low level, because the last message I received in my Domoticz from that node gave a battery voltage of 1.64V
    Anyway, since I monitor all battery levels via a script in Domoticz, there is no need for BoD.

    How is 1.64v possible,It was my understanding that 8Mhz requires a minimum of 2.4v?


  • Mod

    The processor is guaranteed to work within the specified limits. Outside the specified limits, no guarantees are made. It might work, it might not work or it might work slightly with strange glitches.


  • I see now.Thank you
    Has anyone modified Gertsanders Firmware to run at 1Mhz?
    That would give reasonably stable results down to 1.8v.
    I don't have the skills to compile from scratch and cater for the led on pin8 etc.


  • Hardware Contributor

    @rmtucker The firmware itself does not need to be changed to use the internal oscillator. You accomplish that by using a different set of fuse values:
    atmega328pO4M8i.bootloader.low_fuses=0xE2
    atmega328pO4M8i.bootloader.high_fuses=0xDE
    atmega328pO4M8i.bootloader.extended_fuses=0x07

    This sets the processor to a mode using the internal oscillator.

    Add the call to divide the frequency by 8 (can be done in the sketch itself) and you have a 1MHz internal clock.


  • @GertSanders So have you never found it a problem running at 8Mhz?
    Do most of your sensors work ok below the 2.4v threshold?
    Guess i will find out when the pcb boards arrive😃


  • Hardware Contributor

    @rmtucker Short answer: yes. So far most my sensors are working fine and all sit above 2.4V but I have not had problems when they do below 2.4V

    There is one sensor now that has a battery in decline. This sensor uses a lot of power and goes through it's batteries very fast. So it is a good test for this low voltage work. It is now at 2.11V and still sends messages every 5 minutes. On the first graph you can see it is still working fine wel below 2.4V and it is clocked at 8MHz with a crystal.

    Screen Shot 2016-01-03 at 20.27.54.png

    I have a notification on all my sensors so that when the battery voltage goes below 2V I get a Prowl from Domoticz. This has only happened on this sensor (twice so far), because I was using NiMH batteries (which discharge faster than alkaline). Around 2 november I put in 2 alkaline batteries (AAA), but these were not brand new.

    Most of my sensors have a discharge pattern as here below:

    Screen Shot 2016-01-03 at 20.38.51.png


  • @GertSanders What rate is the sensor in the very bottom graph sending messages?
    That discharge rate looks very nice.

    @GertSanders said:

    @rmtucker The firmware itself does not need to be changed to use the internal oscillator. You accomplish that by using a different set of fuse values:
    atmega328pO4M8i.bootloader.low_fuses=0xE2
    atmega328pO4M8i.bootloader.high_fuses=0xDE
    atmega328pO4M8i.bootloader.extended_fuses=0x07

    This sets the processor to a mode using the internal oscillator.

    Add the call to divide the frequency by 8 (can be done in the sketch itself) and you have a 1MHz internal clock.

    Problem with using div/8 in the sketch and not altering the bootloader is that all the timings are off for baud rates and pwm etc.
    Where if it is altered in the bootloader it all works as it should.

    Last question i promise 😋

    I currently use the arduino mini pro and when uploading sketches to it using ftdi,i have to press the reset button to get the upload to work.
    Will i have the same problem with your boards?


  • Hardware Contributor

    @rmtucker On my board I do not need to press a reset to be able to upload sketches, since I connected the RESET pin to the FTDI header via a capacitor.

    So if the FTDI interface does the reset via RTS pin, then it will reset the board and you can upload sketches.

    The sensor in the last graph sends it's voltage and temperature every 5 minutes, even if the value is sometimes the same as the previous one. It also sends it's battery voltage every 5 minutes.

    In my last version of the sketch I have now added a change based on the Sensebender sketch. That sketch sends it's temperature or humidity only if the change is a minimal difference with the previously sent temperature or humidity. It always sends it's battery level every half hour. That should make it last minimum a year on 2 AAA batteries.

    Below is a graph of another sensor sending data every 5 minutes.
    Screen Shot 2016-01-05 at 21.06.06.png


  • In comparison here is an ESP8266 doing the same job every 5mins
    But that is 4 AA Alkaline batteries.
    And by the look of todays voltage it is on it's way out.

    Screenshot from 2016-01-07 17:55:20.jpg


  • Hero Member

    @GertSanders said:

    It seems you have removed the crystal and capacitors and plan to use the internal oscillator, I did this as well. Works most of the time, but uploading of sketches can give transmission errors of you go above 57K6 baud. Better to transmit at 36Kbit then (needs a change in the BOARDS.TXT file of Arduino IDE)

    76K8 baud works better than 57K6 (division from 8 MHz has less error), and there are Optiboot variants which support it (with theBOARDS.TXT change you mention). Or 38K4 baud (half that) as you suggest, which is no more timing accurate than 76K8 but by being slower still may give more margin for sloppy edges or the like - if needed.


  • Hi GertSanders,

    After ordered and make 3 of 50mm x 30mm board with success. Now I ordered the AC Capable 50mm x 50mm board. I try to read the schema and I have some question. If I want to use this board with only 2 AAA battery, Do I need to use AMS1117? and witch jumper do I need to close? It is optional to use AT24C ?

    Thank you for your help


  • Hardware Contributor

    @Carl-H To use the board with AA batteries you do NOT need to place the AMS1117. But you will need to short the jumper "BAT" which you will find on the same surface as the AMS1117 if you want to feed the NRF24 with the same power.
    The batteries are connected to the Vcc power line. The NRF24 is connected to the 3V3 power line. There is no interconnection, unless you use the AMS1117 or you short the jumper "BAT".

    The AT24C's are optional. If you do plan to use them, you will also need to place the I2C pull resistors and you will need to short the jumpers RSCL and RSDA. These two jumpers connect the pull-up resistors to the SCL and SDA lines.
    If you use a sensor connected to the pins SCL/SDA of the extension connector you sometimes have no need for pull-ups as the sensor itself has them.
    The jumpers SCL-SDA and SDA-SCL are there to allow switching the signals of the SCL/SDA pins on the extension connector. The jumper closest to the board edge is for the pin on the very edge of the connector, the jumper close to the ATSHA is for the second pin. Without shorting these two jumpers, the pins on the extension connector have no function.
    Some sensor-boards have a SDA-SCL-GND-3V3 connector, others have a SCL-SDA-GND-3V3 pattern. The jumpers are there to be able to use both types.

    IMG_7673.jpg


  • Thanks for your clear explication! I have another question, where is the FTDI port ?


  • Hardware Contributor

    @Carl-H It is part of the expansion connector.

    I added more info on the OpenHardware.io site.


  • Ok my boards arrived from DirtyPCB.
    A couple of questions:-

    1.I am not using NR2 (The radio socket that protrudes),Also i am using the internal osc and not the xtal.

    So can i leave out C9,NR2 Socket,C5,C6,Xtal ?

    2.What are C2,C3 doing.
    The socket for the cpu i have fitted will not let me squeeze them in.

    Should i solder them in underneath or can they be left out?


  • Contest Winner

    @mtucker

    1. Yes you are right about leaving out these components, but if you use NR1 i should leave out C8 and keep C9 (mount the decouple C's as close to the decouple component as possible)

    2. these components are for decoupling the uP. You can mount them at the bottom, do not leave the out.
      I used a tip from earlier in this forum thread for gaining a little bit more space when using these

    Cheerz


  • Hardware Contributor

    @BartE answered perfectly. You can leave out C5,C6 and XTAL if you use the internal oscillator. C9 is for the NRF24, no matter if you use NR1 or nR2 socket. And yes, you only need 1 socket, so if you use NR1, no need to add NR2 (and vice versa).
    Socket NR2 is for the longer (and power amplified) radio with external antenna, NR1 was intended for the standard NRF24L01+ with PCB antenna.
    C2 decouples AVCC (the analog power input), just as C1 decouples the VCC (digital) power input. C3 stabilises the analog reference input. If you do not use the analog->digital conversion, you could skip C3 as well.

    I also do not use standard 28 pin sockets, but strip sockets just like BartE.
    In the image here I used a standard socket, but cut away the middle "bridge" to allow mounting the decoupling capacitors.

    https://www.openhardware.io/uploads/568faa0cbaba42246aa57103/image/IMG_7527.jpg

    In the image below I use the strips BartE mentioned:

    https://www.openhardware.io/uploads/568faa0cbaba42246aa57103/image/IMG_7686.jpg

    More images and details are here:

    https://www.openhardware.io/view/5/Battery-based-atmega328p-sensor-no-SMD


  • I am pulling out what hair i have left.
    All i am getting is this:-
    find parent
    send: 253-253-255-255 s=255,c=3,t=7,pt=0,l=0,sg=0,st=bc:
    find parent
    send: 253-253-255-255 s=255,c=3,t=7,pt=0,l=0,sg=0,st=bc:
    find parent
    send: 253-253-255-255 s=255,c=3,t=7,pt=0,l=0,sg=0,st=bc:
    find parent
    send: 253-253-255-255 s=255,c=3,t=7,pt=0,l=0,sg=0,st=bc:
    find parent
    send: 253-253-255-255 s=255,c=3,t=7,pt=0,l=0,sg=0,st=bc:
    find parent
    send: 253-253-255-255 s=255,c=3,t=7,pt=0,l=0,sg=0,st=bc:
    Init complete, id=253, parent=255, distance=255
    Battery:3.161 Batt%:90 Temperature:21.73C Humidity:56%
    find parent
    send: 253-253-255-255 s=255,c=3,t=7,pt=0,l=0,sg=0,st=bc:


  • Hardware Contributor

    Node 253 tries to connect and fint its way to the gateway (find parent) but doesnt get any respons.
    Do you have a working gateway - what does the gateway log looks like?


  • Yes the gateway has been working fine.
    I will connect the gateway back up to the computer and see what it is saying and let you know.


  • Hardware Contributor

    Which controller are you using?


  • Sorry Guys seems the aerial was not tight enough on the Gateway,All working great now.


  • Hmm thats a little worrying,Both sensors are not enclosed sitting in fresh air next to each other.
    10% away from each other seems a lot.
    I am awaiting a delivery of more SI7021 sensors let's see where that takes us??
    0_1454372709451_Screenshot from 2016-02-02 00:21:23.jpg


  • Are these identical sensors?

    I have 10 sensebender micros with a SI7021 sensor and they show completely the same values.


  • No
    One is an si7021 running on the board in this thread.
    The other is a HTU21D running on a pro micro that i already had set up and running.


  • @GertSanders
    I have been struggling to upload photos in the openhardware section of your node and I think it is better if we move our discussion here. Take a look at these:
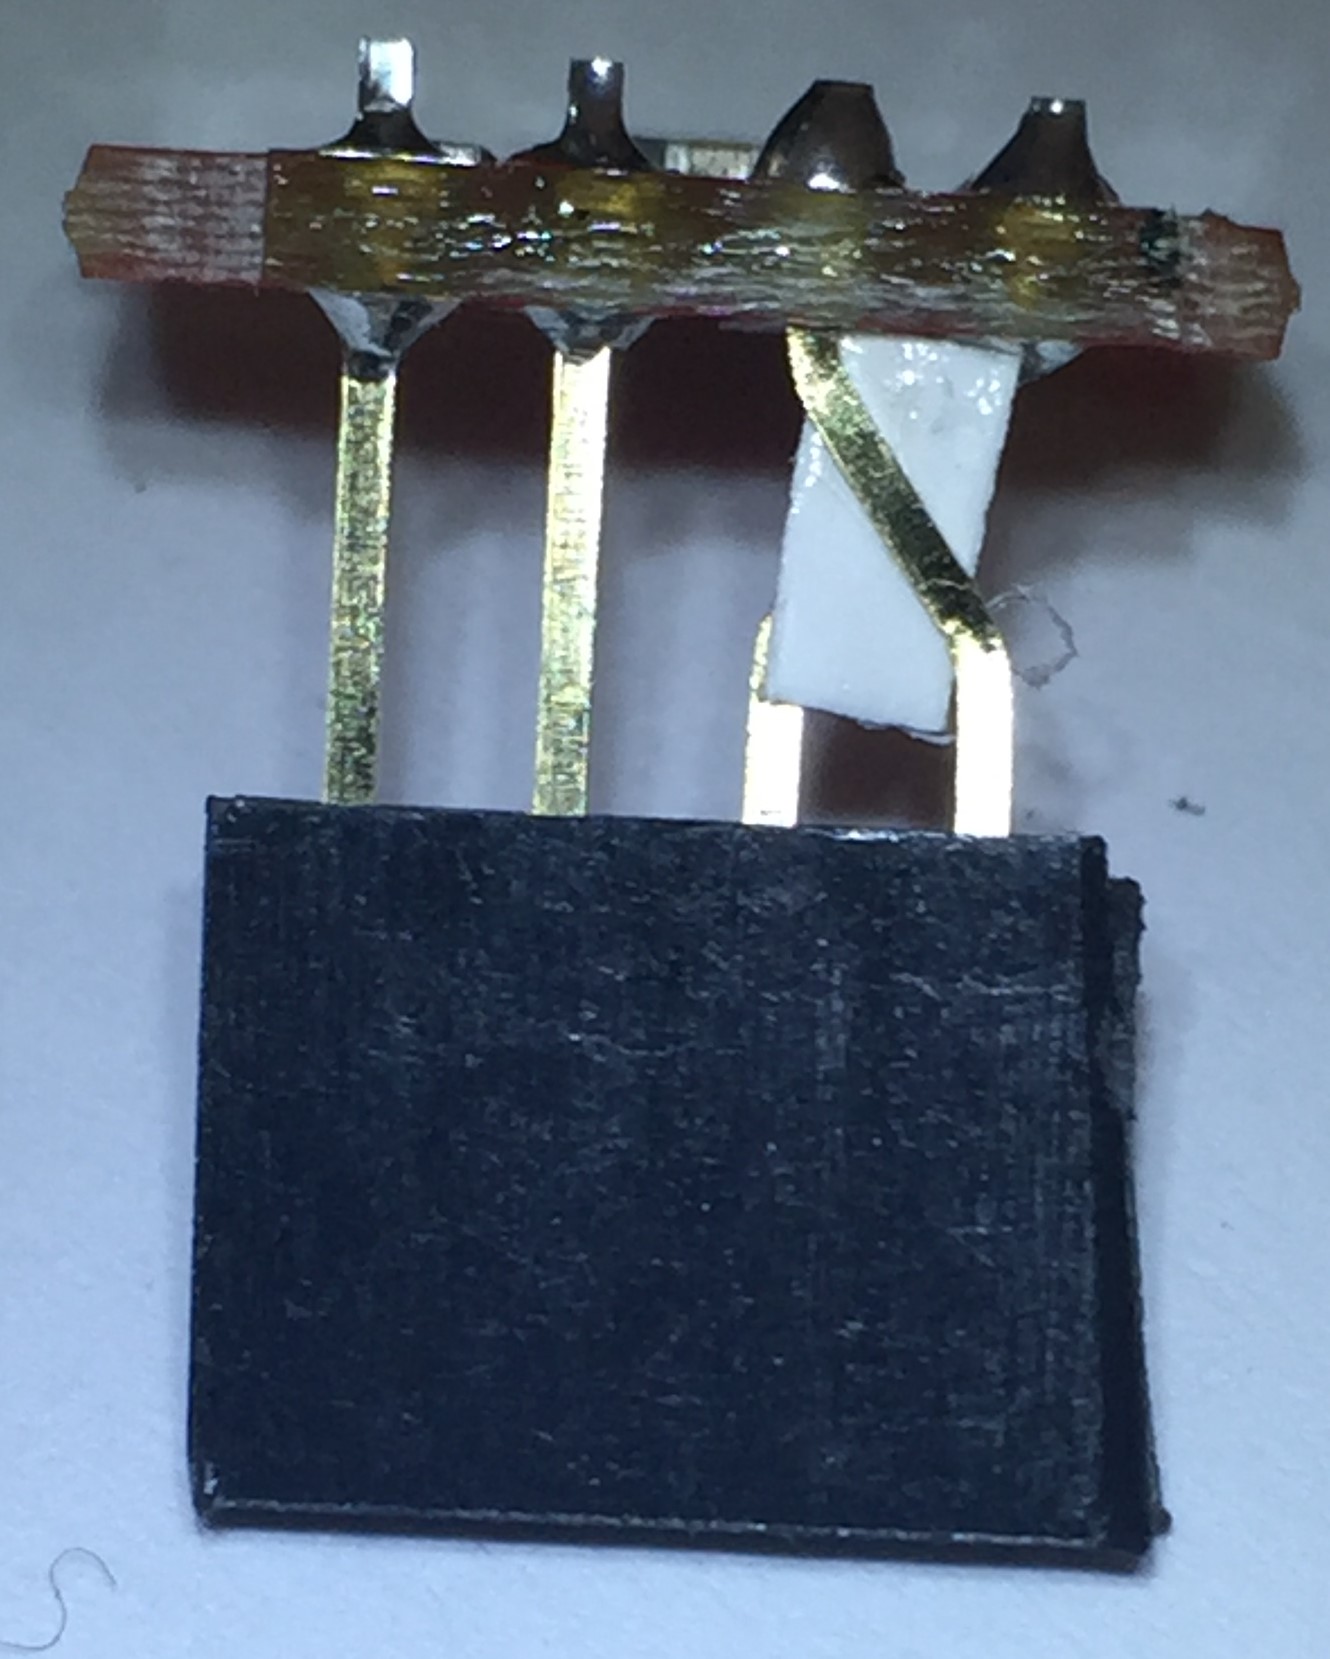
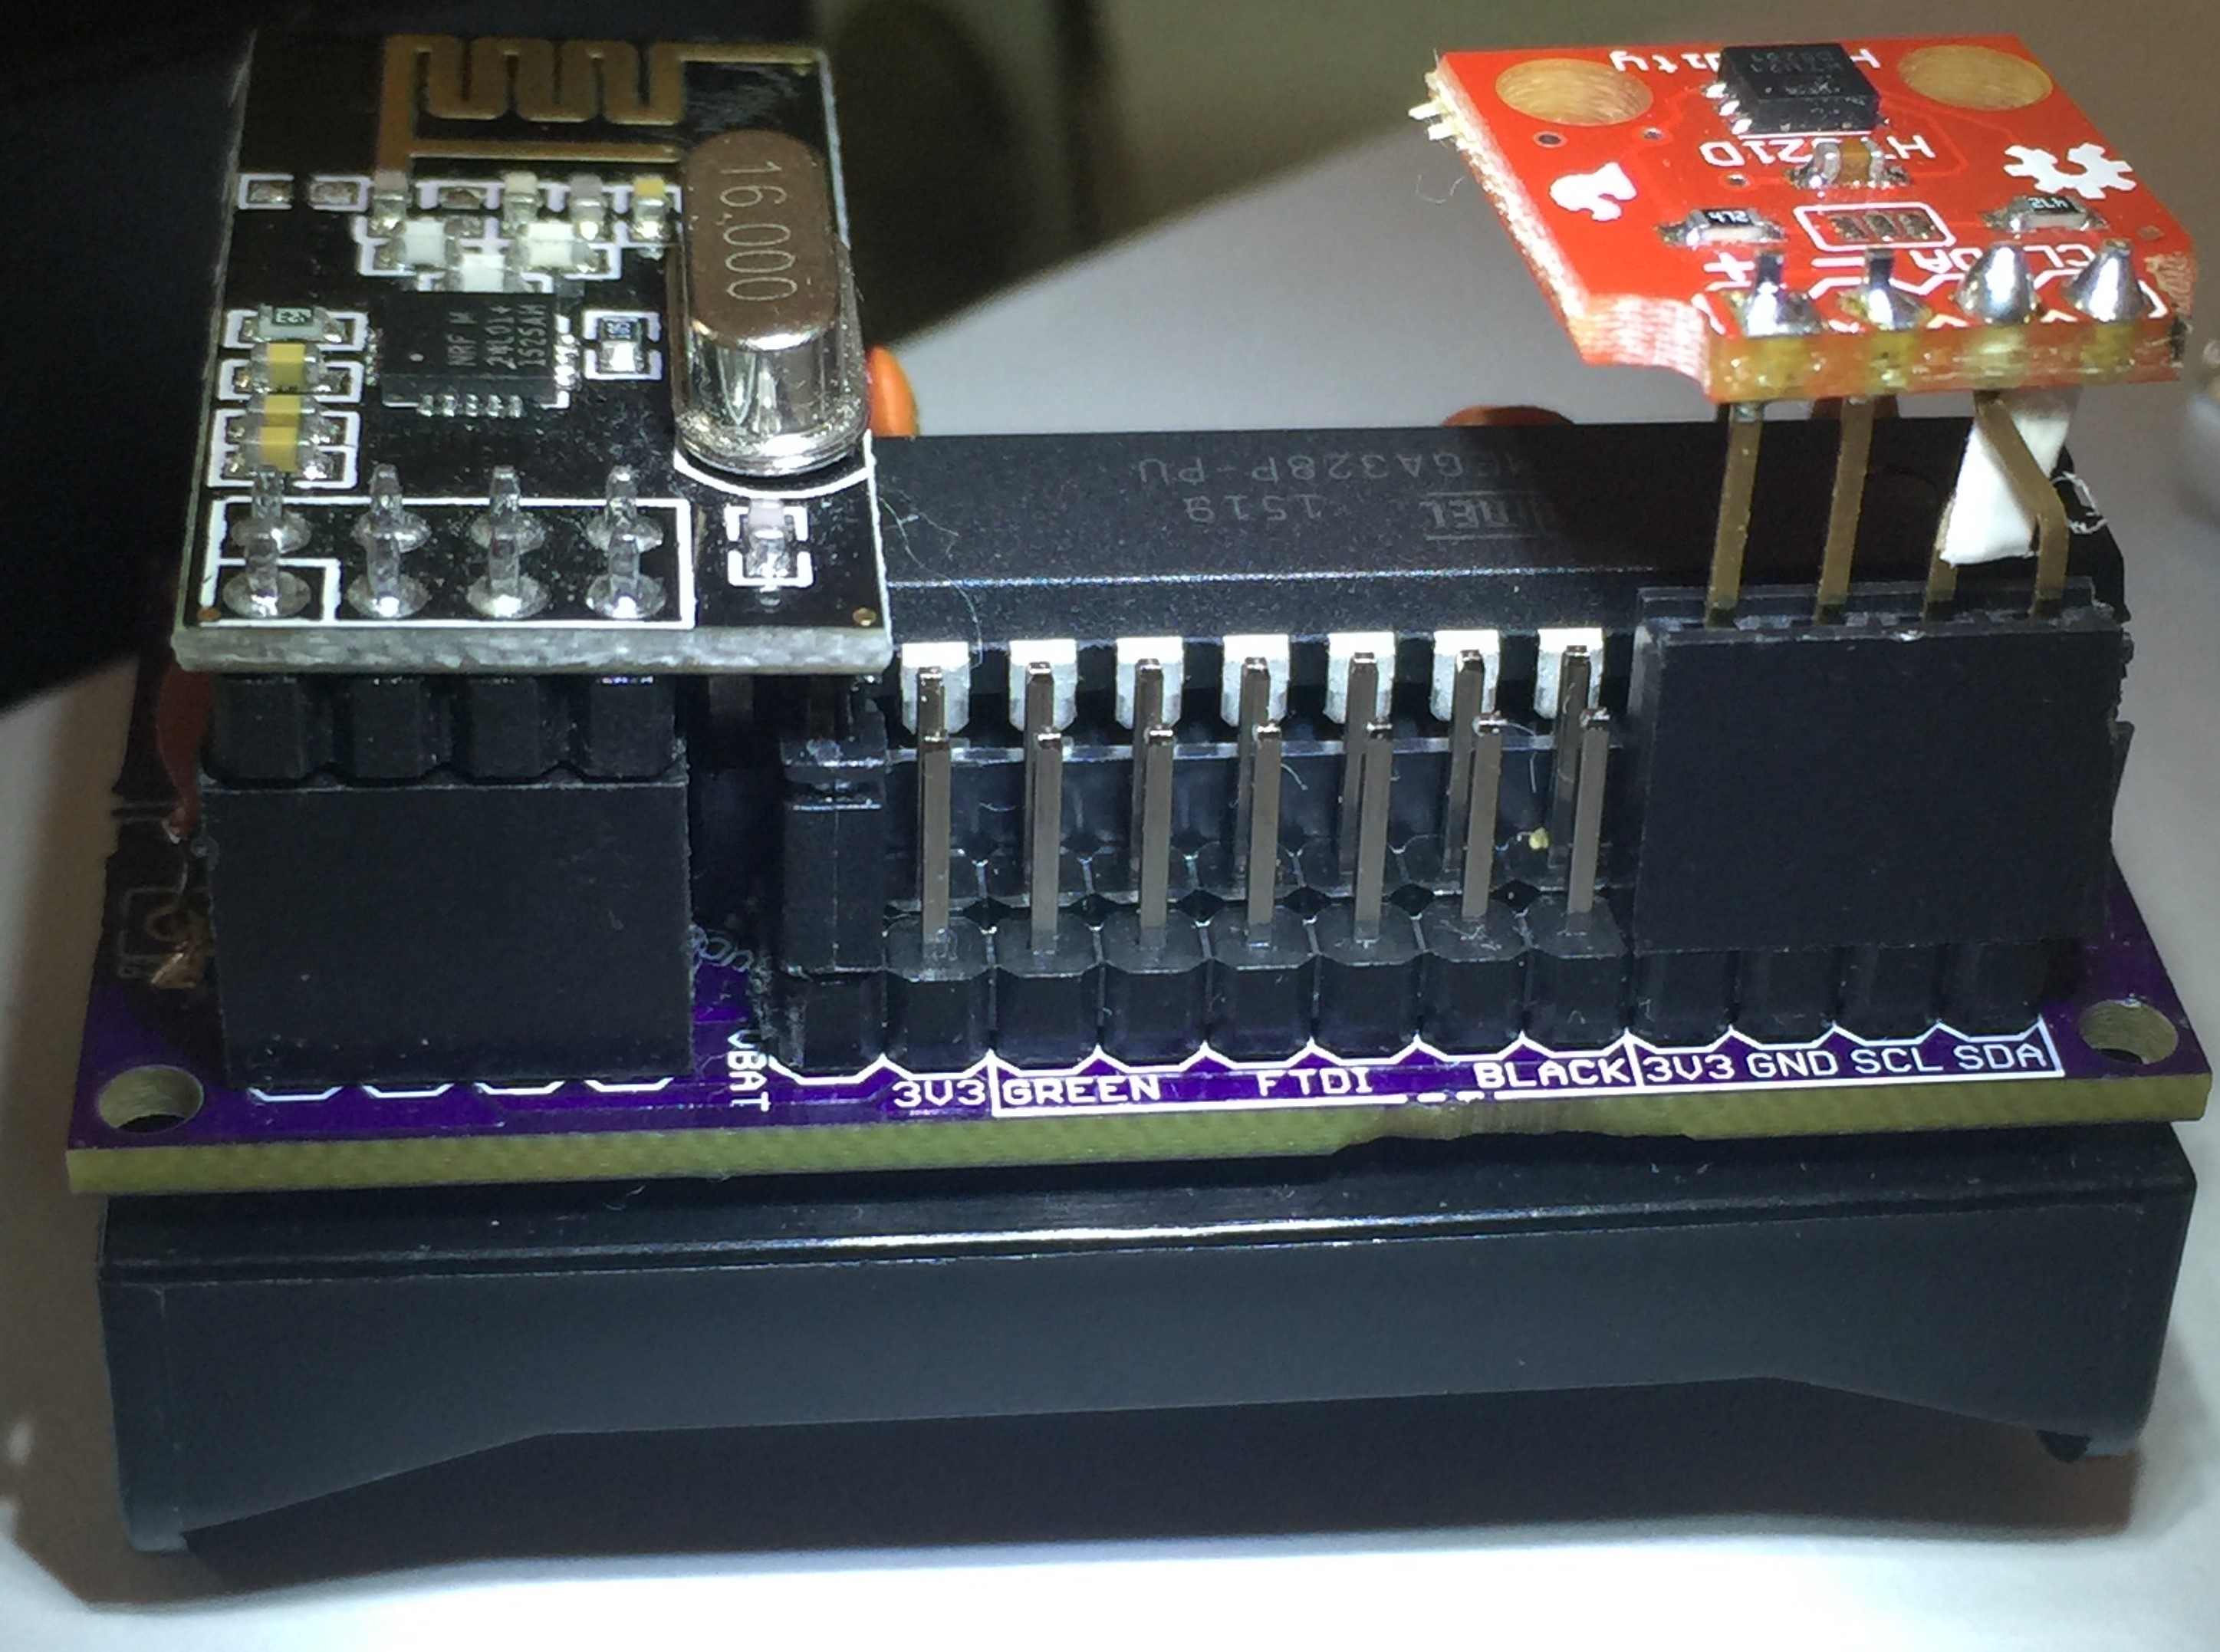
    0_1456851220108_2016-02-29 13.20.24.jpg

    0_1456851230641_2016-02-29 13.22.06.jpg

    This is my answer to the problem, but I think we can have a neater solution by having jumpers deciding on SDA/SDL pin out ?


  • Hardware Contributor

    @alexsh1 There is indeed a better solution, the next version of this board will allow swapping the I2C data and clock pins 🙂


  • @GertSanders
    Other than that I have not been using the JST connector - this may save some space unless you want to leave it as a power backup. I never used the second row pins (behind the FTDI connection) and some of them are not accessible if using a sensor connected via I2C.


  • This post is deleted!


  • @GertSanders
    I have been running these boards for some time now and overall very easy and compact.
    And battery life on 2 AA batteries is years.
    But i still have problems with deadspots in the house etc.
    So i thought i would try changing the radio's to rfm69w and make another serial gateway with an rfm69hw.
    I have received some of the hallard nrf to rfm adapter boards which i believe can be plugged straight in
    What i would like to know is,Would it be ok to use one of these boards as a serial gateway with an ftdi adapter?
    I am using the board barebones with no external crystal etc at 8mhz.(would this be a problem for a gateway?).

    This would save on a lot of wiring (Level shifters etc).


  • @rmtucker I'm using rfm69w with @GertSanders board (I think it is v1-1) via the same adapter you ordered. You need to solder IRQ pad in order for the board to work with rfm69. I tried to compile both a gateway and a sensor code and it worked. No need to have a crystal if you have the right bootloader on atmega328p. With or without crystal does not matter for radio. Radio has got its own crystal


  • @alexsh1 said:

    @rmtucker I'm using rfm69w with @GertSanders board (I think it is v1-1) via the same adapter you ordered. You need to solder IRQ pad in order for the board to work with rfm69. I tried to compile both a gateway and a sensor code and it worked. No need to have a crystal if you have the right bootloader on atmega328p. With or without crystal does not matter for radio. Radio has got its own crystal

    Wonderful just what I wanted too hear.
    But could you elaborate on the irq soldering?


  • @rmtucker just check out how to connect rfm69 to atmega328. @GertSanders luckily designed the board to be universal- there is a solder pad to connect D2 to IRQ, which you need to solder to use rfm69


  • Hardware Contributor

    @alexsh1
    Indeed, there is a solderpad near to the D2 pin which needs to be closed (connected) to allow the IRQ signal to go to D2, so one can use the radio


Log in to reply
 

Suggested Topics

  • 8
  • 5
  • 1
  • 90
  • 1
  • 7

31
Online

11.4k
Users

11.1k
Topics

112.7k
Posts