
Skip to content
  • MySensors
  • OpenHardware.io
  • Categories
  • Recent
  • Tags
  • Popular
Skins
  • Light
  • Brite
  • Cerulean
  • Cosmo
  • Flatly
  • Journal
  • Litera
  • Lumen
  • Lux
  • Materia
  • Minty
  • Morph
  • Pulse
  • Sandstone
  • Simplex
  • Sketchy
  • Spacelab
  • United
  • Yeti
  • Zephyr
  • Dark
  • Cyborg
  • Darkly
  • Quartz
  • Slate
  • Solar
  • Superhero
  • Vapor

  • Default (No Skin)
  • No Skin
Collapse
Brand Logo
  1. Home
  2. OpenHardware.io
  3. 💬 Instrumentation Amplifier

💬 Instrumentation Amplifier

Scheduled Pinned Locked Moved OpenHardware.io
2 Posts 2 Posters 767 Views 1 Watching
  • Oldest to Newest
  • Newest to Oldest
  • Most Votes
Reply
  • Reply as topic
Log in to reply
This topic has been deleted. Only users with topic management privileges can see it.
  • O Offline
    O Offline
    openhardware.io
    wrote on last edited by
    #1

    https://www.openhardware.io/view/660/Instrumentation-Amplifier

    1 Reply Last reply
    0
    • tonymac32T Offline
      tonymac32T Offline
      tonymac32
      wrote on last edited by
      #2

      Hello everyone,

      Had a moment to put in a post, to let you know I could answer questions. I'll probably put a few more designs up here if I get any interest. The Github for the design will always be the most recent, but I will release revisions here if/when they need to happen.

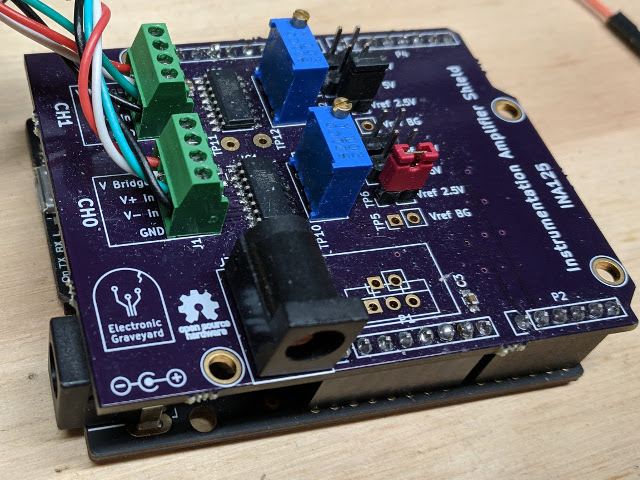
      This board came about because I had need of a fast sampling strain gauge load cell circuit for a project. I designed this to be a prototype board to work between different MCU boards and with varying load cells.

      This circuit has been tested using 3 different Arduino form factor boards, the Uno, the Sparkfun ATSAMD21G breakout, and the Adafruit Metro M4 Express.
      0_1547329403428_IMG_20190112_161433.jpg

      I don't have the regulator populated in the image, I was using a wire jumper until deciding on which board this particular one would permanently reside, the Sparkfun board, for example, require a 5V v-in, whereas the Adafruit and Arduino can handle 12V.

      The 2.54mm pitch terminal blocks are spaced back from the edge of the board in case a smaller board is desired (to match the Sparkfun or Coridium board profiles), and to allow the use of a 90 degree pin header instead of the screw terminals without going off the end of the board.


      1 Reply Last reply
      1

      Hello! It looks like you're interested in this conversation, but you don't have an account yet.

      Getting fed up of having to scroll through the same posts each visit? When you register for an account, you'll always come back to exactly where you were before, and choose to be notified of new replies (either via email, or push notification). You'll also be able to save bookmarks and upvote posts to show your appreciation to other community members.

      With your input, this post could be even better 💗

      Register Login
      Reply
      • Reply as topic
      Log in to reply
      • Oldest to Newest
      • Newest to Oldest
      • Most Votes


      12

      Online

      12.1k

      Users

      11.2k

      Topics

      113.4k

      Posts


      Copyright 2025 TBD   |   Forum Guidelines   |   Privacy Policy   |   Terms of Service
      • Login

      • Don't have an account? Register

      • Login or register to search.
      • First post
        Last post
      0
      • MySensors
      • OpenHardware.io
      • Categories
      • Recent
      • Tags
      • Popular