Rain Guage
-
@BulldogLowell
Thanks for the comments and sorry for the delayed response. It was a busy weekend and I didn't get much time in front of the computer.I had a whack of combining your desire to use floats, and my desire not to use floats!
Haha! I only used floats because I don't know any better. I'm curious, why the dislike of floats?
Once you get it done, let's take @hek 's idea and put it into github.
Is this something you would like me to do since you made it way better :) I'm happy to do it but I don't want to overstep. I consider this your handy work that I'm just happy to use.
Take a look at this and let me know if you like it, note it is untested and I still have to test the circular buffer storing ints instead of bytes.
Great! I will take a look some time this week. I mounted my gauge on the house today because we were supposed to get some rain and I wanted to see how it worked in real life. Unfortunately we didn't get any... Hopefully we will get some in the next couple of days before I pull it off to do some more testing.
we also need to create image files for the Sensor, but for now, if you want to do the tutorial, I say go for it!
I was thinking of going through how I made my gauge by using an existing rain gauge. I'd go over how to do the calculations for the tipping bucket calibration, uploading the files to Vera and how I added the MySensors stuff to the existing gauge. I will definitely mention the 3d printing option as well
Thanks for your help!.
My "How To" home automation video channel: https://www.youtube.com/channel/UCq_Evyh5PQALx4m4CQuxqkA
-
@BulldogLowell
Thanks for the comments and sorry for the delayed response. It was a busy weekend and I didn't get much time in front of the computer.I had a whack of combining your desire to use floats, and my desire not to use floats!
Haha! I only used floats because I don't know any better. I'm curious, why the dislike of floats?
Once you get it done, let's take @hek 's idea and put it into github.
Is this something you would like me to do since you made it way better :) I'm happy to do it but I don't want to overstep. I consider this your handy work that I'm just happy to use.
Take a look at this and let me know if you like it, note it is untested and I still have to test the circular buffer storing ints instead of bytes.
Great! I will take a look some time this week. I mounted my gauge on the house today because we were supposed to get some rain and I wanted to see how it worked in real life. Unfortunately we didn't get any... Hopefully we will get some in the next couple of days before I pull it off to do some more testing.
we also need to create image files for the Sensor, but for now, if you want to do the tutorial, I say go for it!
I was thinking of going through how I made my gauge by using an existing rain gauge. I'd go over how to do the calculations for the tipping bucket calibration, uploading the files to Vera and how I added the MySensors stuff to the existing gauge. I will definitely mention the 3d printing option as well
Thanks for your help!.
@petewill said:
why the dislike of floats?
their four-byte size on arduino make for a huge eeprom storage buffer that we really don't need, we will never have negative rain and we'd never be interested in precision below 0.01 inches or milimeters.
@petewill said:
I mounted my gauge on the house today
terrific, glad to see it make its way into the real world!
-
@petewill said:
why the dislike of floats?
their four-byte size on arduino make for a huge eeprom storage buffer that we really don't need, we will never have negative rain and we'd never be interested in precision below 0.01 inches or milimeters.
@petewill said:
I mounted my gauge on the house today
terrific, glad to see it make its way into the real world!
@BulldogLowell said:
their four-byte size on arduino make for a huge eeprom storage buffer that we really don't need
Good to know! I still have a lot to learn about all this stuff. It's definitely fun.
terrific, glad to see it make its way into the real world!
Yes, me too! I'm happy to report it's working. It rained 6.4mm last night. SO COOL!
My "How To" home automation video channel: https://www.youtube.com/channel/UCq_Evyh5PQALx4m4CQuxqkA
-
@BulldogLowell said:
their four-byte size on arduino make for a huge eeprom storage buffer that we really don't need
Good to know! I still have a lot to learn about all this stuff. It's definitely fun.
terrific, glad to see it make its way into the real world!
Yes, me too! I'm happy to report it's working. It rained 6.4mm last night. SO COOL!
-
how about adding windspeed to the device?
-
how about adding windspeed to the device?
-
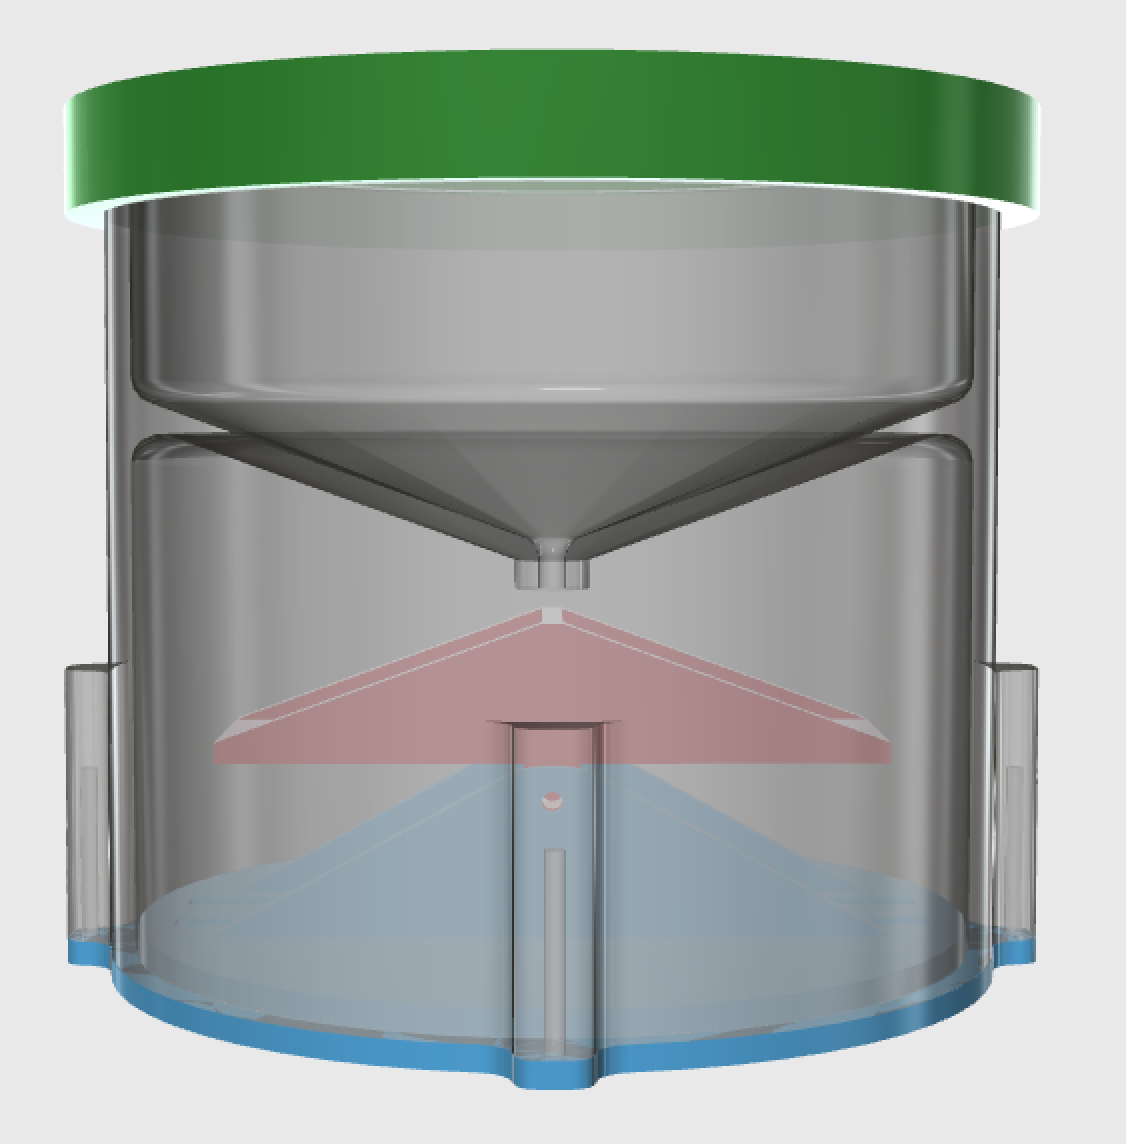
-
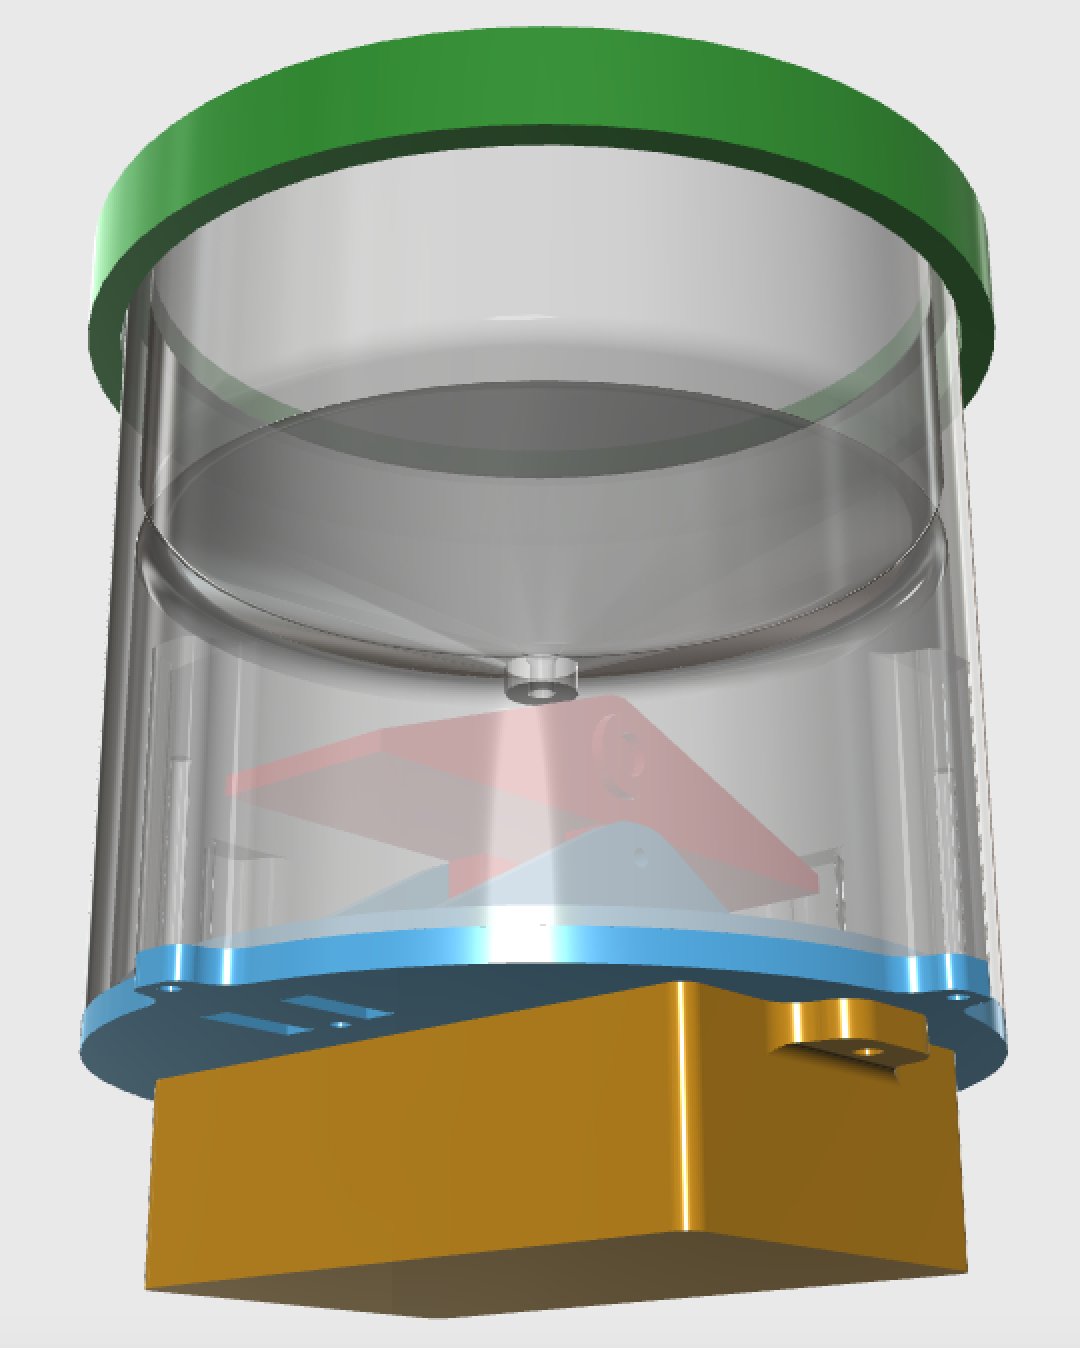
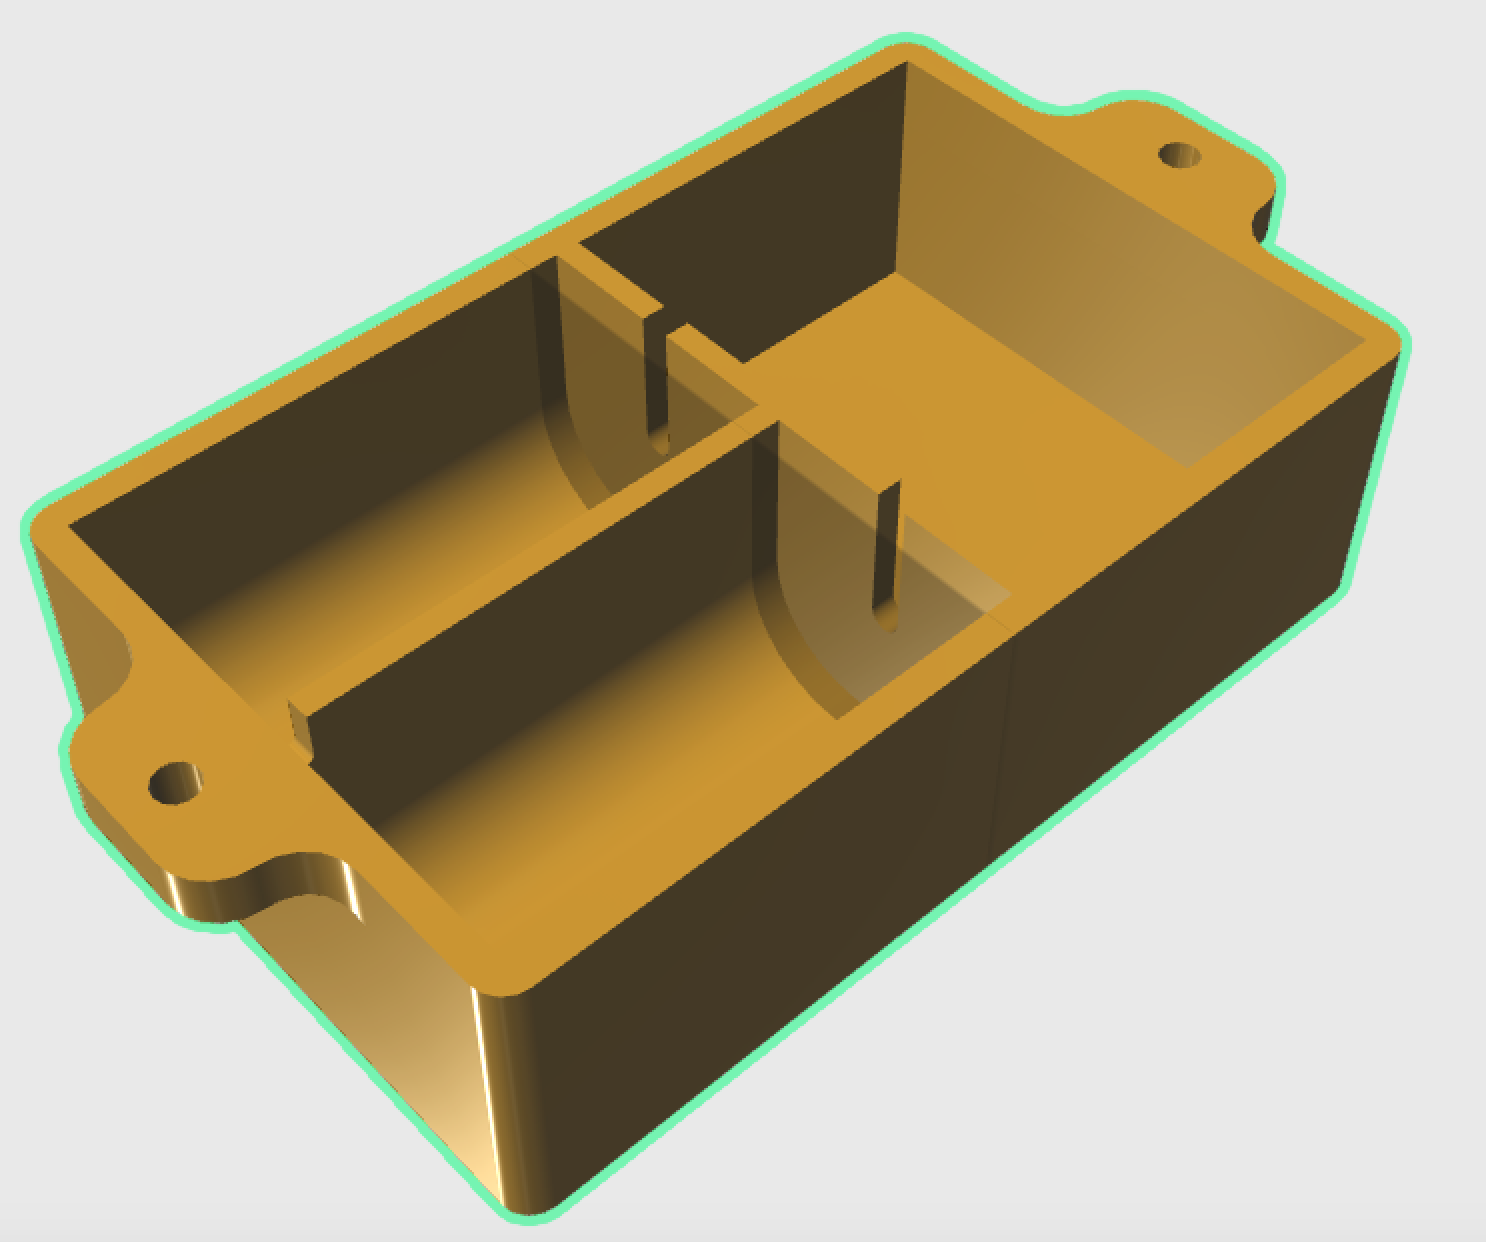
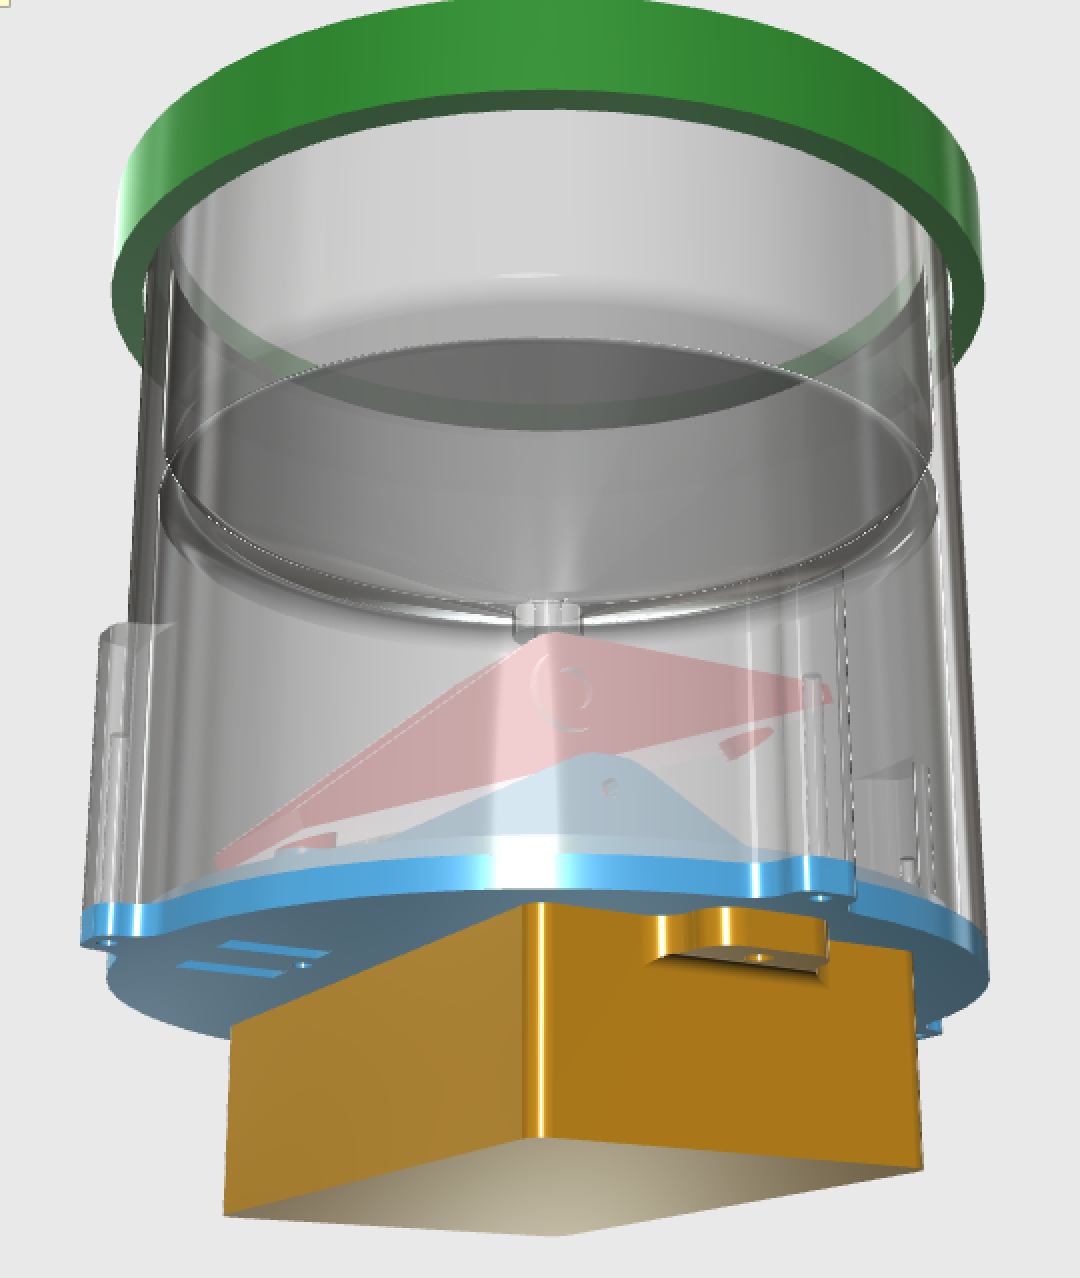
electronics box:
-
@BulldogLowell this looks great once you complete it I will print it. Only problem our raining session is over till Dec. But I can start the build so long :).
-
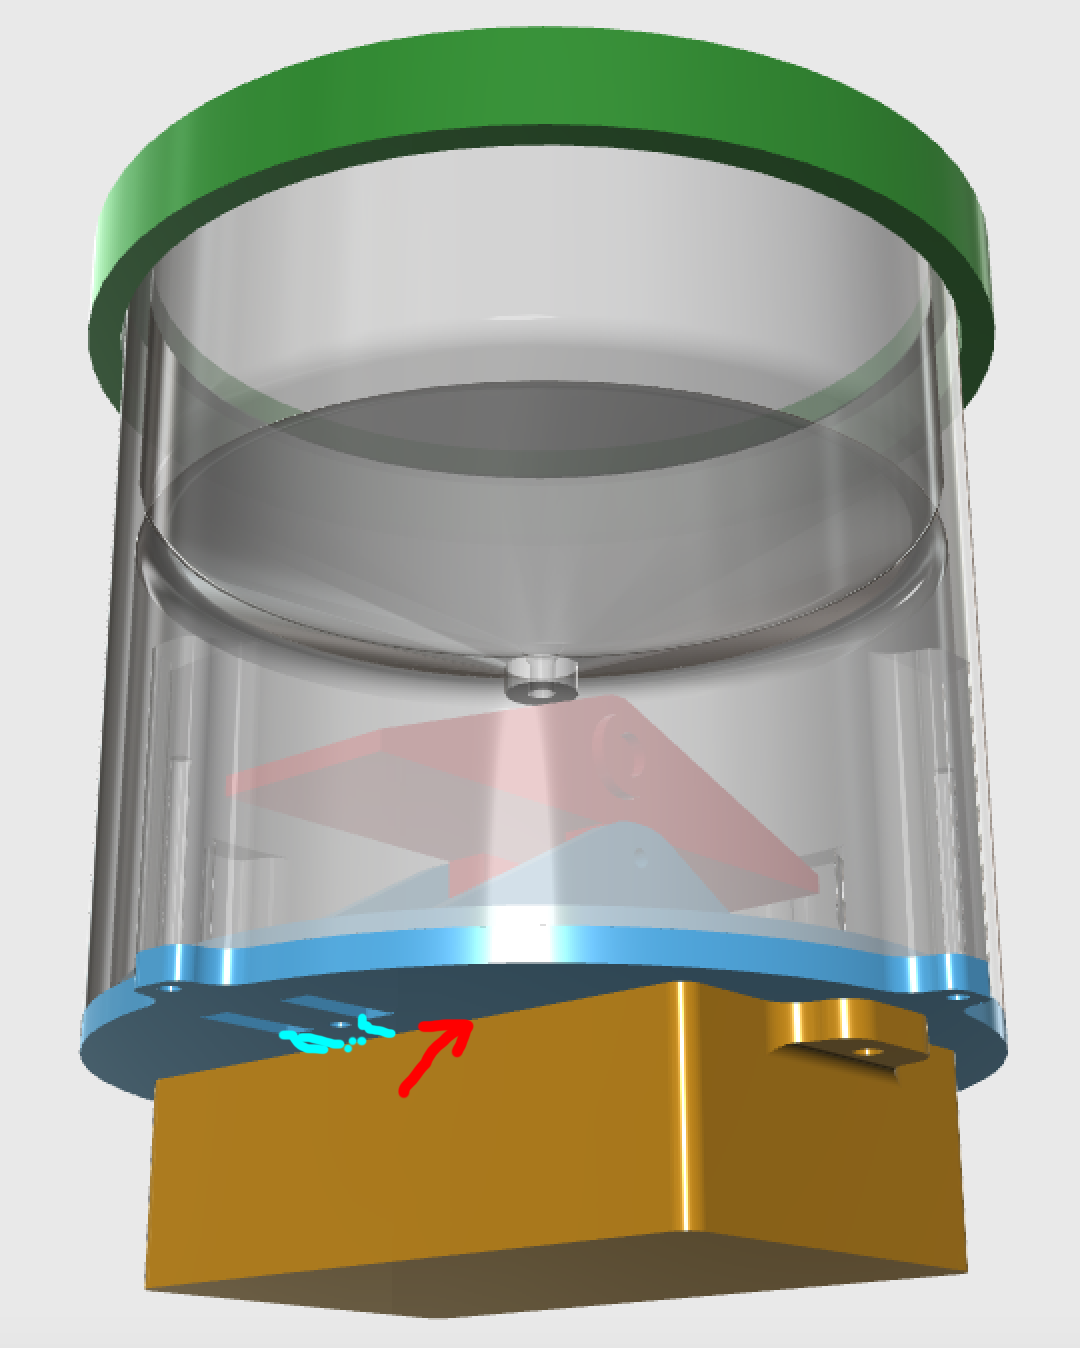
Nice. But I'm a bit worried about water finding its way into the electronics. Would it be possible to make a cavity for the electronics box in the bottom plate?
@hek
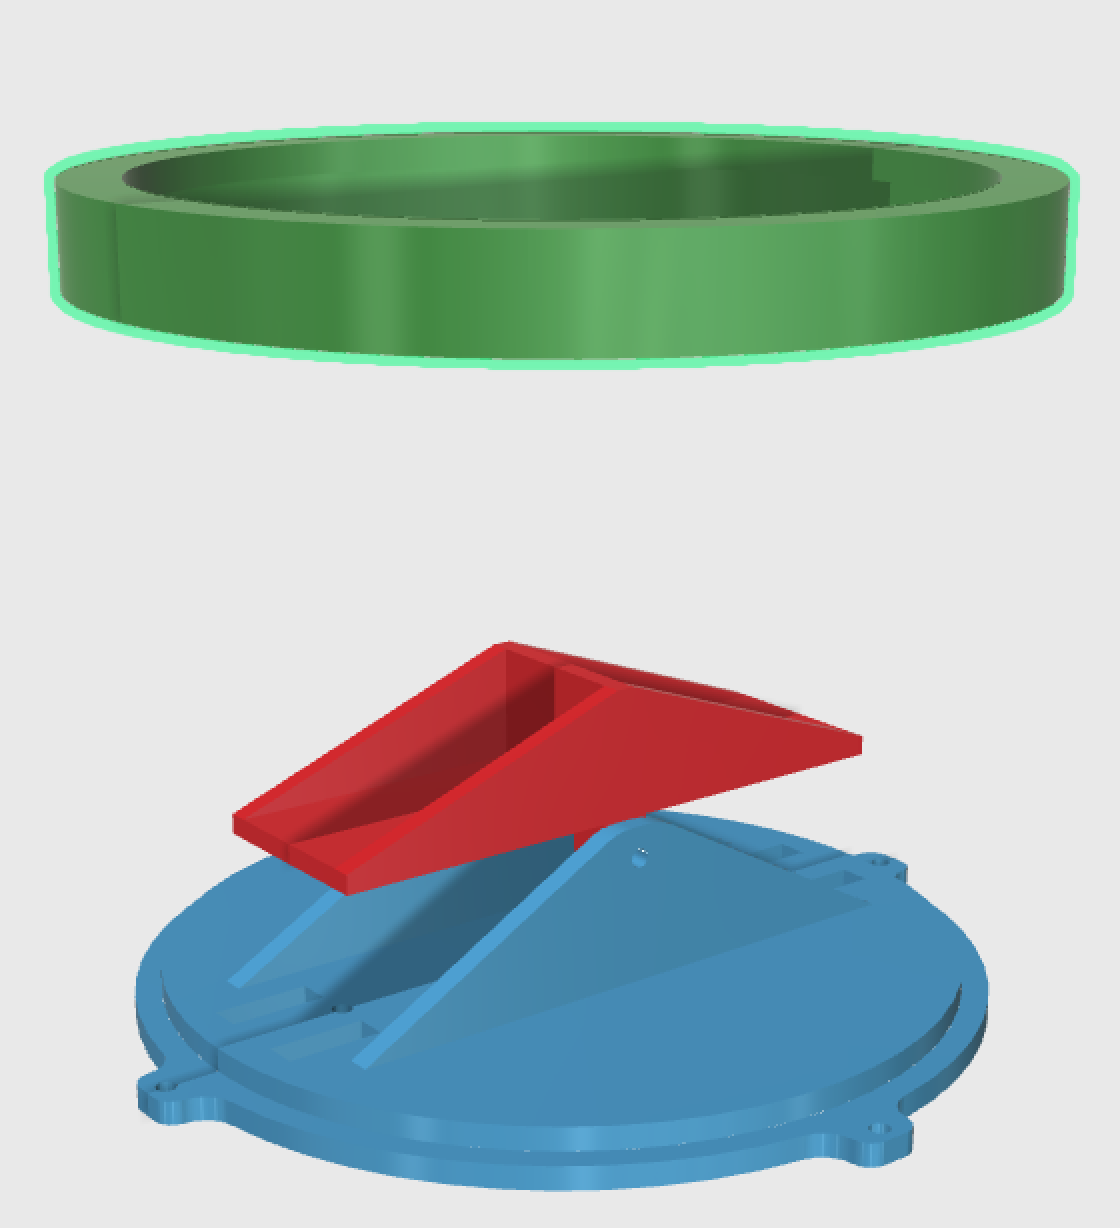
recessing the electronics into the bottom would be tough in this design. I was taking advantage on the two parts to use the smooth plate of the printer, and then make a gasket or even use silicone. lemme think about it. I could add a couple of deflectors on the bottom plate to glue on around where the weep holes are...PS enough room for 2 C sized cells
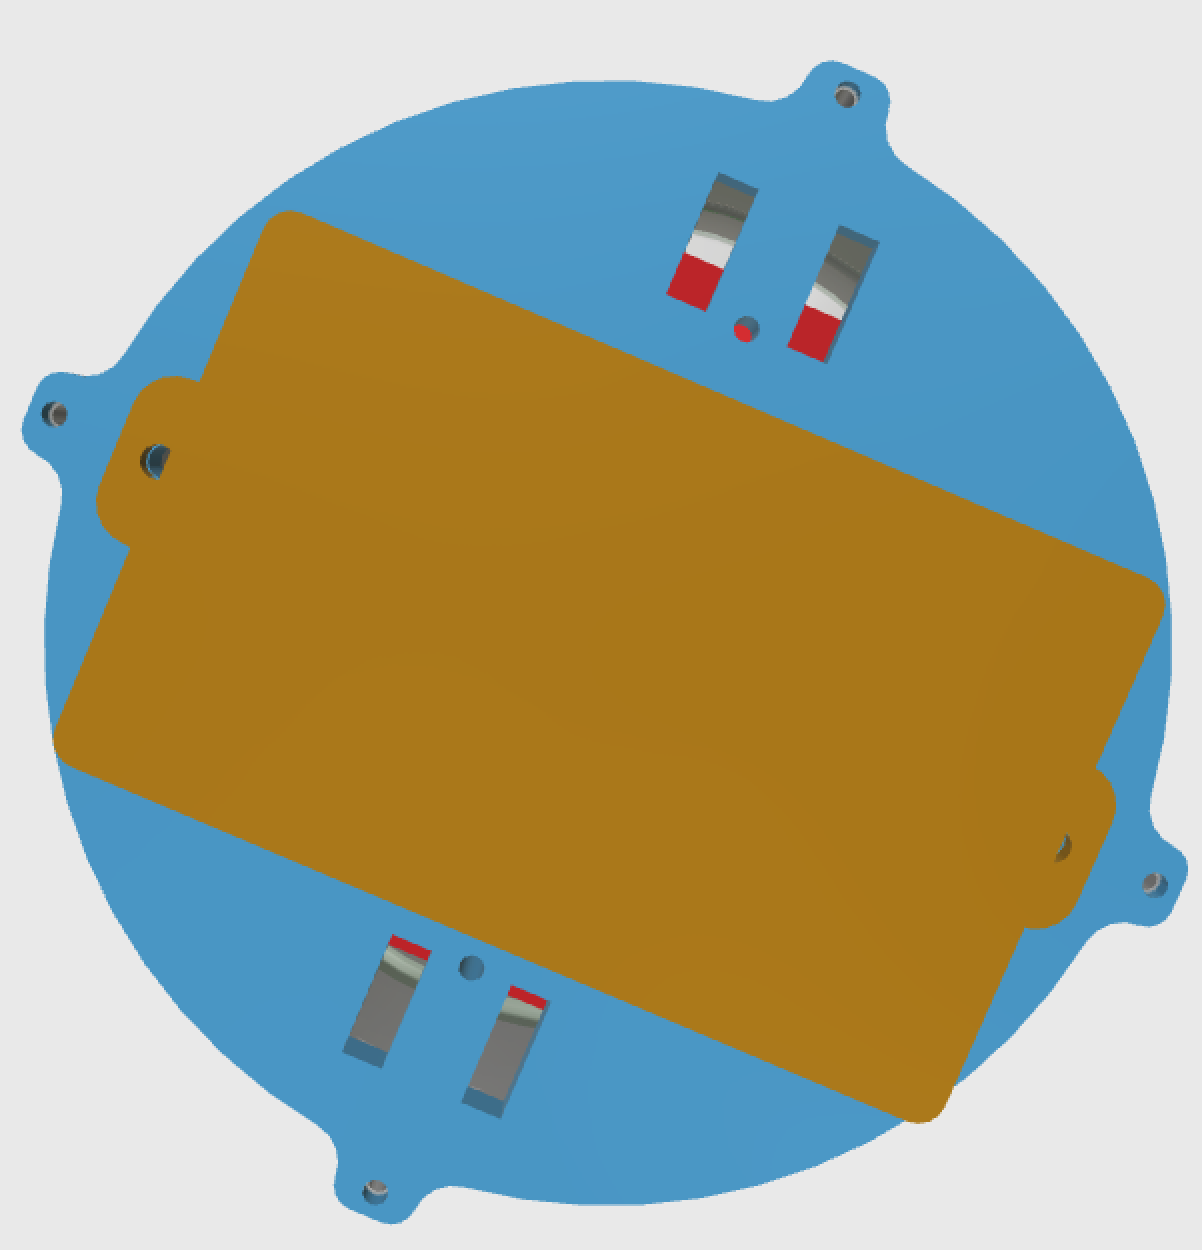
bottom view:
-
@BulldogLowell Awesome!
I kind of wish I didn't have mine built already :)
I may have missed it but did you have any mounting holes (for the side of a building or pole) What is your vision for that?
It would also be cool to see some place to add a DHT22 in there. On mine I added one of those as well as a BH1750 for light. I'm not sure how long that will hold up though.
My "How To" home automation video channel: https://www.youtube.com/channel/UCq_Evyh5PQALx4m4CQuxqkA
-
@BulldogLowell Awesome!
I kind of wish I didn't have mine built already :)
I may have missed it but did you have any mounting holes (for the side of a building or pole) What is your vision for that?
It would also be cool to see some place to add a DHT22 in there. On mine I added one of those as well as a BH1750 for light. I'm not sure how long that will hold up though.
@petewill said:
It would also be cool to see some place to add a DHT22 in there. On mine I added one of those as well as a BH1750 for light. I'm not sure how long that will hold up though.
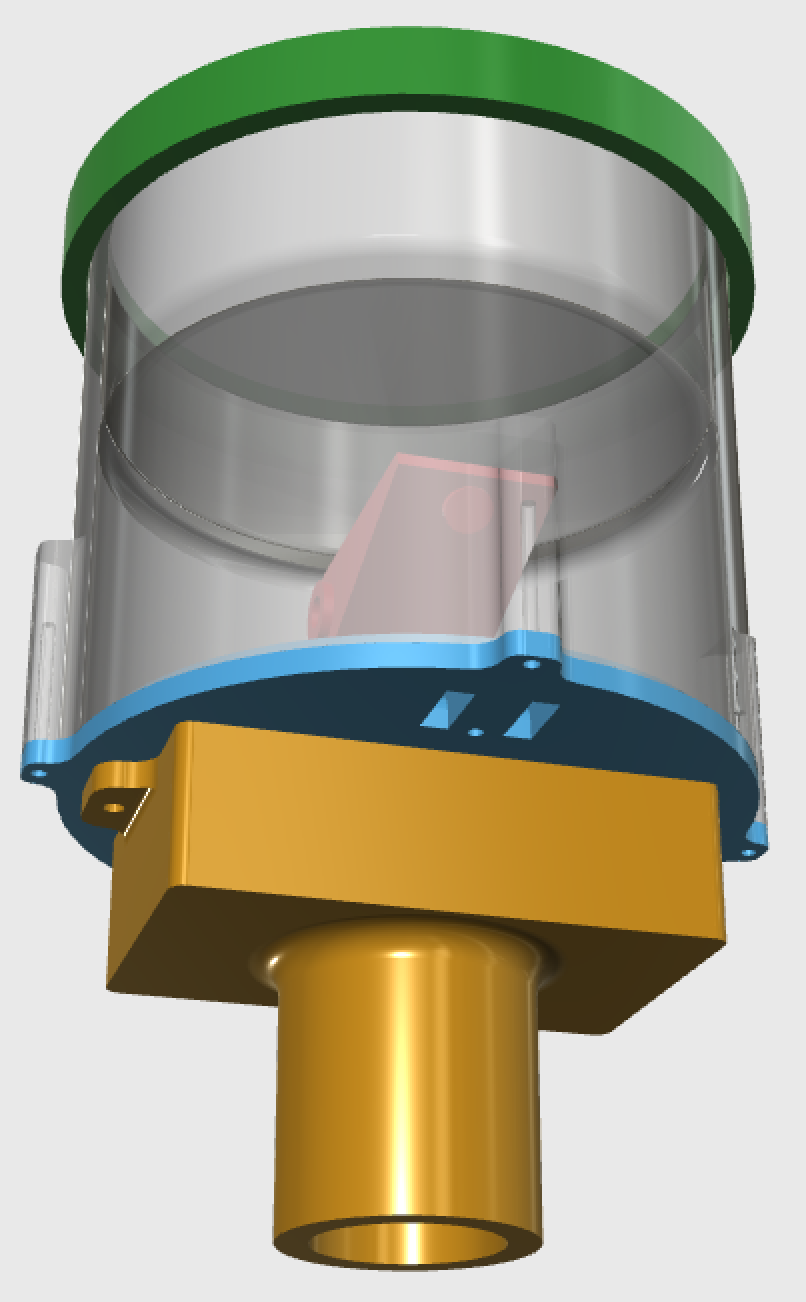
I'll try to fit that in, if I can, but I'm really focusing on sealing up the electronics. A skirt around the electronics housing may be enough...
I was thinking of a female 'flange-like' option for the unit to sit at the top of some galvanized pipe. It could be mounted that way on the side of a house, a fence or just a pole (back of your basketball backboard!). So, the yellow-brown part will be of two options to print.
-
@petewill said:
It would also be cool to see some place to add a DHT22 in there. On mine I added one of those as well as a BH1750 for light. I'm not sure how long that will hold up though.
I'll try to fit that in, if I can, but I'm really focusing on sealing up the electronics. A skirt around the electronics housing may be enough...
I was thinking of a female 'flange-like' option for the unit to sit at the top of some galvanized pipe. It could be mounted that way on the side of a house, a fence or just a pole (back of your basketball backboard!). So, the yellow-brown part will be of two options to print.
-
@BulldogLowell Awesome!
I kind of wish I didn't have mine built already :)
I may have missed it but did you have any mounting holes (for the side of a building or pole) What is your vision for that?
It would also be cool to see some place to add a DHT22 in there. On mine I added one of those as well as a BH1750 for light. I'm not sure how long that will hold up though.
-
If you add a little edge around the holes, the water cannt flow into the electronic box.
-
As it happens, I am sort of turning the code on its head for this update. Do you want to use accumulated rain over X days as the trigger?
I was thinking about storing the time on EEPROM and retrieving the stored rain values from VERA for each of the last 5 days after a power-up/restart. This saves from having to create too much EEPROM management, plus we can observe how much time has passed in the event of a power-off. That is, if the unit starts up, we test EEPROM to see what was the last day of rain recorded. If it hasn't been more than one, then we retrieve the values from VERA that were previously sent up. Sound OK to you?
I would save an epoch timestamp once each day at midnight when we total today's rain and cascade the values back a day.
-
@BulldogLowell said:
Do you want to use accumulated rain over X days as the trigger?
As opposed to hours? I don't have too strong of an opinion either way. I think whatever is easier works. If they are both the same then maybe hours so we have a little more granular control?
I was thinking about storing the time on EEPROM and retrieving the stored rain values from VERA for each of the last 5 days after a power-up/restart.
I like that it will simplify the EEPROM more and potentially prolong the life of the device (since it's not using as much EEPROM). One thought though, if there is a communication error between Vera and the rain gauge when it is first started is there a way to prevent the rain gauge from subsequently overwriting the values in Vera? I don't know too much about the "ack" portion of the communication but maybe that would make it so it's not an issue?
I'm excited to see the new code. Keep up the good work!
My "How To" home automation video channel: https://www.youtube.com/channel/UCq_Evyh5PQALx4m4CQuxqkA