PC Power Switch
-
Hi Guys
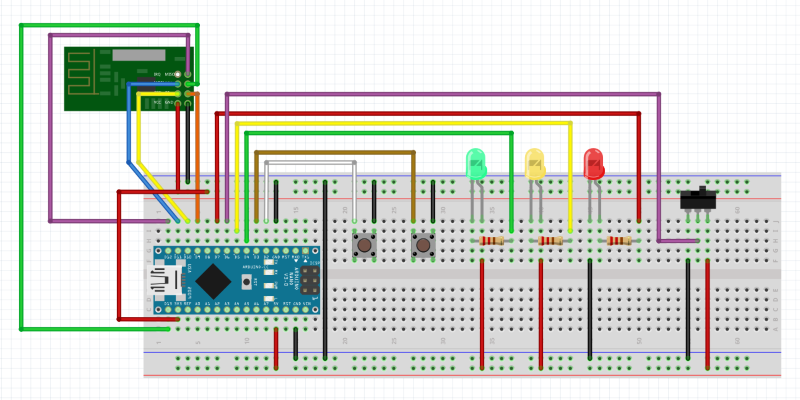
Looking for more stuff to control and my eyes fell upon my PC. I was away for a week a while back and it could have been useful to be able to turn my PC on and off remotely. So here it is. Just a test circuit at the moment, but it should just be a case of replacing the power and reset led's with inputs from the case buttons to get it working.
Luckily, and i'm not sure this is universal but my mobo's USB sockets are permanently live with the pc off so power is not an issue.
It currently shows up as 3 switches in Vera UI7,
Power ON/OFF
Reset
Power Force OFFThe circuit has a Power switch and Reset switch for local control, What I do need is some nice code to work out if I am long pressing the Power switch to force a close.
The toggle switch is to simulate 5V coming from the PC when powered up, this is the On detection.
The 5V feed to the led's would be replaced by the high side of the switches in the PC.
Here is the code.
// Example sketch för a "light switch" where you can control light or something
// else from both vera and a local physical button (connected between digital
// pin 3 and GND).
// This node also works as a repeader for other nodes

#include <MySensor.h>
#include <SPI.h>
#include <Bounce2.h>

#define BUTTON_PWR_PIN  2  // Arduino Digital I/O pin number for button
#define BUTTON_RST_PIN  3  // Arduino Digital I/O pin number for button
#define SWITCH_PRW_PIN  4  // Arduino Digital I/O pin number for SWITCH
#define SWITCH_RST_PIN  5  // Arduino Digital I/O pin number for SWITCH
#define PC_ON_PIN 6        // Connected to PC 5v output Molex
#define PC_ON_LED 7        // PC On LED

#define NODE_ID AUTO
#define SKETCH_NAME "MySensor_PC_Switch"
#define SKETCH_VERSION "1.0"
#define NODE_REPEAT false

#define CHILD_ID_SWITCH_PWR 0
#define CHILD_ID_SWITCH_RST 1
#define CHILD_ID_SWITCH_OFF 2

#define SWITCH_ON 0
#define SWITCH_OFF 1

Bounce debouncerPWR = Bounce();
Bounce debouncerRST = Bounce();
int oldPWRValue=0;
int oldRSTValue=0;
int pcState=0;
int currentpcState=0;
unsigned long status_timer = millis();
unsigned long now_time = millis();
unsigned long update_time = 30000;
bool statePWR;
bool stateRST;
MySensor gw;
MyMessage msgPwr(CHILD_ID_SWITCH_PWR,V_LIGHT);
MyMessage msgRst(CHILD_ID_SWITCH_RST,V_LIGHT);
MyMessage msgOff(CHILD_ID_SWITCH_OFF,V_LIGHT);

void setup()
{
  gw.begin(incomingMessage, AUTO, true);

  // Send the sketch version information to the gateway and Controller
  gw.sendSketchInfo(SKETCH_NAME, SKETCH_VERSION);

 // Setup the buttons
  pinMode(BUTTON_PWR_PIN,INPUT);
  digitalWrite(BUTTON_PWR_PIN,HIGH);
  pinMode(BUTTON_RST_PIN,INPUT);
  digitalWrite(BUTTON_RST_PIN,HIGH);

  // After setting up the button, setup debouncer
  debouncerPWR.attach(BUTTON_PWR_PIN);
  debouncerPWR.interval(5);
  debouncerRST.attach(BUTTON_RST_PIN);
  debouncerRST.interval(5);

  // Register all sensors to gw (they will be created as child devices)
  gw.present(CHILD_ID_SWITCH_PWR, S_LIGHT);
  gw.present(CHILD_ID_SWITCH_RST, S_LIGHT);
  gw.present(CHILD_ID_SWITCH_OFF, S_LIGHT);

  // Make sure SWITCHs are off when starting up
  digitalWrite(SWITCH_PRW_PIN, SWITCH_OFF);
  digitalWrite(SWITCH_RST_PIN, SWITCH_OFF);
  // Then set SWITCH pins in output mode
  pinMode(SWITCH_PRW_PIN, OUTPUT);
  pinMode(SWITCH_RST_PIN, OUTPUT);
  pinMode(PC_ON_LED, OUTPUT);

  pinMode(PC_ON_PIN, INPUT);

  // Set SWITCH to last known state (using eeprom storage)
  //state = gw.loadState(CHILD_ID);
  //digitalWrite(SWITCH_PIN, state?SWITCH_ON:SWITCH_OFF);
}


/*
*  Example on how to asynchronously check for new messages from gw
*/
void loop() {
  gw.process();
  debouncerPWR.update();
  debouncerRST.update();
  // Get the update value
  int valuePWR = debouncerPWR.read();
  int valueRST = debouncerRST.read();

  if (valuePWR != oldPWRValue && valuePWR==0) {
    pushButton(SWITCH_PRW_PIN, 200);
    sendPCState(1);
  }
  if (valueRST != oldRSTValue && valueRST==0) {
    pushButton(SWITCH_RST_PIN, 200);
    sendPCState(1);
  }
  oldPWRValue = valuePWR;
  oldRSTValue = valueRST;

  currentpcState = digitalRead(PC_ON_PIN);
  if(currentpcState != pcState) {
    if (currentpcState == HIGH) {
      pcState = 1;
      Serial.println("PC Turned on");
      digitalWrite(PC_ON_LED, HIGH);
    }
    else {
      pcState = 0;
      Serial.println("PC Turned off");
      digitalWrite(PC_ON_LED, LOW);
    }
    delay(50);
    sendPCState(1);
  }
  now_time = millis();
  if (now_time - status_timer > update_time) {
    sendPCState(1);
    status_timer = now_time;
  }
}

void incomingMessage(const MyMessage &message) {
  // We only expect one type of message from controller. But we better check anyway.
  if (message.isAck()) {
     Serial.println("This is an ack from gateway");
  }

  if (message.type == V_LIGHT) {
     // Change SWITCH state

     if (message.sensor == 0 && !message.isAck()) {
       Serial.println("Pushing Power Button");
       pushButton(SWITCH_PRW_PIN, 200);
     }
     if (message.sensor == 1 && message.getBool()) {
       Serial.println("Pushing Reset Button");
       pushButton(SWITCH_RST_PIN, 200);
     }
     if (message.sensor == 2 && !message.isAck()) {
       Serial.println("Pushing and Holding Power Button");
       pushButton(SWITCH_PRW_PIN, 6000);
     }

     // Write some debug info
     Serial.print("Incoming change for sensor:");
     Serial.print(message.sensor);
     Serial.print(", New status: ");
     Serial.println(message.getBool());
   }
}

void sendPCState(boolean ack){
  gw.send(msgPwr.set(pcState), ack); // Send new state and request ack back
  delay(100);
  gw.send(msgOff.set(pcState), ack); // Send new state and request ack back
  delay(100);
  gw.send(msgRst.set(stateRST), ack); // Send new state and request ack back
}

void pushButton(int button, int pushTime) {
  digitalWrite(button, SWITCH_ON);
  delay(pushTime);
  digitalWrite(button, SWITCH_OFF);
}
I am using bounce2 for the switches, if anyone has some nice code to detect long presses that would be great.
What I would like to do is have just a single device in Vera with all the switches on it, but going through the xml and json files makes my head explode.
This could be expanded to include temps and fan speeds and all sorts of malarkey.
Oh I just had a thought, this could be really handy for server farms :)
-
Here is a nice button libary
http://www.mathertel.de/Arduino/OneButtonLibrary.aspx -
Eeeeexcellent.. nice library, works great.
// Example sketch för a "light switch" where you can control light or something // else from both vera and a local physical button (connected between digital // pin 3 and GND). // This node also works as a repeader for other nodes #include <MySensor.h> #include <SPI.h> #include <OneButton.h> // Setup a new OneButton on pin A1. OneButton BUTTON_PWR_PIN(A1, true); // Setup a new OneButton on pin A2. OneButton BUTTON_RST_PIN(A2, true); //#define BUTTON_PWR_PIN 2 // Arduino Digital I/O pin number for button //#define BUTTON_RST_PIN 3 // Arduino Digital I/O pin number for button #define SWITCH_PRW_PIN 4 // Arduino Digital I/O pin number for SWITCH #define SWITCH_RST_PIN 5 // Arduino Digital I/O pin number for SWITCH #define PC_ON_PIN 6 // Connected to PC 5v output Molex #define PC_ON_LED 7 // PC On LED #define NODE_ID AUTO #define SKETCH_NAME "MySensor_PC_Switch" #define SKETCH_VERSION "1.0" #define NODE_REPEAT false #define CHILD_ID_SWITCH_PWR 0 #define CHILD_ID_SWITCH_RST 1 #define CHILD_ID_SWITCH_OFF 2 #define SWITCH_ON 0 #define SWITCH_OFF 1 int pcState=0; int currentpcState=0; unsigned long status_timer = millis(); unsigned long now_time = millis(); unsigned long update_time = 30000; bool statePWR; bool stateRST; MySensor gw; MyMessage msgPwr(CHILD_ID_SWITCH_PWR,V_LIGHT); MyMessage msgRst(CHILD_ID_SWITCH_RST,V_LIGHT); MyMessage msgOff(CHILD_ID_SWITCH_OFF,V_LIGHT); void setup() { gw.begin(incomingMessage, AUTO, true); // Send the sketch version information to the gateway and Controller gw.sendSketchInfo(SKETCH_NAME, SKETCH_VERSION); // link the button 1 functions. BUTTON_PWR_PIN.attachClick(click1); BUTTON_PWR_PIN.attachLongPressStop(longPressStop1); // link the button 2 functions. BUTTON_RST_PIN.attachClick(click2); // Register all sensors to gw (they will be created as child devices) gw.present(CHILD_ID_SWITCH_PWR, S_LIGHT); gw.present(CHILD_ID_SWITCH_RST, S_LIGHT); gw.present(CHILD_ID_SWITCH_OFF, S_LIGHT); // Make sure SWITCHs are off when starting up digitalWrite(SWITCH_PRW_PIN, SWITCH_OFF); digitalWrite(SWITCH_RST_PIN, SWITCH_OFF); // Then set SWITCH pins in output mode pinMode(SWITCH_PRW_PIN, OUTPUT); pinMode(SWITCH_RST_PIN, OUTPUT); pinMode(PC_ON_LED, OUTPUT); pinMode(PC_ON_PIN, INPUT); } void loop() { gw.process(); BUTTON_PWR_PIN.tick(); BUTTON_RST_PIN.tick(); currentpcState = digitalRead(PC_ON_PIN); if(currentpcState != pcState) { if (currentpcState == HIGH) { pcState = 1; Serial.println("PC Turned on"); digitalWrite(PC_ON_LED, HIGH); } else { pcState = 0; Serial.println("PC Turned off"); digitalWrite(PC_ON_LED, LOW); } delay(50); sendPCState(1); } now_time = millis(); if (now_time - status_timer > update_time) { sendPCState(1); status_timer = now_time; } } void incomingMessage(const MyMessage &message) { // We only expect one type of message from controller. But we better check anyway. if (message.isAck()) { Serial.println("This is an ack from gateway"); } if (message.type == V_LIGHT) { // Change SWITCH state if (message.sensor == 0 && !message.isAck()) { Serial.println("Pushing Power Button"); pushButton(SWITCH_PRW_PIN, 200); } if (message.sensor == 1 && message.getBool()) { Serial.println("Pushing Reset Button"); pushButton(SWITCH_RST_PIN, 200); } if (message.sensor == 2 && !message.isAck()) { Serial.println("Pushing and Holding Power Button"); pushButton(SWITCH_PRW_PIN, 6000); } // Write some debug info Serial.print("Incoming change for sensor:"); Serial.print(message.sensor); Serial.print(", New status: "); Serial.println(message.getBool()); } } void sendPCState(boolean ack){ gw.send(msgPwr.set(pcState), ack); // Send new state and request ack back delay(100); gw.send(msgOff.set(pcState), ack); // Send new state and request ack back delay(100); gw.send(msgRst.set(stateRST), ack); // Send new state and request ack back } void pushButton(int button, int pushTime) { digitalWrite(button, SWITCH_ON); delay(pushTime); digitalWrite(button, SWITCH_OFF); } // ----- button 1 callback functions // This function will be called when the button1 was pressed 1 time (and no 2. button press followed). void click1() { Serial.println("Button 1 click."); pushButton(SWITCH_PRW_PIN, 200); sendPCState(1); } // click1 // This function will be called once, when the button1 is released after beeing pressed for a long time. void longPressStop1() { Serial.println("Button 1 longPress stop"); pushButton(SWITCH_PRW_PIN, 6000); sendPCState(1); } // longPressStop1 // ... and the same for button 2: void click2() { Serial.println("Button 2 click."); pushButton(SWITCH_RST_PIN, 200); sendPCState(1); } // click2``` -
Not wanting to be dick but if i may suggest an alternative,
Try Wake on LAN, as long as you are connect via LAN you can just send a command remotely and it will turn on the PC.
Non the less great project bro.
-
Not wanting to be dick but if i may suggest an alternative,
Try Wake on LAN, as long as you are connect via LAN you can just send a command remotely and it will turn on the PC.
Non the less great project bro.
@Mohsin-Hassan you can only turn on computer like that, not turn it off or reset it which are really important operations if the computer is stuck....
-
No, it will turn off and reset too. The circuit will "press" all the buttons needed.
-
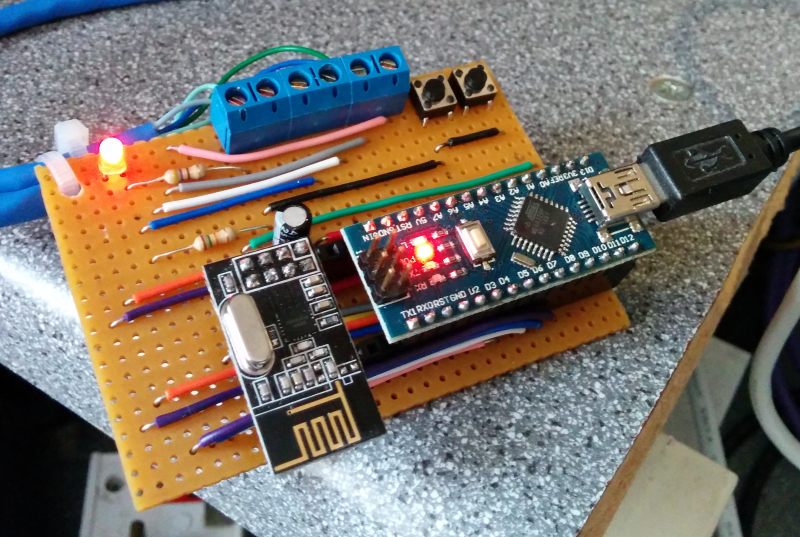
All connected up (temporary, you know, next 2 years) and tested. Except the force shut-down, don't want to put my drive trough that unless it is needed; but I'm running the fast lane Windows 10 so probably sometime this week.
Only changes to circuit I needed was to link the inputs directly to the switches cutting out the test Led's. power switch is 5V but reset was 3.3V but there is no arduino supplied voltage on the inputs so it seems happy enough.
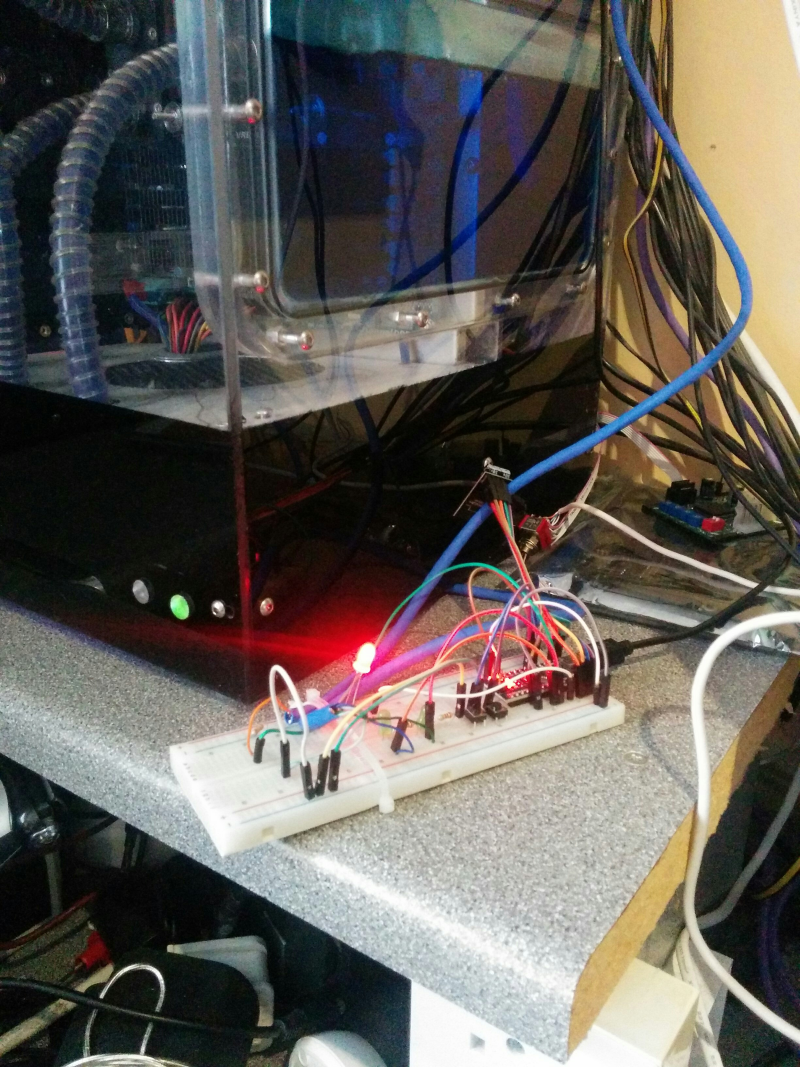
I would say sorry about the mess, BUT I'M NOT :)
-
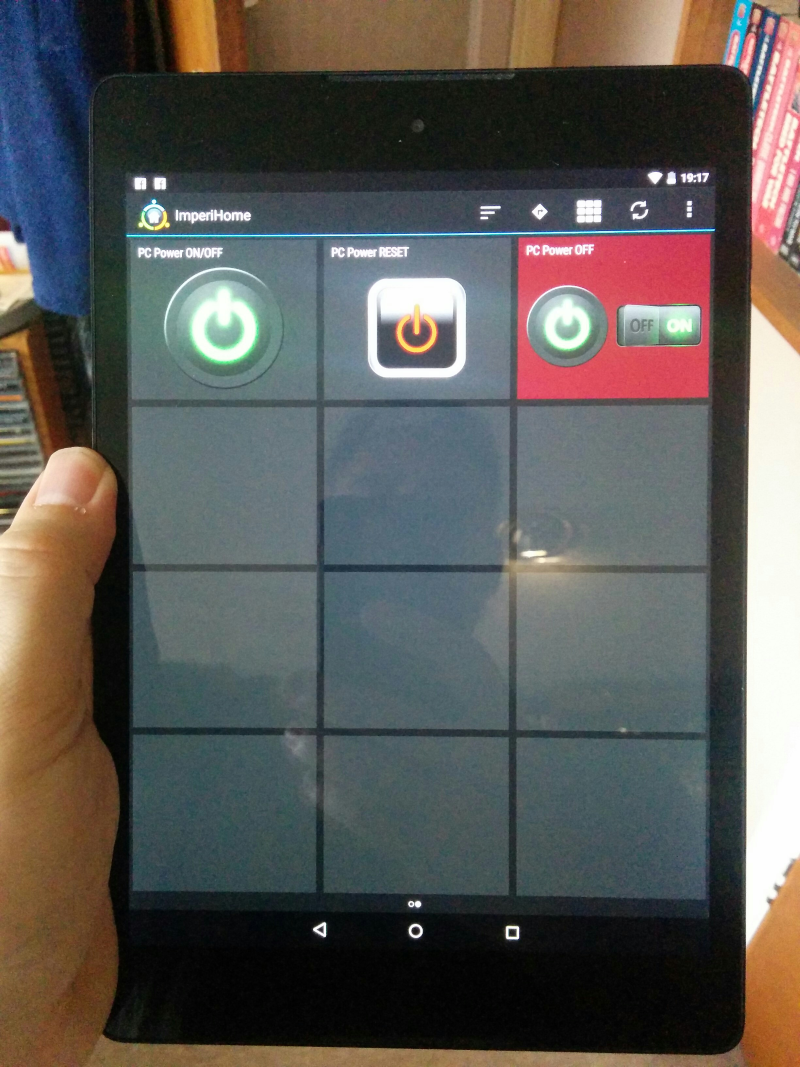
I have been using imperihome to control my vera, a much nicer interface. and this in my PC Screen. It allows protected operations so I get a confirmation request before pushing a button. And because of the 30 second pc status update from the 5v input, the switches show the state of the PC not the switches.
-
Well, I turned on my PC before I left work today, because I could :)
-
Well, I turned on my PC before I left work today, because I could :)
@stephenmhall said:
Well, I turned on my PC before I left work today, because I could :)
Awsome! I would do that too even though it takes 20 seconds for pc to boot :D
-
Now just add to it something that sense your car (garage door opener?) and turn on your pc! Cool project
-
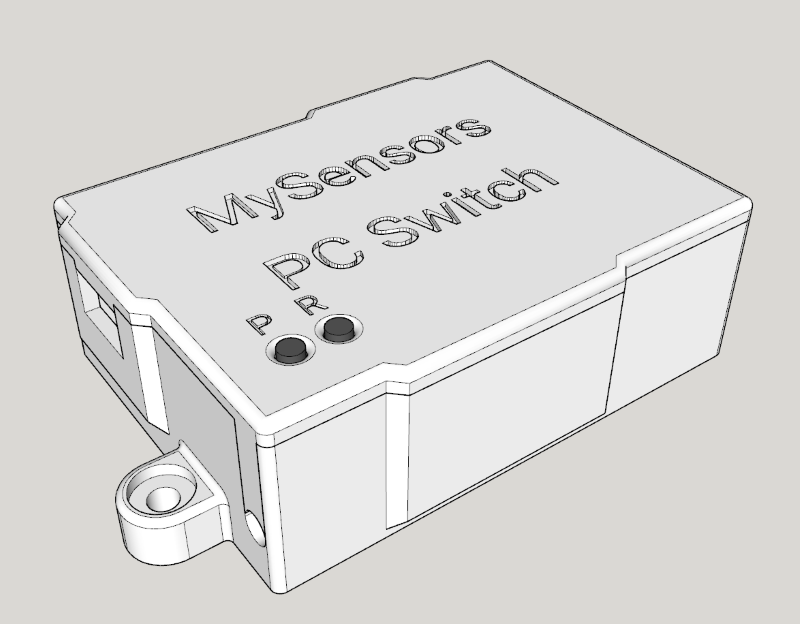
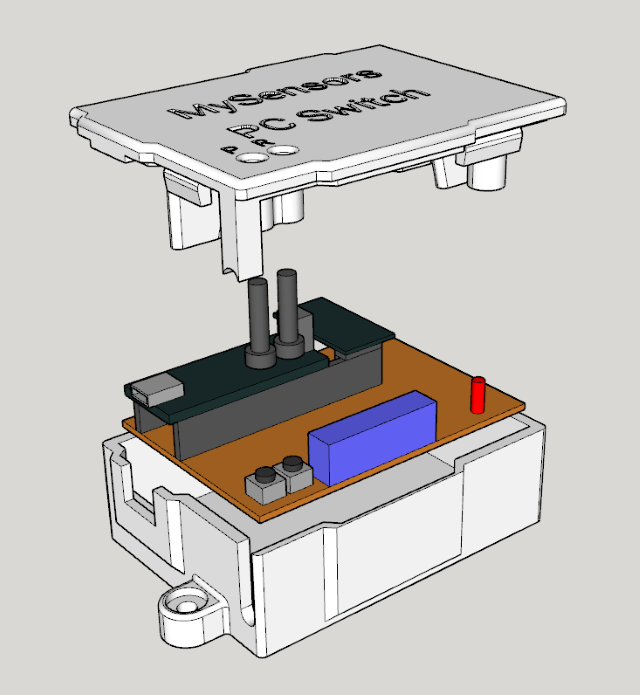
Finally got it on strip board and a box is printing. I would like to get into cnc machining of 2 sided pcb's but I need some smaller bits and some extra knowledge before I start that.
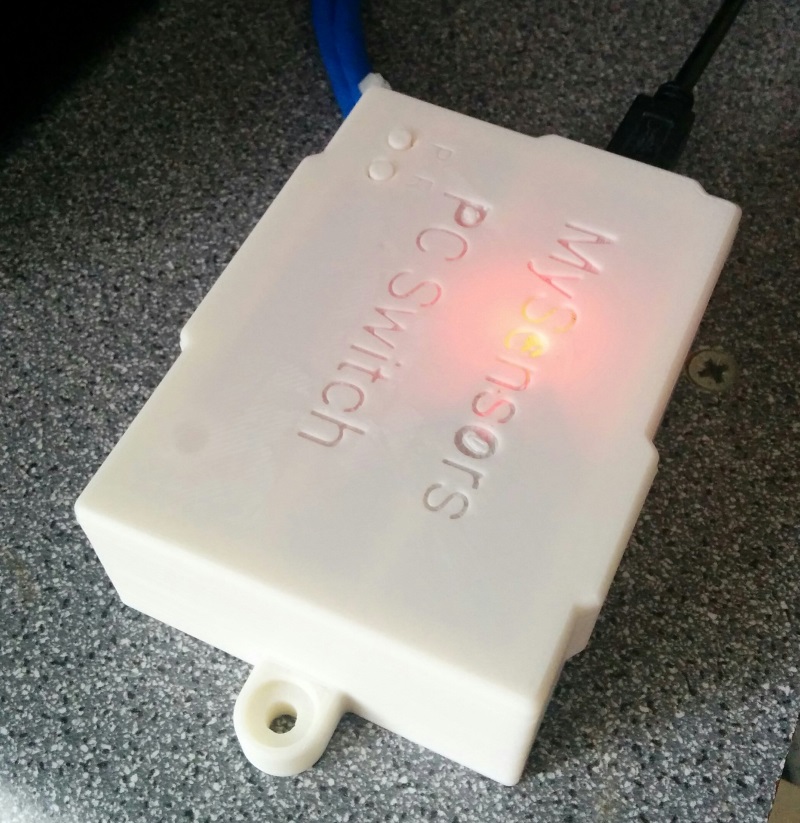
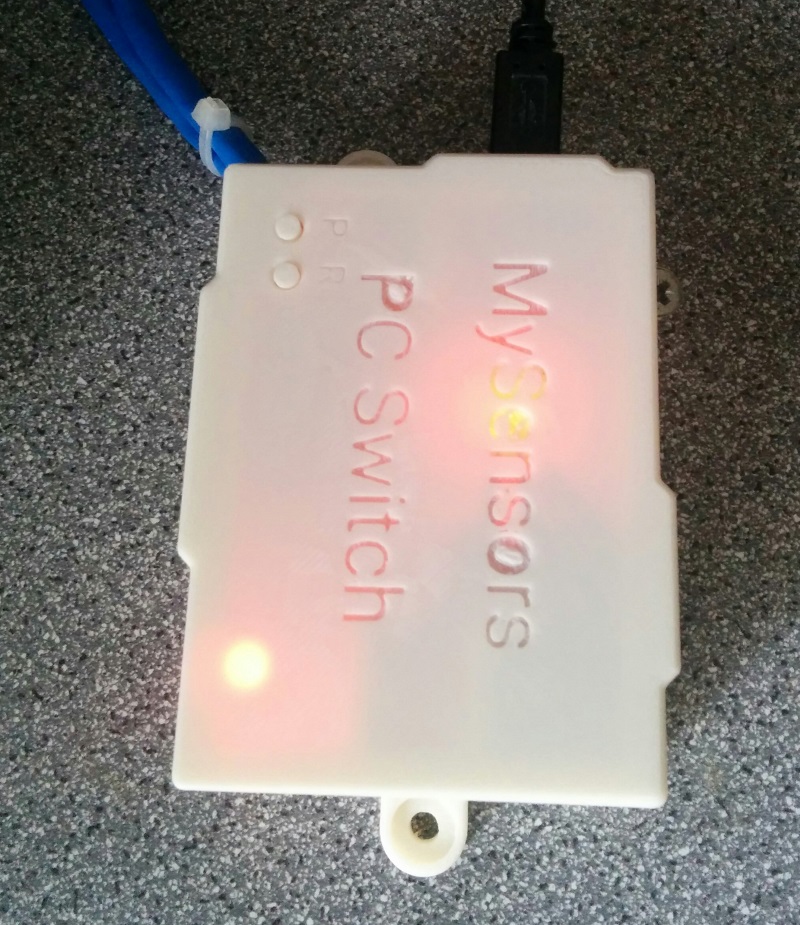
Here is what the box should look like.
Mod Everything!
-
pictures of the real thing