My Slim 2AA Battery Node


  • Hardware Contributor

    @Cliff-Karlsson said:

    Ok thanks for the info. So if I do not have any crystals it is not possible to burn the bootloader in any way?

    No, not if its fuses are set for external crystal.


  • Hardware Contributor

    An ATMEGA328 coming from ATMEL is normally set to use the internal oscillator and has no bootloader. You will then have no need to put a crystal.

    I do this anyway on my breadboard (for the 28 pin DIP versions).

    If you have the SMD version of the atmega328 (the AU variant), I'm assuming it is set in the same default state (no crystal needed, running on internal oscillator).


  • @Cliff-Karlsson i added 10 Mhz and it worked as I didnt have 16 Mhz. Also tested with 20Mhz and worked


  • First node. Door sensor.
    Great boards :+
    0_1453937636107_1453937611984-964477924.jpg

    0_1453938444465_1453938399889-988876899.jpg

    .


  • @ahmedadelhosni said:

    @meddie THanks for the answer.

    Can you please also explain your final result to reach 4uA. I have also the same problem and current is 90uA and sometimes drops to 20uA, then rises again. Thanks.

    Edit: I figured out that I was using the 3.3v from arduino UNO. CHanged to two 1.5 batteries. THe current drops to 1.4uA when contact is open but sometimes it is also 15 uA. And when contact is closed it is 60 uA, and sometimes drops. Don't know why it is not stable.

    Edit 26.1.2016: I managed to reach 1.4uA with door opened, and 15uA when closed. I guess the problem was with the wiring. DOn't really know but I used a battery holder instead. I will try to rechange the resistor value to 1Mohm and reupdate.

    Edit 27.1.2016: ok I created another node and connected the contact sensor in series with the 1Mohm and the output is the voltage divider. now it is 1.4uA when open and 4.6uA when closed.

    Thanks

    Yes, i used a 1 Mohm reisitor instead of the internall pull up. You can read this few messages above. This was a tip from GertSander


  • Hi, I build the board but I still have issues with burning ATMega328p chip.
    Can you describe and attach files that should work?
    The only success "burn" I had with burning bootloader was with hex and boards entry from first post using arduino uno and ips programer ( so it is like burning uno bootloader with your setup)
    After that I was trying to upload sketch but than it was not possible because of "?# in boards file but there is no such sign.
    I rewert file to stock and burn sketch like it would be standard uno board but using programer and not standard usb. No idea if it is corect so that is why I ask for more details.
    Thank you in advance
    Tomasz


  • Hardware Contributor

    @Tomasz-Pazio Sounds more like some issue with the IDE and boards file than hw and fuses/bootloader. Have you tried different IDE versions?


  • @ahmedadelhosni
    what is it on the door? is that a plastic wrap?


  • @meddie
    0_1454272780491_1453938474660-1453938399889-988876899.jpg

    The sensor is drawn by black rectangle. This is adhesive tape like this : http://2.imimg.com/data2/YX/UQ/MY-3910304/sale-bopp-clarity-adhesive-tape-250x250.jpg

    The other red rectangle on the door was old tape I didn't remove. Actually before getting my boards I used a bread board and a battery for testing, so I needed a tape for support and keeping it in place 🙂


  • 👍


  • @m26872 thanks for advice, bootloader burned on IDE 1.0.x and after that, sketches are uploaded properly on 1.6.x.

    One more question, how it should report battery state? I can not see any variable created for this in Vera.


  • Hardware Contributor

    @Tomasz-Pazio Great! If I remember Vera correct, a variable should be created automaticly upon first message if you use the sendbatterylevel() fuction.


  • anyone care to write down the exact precedure of how to burn a new bootloader to the atmel chip? what files goes to what folders and so on.


  • Hardware Contributor

    @Cliff-Karlsson I'm experimenting with several versions of Optiboot (various upload and upload combinations) for my board. Once that is done, I will add it to the documentation of my board. I'm extending the sketch found here:

    http://www.gammon.com.au/forum/?id=11635


  • Hardware Contributor


  • OK, so finally I have received most of the parts I need to build a few of these sensors. I want to go with a temp sensor at first, the si7021. So I wanted to check what "other bits" I need (newb alert).

    0_1454624296448_upload-80039080-fce7-4484-b238-a54bdb2d28fd

    From there, do I need both 1 and 2? If so, what are these?

    0_1454624355650_upload-36748b2e-623b-4953-bdb4-394fbe264ef6

    From here, what are 3 and 4? Do I need both?

    Also, depending on the answers above, do I solder to exactly the same pins? Have I missed anything?

    Thanks


  • Ok, finaly succeded in burning the bootloader. Now comes next part. Fuses and lockbits, I have no idea what this means but is this what I need to do?

    avrdude -C ../etc/avrdude.conf -c usbasp -B5 -p ATmega328P -U lfuse:w:0x62:m -U hfuse:w:0xDE:m -U efuse:w:0x07:m -U lock:w:0x2F:m


  • oh, yes! And you have to be carefully with them, because to set the fuses wrong, can destroy your µcontroller


  • if you look to message Nr 179 you will find my bootloader and the correct fuses for this. But its a 1MHz Bootloader and the fuses too.
    Dont use it if you want to run it at 8 MHz.


  • Web-based fuse calculator
    A different way of evaluating fuses is presented at this web page:
    http://www.engbedded.com/fusecalc

    At the bottom I inserted your fuses.
    Translation:
    Divide by8-> if your mcy board uses 8Mhz, then you now use 1Mhz Clock (Good this enables that you now can use a lower voltage down to 1,9V)
    SPI is enabled, then you can program your mcu with FTDI cable
    BOD mcu will not power down mcu when you have a low voltage (So you can use down to 1,9V)
    I write 1,9Volt since this is the lowest voltage your NRF24L01+ can use for operation

    0_1454685582246_upload-5f146d65-d819-455d-8d3c-ed029eb79abb


  • Sorry for asking the same questions over and over but I have just used the files linked at the top of this thread.

    This is the bootloader that I used:

    atmega328_1a.hex (Optiboot for 9600baud at 1MHz)
    
    
    ##############################################################
    # Add the new board to boards.txt (normally located at "C:\Program Files\Arduino\hardware\arduino\avr"
    # The *.bootloader.* etries only matters if you want to program bootloader (and fuses) from Arduino IDE. 
    # See http://www.engbedded.com/fusecalc (select Atmega328p) for interpretation of fuse values and how 
    # extended fuses are written in different applications (07h in Arduino IDE = FFh in Atmel studio).
    ##############################################################
    
    apm96.name=APM Optiboot internal 1MHz noBOD 9600baud
    
    apm96.upload.tool=avrdude
    apm96.upload.protocol=arduino
    apm96.upload.maximum_size=32256
    apm96.upload.speed=9600
    apm96.bootloader.tool=avrdude
    apm96.bootloader.low_fuses=0x62
    apm96.bootloader.high_fuses=0xde
    apm96.bootloader.extended_fuses=0x07
    apm96.bootloader.path=optiboot_v50
    apm96.bootloader.file=atmega328_1a.hex
    apm96.bootloader.unlock_bits=0x3F
    apm96.bootloader.lock_bits=0x2F
    apm96.build.mcu=atmega328p
    apm96.build.f_cpu=1000000L
    apm96.build.core=arduino
    apm96.build.variant=standard


    Do I still need to add fuses or is that done when the bootloader is burned?


  • @Cliff-Karlsson

    It is already done when you burn the bootloader.

    apm96.bootloader.low_fuses=0x62
    apm96.bootloader.high_fuses=0xde


  • Hardware Contributor

    @Cliff-Karlsson said:

    Ok, finaly succeded in burning the bootloader.

    Great news!! With Arduino as ISP? Any particular tips to share?


  • @m26872 I am fairly sure that all methods work in normal cases but nothing worked for me fore some reason 🙂 .

    The only way I could get it to work was when I finaly put the chip in an Arduino Uno clone with 328p Dip(?) socket and connected an USBtiny ISP to the ISCP of that Uno. It took just a couple of seconds and then it was done :).

    I flashed like 6-7 ships right away with bootloader and blink-sketch just for fun. Biggest problem now is to get the damn chip in/out of the sockets without bending any legs. But I ordered a chip extractor to remedy that problem (in 4-6 weeks :()


  • Hardware Contributor

    @Cliff-Karlsson
    👍

    To get the ICs out from the DIP socket, I just use a small screw driver (2-3mm) and gently push it all the way under from one side only. And of course, don't push in the IC to hard to begin with.


  • @Cliff-Karlsson
    You shall buy Textool ZIF socket. not sure which fits your Arduino, If you at some point get's lazy (Solder less, and accept to use a little more space) and use Arduino Pro Mini then textool 224-3344 ZIF will be your friend


  • Hi all, I'm seeing replies, but I'm not sure if any are aimed at my question? I think not?


  • Hardware Contributor

    @rsachoc
    I've started a new thread aimed at your question. I'll soon delete much of the content in the post you based your question on and refer to the new thread instead.


  • it would be nice when a atsha204 a an a flash rom where placed to pcb for signing and ota


  • Hardware Contributor

    @meddie I don't use any of it myself yet, but I know it's only a matter of time until they'll be needed. I think a add-on board to all already existing nodes would be my personal priority then, but new users would prefer it on-board of course and only populate if needed. I'll put on my not yet posted future requests list. (I remember top-side labels are also wanted.) A thing to remember though, is that my Slim Node design is a concept was a lean and simplicity concept, without preparations for maximum flexibility etc.

    As I've said earlier - if anyone like to do their own Slim Node design, you're very welcome. And if you share it, it's even better.


  • Hardware Contributor


  • What i like on this node is the great idea with the casing. To use a cable duct is a great idea. We have wooden windows and i found in a diy market cable ducts in wooden look
    like this:
    wooden look cable duct

    The Problem is that the size is 15x15 mm outside. inside the pcb can be max. 13 mm.


  • Hardware Contributor

    @meddie I think 15x15 is very common and should be to prefer, but if I remember correct there's not enough space for AA batteries, or is there?


  • Hardware Contributor

    @GertSanders Good job! If you go the SMD way I think a lot could be done. Perhaps matching AAA width? Leave some (only few) SMD pads open for sensor connection, no proto area, etc.


  • oh, yes. You have right, the battery fits in it, but its a little bit too big so i cant close the cover. Damn i didnt try it before.
    ok the i have to look for a graeter duct.


  • Hero Member

    Currently this is my favorite board. Minimal size, traditional components and just enough breadboard space. A few variations:
    0_1454859878498_upload-23af4fbe-6938-4079-9fc4-d149c8950370 Soldered an 8 mHz resonator (a 'crystal' which does not need the capacitors) for a more stable clock.

    0_1454860192227_upload-c6f3a164-b5cb-43f5-af82-c556674568f4 0_1454860883223_upload-351808cf-868d-4076-80ce-2e4b05ec4898 Soldered a 3.3v LDO (662k) under the radio to have it powered with a rechargeable Lipo (4.1V max) battery. And added a voltage divider to measure the actual battery voltage.

    0_1454860058592_upload-a677913a-22a8-466d-920d-ae620591088b 0_1454860344864_upload-77335242-a0b4-4371-85f5-4d11731c0868
    With a SMD version of the radio. Needs some creative soldering...

    0_1454860702395_upload-e1af1f72-11c5-409d-9eca-762e3c657183 Compared to an other favourite ( @GertSanders )

    It would even be better if the smd radio could be soldered on the board. Kicad is giving me a headache so if anybody wants to volunteer with a panelized design.... (I will reward you with a free batch of 'dirty' boards, just drop me a pm)


  • Hardware Contributor

    AA batteries are 14mm in diameter. AAA batteries are 10mm in diameter.

    I have single AAA batteryholders which are 13mm wide at the base, and including a battery they are 13mm high at the highest point.

    LEGRAND sells 16x16mm cable ducts (http://www.ecataleg.be/fr/category/2751/16-x-16), which is what I plan to use, but the 15x15 ducts should work as well.


  • Hardware Contributor

    @m26872 I'm trying to make a full SMD board with the smd variant of the nrf24.

    So far, my first design is a 21mm square.

    I have been thinking about a long 13mm x 100mm variant. That would allow plenty of space, at least 1 AAA, but more importantly would allow panelisation when combining with a 13x100 board for two AAA battery holders.

    This would give 3 sensor nodes + 3 battery holder boards in one 100x100 panel, or 6 sensor boards if we use your technique of "ty-wrapping" batteries.


  • A couple of more questions. In one of the pictures at the top the electrulyte 4,.7 uf capacitator is placed closer to the atmel chip and the 0.1 uf (c5) is placed closest to the edge does it matter witch capacitator goes where?

    The 10k resistor should be 1/4 or 1/8 W according to the bom. I had some small 1/6 W 10k resistors can I use them? I also have some bigger blue 10k resistor that I do not know the W rating on.

    Where did you purchase the female pin-header that are used for the chips? I have some atmega chip-sockets that are quite narrow and it is hard to fit the components underneath. I also have some other female pin-headers but they are atleast twice as high than the ones in the pictures.


  • Mod

    @AWI said:

    panelized design

    If you're struggling with panelizing boards I can recommend the excellent gerber tools from Stijn Kuipers.

    It allows you to create designs like this (10x10cm, DirtyPCBs):

    0_1454871223582_20150501-111911.jpg

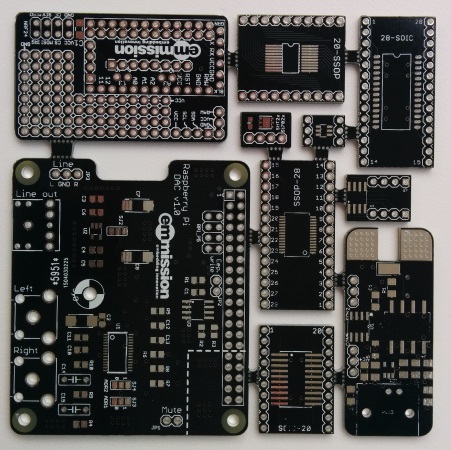
    Drop him a message and he'll send you a download link.


  • Hero Member

    @Yveaux Tnhx, but I guess I am not ready for the first step (creating/ adapting a board in Kicad) yet ....


  • Mod

    @AWI Sorry, can't help you with that. All Eagle here 😅


  • Hardware Contributor

    @Yveaux I tried to find an email address on the website, but apart from a LinkIn link I could not find anything. Also, in LinkedIn you need a paying version to be able to send InMail, and I do not have a paid account. Would you care to tell me how you were able to send Stijn a message ?


  • Hero Member

    @Cliff-Karlsson You can swap the capacitors and use all resistor dissipation values. The pin headers you can find here for example


  • Mod

    @GertSanders It's been a while, but my first contact was through his Twitter account. Try that first, otherwise ping me.


  • Hardware Contributor

    @Yveaux I do not have a twitter account, so no joy. And I feel stupid to say so, but how do you ping someone on this forum ?


  • @Yveaux i remember once that i read that dirtypcbs does not allow for different designs in their panelized boards. Am i correct ?


  • Mod

    @ahmedadelhosni apparently not 😊
    The board above was produced by ditypcb's. In fact they're one of the few (only?) cheap PCB manufacturers that allow panelization.


  • @Yveaux aha. I thought that this means multiple (same) design not different. Thanks 🙂


  • Hardware Contributor

    Updated first post with share stats and info.

    Feature requests and example links will come asap.


  • This post is deleted!


  • Just ordered my first set of boards; v2.0 in Red; can't wait to try these out!

    Thanks @m26872


  • Hi

    I've just ordered a set of the PCB boards and looking forward to putting these together mainly into reed switches and motion sensors

    I have scanned the whole thread and there doesn't seem to be a comprehensive list of exactly which components are required anywhere here, well not all in one place at least.

    Can I just confirm exactly what is required to build a senor node.

    1 x PDB board
    1 x ATMega328p 28pin PDIP
    1 x NRF24L01+ radio module
    1 x 4.7uF Decoupling-Capacitor for radio (I assume these are still required??)
    1 x right angle pin header for connecting to program and connect batteries
    1 x Length of cable ducting for housing
    2 x AA batteries
    Cables for connecting batteries
    Battery connector
    1 x senor of choice
    I notice there seem to be an assortment of capacitors/regulators in most of the photos on this thread, but no definitive list of which are needed. (I am very new to all this so please excuse my ignorance)

    Extras needed
    1 x FTDI USB to TTL Serial Adapter

    Have I missed anything of my list? Also I would be really grateful for links to some of the above components.

    Sorry these are very basic noob questions, but I feel it would really helpful for people such as myself to have everything clearly listed in one place, as the main mysensors build pages do. So people know exactly what is needed.


  • Hardware Contributor


  • Hardware Contributor

    A nice additions would be a place to solder a ATSHA204A on board like the Sensebender! I'll try to make the change in KiCad!


  • @Soloam
    and a flash module for OTA Sketch Uploads 🙂


  • Thanks @GertSanders for showing me the BOM I hadn't realised it was there, but do I need everything listed there to get it working properly?


  • Hardware Contributor

    @Matt-Pitts
    I'm assuming that if a designer goes through the trouble of listing items on a bom, they are needed.

    But you are right, that is not always the case. I'm not at my Mac (using a miniscreen now), so i can not multitask.


  • Hello,
    I have problems to upload the scatch to the bare Amtel. I use an USB-TTL FTL Adaper and connect, RX/TX and Reset Pin with 100n->DTR. But I got always errors on uploading.

    The bootloader I have successfull burned with an raspberry pi and gpio (http://www.lxccu.com/hb-raspberry-bootloader-update😞

    sudo bin/avrdude -Cbin/avrdude.conf -p m328p -P gpio -c gpio -U lfuse:w:0x62:m -U hfuse:w:0xde:m -U efuse:w:0x07:m -U lock:w:0x2F:m -e -Uflash:w:1443392692398-atmega328_1a.hex:i
    avrdude: safemode: Fuses OK

    How can I got it working?
    Thank you

    Thomas


  • Have you tried to upload a standard arduino bootloader?, are you using correct baud settings for uploading?


  • @bjacobse No, used the bootloader from here (http://forum.mysensors.org/uploads/files/1443392692398-atmega328_1a.hex). This is an bootloader for the internal clock.
    Baud settings to upload the sketch or the bootloader?


  • Hardware Contributor

    @Tom71 I think the question was if you have been successful with programming a standard bootloader to a standard Arduino board and then uploading and running a sketch?


  • @m26872 Sure, but not with an bootloader (optiboot with intenal clock) on an bare Atmega. Later I will try this: http://forum.mysensors.org/uploads/files/1454449901412-7.png
    I build some MySensors with an Arduino Micro, but not with only an Atmega.

    Update: I don't know what's different, but this works. Perhaps I forget to connect Reset from FDL -> Pin 1.
    Now I can upload simple sketches.


  • I have not had success to upload a sketch via FTDI on an Arduino ProMini using Optiboot. When I flash an ordinary bootloader (Taken from the Arduino IDE), I can easily upload a sketch via FTDI.
    so that's why I recommend to flash a standard bootloader and check if you then can upload a sketch afterwards.


  • @bjacobse Witch bootloader you have taken?


  • Hi I'm just about to start ording parts of the slim node. Looking through the thread I'm thinking based on my limited knowledge of arduino, I might be better off buying chips which already have a bootloader installed?

    Can people advise, how difficult is it to upload the boot loader? Thanks


  • Hardware Contributor


  • @Tom71
    well I have not yet started to use the Mysensor specific bootloader. When I use the optiboot, I upload sketch with my USBtiny (so no FTDI), and when I use FTDI for uploading sketch I used the "Arduino Pro or pro mini (3,3V, 8MHz) w/ATmega328"


  • @bjacobse I thought the USBtiny is only to upload the bootloader, not the mysensors software.
    I did two things:

    1. Burn the bootloader atmega328_1a.hex to an bare Atmega328p with an Arduino as ISP
    2. Upload an simple scetch to the Atmega with an RX/TX uploader (I used an USB to TTL with an FTDI and also an Ardunino Uno without the Atmega chip, like here http://forum.mysensors.org/uploads/files/1454449901412-7.png) Both are working.

    I'm still waiting for the PCB. After receiving I want to build the motion sensor.


  • @Tom71
    USBtiny is a programmer, and can both burn (upload) sketch + burn bootloader


  • Hardware Contributor

    Difference is that if you use a ISP programmer you will use the complete memory. You can use ISP to upload a bootloader which is required to burn a sketch with ftdi into remaining memory but its possible to use a ISP to flash a sketch without bootloader as well.


  • @Matt-Pitts
    Depending of your Arduino, the USBtiny is easy to use. Maybe your Aeduino have the pinheader so then only click the cable and burn bootloader. I use Arduino Pro Mini and have an adapter ZIF socket that fits my Arduino ProMini
    https://learn.adafruit.com/usbtinyisp


  • @bjacobse I'm out of fucus. What was the problem? Can you burn the bootloader+sketch with an USBtiny on an bare Atmgea328p? Connected on MISO/MOSI/SCK/RESET/VCC/GND?
    The Arduino Pro Mini is different from the Atmgea328p. On the arduino is an external clock.


  • @Tom71
    Can you burn the bootloader+sketch with an USBtiny on an bare Atmgea328p?
    I have no idea - I have never tried this.
    My originally point is that I have had similar problem to upload a sketch with a FTDI on an Arduino Pro Mini that have been flashed with Optiboot, and when flashed with a "normal" bootloader I could easily upload a sketch with FTDI. I mainly use Arduino Pro Mini 3,3V 8MHz...and that have the crystals etc in place


  • @bjacobse Which Optiboot loader did you exactly use? I can try it. I have an Arduino Pro Mini.


  • I have ordered these. Hopefully they can get here soon-ish. All my prototyping is done and the WAF is dropping steadily with all the wires and components lying around.

    One question on this - separating the individual boards from the panel: dremel tool with cuter blade fine? Or do I need to use some other method?


  • Hardware Contributor

    @wergeld I just make two small cuts from each side by a side cutter, then a gentle bend over some sharp edge like the table or a cutting board.


  • @m26872 Sounds good! Current status is "at board house." Getting twitchy waiting.


  • @wergeld

    Just got a notification from DirtyPCB's that mine shipped - placed the order 9 days ago so give it some time. When I ordered mine, they were just re-opening from being closed for a week; I think it was Chinese new year or something.


  • Hello, I ordered it too yesterday 🙂 Can't wait to step forward from my breadboards with a lot wires to PCB without wires 😄

    @m26872 Thanks for sharing it!


  • @drock1985 Right. I waited until a week after Chinese new year to order. Let the hangovers end and the trainstations empty . I am looking forward to finalizing my sensor network with cases as well. I have several old plastic/wood boxes lying around waiting for a less rats-nest setup.


  • now I finally set up my first sensor board, and, as expected, I don´t receive any data from it on my gateway :suspect:

    I uploaded the sketch following the instructions from here: https://www.arduino.cc/en/Tutorial/ArduinoToBreadboard using a 16MHz Crystal.

    The sketch should run, but it doesn´t. Any ideas how to troubleshoot now?

    edit: I opened the serial monitor after I uploaded the sketch using the mwthod mentioned above and I get the message "radio init fail".
    The same sketch works on my UNO and I have no radio problem.

    Do I have to upload the sketch without the 16MHz Crystal to get it work proper?


  • Hardware Contributor

    @siod

    • Since external crystal isn't this designs standard, I think you should describe your hardware a bit more.
    • Uno fuses and bootloader?
    • "radio init fail" means nRF wiring issue in 99% of all cases.


  • I just installed the NRF module at it´s desired place as well as the two capacitors and the resistors as described above. The crystal is only used for uploading the sketch to the Atmega328 chip, described here: https://www.arduino.cc/en/Tutorial/ArduinoToBreadboard
    alt text

    So a wiring issue should not be the problem. Also, the code should have been uploaded well, because when I put the chip back to the breadboard and fire up my Arduino I at least receive the "radio init fail" message.

    I just wonder if you guys upload your sketches the same way or if you use a different setup. I know there is a way to upload the sketch without the 16MHz crystal and I would like to know if this could be the problem.

    edit: I´ve re-read your first post and also this thread http://forum.mysensors.org/topic/3018/tutorial-how-to-burn-1mhz-8mhz-bootloader-using-arduino-ide-1-6-5-r5/2 ...

    Do I have to burn the bootloader using 1MHz or 8 MHz? I don´t get why this makes a difference, only that the batteries would drain faster the higher the MHz rate is.

    I already uploaded a bootloader on my chips with a 16MHz crystal. Could I just re-upload a new bottloader using 1 or 8 MHz and overwrite the 16MHz bootloader?


  • Hardware Contributor

    @siod The lowered MHz is not to drain battery slower. To save power we want to run wihtout buck- or boost (step-up or step-down) voltage regulators. When we do that, we need to ensure all circuit components work in whole battery voltage range. A good trade-off/design is then to make the Atmega work down to the same lower limit as the nRF24L01+, which is ~1.9V. Unfortunately the Atmega is unstable at high frequencies with low voltages. That why we need a low frequency. An external 4MHz should be low enough, but an easier, cheaper and usually good enough solution is to by the ATmega "fuse settings" activate an 8MHz internal crystal together with a "divide by 8" prescaler.
    To fascilitate the use of noob-friendly Arduino IDE and concept of loading sketches and debug through a serial interface, we need to have a "bootloader" on the Atmega. The procedure you're referring to is how you put this bootloader to the ATmega. I would strongly recommend a beginner to start with ready made Arduinos in projects before starting to play with blank/bare ATmegas.
    Whether you need the 16MHz crystal, 8MHz or none depends it's current fuse settings. Bootloader and fuse settings determine how you load, debug and run your sketch.
    I think the guides, project threads, links and references provided here in the forum should be enough when you've come to the point where you can make it all the way.


  • Did anybody tested this board with an ATSHA204A on A2? The ATSHA204A works with 2.0 to 5.5 V.


  • @Tom71
    I'm waiting on my PCBs/ATmegas but thats exactly something I'm wondering as well. I'm just trying to think of how the wires look in my head while waiting for everything to get delivered.


  • ok guys, I finally set up my first sensor and it´s communicating well. I´ve attached two reed switch which work fine, only my temp snesor DHT11 doesn´t work. Are there any known issues with this sensor?

    pls have a look at my setup and my code, thank you:

    // Simple binary switch example 
    // Connect button or door/window reed switch between 
    // digitial I/O pin 3 (BUTTON1_PIN below) and GND.
    
    #include <MySensor.h>
    #include <SPI.h>
    
    // Define Node ID
    #define MY_NODE_ID 1
    
    //Kontaktschalter
    #include <Bounce2.h>
    #define CHILD1_ID 1 // Kontaktschalter 1
    #define CHILD2_ID 2 // Kontaktschalter 1
    #define BUTTON1_PIN  5  // Kontaktschalter 1
    #define BUTTON2_PIN  6  // Kontaktschalter 2
    
    //Tempsensor
    #include <DHT.h>  
    #define CHILD_ID_HUM 3
    #define CHILD_ID_TEMP 4
    #define HUMIDITY_SENSOR_DIGITAL_PIN 4
    unsigned long SLEEP_TIME = 30000; // Sleep time between reads (in milliseconds)
    
    MySensor gw;
    
    //Kontaktschalter
    Bounce debouncer1 = Bounce(); 
    Bounce debouncer2 = Bounce(); 
    int oldValueReed1=-1;
    int oldValueReed2=-1;
    
    //tempsensor
    DHT dht;
    float lastTemp;
    float lastHum;
    boolean metric = true; 
    
    //Messages
    // Kontaktschalter
    MyMessage msgReed1(CHILD1_ID,V_TRIPPED); // Kontaktschalter 1
    MyMessage msgReed2(CHILD2_ID,V_TRIPPED); // Kontaktschalter 2
    
    //TempMessage
    MyMessage msgHum(CHILD_ID_HUM, V_HUM);
    MyMessage msgTemp(CHILD_ID_TEMP, V_TEMP);
    
    void setup()  
    {  
      gw.begin(NULL, MY_NODE_ID, true);
    
      //Tempsensor
      dht.setup(HUMIDITY_SENSOR_DIGITAL_PIN); 
    
    // Setup Kontaktschalter 1
      pinMode(BUTTON1_PIN,INPUT);
        // Activate internal pull-up
      digitalWrite(BUTTON1_PIN,HIGH);
    // Setup Kontaktschalter 2
      pinMode(BUTTON2_PIN,INPUT);
      // Activate internal pull-up
      digitalWrite(BUTTON2_PIN,HIGH);
      
      // After setting up the button, setup debouncer
      debouncer1.attach(BUTTON1_PIN);
      debouncer2.attach(BUTTON2_PIN);
      debouncer1.interval(5);
      debouncer2.interval(5);
      
      // Register binary input sensor to gw (they will be created as child devices)
      // You can use S_DOOR, S_MOTION or S_LIGHT here depending on your usage. 
      // If S_LIGHT is used, remember to update variable type you send in. See "msg" above.
      gw.present(CHILD1_ID, S_DOOR); 
      gw.present(CHILD2_ID, S_DOOR); 
      //Tempsensor
      gw.present(CHILD_ID_HUM, S_HUM);
      gw.present(CHILD_ID_TEMP, S_TEMP); 
      metric = gw.getConfig().isMetric;
    }
    
    
    //  Check if digital input has changed and send in new value
    void loop() 
    {
      //Kontakstschalter 1
      debouncer1.update();
      // Get the update value
      int valueReed1 = debouncer1.read();
     
      if (valueReed1 != oldValueReed1) {
         // Send in the new value
         gw.send(msgReed1.set(valueReed1==HIGH ? 1 : 0));
         Serial.println("Button 1 geschaltet");
         oldValueReed1 = valueReed1;
      }
      //Kontakstschalter 2
      debouncer2.update();
      // Get the update value
      int valueReed2 = debouncer2.read();
     
      if (valueReed2 != oldValueReed2) {
         // Send in the new value
         gw.send(msgReed2.set(valueReed2==HIGH ? 1 : 0));
         Serial.println("Button 2 geschaltet");
         oldValueReed2 = valueReed2;
      }
      
     //Tempsensor
    
     delay(dht.getMinimumSamplingPeriod());
    
      float temperature = dht.getTemperature();
      if (isnan(temperature)) {
          Serial.println("Failed reading temperature from DHT");
      } else if (temperature != lastTemp) {
        lastTemp = temperature;
        if (!metric) {
          temperature = dht.toFahrenheit(temperature);
        }
        gw.send(msgTemp.set(temperature, 1));
        Serial.print("T: ");
        Serial.println(temperature);
      }
      
      float humidity = dht.getHumidity();
      if (isnan(humidity)) {
          Serial.println("Failed reading humidity from DHT");
      } else if (humidity != lastHum) {
          lastHum = humidity;
          gw.send(msgHum.set(humidity, 1));
          Serial.print("H: ");
          Serial.println(humidity);
      }
    
      //gw.sleep(SLEEP_TIME); //sleep a bit 
    
    } 


    http://abload.de/image.php?img=20160306_11174141u66.jpg


  • @siod my understanding was that the voltage which is provided by the slim node wouldn't be suitable for the DHT11 and DHT22, as they require a minimum of 3.3v. There is some discussion here on the DHT22, which I understand has the same voltage requirements as the DHT11.


  • Hardware Contributor

    @siod I'm pretty sure DHT nor DS18B20s won't work at 1MHz.


  • Oh man, one problem solved, next just comes up...

    So what can I Do now? Just upload the 8MHz bootloader and just use 8MHz instead of 1MHz?

    edit: Ok, tested it, it works with the 8MHz Bootloader!

    please explain one more time if I could just use the 8MHz Bootloader, I still could not fully understand why I should use the 1 MHz Bootloader (maybe because of my bad english and also my lack of electronics knowledge). Thank you very much!!

    edit2: I measured 0,02 Ampere consumption, isn´t that too much?


  • Hardware Contributor

    @siod Either your Atmega328p or you DHT22 will work unstable as your battery drain and voltage drops. I haven't tested and don't remember the specs, but my guess is that DHT will stop working very soon with battery <3V.

    I suggest you choose this or this design.


  • OK thx for the hint, I guess I will just add a third AA battery, that should solve my problem...


  • @siod
    Attention this can damage your nrf24 Module.
    Greets Eddie


  • I really don't want to spam this thread...

    But from my arduino Uno the nrf24l01 module is also powered by 5V!?!

    Edit : ah ok, the arduino is going to regulate down to 3.3v... Then I cant use 3AAs 😞


  • @siod I was in much the same position as you, but the simple suggestion is to use the SI7021, as per this thread. Otherwise, the links in the other thread are for the 5v builds.


  • I wasn't aware that the nrf24l01 is so sensitive to voltage higher than 1.9v. I would like to have a sensor design to which I can add different sensors, just for the purpose I need it right now. So most sensors need 3.3v or 5v and I have to decide if I use 3v cells, which are more expensive or use step up / step down regulators which will drain my batteries. I just want to keep the flexibility to add any sort of sensor to my board... What would you suppose to do, also I think I am not the only one who faces those problems. Of course I am a beginner and still have a lot to learn but I also just want to finish this project as I am working on it for a very long time now...


  • when you are gonna to use some power up/down converter, them will need more power, so your battery will be faster empty.
    If you make your circuit so simple as possible, so you can reach the longest battery time.


  • Hardware Contributor

    @siod said:

    I wasn't aware that the nrf24l01 is so sensitive to voltage higher than 1.9v.

    Typo? I suppose you mean 3.3V.

    I would like to have a sensor design to which I can add different sensors...

    Please reply why you don't like those two designs I linked to in my last post above.


  • Hardware Contributor

    5V as a supply voltage had been the standard for many decades.

    As integrated circuits have become more compact and more efficient, 3.3V and 1.8V as supply voltages have become standards as well. 3.3V for most components, 1.8V is more recent and only used in some very highly integrated circuits.

    For sensornodes based on batteries, the 3.3V standard is very usefull and most sensors are available for this working voltage.

    If you really need 5V for a particular sensor, then think about AC or USB powered nodes. 5V sensors are a bad choice for battery based nodes. The 5V sensors are mostly old designs, and very inefficient when looking at them from a powerconsumption point of view.

    So you can want to combine 3.3V and 5V sensors, but our experience is NOT to combine and make a choice for low power (modern) 3.3V sensors when trying to build battery based sensor nodes.


Log in to reply
 

Suggested Topics

  • 8
  • 2
  • 29
  • 1
  • 3
  • 2

0
Online

11.2k
Users

11.1k
Topics

112.5k
Posts