Step-by-step procedure to connect the NRF24L01+ to the GPIO pins and use the Raspberry as a Serial Gateway (MySensors 1.x)
-
Hi,
maybe someone could give me a hint. I installed everything and it looks like it is working, but no sensors are displayed in Domoticz. Any idea what's wrong?I used this sensor before with a ESP Wifi gateway and it was working fine. The DallasTemp Sensors got visible in Domoticz right after the gateway was added in the Hardware section.
After installing the NRF24l01 on the Rasperry Pi 3 and follwing the instructions above, I added MySensorsGateway USB with /dev/ttyUSB20, but nothing happend.
Would be nice, if I could get this smart thing working. Else I would need to go back to the ESP Wifi gateway.
Domoticz log:
2016-12-30 00:31:01.610 Domoticz V3.5877 (c)2012-2016 GizMoCuz
2016-12-30 00:31:01.611 Build Hash: 15b013c, Date: 2016-11-10 16:44:33
2016-12-30 00:31:01.611 System: Raspberry Pi
2016-12-30 00:31:01.611 Startup Path: /home/pi/domoticz/
2016-12-30 00:31:02.327 Sunrise: 08:18:00 SunSet:15:59:00
2016-12-30 00:31:02.327 EventSystem: reset all events...
2016-12-30 00:31:02.411 Active notification subsystems: (0/12)
2016-12-30 00:31:02.448 WebServer(HTTP) started on address: :: with port 8080
2016-12-30 00:31:02.479 WebServer(SSL) started on address: :: with port 443
2016-12-30 00:31:02.481 Proxymanager started.
2016-12-30 00:31:02.516 Starting shared server on: :::6144
2016-12-30 00:31:02.516 TCPServer: shared server started...
2016-12-30 00:31:02.517 RxQueue: queue worker started...
2016-12-30 00:31:04.520 EventSystem: reset all events...
2016-12-30 00:31:04.520 EventSystem: reset all device statuses...
2016-12-30 00:31:04.521 EventSystem: Started
2016-12-30 00:31:05.519 MySensors: Using serial port: /dev/ttyUSB20
2016-12-30 00:33:06.145 Incoming connection from: 127.0.0.1
pi@raspberrypi:~ $ sudo /usr/local/sbin/PiGatewaySerial
Starting PiGatewaySerial...
Protocol version - 1.4
Created PTY '/dev/pts/2'
Gateway tty: /dev/ttyMySensorsGateway
================ SPI Configuration ================
CSN Pin = CE0 (PI Hardware Driven)
CE Pin = Custom GPIO25
Clock Speed = 8 Mhz
================ NRF Configuration ================
STATUS = 0x0e RX_DR=0 TX_DS=0 MAX_RT=0 RX_P_NO=7 TX_FULL=0
RX_ADDR_P0-1 = 0xa8a8e1fc02 0xa8a8e1fc00
RX_ADDR_P2-5 = 0xff 0xc4 0xc5 0xc6
TX_ADDR = 0xa8a8e1fc02
RX_PW_P0-6 = 0x20 0x20 0x20 0x00 0x00 0x00
EN_AA = 0x3b
EN_RXADDR = 0x06
RF_CH = 0x4c
RF_SETUP = 0x23
CONFIG = 0x0e
DYNPD/FEATURE = 0x3f 0x06
Data Rate = 250KBPS
Model = nRF24L01+
CRC Length = 16 bits
PA Power = PA_LOW
read: 2-2-0 s=255,c=3,t=24,pt=1,l=1:1
read: 2-2-255 s=255,c=3,t=7,pt=0,l=0:
send: 0-0-2-2 s=255,c=3,t=8,pt=1,l=1,st=ok:0
read: 2-2-255 s=255,c=3,t=7,pt=0,l=0:
send: 0-0-2-2 s=255,c=3,t=8,pt=1,l=1,st=ok:0
read: 2-2-255 s=255,c=3,t=7,pt=0,l=0:
send: 0-0-2-2 s=255,c=3,t=8,pt=1,l=1,st=ok:0
read: 2-2-0 s=255,c=3,t=24,pt=1,l=1:1
read: 2-2-255 s=255,c=3,t=7,pt=0,l=0:
send: 0-0-2-2 s=255,c=3,t=8,pt=1,l=1,st=ok:0
read: 2-2-0 s=255,c=3,t=24,pt=1,l=1:1
...
pi@raspberrypi:~ $ sudo cat /dev/ttyMySensorsGateway
0;0;3;0;14;Gateway startup complete.
2;255;3;0;24;1
2;255;3;0;24;1
2;255;3;0;24;1
2;255;3;0;24;1
2;255;3;0;24;1
1;255;3;0;24;1
2;255;3;0;24;1
1;255;3;0;24;1
2;255;3;0;24;1
1;255;3;0;24;1
2;255;3;0;24;1
1;255;3;0;24;1
2;255;3;0;24;1
2;255;3;0;24;1
2;255;3;0;24;1
...
Traces from sensor node:
Starting sensor (RNNNA-, 2.0.0)
TSM:INIT
TSM:RADIO:OK
TSP:ASSIGNID:OK (ID=2)
TSM:FPAR
TSP:MSG:SEND 2-2-255-255 s=255,c=3,t=7,pt=0,l=0,sg=0,ft=0,st=bc:
TSP:MSG:READ 0-0-2 s=255,c=3,t=8,pt=1,l=1,sg=0:0
TSP:MSG:FPAR RES (ID=0, dist=0)
TSP:MSG:PAR OK (ID=0, dist=1)
TSM:FPAR:OK
TSM:ID
TSM:CHKID:OK (ID=2)
TSM:UPL
TSP:PING:SEND (dest=0)
TSP:MSG:SEND 2-2-0-0 s=255,c=3,t=24,pt=1,l=1,sg=0,ft=0,st=ok:1
TSP:CHKUPL:FAIL (hops=255)
!TSM:UPL:FAIL
TSM:FPAR
TSP:MSG:SEND 2-2-255-255 s=255,c=3,t=7,pt=0,l=0,sg=0,ft=0,st=bc:
TSM:FPAR
TSP:MSG:SEND 2-2-255-255 s=255,c=3,t=7,pt=0,l=0,sg=0,ft=0,st=bc:
TSP:MSG:READ 0-0-2 s=255,c=3,t=8,pt=1,l=1,sg=0:0
TSP:MSG:FPAR RES (ID=0, dist=0)
TSP:MSG:PAR OK (ID=0, dist=1)
TSM:FPAR:OK
TSM:ID
TSM:CHKID:OK (ID=2)
TSM:UPL
TSP:PING:SEND (dest=0)
TSP:MSG:SEND 2-2-0-0 s=255,c=3,t=24,pt=1,l=1,sg=0,ft=0,st=ok:1
TSP:CHKUPL:FAIL (hops=255)
!TSM:UPL:FAIL
TSM:FPAR
TSP:MSG:SEND 2-2-255-255 s=255,c=3,t=7,pt=0,l=0,sg=0,ft=0,st=bc:
TSP:MSG:READ 0-0-2 s=255,c=3,t=8,pt=1,l=1,sg=0:0
TSP:MSG:FPAR RES (ID=0, dist=0)
TSP:MSG:PAR OK (ID=0, dist=1)
TSM:FPAR:OK
TSM:ID
TSM:CHKID:OK (ID=2)
TSM:UPL
TSP:PING:SEND (dest=0)
TSP:MSG:SEND 2-2-0-0 s=255,c=3,t=24,pt=1,l=1,sg=0,ft=0,st=ok:1
TSP:CHKUPL:FAIL (hops=255)
!TSM:UPL:FAIL
....@_Rooky_ congratulations on your first post in the forum, welcome!
The gateway uses MySensors 1.4 and the node uses version 2. These versions are not compatible.
You probably want to use version 2 for the gateway as well. https://www.mysensors.org/build/raspberry describes how to create a gateway for version 2 (the gateway was completely rewritten for version 2)
-
@_Rooky_ congratulations on your first post in the forum, welcome!
The gateway uses MySensors 1.4 and the node uses version 2. These versions are not compatible.
You probably want to use version 2 for the gateway as well. https://www.mysensors.org/build/raspberry describes how to create a gateway for version 2 (the gateway was completely rewritten for version 2)
@mfalkvidd many thanks for the very quick and polite reply.
It is working now and this solution is much better way, than using an additional ESP as gateway.
Even though I got on the wrong lane, I learned more details from your excellent guide, than from the "make", "make install" from the MySensors page ... and still got a lot to learn -
Thanks for this thorough guide, it works perfect :)
-
@mfalkvidd Hi there and thanks for a great and super detailed step-by-step tutorial.
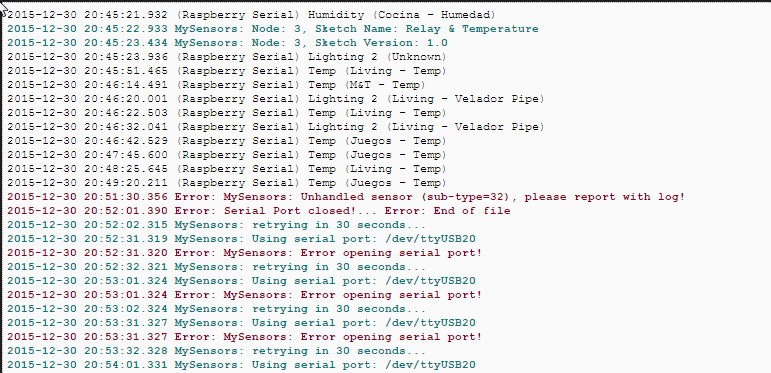
I've got mine running in no time with your instructions, but after a couple of minutes I've got the following error:
2015-12-30 20:51:30.356 Error: MySensors: Unhandled sensor (sub-type=32), please report with log!
2015-12-30 20:52:01.390 Error: Serial Port closed!... Error: End of file
2015-12-30 20:52:02.315 MySensors: retrying in 30 seconds...
2015-12-30 20:52:31.319 MySensors: Using serial port: /dev/ttyUSB20
2015-12-30 20:52:31.320 Error: MySensors: Error opening serial port!
2015-12-30 20:52:32.321 MySensors: retrying in 30 seconds...
2015-12-30 20:53:01.324 MySensors: Using serial port: /dev/ttyUSB20I also attached a partial screen capture showing that it was working before 8-)
Any idea on why is this happening and how to solve it?
Southern regards and happy new year to all!
@Scala I have the same error as you. Worked perfectly first time, and after reboot the "/dev/ttyMySensorsGateway: No such file or directory" error message appear. Did you solve this?
-
Hello, If followed the instruction and everything seemed to work without any problem.
However when I enter the command : sudo cat /dev/ttyMySensorsGateway
I get the message : cat: /dev/ttyMySensorsGateway: No such file or directory
Does anybody have any idea how to solve this ?@MrRikkie Did you solve this issue? I got the same error as you..
-
hi
when that run this code
:sudo /etc/init.d/PiGatewaySerial starterror:
[....] Starting PiGatewaySerial (via systemctl): PiGatewaySerial.serviceFailed to start PiGatewaySerial.service: Unit PiGatewaySerial.service failed to load: No such file or directory.can you help me??
-
Note: This guide is only applicable to MySensors 1.x. For MySensors 2, use this guide.
I noticed that a step-by-step procedure to connect the NRF24L01 to the GPIO pins and use the Raspberry as a Serial Gateway was listed in the document for MySensors 1.6.
Since I have three gateways configured this way, and I need to set up 3 more for covering different offices around the world, and I had already written the instructions in Swedish for Datormagazin, I thought I'd help out.
This is the first draft. Any feedback is welcome.
INTRODUCTION
The radio module NRF24L01+ is cheap and power efficient, but it is unable to communicate with regular wifi. The bridge between NRF24L01+ nodes and the "computer world" is called a Gateway. You can use other types of gateways, but connecting the NRF24L01+ module directly to the Raspberry Pi is a simple and cheap alternative.Wiring Things Up
Connect the NRF20L01+ radio module to the Raspberry Pi like this:
![raspi_mysensors[1].png](/uploads/files/1448223387663-raspi_mysensors-1.png)
Raspberry Pi NRF24L01+ Color 6 / GND GND Black 1 / 3.3V DC VCC Red 22 / GPIO25 CE Orange 24 / GPIO 8 CSN/CS Yellow 23 / GPIO11 / SPI_CLK SCK Green 19 / GPIO10 / SPI_MOSI MOSI Blue 21 / GPIO9 / SPI_MISO MISO Violet The IRQ pin on NRF24L01 is not currently used.
For a comprehensive view of the Raspberry Pi pins, see http://pinout.xyz/
You should also connect a decoupling capacitor to the radio. See this guide.
COMPILING THE GATEWAY
Login to your Raspberry Pi (using SSH or open a terminal on the graphical console) and run these commands:git clone https://github.com/TMRh20/RF24.git cd RF24 make all && sudo make install cd .. git clone https://github.com/mysensors/Raspberry.git cd Raspberry make all && sudo make installIf you get the following error:
pi@raspberrypi ~/RF24 $ make all && sudo make install
g++ -Wall -fPIC -Ofast -mfpu=vfp -mfloat-abi=hard -mtune=arm1176jzf-s -march=armv7-a -D BCM2835_PERI_BASE=0x -c RF24.cpp
gcc -Wall -fPIC -Ofast -mfpu=vfp -mfloat-abi=hard -mtune=arm1176jzf-s -march=armv7-a -D BCM2835_PERI_BASE=0x -c bcm2835.c
bcm2835.c: In function ‘bcm2835_init’:
bcm2835.c:1207:28: error: invalid suffix "x" on integer constant
You've probably run into the problem discussed in this thread. People have had luck with different solutions. The simplest is to make the following change to ~/Raspberry/librf24-bcm/Makefile
#IOBASE := $(shell cat /proc/iomem | grep bcm2708_vcio | cut -f 1 -d "-")
IOBASE := 3F000000
VERIFY THE GATEWAY
Run sudo /usr/local/sbin/PiGatewaySerial. The output should look like this:pi@raspberrypi ~/Raspberry $ sudo /usr/local/sbin/PiGatewaySerial Starting PiGatewaySerial... Protocol version - 1.4 Created PTY '/dev/pts/1' Gateway tty: /dev/ttyMySensorsGateway ================ SPI Configuration ================ CSN Pin = CE0 (PI Hardware Driven) CE Pin = Custom GPIO25 Clock Speed = 8 Mhz ================ NRF Configuration ================ STATUS = 0x0e RX_DR=0 TX_DS=0 MAX_RT=0 RX_P_NO=7 TX_FULL=0 RX_ADDR_P0-1 = 0xe7e7e7e7e7 0xc2c2c2c2c2 RX_ADDR_P2-5 = 0xff 0xc4 0xc5 0xc6 TX_ADDR = 0xe7e7e7e7e7 RX_PW_P0-6 = 0x00 0x00 0x20 0x00 0x00 0x00 EN_AA = 0x3b EN_RXADDR = 0x07 RF_CH = 0x4c RF_SETUP = 0x23 CONFIG = 0x0e DYNPD/FEATURE = 0x3f 0x06 Data Rate = 250KBPS Model = nRF24L01+ CRC Length = 16 bits PA Power = PA_LOWIf the NRF24L01+ isn't correctly wired, the following error will be shown
pi@raspberrypi ~ $ sudo /usr/local/sbin/PiGatewaySerial
Starting PiGatewaySerial...
Protocol version - 1.4
Created PTY '/dev/pts/2'
Gateway tty: /dev/ttyMySensorsGateway
check wires
If this happens, double-check your wiring and correct any problems. Press Ctrl+Z and type
sudo killall PiGatewaySerialto get rid of the non-functioning Gateway. Then run sudo /usr/local/sbin/PiGatewaySerial again
If all is well, exit PiGatewaySerial by pressing Ctrl+C. Then run
sudo /etc/init.d/PiGatewaySerial startto start the gateway as a background process. Verify that it started correctly by running
sudo cat /dev/ttyMySensorsGatewayYou should see the message "Gateway startup complete". Exit by typing Ctrl+C.
MAKE THE GATEWAY AUTOSTART
To make sure the Gateway is started when your Raspberry Pi boots up, run the following command:sudo make enable-gwserialEnable the gateway for use with Domoticz
Domoticz (and maybe other home automation systems) has trouble reading from the default path created by PiGatewaySerial. You might need to run the following command:sudo ln -s /dev/ttyMySensorsGateway /dev/ttyUSB20And change /etc/rc.local from this
exit 0to this
ln -s /dev/ttyMySensorsGateway /dev/ttyUSB20
exit 0
OTHER NOTES
-
The 3.3V power on the Raspberry Pi is rated for a maximum of 50mA. A regular NRF24L01+ only needs 15mA, but if you are using a power amplified version you might exceed what the Raspberry Pi can output. In that case, an external power supply might be required. If you use an external power source gnd must be connected to the Raspberry Pi's gnd.
-
Connecting the NRF24L01+ directly to your Raspberry Pi will prevent you from using the Raspberry Pi's gpio ports for other things, like a Z-wave board.
-
A user experienced slow data transfer compared to USB-to-Serial(ttl)<-->MySensors Gateway connection, especially on OTA firmware update. If you think this will cause a problem for you, an ethernet gateway might be a better alternative.
As always, I stand on the shoulders of giants. Related posts:
- http://forum.mysensors.org/topic/1151/tutorial-raspberry-pi-nrf24l01-direct-connection
- http://forum.mysensors.org/topic/1974/domoticz-as-controller-and-a-gateway-for-mysensor-nodes-running-on-a-raspberry-pi-2
TROUBLESHOOTING
If you get this errorpi@Domoticz3:~/Raspberry$ sudo /etc/init.d/PiGatewaySerial start [....] Starting PiGatewaySerial (via systemctl): PiGatewaySerial.serviceFailed to start PiGatewaySerial.service: Unit PiGatewaySerial.service failed to load: No such file or directory. failed!or this error
pi@raspberrypi ~ $ sudo /usr/local/sbin/PiGatewaySerial
sudo: /usr/local/sbin/PiGatewaySerial: command not found
you have probably forgotten to run sudo make install. Read the instructions again, and follow them this time :-) User @sineverba reported that a reboot of the Pi after running make install helped.
TROUBLESHOOTING
If you get this errorpi@Domoticz3:~/Raspberry$ sudo /etc/init.d/PiGatewaySerial start [....] Starting PiGatewaySerial (via systemctl): PiGatewaySerial.serviceFailed to start PiGatewaySerial.service: Unit PiGatewaySerial.service failed to load: No such file or directory. failed!or this error
pi@raspberrypi ~ $ sudo /usr/local/sbin/PiGatewaySerial
sudo: /usr/local/sbin/PiGatewaySerial: command not found
you have probably forgotten to run sudo make install. Read the instructions again, and follow them this time :-)
In my case I did need simply to restart. I did "make install" but I did need to restart ;) ;)
-
-
I know this thread is ancient, but why it was needed to add
sudo ln -s /dev/ttyMySensorsGateway /dev/ttyUSB20into rc.local if you could just change a line in makefile from
TTY_NAME := /dev/ttyMySensorsGatewayto
TTY_NAME := /dev/ttyUSB20and create "proper" name from the start
-
Hi,
I plan using a gateway with Mydomoticz and this solution seems great. However, I might want to use later signing or the high Amplifier NRF24 or even the version 2 which seem not suitable for this project.
How easy is it to start with this gateway, then migrate to an external ethernet gateway ?
I saw this gateway can be uninstalled, but should I then modify anything on sensors to move them to new gateway ? will I lose log datas in Domoticz ?br,
Ricorico94 -
Hi,
I plan using a gateway with Mydomoticz and this solution seems great. However, I might want to use later signing or the high Amplifier NRF24 or even the version 2 which seem not suitable for this project.
How easy is it to start with this gateway, then migrate to an external ethernet gateway ?
I saw this gateway can be uninstalled, but should I then modify anything on sensors to move them to new gateway ? will I lose log datas in Domoticz ?br,
Ricorico94@ricorico94 welcome to the MySensors commu ity! All you need to do when switching from raspberry pi gateway to ethernet gateway is change the "hardware" configuration in Domoticz.
However, if you are just starting out, don't use this gateway. It works for MySensors 1.x only. Use the new raspberry pi gateway instead.