PIR am312
-
So, I made a little test jig to try it out. It seems to have roughly 4 detection "zones" with fairly wide gaps between them where it's more or less blind. Also, if I walk straight at it from the front, it doesn't detect me until I'm about 3 feet away. So, although I'm no expert, I'd say the detection coverage is kinda spotty. Maybe the small domed plastic optics are sub-optimal? Has anyone tried alternatives?
Just thinking out loud, but maybe you can use two and by skewing their alignment try to make it so that the gaps in one are mostly covered by the detection zones of the other, and visa versa?
Not sure how to make the best use of this yet, but I do like the very low power consumption. I think there's a pony in there somewhere, and we just need to find it.
Anyone have ideas?
-
Did that resonate with anyone? Has anyone else observed "the problem" I described? If not, maybe I set it up wrong.
-
I have experienced similar behavior yes, didn't have time to check enough but from some directions it gave me the impression not to detect anything.
It seemed better with lens from a SR501. I'm waiting for the PCB with am612 to be able to test with a properly aligned SR501 lens. -
I have experienced similar behavior yes, didn't have time to check enough but from some directions it gave me the impression not to detect anything.
It seemed better with lens from a SR501. I'm waiting for the PCB with am612 to be able to test with a properly aligned SR501 lens.@Nca78
Thanks! I just now took the lens cover off an SR501 and very crudely attached it to the Banggood sensor (after first removing its cap). It seems to be an improvement. So, I expect doing a proper job of it will yield an even greater improvement.Fortunately, it looks as though there's a good variety of PIR lenses on Aliexpress for cheap.
-
the fun will be to make them fit on the sensor :)
I was thinking hot glue and a cardboard backing for prototyping, but maybe a backing which actually reflects IR (like a metal foil?) would help keep the IR bouncing around inside it more and be a good thing. Really not sure.
On the other hand, maybe there's a better lens which can snap onto the existing body. That would be better, at least from a hassle standpoint.
-
maybe make a mock pcb board of a SR501 with a hole in the middle so you can attach the lens on the board and stick the am312 in the center hole
maybe make a mock pcb board of a SR501 with a hole in the middle so you can attach the lens on the board and stick the am312 in the center hole
Or, as a POC, just drill a hole in the middle of an SR501 board, since the lens already snaps smartly to that board.
Does PCB need a special kind of drill bit, like for glass or something?
-
So I guess this may mean we won't be using the bangood sensors after all. Instead we'll be buying chips and mounting them to custom PCB's, like NCA78 is doing. That is, unless there's a better lens cap that just naturally fits the body of the banggood sensor.
Which means I should order some of those PIR sensor IC's soon, given the long shipping lead times.
-
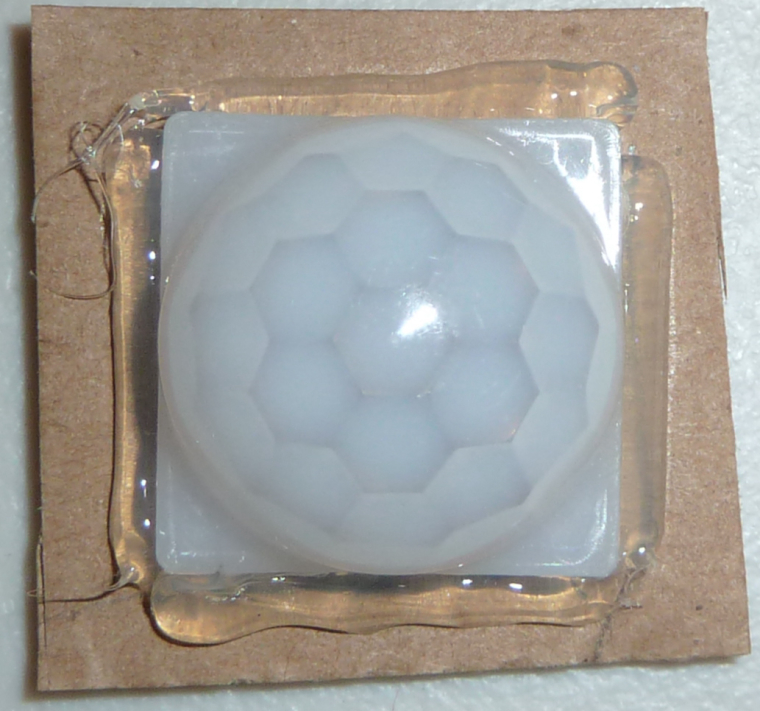
For a preliminary POC, I made a lens holder with cardboard and hot glue:
and drilled a 15/32" hole in the middle for the PIR element, which I shoved in the back:
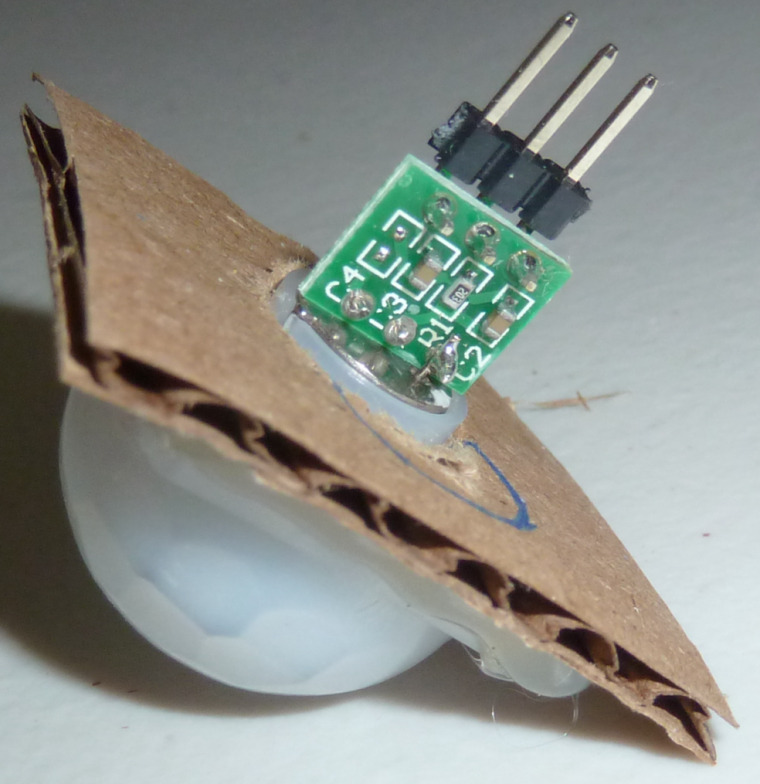
Obviously it's still crude, but it's better than my first attempt. It also performs better. It still has spotty coverage, but not as bad as before. Obviously a more properly installed and aligned lens should perform better still.
Anyhow, that's as far as I'm going to take it for now. I look forward to hearing what others might come up with, as well as their impressions about the coverage.
-
I did. What you see is just the holder that the regular lens snaps onto.
-
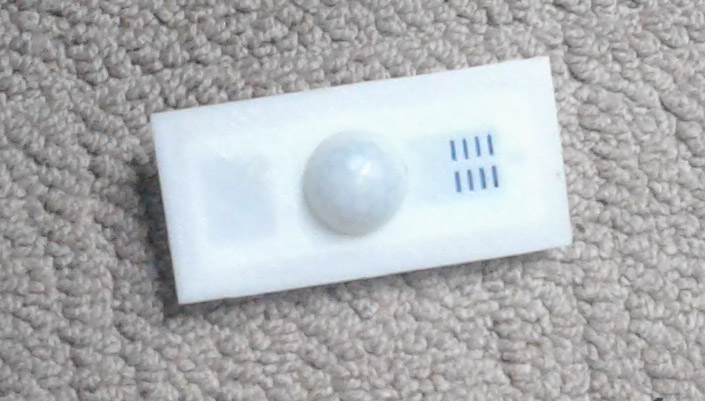
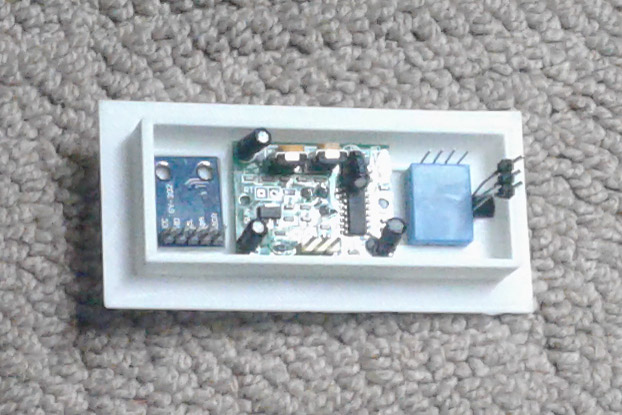
Here is my version of a holder. It is for the bigger PIR. But it holds a dhtXX, ds18b20, and a light sensor as well.
-
Nice!
On my holder, the sensor depth is presumably wrong from a focusing point of view--at least if the SR501 is a proper guide for how it should be done. The sensor should really be deeper into the cavity. I suppose that alone might make a meaningful improvement. Alas, I think that may call for mounting the sensor element onto a PCB, so that it sits flush on top.
-
@Nca78
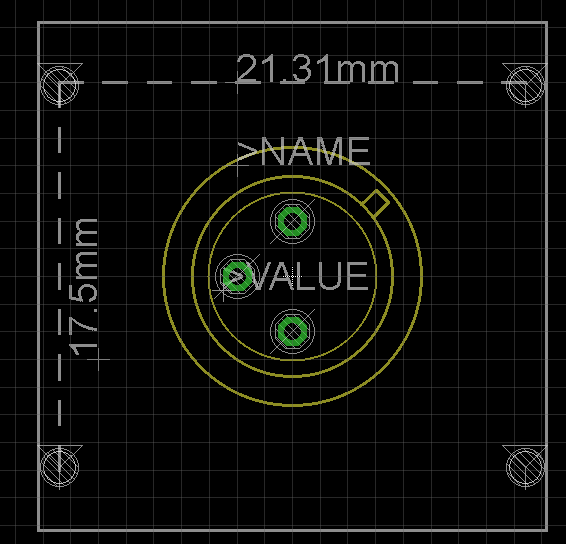
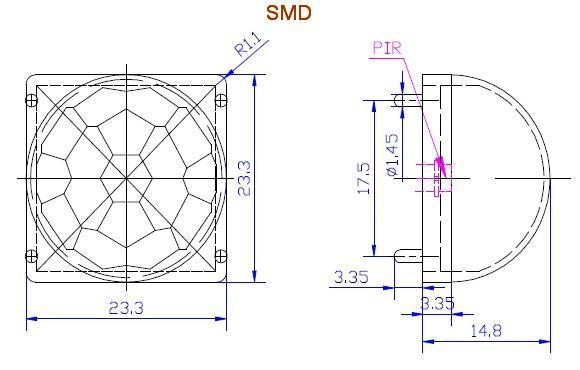
Have you worked out the dimensions for the four holes that the SR501 lens fits into? I'm guessing so, given your shield above. I could of course try measuring the distances with a micrometer and the hole diameters with some gauged wire, but it might take a few PCB iterations to get it right. However, if you know the exact hole diameter and distance between the holes, it would be helpful if you shared that info so that we can get cracking on making custom PCB's that incorporate it. -
Searched a bit and found this. Guess my measurements were a bit off, hope it will fit with 17.4 and a bit over 22...
I should have searched while doing the PCB :DReal measurements are 17.5mm and 23.3-1.45 = 21.85
I ran a banggood PIR sensor off my 3.3v boosted 10F supercap solar node last night and, as you would expect, the extra load was so low that it's practically a rounding error. :) These PIR's would have no problem being powered for days from a supercap.
@Nca78 I guess what you're calling "sensibility" on your board above is another name for sensitivity? i.e. you figured out how to adjust the sensitivity of the PIR detector? That's something not obviously accessible on the banggood PIR's, as they don't seem to come with a sensitivity adjustment. If you've already figured out how to adjust the sensitivity, would you mind sharing the schematic? It might help us avoid re-inventing the wheel if we were to follow the path you've already blazed.