What did you build today (Pictures) ?

-
One more build for today: building the raspberry pi gateway.
I often need to test different settings for the Raspberry Pi Gateway. Running make after just changing one parameter in the configure command (for example, turning on or off interrupts for nrf24 or changing the PA_LEVEL) results in a 1m 13s wait on my Raspberry Pi:
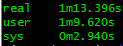
I installed ccache using these instructions and now a make with the same type of change is done in 31s.
Not that much of a win, but it saves a lot of time when trying many different settings. -
@mfalkvidd on my Pi3 it takes 40 around seconds, are you using an old Pi1 ?
-
Today I finally got my thumbs out and upgraded my plant monitoring to MySensors 2.x (from 1.x).
Updated sketch is available on Github: https://github.com/mfalkvidd/arduino-plantmoistureResult: I really need to water my plants ;-) But the 2.5 year old batteries are still going strong.

-
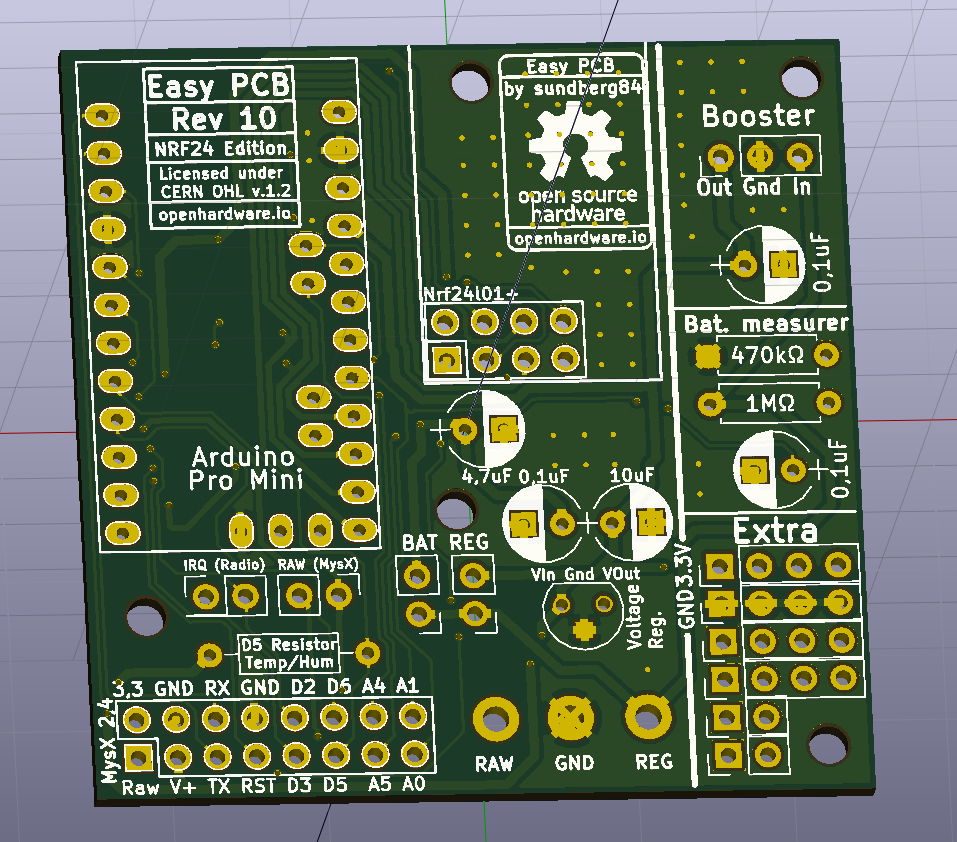
Tonight some more PCB design:
-
Tonight some more PCB design:
@sundberg84 I will throw my two cents in on the design. An issue that I had brought up on previous revisions had to do with capacitors. On the Rev 9 and below boards, your capacitor footprints were pretty much all for flat ceramic capacitors. While I was able to make it work for the couple can style electrolytics that I used, it wasn't quite right. Now on this revision, I see that all of your capacitors have a can electrolytic style footprint. I think it needs to be a mix. The 4.7uf and 10 uf capacitors should be can style footprint, whereas your 0.1s should be non polarized ceramic flat cap footprints. The flat pack ceramics I think have a wider hole spacing.
Again, just my two cents
Vera Plus running UI7 with MySensors, Sonoffs and 1-Wire devices
Visit my website for more Bits, Bytes and Ramblings from me: http://dan.bemowski.info/ -
@sundberg84 I will throw my two cents in on the design. An issue that I had brought up on previous revisions had to do with capacitors. On the Rev 9 and below boards, your capacitor footprints were pretty much all for flat ceramic capacitors. While I was able to make it work for the couple can style electrolytics that I used, it wasn't quite right. Now on this revision, I see that all of your capacitors have a can electrolytic style footprint. I think it needs to be a mix. The 4.7uf and 10 uf capacitors should be can style footprint, whereas your 0.1s should be non polarized ceramic flat cap footprints. The flat pack ceramics I think have a wider hole spacing.
Again, just my two cents
@dbemowsk the positive with polarized footprint is that you can use both and it's very easy for a newbie to see which one is Gnd. You who are more experienced can determine if you want to use a flat unpolarized cap.
-
This evening I spent a few hours finding more MySensors keywords that exist but weren't highlighted.
I found about 20 that were documented but not highlighted, so I added them.I also found 3 that weren't documented nor highlighted. I have created issues on github to document them. Help is welcome. Documenting the keywords is an easy way to contribute to the project.
https://github.com/mysensors/MySensors/issues/1090
https://github.com/mysensors/MySensors/issues/1089
https://github.com/mysensors/MySensors/issues/1088 -
@dbemowsk the positive with polarized footprint is that you can use both and it's very easy for a newbie to see which one is Gnd. You who are more experienced can determine if you want to use a flat unpolarized cap.
@sundberg84 one of the 0.1uf caps that i use has short leads and wouldn't fit that hole spacing. They are higher voltage capacitors that i bought years ago for another project that i am trying to use up. I do see your point though.
-
Today I finally got my thumbs out and upgraded my plant monitoring to MySensors 2.x (from 1.x).
Updated sketch is available on Github: https://github.com/mfalkvidd/arduino-plantmoistureResult: I really need to water my plants ;-) But the 2.5 year old batteries are still going strong.
@mfalkvidd said in What did you build today (Pictures) ?:
Today I finally got my thumbs out and upgraded my plant monitoring to MySensors 2.x (from 1.x).
Updated sketch is available on Github: https://github.com/mfalkvidd/arduino-plantmoistureResult: I really need to water my plants ;-) But the 2.5 year old batteries are still going strong.
What kind of components is this running on? I am having trouble getting my batteries to run even 2.5 months (or 2.5 weeks for the outside temp sensor...) :)
-
@sundberg84 one of the 0.1uf caps that i use has short leads and wouldn't fit that hole spacing. They are higher voltage capacitors that i bought years ago for another project that i am trying to use up. I do see your point though.
This post is deleted! -
Today I built a led dimmer and motion detector for my kitchen. Running on 12v and a led list of about 2m.
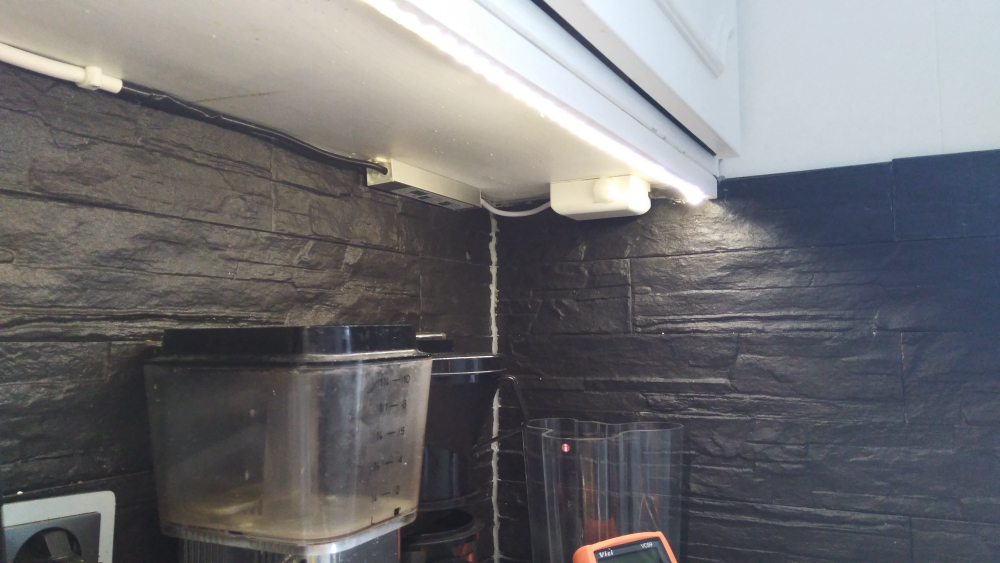
Everything is built on my MysX led board and it was so easy to assemble everything and it's really small.
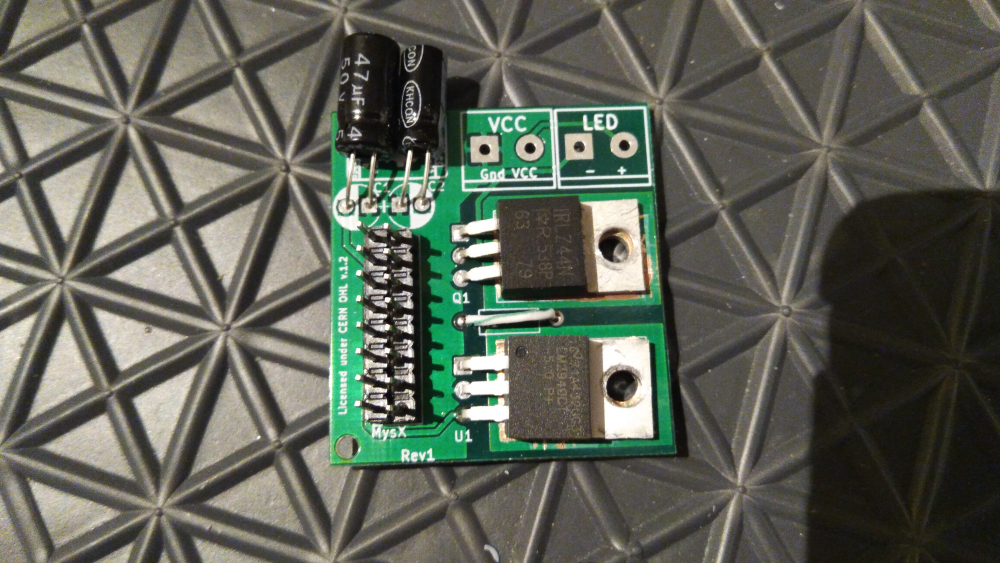
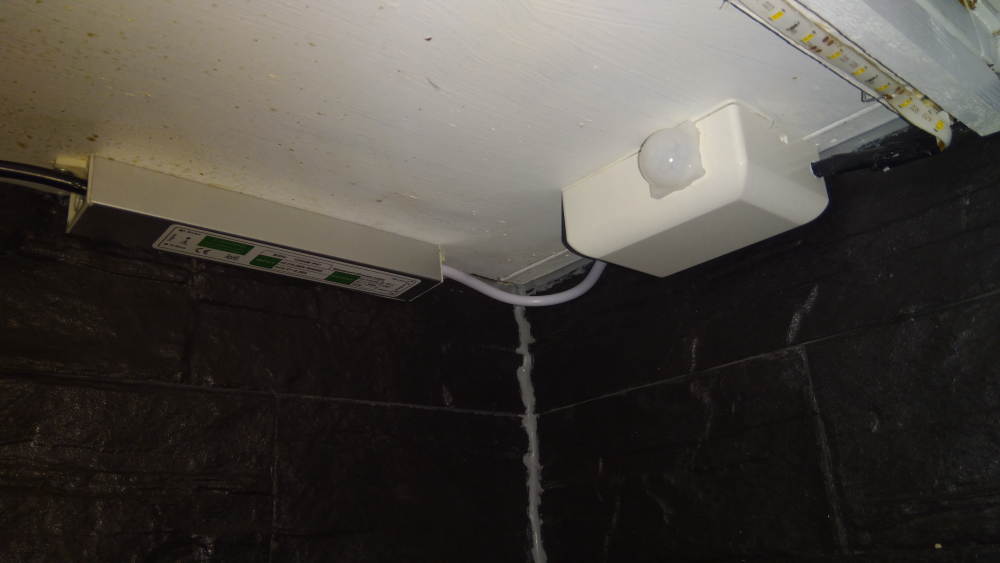
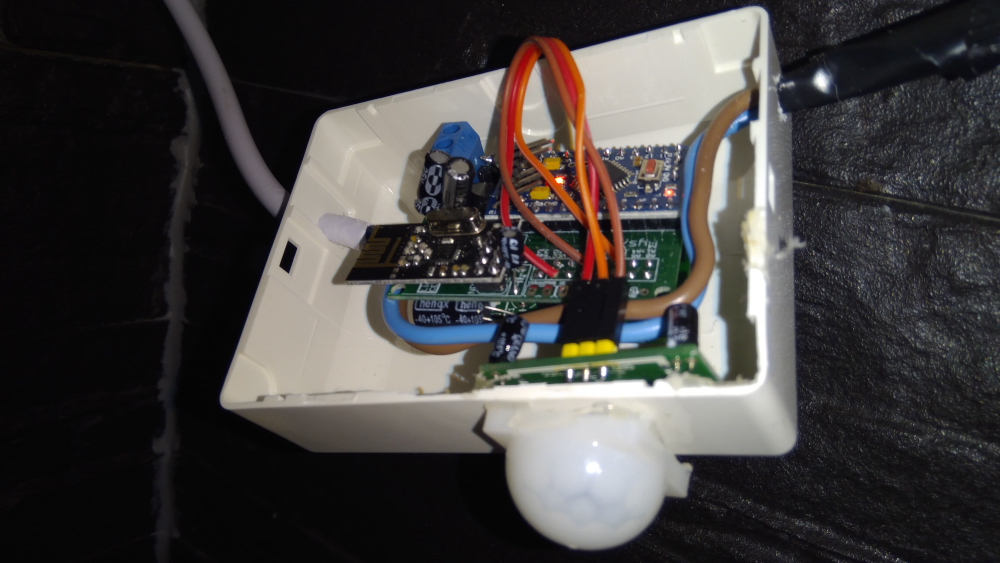
I have documented this project and will show you in a video when edited.
-
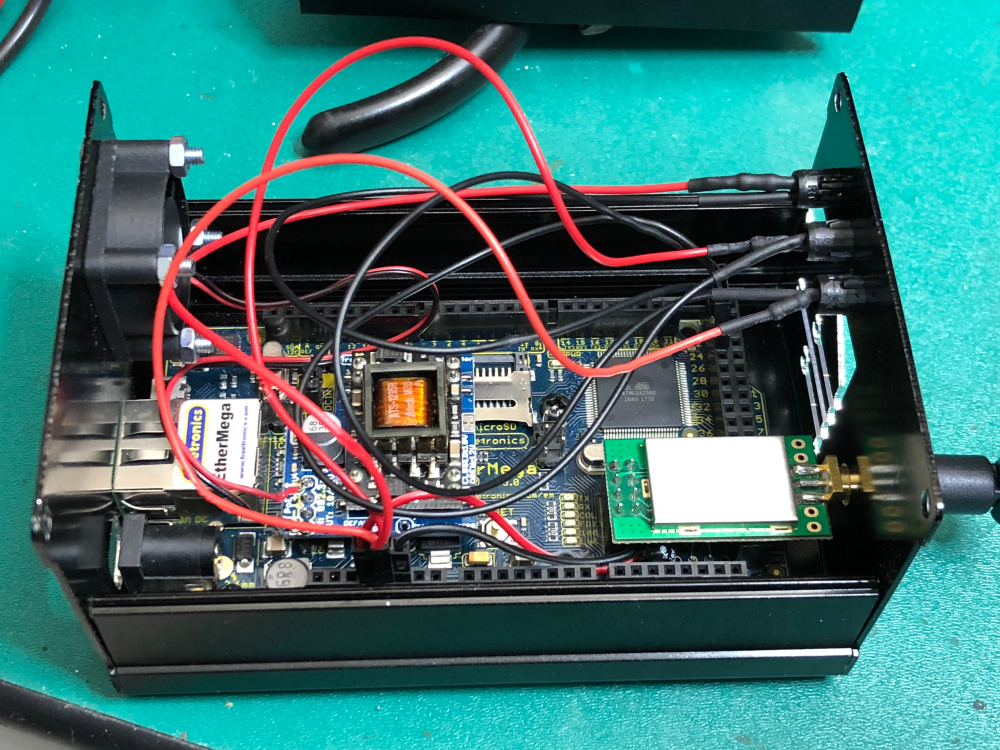
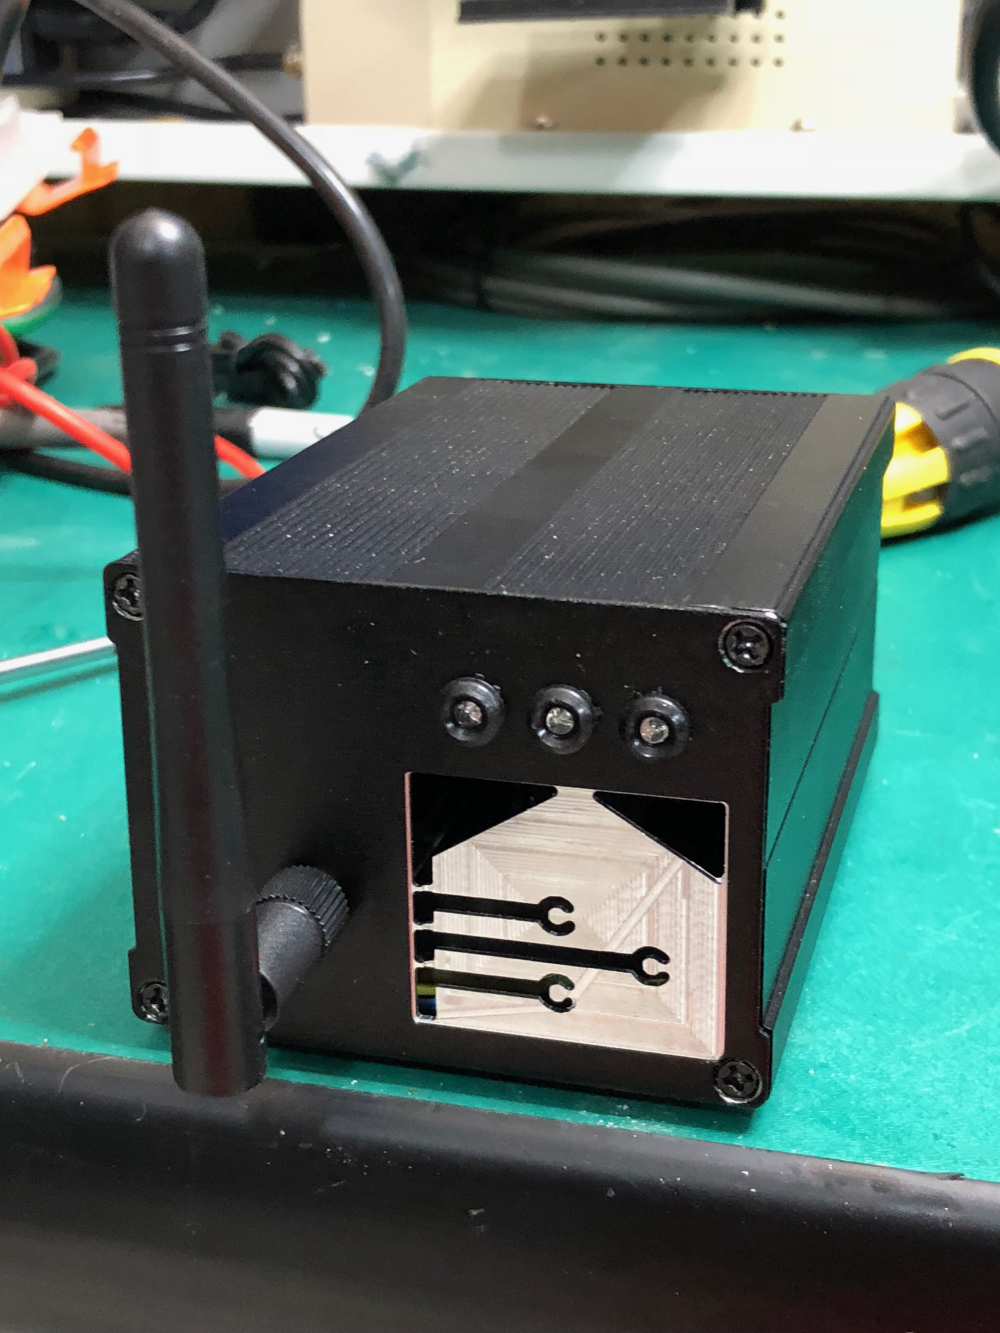
Today I built a new Ethernet Gateway.
Using a Freetrionics Ethermega - Fixed SPI bus, so no soft SPI and I can use MY_RX_MESSAGE_BUFFER_FEATURE. PoE, improved voltage regulator design so I can run the amplified NRF24 with MY_RF24_PA_LEVEL RF24_PA_HIGH.
Under the radio is a small prototyping area with capacitor for the radio and an ATSHA204A - because one day I swear I will implement signing.
Slightly modified Gateway sketch that writes successful DHCP IP addresses to EEPROM. I assign a static address on my router. If there's a power failure, the gateway will start up with last address - router takes ages to come online.
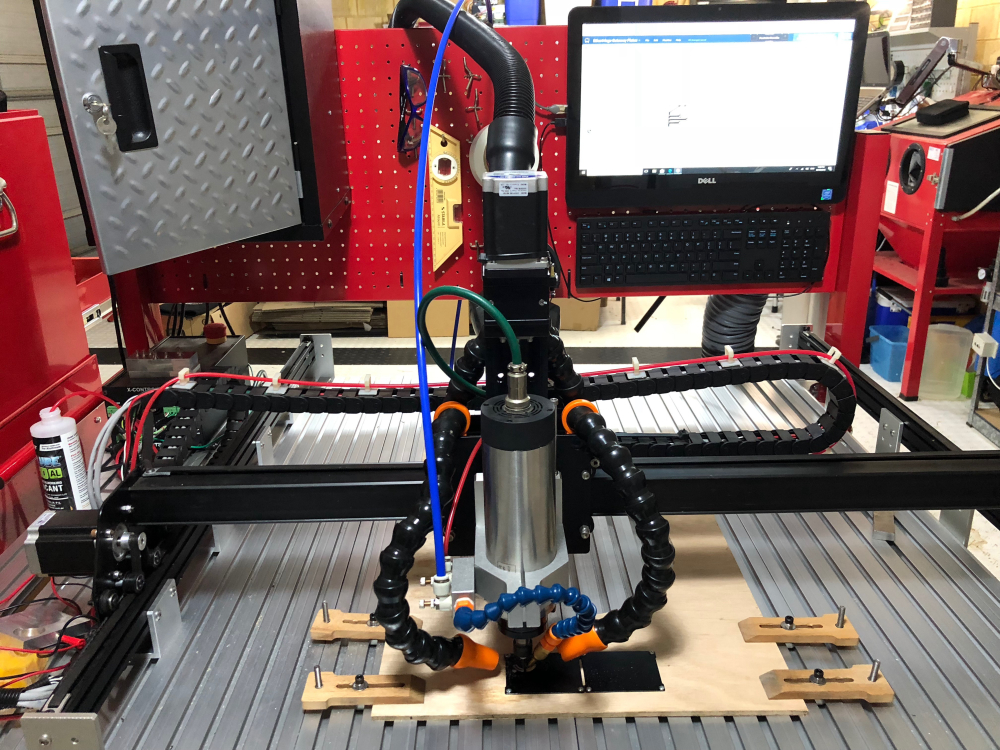
Fired up the X-carve to cut the aluminium chassis, which has added benefit of shielding the NRF radio as well. The complicated cutout on the front was to allow air intake for the fan. Was supposed to just be a grille, but after a couple of beers I got too cute for my own good. Took 2 hours to cut that. :)
-
A video of my Ledstrip project in the kitchen: