Dear All
I am very sorry for the late reply but I did not give up that project. (I do not get a e-mail when you posted a message. (I will check my preferences).
First I would like to tanks you for all of you suggestion and specially to @AffordableTech for his great proposal.
I have some BME280 and I can use one to measure the room humidity as suggested Paul.
I also red a suggestion to put another sensor on the wall (not into) the wall. I am a bit suspicious about that, because as long as it on the surface of the wall, the humidiity of the room will interfer with the measure of the wall.
I am agree with Paul, to drill the wall is a good idea.
But will the the wall have the same moisture in all of it surface? That the reason why, I though more easier to have some Stainless steel nail as the hole would be small.
By the way:
But something else, why is the father not finding the rootcause for the wall to become wet?
he needs to put the energy in fixing the wall, permanently
Yes of course, this should be done once, but now the request is to find where is the most wet zone of the wall, but first to obeserve how to wall get wet during the winter season.
No body compared the nails idea!
I could have 9 pair of nails (3 at the bottom, 3 at middle and 3 at the top of the wall). With a LMC555 . I already developped a such solution to measure the Soil Water Potential in soil, with Arduino and LoRaWAN. The nail hole are very smaller than a 20mm hole :)
I have to assembled two PCB for that projects and I will do over the week-end. I am not sure if I will have time to try the discussed suggestion (Paul's suggestion and Stainless steel nail), but I will keep you informed about the progress
@AffordableTech if you are still around, how would you compare your suggestion and the Stainless steel nails idea?
here is how I plan to do. I already have a PCB ready for that working with a LMC555.
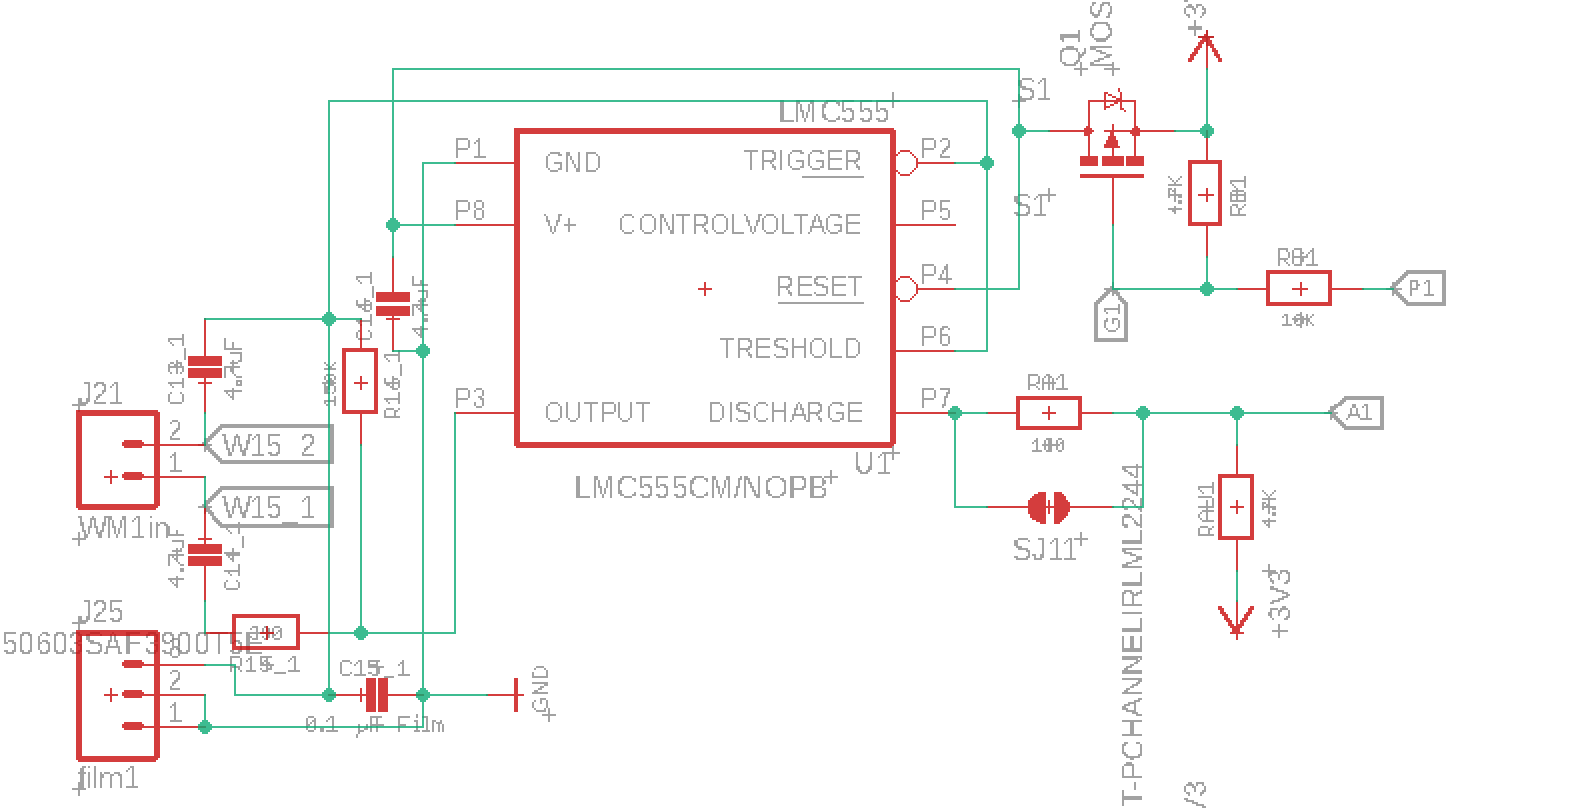
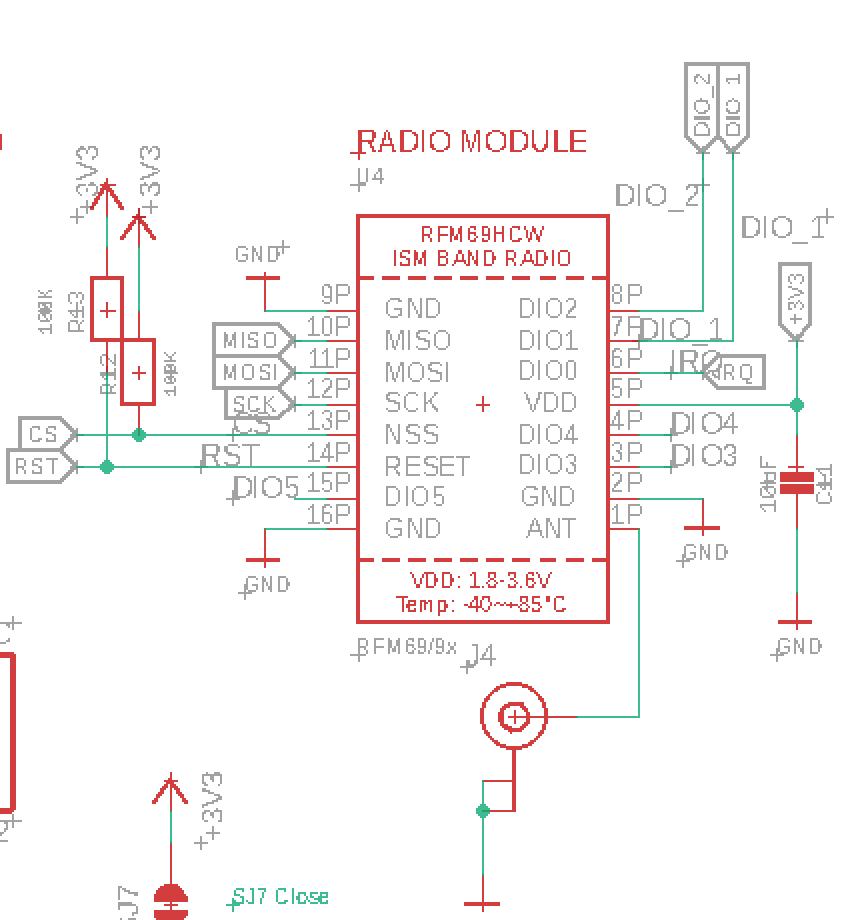
The nails will be connected to the J21. I think, the pair of nails, will be at 2-3cm each other. When P1 is Low, the LMC55 is powered with 3.2V for 2-3 sec. This circuit is designed to have a frequency in response on A1. More the frequency is high, more the zone is wet. More the frequency is low, more the zone is dry. For now, if I can analyse the zone with frequencies, is fine. I will have to adapt my Arduino code of course, but I think interesting to try. On my PCB , I have a LoRaWAN module to send the value to a gateway. Where is the house there is no GSM coverage, Then the gateway will be connected to a neighbour WiFi network. The two house are close, then no issue about distance and transmission. I will get the measure on my server (graph) in real time. That circuit is for Soil moisture, but as the Watermark sensor works with two electrod in a granular sand, I believe the 2 nails could be the two electrond but in a wall. Isn't? I will try it and see if I am a dreamer or nor (laugth). Can it be a good idea?
Note: my module is based on Adafruit boards (feather MO)
In any case, I will also try to drill the walls of my mother house, in the cave, as suggested me Paul. But I am not sure yet, how I will protect the BME280 (or other) to be damage after some months of measurement.
I will keep you inform about the progress in the following weeks (I am employed during the weeks)
I am still novice about that project and looking for experience and suggestion. Then feel you free to give me your point of view about nails idea and of course, I will consider all @AffordableTech suggestion. there are very interesting, for sure.
Let's see.
Thank a lot