Minimal design thoughts


  • Hero Member

    @tbowmo Looks great! I hope my regulators turn out as nice. They should hopefully arrive next week.

    Best thing about the panelizer is obviously if you mass produce different sized boards, and use 10x10 cm PCBs (that are almost half the price / square cm), not only fitting a ton of boards in one space, but beating the freeware limitation in Eagle.


  • Admin

    So almost finished the first two boards of the new revision..

    I changed the footprint of all the SMD capacitors, and resistors, to footprints recomended by the manufacturer we are in dialog with for the mass production. Only problem is, that it's a nightmare soldering the 0402 smd components now, because the footprints are much smaller than what was used on the first revision.

    Anyway, only missing decoupling capacitors now, so I'm going to power it up, just to see if everything works like it should.

    2015-02-22-1.jpg 2015-02-22-2.jpg

    The two first is also with atsha204 mounted! Hope that everything is connected as it should be 🙂

    First powerup seems to be ok. no excessive power ussage, and bootloader is successfully dumped into the first board. So it seems like a success sofar. (Even LED lights up during bootloader startup.. So that's also a success :))

    2015-02-22-3.jpg

    Also ATSHA204 is confirmed working on the first prototype!


  • Contest Winner

    Properly done!


  • so @tbowmo when can we order em ? just waiting to get a may be around 10 to start with 🙂


  • Admin

    @sharath-krishna

    To my best knowledge at the moment, it will be Q2 this year.

    It should work, as the extra components added in rev. 2, have been verified as working (it's the atsha204 chip, for signing purposes). Everything else should be working, as I haven't altered in the schematics, so connections should be the same as the previous version.


  • Contest Winner

    @tbowmo Looking at the placement, I have a few questions regarding connectivity. With the RF-board mounted (looks like it goes in on the bottom layer), will it be possible to access the other holes?
    Essentially, I wonder about the mounting possibilities. As there are no holes for screws, I am guessing the board is intended to be mated to a backplane using the IO-pins as interconnects? But will that be possible when the RF board is mounted? The programmer and FTDI-headers I suppose go up from the top layer so they are out of the way, but my concern is that the RF board will cover the IO-rows on the other side.
    Or is the intention to have a board that is wire-soldered directly and RF module is mounted last? I worry a bit on maintenance then 🙂


  • Admin

    @Anticimex

    main thought was that it was only going to be used with wires connected to the board (that's the way I wanted to use it). the FTDI header, was only intended for downloading software, and debug purposes.

    The radio will cover the FTDI header, and the pinheader on one of the sides of the board. So you have to mount the board to another board "upside down", that is with the atmega facing down to the other board. In this case the micro sensor is sandwitched between the radio module, and the extension board.

    There are tradeoffs when trying to make things as small as possible (which was my initial goal of this board).


  • Contest Winner

    @tbowmo Sure, no problems. I was just wondering about the intended usecase. I think it should be possible to mount both the programming and the FTDI header on the same side though. This leaves the RF board free to use all needed space. And direct wires to all other IO. A "ugly" approach is also to simply not solder FTDI at all. Just put the pin header in and press it against the side when programming (if bootloader exists). Same could be done for the programming header (if you want a really thin board topology).
    But since batteries will create some "height" I think it should be possible to keep both headers pointing up from the AVR-side of the board. Might I suggest for future revisions a 3mm mounting hole/point up center between the nice silk screen grafitti? But perhaps it will be obscured by the RF board. It will be tricky to get the board mounted through that hole in that case if it has to be done before the board is soldered I guess. Oh well, you can't get everything 🙂
    Good work on the routing. The I2C pullups must have been painful.


  • Hero Member

    @Anticimex said:

    Just put the pin header in and press it against the side when programming

    This is what I do with the Pro Mini, have not had any problems yet.


  • @tbowmo what might be the cost we are talking of here for the complete assembled board ?


  • Admin


  • Admin

    @Anticimex

    I don't solder any pinheaders for the serial port, just putting the pins from the ftdi module in the holes on the micro board, and then holding it in place. Done the same thing for the ISP port, but it's a bit more problematic. The last two boards that I have assembled, is with pins in the ISP port.

    I expect to have a "standard" bootloader in the boards (Together with a standard sketch for reading / reporting sensor values), when we receive them from China, so the ISP port is not necessary for the average user. only serial port for reprogramming (if not going for OTA).

    But it might be an option for a future module, to have better access to the headers. Also might go with the nrf24 smd modules. But that's another project at the moment 🙂


  • Admin

    @Anticimex

    btw. the only painfull thing about the current layout, is handsoldering it 🙂 it's a nightmare.. Almost regret that I used the new footprints for resistors / capacitors, as it makes things a lot more difficult.


  • Contest Winner

    @tbowmo Sure. But after a chat with @hek I believe you have dabbled with a bootloader that can flash in new FW from the external SPI flash. This is to me very interesting because that means we can deploy FW updates OTA using the MySensor library to flash the external flash, write some EEPROM byte to inform bootloader that new firmware is available, reboot to have the FW transferred by the bootloader and then boot the new FW. And this in turn means that we can transfer the new firmware signed, therefore support signed FOTA and THAT is very much interesting to me 🙂
    So for me, the ideal would be that the board was preflashed with that bootloader (patched to be triggered by MySensors logic if necessary). Then there would be no requirement to have any extra headers, as you can push whatever you want, and signing can be implemented without actually changing the bootloader (headers will probably be needed during development, but that could just as well be done on breadboard).


  • Admin

    @Anticimex

    But you would still need to set the keys...


  • Contest Winner

    @hek Well, not really. If you like, you can FOTA down the personalizer with your PSK and execute it by remote on a "virgin" unit Then FOTA down your application FW. It is only when your application tells the GW that it require signing, signing actually kicks in.


  • Admin

    @Anticimex

    Yes, I have a bootloader, that copies external flash, to internal. It's also verified as working, with a local firmware update where I downloaded a sketch to the micro, which put another sketch into the external flash, so no OTA in the verification phase. I used DualOptiboot from lowpowerlabs (There is a copy on my github account.)

    The bootloader looks for a signature in the first couple of bytes of the external flash, if present it copies data and erases the external flash.

    I just don't know what direction things are going at the moment, as there also exists the standard MySensors bootloader. If we use dualoptiboot, we need to have FOTA code in the default application that is loaded into the device, before shipment from china.


  • Admin

    @hek, @Anticimex

    if we are going to use the external flash for OTA, then it should be included in the library? So the libraray handles the OTA packets, putting data into the external flash etc.


  • Admin

    @tbowmo
    Yes, that would be the most reliable option to allow updates un normal running mode.

    I discussed this with @Anticimex earlier today and how to combine it with signing without totally flood the network with nonce requests etc.

    Neither of us have the flash memory though 😉


  • Contest Winner

    @tbowmo Yep. The way I understand how things work, I suggest the following:
    Library initiates OTA transfer stream and transmit all FW for storage in external flash. Both sender and transmitter calculates some checksum of the FW and the checksum is sent finally, as a separate command.
    The stream data is sent with a special command that bypasses signature. The checksum is sent with a type that is included with other signed types (currently only the singing handshake commands are excluded from signing).
    That way, if receiver require it, FOTA will also be signed since the checksum packet is signed.
    If the receiver accepts the signature (and the checksum is valid) receiver writes the bootloader specific indicators and restarts, so bootloader can transfer the received firmware to PROGMEM, and "Bob's your uncle". Secure FOTA to your difficult-to-reach node somewhere in the house 🙂


  • Admin

    @hek said:

    Neither of us have the flash memory though 😉

    Hmm we should do something about that at som point in time 😉

    I could send you a couple of bare boards, you could practice your soldering skils on ? 😉


  • Admin

    @hek said:

    Neither of us have the flash memory though 😉

    Maybe we could figure something out.. I could send a couple of empty rev. 2 boards, and you could practice your soldering skills and assemble one yourself 😉


  • Admin

    That might be a good idea. Just hope I won't mess it up too much. Which components do I have to order in the meantime.


  • Admin

    @hek

    I have a BOM at mouser, but need to double check it.. (Also, might have some of the capacitors/resistors in my "private" stock, so you don't need to order them)


  • Admin

    @tbowmo you can sign me up too however I can handle the component side of it if you share the mouser BOM.


  • Admin

    @blacey said:

    @tbowmo you can sign me up too however I can handle the component side of it if you share the mouser BOM.

    The BOM should be available at
    http://www.mouser.com/ProjectManager/ProjectDetail.aspx?AccessID=a509f9ca59

    It should match the current PCB layout for the major number of parts. I haven't looked at the crystal yet, to see if that fits, as I have changed the footprint to the one provided by the manufacturer in china when going with rev. 2.

    At the moment I'm considering if the crystal should be dropped from the BOM, kind of missing a real purpose for it at the moment, as I don't think that "precise timing" is necessary for a node that repports in at a regular interval.. I (for one) don't care if it reports temperature / humidity "exactly" every 60 seconds, or if it's every 55 or 65 seconds.. But others might have another priority?

    Schematics / PCB layout is available on github : https://github.com/tbowmo/MySensorMicro (please double check BOM from mouser, and the eagle files. I might have missed something :))


  • Admin

    @tbowmo Awesome! I'm on it 👍


  • Admin

    So, a small update on the rev.2 board status.

    I am verifying the rest of the board now, before we kick of an initial testrun of 5 boards at the manufacturer. Everything seems to be working, electrically..

    Unfortunately something has happened in the SPI library in arduino, so the external flash, is now crashing the arduino sketch, while initializing. Someone else has already reported it to lowpowerlabs github repo https://github.com/LowPowerLab/SPIFlash/issues/8

    Having had the above issues, I have already build, and disassembled two nodes, trying to debug things :s

    Oh the fun of debugging embedded things...

    update

    I found a solution, someone else had made the necessary changes to lowpowerlabs spiflash library (check the issue comments in the link above)

    I also read in the release notes for arduino 1.6.0, that they have changed the SPI library to support transactions. Will this have any effect on MySensors? (@hek, any comments?)


  • @tbowmo : if the connections are fine when can we expect he board for production ?? looks everything is fine


  • Admin

    @sharath-krishna

    We are getting closer to a launch. A production partner has been found. All on-board hardware have been verified as OK! And I'm verifying the last bits (Want to have a complete node running, before giving a GO..) Also finishing the software that should be preloaded on the atmega.

    Depending on how things are going, we should be able to make the first trial batch within the next couple of weeks (I hope!) which we then need to verify before starting the big machine.

    Going to be an exiting spring this year 🙂


  • To where will you be able to ship the nodes ? I live in France. I don't know where you are located...


  • Admin

    @doblanch

    It will be shipped directly from the producer to any location.


  • @hek Thank you for your reply. I'm going to deploy may be like 5/6 nodes. Another question, By any chance, did you think about a case which accept module+battery ?


  • Admin

    A case already was on my short-list and we could very well provide it.

    Depending on demand it could be 3d-printed or for larger quantities done with mold injection by our partner.

    But I would really need some help from a (talented) 3d modeller for this. Do we have anyone here that can help out?

    The box must have a battery compartment for 2XAA. A big question is if it also should have space for an extra sensor?
    Would be great if we could provide a couple of cover-options for things like motion (HC-SR501) and another for light/uv/ir sensor. Hope we can get creative together here.


  • Admin

    A small update from the workbench here 🙂

    The first rev.2 node is transmitting like it has never done anything else right now.

    Next up is programming the bootloader, I am having some troubles in that area.. It seems that it is programmed, but I can't get it to accept any downloads from the arduino IDE.

    Anyone got any hints for me to follow?


  • Contest Winner

    @tbowmo have you checked that the fuse configuration matches the HW with respect to frequencies and such?


  • Admin

    @Anticimex

    I have checked, and double checked fuses 🙂 I'm using avrdude to program the bootloader directly, and it seems that it is starting up (the LED is lighting up as it is supposed to). Also when I program a sketch via ISP (using jtagice3) serial is working fine, so it seems that fuse settings is right for oscillator (at least)

    But I might have missed something with the fuse settings.

    I get these fuses
    AVRDUDE -U lfuse:w:0xE2:m -U hfuse:w:0xDA:m -U efuse:w:0xFE:m -U lock:w:0xFF:m

    from http://eleccelerator.com/fusecalc/fusecalc.php?chip=atmega328p&LOW=E2&HIGH=DA&EXTENDED=FE&LOCKBIT=FF


  • Contest Winner

    @tbowmo I am just taking wild guesses and the one thing that came to my mind if you seem to have bootloader running but cannot download is that the serial line is out of sync for some reason. But I have not dissected the arduino bootloader or the protocol so I am in deep murky waters making assumptions now 🙂


  • Admin

    @Anticimex

    Yeah, but it's hard to debug things in the bootloader.


  • Contest Winner

    @tbowmo Tell me about it. It's what I do for a living 🙂
    You don't have means to pick up the serial line after the FTDI adapter by any chance? It perhaps reveals garbage or signs of non-matching BAUD rates.


  • Admin

    @tbowmo

    The fuse settings say 8Mhz internal, 2kb bootloader. Which bootloader are you using and did you adjust the baud settings in the boards.txt for the IDE (i.e. upload.speed=57600)? Also, do you get serial output at the set baud rate when uploading a simple serial output sketch via isp? Alternatively, I recommend recompiling the bootloader at 8Mhz for correct baud settings.


  • Admin

    @tekka

    It's DualOptiboot that I'm using, compiled for 8Mhz (internal RC oscillator).


  • @hek Hello, I have a friend who is working with 3D modeling. i can study it. I do not guaranty for the moment, as it doesn't rely on me directly. however I can do the best, and try to move forward.
    If I understand correctly, we need the place for the sensor+antenna+AA battery...
    On the PCB, is there some hole to place some screws ?
    How should we close the case ? by putting some screw or just putting a cover ? make sense ?


  • Admin

    @doblanch

    The board has humidity/temperature build in. So we only need space for maybe one extra sensor (question is how large volume this would need?).
    Punch out holes for wires to external things like permanent power, buttons or reed-switches.

    Click on cover would be nice but requires more accuracy in the making. A screw wouldn't be a big problem.

    Many variables... 😉


  • Admin

    @tekka @Anticimex

    Bootloader is working now.. I tried to compile for another target, atmega328_pro8, which worked.. (used "pro8" the other day, which also compiles for atmega328.. Hmm.. go figure)


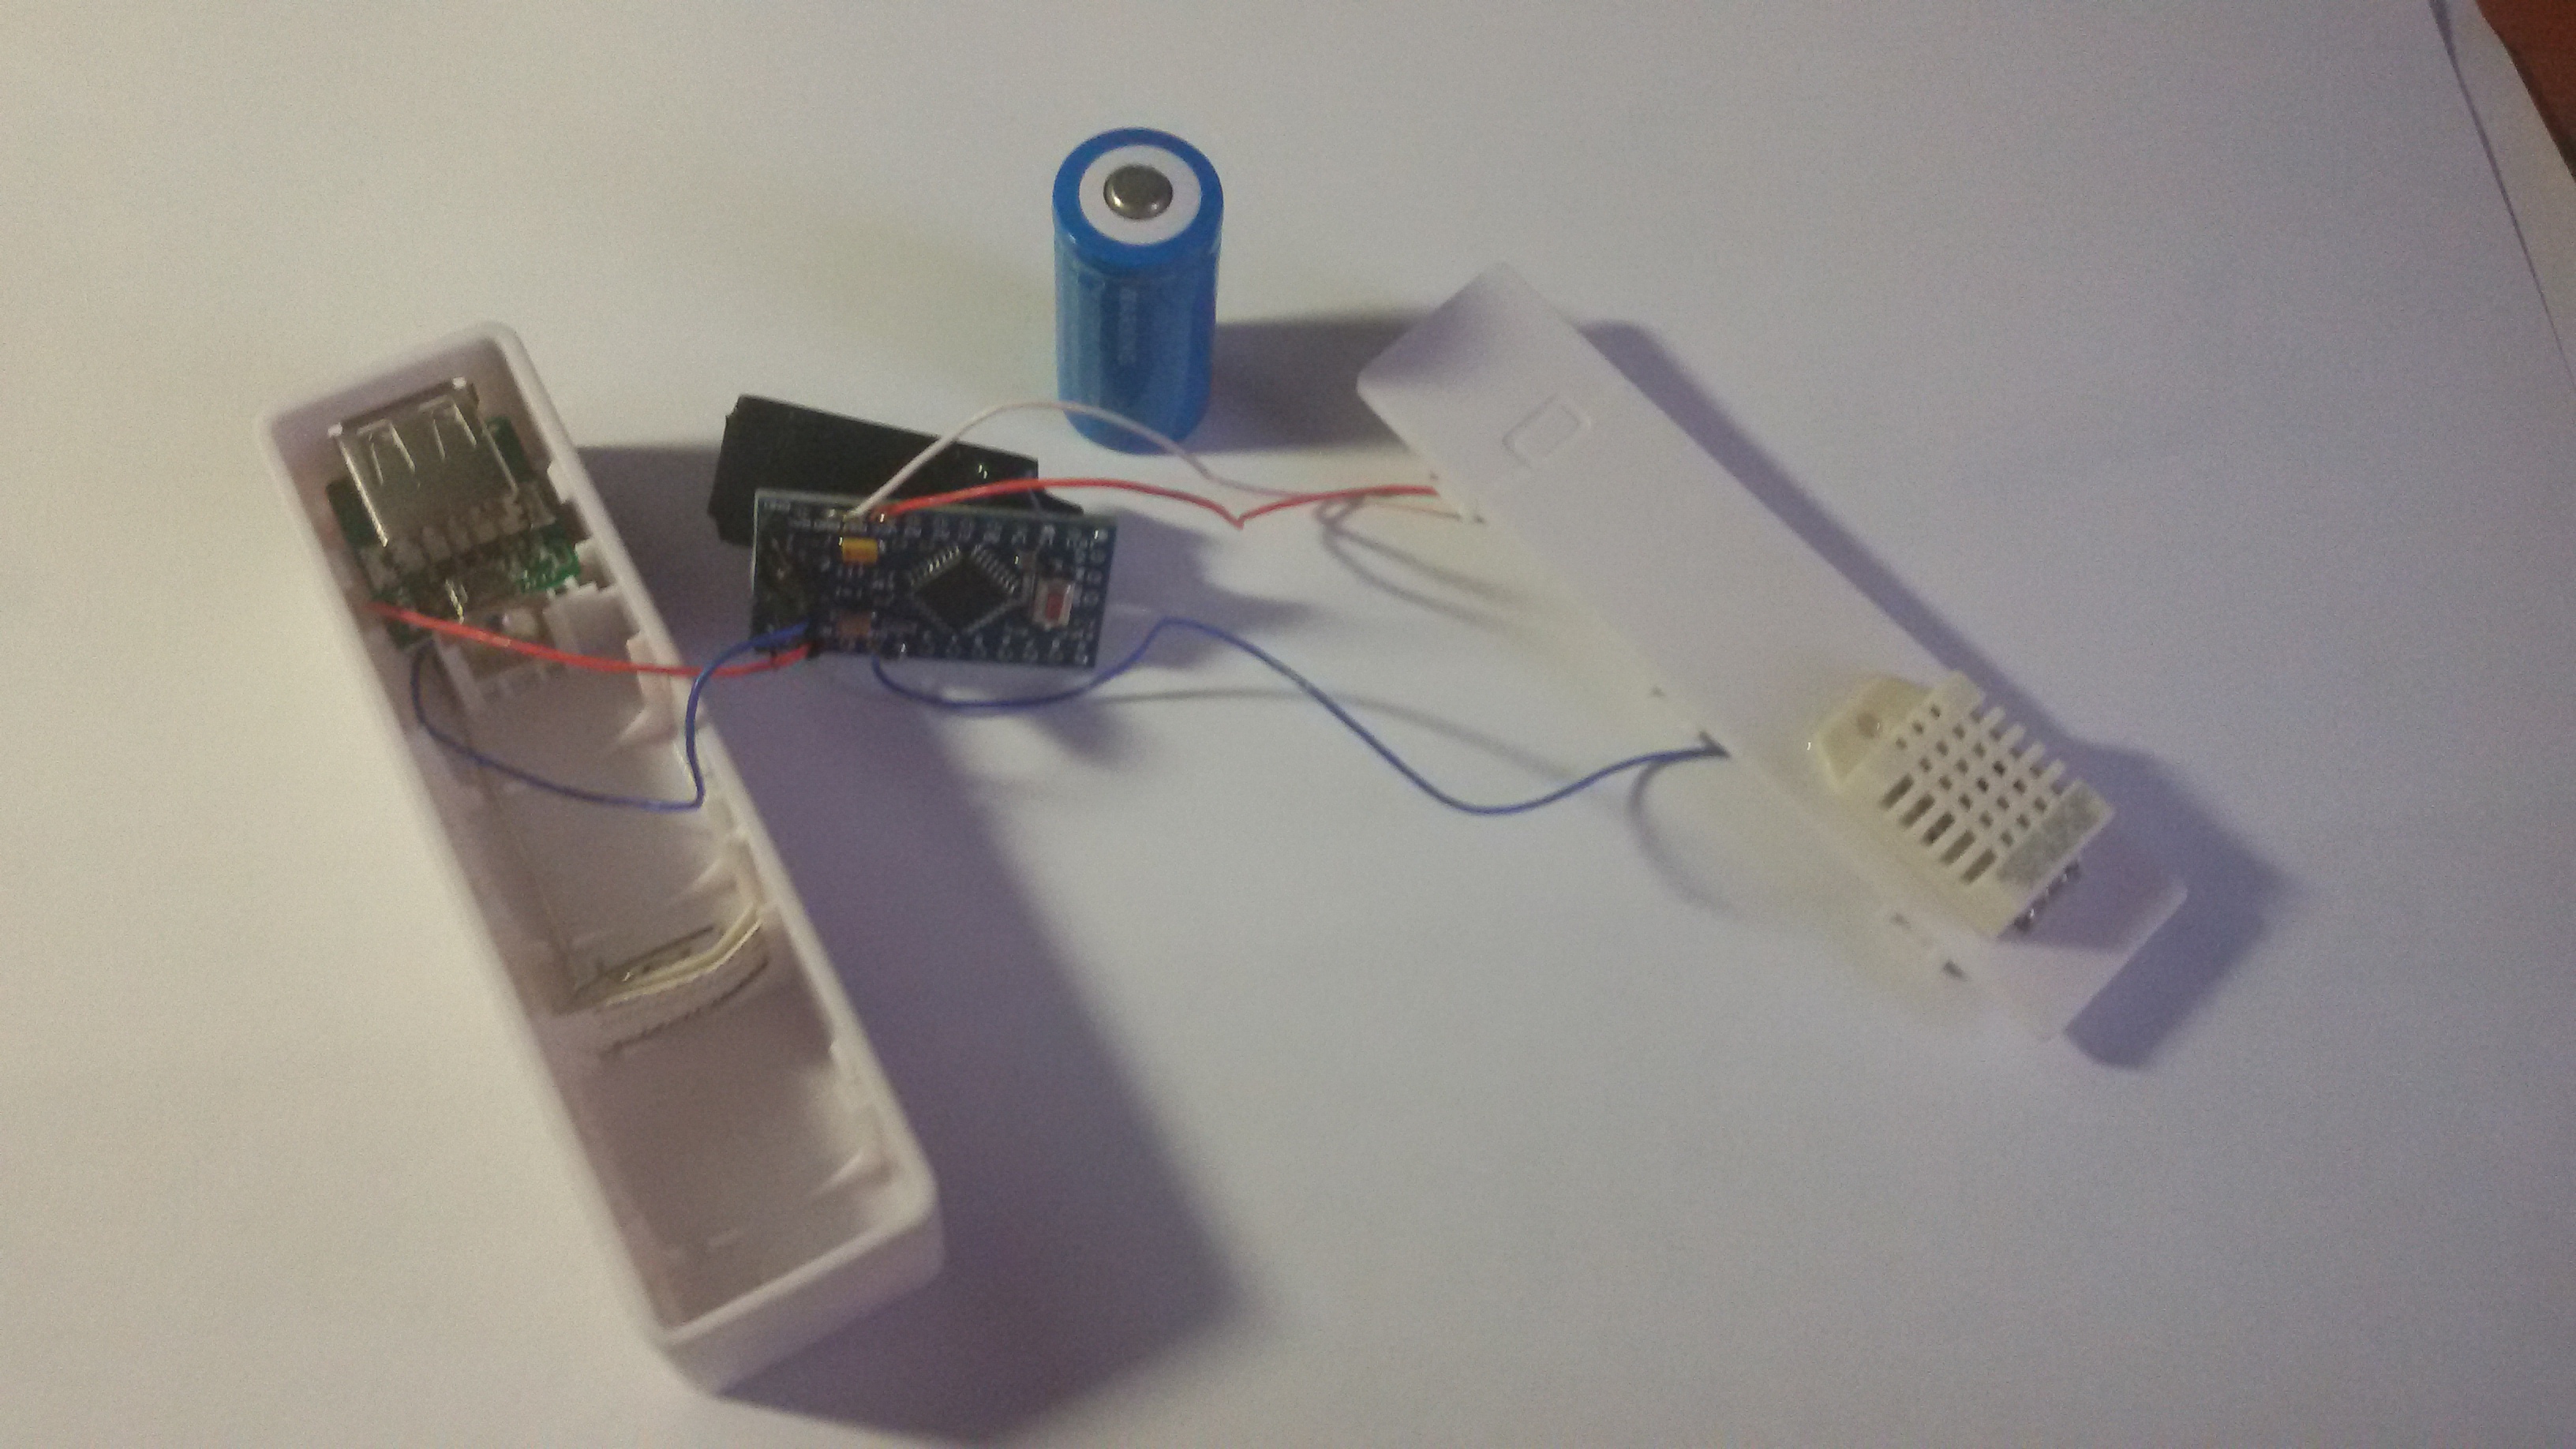
  • @hek I know , yes for the T/H sensor. As we put 2 AA battery, we have to know if we want to stack sensor/battery or not...otherwise, battery and sensor will be on the same plan.
    I think that we can start without extra sensor, and add it in function of request, I'm going to buy a 3D printer, It will be my first tests.


  • Admin

    Today the production files have been sent off to China, for the first batch of 5 prototypes build by them. We then need to verify them, and if they are found OK, we start a larger production run.

    Feeling like Christmas is comming up 🙂


  • I'm too late for my suggestion, but maybe it can be implemented in future versions if considered. Just in order to simplify connectivity with sensors, spare pins could be accessible via grove connectors. However the board looks amazingly small!


  • Hardware Contributor

    Why do not use CR123A accumulator?
    It is smaller and can be charged.
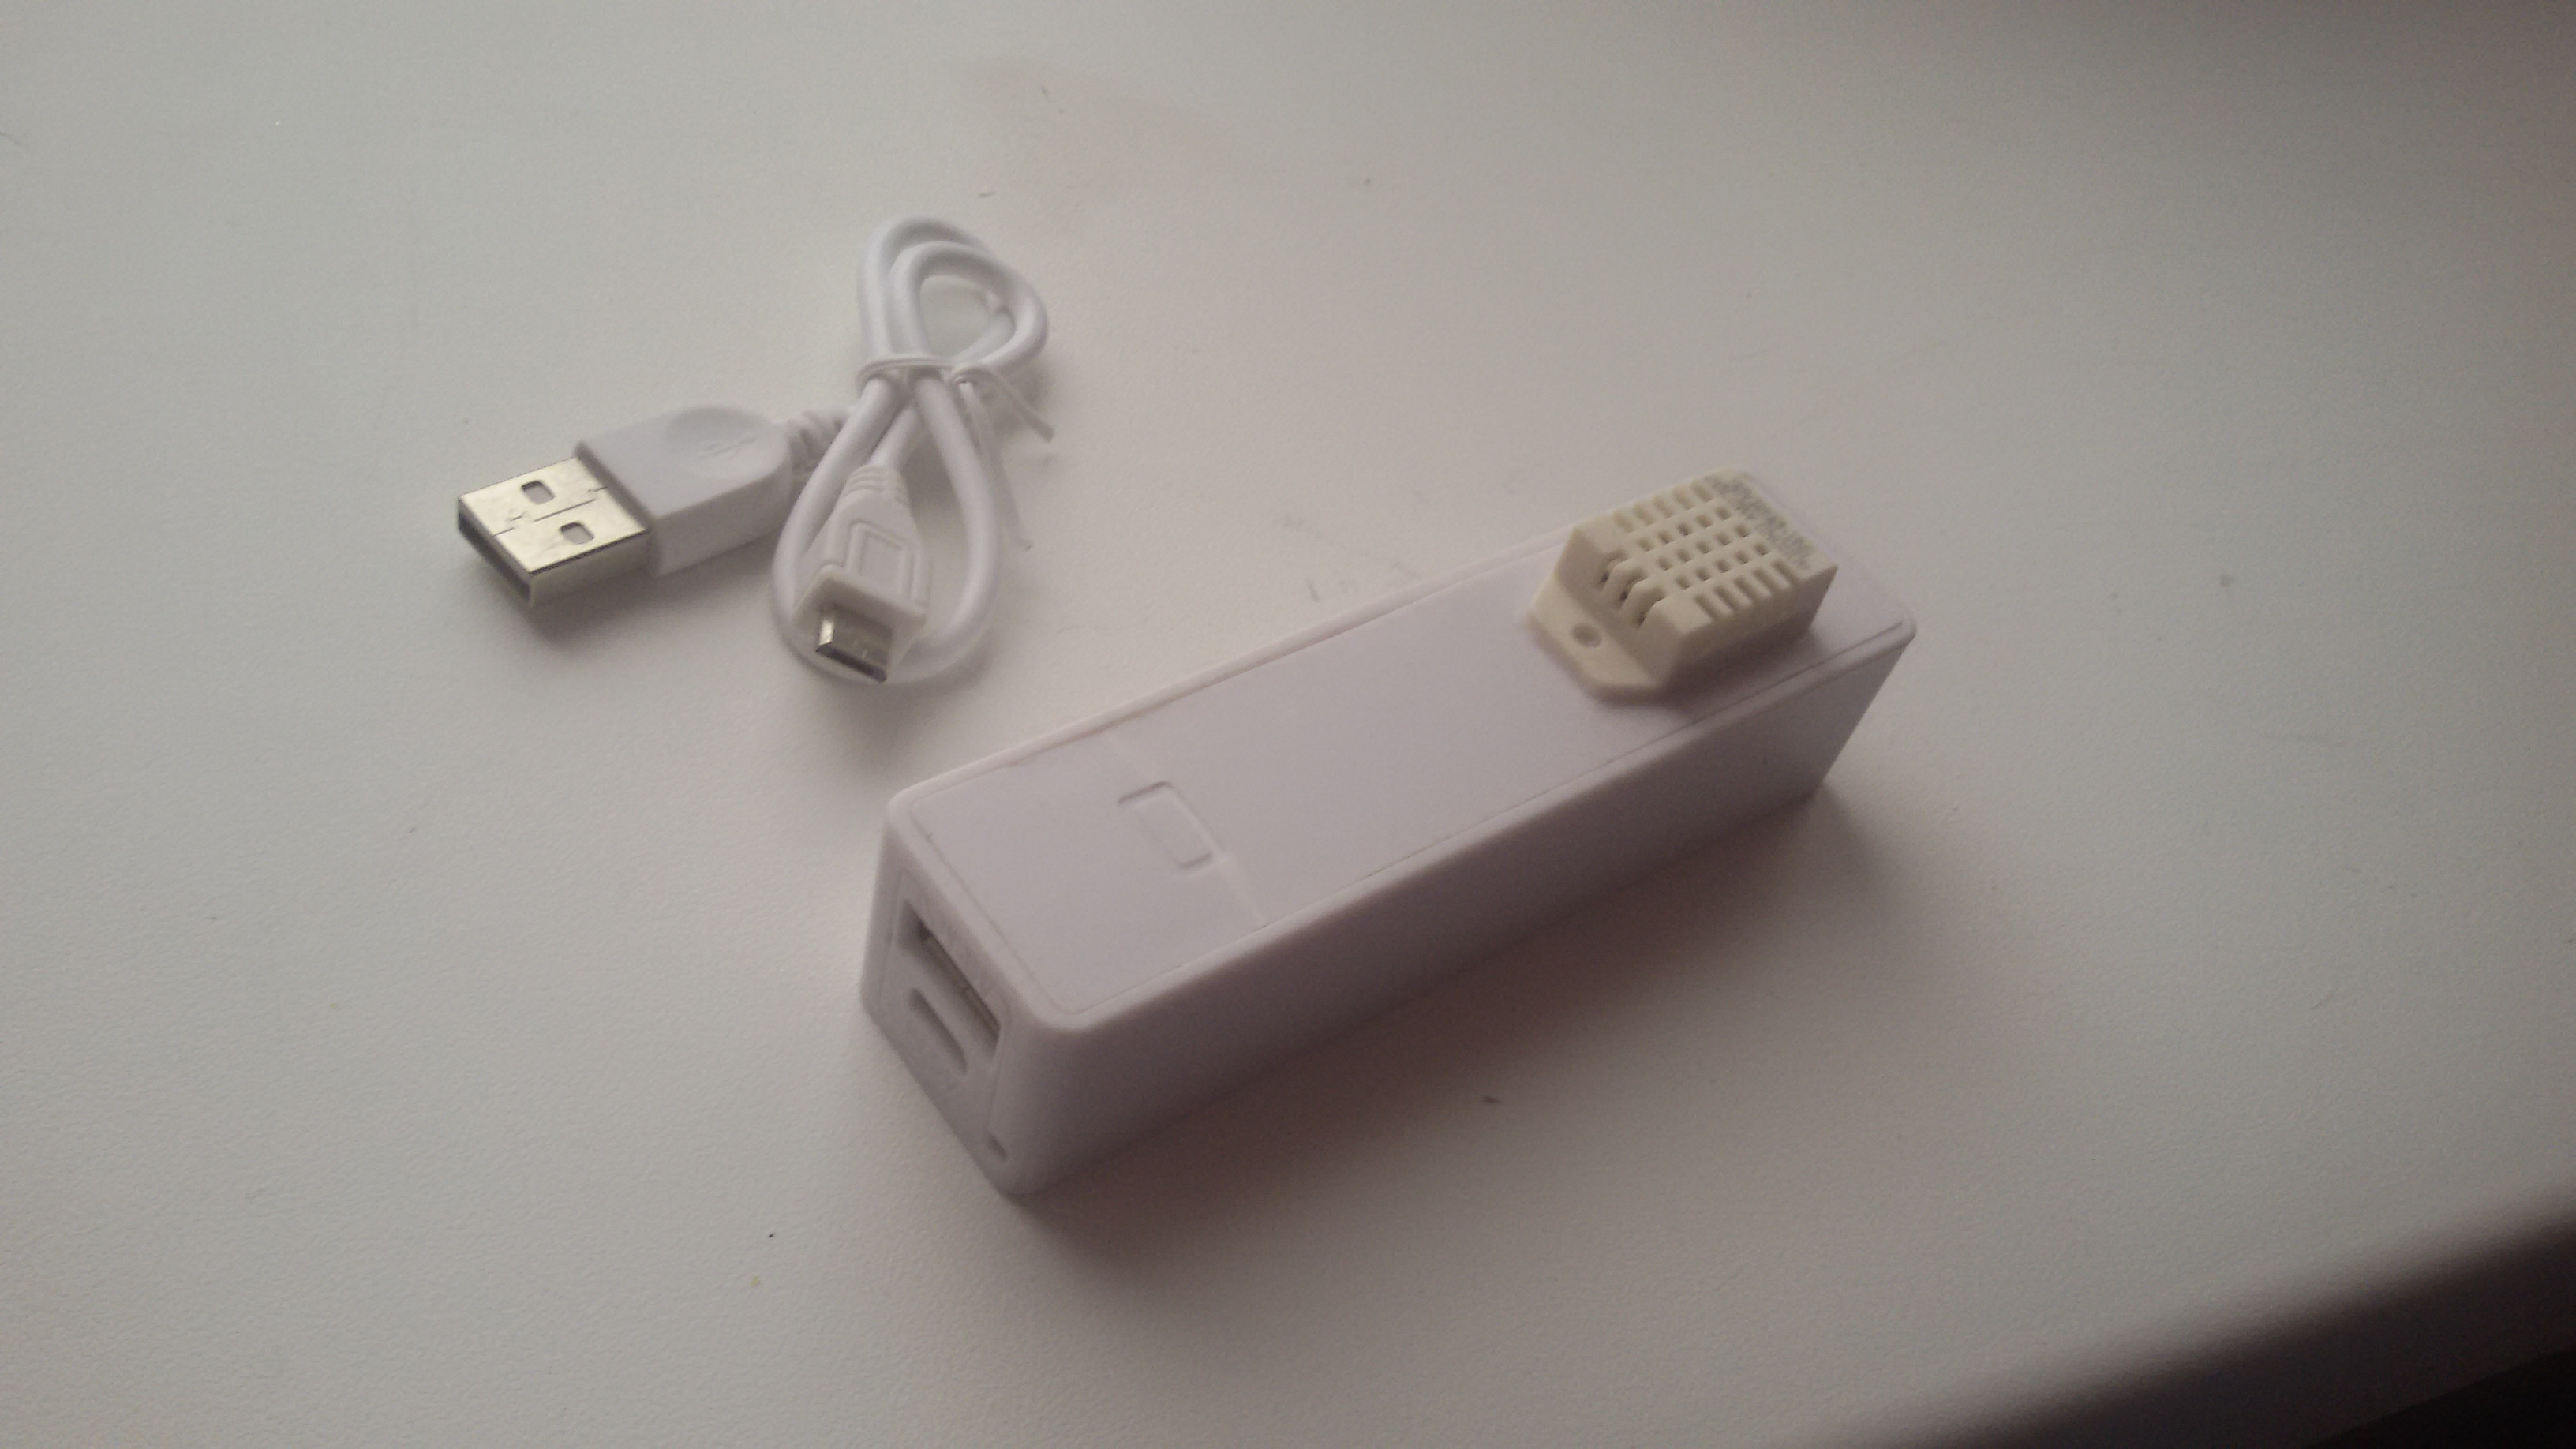
    And not nide regulator

    I use box with charger. With CR123A accumulator.
    http://www.ebay.com/itm/2600Mah-USB-Portable-External-Battery-Charger-Power-Bank-for-Cell-Mobile-Phone-/301514424642?pt=LH_DefaultDomain_0&var=&hash=item4633a90142

    Very cheap

    1420881033-0de30-1672kb.jpg
    1420881032-82f5e-1161kb.jpg


  • @Ivan-Z Really nice idea for battery powered nodes:)


  • Hero Member

    @Ivan-Z how did you connect the power to the arduino? How are you powering the Radio? Is it a Pro Mini 3.3V? How long does the battery last? Did you do anything special to the arduino ( hardware changes or something else? )


  • Hardware Contributor

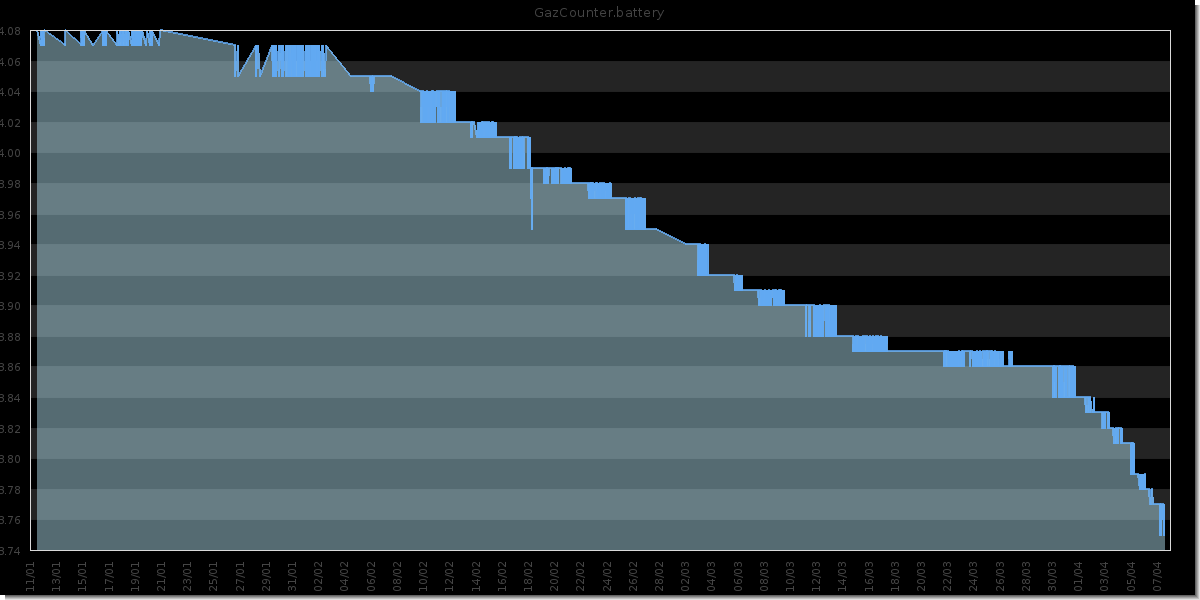
    CR123A in full charge has 4.07v

    Gas counter started 2014/11/01.

    In winter, temperatures drop below -10

    скачанные файлы.png


  • Admin

    @Ivan-Z

    You say that it don't need a regulator? the battery voltage is 4.07 when fully charged, that is 0.47V above the absolute maximum rating of the NRF24L01+, as it's only rated to 3.6V maximum. Same goes for the Si7021, maximum supply voltage is 3.6V.

    So CR123A is not a good battery, unless you put a regulator in the loop, which then again uses current, and causes a voltage drop from battery supply


  • Hardware Contributor

    DHT22 = 3.3-6V DC

    CR123A = 3.6v ( Bat full charge i have 4.07v )

    NRF24L01+ = 3.6

    I have 8 device and his work with CR123A for 6 months
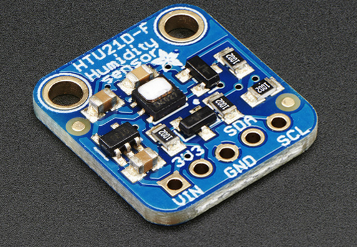
    When charge some device cannot translate packets, but after work


  • Hero Member

    @Ivan-Z I think you are lucky... I burned a few radio's with a similar setup (with LiPO solar charger) I like your minimal design. If you replace the DHT sensor with a htu21 you can make it even smaller. There are a few htu21d boards with a 3.3v regulator on it which you could use to power the radio.


  • Hardware Contributor

    @AWI
    What regulator do you use?

    I do not use the regulator because it has a extremeconsumption
    AMS1117-3.3 = 5~10mV in idle


  • Hero Member

    @Ivan-Z I use the XC6206 series regulator. most of the times. The quiescent current for this one is very low 1-3 uA. This regulator is used by many of the sensor board suppliers to supply sensors with 3.3v Eg. In many cases (eg Adafruit) you can use the board as a "3.3v power supply"
    upload-087eda80-75af-457b-804a-a16e6d67612f


  • Hi guys. I'm waiting for your board!
    the only concern is about the 2xAA batteries adoption that could increase the overall size of a sensor node to a "normal node" size ( http://www.seeedstudio.com/depot/s/devduino.html?search_in_description=0).
    I would like a stack as following: battery+board+radio. with the same footprint of the radio module.
    The battery could be a CR123 with regulator, and the holder could be a pcb holder as this: http://www.memoryprotectiondevices.com/datasheets/BH-CR2-PC-datasheet.pdf
    I actually ordered some of these: http://www.elecrow.com/devduino-sensor-node-v4-atmega-328-p-1201.html, at this moment the closest to my size requirements.
    What do you think.?


  • Hero Member

    @Roberto-Brunialti I am looking forward to this board also. I deployed a few Devduino V4's. These are really well built but lack the "minimal" size, have only a few connectors (enough in most cases as a good temp/hum sensor is on board).. And "restrict" you to the use of non-rechargable CR123 cells (3V,no regulator). I will love the very small footprint combined with the flexibility in power sources (and extra features) in the "Minimal design thoughts" design. 😍


  • Admin

    Think we should rename the thread to "Mysensors Micro" as this is the new name, since it's the first "official" board from mysensors.

    Anyway, just got a couple of pictures from the factory in China, they have build the first batch of 5 pcb's that they are verifying at the moment, and then they should be shipped to us (either @hek or me?) and then we need to verify it, before giving a go on the production.

    So we are comming closer to a "launch" of the device.


  • Admin

    @tbowmo

    Yep, might also be good to create a new thread in Announcement when it has been launched (and is for sale) with a back-reference here for history/design decisions made by you.

    I should probably start working on a more complete page on the main site with more details and illustrations.


  • In your design, C3, the nrf 4u7 capacitor, is a classic ceramic capacitor. In the mysensors tutorial, they write a polarized capacitor is better for the NRF. I use tantalum capacitor wich are bigger but is there a difference with the ceramic one for the nrf. I would like to use a ceramic 0603 too if there is no difference for nrf.

    Thank's


  • Admin

    @Tibus

    In theory ceramic capacitors should be better, it has a lower ESR, and are better suited to reduce ripple, or noise on the supply locally, as it has a faster response to power requirements, than equivalent electrolytic capacitors.


  • will it be possible to use this board pcb without soldering the sensor , flash and security chip?


  • Admin

    @Mickey

    Yes, you can use it without those mounted. But I don't think that we are going to sell it without those components mounted


  • Any good news about the d-day (delivery day 😃 ) ?


  • Admin

    Small production run of 200 units started this morning. 🙂


  • @hek said:

    Small production run of 200 units started this morning. 🙂

    You would run-out of units very soon...


  • when preorders will be available ?


  • Admin

    @Roberto-Brunialti

    I will check with Itead Studio if their shop can handle pre-orders.


  • Admin

    @Mickey

    Then we will make another 200 (or more, depending on requests) 🙂


  • What's the expected price point for these?


  • Admin

    @hautomate

    They are going for 14$ plus shipping.. Expected shipping date is set to 20th of May.

    (the project is receiving about 1$ for each unit sold)

    / Thomas


  • Oh! Where do I order?! Been waiting for this!


  • Admin

    @gadu

    An initial product page is up at iteadstudio : http://imall.iteadstudio.com/mysensors-micro.html

    We are working on updating product description etc.


  • FYI - ITead is already taking preorders for the board.


  • Hi, I have ordered some boards from Itead. Just some doubts: is the board a 5v or a 3.3? what's about nrf24 decoupling capacitor? May I assume the nrf24 is correctly powered at 3.3 V by the board?
    Sorry but i'm on the "soft" side more than the "hard" ...:-)


  • Contest Winner

    @Roberto-Brunialti The board is "2XAA" battery, in other words; 3V. Some components on the board won't survive 5V so it is important not to use that voltage. Decoupling for the radio is onboard.


  • Contest Winner

    The board has it's "own" thread as of now:
    http://forum.mysensors.org/topic/1345/sensebender-micro


  • that ìs fine for me!


  • Hi, i ordered some boards from OSHPark and at the weekend i solder this thing together. Here a pic from my work 🙂

    IMG_3099.JPG - Windows Photo Viewer 2015-05-11 10.11.04.png

    Ok, it's work. You see, i have old nrf24 Modules they have not the same pinout, but i ordered some here in germany.

    Some points to the design:

    • this pcb has on both sides small SMD Components, that very hard to solder. I solder my one with an IR Oven and can only solder one side. It's mostly ok becouse on the second size i can solder with an iron, but never 04 components 🙂
    • the size of smd components are too small, i understand this when you use the small Atemag328p MLF and only 04 components. Better are 0603 or 0805.

    Ok, enough ... the board are great and give me a lot of ideas to my board. my are a small bigger but use the nrf24l01+ SMD version and a normal arduino pro mini. Please have a look:

    1 Board - C__Users_D063239_ownCloud_Xambi_Xambi_kids_PROTOTYPE_xambikid_mini_pro_Arduino-Pro-Mini-xkid.brd - EAGLE 7.2.0 Light 2015-05-11 10.22.13.png


  • Admin

    @Frank-Herrmann

    looks nice. And yes, I know that 0603 is prefered for home soldering. However, as we are going to get this SMD assembled in china, there is no problem in using 0402 components.

    Also, if I where to use 0603 (or 0804 for that matter), the board would be bigger.

    I am working on another pcb now (a GW for mysensors), where I am going for 0603, as I don't have the same size restrictions, as I had when doing this board. This will also be double sided (so far anyways, might change it down the road)


  • @tbowmo what type of capacitors do you use for the sensebender? The 100nf are ceramic I suppose, but what about the 4.7uf for radio?


  • Admin

    @Magnus-Pernemark

    It's all ceramics.. (also the 4.7uF for radio)


Log in to reply
 

Suggested Topics

0
Online

11.2k
Users

11.1k
Topics

112.5k
Posts