Skip to content
  • MySensors
  • OpenHardware.io
  • Categories
  • Recent
  • Tags
  • Popular
Skins
  • Light
  • Brite
  • Cerulean
  • Cosmo
  • Flatly
  • Journal
  • Litera
  • Lumen
  • Lux
  • Materia
  • Minty
  • Morph
  • Pulse
  • Sandstone
  • Simplex
  • Sketchy
  • Spacelab
  • United
  • Yeti
  • Zephyr
  • Dark
  • Cyborg
  • Darkly
  • Quartz
  • Slate
  • Solar
  • Superhero
  • Vapor

  • Default (No Skin)
  • No Skin
Collapse
Brand Logo
  1. Home
  2. Bug Reports
  3. [solved] RFM69 based nodes unable to report Lib Version

[solved] RFM69 based nodes unable to report Lib Version

Scheduled Pinned Locked Moved Bug Reports
51 Posts 8 Posters 17.8k Views 5 Watching
  • Oldest to Newest
  • Newest to Oldest
  • Most Votes
Reply
  • Reply as topic
Log in to reply
This topic has been deleted. Only users with topic management privileges can see it.
  • J jpaulin

    @Anticimex
    I don't know how to file a pull request, so I put the test results here.

    Modified as follows to remove the preprocessor condition at: https://github.com/mysensors/MySensors/blob/development/core/MySigning.cpp#L154-L160

    // #if defined(MY_SIGNING_FEATURE)
        // If we do support signing, wait for the gateway to tell us how it prefer us to transmit our messages
        if (destination == GATEWAY_ADDRESS) {
    	    SIGN_DEBUG(PSTR("Waiting for GW to send signing preferences...\n"));
    	    wait(2000, C_INTERNAL, I_SIGNING_PRESENTATION);
    }
    // #endif
    

    solves the issue.

    At the same time the internal message received from the gateway seems to be erroneously transferred to the receive() function in a sketch. Adding to the sketch

    void receive(const MyMessage &message) {
        Serial.println("something came in");
    }
    

    gets the message dump:

    2310 TSF:MSG:SEND,3-3-0-0,s=255,c=3,t=15,pt=6,l=2,sg=0,ft=0,st=OK:0100
    2332 TSF:MSG:READ,0-0-3,s=255,c=3,t=15,pt=6,l=2,sg=0:0100
    something came in
    2409 TSF:MSG:SEND,3-3-0-0,s=255,c=0,t=17,pt=0,l=10,sg=0,ft=0,st=OK:2.0.1-beta
    2496 TSF:MSG:SEND,3-3-0-0,s=255,c=3,t=6,pt=1,l=1,sg=0,ft=0,st=OK:0
    

    To solve this I made the following change to _processInternalMessages(void) in MySensorsCore.cpp.
    Line https://github.com/mysensors/MySensors/blob/development/core/MySensorsCore.cpp#L407 is replaced with:

    	else if (type == I_SIGNING_PRESENTATION) {
    	}
    	else return false;
    

    The message dump now looks like this:

    2250 TSF:MSG:SEND,3-3-0-0,s=255,c=3,t=15,pt=6,l=2,sg=0,ft=0,st=OK:0100
    2269 TSF:MSG:READ,0-0-3,s=255,c=3,t=15,pt=6,l=2,sg=0:0100
    2331 TSF:MSG:SEND,3-3-0-0,s=255,c=0,t=17,pt=0,l=10,sg=0,ft=0,st=OK:2.0.1-beta
    2441 TSF:MSG:SEND,3-3-0-0,s=255,c=3,t=6,pt=1,l=1,sg=0,ft=0,st=OK:0
    

    At the API description page https://www.mysensors.org/download/serial_api_20 seems to be another error.
    For the internal message t=15 the name description

    I_REQUEST_SIGNING 	15 	Used between sensors when initialting signing.
    

    should be changed to

    I_SIGNING_PRESENTATION 	15 	Provides signing related preferences.
    

    This I think is relevant both for the master and the development branch.

    AnticimexA Offline
    AnticimexA Offline
    Anticimex
    Contest Winner
    wrote on last edited by
    #15

    @jpaulin thanks for the updates. I will have a look at making a pr when I get opportunity. @hek does the documentation issue sound familiar? ;)

    Do you feel secure today? No? Start requiring some signatures and feel better tomorrow ;)

    1 Reply Last reply
    0
    • J jpaulin

      @Anticimex
      I don't know how to file a pull request, so I put the test results here.

      Modified as follows to remove the preprocessor condition at: https://github.com/mysensors/MySensors/blob/development/core/MySigning.cpp#L154-L160

      // #if defined(MY_SIGNING_FEATURE)
          // If we do support signing, wait for the gateway to tell us how it prefer us to transmit our messages
          if (destination == GATEWAY_ADDRESS) {
      	    SIGN_DEBUG(PSTR("Waiting for GW to send signing preferences...\n"));
      	    wait(2000, C_INTERNAL, I_SIGNING_PRESENTATION);
      }
      // #endif
      

      solves the issue.

      At the same time the internal message received from the gateway seems to be erroneously transferred to the receive() function in a sketch. Adding to the sketch

      void receive(const MyMessage &message) {
          Serial.println("something came in");
      }
      

      gets the message dump:

      2310 TSF:MSG:SEND,3-3-0-0,s=255,c=3,t=15,pt=6,l=2,sg=0,ft=0,st=OK:0100
      2332 TSF:MSG:READ,0-0-3,s=255,c=3,t=15,pt=6,l=2,sg=0:0100
      something came in
      2409 TSF:MSG:SEND,3-3-0-0,s=255,c=0,t=17,pt=0,l=10,sg=0,ft=0,st=OK:2.0.1-beta
      2496 TSF:MSG:SEND,3-3-0-0,s=255,c=3,t=6,pt=1,l=1,sg=0,ft=0,st=OK:0
      

      To solve this I made the following change to _processInternalMessages(void) in MySensorsCore.cpp.
      Line https://github.com/mysensors/MySensors/blob/development/core/MySensorsCore.cpp#L407 is replaced with:

      	else if (type == I_SIGNING_PRESENTATION) {
      	}
      	else return false;
      

      The message dump now looks like this:

      2250 TSF:MSG:SEND,3-3-0-0,s=255,c=3,t=15,pt=6,l=2,sg=0,ft=0,st=OK:0100
      2269 TSF:MSG:READ,0-0-3,s=255,c=3,t=15,pt=6,l=2,sg=0:0100
      2331 TSF:MSG:SEND,3-3-0-0,s=255,c=0,t=17,pt=0,l=10,sg=0,ft=0,st=OK:2.0.1-beta
      2441 TSF:MSG:SEND,3-3-0-0,s=255,c=3,t=6,pt=1,l=1,sg=0,ft=0,st=OK:0
      

      At the API description page https://www.mysensors.org/download/serial_api_20 seems to be another error.
      For the internal message t=15 the name description

      I_REQUEST_SIGNING 	15 	Used between sensors when initialting signing.
      

      should be changed to

      I_SIGNING_PRESENTATION 	15 	Provides signing related preferences.
      

      This I think is relevant both for the master and the development branch.

      AnticimexA Offline
      AnticimexA Offline
      Anticimex
      Contest Winner
      wrote on last edited by
      #16

      @jpaulin I have made a pull request. My solution differs slightly from your as the I_SIGNING_PRESENTATION should never reach the _processInternalMessages function. I do however not have the ability to test so I would appreciate if you could test the PR for me?
      Thanks for finding and pointing out the flaws! :D

      Do you feel secure today? No? Start requiring some signatures and feel better tomorrow ;)

      J 1 Reply Last reply
      3
      • AnticimexA Anticimex

        @jpaulin I have made a pull request. My solution differs slightly from your as the I_SIGNING_PRESENTATION should never reach the _processInternalMessages function. I do however not have the ability to test so I would appreciate if you could test the PR for me?
        Thanks for finding and pointing out the flaws! :D

        J Offline
        J Offline
        jpaulin
        wrote on last edited by
        #17

        @Anticimex
        I updated my node and GW with your pull request and made some basic tests and it seems to work ok with my sketch. I added MY_DEBUG_VERBOSE_SIGNING and got the following messages.

        From the node:

        2205 TSM:READY
        2220 TSF:MSG:SEND,3-3-0-0,s=255,c=3,t=15,pt=6,l=2,sg=0,ft=0,st=OK:0100
        2226 Waiting for GW to send signing preferences...
        2280 TSF:MSG:READ,0-0-3,s=255,c=3,t=15,pt=6,l=2,sg=0:0100
        2285 Received signing presentation, but signing is not supported (message ignored)
        2349 TSF:MSG:SEND,3-3-0-0,s=255,c=0,t=17,pt=0,l=10,sg=0,ft=0,st=OK:2.0.1-beta
        2450 TSF:MSG:SEND,3-3-0-0,s=255,c=3,t=6,pt=1,l=1,sg=0,ft=0,st=OK:0
        

        From the GW:

        0;255;3;0;9;TSF:MSG:PINGED,ID=3,HP=1
        0;255;3;0;9;TSF:MSG:SEND,0-0-3-3,s=255,c=3,t=25,pt=1,l=1,sg=0,ft=0,st=OK:1
        0;255;3;0;9;TSF:MSG:READ,3-3-0,s=255,c=3,t=15,pt=6,l=2,sg=0:0100
        0;255;3;0;9;Informing node 3 that we do not require signatures because we do not support it
        0;255;3;0;9;TSF:MSG:SEND,0-0-3-3,s=255,c=3,t=15,pt=6,l=2,sg=0,ft=0,st=OK:0100
        0;255;3;0;9;TSF:MSG:READ,3-3-0,s=255,c=0,t=17,pt=0,l=10,sg=0:2.0.1-beta
        0;255;3;0;9;Sending message on topic: my_RFM69_gw1-out/3/255/0/0/17
        0;255;3;0;9;TSF:MSG:READ,3-3-0,s=255,c=3,t=6,pt=1,l=1,sg=0:0
        

        Do you need some more testing?

        AnticimexA 1 Reply Last reply
        0
        • J jpaulin

          @Anticimex
          I updated my node and GW with your pull request and made some basic tests and it seems to work ok with my sketch. I added MY_DEBUG_VERBOSE_SIGNING and got the following messages.

          From the node:

          2205 TSM:READY
          2220 TSF:MSG:SEND,3-3-0-0,s=255,c=3,t=15,pt=6,l=2,sg=0,ft=0,st=OK:0100
          2226 Waiting for GW to send signing preferences...
          2280 TSF:MSG:READ,0-0-3,s=255,c=3,t=15,pt=6,l=2,sg=0:0100
          2285 Received signing presentation, but signing is not supported (message ignored)
          2349 TSF:MSG:SEND,3-3-0-0,s=255,c=0,t=17,pt=0,l=10,sg=0,ft=0,st=OK:2.0.1-beta
          2450 TSF:MSG:SEND,3-3-0-0,s=255,c=3,t=6,pt=1,l=1,sg=0,ft=0,st=OK:0
          

          From the GW:

          0;255;3;0;9;TSF:MSG:PINGED,ID=3,HP=1
          0;255;3;0;9;TSF:MSG:SEND,0-0-3-3,s=255,c=3,t=25,pt=1,l=1,sg=0,ft=0,st=OK:1
          0;255;3;0;9;TSF:MSG:READ,3-3-0,s=255,c=3,t=15,pt=6,l=2,sg=0:0100
          0;255;3;0;9;Informing node 3 that we do not require signatures because we do not support it
          0;255;3;0;9;TSF:MSG:SEND,0-0-3-3,s=255,c=3,t=15,pt=6,l=2,sg=0,ft=0,st=OK:0100
          0;255;3;0;9;TSF:MSG:READ,3-3-0,s=255,c=0,t=17,pt=0,l=10,sg=0:2.0.1-beta
          0;255;3;0;9;Sending message on topic: my_RFM69_gw1-out/3/255/0/0/17
          0;255;3;0;9;TSF:MSG:READ,3-3-0,s=255,c=3,t=6,pt=1,l=1,sg=0:0
          

          Do you need some more testing?

          AnticimexA Offline
          AnticimexA Offline
          Anticimex
          Contest Winner
          wrote on last edited by
          #18

          @jpaulin thanks for testing. The change should have little effect for people using signing. The issue is for people who does not use it as the node did not wait for a gw response in that case.

          Do you feel secure today? No? Start requiring some signatures and feel better tomorrow ;)

          1 Reply Last reply
          0
          • korttomaK Offline
            korttomaK Offline
            korttoma
            Hero Member
            wrote on last edited by
            #19

            tried the latest development branch on my test system and the results are good so far. Now I just need to update my "real" system also. Thanks to everyone that participated in solving this!!

            • Tomas
            1 Reply Last reply
            1
            • korttomaK Offline
              korttomaK Offline
              korttoma
              Hero Member
              wrote on last edited by
              #20

              Updated now also 2 nodes in my "real" system and both now successfully reported Lib version. I did not update the GW. Maybe it is safe to say that the Lib reporting problem is solved now.

              Now I will try to look in to the sofSerial RFM69 solution that @scalz is working on, do you have any eta on when you will try to include our solution in the official MySensors development branch?
              Any recommendations for the wiring of an W5100/RFM69 Gateway?

              • Tomas
              J 1 Reply Last reply
              1
              • scalzS Offline
                scalzS Offline
                scalz
                Hardware Contributor
                wrote on last edited by scalz
                #21

                i have removed my stuff for the moment..
                for integration in mysensors, it's coreteam work in progress, thx to @Tekka ;)
                Once, someone smart told me that 1+1=3, quite true :) and with Tekka i think we can say = 4 ahah
                So for an eta.., i prefer not saying anything lol, just i'm back on this for the week, i was playing with other stuff..

                1 Reply Last reply
                0
                • korttomaK korttoma

                  Updated now also 2 nodes in my "real" system and both now successfully reported Lib version. I did not update the GW. Maybe it is safe to say that the Lib reporting problem is solved now.

                  Now I will try to look in to the sofSerial RFM69 solution that @scalz is working on, do you have any eta on when you will try to include our solution in the official MySensors development branch?
                  Any recommendations for the wiring of an W5100/RFM69 Gateway?

                  J Offline
                  J Offline
                  jpaulin
                  wrote on last edited by
                  #22

                  @korttoma I have an up and running RFM69 GW with W5100 (actually a W5500, but it's the same). I'm not using softSerial in my setup. With this it is possible to integrate with eg. Moteino or Anarduino, which comes with the radio chip preinstalled on the Arduino compatible boards. But a standard arduino with a separate chip would work as well (lower price). The GW-RFM69 has been stable and flawless, as far as I can see, for quite some time. The SPI for the RFM69 and W5500 uses the following pins in my setup.

                  RFM69W:

                  • SCK = 13
                  • MISO = 12
                  • MOSI = 11
                  • CS = 10
                  • IRQ = 2

                  W5500:

                  • SCK = 13
                  • MISO = 12
                  • MOSI = 11
                  • CS = 7

                  I'll try to share wire diagrams and software setup later. I had to do some tweakings in the ethernet.h file to make it work.

                  korttomaK 1 Reply Last reply
                  1
                  • J jpaulin

                    @korttoma I have an up and running RFM69 GW with W5100 (actually a W5500, but it's the same). I'm not using softSerial in my setup. With this it is possible to integrate with eg. Moteino or Anarduino, which comes with the radio chip preinstalled on the Arduino compatible boards. But a standard arduino with a separate chip would work as well (lower price). The GW-RFM69 has been stable and flawless, as far as I can see, for quite some time. The SPI for the RFM69 and W5500 uses the following pins in my setup.

                    RFM69W:

                    • SCK = 13
                    • MISO = 12
                    • MOSI = 11
                    • CS = 10
                    • IRQ = 2

                    W5500:

                    • SCK = 13
                    • MISO = 12
                    • MOSI = 11
                    • CS = 7

                    I'll try to share wire diagrams and software setup later. I had to do some tweakings in the ethernet.h file to make it work.

                    korttomaK Offline
                    korttomaK Offline
                    korttoma
                    Hero Member
                    wrote on last edited by
                    #23

                    @jpaulin I am very interested in your solution. Could it work with a normal Arduino Pro mini 3,3V version? Just so that I know if I need to order some parts or can work with what I have.

                    • Tomas
                    J 2 Replies Last reply
                    0
                    • korttomaK korttoma

                      @jpaulin I am very interested in your solution. Could it work with a normal Arduino Pro mini 3,3V version? Just so that I know if I need to order some parts or can work with what I have.

                      J Offline
                      J Offline
                      jpaulin
                      wrote on last edited by
                      #24

                      @korttoma
                      Yes, it should work with an Arduino Pro Mini 3.3V. Personally I'm using for the moment an Anarduino. But it's almost the same.

                      1 Reply Last reply
                      0
                      • korttomaK korttoma

                        @jpaulin I am very interested in your solution. Could it work with a normal Arduino Pro mini 3,3V version? Just so that I know if I need to order some parts or can work with what I have.

                        J Offline
                        J Offline
                        jpaulin
                        wrote on last edited by jpaulin
                        #25

                        @korttoma
                        My RFM69 - Ethernet - GW has the following setup.

                        On the RFM69 radio I'm using D10 as CS pin (Chip Select). This is because in my case the RFM69 radio is hard-wired to pin D10, as with eg. a Moteino or Anarduino. But this is not mandatory. If you use an Arduino Pro Mini you could select another pin for the RFM69 CS-pin on the Arduino, if you want.

                        The Ethernet W5100 uses the Arduino IDE pre-installed library Ethernet.h. In the library the CS-pin is as well fixed to D10. CS of course has to be unique for each SPI slave device. I changed directly in the Ethenet.h library the CS pin to be D7. But D9, D8 or some other pin is ok to use as well.

                        Take care, if none of your SPI Slave devices (radio and W5100) uses D10 as CS-pin. In this case make sure to set the D10 pin to OUTPUT in your sketch to keep the Arduino as SPI Master. On the ATmega328 the D10 pin is hard-wired to be the SS pin (Slave Select). The Arduino has to always be the SPI Master and the devices SPI Slaves on the SPI bus to get everything to work.

                        Another consideration is:
                        The RFM69 radio uses the SPI functions during the interrupt sequence (Pin D2). The Ethernet.h library won't work correctly if another device uses SPI signalling during an interrupt sequence. The fix I'm using is to block interrupts from the radio-unit during SPI usage of the W5100 unit. I haven't seen any flaws with this fix so far. I've found other people on the internet using the same fix too without issues.

                        To use RFM69 CS=D10 pin and W5100 CS=D9 pin do the following change in the W5100.h that is part of the Ethernet library.
                        If you use a Windows computer you'll find the file here:

                        C:\Program Files (x86)\Arduino\libraries\Ethernet\src\utility\w5100.h

                        Look for the following lines at the end of the file.

                        #else
                          inline static void initSS()    { DDRB  |=  _BV(2); };
                          inline static void setSS()     { PORTB &= ~_BV(2); };
                          inline static void resetSS()   { PORTB |=  _BV(2); };
                        #endif
                        

                        If you use D9 as CS pin for the W5100 module change as follows:

                        #else
                          inline static void initSS()    { DDRB  |=  _BV(1); };
                          inline static void setSS()     { cli(); PORTB &= ~_BV(1); };
                          inline static void resetSS()   { PORTB |=  _BV(1); sei(); };
                        #endif
                        

                        If you uses, as I do, D7 as CS pin then change as follows:

                        #else
                          inline static void initSS()    { DDRD  |=  _BV(7); };
                          inline static void setSS()     { cli(); PORTD &= ~_BV(7); };
                          inline static void resetSS()   { PORTD |=  _BV(7); sei(); };
                        #endif
                        

                        If you want to keep D10 for the W5100 just add the cli(); and sei(); macros. (cli = clear interrupt. sei = set interrupt).

                        If you want to use another SPI CS pin than D10 on the RFM69 radio (eg. D9) it should be safe to modify it directly in the sketch with the preprocessor constant:

                        #define MY_RF69_SPI_CS 9
                        

                        For the MOSI, MISO and SCK pins use as mentioned above, they are as well hard-wired in the ATmega328 chip to D11,D12 and D13.

                        If you have any doubts please let me know.

                        korttomaK 1 Reply Last reply
                        2
                        • J jpaulin

                          @korttoma
                          My RFM69 - Ethernet - GW has the following setup.

                          On the RFM69 radio I'm using D10 as CS pin (Chip Select). This is because in my case the RFM69 radio is hard-wired to pin D10, as with eg. a Moteino or Anarduino. But this is not mandatory. If you use an Arduino Pro Mini you could select another pin for the RFM69 CS-pin on the Arduino, if you want.

                          The Ethernet W5100 uses the Arduino IDE pre-installed library Ethernet.h. In the library the CS-pin is as well fixed to D10. CS of course has to be unique for each SPI slave device. I changed directly in the Ethenet.h library the CS pin to be D7. But D9, D8 or some other pin is ok to use as well.

                          Take care, if none of your SPI Slave devices (radio and W5100) uses D10 as CS-pin. In this case make sure to set the D10 pin to OUTPUT in your sketch to keep the Arduino as SPI Master. On the ATmega328 the D10 pin is hard-wired to be the SS pin (Slave Select). The Arduino has to always be the SPI Master and the devices SPI Slaves on the SPI bus to get everything to work.

                          Another consideration is:
                          The RFM69 radio uses the SPI functions during the interrupt sequence (Pin D2). The Ethernet.h library won't work correctly if another device uses SPI signalling during an interrupt sequence. The fix I'm using is to block interrupts from the radio-unit during SPI usage of the W5100 unit. I haven't seen any flaws with this fix so far. I've found other people on the internet using the same fix too without issues.

                          To use RFM69 CS=D10 pin and W5100 CS=D9 pin do the following change in the W5100.h that is part of the Ethernet library.
                          If you use a Windows computer you'll find the file here:

                          C:\Program Files (x86)\Arduino\libraries\Ethernet\src\utility\w5100.h

                          Look for the following lines at the end of the file.

                          #else
                            inline static void initSS()    { DDRB  |=  _BV(2); };
                            inline static void setSS()     { PORTB &= ~_BV(2); };
                            inline static void resetSS()   { PORTB |=  _BV(2); };
                          #endif
                          

                          If you use D9 as CS pin for the W5100 module change as follows:

                          #else
                            inline static void initSS()    { DDRB  |=  _BV(1); };
                            inline static void setSS()     { cli(); PORTB &= ~_BV(1); };
                            inline static void resetSS()   { PORTB |=  _BV(1); sei(); };
                          #endif
                          

                          If you uses, as I do, D7 as CS pin then change as follows:

                          #else
                            inline static void initSS()    { DDRD  |=  _BV(7); };
                            inline static void setSS()     { cli(); PORTD &= ~_BV(7); };
                            inline static void resetSS()   { PORTD |=  _BV(7); sei(); };
                          #endif
                          

                          If you want to keep D10 for the W5100 just add the cli(); and sei(); macros. (cli = clear interrupt. sei = set interrupt).

                          If you want to use another SPI CS pin than D10 on the RFM69 radio (eg. D9) it should be safe to modify it directly in the sketch with the preprocessor constant:

                          #define MY_RF69_SPI_CS 9
                          

                          For the MOSI, MISO and SCK pins use as mentioned above, they are as well hard-wired in the ATmega328 chip to D11,D12 and D13.

                          If you have any doubts please let me know.

                          korttomaK Offline
                          korttomaK Offline
                          korttoma
                          Hero Member
                          wrote on last edited by
                          #26

                          Hi @jpaulin thanks for this, I will test it immediately.

                          Would you mind sharing your complete sketch? The MySensors W5100 GW example has all this Soft SPI stuff, I might make a mistake clearing out all the unnecessary parts.

                          Btw, do you see any problem with me adding some local "sensors" to this type of GW? I would like to add 4 relays and 4 buttons to it also.
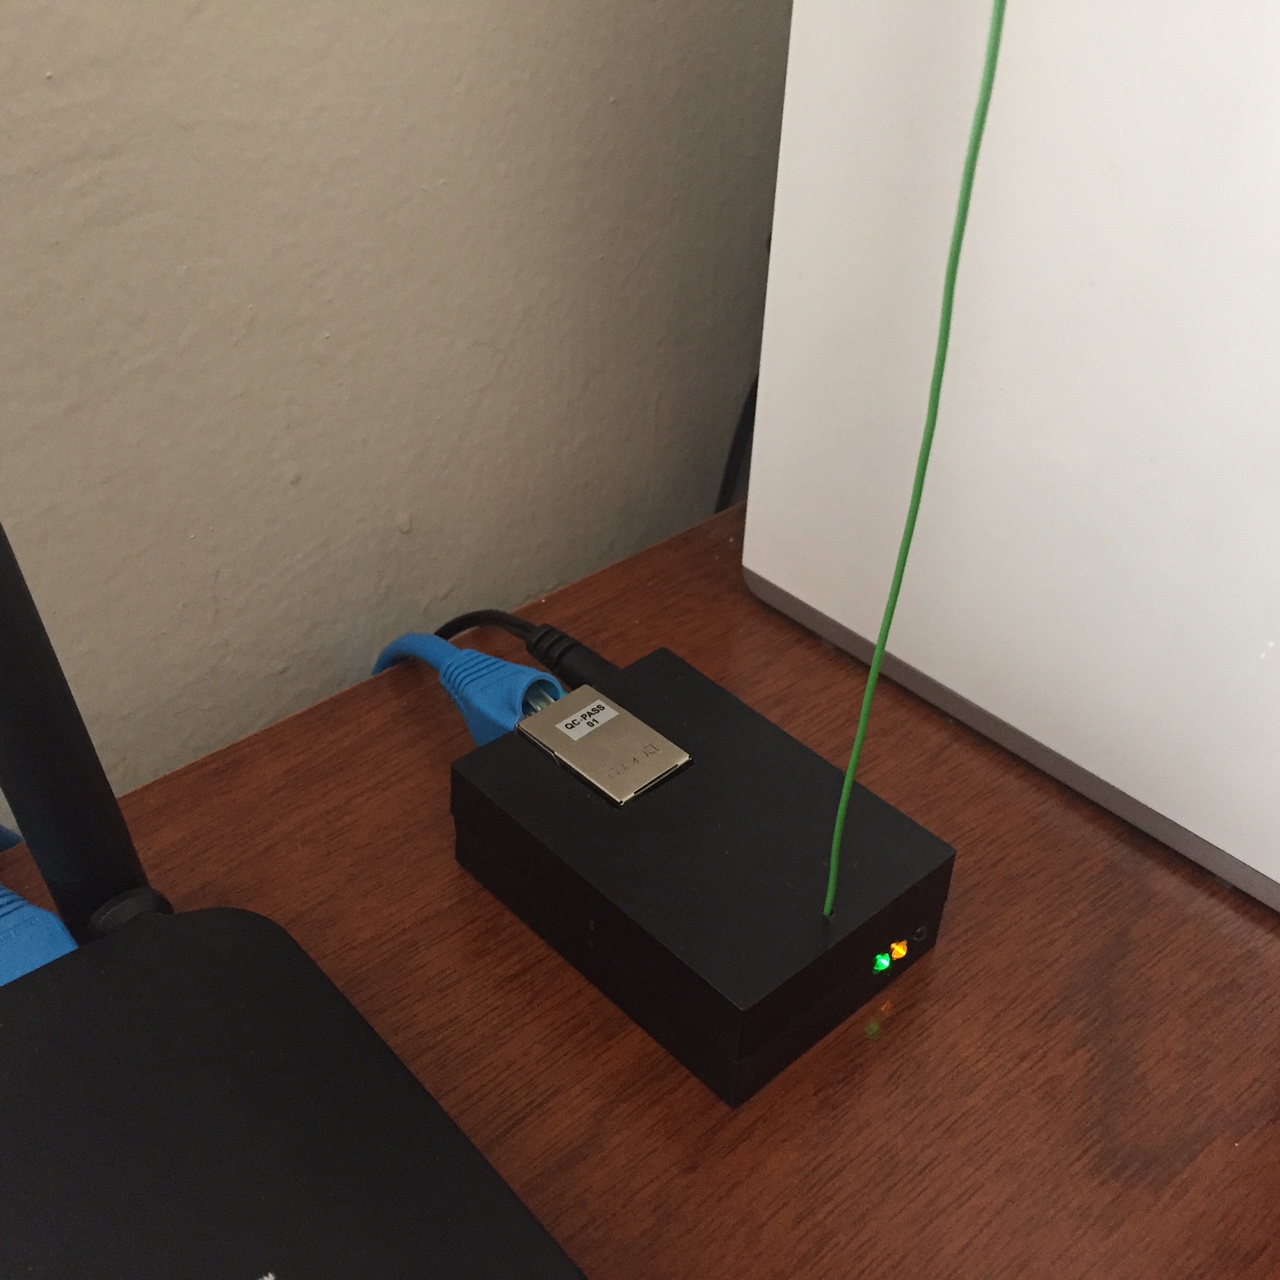
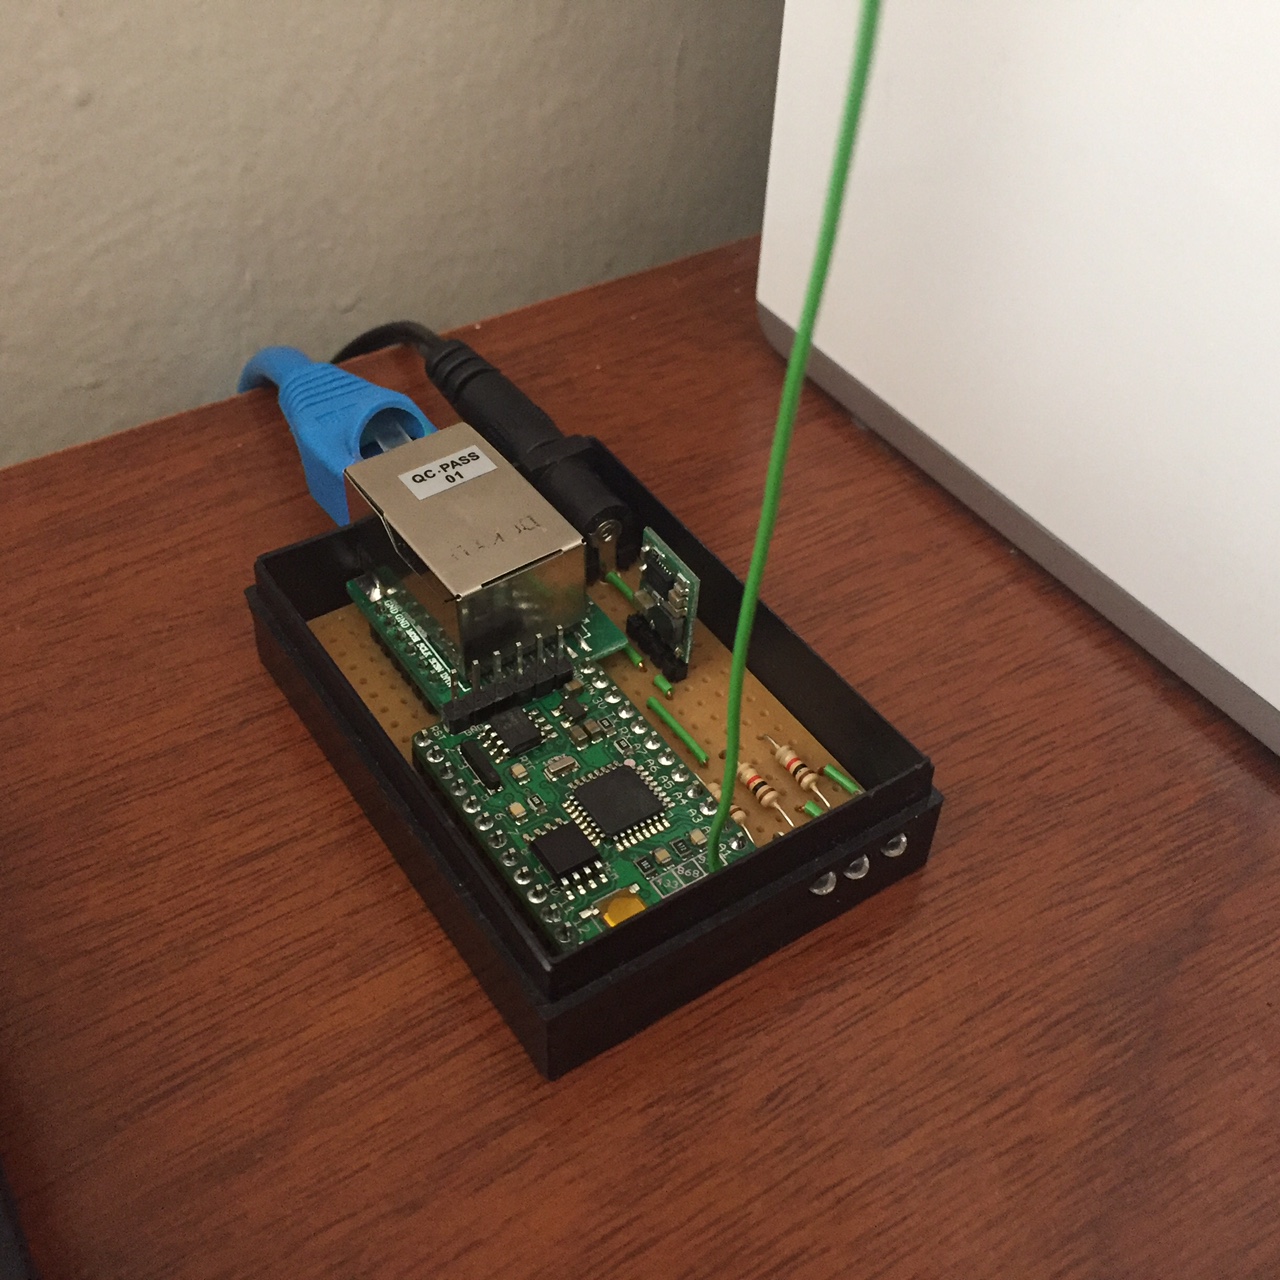
                          • Tomas
                          1 Reply Last reply
                          0
                          • korttomaK Offline
                            korttomaK Offline
                            korttoma
                            Hero Member
                            wrote on last edited by
                            #27

                            It is alive :D

                            I managed to get a W5100 RFM69 Gateway working.
                            I wanted minimal change to the w5100.h so I just added the cli(); and sei(); macros.
                            (I would still like to see your sketch @jpaulin to compare)

                            There are some random failures in the RF communication but these might be because of the breadboard setup. I just have one temp sensor sending in some value now to test with.

                            • Tomas
                            J 1 Reply Last reply
                            0
                            • korttomaK korttoma

                              It is alive :D

                              I managed to get a W5100 RFM69 Gateway working.
                              I wanted minimal change to the w5100.h so I just added the cli(); and sei(); macros.
                              (I would still like to see your sketch @jpaulin to compare)

                              There are some random failures in the RF communication but these might be because of the breadboard setup. I just have one temp sensor sending in some value now to test with.

                              J Offline
                              J Offline
                              jpaulin
                              wrote on last edited by
                              #28

                              @korttoma
                              Here's my sketch. It's an MQTT GW with LEDs.

                              /**
                               * The MySensors Arduino library handles the wireless radio link and protocol
                               * between your home built sensors/actuators and HA controller of choice.
                               * The sensors forms a self healing radio network with optional repeaters. Each
                               * repeater and gateway builds a routing tables in EEPROM which keeps track of the
                               * network topology allowing messages to be routed to nodes.
                               *
                               * Created by Henrik Ekblad <henrik.ekblad@mysensors.org>
                               * Copyright (C) 2013-2015 Sensnology AB
                               * Full contributor list: https://github.com/mysensors/Arduino/graphs/contributors
                               *
                               * Documentation: http://www.mysensors.org
                               * Support Forum: http://forum.mysensors.org
                               *
                               * This program is free software; you can redistribute it and/or
                               * modify it under the terms of the GNU General Public License
                               * version 2 as published by the Free Software Foundation.
                               *
                               *******************************
                               *
                               * REVISION HISTORY
                               * Version 1.0 - Henrik Ekblad
                               *
                               * DESCRIPTION
                               * The W5100 MQTT gateway sends radio network (or locally attached sensors) data to your MQTT broker.
                               * The node also listens to MY_MQTT_TOPIC_PREFIX and sends out those messages to the radio network
                               *
                               * LED purposes:
                               * - RX (yellow) - blink fast on radio message recieved. In inclusion mode will blink fast only on presentation received
                               * - TX (green) - blink fast on radio message transmitted. In inclusion mode will blink slowly
                               * - ERR (red) - fast blink on error during transmission error or receive crc error
                               *
                               */
                              
                              
                              // Enable debug prints to serial monitor
                              #define MY_DEBUG
                              
                              // Enables and select radio type (if attached)
                              //#define MY_RADIO_NRF24
                              #define MY_RADIO_RFM69
                              
                              #define MY_RFM69_FREQUENCY   RF69_433MHZ
                              
                              
                              #define MY_GATEWAY_MQTT_CLIENT
                              
                              // Set this node's subscribe and publish topic prefix
                              #define MY_MQTT_PUBLISH_TOPIC_PREFIX "my_RFM69_gw1-out"
                              #define MY_MQTT_SUBSCRIBE_TOPIC_PREFIX "my_RFM69_gw1-in"
                              
                              // Set MQTT client id
                              #define MY_MQTT_CLIENT_ID "mysensors_RFM69-1"
                              
                              // W5100 Ethernet module SPI enable (optional if using a shield/module that manages SPI_EN signal)
                              //#define MY_W5100_SPI_EN 4
                              
                              // Enable these if your MQTT broker requires username/password
                              //#define MY_MQTT_USER "username"
                              //#define MY_MQTT_PASSWORD "password"
                              
                              // Enable MY_IP_ADDRESS here if you want a static ip address (no DHCP)
                              #define MY_IP_ADDRESS 192,168,1,93
                              
                              // If using static ip you need to define Gateway and Subnet address as well
                              #define MY_IP_GATEWAY_ADDRESS 192,168,1,1
                              #define MY_IP_SUBNET_ADDRESS 255,255,255,0
                              
                              // MQTT broker ip address or url. Define one or the other.
                              //#define MY_CONTROLLER_URL_ADDRESS "m20.cloudmqtt.com"
                              #define MY_CONTROLLER_IP_ADDRESS 192, 168, 1, 90
                              
                              // The MQTT broker port to to open
                              #define MY_PORT 1883
                              
                              
                              // Set blinking period
                              #define MY_DEFAULT_LED_BLINK_PERIOD 50
                              
                              // Flash leds on rx/tx/err
                              // Uncomment to override default HW configurations
                              #define MY_DEFAULT_ERR_LED_PIN A3  // Error led pin
                              #define MY_DEFAULT_RX_LED_PIN  A2  // Receive led pin
                              #define MY_DEFAULT_TX_LED_PIN  A0  // Transmit led pin
                              
                              
                              #include <Ethernet.h>    // modified for W5500 module and with CS pin = D7 (Default CS pin D10 is already used by RFM69W module)
                              #include <MySensors.h>
                              
                              void setup() {
                              }
                              
                              void presentation() {
                                // Present locally attached sensors here
                              }
                              
                              void loop() {
                                // Send locally attached sensors data here
                              }
                              
                              korttomaK 1 Reply Last reply
                              1
                              • scalzS Offline
                                scalzS Offline
                                scalz
                                Hardware Contributor
                                wrote on last edited by scalz
                                #29

                                little side note about the rfm69 driver : it will use spitransaction which should solve this, with some noint/int should be ok. (https://www.arduino.cc/en/Tutorial/SPITransaction)

                                1 Reply Last reply
                                0
                                • J jpaulin

                                  @korttoma
                                  Here's my sketch. It's an MQTT GW with LEDs.

                                  /**
                                   * The MySensors Arduino library handles the wireless radio link and protocol
                                   * between your home built sensors/actuators and HA controller of choice.
                                   * The sensors forms a self healing radio network with optional repeaters. Each
                                   * repeater and gateway builds a routing tables in EEPROM which keeps track of the
                                   * network topology allowing messages to be routed to nodes.
                                   *
                                   * Created by Henrik Ekblad <henrik.ekblad@mysensors.org>
                                   * Copyright (C) 2013-2015 Sensnology AB
                                   * Full contributor list: https://github.com/mysensors/Arduino/graphs/contributors
                                   *
                                   * Documentation: http://www.mysensors.org
                                   * Support Forum: http://forum.mysensors.org
                                   *
                                   * This program is free software; you can redistribute it and/or
                                   * modify it under the terms of the GNU General Public License
                                   * version 2 as published by the Free Software Foundation.
                                   *
                                   *******************************
                                   *
                                   * REVISION HISTORY
                                   * Version 1.0 - Henrik Ekblad
                                   *
                                   * DESCRIPTION
                                   * The W5100 MQTT gateway sends radio network (or locally attached sensors) data to your MQTT broker.
                                   * The node also listens to MY_MQTT_TOPIC_PREFIX and sends out those messages to the radio network
                                   *
                                   * LED purposes:
                                   * - RX (yellow) - blink fast on radio message recieved. In inclusion mode will blink fast only on presentation received
                                   * - TX (green) - blink fast on radio message transmitted. In inclusion mode will blink slowly
                                   * - ERR (red) - fast blink on error during transmission error or receive crc error
                                   *
                                   */
                                  
                                  
                                  // Enable debug prints to serial monitor
                                  #define MY_DEBUG
                                  
                                  // Enables and select radio type (if attached)
                                  //#define MY_RADIO_NRF24
                                  #define MY_RADIO_RFM69
                                  
                                  #define MY_RFM69_FREQUENCY   RF69_433MHZ
                                  
                                  
                                  #define MY_GATEWAY_MQTT_CLIENT
                                  
                                  // Set this node's subscribe and publish topic prefix
                                  #define MY_MQTT_PUBLISH_TOPIC_PREFIX "my_RFM69_gw1-out"
                                  #define MY_MQTT_SUBSCRIBE_TOPIC_PREFIX "my_RFM69_gw1-in"
                                  
                                  // Set MQTT client id
                                  #define MY_MQTT_CLIENT_ID "mysensors_RFM69-1"
                                  
                                  // W5100 Ethernet module SPI enable (optional if using a shield/module that manages SPI_EN signal)
                                  //#define MY_W5100_SPI_EN 4
                                  
                                  // Enable these if your MQTT broker requires username/password
                                  //#define MY_MQTT_USER "username"
                                  //#define MY_MQTT_PASSWORD "password"
                                  
                                  // Enable MY_IP_ADDRESS here if you want a static ip address (no DHCP)
                                  #define MY_IP_ADDRESS 192,168,1,93
                                  
                                  // If using static ip you need to define Gateway and Subnet address as well
                                  #define MY_IP_GATEWAY_ADDRESS 192,168,1,1
                                  #define MY_IP_SUBNET_ADDRESS 255,255,255,0
                                  
                                  // MQTT broker ip address or url. Define one or the other.
                                  //#define MY_CONTROLLER_URL_ADDRESS "m20.cloudmqtt.com"
                                  #define MY_CONTROLLER_IP_ADDRESS 192, 168, 1, 90
                                  
                                  // The MQTT broker port to to open
                                  #define MY_PORT 1883
                                  
                                  
                                  // Set blinking period
                                  #define MY_DEFAULT_LED_BLINK_PERIOD 50
                                  
                                  // Flash leds on rx/tx/err
                                  // Uncomment to override default HW configurations
                                  #define MY_DEFAULT_ERR_LED_PIN A3  // Error led pin
                                  #define MY_DEFAULT_RX_LED_PIN  A2  // Receive led pin
                                  #define MY_DEFAULT_TX_LED_PIN  A0  // Transmit led pin
                                  
                                  
                                  #include <Ethernet.h>    // modified for W5500 module and with CS pin = D7 (Default CS pin D10 is already used by RFM69W module)
                                  #include <MySensors.h>
                                  
                                  void setup() {
                                  }
                                  
                                  void presentation() {
                                    // Present locally attached sensors here
                                  }
                                  
                                  void loop() {
                                    // Send locally attached sensors data here
                                  }
                                  
                                  korttomaK Offline
                                  korttomaK Offline
                                  korttoma
                                  Hero Member
                                  wrote on last edited by
                                  #30

                                  @jpaulin Thanks, not much different from my sketch I see:

                                  // Enable debug prints to serial monitor
                                  #define MY_DEBUG 
                                  
                                  // Enable and select radio type attached
                                  #define MY_RADIO_RFM69
                                  #define MY_RFM69_FREQUENCY RF69_433MHZ
                                  #define MY_RF69_SPI_CS 9
                                  // Enable gateway ethernet module type 
                                  #define MY_GATEWAY_W5100
                                  
                                  
                                  #define MY_IP_ADDRESS 192,168,1,25   // If this is disabled, DHCP is used to retrieve address
                                  
                                  // The port to keep open on node server mode / or port to contact in client mode
                                  #define MY_PORT 5003      
                                  
                                  // The MAC address can be anything you want but should be unique on your network.
                                  // Newer boards have a MAC address printed on the underside of the PCB, which you can (optionally) use.
                                  // Note that most of the Ardunio examples use  "DEAD BEEF FEED" for the MAC address.
                                  #define MY_MAC_ADDRESS 0xDE, 0xAD, 0xBE, 0xEF, 0xFE, 0xED
                                  
                                  // Flash leds on rx/tx/err
                                  //#define MY_LEDS_BLINKING_FEATURE
                                  // Set blinking period
                                  #define MY_DEFAULT_LED_BLINK_PERIOD 300
                                  
                                  // Enable inclusion mode
                                  #define MY_INCLUSION_MODE_FEATURE
                                  // Enable Inclusion mode button on gateway
                                  //#define MY_INCLUSION_BUTTON_FEATURE
                                  // Set inclusion mode duration (in seconds)
                                  #define MY_INCLUSION_MODE_DURATION 60 
                                  // Digital pin used for inclusion mode button
                                  #define MY_INCLUSION_MODE_BUTTON_PIN  3 
                                  
                                  // Uncomment to override default HW configurations
                                  //#define MY_DEFAULT_ERR_LED_PIN 7  // Error led pin
                                  //#define MY_DEFAULT_RX_LED_PIN  8  // Receive led pin
                                  //#define MY_DEFAULT_TX_LED_PIN  9  // the PCB, on board LED
                                  
                                  #include <SPI.h>
                                  
                                  #if defined(MY_USE_UDP)
                                    #include <EthernetUdp.h>
                                  #endif
                                  #include <Ethernet.h>
                                  #include <MySensors.h>
                                  
                                  
                                  void setup(){
                                  }
                                  
                                  void loop() {
                                  }
                                  

                                  It has been running for a few hours now without issues. Gona try adding the buttons and relays tomorrow.

                                  • Tomas
                                  1 Reply Last reply
                                  1
                                  • korttomaK Offline
                                    korttomaK Offline
                                    korttoma
                                    Hero Member
                                    wrote on last edited by korttoma
                                    #31

                                    Adding the relays and buttons seems to work fine also. I will go with this setup now until there is a "Official" solution for the GatewayW5100RFM69.

                                    /**
                                     * The MySensors Arduino library handles the wireless radio link and protocol
                                     * between your home built sensors/actuators and HA controller of choice.
                                     * The sensors forms a self healing radio network with optional repeaters. Each
                                     * repeater and gateway builds a routing tables in EEPROM which keeps track of the
                                     * network topology allowing messages to be routed to nodes.
                                     *
                                     * Created by Henrik Ekblad <henrik.ekblad@mysensors.org>
                                     * Copyright (C) 2013-2015 Sensnology AB
                                     * Full contributor list: https://github.com/mysensors/Arduino/graphs/contributors
                                     *
                                     * Documentation: http://www.mysensors.org
                                     * Support Forum: http://forum.mysensors.org
                                     *
                                     * This program is free software; you can redistribute it and/or
                                     * modify it under the terms of the GNU General Public License
                                     * version 2 as published by the Free Software Foundation.
                                     *
                                     *******************************
                                     *
                                     * REVISION HISTORY
                                     * Version 1.0 - Henrik EKblad
                                     * Contribution by a-lurker and Anticimex,
                                     * Contribution by Norbert Truchsess <norbert.truchsess@t-online.de>
                                     * Contribution by Tomas Hozza <thozza@gmail.com>
                                     *
                                     *
                                     * DESCRIPTION
                                     * The EthernetGateway sends data received from sensors to the ethernet link.
                                     * The gateway also accepts input on ethernet interface, which is then sent out to the radio network.
                                     *
                                     * The GW code is designed for Arduino 328p / 16MHz.  ATmega168 does not have enough memory to run this program.
                                     *
                                     * LED purposes:
                                     * - To use the feature, uncomment WITH_LEDS_BLINKING in MyConfig.h
                                     * - RX (green) - blink fast on radio message recieved. In inclusion mode will blink fast only on presentation recieved
                                     * - TX (yellow) - blink fast on radio message transmitted. In inclusion mode will blink slowly
                                     * - ERR (red) - fast blink on error during transmission error or recieve crc error
                                     *
                                     * See http://www.mysensors.org/build/ethernet_gateway for wiring instructions.
                                     *
                                     */
                                    
                                    // Enable debug prints to serial monitor
                                    #define MY_DEBUG 
                                    #define SN "EthGW/RFM69 Rele Button"
                                    #define SV "1.0"
                                    
                                    // Enable and select radio type attached
                                    //#define MY_RADIO_NRF24
                                    #define MY_RADIO_RFM69
                                    #define MY_RFM69_FREQUENCY RF69_433MHZ
                                    #define MY_RF69_SPI_CS 9
                                    // Enable gateway ethernet module type 
                                    #define MY_GATEWAY_W5100
                                    
                                    // W5100 Ethernet module SPI enable (optional if using a shield/module that manages SPI_EN signal)
                                    //#define MY_W5100_SPI_EN 10  
                                    
                                    // Enable Soft SPI for NRF radio (note different radio wiring is required)
                                    // The W5100 ethernet module seems to have a hard time co-operate with 
                                    // radio on the same spi bus.
                                    
                                    
                                    // Enable to UDP          
                                    //#define MY_USE_UDP
                                    
                                    #define MY_IP_ADDRESS 192,168,1,25   // If this is disabled, DHCP is used to retrieve address
                                    // Renewal period if using DHCP
                                    //#define MY_IP_RENEWAL_INTERVAL 60000
                                    // The port to keep open on node server mode / or port to contact in client mode
                                    #define MY_PORT 5003      
                                    
                                    // Controller ip address. Enables client mode (default is "server" mode). 
                                    // Also enable this if MY_USE_UDP is used and you want sensor data sent somewhere. 
                                    //#define MY_CONTROLLER_IP_ADDRESS 192, 168, 178, 254   
                                     
                                    // The MAC address can be anything you want but should be unique on your network.
                                    // Newer boards have a MAC address printed on the underside of the PCB, which you can (optionally) use.
                                    // Note that most of the Ardunio examples use  "DEAD BEEF FEED" for the MAC address.
                                    #define MY_MAC_ADDRESS 0xDE, 0xAD, 0xBE, 0xEF, 0xFE, 0xED
                                    
                                    // Flash leds on rx/tx/err
                                    //#define MY_LEDS_BLINKING_FEATURE
                                    // Set blinking period
                                    #define MY_DEFAULT_LED_BLINK_PERIOD 300
                                    
                                    // Enable inclusion mode
                                    #define MY_INCLUSION_MODE_FEATURE
                                    // Enable Inclusion mode button on gateway
                                    //#define MY_INCLUSION_BUTTON_FEATURE
                                    // Set inclusion mode duration (in seconds)
                                    #define MY_INCLUSION_MODE_DURATION 60 
                                    // Digital pin used for inclusion mode button
                                    #define MY_INCLUSION_MODE_BUTTON_PIN  3 
                                    
                                    // Uncomment to override default HW configurations
                                    //#define MY_DEFAULT_ERR_LED_PIN 7  // Error led pin
                                    //#define MY_DEFAULT_RX_LED_PIN  8  // Receive led pin
                                    //#define MY_DEFAULT_TX_LED_PIN  9  // the PCB, on board LED
                                    
                                    #include <SPI.h>
                                    
                                    #if defined(MY_USE_UDP)
                                      #include <EthernetUdp.h>
                                    #endif
                                    #include <Ethernet.h>
                                    #include <MySensors.h>
                                    #include <Bounce2.h>
                                    #define RELAY_ON 0                      // switch around for ACTIVE LOW / ACTIVE HIGH relay
                                    #define RELAY_OFF 1
                                    //
                                    
                                    #define noRelays 4                     //2-4
                                    
                                    const int relayPin[] = {14, 15, 16, 17};       //  switch around pins to your desire
                                    const int buttonPin[] = {6, 7, 4, 5};   //  switch around pins to your desire
                                    
                                    class Relay             // relay class, store all relevant data (equivalent to struct)
                                    {
                                      public:
                                        int buttonPin;                   // physical pin number of button
                                        int relayPin;             // physical pin number of relay
                                        boolean relayState;               // relay status (also stored in EEPROM)
                                    };
                                    
                                    Relay Relays[noRelays];
                                    Bounce debouncer[noRelays];
                                    MyMessage msg[noRelays];
                                    
                                    void setup() {
                                      wait(100);
                                      // Initialize Relays with corresponding buttons
                                      for (int i = 0; i < noRelays; i++) {
                                        Relays[i].buttonPin = buttonPin[i];              // assign physical pins
                                        Relays[i].relayPin = relayPin[i];
                                        msg[i].sensor = i;                                   // initialize messages
                                        msg[i].type = V_LIGHT;
                                        pinMode(Relays[i].buttonPin, INPUT_PULLUP);
                                        wait(100);
                                        pinMode(Relays[i].relayPin, OUTPUT);
                                        Relays[i].relayState = loadState(i);                               // retrieve last values from EEPROM
                                        digitalWrite(Relays[i].relayPin, Relays[i].relayState ? RELAY_ON : RELAY_OFF); // and set relays accordingly
                                        send(msg[i].set(Relays[i].relayState ? true : false));                 // make controller aware of last status
                                        wait(50);
                                        debouncer[i] = Bounce();                        // initialize debouncer
                                        debouncer[i].attach(buttonPin[i]);
                                        debouncer[i].interval(30);
                                        wait(50);
                                      }
                                    }
                                    
                                    void presentation()
                                    {
                                      // Send the sketch version information to the gateway and Controller
                                      sendSketchInfo(SN, SV);
                                    
                                      wait(100);
                                    
                                      for (int i = 0; i < noRelays; i++)
                                        present(i, S_LIGHT);                               // present sensor to gateway
                                    
                                      wait(100);
                                    }
                                    
                                    
                                    void loop()
                                    {
                                      for (byte i = 0; i < noRelays; i++) {
                                        if (debouncer[i].update()) {
                                          
                                          int value = debouncer[i].read();
                                          
                                          if ( value == LOW) {
                                            Relays[i].relayState = !Relays[i].relayState;
                                            digitalWrite(Relays[i].relayPin, Relays[i].relayState ? RELAY_ON : RELAY_OFF);
                                            send(msg[i].set(Relays[i].relayState ? true : false));
                                            // save sensor state in EEPROM (location == sensor number)
                                            saveState( i, Relays[i].relayState );
                                    
                                          }
                                    
                                        }
                                      }
                                      //wait(20);
                                    }
                                    
                                    void receive(const MyMessage &message) {
                                      if (message.type == V_LIGHT) {
                                        if (message.sensor < noRelays) {          // check if message is valid for relays..... previous line  [[[ if (message.sensor <=noRelays){ ]]]
                                          Relays[message.sensor].relayState = message.getBool();
                                          digitalWrite(Relays[message.sensor].relayPin, Relays[message.sensor].relayState ? RELAY_ON : RELAY_OFF); // and set relays accordingly
                                          saveState( message.sensor, Relays[message.sensor].relayState ); // save sensor state in EEPROM (location == sensor number)
                                        }
                                      }
                                      wait(20);
                                    }
                                    
                                    • Tomas
                                    J 2 Replies Last reply
                                    0
                                    • korttomaK korttoma

                                      Adding the relays and buttons seems to work fine also. I will go with this setup now until there is a "Official" solution for the GatewayW5100RFM69.

                                      /**
                                       * The MySensors Arduino library handles the wireless radio link and protocol
                                       * between your home built sensors/actuators and HA controller of choice.
                                       * The sensors forms a self healing radio network with optional repeaters. Each
                                       * repeater and gateway builds a routing tables in EEPROM which keeps track of the
                                       * network topology allowing messages to be routed to nodes.
                                       *
                                       * Created by Henrik Ekblad <henrik.ekblad@mysensors.org>
                                       * Copyright (C) 2013-2015 Sensnology AB
                                       * Full contributor list: https://github.com/mysensors/Arduino/graphs/contributors
                                       *
                                       * Documentation: http://www.mysensors.org
                                       * Support Forum: http://forum.mysensors.org
                                       *
                                       * This program is free software; you can redistribute it and/or
                                       * modify it under the terms of the GNU General Public License
                                       * version 2 as published by the Free Software Foundation.
                                       *
                                       *******************************
                                       *
                                       * REVISION HISTORY
                                       * Version 1.0 - Henrik EKblad
                                       * Contribution by a-lurker and Anticimex,
                                       * Contribution by Norbert Truchsess <norbert.truchsess@t-online.de>
                                       * Contribution by Tomas Hozza <thozza@gmail.com>
                                       *
                                       *
                                       * DESCRIPTION
                                       * The EthernetGateway sends data received from sensors to the ethernet link.
                                       * The gateway also accepts input on ethernet interface, which is then sent out to the radio network.
                                       *
                                       * The GW code is designed for Arduino 328p / 16MHz.  ATmega168 does not have enough memory to run this program.
                                       *
                                       * LED purposes:
                                       * - To use the feature, uncomment WITH_LEDS_BLINKING in MyConfig.h
                                       * - RX (green) - blink fast on radio message recieved. In inclusion mode will blink fast only on presentation recieved
                                       * - TX (yellow) - blink fast on radio message transmitted. In inclusion mode will blink slowly
                                       * - ERR (red) - fast blink on error during transmission error or recieve crc error
                                       *
                                       * See http://www.mysensors.org/build/ethernet_gateway for wiring instructions.
                                       *
                                       */
                                      
                                      // Enable debug prints to serial monitor
                                      #define MY_DEBUG 
                                      #define SN "EthGW/RFM69 Rele Button"
                                      #define SV "1.0"
                                      
                                      // Enable and select radio type attached
                                      //#define MY_RADIO_NRF24
                                      #define MY_RADIO_RFM69
                                      #define MY_RFM69_FREQUENCY RF69_433MHZ
                                      #define MY_RF69_SPI_CS 9
                                      // Enable gateway ethernet module type 
                                      #define MY_GATEWAY_W5100
                                      
                                      // W5100 Ethernet module SPI enable (optional if using a shield/module that manages SPI_EN signal)
                                      //#define MY_W5100_SPI_EN 10  
                                      
                                      // Enable Soft SPI for NRF radio (note different radio wiring is required)
                                      // The W5100 ethernet module seems to have a hard time co-operate with 
                                      // radio on the same spi bus.
                                      
                                      
                                      // Enable to UDP          
                                      //#define MY_USE_UDP
                                      
                                      #define MY_IP_ADDRESS 192,168,1,25   // If this is disabled, DHCP is used to retrieve address
                                      // Renewal period if using DHCP
                                      //#define MY_IP_RENEWAL_INTERVAL 60000
                                      // The port to keep open on node server mode / or port to contact in client mode
                                      #define MY_PORT 5003      
                                      
                                      // Controller ip address. Enables client mode (default is "server" mode). 
                                      // Also enable this if MY_USE_UDP is used and you want sensor data sent somewhere. 
                                      //#define MY_CONTROLLER_IP_ADDRESS 192, 168, 178, 254   
                                       
                                      // The MAC address can be anything you want but should be unique on your network.
                                      // Newer boards have a MAC address printed on the underside of the PCB, which you can (optionally) use.
                                      // Note that most of the Ardunio examples use  "DEAD BEEF FEED" for the MAC address.
                                      #define MY_MAC_ADDRESS 0xDE, 0xAD, 0xBE, 0xEF, 0xFE, 0xED
                                      
                                      // Flash leds on rx/tx/err
                                      //#define MY_LEDS_BLINKING_FEATURE
                                      // Set blinking period
                                      #define MY_DEFAULT_LED_BLINK_PERIOD 300
                                      
                                      // Enable inclusion mode
                                      #define MY_INCLUSION_MODE_FEATURE
                                      // Enable Inclusion mode button on gateway
                                      //#define MY_INCLUSION_BUTTON_FEATURE
                                      // Set inclusion mode duration (in seconds)
                                      #define MY_INCLUSION_MODE_DURATION 60 
                                      // Digital pin used for inclusion mode button
                                      #define MY_INCLUSION_MODE_BUTTON_PIN  3 
                                      
                                      // Uncomment to override default HW configurations
                                      //#define MY_DEFAULT_ERR_LED_PIN 7  // Error led pin
                                      //#define MY_DEFAULT_RX_LED_PIN  8  // Receive led pin
                                      //#define MY_DEFAULT_TX_LED_PIN  9  // the PCB, on board LED
                                      
                                      #include <SPI.h>
                                      
                                      #if defined(MY_USE_UDP)
                                        #include <EthernetUdp.h>
                                      #endif
                                      #include <Ethernet.h>
                                      #include <MySensors.h>
                                      #include <Bounce2.h>
                                      #define RELAY_ON 0                      // switch around for ACTIVE LOW / ACTIVE HIGH relay
                                      #define RELAY_OFF 1
                                      //
                                      
                                      #define noRelays 4                     //2-4
                                      
                                      const int relayPin[] = {14, 15, 16, 17};       //  switch around pins to your desire
                                      const int buttonPin[] = {6, 7, 4, 5};   //  switch around pins to your desire
                                      
                                      class Relay             // relay class, store all relevant data (equivalent to struct)
                                      {
                                        public:
                                          int buttonPin;                   // physical pin number of button
                                          int relayPin;             // physical pin number of relay
                                          boolean relayState;               // relay status (also stored in EEPROM)
                                      };
                                      
                                      Relay Relays[noRelays];
                                      Bounce debouncer[noRelays];
                                      MyMessage msg[noRelays];
                                      
                                      void setup() {
                                        wait(100);
                                        // Initialize Relays with corresponding buttons
                                        for (int i = 0; i < noRelays; i++) {
                                          Relays[i].buttonPin = buttonPin[i];              // assign physical pins
                                          Relays[i].relayPin = relayPin[i];
                                          msg[i].sensor = i;                                   // initialize messages
                                          msg[i].type = V_LIGHT;
                                          pinMode(Relays[i].buttonPin, INPUT_PULLUP);
                                          wait(100);
                                          pinMode(Relays[i].relayPin, OUTPUT);
                                          Relays[i].relayState = loadState(i);                               // retrieve last values from EEPROM
                                          digitalWrite(Relays[i].relayPin, Relays[i].relayState ? RELAY_ON : RELAY_OFF); // and set relays accordingly
                                          send(msg[i].set(Relays[i].relayState ? true : false));                 // make controller aware of last status
                                          wait(50);
                                          debouncer[i] = Bounce();                        // initialize debouncer
                                          debouncer[i].attach(buttonPin[i]);
                                          debouncer[i].interval(30);
                                          wait(50);
                                        }
                                      }
                                      
                                      void presentation()
                                      {
                                        // Send the sketch version information to the gateway and Controller
                                        sendSketchInfo(SN, SV);
                                      
                                        wait(100);
                                      
                                        for (int i = 0; i < noRelays; i++)
                                          present(i, S_LIGHT);                               // present sensor to gateway
                                      
                                        wait(100);
                                      }
                                      
                                      
                                      void loop()
                                      {
                                        for (byte i = 0; i < noRelays; i++) {
                                          if (debouncer[i].update()) {
                                            
                                            int value = debouncer[i].read();
                                            
                                            if ( value == LOW) {
                                              Relays[i].relayState = !Relays[i].relayState;
                                              digitalWrite(Relays[i].relayPin, Relays[i].relayState ? RELAY_ON : RELAY_OFF);
                                              send(msg[i].set(Relays[i].relayState ? true : false));
                                              // save sensor state in EEPROM (location == sensor number)
                                              saveState( i, Relays[i].relayState );
                                      
                                            }
                                      
                                          }
                                        }
                                        //wait(20);
                                      }
                                      
                                      void receive(const MyMessage &message) {
                                        if (message.type == V_LIGHT) {
                                          if (message.sensor < noRelays) {          // check if message is valid for relays..... previous line  [[[ if (message.sensor <=noRelays){ ]]]
                                            Relays[message.sensor].relayState = message.getBool();
                                            digitalWrite(Relays[message.sensor].relayPin, Relays[message.sensor].relayState ? RELAY_ON : RELAY_OFF); // and set relays accordingly
                                            saveState( message.sensor, Relays[message.sensor].relayState ); // save sensor state in EEPROM (location == sensor number)
                                          }
                                        }
                                        wait(20);
                                      }
                                      
                                      J Offline
                                      J Offline
                                      jpaulin
                                      wrote on last edited by
                                      #32

                                      @korttoma Excellent news. So now we are at least two with a stable RFM69-Ethernet-GW. :smiley:

                                      1 Reply Last reply
                                      0
                                      • korttomaK korttoma

                                        Adding the relays and buttons seems to work fine also. I will go with this setup now until there is a "Official" solution for the GatewayW5100RFM69.

                                        /**
                                         * The MySensors Arduino library handles the wireless radio link and protocol
                                         * between your home built sensors/actuators and HA controller of choice.
                                         * The sensors forms a self healing radio network with optional repeaters. Each
                                         * repeater and gateway builds a routing tables in EEPROM which keeps track of the
                                         * network topology allowing messages to be routed to nodes.
                                         *
                                         * Created by Henrik Ekblad <henrik.ekblad@mysensors.org>
                                         * Copyright (C) 2013-2015 Sensnology AB
                                         * Full contributor list: https://github.com/mysensors/Arduino/graphs/contributors
                                         *
                                         * Documentation: http://www.mysensors.org
                                         * Support Forum: http://forum.mysensors.org
                                         *
                                         * This program is free software; you can redistribute it and/or
                                         * modify it under the terms of the GNU General Public License
                                         * version 2 as published by the Free Software Foundation.
                                         *
                                         *******************************
                                         *
                                         * REVISION HISTORY
                                         * Version 1.0 - Henrik EKblad
                                         * Contribution by a-lurker and Anticimex,
                                         * Contribution by Norbert Truchsess <norbert.truchsess@t-online.de>
                                         * Contribution by Tomas Hozza <thozza@gmail.com>
                                         *
                                         *
                                         * DESCRIPTION
                                         * The EthernetGateway sends data received from sensors to the ethernet link.
                                         * The gateway also accepts input on ethernet interface, which is then sent out to the radio network.
                                         *
                                         * The GW code is designed for Arduino 328p / 16MHz.  ATmega168 does not have enough memory to run this program.
                                         *
                                         * LED purposes:
                                         * - To use the feature, uncomment WITH_LEDS_BLINKING in MyConfig.h
                                         * - RX (green) - blink fast on radio message recieved. In inclusion mode will blink fast only on presentation recieved
                                         * - TX (yellow) - blink fast on radio message transmitted. In inclusion mode will blink slowly
                                         * - ERR (red) - fast blink on error during transmission error or recieve crc error
                                         *
                                         * See http://www.mysensors.org/build/ethernet_gateway for wiring instructions.
                                         *
                                         */
                                        
                                        // Enable debug prints to serial monitor
                                        #define MY_DEBUG 
                                        #define SN "EthGW/RFM69 Rele Button"
                                        #define SV "1.0"
                                        
                                        // Enable and select radio type attached
                                        //#define MY_RADIO_NRF24
                                        #define MY_RADIO_RFM69
                                        #define MY_RFM69_FREQUENCY RF69_433MHZ
                                        #define MY_RF69_SPI_CS 9
                                        // Enable gateway ethernet module type 
                                        #define MY_GATEWAY_W5100
                                        
                                        // W5100 Ethernet module SPI enable (optional if using a shield/module that manages SPI_EN signal)
                                        //#define MY_W5100_SPI_EN 10  
                                        
                                        // Enable Soft SPI for NRF radio (note different radio wiring is required)
                                        // The W5100 ethernet module seems to have a hard time co-operate with 
                                        // radio on the same spi bus.
                                        
                                        
                                        // Enable to UDP          
                                        //#define MY_USE_UDP
                                        
                                        #define MY_IP_ADDRESS 192,168,1,25   // If this is disabled, DHCP is used to retrieve address
                                        // Renewal period if using DHCP
                                        //#define MY_IP_RENEWAL_INTERVAL 60000
                                        // The port to keep open on node server mode / or port to contact in client mode
                                        #define MY_PORT 5003      
                                        
                                        // Controller ip address. Enables client mode (default is "server" mode). 
                                        // Also enable this if MY_USE_UDP is used and you want sensor data sent somewhere. 
                                        //#define MY_CONTROLLER_IP_ADDRESS 192, 168, 178, 254   
                                         
                                        // The MAC address can be anything you want but should be unique on your network.
                                        // Newer boards have a MAC address printed on the underside of the PCB, which you can (optionally) use.
                                        // Note that most of the Ardunio examples use  "DEAD BEEF FEED" for the MAC address.
                                        #define MY_MAC_ADDRESS 0xDE, 0xAD, 0xBE, 0xEF, 0xFE, 0xED
                                        
                                        // Flash leds on rx/tx/err
                                        //#define MY_LEDS_BLINKING_FEATURE
                                        // Set blinking period
                                        #define MY_DEFAULT_LED_BLINK_PERIOD 300
                                        
                                        // Enable inclusion mode
                                        #define MY_INCLUSION_MODE_FEATURE
                                        // Enable Inclusion mode button on gateway
                                        //#define MY_INCLUSION_BUTTON_FEATURE
                                        // Set inclusion mode duration (in seconds)
                                        #define MY_INCLUSION_MODE_DURATION 60 
                                        // Digital pin used for inclusion mode button
                                        #define MY_INCLUSION_MODE_BUTTON_PIN  3 
                                        
                                        // Uncomment to override default HW configurations
                                        //#define MY_DEFAULT_ERR_LED_PIN 7  // Error led pin
                                        //#define MY_DEFAULT_RX_LED_PIN  8  // Receive led pin
                                        //#define MY_DEFAULT_TX_LED_PIN  9  // the PCB, on board LED
                                        
                                        #include <SPI.h>
                                        
                                        #if defined(MY_USE_UDP)
                                          #include <EthernetUdp.h>
                                        #endif
                                        #include <Ethernet.h>
                                        #include <MySensors.h>
                                        #include <Bounce2.h>
                                        #define RELAY_ON 0                      // switch around for ACTIVE LOW / ACTIVE HIGH relay
                                        #define RELAY_OFF 1
                                        //
                                        
                                        #define noRelays 4                     //2-4
                                        
                                        const int relayPin[] = {14, 15, 16, 17};       //  switch around pins to your desire
                                        const int buttonPin[] = {6, 7, 4, 5};   //  switch around pins to your desire
                                        
                                        class Relay             // relay class, store all relevant data (equivalent to struct)
                                        {
                                          public:
                                            int buttonPin;                   // physical pin number of button
                                            int relayPin;             // physical pin number of relay
                                            boolean relayState;               // relay status (also stored in EEPROM)
                                        };
                                        
                                        Relay Relays[noRelays];
                                        Bounce debouncer[noRelays];
                                        MyMessage msg[noRelays];
                                        
                                        void setup() {
                                          wait(100);
                                          // Initialize Relays with corresponding buttons
                                          for (int i = 0; i < noRelays; i++) {
                                            Relays[i].buttonPin = buttonPin[i];              // assign physical pins
                                            Relays[i].relayPin = relayPin[i];
                                            msg[i].sensor = i;                                   // initialize messages
                                            msg[i].type = V_LIGHT;
                                            pinMode(Relays[i].buttonPin, INPUT_PULLUP);
                                            wait(100);
                                            pinMode(Relays[i].relayPin, OUTPUT);
                                            Relays[i].relayState = loadState(i);                               // retrieve last values from EEPROM
                                            digitalWrite(Relays[i].relayPin, Relays[i].relayState ? RELAY_ON : RELAY_OFF); // and set relays accordingly
                                            send(msg[i].set(Relays[i].relayState ? true : false));                 // make controller aware of last status
                                            wait(50);
                                            debouncer[i] = Bounce();                        // initialize debouncer
                                            debouncer[i].attach(buttonPin[i]);
                                            debouncer[i].interval(30);
                                            wait(50);
                                          }
                                        }
                                        
                                        void presentation()
                                        {
                                          // Send the sketch version information to the gateway and Controller
                                          sendSketchInfo(SN, SV);
                                        
                                          wait(100);
                                        
                                          for (int i = 0; i < noRelays; i++)
                                            present(i, S_LIGHT);                               // present sensor to gateway
                                        
                                          wait(100);
                                        }
                                        
                                        
                                        void loop()
                                        {
                                          for (byte i = 0; i < noRelays; i++) {
                                            if (debouncer[i].update()) {
                                              
                                              int value = debouncer[i].read();
                                              
                                              if ( value == LOW) {
                                                Relays[i].relayState = !Relays[i].relayState;
                                                digitalWrite(Relays[i].relayPin, Relays[i].relayState ? RELAY_ON : RELAY_OFF);
                                                send(msg[i].set(Relays[i].relayState ? true : false));
                                                // save sensor state in EEPROM (location == sensor number)
                                                saveState( i, Relays[i].relayState );
                                        
                                              }
                                        
                                            }
                                          }
                                          //wait(20);
                                        }
                                        
                                        void receive(const MyMessage &message) {
                                          if (message.type == V_LIGHT) {
                                            if (message.sensor < noRelays) {          // check if message is valid for relays..... previous line  [[[ if (message.sensor <=noRelays){ ]]]
                                              Relays[message.sensor].relayState = message.getBool();
                                              digitalWrite(Relays[message.sensor].relayPin, Relays[message.sensor].relayState ? RELAY_ON : RELAY_OFF); // and set relays accordingly
                                              saveState( message.sensor, Relays[message.sensor].relayState ); // save sensor state in EEPROM (location == sensor number)
                                            }
                                          }
                                          wait(20);
                                        }
                                        
                                        J Offline
                                        J Offline
                                        jpaulin
                                        wrote on last edited by jpaulin
                                        #33

                                        @korttoma Sharing a pair of photos of my gw. Became pretty neat, I think. It's parked permanently beside the WiFi Router.
                                        0_1478804847890_IMG_5989.JPG

                                        0_1478804919975_IMG_6002.JPG

                                        1 Reply Last reply
                                        3
                                        • korttomaK Offline
                                          korttomaK Offline
                                          korttoma
                                          Hero Member
                                          wrote on last edited by
                                          #34

                                          I've seen pictures of your GW in another thread, it is very nice and professional @jpaulin

                                          I stil have some parts missing from my GW build so I only have the breadboard setup right now.

                                          • Tomas
                                          1 Reply Last reply
                                          0
                                          Reply
                                          • Reply as topic
                                          Log in to reply
                                          • Oldest to Newest
                                          • Newest to Oldest
                                          • Most Votes


                                          8

                                          Online

                                          11.7k

                                          Users

                                          11.2k

                                          Topics

                                          113.0k

                                          Posts


                                          Copyright 2019 TBD   |   Forum Guidelines   |   Privacy Policy   |   Terms of Service
                                          • Login

                                          • Don't have an account? Register

                                          • Login or register to search.
                                          • First post
                                            Last post
                                          0
                                          • MySensors
                                          • OpenHardware.io
                                          • Categories
                                          • Recent
                                          • Tags
                                          • Popular