Backlit Dimmable LED Mirror with Motion Sensor
-
Do you have the Fitzing and code for the 3 zone? I have several places to use this. Any "max wattage" info, per channel and total?
Thanks,
RichardSorry it has been too long since I made this video and I don't remember the reference. If you're talking about my Arduino that dims three separate lights it's basically just the same wiring except you use 3 different PWM pins to the 3 different MOSFETs. The max wattage is determined by the MOSFET you use.
If that's not what you're referring to, let me know.
-
Sorry it has been too long since I made this video and I don't remember the reference. If you're talking about my Arduino that dims three separate lights it's basically just the same wiring except you use 3 different PWM pins to the 3 different MOSFETs. The max wattage is determined by the MOSFET you use.
If that's not what you're referring to, let me know.
@petewill Yes that's what I'm talking about. Just wondering how the code was modified to discretely control the 3 zones.
-
@petewill Yes that's what I'm talking about. Just wondering how the code was modified to discretely control the 3 zones.
@csa02221862 said:
@petewill Yes that's what I'm talking about. Just wondering how the code was modified to discretely control the 3 zones.
you want with or without the buttons?
If with, how would the buttons work?
-
@petewill Yes that's what I'm talking about. Just wondering how the code was modified to discretely control the 3 zones.
@csa02221862 Sorry for the delayed reply. Busy day yesterday. Here is my code that I'm running in my 1.4.1/1.5 environment.
/*** * This program is free software; you can redistribute it and/or * modify it under the terms of the GNU General Public License * version 2 as published by the Free Software Foundation. * * DESCRIPTION * This sketch provides a Dimmable LED Light using PWM and based Henrik Ekblad * <henrik.ekblad@gmail.com> Vera Arduino Sensor project. * Developed by Bruce Lacey, inspired by Hek's MySensor's example sketches. * * The circuit uses a MOSFET for Pulse-Wave-Modulation to dim the attached LED or LED strip. * The MOSFET Gate pin is connected to Arduino pin 3 (LED_PIN), the MOSFET Drain pin is connected * to the LED negative terminal and the MOSFET Source pin is connected to ground. * * This sketch is extensible to support more than one MOSFET/PWM dimmer per circuit. * * REVISION HISTORY * Version 1.0 - February 15, 2014 - Bruce Lacey * Version 1.1 - August 13, 2014 - Converted to 1.4 (hek) * Version 1.2 - January 22, 2015 - Created a seperate control for the basement LEDs * Version 1.3 - March 7, 2015 - Added coat closet LED * ***/ #define SN "Basement LEDs" #define SV "1.3" #include <MySensor.h> #include <SPI.h> #define NODE_ID AUTO //Change to a number to manually assign a node ID #define MASTER_WINDOW_LED_CHILD 0 #define COAT_CLOSET_LED_CHILD 1 #define UPSTAIRS_RAIL_LED_CHILD 30 #define BASEMENT_DESK_LED_CHILD 40 #define MASTER_WINDOW_LED_PIN 3 // Arduino pin attached to MOSFET Gate pin #define UPSTAIRS_RAIL_LED_PIN 5 #define BASEMENT_DESK_LED_PIN 6 #define COAT_CLOSET_LED_PIN 9 #define FADE_DELAY 10 // Delay in ms for each percentage fade up/down (10ms = 1s full-range dim) //MySensor gw; MySensor gw(4, 10); //Change CE PIN to free up another PWM pin static int currentLevelUpstairsRail = 0; static int currentLevelBasementDesk = 0; static int currentLevelMasterWinLight = 0; static int currentLevelCoatCloset = 0; /*** * Dimmable LED initialization method */ void setup() { Serial.println( SN ); gw.begin( incomingMessage, NODE_ID); // Register the LED Dimmable Light with the gateway gw.present(UPSTAIRS_RAIL_LED_CHILD, S_DIMMER ); gw.present(BASEMENT_DESK_LED_CHILD, S_DIMMER ); gw.present(MASTER_WINDOW_LED_CHILD, S_DIMMER ); gw.present(COAT_CLOSET_LED_CHILD, S_DIMMER ); gw.sendSketchInfo(SN, SV); } /*** * Dimmable LED main processing loop */ void loop() { gw.process(); } void incomingMessage(const MyMessage &message) { if (message.type == V_LIGHT || message.type == V_DIMMER) { // Retrieve the power or dim level from the incoming request message int requestedLevel = atoi( message.data ); // Adjust incoming level if this is a V_LIGHT variable update [0 == off, 1 == on] requestedLevel *= ( message.type == V_LIGHT ? 100 : 1 ); // Clip incoming level to valid range of 0 to 100 requestedLevel = requestedLevel > 100 ? 100 : requestedLevel; requestedLevel = requestedLevel < 0 ? 0 : requestedLevel; // Serial.print( "Changing level to " ); // Serial.println( requestedLevel ); //fadeToLevel( requestedLevel );//old code fadeToLevel( message.sensor, requestedLevel ); } } void fadeToLevel(int ledChild, int toLevel ) { // Serial.print( "In the FadeToLevel method. ChildID: " ); // Serial.println( ledChild ); int currentLevel; int ledPin; if(ledChild == UPSTAIRS_RAIL_LED_CHILD){ currentLevel = currentLevelUpstairsRail; ledPin = UPSTAIRS_RAIL_LED_PIN; } else if(ledChild == MASTER_WINDOW_LED_CHILD){ currentLevel = currentLevelMasterWinLight; ledPin = MASTER_WINDOW_LED_PIN; } else if(ledChild == COAT_CLOSET_LED_CHILD){ currentLevel = currentLevelCoatCloset; ledPin = COAT_CLOSET_LED_PIN; } else{ currentLevel = currentLevelBasementDesk; ledPin = BASEMENT_DESK_LED_PIN; } int delta = ( toLevel - currentLevel ) < 0 ? -1 : 1; while ( currentLevel != toLevel ) { currentLevel += delta; analogWrite(ledPin, (int)(currentLevel / 100. * 255) ); delay( FADE_DELAY ); // Serial.println( ledPin ); } if(ledChild == UPSTAIRS_RAIL_LED_CHILD){ currentLevelUpstairsRail = toLevel; } else if(ledChild == MASTER_WINDOW_LED_CHILD){ currentLevelMasterWinLight = toLevel; } else if(ledChild == COAT_CLOSET_LED_CHILD){ currentLevelCoatCloset = toLevel; } else{ currentLevelBasementDesk = toLevel; } //gw.sendVariable( ledChild, V_LIGHT, currentLevel > 0 ? 1 : 0 ); //gw.sendVariable( ledChild, V_DIMMER, currentLevel ); MyMessage dimmerMsg(ledChild, V_DIMMER); gw.send(dimmerMsg.set(currentLevel)); }``` -
Pete, thanks.
This will work for most situations I need. Is there an option to add the buttons and motion to one or more of the led's?
Hate to bother you again.
Richard
-
Pete, thanks.
This will work for most situations I need. Is there an option to add the buttons and motion to one or more of the led's?
Hate to bother you again.
Richard
@csa02221862 It should be possible but I never added it. This is in my basement controlling various lights throughout my house so I don't need buttons very often (when I do I just use my phone). The motion sensors are run through a different node and all the logic happens through my controller.
-
@petewill Thanks for an awesome write up, I just recently ran across it! I am trying to get it working and downloaded the 1.4 library and tried uploading the sketch to my pro mini and got the following error:
Sketch uses 18,642 bytes (130%) of program storage space. Maximum is 14,336 bytes.
Global variables use 633 bytes (61%) of dynamic memory, leaving 391 bytes for local variables. Maximum is 1,024 bytes.
processing.app.debug.RunnerException: Sketch too big; see http://www.arduino.cc/en/Guide/Troubleshooting#size for tips on reducing it.
at cc.arduino.Compiler.size(Compiler.java:315)
at cc.arduino.Compiler.build(Compiler.java:156)
at processing.app.Sketch.build(Sketch.java:1111)
at processing.app.Sketch.exportApplet(Sketch.java:1146)
at processing.app.Sketch.exportApplet(Sketch.java:1132)
at processing.app.Editor$DefaultExportHandler.run(Editor.java:2409)
at java.lang.Thread.run(Thread.java:745)
Sketch too big; see http://www.arduino.cc/en/Guide/Troubleshooting#size for tips on reducing it.Any suggestions on what I might be doing wrong? I am pretty new so I might be overlooking something really simple..
-
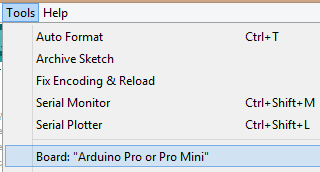
@loralg Are you sure you're choosing the Pro Mini from the Tools > Boards menu? It should have around 32,000 bytes not 14,336.
-
@petewill there are atmega168-based pro minis. Using them with MySensors is hard though, because of their small flash size.
-
@petewill @mfalkvidd After looking I have the 168.. I already have some more ordered that are the 328 though. I should have looked closer when I ordered the first batch. Thanks for the help! I figured it was probably something simple I had overlooked on my end.