How To - Doorbell Automation Hack
-
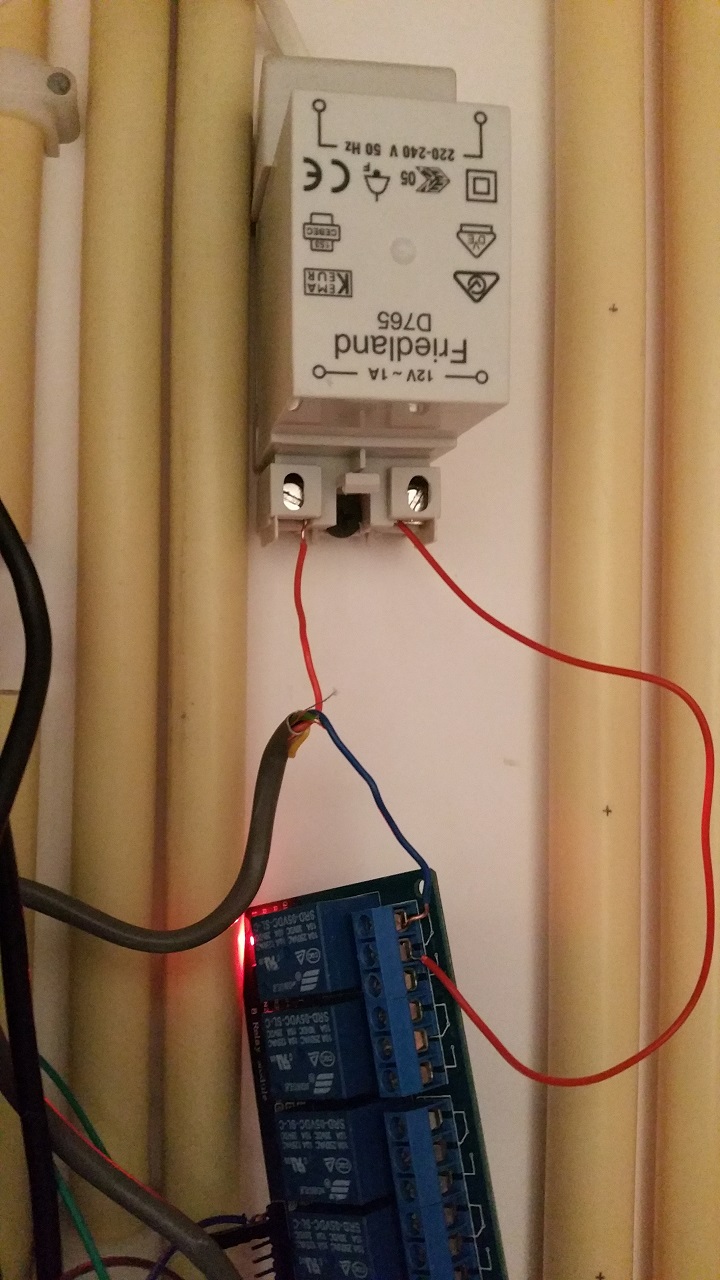
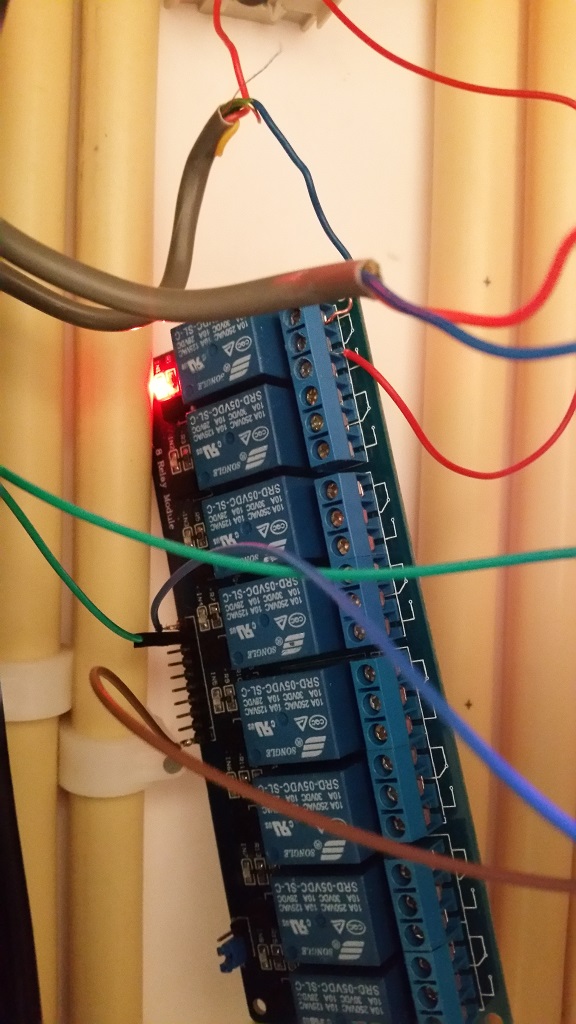
Just to make sure I've took some photo's.
When I take a multimeter and place it on the bottom two wires of the trafo I get zero rating.
There is no difference between blue and red, neither does it make a difference if I change the wires in what ever way. Tried all possibilities I can think of. -
Yeah i know. Does it matter? It's seperated by the relay from the rest right?
Or am I saying something stupid here.... :confused: -
Sure, no prob.

This is the relay, at the moment a 6 port, didn't had a one port available.
The green wire is connected to IN1 on the relay and pin4 on the arduino.

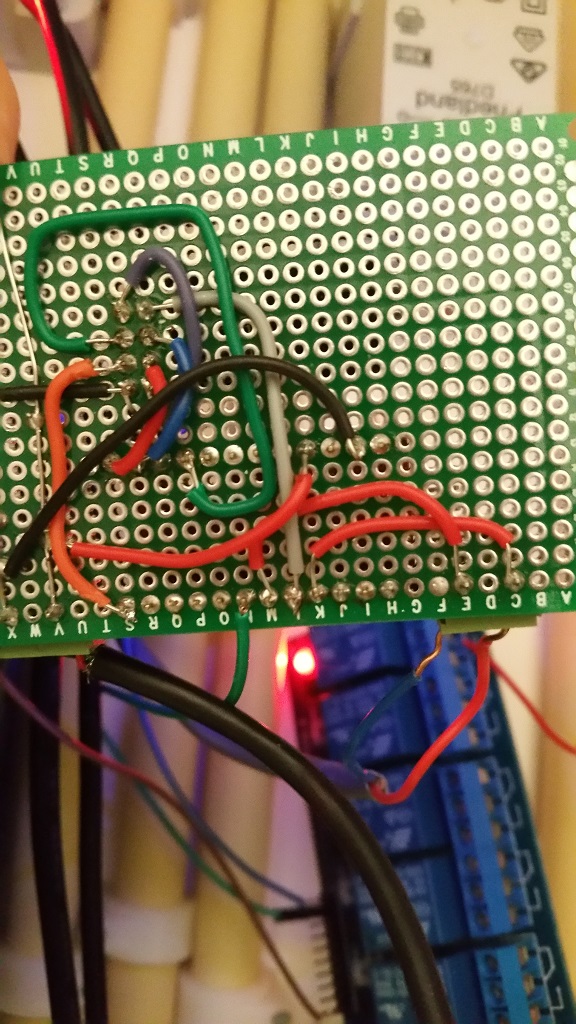
the backside of the print. The bottom row 'S' is pin 9 on the arduino, 'M' and 'K' is pin3 and Ground to doorbellbutton.

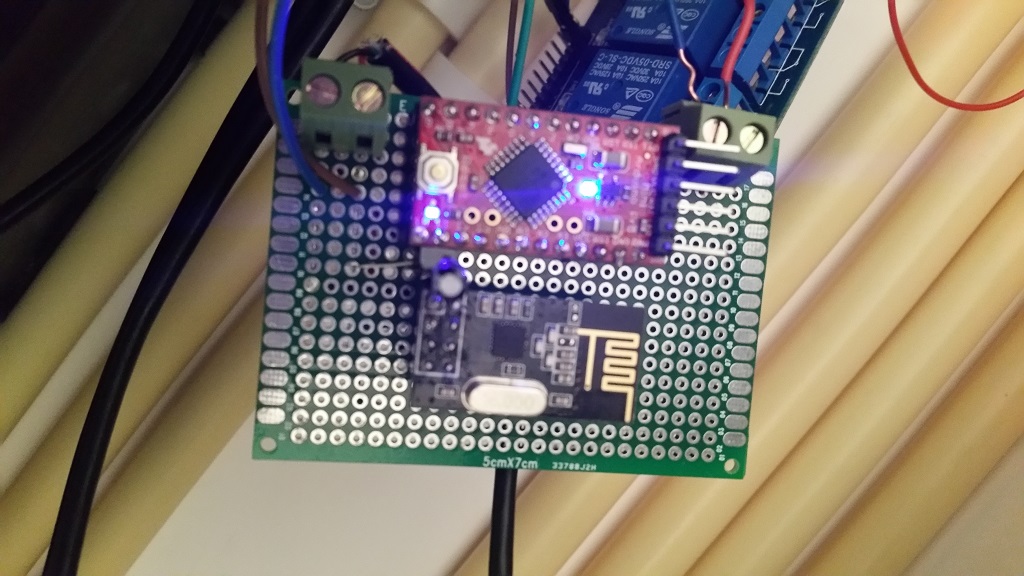
front side. The brown and blue on the left are 5V to the relay, on the right red and blue are input doorbellbutton. -
For the NC problem change:
#define RELAY_ON 1
#define RELAY_OFF 0
to:
#define RELAY_ON 0 #define RELAY_OFF 1 -
Huh, I have the same problem as @arjen is describing too, the only difference is i'm using a 2x raly vs. his 4. I don't have an issue with the relay being on, since my node is always powered on, the pull always goes high. Might just change it in the code/wiring though when I get the Arduino IDE working again.
Quick question: do you have the relay board powered by the Arduino, or another 5V source?
-
Made the changes to the sketch as suggested, and now I can connect it to NO.
Just to make sure I didn't made a mistake while soldering, used a fresh nano and made all connections again. In the sketch the changes still need to be made, however as far as i could test this morning all is working fine now!
Thanks for all the tips!The relay is powered by the same powersource as the arduino (6 port powered usb hub 2A).
-
Huh, I have the same problem as @arjen is describing too, the only difference is i'm using a 2x raly vs. his 4. I don't have an issue with the relay being on, since my node is always powered on, the pull always goes high. Might just change it in the code/wiring though when I get the Arduino IDE working again.
Quick question: do you have the relay board powered by the Arduino, or another 5V source?
@drock1985 the relay should be powered by the same 5v power source as the Arduino but not from the arduino. It can draw too much power and cause issues when connected to the arduino.
@arjen Great! I just noticed the selection pin (can't think of the correct name right now) on your relay. I wonder if switching that would allow you to use the original code as well as the NO connections?
-
Excellent project, great work.. So I need to pick your mind.... I have a doorbell that can change music and volume. I hope to be able to fully control it by zwave using this app with Vera...Any ideas.....
-
Hello all - sorry I have been away for so long...
This bring back memories http://forum.mysensors.org/topic/1620/mysensored-doorbell
I wish I found a way of triggering the notification from the ring and not the other way around, as this way when something happen to your arduino the doorbell will not ring. Didn't happen yet - it works perfectly for 6 months but I would feel more relaxed if it was the other way around. Oh well... -
@Moshe-Livne Cool! You can look at it the other way around on the Arduino processing the ring issue you raised. I now have the ability to turn off the ring if I want to. So I guess there is some give and take :)
@petewill ummmm you could still cut the ring even if it was the other way around with a relay. Sorry to be a pain :-) can't fight my mold hehehe. generally I find the reliability of dorrbells (especially the old wired kind) to be excellent. mine has been working flawlessly for at least 35 years.
-
@petewill ummmm you could still cut the ring even if it was the other way around with a relay. Sorry to be a pain :-) can't fight my mold hehehe. generally I find the reliability of dorrbells (especially the old wired kind) to be excellent. mine has been working flawlessly for at least 35 years.
@Moshe-Livne Ok, I must have misunderstood. I thought you wanted the bell to ring no matter what then just detect the signal so you could send it to your gateway. Either way, that's why MySensors is so great, you can do pretty much what ever YOU want, not what someone else wants :)
-
@Moshe-Livne Ok, I must have misunderstood. I thought you wanted the bell to ring no matter what then just detect the signal so you could send it to your gateway. Either way, that's why MySensors is so great, you can do pretty much what ever YOU want, not what someone else wants :)
@petewill My original plan was to unintrusively detect the ring and trigger the arduino without effecting the bell circuit. However, it proved to be a bit more complicated and 2 dead arduinos and several other fried components later I gave up.
-
I am new to home automation but curious if this same setup would work by having the arduino centrally located with the transformer in a closet and use the extra connections on the existing 4 conductor wire from the transformer to connect the new relay installed in the chime?
All this saves is some extra space and having to run 5V to the chime but one could use a larger arduino for additional automation projects rather than dedicated to just the chime.
Very nice tutorial- very easy to follow. Thanks
-
Hey @mike0913 ,
You can check out what I did with my Doorbell hack here (http://forum.mysensors.org/topic/2293/how-to-2-door-chime-automation-hack-thanks-petewill), it may help with your situation. Basically, I used the 16VAC input from the doorbell to power my Arduino, relays, and actual doorbell chime itself. Due to confined space, I had to mount mine in an external box below the existing door chime.
-
@petewill, thanks for the reply and sorry it took me so long. I have decided to keep it to a small project starting with the remote on off, then moving to a trigger to my camera. I plan on breaking the doorbell down once the wife is out of the house for a day, lol. Thanks again.
