My Slim 2AA Battery Node


  • Hardware Contributor

    @siod Thanks for your report. Could you please share some more info. Hw/sw versions, nRF-batches, sensors, configs/settings, sketches etc. @Komaandy could only confirm issues with a PIR eqiupped node, but you have a door-switch so I guess it's a potential generic problem then. Let's hope for other reports as to help us narrow down the search.

    I have not yet migrated to MySensors 2.x 😳 , but it's hopefully coming soon. My Slim Nodes from the start of this thread (~ 10 pcs) are still in flawless production.


  • Hardware Contributor

    @m26872 - I made myself a slim node with a light sensor and a uv-sensor last weekend. Its running latest dev branch and has been working flawless atleast 1 week now.


  • @m26872 First of all: I already got so much help and I am very grateful for that, awesome community!

    I don´t think I will ever find the problem with those sensors and because of the lack of time I have (familiy, work...) I think looking for the problem would take longer than just build a new sensor. And that´s what I will do next: I will just build another node, one step after the other and so I can validate if it maybe is a hardware problem or a code problem. BTW my whole sketch is just a few posts above this one...

    So I will come back after I started over...


  • @m26872

    Hi there,

    im still into troubleshooting, and what i did last was create a "mock up temperatursensor slim node " with this sketch
    , so its really only the node and batteries. But it still freezes 😞
    Hardware i use is :

    -Atmega328p 1Mhz bootloader. // Burnt the bootloader with one Arduino UNO as master and another Arduino UNO on which I replaced the Atmega328p as slave // Arduino as ISP // with the latest Arduino IDE (1.8.2)

    • after burning the bootloader on the bare ATMEGA´s i assemble them on the node and transfer the sketch via FTDI232

    Furthermore i use
    -generic Capacitors and restistors ( specs from your BOM)

    • Kuman nRF24L01 batches ( bought like 30 in a bulk once, but other "nonslimnodes" are working)
      -fresh batteries

    Any help is very aprreciated 🙂 🙂

    /*
    * MockMySensors
    *
    * This skecth is intended to crate fake sensors which register and respond to the controller
    * ***
    * Barduino 2015, GizMoCuz 2015
    */
    
    // Enable debug prints to serial monitor
    #define MY_DEBUG
    
    // Enable and select radio type attached
    #define MY_RADIO_NRF24
    //#define MY_RADIO_RFM69
    
    #define MY_NODE_ID 123
    
    #include <MySensors.h>
    
    #define RADIO_ERROR_LED_PIN 4  // Error led pin
    #define RADIO_RX_LED_PIN    6  // Receive led pin
    #define RADIO_TX_LED_PIN    13  // the PCB, on board LED
    
    // Wait times
    #define LONG_WAIT 500
    #define SHORT_WAIT 50
    
    #define SKETCH_NAME "MockMySensors "
    #define SKETCH_VERSION "v0.5"
    
    // Define Sensors ids
    /*      S_DOOR, S_MOTION, S_SMOKE, S_LIGHT, S_DIMMER, S_COVER, S_TEMP, S_HUM, S_BARO, S_WIND,
       S_RAIN, S_UV, S_WEIGHT, S_POWER, S_HEATER, S_DISTANCE, S_LIGHT_LEVEL, S_ARDUINO_NODE,
       S_ARDUINO_REPEATER_NODE, S_LOCK, S_IR, S_WATER, S_AIR_QUALITY, S_CUSTOM, S_DUST,
       S_SCENE_CONTROLLER
    */
    
    ////#define ID_S_ARDUINO_NODE            //auto defined in initialization
    ////#define ID_S_ARDUINO_REPEATER_NODE   //auto defined in initialization
    
    
    // Some of these ID's have not been updated for v1.5.  Uncommenting too many of them
    // will make the sketch too large for a pro mini's memory so it's probably best to try
    // one at a time.
    
    //#define ID_S_ARMED             0  // dummy to controll armed stated for several sensors
    //#define ID_S_DOOR              1
    //#define ID_S_MOTION            2
    //#define ID_S_SMOKE             3
    //#define ID_S_LIGHT             4
    //#define ID_S_DIMMER            5
    //#define ID_S_COVER             6
    #define ID_S_TEMP              7
    //#define ID_S_HUM               8
    //#define ID_S_BARO              9
    //#define ID_S_WIND              10
    //#define ID_S_RAIN              11
    //#define ID_S_UV                12
    //#define ID_S_WEIGHT            13
    //#define ID_S_POWER             14
    //#define ID_S_HEATER            15
    //#define ID_S_DISTANCE          16
    //#define ID_S_LIGHT_LEVEL       17
    //#define ID_S_LOCK              18
    //#define ID_S_IR                19
    //#define ID_S_WATER             20
    //#define ID_S_AIR_QUALITY       21
    //#define ID_S_DUST              22
    //#define ID_S_SCENE_CONTROLLER  23
    //// Lib 1.5 sensors
    //#define ID_S_RGB_LIGHT         24
    //#define ID_S_RGBW_LIGHT        25
    //#define ID_S_COLOR_SENSOR      26
    //#define ID_S_HVAC              27
    //#define ID_S_MULTIMETER        28
    //#define ID_S_SPRINKLER         29
    //#define ID_S_WATER_LEAK        30
    //#define ID_S_SOUND             31
    //#define ID_S_VIBRATION         32
    //#define ID_S_MOISTURE          33
    //
    //#define ID_S_CUSTOM            99


    // Global Vars
    unsigned long SLEEP_TIME = 60000; // Sleep time between reads (in milliseconds)
    bool metric = true;
    long randNumber;
    
    
    //Instanciate Messages objects
    
    #ifdef ID_S_ARMED
    bool isArmed;
    #endif
    
    #ifdef ID_S_DOOR // V_TRIPPED, V_ARMED
    MyMessage msg_S_DOOR_T(ID_S_DOOR,V_TRIPPED);
    MyMessage msg_S_DOOR_A(ID_S_DOOR,V_ARMED);
    #endif
    
    #ifdef ID_S_MOTION // V_TRIPPED, V_ARMED
    MyMessage msg_S_MOTION_A(ID_S_MOTION,V_ARMED);
    MyMessage msg_S_MOTION_T(ID_S_MOTION,V_TRIPPED);
    #endif
    
    #ifdef ID_S_SMOKE  // V_TRIPPED, V_ARMED
    MyMessage msg_S_SMOKE_T(ID_S_SMOKE,V_TRIPPED);
    MyMessage msg_S_SMOKE_A(ID_S_SMOKE,V_ARMED);
    #endif
    
    #ifdef ID_S_LIGHT
    MyMessage msg_S_LIGHT(ID_S_LIGHT,V_LIGHT);
    bool isLightOn=0;
    #endif
    
    #ifdef ID_S_DIMMER
    MyMessage msg_S_DIMMER(ID_S_DIMMER,V_DIMMER);
    int dimmerVal=100;
    #endif
    
    #ifdef ID_S_COVER
    MyMessage msg_S_COVER_U(ID_S_COVER,V_UP);
    MyMessage msg_S_COVER_D(ID_S_COVER,V_DOWN);
    MyMessage msg_S_COVER_S(ID_S_COVER,V_STOP);
    MyMessage msg_S_COVER_V(ID_S_COVER,V_VAR1);
    int coverState=0; //0=Stop; 1=up; -1=down
    #endif
    
    #ifdef ID_S_TEMP
    MyMessage msg_S_TEMP(ID_S_TEMP,V_TEMP);
    #endif
    
    #ifdef ID_S_HUM
    MyMessage msg_S_HUM(ID_S_HUM,V_HUM);
    #endif
    
    #ifdef ID_S_BARO
    MyMessage msg_S_BARO_P(ID_S_BARO,V_PRESSURE);
    MyMessage msg_S_BARO_F(ID_S_BARO,V_FORECAST);
    #endif
    
    #ifdef ID_S_WIND
    MyMessage msg_S_WIND_S(ID_S_WIND,V_WIND);
    MyMessage msg_S_WIND_G(ID_S_WIND,V_GUST);
    MyMessage msg_S_WIND_D(ID_S_WIND,V_DIRECTION);
    #endif
    
    #ifdef ID_S_RAIN
    MyMessage msg_S_RAIN_A(ID_S_RAIN,V_RAIN);
    MyMessage msg_S_RAIN_R(ID_S_RAIN,V_RAINRATE);
    #endif
    
    #ifdef ID_S_UV
    MyMessage msg_S_UV(ID_S_UV,V_UV);
    #endif
    
    #ifdef ID_S_WEIGHT
    MyMessage msg_S_WEIGHT(ID_S_WEIGHT,V_WEIGHT);
    #endif
    
    #ifdef ID_S_POWER
    MyMessage msg_S_POWER_W(ID_S_POWER,V_WATT);
    MyMessage msg_S_POWER_K(ID_S_POWER,V_KWH);
    #endif
    
    
    #ifdef ID_S_HEATER
    
    //////// REVIEW IMPLEMENTATION ////////////
    
    MyMessage msg_S_HEATER_SET_POINT(ID_S_HEATER,
                                    V_HVAC_SETPOINT_HEAT);  // HVAC/Heater setpoint (Integer between 0-100). S_HEATER, S_HVAC
    MyMessage msg_S_HEATER_FLOW_STATE(ID_S_HEATER,
                                     V_HVAC_FLOW_STATE);     // Mode of header. One of "Off", "HeatOn", "CoolOn", or "AutoChangeOver" // S_HVAC, S_HEATER
    
    //MyMessage msg_S_HEATER_STATUS(ID_S_HEATER,V_STATUS);
    //MyMessage msg_S_HEATER_TEMP(ID_S_HEATER,V_TEMP);
    
    float heater_setpoint=21.5;
    String heater_flow_state="Off";
    
    //  float heater_temp=23.5;
    //  bool heater_status=false;
    
    
    // V_TEMP                // Temperature
    // V_STATUS              // Binary status. 0=off 1=on
    // V_HVAC_FLOW_STATE     // Mode of header. One of "Off", "HeatOn", "CoolOn", or "AutoChangeOver"
    // V_HVAC_SPEED          // HVAC/Heater fan speed ("Min", "Normal", "Max", "Auto")
    // V_HVAC_SETPOINT_HEAT  // HVAC/Heater setpoint
    #endif
    
    #ifdef ID_S_DISTANCE
    MyMessage msg_S_DISTANCE(ID_S_DISTANCE,V_DISTANCE);
    #endif
    
    #ifdef ID_S_LIGHT_LEVEL
    MyMessage msg_S_LIGHT_LEVEL(ID_S_LIGHT_LEVEL,V_LIGHT_LEVEL);
    #endif
    
    #ifdef ID_S_LOCK
    MyMessage msg_S_LOCK(ID_S_LOCK,V_LOCK_STATUS);
    bool isLocked = 0;
    #endif
    
    #ifdef ID_S_IR
    MyMessage msg_S_IR_S(ID_S_IR,V_IR_SEND);
    MyMessage msg_S_IR_R(ID_S_IR,V_IR_RECEIVE);
    long irVal = 0;
    #endif
    
    #ifdef ID_S_WATER
    MyMessage msg_S_WATER_F(ID_S_WATER,V_FLOW);
    MyMessage msg_S_WATER_V(ID_S_WATER,V_VOLUME);
    #endif
    
    #ifdef ID_S_AIR_QUALITY
    MyMessage msg_S_AIR_QUALITY(ID_S_AIR_QUALITY,V_LEVEL);
    #endif
    
    #ifdef ID_S_DUST
    MyMessage msg_S_DUST(ID_S_DUST,V_LEVEL);
    #endif
    
    #ifdef ID_S_SCENE_CONTROLLER
    MyMessage msg_S_SCENE_CONTROLLER_ON(ID_S_SCENE_CONTROLLER,V_SCENE_ON);
    MyMessage msg_S_SCENE_CONTROLLER_OF(ID_S_SCENE_CONTROLLER,V_SCENE_OFF);
    // not sure if scene controller sends int or chars
    // betting on ints as Touch Display Scen by Hek // compiler warnings
    char *scenes[] = {
       (char *)"Good Morning",
       (char *)"Clean Up!",
       (char *)"All Lights Off",
       (char *)"Music On/Off"
    };
    
    int sceneVal=0;
    int sceneValPrevious=0;
    
    #endif
    
    #ifdef ID_S_RGB_LIGHT
    MyMessage msg_S_RGB_LIGHT_V_RGB(ID_S_RGB_LIGHT,V_RGB);
    MyMessage msg_S_RGB_LIGHT_V_WATT(ID_S_RGB_LIGHT,V_WATT);
    String rgbState="000000";
    //RGB light V_RGB, V_WATT
    //RGB value transmitted as ASCII hex string (I.e "ff0000" for red)
    #endif
    
    #ifdef ID_S_RGBW_LIGHT
    MyMessage msg_S_RGBW_LIGHT_V_RGBW(ID_S_RGBW_LIGHT,V_RGBW);
    MyMessage msg_S_RGBW_LIGHT_V_WATT(ID_S_RGBW_LIGHT,V_WATT);
    String rgbwState="00000000";
    //RGBW light (with separate white component)	V_RGBW, V_WATT
    //RGBW value transmitted as ASCII hex string (I.e "ff0000ff" for red + full white)	S_RGBW_LIGHT
    #endif
    
    #ifdef ID_S_COLOR_SENSOR
    MyMessage msg_S_COLOR_SENSOR_V_RGB(ID_S_COLOR_SENSOR,V_RGB);
    //Color sensor	V_RGB
    //RGB value transmitted as ASCII hex string (I.e "ff0000" for red)	S_RGB_LIGHT, S_COLOR_SENSOR
    #endif
    
    #ifdef ID_S_HVAC
    MyMessage msg_S_HVAC_V_HVAC_SETPOINT_HEAT(ID_S_HVAC,V_HVAC_SETPOINT_HEAT);
    MyMessage msg_S_HVAC_V_HVAC_SETPOINT_COOL(ID_S_HVAC,V_HVAC_SETPOINT_COOL);
    MyMessage msg_S_HVAC_V_HVAC_FLOW_STATET(ID_S_HVAC,V_HVAC_FLOW_STATE);
    MyMessage msg_S_HVAC_V_HVAC_FLOW_MODE(ID_S_HVAC,V_HVAC_FLOW_MODE);
    MyMessage msg_S_HVAC_V_HVAC_SPEED(ID_S_HVAC,V_HVAC_SPEED);
    
    float hvac_SetPointHeat = 16.5;
    float hvac_SetPointCool = 25.5;
    String hvac_FlowState   = "AutoChangeOver";
    String hvac_FlowMode    = "Auto";
    String hvac_Speed       = "Normal";
    
    //Thermostat/HVAC device
    //V_HVAC_SETPOINT_HEAT,  // HVAC/Heater setpoint
    //V_HVAC_SETPOINT_COOL,  // HVAC cold setpoint
    //V_HVAC_FLOW_STATE,     // Mode of header. One of "Off", "HeatOn", "CoolOn", or "AutoChangeOver"
    //V_HVAC_FLOW_MODE,      // Flow mode for HVAC ("Auto", "ContinuousOn", "PeriodicOn")
    //V_HVAC_SPEED           // HVAC/Heater fan speed ("Min", "Normal", "Max", "Auto")
    
    // NOT IMPLEMENTED YET
    //V_TEMP                 // Temperature
    //V_STATUS               // Binary status. 0=off 1=on
    #endif
    
    #ifdef ID_S_MULTIMETER
    MyMessage msg_S_MULTIMETER_V_IMPEDANCE(ID_S_MULTIMETER,V_IMPEDANCE);
    MyMessage msg_S_MULTIMETER_V_VOLTAGE(ID_S_MULTIMETER,V_VOLTAGE);
    MyMessage msg_S_MULTIMETER_V_CURRENT(ID_S_MULTIMETER,V_CURRENT);
    
    // Multimeter device	V_VOLTAGE, V_CURRENT, V_IMPEDANCE
    // V_IMPEDANCE	14	Impedance value
    // V_VOLTAGE	38	Voltage level
    // V_CURRENT	39	Current level
    #endif
    
    #ifdef ID_S_SPRINKLER
    // S_SPRINKLER	31	Sprinkler device	V_STATUS (turn on/off), V_TRIPPED (if fire detecting device)
    // V_STATUS	2	Binary status. 0=off 1=on
    // V_ARMED	15	Armed status of a security sensor. 1=Armed, 0=Bypassed
    // V_TRIPPED	16	Tripped status of a security sensor. 1=Tripped, 0=Untripped
    #endif
    
    #ifdef ID_S_WATER_LEAK
    #endif
    #ifdef ID_S_SOUND
    #endif
    #ifdef ID_S_VIBRATION
    #endif
    #ifdef ID_S_MOISTURE
    #endif
    
    #ifdef ID_S_MOISTURE
    MyMessage msg_S_MOISTURE(ID_S_MOISTURE,V_LEVEL);
    #endif
    
    #ifdef ID_S_CUSTOM
    MyMessage msg_S_CUSTOM_1(ID_S_CUSTOM,V_VAR1);
    MyMessage msg_S_CUSTOM_2(ID_S_CUSTOM,V_VAR2);
    MyMessage msg_S_CUSTOM_3(ID_S_CUSTOM,V_VAR3);
    MyMessage msg_S_CUSTOM_4(ID_S_CUSTOM,V_VAR4);
    MyMessage msg_S_CUSTOM_5(ID_S_CUSTOM,V_VAR5);
    #endif


    void setup()
    {
       // Random SEED
       randomSeed(analogRead(0));
    
       wait(LONG_WAIT);
       Serial.println("GW Started");
    }
    
    void presentation()
    {
       // Send the Sketch Version Information to the Gateway
       Serial.print("Send Sketch Info: ");
       sendSketchInfo(SKETCH_NAME, SKETCH_VERSION);
       Serial.print(SKETCH_NAME);
       Serial.println(SKETCH_VERSION);
       wait(LONG_WAIT);
    
       // Get controller configuration
       Serial.print("Get Config: ");
       metric = getControllerConfig().isMetric;
       Serial.println(metric ? "Metric":"Imperial");
       wait(LONG_WAIT);
    
       // Init Armed
    #ifdef ID_S_ARMED
       isArmed = true;
    #endif
    
       // Register all sensors to gw (they will be created as child devices)
       Serial.println("Presenting Nodes");
       Serial.println("________________");
    
    #ifdef ID_S_DOOR
       Serial.println("  S_DOOR");
       present(ID_S_DOOR,S_DOOR,"Outside Door");
       wait(SHORT_WAIT);
    #endif
    
    #ifdef ID_S_MOTION
       Serial.println("  S_MOTION");
       present(ID_S_MOTION,S_MOTION,"Outside Motion");
       wait(SHORT_WAIT);
    #endif
    
    #ifdef ID_S_SMOKE
       Serial.println("  S_SMOKE");
       present(ID_S_SMOKE,S_SMOKE,"Kitchen Smoke");
       wait(SHORT_WAIT);
    #endif
    
    #ifdef ID_S_LIGHT
       Serial.println("  S_LIGHT");
       present(ID_S_LIGHT,S_LIGHT,"Hall Light");
       wait(SHORT_WAIT);
    #endif
    
    #ifdef ID_S_DIMMER
       Serial.println("  S_DIMMER");
       present(ID_S_DIMMER,S_DIMMER,"Living room dimmer");
       wait(SHORT_WAIT);
    #endif
    
    #ifdef ID_S_COVER
       Serial.println("  S_COVER");
       present(ID_S_COVER,S_COVER,"Window cover");
       wait(SHORT_WAIT);
    #endif
    
    #ifdef ID_S_TEMP
       Serial.println("  S_TEMP");
       present(ID_S_TEMP,S_TEMP,"House Temperarue");
       wait(SHORT_WAIT);
    #endif
    
    #ifdef ID_S_HUM
       Serial.println("  S_HUM");
       present(ID_S_HUM,S_HUM,"Current Humidity");
       wait(SHORT_WAIT);
    #endif
    
    #ifdef ID_S_BARO
       Serial.println("  S_BARO");
       present(ID_S_BARO,S_BARO," Air pressure");
       wait(SHORT_WAIT);
    #endif
    
    #ifdef ID_S_WIND
       Serial.println("  S_WIND");
       present(ID_S_WIND,S_WIND,"Wind Station");
       wait(SHORT_WAIT);
    #endif
    
    #ifdef ID_S_RAIN
       Serial.println("  S_RAIN");
       present(ID_S_RAIN,S_RAIN,"Rain Station");
       wait(SHORT_WAIT);
    #endif
    
    #ifdef ID_S_UV
       Serial.println("  S_UV");
       present(ID_S_UV,S_UV,"Ultra Violet");
       wait(SHORT_WAIT);
    #endif
    
    #ifdef ID_S_WEIGHT
       Serial.println("  S_WEIGHT");
       present(ID_S_WEIGHT,S_WEIGHT,"Outdoor Scale");
       wait(SHORT_WAIT);
    #endif
    
    #ifdef ID_S_POWER
       Serial.println("  S_POWER");
       present(ID_S_POWER,S_POWER,"Power Metric");
       wait(SHORT_WAIT);
    #endif
    
    #ifdef ID_S_HEATER
       Serial.println("  S_HEATER");
       present(ID_S_HEATER,S_HEATER,"Garage Heater");
       wait(SHORT_WAIT);
    #endif
    
    #ifdef ID_S_DISTANCE
       Serial.println("  S_DISTANCE");
       present(ID_S_DISTANCE,S_DISTANCE,"Distance Measure");
       wait(SHORT_WAIT);
    #endif
    
    #ifdef ID_S_LIGHT_LEVEL
       Serial.println("  S_LIGHT_LEVEL");
       present(ID_S_LIGHT_LEVEL,S_LIGHT_LEVEL,"Outside Light Level");
       wait(SHORT_WAIT);
    #endif
    
    #ifdef ID_S_LOCK
       Serial.println("  S_LOCK");
       present(ID_S_LOCK,S_LOCK,"Front Door Lock");
       wait(SHORT_WAIT);
    #endif
    
    #ifdef ID_S_IR
       Serial.println("  S_IR");
       present(ID_S_IR,S_IR,"Univeral Command");
       wait(SHORT_WAIT);
    #endif
    
    #ifdef ID_S_WATER
       Serial.println("  S_WATER");
       present(ID_S_WATER,S_WATER,"Water Level");
       wait(SHORT_WAIT);
    #endif
    
    #ifdef ID_S_AIR_QUALITY
       Serial.println("  S_AIR_QUALITY");
       present(ID_S_AIR_QUALITY,S_AIR_QUALITY,"Air Station");
       wait(SHORT_WAIT);
    #endif
    
    #ifdef ID_S_DUST
       Serial.println("  S_DUST");
       present(ID_S_DUST,S_DUST,"Dust Level");
       wait(SHORT_WAIT);
    #endif
    
    #ifdef ID_S_SCENE_CONTROLLER
       Serial.println("  S_SCENE_CONTROLLER");
       present(ID_S_SCENE_CONTROLLER,S_SCENE_CONTROLLER,"Scene Controller");
       wait(SHORT_WAIT);
    #endif
    
    #ifdef ID_S_RGB_LIGHT
       Serial.println("  RGB_LIGHT");
       present(ID_S_RGB_LIGHT,S_RGB_LIGHT,"Mood Light");
       wait(SHORT_WAIT);
    #endif
    
    #ifdef ID_S_RGBW_LIGHT
       Serial.println("  RGBW_LIGHT");
       present(ID_S_RGBW_LIGHT,S_RGBW_LIGHT,"Mood Light 2");
       wait(SHORT_WAIT);
    #endif
    
    #ifdef ID_S_COLOR_SENSOR
       Serial.println("  COLOR_SENSOR");
       present(ID_S_COLOR_SENSOR,S_COLOR_SENSOR,"Hall Painting");
       wait(SHORT_WAIT);
    #endif
    
    #ifdef ID_S_HVAC
       Serial.println("  HVAC");
       present(ID_S_HVAC,S_HVAC,"HVAC");
       wait(SHORT_WAIT);
    #endif
    
    #ifdef ID_S_MULTIMETER
       Serial.println("  MULTIMETER");
       present(ID_S_MULTIMETER,S_MULTIMETER,"Electric Staion");
       wait(SHORT_WAIT);
    #endif
    
    #ifdef ID_S_SPRINKLER
    #endif
    #ifdef ID_S_WATER_LEAK
    #endif
    #ifdef ID_S_SOUND
    #endif
    #ifdef ID_S_VIBRATION
    #endif
    #ifdef ID_S_MOISTURE
    #endif
    
    #ifdef ID_S_MOISTURE
       Serial.println("  S_MOISTURE");
       present(ID_S_MOISTURE,S_MOISTURE,"Basement Sensor");
       wait(SHORT_WAIT);
    #endif
    
    #ifdef ID_S_CUSTOM
       Serial.println("  S_CUSTOM");
       present(ID_S_CUSTOM,S_CUSTOM,"Other Stuff");
       wait(SHORT_WAIT);
    #endif


       Serial.println("________________");
    
    }
    
    void loop()
    {
       Serial.println("");
       Serial.println("");
       Serial.println("");
       Serial.println("#########################");
       randNumber=random(0,101);
    
       Serial.print("RandomNumber:");
       Serial.println(randNumber);
       // Send fake battery level
       Serial.println("Send Battery Level");
       sendBatteryLevel(randNumber);
       wait(LONG_WAIT);
    
       // Request time
       Serial.println("Request Time");
       requestTime();
       wait(LONG_WAIT);
    
       //Read Sensors
    #ifdef ID_S_DOOR
       door();
    #endif
    
    #ifdef ID_S_MOTION
       motion();
    #endif
    
    #ifdef ID_S_SMOKE
       smoke();
    #endif
    
    #ifdef ID_S_LIGHT
       light();
    #endif
    
    #ifdef ID_S_DIMMER
       dimmer();
    #endif
    
    #ifdef ID_S_COVER
       cover();
    #endif
    
    #ifdef ID_S_TEMP
       temp();
    #endif
    
    #ifdef ID_S_HUM
       hum();
    #endif
    
    #ifdef ID_S_BARO
       baro();
    #endif
    
    #ifdef ID_S_WIND
       wind();
    #endif
    
    #ifdef ID_S_RAIN
       rain();
    #endif
    
    #ifdef ID_S_UV
       uv();
    #endif
    
    #ifdef ID_S_WEIGHT
       weight();
    #endif
    
    #ifdef ID_S_POWER
       power();
    #endif
    
    #ifdef ID_S_HEATER
       heater();
    #endif
    
    #ifdef ID_S_DISTANCE
       distance();
    #endif
    
    #ifdef ID_S_LIGHT_LEVEL
       light_level();
    #endif
    
    #ifdef ID_S_LOCK
       lock();
    #endif
    
    #ifdef ID_S_IR
       ir();
    #endif
    
    #ifdef ID_S_WATER
       water();
    #endif
    
    #ifdef ID_S_AIR_QUALITY
       air();
    #endif
    
    #ifdef ID_S_DUST
       dust();
    #endif
    
    #ifdef ID_S_SCENE_CONTROLLER
       scene();
    #endif
    
    #ifdef ID_S_RGB_LIGHT
       rgbLight();
    #endif
    
    #ifdef ID_S_RGBW_LIGHT
       rgbwLight();
    #endif
    
    #ifdef ID_S_COLOR_SENSOR
       color();
    #endif
    
    #ifdef ID_S_HVAC
       hvac();
    #endif
    
    #ifdef ID_S_MULTIMETER
       multimeter();
    #endif
    
    #ifdef ID_S_SPRINKLER
    #endif
    #ifdef ID_S_WATER_LEAK
    #endif
    #ifdef ID_S_SOUND
    #endif
    #ifdef ID_S_VIBRATION
    #endif
    #ifdef ID_S_MOISTURE
    #endif
    
    #ifdef ID_S_MOISTURE
       moisture();
    #endif
    
    #ifdef ID_S_CUSTOM
       custom();
    #endif
    
       sendBatteryLevel(randNumber);
       wait(SHORT_WAIT);
       Serial.println("#########################");
       wait(SLEEP_TIME); //sleep a bit
    }
    
    // This is called when a new time value was received
    void receiveTime(unsigned long controllerTime)
    {
    
       Serial.print("Time value received: ");
       Serial.println(controllerTime);
    
    }
    
    //void door(){}
    
    #ifdef ID_S_DOOR
    void door()
    {
    
       Serial.print("Door is: " );
    
       if (randNumber <= 50) {
       	Serial.println("Open");
       	send(msg_S_DOOR_T.set((int16_t)1));
       } else {
       	Serial.println("Closed");
       	send(msg_S_DOOR_T.set((int16_t)0));
       }
    #ifdef ID_S_ARMED
       Serial.print("System is: " );
       Serial.println((isArmed ? "Armed":"Disarmed"));
       send(msg_S_DOOR_A.set(isArmed));
    #endif
    }
    #endif
    
    #ifdef ID_S_MOTION
    void motion()
    {
    
       Serial.print("Motion is: " );
    
       if (randNumber <= 50) {
       	Serial.println("Active");
       	send(msg_S_MOTION_T.set(1));
       } else {
       	Serial.println("Quiet");
       	send(msg_S_MOTION_T.set(0));
       }
    
    #ifdef ID_S_ARMED
       Serial.print("System is: " );
       Serial.println((isArmed ? "Armed":"Disarmed"));
       send(msg_S_MOTION_A.set(isArmed));
    #endif
    }
    #endif
    
    #ifdef ID_S_SMOKE
    void smoke()
    {
    
       Serial.print("Smoke is: " );
    
       if (randNumber <= 50) {
       	Serial.println("Active");
       	send(msg_S_SMOKE_T.set(1));
       } else {
       	Serial.println("Quiet");
       	send(msg_S_SMOKE_T.set(0));
       }
    
    #ifdef ID_S_ARMED
       Serial.print("System is: " );
       Serial.println((isArmed ? "Armed":"Disarmed"));
       send(msg_S_SMOKE_A.set(isArmed));
    #endif
    
    }
    #endif
    
    #ifdef ID_S_LIGHT
    void light()
    {
    
       Serial.print("Light is: " );
       Serial.println((isLightOn ? "On":"Off"));
    
       send(msg_S_LIGHT.set(isLightOn));
    
    }
    #endif
    
    #ifdef ID_S_DIMMER
    void dimmer()
    {
    
       Serial.print("Dimmer is set to: " );
       Serial.println(dimmerVal);
    
       send(msg_S_DIMMER.set(dimmerVal));
    
    }
    #endif
    
    #ifdef ID_S_COVER
    void cover()
    {
    
       Serial.print("Cover is : " );
    
       if (coverState == 1) {
       	Serial.println("Opening");
       	send(msg_S_COVER_U.set(1));
       } else if (coverState == -1) {
       	Serial.println("Closing");
       	send(msg_S_COVER_D.set(0));
       } else {
       	Serial.println("Idle");
       	send(msg_S_COVER_S.set(-1));
       }
       send(msg_S_COVER_V.set(coverState));
    }
    #endif
    
    #ifdef ID_S_TEMP
    void temp()
    {
    
       Serial.print("Temperature is: " );
       Serial.println(map(randNumber,1,100,0,45));
    
       send(msg_S_TEMP.set(map(randNumber,1,100,0,45)));
    
    }
    #endif
    
    #ifdef ID_S_HUM
    void hum()
    {
    
       Serial.print("Humitidty is: " );
       Serial.println(randNumber);
    
       send(msg_S_HUM.set(randNumber));
    
    }
    #endif
    
    #ifdef ID_S_BARO
    void baro()
    {
    
       const char *weather[] = {"stable","sunny","cloudy","unstable","thunderstorm","unknown"};
       long pressure = map(randNumber,1,100,870,1086);// hPa?
       int forecast = map(randNumber,1,100,0,5);
    
       Serial.print("Atmosferic Pressure is: " );
       Serial.println(pressure);
       send(msg_S_BARO_P.set(pressure));
    
       Serial.print("Weather forecast: " );
       Serial.println(weather[forecast]);
       send(msg_S_BARO_F.set(weather[forecast]));
    
    }
    #endif
    
    #ifdef ID_S_WIND
    void wind()
    {
    
       Serial.print("Wind Speed is: " );
       Serial.println(randNumber);
       send(msg_S_WIND_S.set(randNumber));
    
       Serial.print("Wind Gust is: " );
       Serial.println(randNumber+10);
       send(msg_S_WIND_G.set(randNumber+10));
    
       Serial.print("Wind Direction is: " );
       Serial.println(map(randNumber,1,100,0,360));
       send(msg_S_WIND_D.set(map(randNumber,1,100,0,360)));
    
    }
    #endif
    
    #ifdef ID_S_RAIN
    void rain()
    {
    
       Serial.print("Rain ammount  is: " );
       Serial.println(randNumber);
    
       send(msg_S_RAIN_A.set(randNumber));
    
       Serial.print("Rain rate  is: " );
       Serial.println(randNumber/60);
    
       send(msg_S_RAIN_R.set(randNumber/60,1));
    
    }
    #endif
    
    #ifdef ID_S_UV
    void uv()
    {
    
       Serial.print("Ultra Violet level is: " );
       Serial.println(map(randNumber,1,100,0,15));
    
       send(msg_S_UV.set(map(randNumber,1,100,0,15)));
    
    }
    #endif
    
    #ifdef ID_S_WEIGHT
    void weight()
    {
    
       Serial.print("Weight is: " );
       Serial.println(map(randNumber,1,100,0,150));
    
       send(msg_S_WEIGHT.set(map(randNumber,1,100,0,150)));
    
    }
    #endif
    
    #ifdef ID_S_POWER
    void power()
    {
    
       Serial.print("Watt is: " );
       Serial.println(map(randNumber,1,100,0,150));
       send(msg_S_POWER_W.set(map(randNumber,1,100,0,150)));
    
       Serial.print("KWH is: " );
       Serial.println(map(randNumber,1,100,0,150));
       send(msg_S_POWER_K.set(map(randNumber,1,100,0,150)));
    
    }
    #endif
    
    #ifdef ID_S_HEATER
    void heater()
    {
       //  float heater_setpoint=21.5;
       //  float heater_temp=23.5;
       //  bool heater_status=false;
       //  String heatState="Off";
    
       Serial.print("Heater flow state is: " );
       Serial.println(heater_flow_state);
       send(msg_S_HEATER_FLOW_STATE.set(heater_flow_state.c_str()));
    
       //  Serial.print("Heater on/off is: " );
       //  Serial.println((heater_status==true)?"On":"Off");
       //  send(msg_S_HEATER_STATUS.set(heater_status));
    
       //  Serial.print("Heater Temperature is: " );
       //  Serial.println(heater_temp,1);
       //  send(msg_S_HEATER_TEMP.set(heater_temp,1));
    
       Serial.print("Heater Setpoint: " );
       Serial.println(heater_setpoint,1);
       send(msg_S_HEATER_SET_POINT.set(heater_setpoint,1));
    }
    #endif
    
    #ifdef ID_S_DISTANCE
    void distance()
    {
    
       Serial.print("Distance is: " );
       Serial.println(map(randNumber,1,100,0,150));
    
       send(msg_S_DISTANCE.set(map(randNumber,1,100,0,150)));
    
    }
    #endif
    
    #ifdef ID_S_LIGHT_LEVEL
    void light_level()
    {
    
       Serial.print("Light is: " );
       Serial.println(map(randNumber,1,100,0,150));
    
       send(msg_S_LIGHT_LEVEL.set(map(randNumber,1,100,0,150)));
    
    }
    #endif
    
    #ifdef ID_S_LOCK
    void lock()
    {
    
       Serial.print("Lock is: " );
       Serial.println((isLocked ? "Locked":"Unlocked"));
       send(msg_S_LOCK.set(isLocked));
    
    }
    #endif
    
    #ifdef ID_S_IR
    void ir()
    {
    
       Serial.print("Infrared is: " );
       Serial.println(irVal);
    
       send(msg_S_IR_S.set(irVal));
       send(msg_S_IR_R.set(irVal));
    
    }
    #endif
    
    #ifdef ID_S_WATER
    void water()
    {
    
       Serial.print("Water flow is: " );
       Serial.println(map(randNumber,1,100,0,150));
    
       send(msg_S_WATER_F.set(map(randNumber,1,100,0,150)));
    
       Serial.print("Water volume is: " );
       Serial.println(map(randNumber,1,100,0,150));
    
       send(msg_S_WATER_V.set(map(randNumber,1,100,0,150)));
    
    }
    #endif
    
    #ifdef ID_S_AIR_QUALITY
    void air()
    {
    
       Serial.print("Air Quality is: " );
       Serial.println(randNumber);
    
       send(msg_S_AIR_QUALITY.set(randNumber));
    
    }
    #endif
    
    #ifdef ID_S_DUST
    void dust()
    {
    
       Serial.print("Dust level is: " );
       Serial.println(randNumber);
    
       send(msg_S_DUST.set(randNumber));
    
    }
    #endif
    
    #ifdef ID_S_SCENE_CONTROLLER
    void scene()
    {
    
       Serial.print("Scene is: " );
       Serial.println(scenes[sceneVal]);
    
       if(sceneValPrevious != sceneVal) {
       	send(msg_S_SCENE_CONTROLLER_OF.set(sceneValPrevious));
       	send(msg_S_SCENE_CONTROLLER_ON.set(sceneVal));
       	sceneValPrevious=sceneVal;
       }
    
    }
    #endif
    
    #ifdef ID_S_RGB_LIGHT
    void rgbLight()
    {
    
       Serial.print("RGB Light state is: " );
       Serial.println(rgbState);
       send(msg_S_RGB_LIGHT_V_RGB.set(rgbState.c_str()));
    
       Serial.print("RGB Light Watt is: " );
       Serial.println(map(randNumber,1,100,0,150));
       send(msg_S_RGB_LIGHT_V_WATT.set(map(randNumber,1,100,0,150)));
    
    }
    #endif
    
    #ifdef ID_S_RGBW_LIGHT
    void rgbwLight()
    {
    
       Serial.print("RGBW Light state is: " );
       Serial.println(rgbwState);
       send(msg_S_RGBW_LIGHT_V_RGBW.set(rgbwState.c_str()));
    
       Serial.print("RGBW Light Watt is: " );
       Serial.println(map(randNumber,1,100,0,150));
       send(msg_S_RGBW_LIGHT_V_WATT.set(map(randNumber,1,100,0,150)));
    
    }
    #endif
    
    #ifdef ID_S_COLOR_SENSOR
    void color()
    {
       String colorState;
    
       String red   = String(random(0,256),HEX);
       String green = String(random(0,256),HEX);
       String blue  = String(random(0,256),HEX);
    
       colorState=String(red + green + blue);
    
       Serial.print("Color state is: " );
       Serial.println(colorState);
       send(msg_S_COLOR_SENSOR_V_RGB.set(colorState.c_str()));
    
    }
    #endif
    
    #ifdef ID_S_HVAC
    void hvac()
    {
    
       //  float hvac_SetPointHeat = 16.5;
       //  float hvac_SetPointCool = 25.5;
       //  String hvac_FlowState   = "AutoChangeOver";
       //  String hvac_FlowMode    = "Auto";
       //  String hvac_Speed       = "Normal";
    
       Serial.print("HVAC Set Point Heat is: " );
       Serial.println(hvac_SetPointHeat);
       send(msg_S_HVAC_V_HVAC_SETPOINT_HEAT.set(hvac_SetPointHeat,1));
    
       Serial.print("HVAC Set Point Cool is: " );
       Serial.println(hvac_SetPointCool);
       send(msg_S_HVAC_V_HVAC_SETPOINT_COOL.set(hvac_SetPointCool,1));
    
       Serial.print("HVAC Flow State is: " );
       Serial.println(hvac_FlowState);
       send(msg_S_HVAC_V_HVAC_FLOW_STATET.set(hvac_FlowState.c_str()));
    
       Serial.print("HVAC Flow Mode is: " );
       Serial.println(hvac_FlowMode);
       send(msg_S_HVAC_V_HVAC_FLOW_MODE.set(hvac_FlowMode.c_str()));
    
       Serial.print("HVAC Speed is: " );
       Serial.println(hvac_Speed);
       send(msg_S_HVAC_V_HVAC_SPEED.set(hvac_Speed.c_str()));
    
    }
    #endif
    
    #ifdef ID_S_MULTIMETER
    void multimeter()
    {
       int impedance=map(randNumber,1,100,0,15000);
       int volt=map(randNumber,1,100,0,380);
       int amps=map(randNumber,1,100,0,16);
    
       Serial.print("Impedance is: " );
       Serial.println(impedance);
       send(msg_S_MULTIMETER_V_IMPEDANCE.set(impedance));
    
       Serial.print("Voltage is: " );
       Serial.println(volt);
       send(msg_S_MULTIMETER_V_VOLTAGE.set(volt));
    
       Serial.print("Current is: " );
       Serial.println(amps);
       send(msg_S_MULTIMETER_V_CURRENT.set(amps));
    
    }
    #endif
    
    #ifdef ID_S_SPRINKLER
    #endif
    #ifdef ID_S_WATER_LEAK
    #endif
    #ifdef ID_S_SOUND
    #endif
    #ifdef ID_S_VIBRATION
    #endif
    #ifdef ID_S_MOISTURE
    #endif
    
    #ifdef ID_S_MOISTURE
    void moisture()
    {
    
       Serial.print("Moisture level is: " );
       Serial.println(randNumber);
    
       send(msg_S_MOISTURE.set(randNumber));
    }
    #endif
    
    #ifdef ID_S_CUSTOM
    void custom()
    {
    
       Serial.print("Custom value is: " );
       Serial.println(randNumber);
    
       send(msg_S_CUSTOM_1.set(randNumber));
       send(msg_S_CUSTOM_2.set(randNumber));
       send(msg_S_CUSTOM_3.set(randNumber));
       send(msg_S_CUSTOM_4.set(randNumber));
       send(msg_S_CUSTOM_5.set(randNumber));
    
    }
    #endif
    
    
    void receive(const MyMessage &message)
    {
       switch (message.type) {
    #ifdef ID_S_ARMED
       case V_ARMED:
       	isArmed = message.getBool();
       	Serial.print("Incoming change for ID_S_ARMED:");
       	Serial.print(message.sensor);
       	Serial.print(", New status: ");
       	Serial.println((isArmed ? "Armed":"Disarmed" ));
    #ifdef ID_S_DOOR
       	door();//temp ack for door
    #endif
    #ifdef ID_S_MOTION
       	motion();//temp ack
    #endif
    #ifdef ID_S_SMOKE
       	smoke();//temp ack
    #endif
       	break;
    #endif
    
    
       case V_STATUS: // V_LIGHT:
    #ifdef ID_S_LIGHT
       	if(message.sensor==ID_S_LIGHT) {
       		isLightOn =  message.getBool();
       		Serial.print("Incoming change for ID_S_LIGHT:");
       		Serial.print(message.sensor);
       		Serial.print(", New status: ");
       		Serial.println((isLightOn ? "On":"Off"));
       		light(); // temp ack
       	}
    #endif
       	//    #ifdef ID_S_HEATER
       	//        if(message.sensor == ID_S_HEATER){
       	//          heater_status = message.getBool();
       	//          Serial.print("Incoming change for ID_S_HEATER:");
       	//          Serial.print(message.sensor);
       	//          Serial.print(", New status: ");
       	//          Serial.println(heater_status);
       	//          heater();//temp ack
       	//        }
       	//    #endif
       	break;
    
    
    #ifdef ID_S_DIMMER
       case V_DIMMER:
       	if ((message.getInt()<0)||(message.getInt()>100)) {
       		Serial.println( "V_DIMMER data invalid (should be 0..100)" );
       		break;
       	}
       	dimmerVal= message.getInt();
       	Serial.print("Incoming change for ID_S_DIMMER:");
       	Serial.print(message.sensor);
       	Serial.print(", New status: ");
       	Serial.println(message.getInt());
       	dimmer();// temp ack
       	break;
    #endif
    
    #ifdef ID_S_COVER
       case V_UP:
       	coverState=1;
       	Serial.print("Incoming change for ID_S_COVER:");
       	Serial.print(message.sensor);
       	Serial.print(", New status: ");
       	Serial.println("V_UP");
       	cover(); // temp ack
       	break;
    
       case V_DOWN:
       	coverState=-1;
       	Serial.print("Incoming change for ID_S_COVER:");
       	Serial.print(message.sensor);
       	Serial.print(", New status: ");
       	Serial.println("V_DOWN");
       	cover(); //temp ack
       	break;
    
       case V_STOP:
       	coverState=0;
       	Serial.print("Incoming change for ID_S_COVER:");
       	Serial.print(message.sensor);
       	Serial.print(", New status: ");
       	Serial.println("V_STOP");
       	cover(); //temp ack
       	break;
    #endif
    
    
       case V_HVAC_SETPOINT_HEAT:
    
    #ifdef ID_S_HEATER
       	if(message.sensor == ID_S_HEATER) {
       		heater_setpoint=message.getFloat();
    
       		Serial.print("Incoming set point for ID_S_HEATER:");
       		Serial.print(message.sensor);
       		Serial.print(", New status: ");
       		Serial.println(heater_setpoint,1);
       		heater();//temp ack
       	}
    #endif
    
    #ifdef ID_S_HVAC
       	if(message.sensor == ID_S_HVAC) {
       		hvac_SetPointHeat=message.getFloat();
       		Serial.print("Incoming set point for ID_S_HVAC:");
       		Serial.print(message.sensor);
       		Serial.print(", New status: ");
       		Serial.println(hvac_SetPointHeat,1);
       		hvac();//temp ack
       	}
    #endif
       	break;
    
       case V_HVAC_FLOW_STATE:
    #ifdef ID_S_HEATER
       	if(message.sensor == ID_S_HEATER) {
       		heater_flow_state=message.getString();
       		Serial.print("Incoming flow state change for ID_S_HEATER:");
       		Serial.print(message.sensor);
       		Serial.print(", New status: ");
       		Serial.println(heater_flow_state);
       		heater();//temp ack
       	}
    #endif
    
    #ifdef ID_S_HVAC
       	if(message.sensor == ID_S_HVAC) {
       		hvac_FlowState=message.getString();
    
       		Serial.print("Incoming set point for ID_S_HVAC:");
       		Serial.print(message.sensor);
       		Serial.print(", New status: ");
       		Serial.println(hvac_FlowState);
       		hvac();//temp ack
       	}
    #endif
       	break;
    
    #ifdef ID_S_LOCK
       case V_LOCK_STATUS:
       	isLocked =  message.getBool();
       	Serial.print("Incoming change for ID_S_LOCK:");
       	Serial.print(message.sensor);
       	Serial.print(", New status: ");
       	Serial.println(message.getBool()?"Locked":"Unlocked");
       	lock(); //temp ack
       	break;
    #endif
    
    #ifdef ID_S_IR
       case V_IR_SEND:
       	irVal = message.getLong();
       	Serial.print("Incoming change for ID_S_IR:");
       	Serial.print(message.sensor);
       	Serial.print(", New status: ");
       	Serial.println(irVal);
       	ir(); // temp ack
       	break;
       case V_IR_RECEIVE:
       	irVal = message.getLong();
       	Serial.print("Incoming change for ID_S_IR:");
       	Serial.print(message.sensor);
       	Serial.print(", New status: ");
       	Serial.println(irVal);
       	ir(); // temp ack
       	break;
    #endif
    
    #ifdef ID_S_SCENE_CONTROLLER
       case V_SCENE_ON:
       	sceneVal = message.getInt();
       	Serial.print("Incoming change for ID_S_SCENE_CONTROLLER:");
       	Serial.print(message.sensor);
       	Serial.print(", New status: ");
       	Serial.print(scenes[sceneVal]);
       	Serial.println(" On");
       	scene();// temp ack
       	break;
       case V_SCENE_OFF:
       	sceneVal = message.getInt();
       	Serial.print("Incoming change for ID_S_SCENE_CONTROLLER:");
       	Serial.print(message.sensor);
       	Serial.print(", New status: ");
       	Serial.print(scenes[sceneVal]);
       	Serial.println(" Off");
       	scene();// temp ack
       	break;
    #endif
    
    #ifdef ID_S_RGB_LIGHT
       case V_RGB:
       	rgbState=message.getString();
       	Serial.print("Incoming flow state change for ID_S_RGB_LIGHT:");
       	Serial.print(message.sensor);
       	Serial.print(", New status: ");
       	Serial.println(rgbState);
       	rgbLight(); // temp ack
    
       	break;
    #endif
    
    #ifdef ID_S_RGBW_LIGHT
       case V_RGBW:
       	rgbwState=message.getString();
       	Serial.print("Incoming flow state change for ID_S_RGBW_LIGHT:");
       	Serial.print(message.sensor);
       	Serial.print(", New status: ");
       	Serial.println(rgbwState);
       	rgbwLight();
       	break;
    #endif
    
    #ifdef ID_S_HVAC
       //  hvac_SetPointHeat
       //  hvac_SetPointCool
       //  hvac_FlowState
       //  hvac_FlowMode
       //  hvac_Speed
    
       case V_HVAC_SETPOINT_COOL:
       	hvac_SetPointCool=message.getFloat();
    
       	Serial.print("Incoming set point for ID_S_HVAC:");
       	Serial.print(message.sensor);
       	Serial.print(", New status: ");
       	Serial.println(hvac_SetPointCool,1);
       	hvac();//temp ack
       	break;
    
       case V_HVAC_FLOW_MODE:
       	hvac_Speed=message.getString();
    
       	Serial.print("Incoming set point for ID_S_HVAC:");
       	Serial.print(message.sensor);
       	Serial.print(", New status: ");
       	Serial.println(hvac_Speed);
       	hvac();//temp ack
       	break;
    
       case V_HVAC_SPEED:
       	hvac_FlowMode=message.getString();
    
       	Serial.print("Incoming set point for ID_S_HVAC:");
       	Serial.print(message.sensor);
       	Serial.print(", New status: ");
       	Serial.println(hvac_FlowMode);
       	hvac();//temp ack
       	break;
    #endif
    
       default:
       	Serial.print("Unknown/UnImplemented message type: ");
       	Serial.println(message.type);
       }
    
    }```

  • Mod

    can you try to add the watchdog timers and see what happens? Try using a different bootloader? Different power source or using a small booster or an additional AA battery and a LDO. I am just throwing ideas and see what you can do with the stuff you may have at home.


  • @gohan said in My Slim 2AA Battery Node:

    LDO

    @gohan
    Hi, i added a WDT now into the MotionSensorSketch.
    Well at least i guess i did. I just read about it , never used it before. Does the 1Mhz Optiboot boatloaders support this ?

    Unfortunalty I didnt recieve my 3,3V boosters yet and i dont have LDO´s around.
    Concerning the bootloaders. Do you have a suggestion which one to use ? As I read that sticking to 1Mhz is important when using only 2AA batteries because of instability when voltage goes belowe certian values.
    Obviously i could use more batteries, but then i cant supply the nRF2401 from the board right ?

    // Enable debug prints
    #define MY_DEBUG
    
    // Enable and select radio type attached
    #define MY_RADIO_NRF24
    //#define MY_RADIO_RFM69
    #define MY_NODE_ID 40
    #include <MySensors.h>
    #include <avr/wdt.h>
    
    unsigned long SLEEP_TIME = 120000; // Sleep time between reports (in milliseconds)
    #define DIGITAL_INPUT_SENSOR 3   // The digital input you attached your motion sensor.  (Only 2 and 3 generates interrupt!)
    #define CHILD_ID 1   // Id of the sensor child
    
    // Initialize motion message
    MyMessage msg(CHILD_ID, V_TRIPPED);
    
    void setup()
    {
    	wdt_enable(WDTO_2S);
    	pinMode(DIGITAL_INPUT_SENSOR, INPUT);      // sets the motion sensor digital pin as input
    }
    
    void presentation()
    {
    	// Send the sketch version information to the gateway and Controller
    	sendSketchInfo("Motion Sensor", "AndyWasHere");
    
    	// Register all sensors to gw (they will be created as child devices)
    	present(CHILD_ID, S_MOTION);
    }
    
    void loop()
    {
    	// Read digital motion value
    	bool tripped = digitalRead(DIGITAL_INPUT_SENSOR) == HIGH;
    
    	Serial.println(tripped);
    	send(msg.set(tripped?"1":"0"));  // Send tripped value to gw
    
    	// Sleep until interrupt comes in on motion sensor. Send update every two minute.
    	sleep(digitalPinToInterrupt(DIGITAL_INPUT_SENSOR), CHANGE, SLEEP_TIME);
     wdt_reset();
    
    }```

  • Mod

    Actually you would have to put wdt_enable(WDTO_8S); right after Loop() and wdt_disable(); before calling the sleep (this is what I copied from another sketch). The wdt_reset you cold use in the middle of the loop in case you have a function that could take long time to execute and it may trigger the WD timer so you can reset the timer (you can play with the length of the timer according to your needs)


  • @gohan
    maybe like this ?

    void loop()
    
    
    {
    	wdt_enable(WDTO_8S);
    	// Read digital motion value
    	bool tripped = digitalRead(DIGITAL_INPUT_SENSOR) == HIGH;
    
    	Serial.println(tripped);
    	send(msg.set(tripped?"1":"0"));  // Send tripped value to gw
    wdt_disable();
    	// Sleep until interrupt comes in on motion sensor. Send update every two minute.
    	sleep(digitalPinToInterrupt(DIGITAL_INPUT_SENSOR), CHANGE, SLEEP_TIME);
     
    
    }```

  • Mod

    that's what I found. You could also use wdt_enable(WDTO_2S) I think. I haven't done any test yet on this.


  • Hardware Contributor

    @Komaandy Try to remove all your Serial.print.


    1. Has anyone used NRF24L01+ + PA + LNA on these modules ?

    2. Any reason why it shouldnt work out of the box ( does AA batteries give enough power to drive them on LOW settings? )

    3. What type of battery monitoring is recommended on these ones? The resistance or the library way?

    I just got 90 PCBs, beautiful, fast shipping ( i think under 2 weeks to Norway ) and looks well made.
    I'll drop one in each beehive I have ( 7 ) and see how long they last


  • So, it seems i made some progress.
    After changing to the @GertSanders bootloader ( https://www.openhardware.io/view/33/Various-bootloader-files-based-on-Optiboot-62) all the PIR nodes seem to be stable.
    I´m using these settings 0_1495738589974_1.PNG

    Wish me luck 🙂


  • Hardware Contributor

    @Komaandy Yes, using 8MHz instead of 1MHz is perhaps a good idea. Stable enough at room temperature, well proven and will e.g. solve a "Serial.print()" interrupt loop issue. Just remember that you'll lose ~25uA if you'll leave BOD enabled.


  • Hardware Contributor

    @m26872 said in My Slim 2AA Battery Node:

    Just remember that you'll lose ~25uA if you'll leave BOD enabled.

    No, on ATMega328 MySensors disables BOD before going to sleep.
    So extra consumption from BOD will only exist when node is active and in that case it's negligible.


  • Hardware Contributor

    @Nca78 Ok. Thanks. Since ever, or only from 2.x ?


  • Hardware Contributor

    @m26872 no idea I started MySensors with 2.x 😛


  • Update : Day 3 and still all PIR nodes are working 😉
    I´m using the given sketch here.


  • Still up and running stable.
    8Mhz Bootloader did the trick for me 🙂

    0_1496167752608_2.PNG


  • Hardware Contributor

    @Komaandy Nice! Thumbs up for 8MHz (and your "dark-style Fhem" - same as I use) 👍


  • @m26872
    thanks again for this great idea and that you developed these fine boards !
    And by the way...
    As you are using fhem as well...
    How do you manage to reset the tripped "1" in Fhem ?
    I just added a delay and a gw.send"0" to your sketch :), but using fhem would be more sophisticated actually ...
    Thanks


  • Hardware Contributor

    @Komaandy said in My Slim 2AA Battery Node:

    How do you manage to reset the tripped "1" in Fhem ?

    I don't. I just use the last trip time as it's state and then notify (e.g. light or push message) on trip. I think it should be very simple to make a notify with a timer "at" to reset it after a while, if you wish.


  • just want to mention that I am using successfully the same Bootloader @Komaandy is using for about 2 weeks now. So it seems like my problems with freezing nodes are depending on a bad or too slow bootloader...


  • All of the ducting near me is a bit too slim to fit sensors based on this, so I decided to design and print a case instead.

    Does the trick nicely, and I also chose to use proper AA battery clips to retain a good connection, as the cable-tie battery assembly wasn't holding well for me!

    On the Thingiverse page I have a link to the original OnShape doc.

    https://www.thingiverse.com/thing:2418194
    0_1499172178811_IMG_20170704_222046.jpg

    Thoughts, suggestions, etc will be much appreciated!


  • Hi

    Did anyone make DHT 22 slim node with MySensors 2.0? I created one Node from modified MySenors 2 example...But I get a feeling that it is freezing sometimes (but then again comes back to life).


  • Mod

    @Oliviakrk the dht22 needs at least 3.3V to function properly. See the datasheet.


  • Hardware Contributor

    @Oliviakrk - I did a test (which works pretty ok) with a DC/DC step up booster attached to D3 -> Vin. This way I could turn the booster on/off with HIGH/LOW from the sketch. This provided 3.3v to my sensors just fine and has been working for a while now. I dont know what will happen when the voltage drops though.


  • @sundberg84 Thanks. Will try.


  • Hi,
    Thank you for all the hard work put into this project. I have built a few door sensor nodes and have some issues. At first I had pull-ups connected as shown in previous pictures but at a logic 1, when there should have been 3.3V there was only roughly half, 1.7V. I am no expert but I take it there has to be a current leak through the D3 pin for this to happen. I have this on all my nodes. I have tried different code but still the same. When I remove the external pull-up the node works properly but instead the batteries run out in a week or so. Have I made a mistake soldering these and maybe shorted something? I have looked at them closely but can't see anything wrong.

    Does anyone else have this problem? Any tips?


  • Mod

    Did you actually check if there is continuity between the pins you said? Do you have a photo of your nodes?


  • If I disconnect the battery, there is continuity between D3 and VCC with a resistance of around 20 kOhm. So when the door sensor is shut (no resistance), I connect GND through 20 kOhm to VCC. The current should be 0,165 mA. Too high by reading previous posts but still much less than what I get if I measure. Then I get roughly 18 mA! (Far from a Fluke though but has proven reliable before). Am I misunderstanding things?

    I have tried different nodes and sketches with pull-ups both enabled and disabled but I doesn't seem to matter. I have tried different radio modules but still the same, unless I use the bigger! antenna-version. Then the current goes up to 24-25 mA.

    I have done/am doing something really wrong although they seem to work just fine. Tomorrow I will try more radio modules to see if I can find any difference.

    3_1504391407612_IMG_4745.jpeg 2_1504391407612_IMG_4748.jpeg 1_1504391407612_IMG_4747.jpeg 0_1504391407611_IMG_4746.jpeg


  • Hardware Contributor

    @masfak97 It's not clear to me whether you've tried to run it a as pure Arduino, without radio module and without MySensors library in your sketch? (I see that you haven't the serial/FTDI pins soldered - do you use ICSP, pogo-pins or whatever to upload and debug?)


  • I have thought about running it as a pure arduino and to use the debug function, but can't quite get the FTDI to work. I have used this before to upload code to arduino pros. I have a previous node that has all the pins soldered but simply won't be recognized with the USB FTDI. I have also tried switching USB-FTDI but still no luck. Is the FTDI supposed to work if all the pins are there?

    I have also bought a USBtinyISP but haven't read up on how to use it.

    Currently I install a first boot loader with Nick Gammons sketch running on a UNO connected to a breadboard and the 328. After that has been installed, I install the 8 MHz boot loader by Gert Sanders (thank you of it) and finally upload the code using "Upload using programmer". I currently have no way of reading the serial debug from the node.

    I checked the node without the nrf but still power-hungry in the mA.


  • Hardware Contributor

    I think you should focus on getting these basic Arduino functions working so you're in control of what's going on. Note that I recently added a few updates to the first post of this thread (under The uC - Software). Read the tutorials and use 8MHz internal clock.
    When you get everything running, test your door switch again with a simple Arduino sketch.


  • @m26872
    UPDATE 2: There have been reported issues with MySensors 2.x freezing on SlimNodes running at 1MHz, which I've confirmed. Recommended solution when using MyS 2.x, is to use 8MHz (internal) instead.

    This I can confirm - running at 1 MHz introduced some real oddities with latest MySensors library. Not sure what changed but my nodes definitely freaked out. Will try switching to 8 MHz - hopefully before Irma whacks us here.


  • @wergeld
    Same confirmation from my side; 1mhz boot loader doesn't work; dht22 with step up connected does always give NAN. Switching to 8mhz boot loader did the trick.
    //@2.2.0-beta


  • Hardware Contributor

    @kotzer Thanks for sharing. But (AFAIK) the Arduino DHT22 library has never worked at all at 1MHz. And since dht22 doesn't support <3V there's no need for 1MHz anyway.


  • @m26872
    Maybe offtopic, sry, but:
    I have Step up at dht22, so it has 3,3v to operate..

    But I am in wrong topic, it should be your first 2aa sensor ( https://forum.mysensors.org/topic/486/my-2aa-battery-sensor )

    This is what I built, and with 1mhz it doesn't work (tried with step up 3,3v and without) this wasted me many hours, because I wanted to save energy as much possible 😉 with 8mhz its operating well.
    Greets from Germany


  • Hardware Contributor

    @kotzer Infact I'm actually making a few of my first model too rigth now. I had components left over and despite everyones criticism against the dht22, I find it working very well as long as you deal with the failed readings in the sketch. And, the battery life time was pretty good too. Greets. 👍


  • @m26872 I finally got to try your suggestions and loaded the Blink-sketch to my nodes. The power consumtion is then cut to ~4mA. Scrolling back through the forum, I copied the sketch from a user with low power consumption and - Finally - I get an idle comsumtion of 1,9 uA! Connecting the FTDI I can also debug and check for proper function.

    I do have another problem I haven't managed to solve; With an UNO and a breadboard I can easily load the bootloader using Nick Gammons sketch and then the sketch with the UNO as ISP. Using the FTDI I can read the serial stream without any problem but I can't seem to load any bootloader or sketches! I keep getting a sync error. I understand the principle of DTR going low and that the capacitor between DTR and reset and the resistor between +5 and reset will make the LOW into a low-pulse and then back to high. With the FTDI I can program a Pro Mini without any problems but it fails constantly with the nodes.

    I have no scope so I can't visualize the signal but with the meter I can see that the voltage on the reset is ~3,3v, the resistance between +5 and reset is 10 kOhm and the capacitor reads 83 uF although branded 100uF.

    I use Gert Sanders versions of Optiboot at 8Mhz and the one with 38400 NO LED (Thank you for that). I have tried several FTDIs and nodes, checked all connetions, tried to control the reset manually using a breadboard but can't get it to work. I have tried the FTDI at 5v instead (no nRF connected) and tried different boards and speeds. I have tried 1 MHz, 16Mhz.

    Is it possible that 83 uF is too small? Any other tips? When building more nodes it would be great to be able to program them without dismantling.


  • Hardware Contributor

    @masfak97 Have you selected the right board in Arduino IDE? (Installed MiniCore in Board Manager?) Have you tried to use baud 9600 (with corresponding bootloader of course) ?
    I doubt that 83uF is too small.


  • @m26872 Thank you for your suggestions. I have now tried them (and many more) but still can't it to work. It's really not a big problem since I can program them using an Uno as ISP instead but it's really annoying that I can't get it to work.

    I have checked my chips, they are all at mega328P-PU and I have tried many of them with the same result. I have soldered many nodes, thinking that I didn't make the solder connect through the holes but without any luck. I have tried different sockets to make the connections better and I have traced the entire node without finding any broken connections.

    To get the sketch loaded I use Nick Gammons board_programmer with an Uno and use the LilyPad boot loader which enables the internal 8 MHz (Using pin 9 as clock instead of an external crystal). After that I program the Uno with ArduinoISP, set the programmer to Arduino as ISP and upload the sketch with "Burn with programmer" command.

    I have switched USB-cable, USB outlet on the mac, breadboards, dupont cables, capacitors (different ceramic but all show too little capacitance), Atmegas and FTDI programmers. I have tried all combinations with 3.3 and 5 v without any luck. Programming Arduino Pros with the FTDI works fine.

    I have tried the Mincore and Gert Sanders OptiBoot. I have tried to manually reset the chip connecting the reset pin to ground briefly when programming. I have tried lowering the baud rate to 9600. I have tried to load the Uno bootloader together with a 16 MHz crystal and 2 x 22pf capacitors and then the FTDI. I have tried larger electrolytic capacitors.

    Last week, when mimicking the slim node on a breadboard, I managed to get the FTDI to work a few times but can't really say exactly what I did. Now I can't get it to work anymore.

    All in all I have spent many hours trying to figure this out but without any luck. My nodes look just like the ones I see in your pictures.

    Could it be that the internal 8 Mhz is too unstable to work?
    Capacitors being too small? I've seen some reporting that they succeeded with larger...
    Bad connection somewhere > momentary voltage drop?
    Cheap FTDIs?
    Mac USB-power maxing out?
    Bad atmegas?

    Please help me solve this annoying problem.


  • Hardware Contributor

    @masfak97 Wow. You work hard. Of course we must help you. I'm not familiar with your programming method. So that would be my quick wild first guess. I can't read that you've verified the fuse settings? Have tried different startup times e.g?
    Do I understand correctly if you're able to send and recieve commands to the Atmega with your FTDI after it is programmed ?


  • Hi. I have a problem with my slim node with the sketch "temperature"
    with the slim pcb node and a DS18B20 in domoticz it does well the node presentation but neither the S_TEMP child arrives nor does it get any temperature afterwards of course.
    but if I mount the same sketch in an arduino nano and with power to 5v it works perfectly.
    please help


  • Hardware Contributor

    @Mikepara Please elaborate and post your code. Tell us also about power supply, fuse settings (clock speed) and your troubleshooting steps. See debug-faq-and-how-ask-for-help.


  • sorry. the sketch is the "temperature" of library and the bootloader configuration is:
    arduino ide 1.8.5 and usbasp, record the minicore bootloader on atmega328P, clock 8mhz internal, compiler LTO disabled, variant 328P, BOD disabled.
    thanks


  • Hi All,

    This Topic is a little old but hopefully still active. I am using the battery Duracell CR123 because it is small and fits in my case. Would this be an ok choice or does someone has other recommendations?

    Thanks for feedback.

    Marcel


  • Mod

    Look also at AAA/AA size LiFePO4 as it will need just one cell instead of 2 as the normal alkaline/nimh ones


  • Hi,

    Maybe a silly question, but where did you get the library for the Vcc.h ?

     #include <Vcc.h>
                     ^
    compilation terminated.
    exit status 1
    Error compiling for board ATmega328.


    I couldn't find any VCC in the MySensors library set and also doing a search for vcc in the Arduino Library Manager I can't find it either...

    [EDIT] : Found it in other thread. Leaving here for reference: https://github.com/Yveaux/arduino_vcc

    Thanks


  • @gohan said in My Slim 2AA Battery Node:

    LiFePO4

    Thanks


  • I have 29 panels of the latest version of the PCB. It's more than I can use. Please PM me if you are interested in them.


  • As information for everyone, I suggest that if you get sockets for the ATMEGA, that you get
    these: alt text
    rather than these: alt text

    The reason being that the former have a much wider gap in the middle than the later. Because of that, the .1 puff #104 monolithic multilayer 5.08mm pitch capacitors called for in the BOM fit nicely. If you use the later ones, you will need to remove material from the socket to fit them.


  • I just made a new case for a LiFePO4 magnetic sensor implementation of this. Thanks for the excellent work on this handy node design!
    https://www.thingiverse.com/thing:3034907!
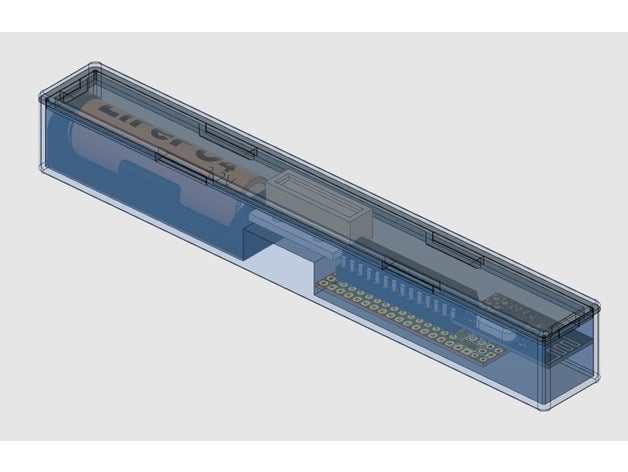
    a picture


  • Mod

    With 2 mini solar panels on the sides and an harvesting circuit, you could run it indefinitely 😁


  • Good evening!

    I had a bit of a break from this forum (approx 3-4 years...) And just got back into it . I managed to put a bootloader into my 328p-pu chip

    can anyone just confirm if it is OK to use this bootloader with the version 2.0 board here.

    I understand that it should run at 8Mhz to be stable . so I assumed I could use the bootloader that comes with Arduino IDE ?

    I flashed this one onto the chip at the moment and will start to solder some of my boards soon. but would like to be sure that it is correct before I go too far 😃

    ##############################################################

    atmega328bb.name=ATmega328 on a breadboard (8 MHz internal clock)

    atmega328bb.upload.tool=arduino:avrdude
    atmega328bb.upload.protocol=arduino
    atmega328bb.upload.maximum_size=30720
    atmega328bb.upload.speed=57600

    atmega328bb.bootloader.low_fuses=0xE2
    atmega328bb.bootloader.high_fuses=0xDA
    atmega328bb.bootloader.extended_fuses=0x05
    #atmega328bb.bootloader.path=arduino:atmega
    atmega328bb.bootloader.file=atmega/ATmegaBOOT_168_atmega328_pro_8MHz.hex
    atmega328bb.bootloader.unlock_bits=0x3F
    atmega328bb.bootloader.lock_bits=0x0F
    atmega328bb.bootloader.tool=arduino:avrdude

    atmega328bb.build.mcu=atmega328p
    atmega328bb.build.f_cpu=8000000L
    atmega328bb.build.core=arduino:arduino
    atmega328bb.build.variant=arduino:standard


  • Hero Member

    @badmannen Welcome back. The good news is that there's now a mysensors bootloader, which is even better because it allows over-the-air firmware updates for the atmega328p: https://www.mysensors.org/about/fota


  • Daaaaang ... it is a good time to be alive and come back to this I see 😃 ... thanks a million to you guys that made that one .. that certainly makes changes a whole lot less painful!


  • @neverdie Alright , that took me a couple of days of fighting with Arduino/Linux/windows/drivers/bootloaders etc etc etc but I got it all running with my updated gateway+repeater-node + mailbox-node. did not try the update function yet but surely it should work. just need one or two more repeater-nodes since I have way to thick cement walls here for this signal.


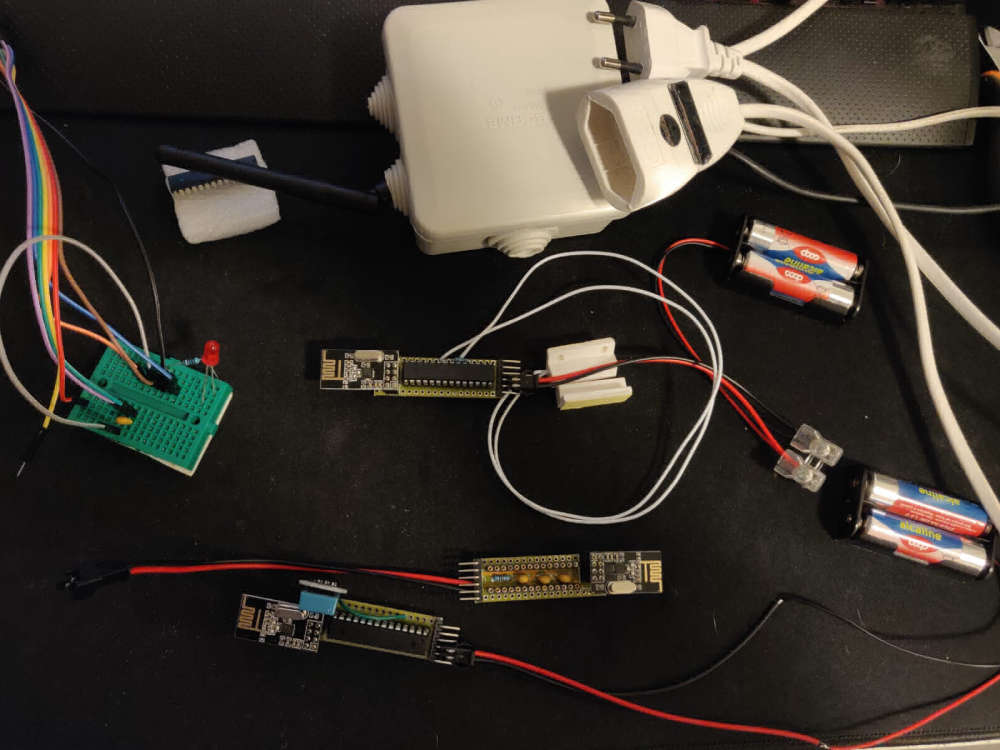
  • OK I had some fun the last couple of days and actually got something done =D !

    Managed to update my gateway and repeater-nodes to latest version and boot-loaded all nodes and future nodes so they are FOTA enabled .

    So far I managed to assemble 3 nodes and after a bit of swearing and soldering and de-soldering and re-soldering I got:
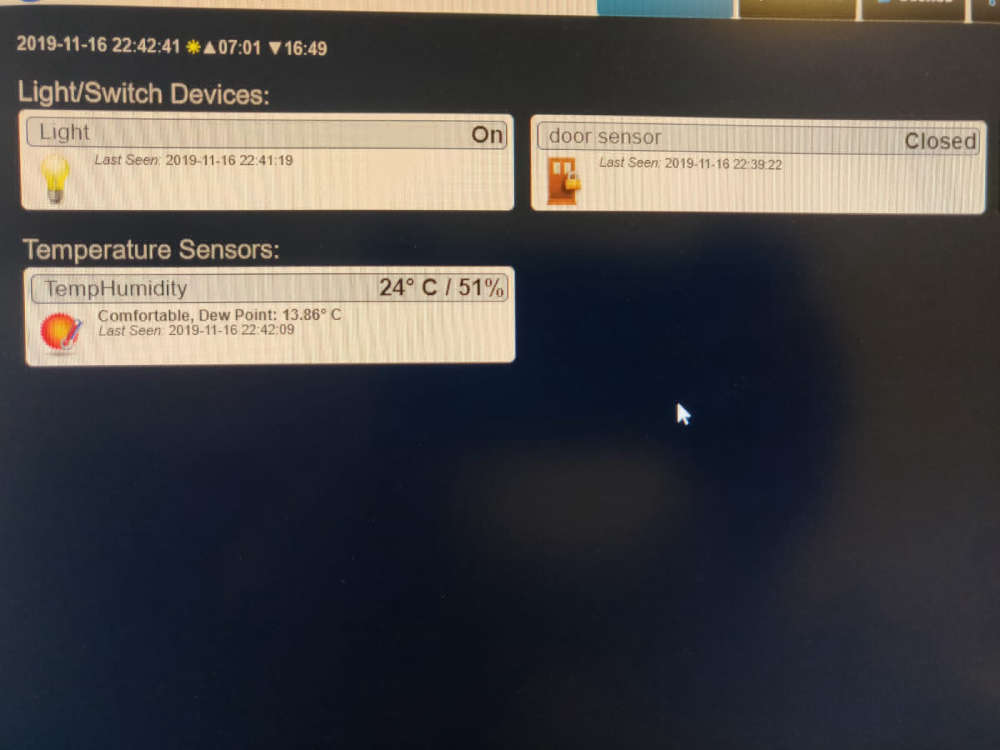
    1 - DHT11 TEMP / HUM node, on Battery (Slim 2AA) - surprisingly accurate actually

    2 - DOOR-SWITCH - on Battery (Slim 2AA) - to be used in my mailbox, got the idea from someone here in the forums, so thank you, I don´t remember who it was since I probably read a million posts by now =D

    3 - a 220V Relay switch, with the PA LN radio, and works as repeater ( runs on a NANO )

    just wanted to say a huge thanks to the MySensors group and all people here on the forum for helping me get started (Had a little break for a couple of years 😃

    0_1573941605467_7883601d-ee83-4cf1-a4cf-48da54912bd8.jpg

    0_1573941554139_e0f66ec8-8ddf-4d79-9ab2-6947f0710e65.jpg


  • Hero Member

    Let us know when you get it to FOTA update.


  • @neverdie
    Just tried it by mounting an "empty" 328P in the node just with the
    fuses set to:
    0xE2
    0xDA
    0xFE

    and with the MYSBootloader .

    Amazing ! . worked at the first try! (this time around =D )

    ( tried and failed a couple of times earlier, but I know I burned 0xFD instead of 0xFE so set the BOD to the wrong value, and that does not work )


  • @neverdie Actually... I run into another problem ..

    After I make a FOTA and upload a sketch . it runs as it should, no problem.

    But if I try to update it again , it never tries to upload the sketch to the node.

    The only thing I could find that was clever to do to make it work ok with a battery node was to use smartSleep();
    which I do ... is there anything else in the code that needs to be present ?


  • Hero Member

    Hopefully someone who knows can chime in.


  • @neverdie OK, that person who knows something is now ME ! =D ... RTFM ... as always , it worked strangely enough to update ONCE with some slightly wrong Fuses set... reloaded the bootloader with soem correct fuses agian .. ( hopefully alst time .. and VOILA! now it works to update the node multiple times .. yeaa.


  • Hero Member

    What were the winning fuse settings that you finally settled on using? Trust me, a year from now you won't remember, and you'll be glad you posted it.


  • OK MY solution was actually the fuses that I said earlier . but confused myself by changing them back and forth a couple of times and downgraded Arduino to the previous version etc.

    So the fuses for my barebone 328P are:

    proMYSBL8.bootloader.low_fuses=0xE2
    proMYSBL8.bootloader.high_fuses=0xDA
    proMYSBL8.bootloader.extended_fuses=0xFE

    the biggest issue I had was probably with ARduino IDE .. that one I enver manged to set the fuses ( I read somewhere it should.. but maybe I´m wrong) . Anyway it works when I set the fuses and upload it with AVRDUDESS.

    (note: hello me 1 year into the future, just do what I say ! )
    😃


  • I just add another note to myself ( And anyone else that lost their hair wondering why the bootloader was lost....)

    DO NOT UPLOAD SKETCH ONLY WITH USBASP ... it deletes the bootloader .
    yes I know it is mentioned on the foru m.. just found it .. but I mention it again...


  • @badmannen

    and here is a good simple explanation of the fuses
    http://www.martyncurrey.com/category/atmega/


  • Hero Member

    FYI: If you run the ceramic resonator at 8mhz, with the zero wake up fuse setting, you can wake the atmega328p up in less than 4usec. This is a huge power savings compared to all other options.


  • @neverdie aa thanks for the info. Might be useful for some other nodes I will do.


  • Hero Member

    @badmannen You're welcome. I even measured it on an oscope just to be sure, so I'm certain it is true.


  • This style?
    € 1,09 8%OFF | 20pcs Ceramic Resonators ZTT 4M 6M 8M 10M 12M 16M 4/6/8/10/12/16MHZ DIP-3 Crystal Frequency Element
    https://s.click.aliexpress.com/e/mRfXWk8Nd


  • Hero Member

    @badmannen no. It's built in. You already have it.


  • @neverdie aa ok sorry got confused there for a second. I'm running the internal, so I guess I will pop them off again now then and burn that fuse for a quicker startup 👍🏻


  • Hero Member

    @badmannen yes, it must be the internal resonator.


  • Hello, will there be a good soul that will help improve the program? I know what the error is but I have no idea how to correct it.

      interruptReturn = sleep(PRIMARY_BUTTON_PIN-2, CHANGE, SECONDARY_BUTTON_PIN-2, CHANGE, ONE_DAY_SLEEP_TIME);
    

    when i change

    PRIMARY_BUTTON_PIN
    

    the interruptReturn = 1, but when i change

    SECONDARY_BUTTON_PIN
    

    the interruptReturn = 0.
    My question is how can i chane it to send 1 and 1 by both contactrons.

    Full code:

    //#define MY_DEBUG
    #define MY_RADIO_NRF24
    #define MY_NODE_ID 100
    #define MY_PARENT_NODE_ID 0
    #define MY_PARENT_NODE_IS_STATIC
    
    #include <MySensors.h>
    #include "Vcc.h"
    
    #define SKETCH_NAME "WindowSlimSensor2pcs_smallR"
    
    #define PRIMARY_CHILD_ID 1
    #define PRIMARY_BUTTON_PIN 2
    #define SECONDARY_CHILD_ID 2
    #define SECONDARY_BUTTON_PIN 3
    #define BATTERY_REPORT_DAY 2   // Desired heartbeat interval when inactive. Maximum heartbeat/report interval is equal to this due to the dayCounter.
    #define BATTERY_REPORT_BY_IRT_CYCLE 10  // Adjust this according to usage frequency.
    #define ONE_DAY_SLEEP_TIME 86400000
    
    //#define BATTERY 3
    
    MyMessage msg(PRIMARY_CHILD_ID, V_TRIPPED);
    MyMessage msg2(SECONDARY_CHILD_ID, V_TRIPPED);
    //MyMessage msg3(BATTERY, V_CUSTOM);
    
    int dayCounter = 0;
    int irtCounter = 0;
    bool interruptReturn=false;
    const float VccMin   = 1.7;           // Minimum expected Vcc level, in Volts.
    const float VccMax   = 3.3;           // Maximum expected Vcc level, in Volts.
    const float VccCorrection = 3.43 / 3.455;  // Measured Vcc by multimeter divided by reported Vcc
    
    
    const int32_t report_interval = 8640000; // 1day -> h * m * s * ms NOTICE: milliseconds, not microseconds!
    
    Vcc vcc(VccCorrection);
    //Vcc vcc;
    #ifdef MY_DEBUG
    void before(){
        Serial.begin(9600);
    }
    #endif
    
    void setup()
    {
        pinMode(PRIMARY_BUTTON_PIN, INPUT);
        pinMode(SECONDARY_BUTTON_PIN, INPUT);
          //EXTERNAL pull-ups
        digitalWrite(PRIMARY_BUTTON_PIN, LOW);
        digitalWrite(SECONDARY_BUTTON_PIN, LOW);  
    }
    
    void presentation()
    {
        sendSketchInfo(SKETCH_NAME, __DATE__);
        present(PRIMARY_CHILD_ID, S_DOOR, "Lewe Okno");
        present(SECONDARY_CHILD_ID, S_DOOR, "Prawe Okno");
      //  present(BATTERY, S_CUSTOM);
    }
    
    void loop()
    
    {
        uint8_t reedState;
        uint8_t reedState2;
        static uint8_t lastReedState = 2;
        static uint8_t lastReedState2 = 2;
        sleep(5); // Short delay to allow buttons to properly settle
        reedState = digitalRead(PRIMARY_BUTTON_PIN);
        sleep(5); // Short delay to allow buttons to properly settle
        reedState2 = digitalRead(SECONDARY_BUTTON_PIN);
    
      if (!interruptReturn) { // Woke up by timer (or first run)
        dayCounter++; 
        if (dayCounter >= BATTERY_REPORT_DAY) {
              dayCounter = 0;
              sendBatteryReport();
        }
      }
      else {    // Woke up by pin change
                irtCounter++;
            sleep(5); 
      
          // Woke up by pin change
          if (reedState != lastReedState) {
            send(msg.set(reedState==HIGH ? 1 : 0));
            lastReedState = reedState;
        }
          if (reedState2 != lastReedState2) {
            send(msg2.set(reedState2==HIGH ? 1 : 0));
            lastReedState2 = reedState2;
        }
          if (irtCounter>=BATTERY_REPORT_BY_IRT_CYCLE) {
            irtCounter=0;
            sendBatteryReport();
          }
        
      }
    
      // Sleep until something happens with the sensor,   or one sleep_time has passed since last awake.
      interruptReturn = sleep(PRIMARY_BUTTON_PIN-2, CHANGE, SECONDARY_BUTTON_PIN-2, CHANGE, ONE_DAY_SLEEP_TIME);
      
    } 
    
    void sendBatteryReport() {
              uint8_t batteryPercent = (uint8_t)vcc.Read_Perc(VccMin, VccMax);
              sendBatteryLevel(batteryPercent);
    }


  • Mod

    Welcome to the forum @Grzegorz-B

    Change

    bool interruptReturn=false;
    

    to

    uint8_t interruptReturn= INTERRUPT_NOT_DEFINED;
    

    and

    if (!interruptReturn) { // Woke up by timer (or first run)
    

    to

    if (interruptReturn== MY_WAKE_UP_BY_TIMER) { // Woke up by timer (or first run)
    

    Documentation for the sleep function is available at https://www.mysensors.org/download/sensor_api_20#sleeping


  • @mfalkvidd Thanks! now its works like a charm 😄


  • Hi,

    Has anybody succeeded Inn creating an rfm69 version of this?


  • I built a Temp/Hum sensor using Slim Node few years back on Mys 1.5x and it was working for so long without any issues. Now I am trying to upgrade it to Mys 2.2x. I successfully loaded the bootloader on a new ATMEGA 328P-PU. Bootloader I used is minicore as recommended by @m26872 in his original post. I used the "Arduino as ISP" method to load the bootloader as explained in this tutorial How to burn 1Mhz & 8Mhz bootloader using Arduino IDE 1.6.5-r5.

    image4.png

    Here are the settings I used in my Arduino IDE when loading the bootloader,

    • internal clock 8 Mhz ( again based on the recommendation from the original post)
    • BOD disabled
    • Compiler LTO disabled
    • Variant "328P/328PA"

    Bootloader Settings

    Now I am trying to upload the temperature/Hum Sketch using FTDI cable with the jumper set at 3.3v, I am getting the "stk500_recv(): programmer is not responding" error. Here is how I am connecting from FTDI to Slimnode and the same configuration has worked originally when I built the node but now it is failing.

    Image1.jpg

    Could some experts in this forum please help me to bring my node back to work?

    Sorry about the long post. Appreciate your help.


  • @kiesel do you mean a copy of the same project or something that does a similar job using an RFM69?


  • Hi,

    this is an awesome project and after waiting for weeks to get all parts, I finally started building.

    The problem I am facing is that it seems that I cannot get the board working if I use such a 8-pin connector socket. I am generally OK with NOT using such a socket for sensors that "go into production" but for some sensors where space is not an issue or for boards which I want to use for testing different NRF24s etc, I would like to make the socket work.

    Does anybody have any tipps on how to make the radio reliably work with a socket? That would be awesome!


Log in to reply
 

Suggested Topics

  • 8
  • 1
  • 2
  • 2
  • 90
  • 2

23
Online

11.2k
Users

11.1k
Topics

112.5k
Posts