MYSBootloader 1.3.0-beta.3
-
I guess not... The old hex for 8Mhz works, but the one from this thread does not... :(
I'm trying to upload this to my Pro Mini, does anyone have an 8Mhz that works?
-
@tekka I've noticed some odd things with my nodes when running the bootloader.
To test I uploaded a simple count time sketch. When running the MYS bootloader the timer resets every 10 seconds, see:
Time: 999
Time: 2000
Time: 3000
Time: 4001
Time: 5001
Time: 6002
Time: 7004
Time: 8003
Time: 9005
Time: 0
Time: 999
Time: 2000
Time: 3000
Time: 4001
Time: 5001
Time: 6002
Time: 7004
Time: 8003
Time: 9005
Time: 0
Using the stock Pro Mim 8Mhz 3.3v bootloader it works fine, any ideas?
Perhaps this is because I'm testing using a non-MySensors sketch? -
@tekka, I'm trying to compile the HEX using OSX. I have installed avr-gcc with homebrew but I get
rm *.o
rm: *.o: No such file or directory
make: [clean] Error 1 (ignored)
rm *.elf
rm: *.elf: No such file or directory
make: [clean] Error 1 (ignored)
rm *.hex
rm: *.hex: No such file or directory
make: [clean] Error 1 (ignored)
"avr-gcc" -funsigned-char -funsigned-bitfields -DF_CPU=16000000L -Os -ffunction-sections -fdata-sections -fpack-struct -fshort-enums -mrelax -Wall -Wextra -Wundef -pedantic -mmcu=atmega328p -c -std=gnu99 -MD -MP -MF "MYSBootloader.d" -MT"MYSBootloader.d" -MT"MYSBootloader.o" -I MYSBootloader.c -o MYSBootloader.o
avr-gcc: fatal error: no input files
compilation terminated.
make: *** [MYSBootloader.o] Error 1When issueing the Make command, can you help, any suggestions?
-
@tekka, started a windows VM, run via MinGW and got this when running makefile, does it look okay?
C:\MySensorsBootloaderRF24-development>mingw32-make.exe rm *.o process_begin: CreateProcess(NULL, rm *.o, ...) failed. make (e=2): The system cannot find the file specified. Makefile:40: recipe for target 'clean' failed mingw32-make.exe: [clean] Error 2 (ignored) rm *.elf process_begin: CreateProcess(NULL, rm *.elf, ...) failed. make (e=2): The system cannot find the file specified. Makefile:40: recipe for target 'clean' failed mingw32-make.exe: [clean] Error 2 (ignored) rm *.hex process_begin: CreateProcess(NULL, rm *.hex, ...) failed. make (e=2): The system cannot find the file specified. Makefile:40: recipe for target 'clean' failed mingw32-make.exe: [clean] Error 2 (ignored) "C:/Arduino/hardware/tools/avr/bin/avr-gcc" -funsigned-char -funsigned-bitfields -DF_CPU=16000000L -Os -ffunction-sections -fdata-sections -fpack-struct -fshort -enums -mrelax -Wall -Wextra -Wundef -pedantic -mmcu=atmega328p -c -std=gnu99 -M D -MP -MF "MYSBootloader.d" -MT"MYSBootloader.d" -MT"MYSBootloader.o" -IC:/Ardu ino/hardware/tools/avr/avr/include/avr MYSBootloader.c -o MYSBootloader.o In file included from Core.h:40:0, from MYSBootloader.c:69: HW.h:51:2: warning: #warning is a GCC extension #warning BAUD_RATE error greater than 2% ^ HW.h:51:2: warning: #warning BAUD_RATE error greater than 2% [-Wcpp] In file included from Core.h:42:0, from MYSBootloader.c:69: MyMessage.h:292:3: warning: ISO C99 doesn't support unnamed structs/unions [-Wpe dantic] }; ^ "C:/Arduino/hardware/tools/avr/bin/avr-gcc" -nostartfiles -Wl,-s -Wl,-static -Wl ,-Map=".map" -Wl,--start-group -Wl,--end-group -Wl,--gc-sections -mrelax -Wl,-se ction-start=.text=0x7800 -mmcu=atmega328p -o MYSBootloader.elf MYSBootloader.o -lm "C:/Arduino/hardware/tools/avr/bin/avr-objcopy" -O ihex -R .eeprom MYSBootloader .elf MYSBootloader.hex "C:/Arduino/hardware/tools/avr/bin/avr-size" MYSBootloader.elf text data bss dec hex filename 2036 6 72 2114 842 MYSBootloader.elf -
@tekka Just wanted to check if the above log looks okay, currently rolling the bootloader out to 14 nodes (painful process!) and wanted to check if it looks okay before I do.
I'm also using this board.txt, I made a separate entry for my Uno's, do they all look okay? I basically used the fuses from the standard Arduino boards.txt with the change of 0x05 to 0x06 for the BOD? I noticed in the makefile that you can specify the fuses, do I need to compile a bootloader for each device with the exact fuses, or will one bootloader for 16 / 8 / 1Mhz suffice?
Thank you very much in advance, the bootloader is amazing work.
menu.cpu=Processor ############################################################## pro.name=MySensors Bootloader for Pro Mini pro.upload.tool=arduino:avrdude pro.upload.protocol=arduino pro.upload.maximum_size=30720 pro.upload.maximum_data_size=2048 pro.bootloader.tool=arduino:avrdude pro.bootloader.unlock_bits=0x3F pro.bootloader.lock_bits=0x0F pro.build.mcu=atmega328p pro.build.board=AVR_PRO pro.build.core=arduino:arduino pro.build.variant=arduino:standard ## Arduino with MYSBootloader Beta 2 ## ------------------------------------------------- ## pro.menu.cpu.16MHzatmega328=ATmega328 16MHz (XTAL, BOD1V8) 1.3 Beta 2 ## pro.menu.cpu.16MHzatmega328.upload.speed=115200 ## pro.menu.cpu.16MHzatmega328.bootloader.low_fuses=0xFF ## pro.menu.cpu.16MHzatmega328.bootloader.high_fuses=0xDA ## pro.menu.cpu.16MHzatmega328.bootloader.extended_fuses=0x06 ## pro.menu.cpu.16MHzatmega328.bootloader.file=MYSBootloader/MYSBootloader_B2_16Mhz.hex ## pro.menu.cpu.16MHzatmega328.build.f_cpu=16000000L ## pro.menu.cpu.8MHzatmega328=ATmega328 8MHz (RC, BOD1V8) 1.3 Beta 2 ## pro.menu.cpu.8MHzatmega328.upload.speed=38400 ## pro.menu.cpu.8MHzatmega328.bootloader.low_fuses=0xE2 ## pro.menu.cpu.8MHzatmega328.bootloader.high_fuses=0xDA ## pro.menu.cpu.8MHzatmega328.bootloader.extended_fuses=0x06 ## pro.menu.cpu.8MHzatmega328.bootloader.file=MYSBootloader/MYSBootloader_B2_8Mhz.hex ## pro.menu.cpu.8MHzatmega328.build.f_cpu=8000000L ## pro.menu.cpu.1MHzatmega328=ATmega328 1MHz (RC/8, BOD1V8) 1.3 Beta 2 ## pro.menu.cpu.1MHzatmega328.upload.speed=9600 ## pro.menu.cpu.1MHzatmega328.bootloader.low_fuses=0x62 ## pro.menu.cpu.1MHzatmega328.bootloader.high_fuses=0xDA ## pro.menu.cpu.1MHzatmega328.bootloader.extended_fuses=0x06 ## pro.menu.cpu.1MHzatmega328.bootloader.file=MYSBootloader/MYSBootloader_B2_1Mhz.hex ## pro.menu.cpu.1MHzatmega328.build.f_cpu=1000000L ## Arduino with MYSBootloader Beta 3 ## ------------------------------------------------- pro.menu.cpu.16MHzatmega328=ATmega328 16MHz (XTAL, BOD1V8) 1.3 Beta 3 pro.menu.cpu.16MHzatmega328.upload.speed=115200 pro.menu.cpu.16MHzatmega328.bootloader.low_fuses=0xFF pro.menu.cpu.16MHzatmega328.bootloader.high_fuses=0xDA pro.menu.cpu.16MHzatmega328.bootloader.extended_fuses=0x06 pro.menu.cpu.16MHzatmega328.bootloader.file=MYSBootloader/MYSBootloader_B3_16Mhz.hex pro.menu.cpu.16MHzatmega328.build.f_cpu=16000000L pro.menu.cpu.8MHzatmega328=ATmega328 8MHz (RC, BOD1V8) 1.3 Beta 3 pro.menu.cpu.8MHzatmega328.upload.speed=38400 pro.menu.cpu.8MHzatmega328.bootloader.low_fuses=0xFF pro.menu.cpu.8MHzatmega328.bootloader.high_fuses=0xDA pro.menu.cpu.8MHzatmega328.bootloader.extended_fuses=0x06 pro.menu.cpu.8MHzatmega328.bootloader.file=MYSBootloader/MYSBootloader_B3_8Mhz.hex pro.menu.cpu.8MHzatmega328.build.f_cpu=8000000L pro.menu.cpu.1MHzatmega328=ATmega328 1MHz (RC/8, BOD1V8) 1.3 Beta 3 pro.menu.cpu.1MHzatmega328.upload.speed=9600 pro.menu.cpu.1MHzatmega328.bootloader.low_fuses=0x62 pro.menu.cpu.1MHzatmega328.bootloader.high_fuses=0xDA pro.menu.cpu.1MHzatmega328.bootloader.extended_fuses=0x06 pro.menu.cpu.1MHzatmega328.bootloader.file=MYSBootloader/MYSBootloader_B3_1Mhz.hex pro.menu.cpu.1MHzatmega328.build.f_cpu=1000000L ############################################################## ############################################################## ############################################################## ############################################################## ############################################################## menu.cpu=Processor ############################################################## uno.name=MySensors Bootloader for Uno uno.upload.tool=arduino:avrdude uno.upload.protocol=arduino uno.upload.maximum_size=32256 uno.upload.maximum_data_size=2048 uno.bootloader.tool=arduino:avrdude uno.bootloader.unlock_bits=0x3F uno.bootloader.lock_bits=0x0F uno.build.mcu=atmega328p uno.build.board=AVR_UNO uno.build.core=arduino:arduino uno.build.variant=arduino:standard ## Arduino with MYSBootloader Beta 2 ## ------------------------------------------------- ## uno.menu.cpu.16MHzatmega328=ATmega328 16MHz (XTAL, BOD1V8) 1.3 Beta 2 ## uno.menu.cpu.16MHzatmega328.upload.speed=115200 ## uno.menu.cpu.16MHzatmega328.bootloader.low_fuses=0xFF ## uno.menu.cpu.16MHzatmega328.bootloader.high_fuses=0xDA ## uno.menu.cpu.16MHzatmega328.bootloader.extended_fuses=0x06 ## uno.menu.cpu.16MHzatmega328.bootloader.file=MYSBootloader/MYSBootloader_B2_16Mhz.hex ## uno.menu.cpu.16MHzatmega328.build.f_cpu=16000000L ## Arduino with MYSBootloader Beta 3 ## ------------------------------------------------- uno.menu.cpu.16MHzatmega328=ATmega328 16MHz (XTAL, BOD1V8) 1.3 Beta 3 uno.menu.cpu.16MHzatmega328.upload.speed=115200 uno.menu.cpu.16MHzatmega328.bootloader.low_fuses=0xFF uno.menu.cpu.16MHzatmega328.bootloader.high_fuses=0xDA uno.menu.cpu.16MHzatmega328.bootloader.extended_fuses=0x06 uno.menu.cpu.16MHzatmega328.bootloader.file=MYSBootloader/MYSBootloader_B3_16Mhz.hex uno.menu.cpu.16MHzatmega328.build.f_cpu=16000000L -
@tekka, started a windows VM, run via MinGW and got this when running makefile, does it look okay?
C:\MySensorsBootloaderRF24-development>mingw32-make.exe rm *.o process_begin: CreateProcess(NULL, rm *.o, ...) failed. make (e=2): The system cannot find the file specified. Makefile:40: recipe for target 'clean' failed mingw32-make.exe: [clean] Error 2 (ignored) rm *.elf process_begin: CreateProcess(NULL, rm *.elf, ...) failed. make (e=2): The system cannot find the file specified. Makefile:40: recipe for target 'clean' failed mingw32-make.exe: [clean] Error 2 (ignored) rm *.hex process_begin: CreateProcess(NULL, rm *.hex, ...) failed. make (e=2): The system cannot find the file specified. Makefile:40: recipe for target 'clean' failed mingw32-make.exe: [clean] Error 2 (ignored) "C:/Arduino/hardware/tools/avr/bin/avr-gcc" -funsigned-char -funsigned-bitfields -DF_CPU=16000000L -Os -ffunction-sections -fdata-sections -fpack-struct -fshort -enums -mrelax -Wall -Wextra -Wundef -pedantic -mmcu=atmega328p -c -std=gnu99 -M D -MP -MF "MYSBootloader.d" -MT"MYSBootloader.d" -MT"MYSBootloader.o" -IC:/Ardu ino/hardware/tools/avr/avr/include/avr MYSBootloader.c -o MYSBootloader.o In file included from Core.h:40:0, from MYSBootloader.c:69: HW.h:51:2: warning: #warning is a GCC extension #warning BAUD_RATE error greater than 2% ^ HW.h:51:2: warning: #warning BAUD_RATE error greater than 2% [-Wcpp] In file included from Core.h:42:0, from MYSBootloader.c:69: MyMessage.h:292:3: warning: ISO C99 doesn't support unnamed structs/unions [-Wpe dantic] }; ^ "C:/Arduino/hardware/tools/avr/bin/avr-gcc" -nostartfiles -Wl,-s -Wl,-static -Wl ,-Map=".map" -Wl,--start-group -Wl,--end-group -Wl,--gc-sections -mrelax -Wl,-se ction-start=.text=0x7800 -mmcu=atmega328p -o MYSBootloader.elf MYSBootloader.o -lm "C:/Arduino/hardware/tools/avr/bin/avr-objcopy" -O ihex -R .eeprom MYSBootloader .elf MYSBootloader.hex "C:/Arduino/hardware/tools/avr/bin/avr-size" MYSBootloader.elf text data bss dec hex filename 2036 6 72 2114 842 MYSBootloader.elf -
@Mark-Swift What changes did you make to the bootloader - the code size seems increased
@tekka None that I'm aware of? :(
I just changed the fuses in the makefile to match the ones in my boards.txt, not sure if that's required, can you take a look at my questions above, I really want to be sure I'm doing all of this right before deploying.
To recap with regards the bootloader.
- Installed Windows 7
- Installed mingw (core and c++ compiler)
- Installed Arduino IDE and MySensors library (Installed at the same location as you, at c drive root)
- Downloaded bootloader from github
- Edited the fuses and clock speed at the top of the makefile to match my boards.txt
- Ran makefile from cmd
-
@tekka It seems to work? I guess if there was an issue it wouldn't work at all?
Please can you conform my fuses look okay in the boards.txt I posted above? Also, do I need to change the fuses in the makefile and make a file for each device, or just 1 x 16Mhz and 1 x 8Mhz for example?
-
@tekka It seems to work? I guess if there was an issue it wouldn't work at all?
Please can you conform my fuses look okay in the boards.txt I posted above? Also, do I need to change the fuses in the makefile and make a file for each device, or just 1 x 16Mhz and 1 x 8Mhz for example?
@Mark-Swift I'm not at my workstation right now - you have to adjust the fuse settings according to your HW configurations and preferences. The fuse settings in the makefile are obsolete if you use the Arduino IDE / boards.txt for flashing. Please use the AVR fuse calculator to calculate to correct fuse settings:
-
I @tekka, I thought as much, so basically I just need a bootloader with the right Mhz and then set fuses in the Arduino IDE boards.txt.
I used the fuse settings from the original boards.txt included with the Arduino IDE, but adjusted the extended one to 0x06 (Adjust BOD).
I noticed you used slightly different fuses to the Arduino IDE, you're using fuses that indicate a floating crystal or something?
-
First of all, thanks for working so hard on the new version of the BL.
My setup:
- MYSBootloader 1.3.0-beta3 (md5 49ef3dc263110613c9c25ac21a8c3d83)
- MYSController 1.0.0.beta (updated to latest version)
- GW on Arduino Nano
- Node on Arduino Pro Mini @ 5V 16 Mhz with MockMySensors sketch running
What I did:
- Flashed latest bootloader version from github on the Pro Mini ATMEGA328P (using AVRDUDESS 2.4 & USBasp, fuses L: 0xFF, H: 0xDA, E: 0x05)
- Flashed latest mysensors lib on both node & gw (tested with both 2.0.0 & 2.1) on the Nano
What I got:
- FW upgrade through MYSController: Working
- Reboot through MYSController: Working
- Serial flashing with Arduino IDE: Working
- Request presentation through MYSController: Working
Request heartbeat through MYSController: Working
But...
Reassign ID through MYSController: NOT WORKING (the node reboots but still preserves the old ID)
(MY_NODE_ID IS NOT DEFINED / THUS SET AS AUTO AS PER MYSENSORS DEFAULTS)
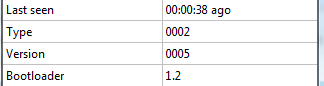
Clear EEPROM through MYSController: NOT WORKING (the node reboots but still holds the value saved in EEPROM using saveState)Node bootlog after Clear EEPROM from MYSBootloader (you can see my debug LOADSTATE which still loads the value 123 from EEPROM):
Starting sensor (RNNNA-, 2.0.0)
TSM:INIT
TSM:RADIO:OK
TSP:ASSIGNID:OK (ID=4)
TSM:FPAR
TSP:MSG:SEND 4-4-255-255 s=255,c=3,t=7,pt=0,l=0,sg=0,ft=0,st=bc:
TSP:MSG:READ 150-150-255 s=255,c=3,t=7,pt=0,l=0,sg=0:
TSP:MSG:BC
TSP:MSG:READ 0-0-4 s=255,c=3,t=8,pt=1,l=1,sg=0:0
TSP:MSG:FPAR RES (ID=0, dist=0)
TSP:MSG:PAR OK (ID=0, dist=1)
TSM:FPAR:OK
TSM:ID
TSM:CHKID:OK (ID=4)
TSM:UPL
TSP:PING:SEND (dest=0)
TSP:MSG:SEND 4-4-0-0 s=255,c=3,t=24,pt=1,l=1,sg=0,ft=0,st=ok:1
TSP:MSG:READ 0-0-4 s=255,c=3,t=25,pt=1,l=1,sg=0:1
TSP:MSG:PONG RECV (hops=1)
TSP:CHKUPL:OK
TSM:UPL:OK
TSM:READY
GW Started
LOADSTATE
123
And...is it expected that the "Info" tab on my node shows bootloader version 1.2?
Is there anything I'm missing to have these features working?
Thanks in advance
-
First of all, thanks for working so hard on the new version of the BL.
My setup:
- MYSBootloader 1.3.0-beta3 (md5 49ef3dc263110613c9c25ac21a8c3d83)
- MYSController 1.0.0.beta (updated to latest version)
- GW on Arduino Nano
- Node on Arduino Pro Mini @ 5V 16 Mhz with MockMySensors sketch running
What I did:
- Flashed latest bootloader version from github on the Pro Mini ATMEGA328P (using AVRDUDESS 2.4 & USBasp, fuses L: 0xFF, H: 0xDA, E: 0x05)
- Flashed latest mysensors lib on both node & gw (tested with both 2.0.0 & 2.1) on the Nano
What I got:
- FW upgrade through MYSController: Working
- Reboot through MYSController: Working
- Serial flashing with Arduino IDE: Working
- Request presentation through MYSController: Working
Request heartbeat through MYSController: Working
But...
Reassign ID through MYSController: NOT WORKING (the node reboots but still preserves the old ID)
(MY_NODE_ID IS NOT DEFINED / THUS SET AS AUTO AS PER MYSENSORS DEFAULTS)
Clear EEPROM through MYSController: NOT WORKING (the node reboots but still holds the value saved in EEPROM using saveState)Node bootlog after Clear EEPROM from MYSBootloader (you can see my debug LOADSTATE which still loads the value 123 from EEPROM):
Starting sensor (RNNNA-, 2.0.0)
TSM:INIT
TSM:RADIO:OK
TSP:ASSIGNID:OK (ID=4)
TSM:FPAR
TSP:MSG:SEND 4-4-255-255 s=255,c=3,t=7,pt=0,l=0,sg=0,ft=0,st=bc:
TSP:MSG:READ 150-150-255 s=255,c=3,t=7,pt=0,l=0,sg=0:
TSP:MSG:BC
TSP:MSG:READ 0-0-4 s=255,c=3,t=8,pt=1,l=1,sg=0:0
TSP:MSG:FPAR RES (ID=0, dist=0)
TSP:MSG:PAR OK (ID=0, dist=1)
TSM:FPAR:OK
TSM:ID
TSM:CHKID:OK (ID=4)
TSM:UPL
TSP:PING:SEND (dest=0)
TSP:MSG:SEND 4-4-0-0 s=255,c=3,t=24,pt=1,l=1,sg=0,ft=0,st=ok:1
TSP:MSG:READ 0-0-4 s=255,c=3,t=25,pt=1,l=1,sg=0:1
TSP:MSG:PONG RECV (hops=1)
TSP:CHKUPL:OK
TSM:UPL:OK
TSM:READY
GW Started
LOADSTATE
123
And...is it expected that the "Info" tab on my node shows bootloader version 1.2?
Is there anything I'm missing to have these features working?
Thanks in advance
-
@tekka is it okay to use the bootloader on the gateway?
-
@Mark-Swift That depends on the use case - what do you have in mind?
@tekka I'd like to put my gateway in quite an isolated place and update the sketches OTA, but I presume that's not possible as without the gateway live, there's nothing to action the OTA :(
I've tried the ESP as it allows OTA updates, but the ESP still has blocking code and it can't handle all my nodes without dropping messages.