What did you build today (Pictures) ?

-
Anyone know or have experience with how well the underlying capacitive soil moisture sensors hold up over the long term? Clearly they're better than the cheap conductive electrode kind, which for most people don't last very long at all, but I recollect reading that water ultimately invades the PCB enough on even the capacitive designs that it goes kaput. Maybe they've been improved since then or maybe there are now known tricks for how to fortify them against that happening?
@NeverDie The guy with the swiss accent once said that you can coat the capacitive soil moisture sensors with a water resistant varnish or put it inside a waterproof shell.
https://www.youtube.com/watch?v=udmJyncDvw0
starting at ~7 mins.@franz-unix Ha, Great minds think alike. :D
-
@NeverDie The guy with the swiss accent once said that you can coat the capacitive soil moisture sensors with a water resistant varnish or put it inside a waterproof shell.
https://www.youtube.com/watch?v=udmJyncDvw0
starting at ~7 mins.@franz-unix Ha, Great minds think alike. :D
@BearWithBeard :+1: :grin: I love the video of the swiss guy!
-
@NeverDie The guy with the swiss accent once said that you can coat the capacitive soil moisture sensors with a water resistant varnish or put it inside a waterproof shell.
https://www.youtube.com/watch?v=udmJyncDvw0
starting at ~7 mins.@franz-unix Ha, Great minds think alike. :D
-
Today I have a very strange problem. I have created a new outdoor sensor which is powered by a 240v-5v HLK module. Its working VERY intermittent and should send data every 5 minutes (no exceptions).
Whats even more strange is that, when my outside node (called multi) is working, I have a battery powered node (sleep 15 min - send - sleep) that seems to go down, and the other way around (not always, but quite frequent - could be very unrelated but I have notised it a couple of times now).
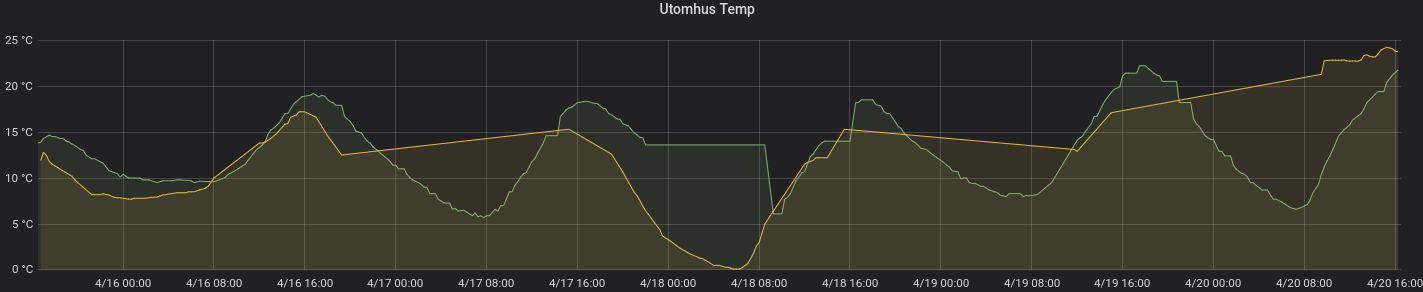
Anyhow, Im very glad i build my logger node - works great once more. I use this so often and really recommend all with a bigger network to have some sort of mobile debugger. Most of the times I use the bluetooth module (2xAA powered) but at this point I have my node on my workbench powered by a USB adapter (orange wires). I then parasite power from the node to run the debugger and is now logging everything to a sd-card.
-
Another picture from today:

Just started working with coincells - CR2032 to be exact. Anyone knows why the battery % varies with the given temperature? Are those coincells very temp. dependent or I have made a misstake somewhere... ???
Controller: Proxmox VM - Home Assistant
MySensors GW: Arduino Uno - W5100 Ethernet, Gw Shield Nrf24l01+ 2,4Ghz
MySensors GW: Arduino Uno - Gw Shield RFM69, 433mhz
RFLink GW - Arduino Mega + RFLink Shield, 433mhz -
Another picture from today:
Just started working with coincells - CR2032 to be exact. Anyone knows why the battery % varies with the given temperature? Are those coincells very temp. dependent or I have made a misstake somewhere... ???
@sundberg84 said in What did you build today (Pictures) ?:
Anyone knows why the battery % varies with the given temperature
They don't like it when it's too cold. Check page 4 :
https://data.energizer.com/pdfs/lithiumcoin_appman.pdf -
Another picture from today:
Just started working with coincells - CR2032 to be exact. Anyone knows why the battery % varies with the given temperature? Are those coincells very temp. dependent or I have made a misstake somewhere... ???
-
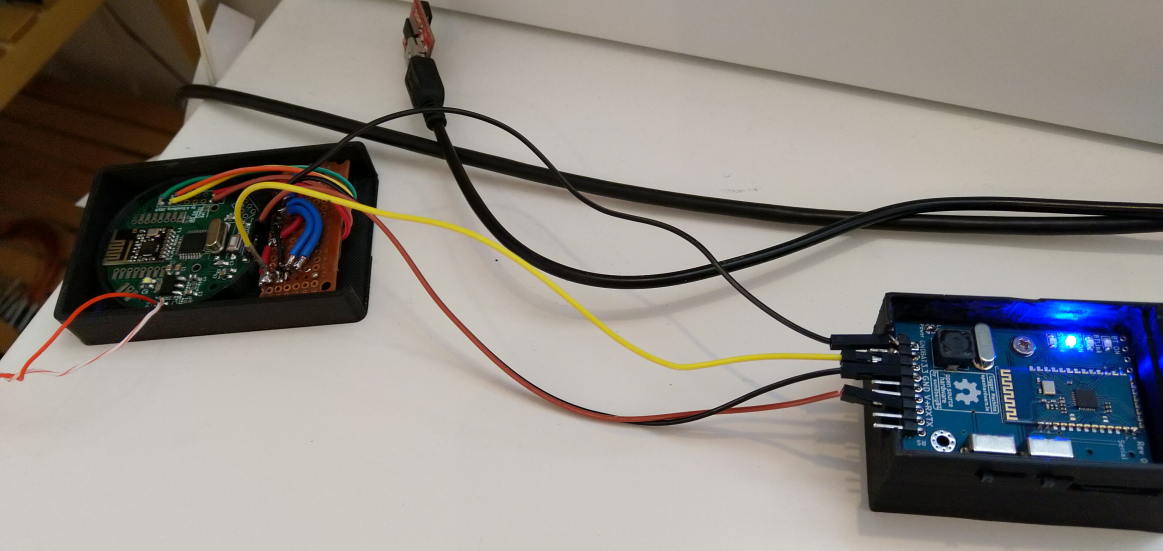
433 MHz ESP 32 MQTT Gateway with proper antenna
-
@sundberg84 looks like you can ditch the temperarure sensor and just use the battery voltage to measure the temperature :muscle:
-
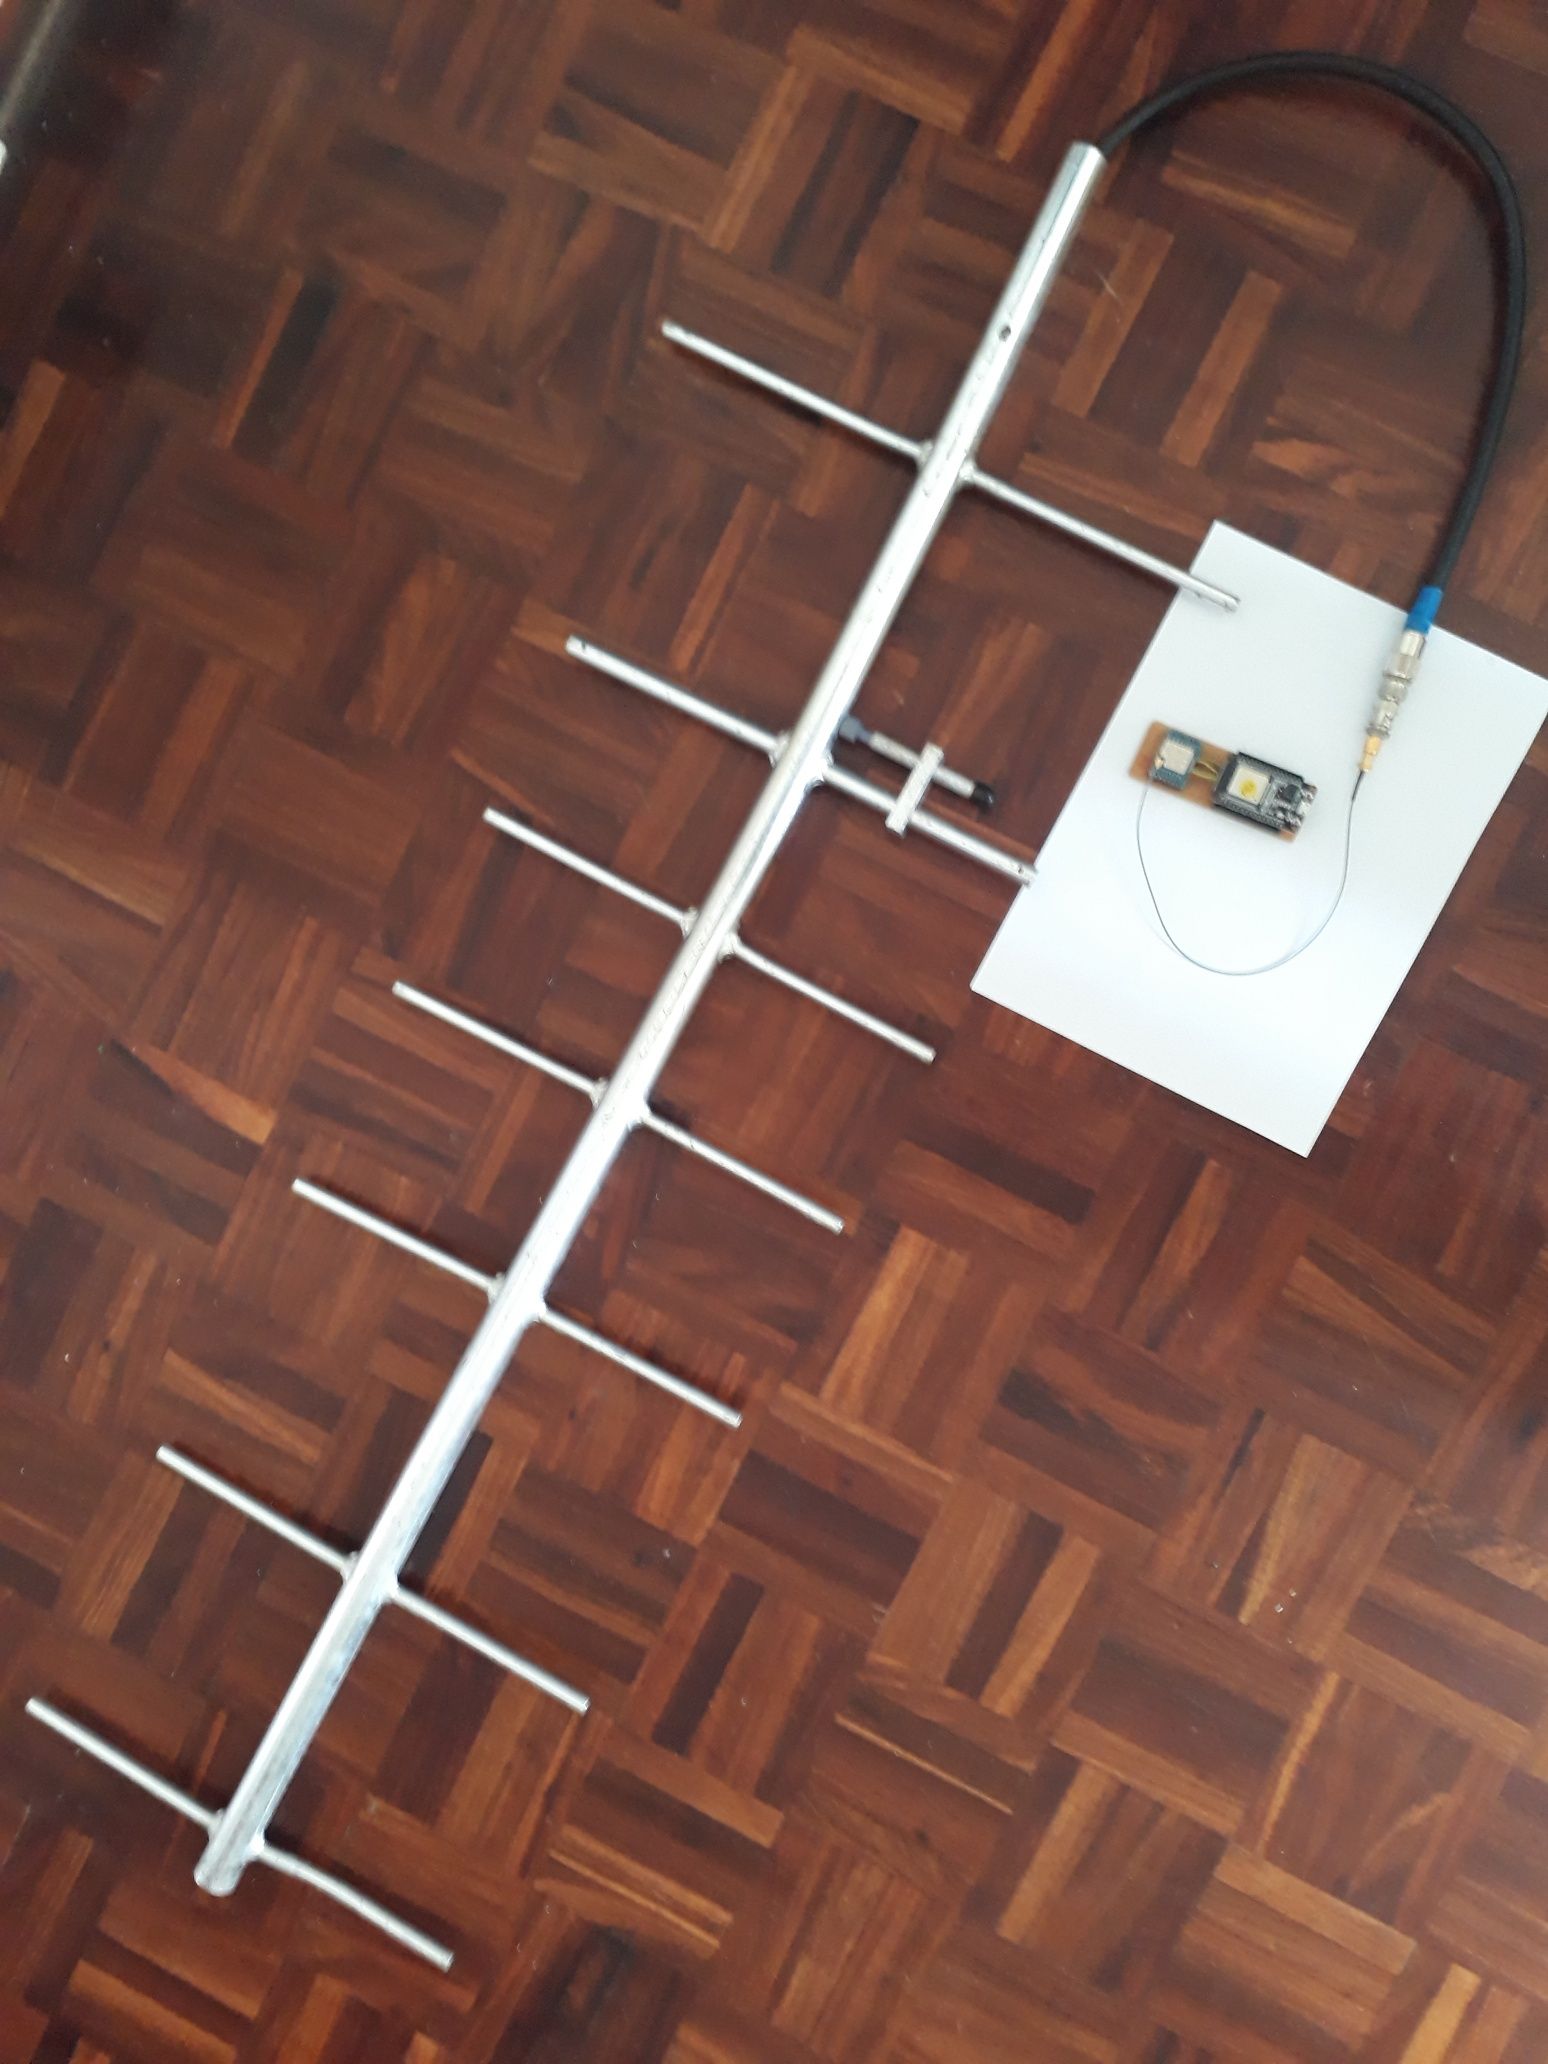
Yesterday received the PCB. Today assembled for testing this battery-powered nRF52-based passive infrared motion detector:
@NeverDie sorry if it's a bit off topic, but I see that 10 pin ARM box connector you use in several of your designs, and I was wondering if it offers anything extra in addition to the regular 6 pin programming pins. I'm asking specifically because I want to try some of your nrf52832 designs, but would like to avoid spending extra money on special connectors and cables. Thanks!
-
@NeverDie sorry if it's a bit off topic, but I see that 10 pin ARM box connector you use in several of your designs, and I was wondering if it offers anything extra in addition to the regular 6 pin programming pins. I'm asking specifically because I want to try some of your nrf52832 designs, but would like to avoid spending extra money on special connectors and cables. Thanks!
@idanronen No, nothing extra. It just conveniently and transparently interfaces to the ribbon adapter cable used by the Nordic nrf52 dev kits for programming external nRF52 MCU's. If you want to roll-your-own, you can do away with most of the pins. I myself migrated to a smaller connector in later designs.
-
@NeverDie thanks for clarifying!
So for example in the mini breakout board (https://www.openhardware.io/view/471/Ebyte-nRF52832-Small-Breakout-Board) I could just align the 6 pads and use a standard 6 pin pogo programmer right?@idanronen Yup. If you have more questions, you should probably ask them on a different thread than this one, as it's off topic here.
-
Offtopic in terms of mysensors platform, but somehow tangent to a home automation. I've made a batch of concrete switches/push buttons which are in this case simple buttons with led backlight and all the logic is located centrally in distribution box, based on KNX ABB module. But I am planning on making smarter and more complex version which could use Mysensors as its transport.
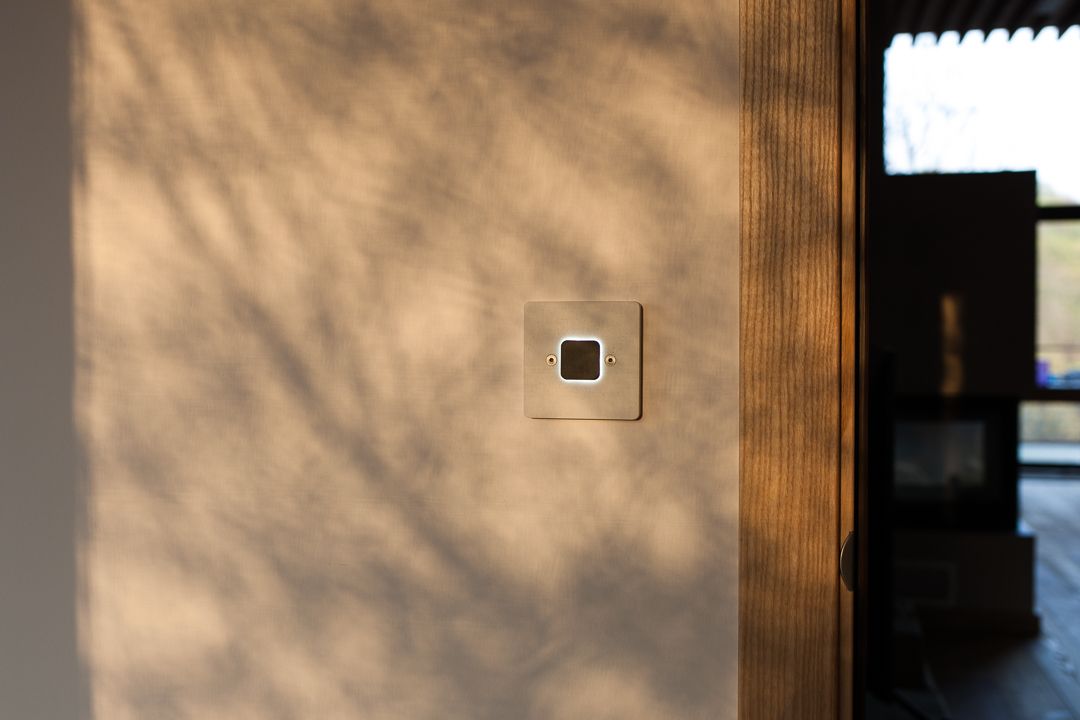

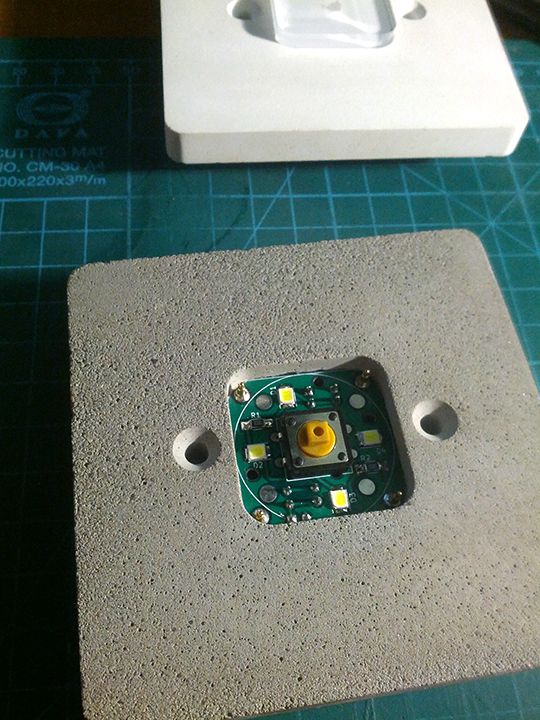
and a photo of insides of one of the prototypes at first stages of development
-
Offtopic in terms of mysensors platform, but somehow tangent to a home automation. I've made a batch of concrete switches/push buttons which are in this case simple buttons with led backlight and all the logic is located centrally in distribution box, based on KNX ABB module. But I am planning on making smarter and more complex version which could use Mysensors as its transport.
and a photo of insides of one of the prototypes at first stages of development
@monte It's a real pleasure to see such professional looking design!
I'm curious though: the button in your teardown looks clear:

so how does it turn black and give the solar eclipse effect? I mean, I can see the 4 LED's that comprise the "sun," but how does the button (the "moon" in this analogy) go from clear to black? -
@monte It's a real pleasure to see such professional looking design!
I'm curious though: the button in your teardown looks clear:
so how does it turn black and give the solar eclipse effect? I mean, I can see the 4 LED's that comprise the "sun," but how does the button (the "moon" in this analogy) go from clear to black?@NeverDie tanks for describing it as "professional":)
The clear button on the last photo was one of prototypes as I've mentioned, frankly process of refining the button part to make it work as it should was the longest part of the development. Now it is made in two stages: at first the transparent acrylic part is cut on laser machine, then it placed into a mold with curing mix of resin and concrete, which makes it's black top layer that blocks the light from below. 3mm acrylic base and 2mm resin top layer.
But I have to say that next batches will be made the other way, which is already in my mind:)@MatiasV thanks! Well, I coluld describe the whole process of making, but it requires a lot of work like making propper mold, the process of trial and error while trying to achieve consistant pour and at last the complex process of making a button that would work without sticking.
Frankly I don't think it's worth time and effort if you plan tho do only one switch for yourself. But I can give you hints about concrete mixture and other stuff, if you're just interested in it's concrete part.