Today I finally finished my second RGB LED lighting in the room. Next is the LED illumination of the perimeter of the bed. Under the bed, I want to place a motion sensor so that it reacts when I get out of bed at night.

vladimir
@vladimir
Posts
-
What did you build today (Pictures) ? -
What did you build today (Pictures) ?Finally, I can join this discussion!
Today I drew a scheme of my first device! This is a system to protect against water leakage. I also posted it in the "hardware" section. Link.

-
Problem with dimmable LED actuator with encoder@hard-shovel thank you very much!:raised_hands: Now everything works!
I will give here a full sketch. I'm sure it will be useful to many./** * The MySensors Arduino library handles the wireless radio link and protocol * between your home built sensors/actuators and HA controller of choice. * The sensors forms a self healing radio network with optional repeaters. Each * repeater and gateway builds a routing tables in EEPROM which keeps track of the * network topology allowing messages to be routed to nodes. * * Created by Henrik Ekblad <henrik.ekblad@mysensors.org> * Copyright (C) 2013-2015 Sensnology AB * Full contributor list: https://github.com/mysensors/Arduino/graphs/contributors * * Documentation: http://www.mysensors.org * Support Forum: http://forum.mysensors.org * * This program is free software; you can redistribute it and/or * modify it under the terms of the GNU General Public License * version 2 as published by the Free Software Foundation. * ******************************* * DESCRIPTION * This sketch provides an example how to implement a dimmable led light node with a rotary * encoder connected for adjusting light level. * The encoder has a click button which turns on/off the light (and remembers last dim-level) * The sketch fades the light (non-blocking) to the desired level. * * Default MOSFET pin is 3 * * Arduino Encoder module * --------------------------- * 5V 5V (+) * GND GND (-) * 4 CLK (or putput 1) * 5 DT (or output 1) * 6 SW (Switch/Click) */ // Enable debug prints #define MY_DEBUG // Enable and select radio type attached #define MY_RADIO_NRF24 //#define MY_RADIO_RFM69 #include <SPI.h> #include <MySensors.h> #include <Bounce2.h> #include <Encoder.h> #define LED_PIN 3 // Arduino pin attached to MOSFET Gate pin #define KNOB_ENC_PIN_1 4 // Rotary encoder input pin 1 #define KNOB_ENC_PIN_2 5 // Rotary encoder input pin 2 #define KNOB_BUTTON_PIN 6 // Rotary encoder button pin #define FADE_DELAY 10 // Delay in ms for each percentage fade up/down (10ms = 1s full-range dim) #define SEND_THROTTLE_DELAY 400 // Number of milliseconds before sending after user stops turning knob #define SN "DimmableLED /w button" #define SV "1.3" #define CHILD_ID_LIGHT 1 #define EEPROM_DIM_LEVEL_LAST 1 #define EEPROM_DIM_LEVEL_SAVE 2 #define LIGHT_OFF 0 #define LIGHT_ON 1 int dimValue; int fadeTo; int fadeDelta; byte oldButtonVal; bool changedByKnob=false; bool sendDimValue=false; unsigned long lastFadeStep; unsigned long sendDimTimeout; char convBuffer[10]; MyMessage dimmerMsg(CHILD_ID_LIGHT, V_DIMMER); MyMessage statusMsg(CHILD_ID_LIGHT, V_STATUS); // Addition for Status update to OpenHAB Controller Encoder knob(KNOB_ENC_PIN_1, KNOB_ENC_PIN_2); Bounce debouncer = Bounce(); void setup() { // Set knob button pin as input (with debounce) pinMode(KNOB_BUTTON_PIN, INPUT); digitalWrite(KNOB_BUTTON_PIN, HIGH); debouncer.attach(KNOB_BUTTON_PIN); debouncer.interval(5); oldButtonVal = debouncer.read(); // Set analog led pin to off analogWrite( LED_PIN, 0); // Retreive our last dim levels from the eprom fadeTo = dimValue = 0; byte oldLevel = loadLevelState(EEPROM_DIM_LEVEL_LAST); Serial.print("Sending in last known light level to controller: "); Serial.println(oldLevel); send(dimmerMsg.set(oldLevel), true); Serial.println("Ready to receive messages..."); } void presentation() { // Send the Sketch Version Information to the Gateway present(CHILD_ID_LIGHT, S_DIMMER); sendSketchInfo(SN, SV); } void loop() { // Check if someone turned the rotary encode checkRotaryEncoder(); // Check if someone has pressed the knob button checkButtonClick(); // Fade light to new dim value fadeStep(); } void receive(const MyMessage &message) { if (message.type == V_STATUS) { // Incoming on/off command sent from controller ("1" or "0") int lightState = message.getString()[0] == '1'; int newLevel = 0; if (lightState==LIGHT_ON) { // Pick up last saved dimmer level from the eeprom newLevel = loadLevelState(EEPROM_DIM_LEVEL_SAVE); } // Send dimmer level back to controller with ack enabled send(dimmerMsg.set(newLevel), true); // We do not change any levels here until ack comes back from gateway return; } else if (message.type == V_PERCENTAGE) { // Incoming dim-level command sent from controller (or ack message) fadeTo = atoi(message.getString(convBuffer)); // Save received dim value to eeprom (unless turned off). Will be // retreived when a on command comes in if (fadeTo != 0) saveLevelState(EEPROM_DIM_LEVEL_SAVE, fadeTo); } saveLevelState(EEPROM_DIM_LEVEL_LAST, fadeTo); Serial.print("New light level received: "); Serial.println(fadeTo); if (!changedByKnob) knob.write(fadeTo<<1); //### need to multiply by two (using Shift left) // Cancel send if user turns knob while message comes in changedByKnob = false; sendDimValue = false; // Stard fading to new light level startFade(); } void checkRotaryEncoder() { long encoderValue = knob.read()>>1 ; //### Divide by 2 (using shift right) if (encoderValue > 100) { encoderValue = 100; knob.write(200); //### max value now 200 due to divide by 2 } else if (encoderValue < 0) { encoderValue = 0; knob.write(0); } if (encoderValue != fadeTo) { fadeTo = encoderValue; changedByKnob = true; startFade(); } } void checkButtonClick() { debouncer.update(); byte buttonVal = debouncer.read(); byte newLevel = 0; if (buttonVal != oldButtonVal && buttonVal == LOW) { if (dimValue==0) { // Turn on light. Set the level to last saved dim value int saved = loadLevelState(EEPROM_DIM_LEVEL_SAVE); newLevel = saved > 1 ? saved : 100; // newLevel = saved > 0 ? saved : 100; } send(dimmerMsg.set(newLevel),true); send(statusMsg.set(newLevel>0 ? "1" : "0")); // Addition for Status update to OpenHAB Controller, No Echo } oldButtonVal = buttonVal; } void startFade() { fadeDelta = ( fadeTo - dimValue ) < 0 ? -1 : 1; lastFadeStep = millis(); } // This method provides a graceful none-blocking fade up/down effect void fadeStep() { unsigned long currentTime = millis(); if ( dimValue != fadeTo && currentTime > lastFadeStep + FADE_DELAY) { dimValue += fadeDelta; analogWrite( LED_PIN, (int)(dimValue / 100. * 255) ); lastFadeStep = currentTime; Serial.print("Fading level: "); Serial.println(dimValue); if (fadeTo == dimValue && changedByKnob) { sendDimValue = true; sendDimTimeout = currentTime; } } // Wait a few millisecs before sending in new value (if user still turns the knob) if (sendDimValue && currentTime > sendDimTimeout + SEND_THROTTLE_DELAY) { // We're done fading.. send in new dim-value to controller. // Send in new dim value with ack (will be picked up in incomingMessage) send(dimmerMsg.set(dimValue), true); // Send new dimmer value and request ack back sendDimValue = false; } } // Make sure only to store/fetch values in the range 0-100 from eeprom int loadLevelState(byte pos) { return min(max(loadState(pos),0),100); } void saveLevelState(byte pos, byte data) { saveState(pos,min(max(data,0),100)); } -
What did you build today (Pictures) ?@zboblamont @bjacobse
I plan to make the leakage sensors waterproof, with outwardly exposed contacts made of stainless steel. I plan to lift the contacts 1-2mm from the floor so that when washing floors, when the floor is just a little wet sensor did not work. I really like the sensors from Xiaomi.


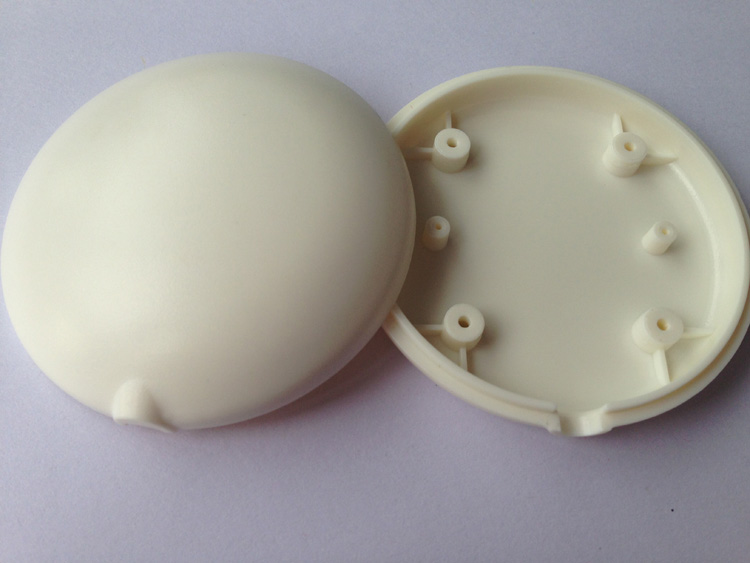
I ordered for the sample here are such cases from China:1 - 31х10mm


2 - 61х20mm
-
Improvement Xiaomi smart kettle (I need help!)If anyone is interested in this project, then I hasten to inform you, good news! :tada:
Today I came across a device "Venta Connected (WiFi control for Venta LW45 humidifier)" from the user @reinhold
Here is a link to the device page: https://www.openhardware.io/view/539/Venta-Connected-WiFi-control-for-Venta-LW45-humidifier
@reinhold, thank you for this project! :raised_hands:I tried to adapt the code of this device to fit my needs. Here's what I got:
#define SKETCH_NAME "XiaomiSmartKettle"
#define SKETCH_VERSION "1.0"

#define MY_DEBUG                     // Enable debug prints to serial monitor
#define MY_RADIO_NRF24               // Enable and select radio type attached
#define MY_REPEATER_FEATURE          // Enabled repeater feature for this node

#include <SPI.h>
#include <MySensors.h>

/**************************************
//***** MySensors settings
 **************************************/

#define WAITING_TIME 250

// Pin Setup:
// Button & LED Actions (output):
//   - PIN_BOIL  D3 ... Boil button press
//   - PIN_WARM   D4 ... Warm button press
// LED detection (input, pullup):
//   - LED_BOIL   D5 ... Boil LED
//   - LED_WARMPOWER  D6 ... Warm power LED (Warming is on, but the heating is not involved yet)
//   - LED_WARMACT  D7 ... Warm action LED (Warming is on and the heater is running)

#define PIN_BOIL 3
#define PIN_WARM 4
#define LED_BOIL 5
#define LED_WARMPOWER 6
#define LED_WARMACT 7

#define ID_BOIL 1
#define ID_WARMPOWER 2
#define ID_WARMACT 3
//#define ID_REPEATER 254


bool boil = false;
bool warmpower = false;
bool warmact = false;

bool prev_boil = false;
bool prev_warmpower = false;
bool prev_warmact = false;


MyMessage msg_boil(ID_BOIL, V_STATUS);
MyMessage msg_warmpower(ID_WARMPOWER, V_STATUS);
MyMessage msg_warmact(ID_WARMACT, V_STATUS);


/**************************************
 ***** Implementation
 **************************************/
void setup() {
  // PIN modes
  pinMode(PIN_BOIL,OUTPUT);
  pinMode(PIN_WARM,OUTPUT);
  pinMode(LED_BOIL,INPUT_PULLUP);
  pinMode(LED_WARMPOWER,INPUT_PULLUP);
  pinMode(LED_WARMACT,INPUT_PULLUP);

}

void presentation() {
  present(ID_BOIL, S_BINARY, "Kettle BOIL", true);
  present(ID_WARMPOWER, S_BINARY, "Kettle WARM POWER", true);
  present(ID_WARMACT, S_BINARY, "Kettle WARM ACTION", true);
//  present(ID_REPEATER, S_ARDUINO_REPEATER_NODE);

  sendSketchInfo(SKETCH_NAME, SKETCH_VERSION);
}

void loop() {
  readKettleState();

  bool changed = false;
  if (boil != prev_boil) {
    Serial.println(F("BOIL changed from "));Serial.print(prev_boil); Serial.print(F(" to ")); Serial.println(boil);
    changed = true;
    send(msg_boil.set(boil));
    prev_boil = boil;
  }
  if (warmpower != prev_warmpower) {
    Serial.println(F("WARMPOWER changed from "));Serial.print(prev_warmpower); Serial.print(F(" to ")); Serial.println(warmpower);
    changed = true;
    send(msg_warmpower.set(warmpower));
    prev_warmpower = warmpower;
  }
  if (warmact != prev_warmact) {
    Serial.println(F("WARMACT changed from "));Serial.print(prev_warmact); Serial.print(F(" to ")); Serial.println(warmact);
    changed = true;
    send(msg_warmact.set(warmact));
    prev_warmact = warmact;
  }

  wait(WAITING_TIME);
}

void receive(const MyMessage &message) {
  readKettleState();
  switch (message.sensor) {

    case ID_BOIL:
        if (message.type == V_STATUS) {
          bool newstate = message.getBool();
          Serial.print(F("Incoming message to set BOIL to: "));
          Serial.println(newstate);
          if (boil != newstate) {
            pressButton(PIN_BOIL);
            Serial.println(F("   => Emulating button press to toggle BOIL"));
          } else {
            Serial.println(F("   => No need to change BOIL state"));
          }
        } else {
          Serial.print(F("Incoming message for ID_BOIL, unknown message type "));
          Serial.println(message.type);
        }
        break;

    case ID_WARMPOWER:
        if (message.type == V_STATUS) {
          bool newstate = message.getBool();
          Serial.print(F("Incoming message to set WARMPOWER to: "));
          Serial.println(newstate);
          if (warmpower != newstate) {
            pressButton(PIN_WARM);
            Serial.println(F("   => Emulating button press to toggle WARMPOWER"));
          } else {
            Serial.println(F("   => No need to change WARMPOWER state"));
          }
        } else {
          Serial.print(F("Incoming message for ID_WARMPOWER, unknown message type "));
          Serial.println(message.type);
        }
        break;

    case ID_WARMACT:
        if (message.type == V_STATUS) {
          bool newstate = message.getBool();
          Serial.print(F("Incoming message to set WARMACT to: "));
          Serial.println(newstate);

          saveState(ID_WARMACT, newstate);
          if (newstate==1) {
            ledOn(LED_WARMACT);
          } else {
            ledOff(LED_WARMACT);
          }
        } else {
          Serial.print(F("Incoming message for ID_WARMACT, unknown message type "));
          Serial.println(message.type);
        }
        break;

    default:
        Serial.print(F("Incoming message for sensor "));
        Serial.print(message.sensor);
        Serial.print(F(", which cannot receive any messages, type="));
        Serial.println(message.type);
  }
}


void readKettleState() {
  boil = digitalRead(LED_BOIL) == LOW;
  warmpower = digitalRead(LED_WARMPOWER) == LOW;
  warmact = digitalRead(LED_WARMACT) == LOW;
}


void pressButton(int pin) {
  digitalWrite(pin, HIGH);
  wait(100);
  digitalWrite(pin, LOW);
}
void ledOn(int pin) {
  digitalWrite(pin, HIGH);
}
void ledOff(int pin) {
  digitalWrite(pin, LOW);
}
I have not yet verified this code on the device, since I do not have all the necessary components. But it compiled without errors, and that makes me happy already!
I have only the fear that the function of warming the water will not work correctly, since the kettle has two LEDs that display the status:
LED_WARMPOWER - Warming is on, but the heating is not involved yet
LED_WARMACT - Warming is on and the heater is running.I would be grateful if you could help me fix this. :raised_hands: Perhaps you will notice other errors in the code, please tell me about them. :wink:
-
Please help! Arduino UNO + RFM69HW (TSM:INIT:TSP FAIL)@mfalkvidd thank you very much for your help! :+1: :v:
-
What did you build today (Pictures) ?The other day I finished the first version of the PCB for my system of protection against water leakage. It will have two automatic ball valves, six leakage sensors with wire breakage monitoring and in the future I plan to connect it to the Mysensors.

Here is a prototype collected with the help of Arduino Pro Mini. Arduino Uno is just nearby, but not connected. Do not pay any attention to him. :)

-
Problem with dimmable LED actuator with encoder@hard-shovel thanks for the answer!
The encoder started working as it should! There was only a problem with the switch in OpenHAB. It does not switch when you press a button on the device. The feeling that OpenHAB does not get the status of this switch. The device works well.
In this video, I clearly demonstrated the problem: https://cloud.mail.ru/public/4fee/HiVX5ZSxhMaybe you know what the problem is? I made all the changes you wrote to me in the previous message. Here is the updated device code:
/** * The MySensors Arduino library handles the wireless radio link and protocol * between your home built sensors/actuators and HA controller of choice. * The sensors forms a self healing radio network with optional repeaters. Each * repeater and gateway builds a routing tables in EEPROM which keeps track of the * network topology allowing messages to be routed to nodes. * * Created by Henrik Ekblad <henrik.ekblad@mysensors.org> * Copyright (C) 2013-2015 Sensnology AB * Full contributor list: https://github.com/mysensors/Arduino/graphs/contributors * * Documentation: http://www.mysensors.org * Support Forum: http://forum.mysensors.org * * This program is free software; you can redistribute it and/or * modify it under the terms of the GNU General Public License * version 2 as published by the Free Software Foundation. * ******************************* * * REVISION HISTORY * Version 1.0 - Developed by Bruce Lacey and GizMoCuz (Domoticz) * Version 1.1 - Modified by hek to incorporate a rotary encode to adjust * light level locally at node * * DESCRIPTION * This sketch provides an example how to implement a dimmable led light node with a rotary * encoder connected for adjusting light level. * The encoder has a click button which turns on/off the light (and remembers last dim-level) * The sketch fades the light (non-blocking) to the desired level. * * Default MOSFET pin is 3 * * Arduino Encoder module * --------------------------- * 5V 5V (+) * GND GND (-) * 4 CLK (or putput 1) * 5 DT (or output 1) * 6 SW (Switch/Click) */ // Enable debug prints #define MY_DEBUG // Enable and select radio type attached #define MY_RADIO_NRF24 //#define MY_RADIO_RFM69 #include <SPI.h> #include <MySensors.h> #include <Bounce2.h> #include <Encoder.h> #define LED_PIN 3 // Arduino pin attached to MOSFET Gate pin #define KNOB_ENC_PIN_1 4 // Rotary encoder input pin 1 #define KNOB_ENC_PIN_2 5 // Rotary encoder input pin 2 #define KNOB_BUTTON_PIN 6 // Rotary encoder button pin #define FADE_DELAY 10 // Delay in ms for each percentage fade up/down (10ms = 1s full-range dim) #define SEND_THROTTLE_DELAY 400 // Number of milliseconds before sending after user stops turning knob #define SN "DimmableLED /w button" #define SV "1.2" #define CHILD_ID_LIGHT 1 #define EEPROM_DIM_LEVEL_LAST 1 #define EEPROM_DIM_LEVEL_SAVE 2 #define LIGHT_OFF 0 #define LIGHT_ON 1 int dimValue; int fadeTo; int fadeDelta; byte oldButtonVal; bool changedByKnob=false; bool sendDimValue=false; unsigned long lastFadeStep; unsigned long sendDimTimeout; char convBuffer[10]; MyMessage dimmerMsg(CHILD_ID_LIGHT, V_DIMMER); Encoder knob(KNOB_ENC_PIN_1, KNOB_ENC_PIN_2); Bounce debouncer = Bounce(); void setup() { // Set knob button pin as input (with debounce) pinMode(KNOB_BUTTON_PIN, INPUT); digitalWrite(KNOB_BUTTON_PIN, HIGH); debouncer.attach(KNOB_BUTTON_PIN); debouncer.interval(5); oldButtonVal = debouncer.read(); // Set analog led pin to off analogWrite( LED_PIN, 0); // Retreive our last dim levels from the eprom fadeTo = dimValue = 0; byte oldLevel = loadLevelState(EEPROM_DIM_LEVEL_LAST); Serial.print("Sending in last known light level to controller: "); Serial.println(oldLevel); send(dimmerMsg.set(oldLevel), true); Serial.println("Ready to receive messages..."); } void presentation() { // Send the Sketch Version Information to the Gateway present(CHILD_ID_LIGHT, S_DIMMER); sendSketchInfo(SN, SV); } void loop() { // Check if someone turned the rotary encode checkRotaryEncoder(); // Check if someone has pressed the knob button checkButtonClick(); // Fade light to new dim value fadeStep(); } void receive(const MyMessage &message) { if (message.type == V_STATUS) { // Incoming on/off command sent from controller ("1" or "0") int lightState = message.getString()[0] == '1'; int newLevel = 0; if (lightState==LIGHT_ON) { // Pick up last saved dimmer level from the eeprom newLevel = loadLevelState(EEPROM_DIM_LEVEL_SAVE); } // Send dimmer level back to controller with ack enabled send(dimmerMsg.set(newLevel), true); // We do not change any levels here until ack comes back from gateway return; } else if (message.type == V_PERCENTAGE) { // Incoming dim-level command sent from controller (or ack message) fadeTo = atoi(message.getString(convBuffer)); // Save received dim value to eeprom (unless turned off). Will be // retreived when a on command comes in if (fadeTo != 0) saveLevelState(EEPROM_DIM_LEVEL_SAVE, fadeTo); } saveLevelState(EEPROM_DIM_LEVEL_LAST, fadeTo); Serial.print("New light level received: "); Serial.println(fadeTo); if (!changedByKnob) knob.write(fadeTo<<1); //### need to multiply by two (using Shift left) // Cancel send if user turns knob while message comes in changedByKnob = false; sendDimValue = false; // Stard fading to new light level startFade(); } void checkRotaryEncoder() { long encoderValue = knob.read()>>1 ; //### Divide by 2 (using shift right) if (encoderValue > 100) { encoderValue = 100; knob.write(200); //### max value now 200 due to divide by 2 } else if (encoderValue < 0) { encoderValue = 0; knob.write(0); } if (encoderValue != fadeTo) { fadeTo = encoderValue; changedByKnob = true; startFade(); } } void checkButtonClick() { debouncer.update(); byte buttonVal = debouncer.read(); byte newLevel = 0; if (buttonVal != oldButtonVal && buttonVal == LOW) { if (dimValue==0) { // Turn on light. Set the level to last saved dim value int saved = loadLevelState(EEPROM_DIM_LEVEL_SAVE); newLevel = saved > 0 ? saved : 100; } send(dimmerMsg.set(newLevel),true); } oldButtonVal = buttonVal; } void startFade() { fadeDelta = ( fadeTo - dimValue ) < 0 ? -1 : 1; lastFadeStep = millis(); } // This method provides a graceful none-blocking fade up/down effect void fadeStep() { unsigned long currentTime = millis(); if ( dimValue != fadeTo && currentTime > lastFadeStep + FADE_DELAY) { dimValue += fadeDelta; analogWrite( LED_PIN, (int)(dimValue / 100. * 255) ); lastFadeStep = currentTime; Serial.print("Fading level: "); Serial.println(dimValue); if (fadeTo == dimValue && changedByKnob) { sendDimValue = true; sendDimTimeout = currentTime; } } // Wait a few millisecs before sending in new value (if user still turns the knob) if (sendDimValue && currentTime > sendDimTimeout + SEND_THROTTLE_DELAY) { // We're done fading.. send in new dim-value to controller. // Send in new dim value with ack (will be picked up in incomingMessage) send(dimmerMsg.set(dimValue), true); // Send new dimmer value and request ack back sendDimValue = false; } } // Make sure only to store/fetch values in the range 0-100 from eeprom int loadLevelState(byte pos) { return min(max(loadState(pos),0),100); } void saveLevelState(byte pos, byte data) { saveState(pos,min(max(data,0),100)); } -
Which dust sensor do you use and why?@gohan Frankly, I'm not particularly aware of this topic. I want to measure the usual dust in the air. :grin: I apologize if my words seem stupid to you. I want to understand which concentration of dust particles should be measured for the living space, what is the ultimate norm of these particles in the air and what sensor is suitable for this.
-
Installation instruction OpenHAB2 + MQTT gateway@mfalkvidd It looks like the whole problem is that I'm trying to do this in the Mac OS. Very strange, but even the debugging mode does not display real-time information.
-
What did you build today (Pictures) ?The project of today is not yet connected with Mysensors.
This is a light relay with an IR receiver for the spotlight illuminating the backyard of my friends' house.
In the dark, the relay can be switched off from the remote control (to block the activation of the relay). If the remote is far away from you, then the lock can be removed with the searchlight switch by restarting it.
To understand if the relay is locked, there is a red LED on the case.


-
KY-40 rotary encoder@lastsamurai Hello!
Did you manage to implement this node? -
Installation instruction OpenHAB2 + MQTT gateway@mfalkvidd The fact of the matter is that I could not figure it out. Here are the problems that I now faced:
- In OpenHAB2, on the Mac OS, debugging information is not displayed when starting start_debug.sh
- I still could not understand why in OpenHAB2, there is no MQTT gateway in the list:

-
What did you build today (Pictures) ? -
The temperature and humidity sensor sends only humidity. Please help me understand.@mfalkvidd Thank you! :raised_hands: Everything worked! :star2:
-
Managing the color of multiple RGB LED nodes@crankycoder This was my first and so far the only idea. :smile: To my regret, it did not work. Such a trick turned out only with a switch.
-
Managing the color of multiple RGB LED nodes@crankycoder Many thanks for the idea!:raised_hands: I think this is the right direction for solving my question.