CNC PCB milling
-
Ah, nevermind. I changed the terminal to send it a carriage return, and now it works. Here is the output from asking it $ and $$:
Grbl 0.9j ['$' for help] $$ (view Grbl settings) $# (view # parameters) $G (view parser state) $I (view build info) $N (view startup blocks) $x=value (save Grbl setting) $Nx=line (save startup block) $C (check gcode mode) $X (kill alarm lock) $H (run homing cycle) ~ (cycle start) ! (feed hold) ? (current status) ctrl-x (reset Grbl) ok $0=10 (step pulse, usec) $1=25 (step idle delay, msec) $2=0 (step port invert mask:00000000) $3=5 (dir port invert mask:00000101) $4=0 (step enable invert, bool) $5=0 (limit pins invert, bool) $6=0 (probe pin invert, bool) $10=3 (status report mask:00000011) $11=0.010 (junction deviation, mm) $12=0.002 (arc tolerance, mm) $13=0 (report inches, bool) $20=0 (soft limits, bool) $21=0 (hard limits, bool) $22=0 (homing cycle, bool) $23=0 (homing dir invert mask:00000000) $24=25.000 (homing feed, mm/min) $25=500.000 (homing seek, mm/min) $26=250 (homing debounce, msec) $27=1.000 (homing pull-off, mm) $100=800.000 (x, step/mm) $101=800.000 (y, step/mm) $102=800.000 (z, step/mm) $110=5000.000 (x max rate, mm/min) $111=5000.000 (y max rate, mm/min) $112=800.000 (z max rate, mm/min) $120=10.000 (x accel, mm/sec^2) $121=10.000 (y accel, mm/sec^2) $122=10.000 (z accel, mm/sec^2) $130=200.000 (x max travel, mm) $131=200.000 (y max travel, mm) $132=200.000 (z max travel, mm) ok -
Here's the current build status:
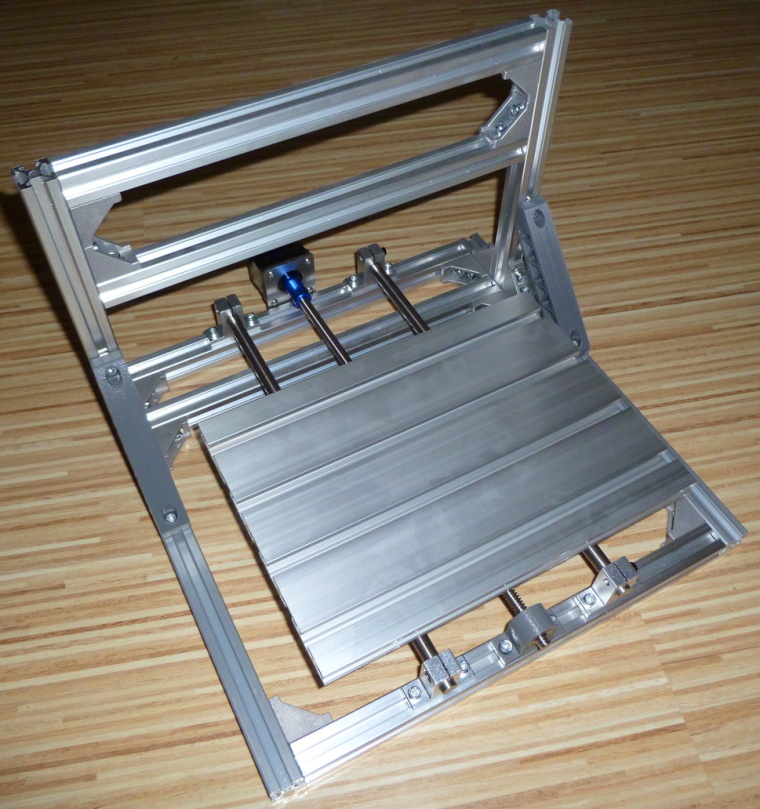
I'm guessing I'm something more than half-way done. -
@NeverDie
firmware settings: it is stored in the EEPROM, but nothing guarantees that the same location will be used for the same parameters in case of different versions, so the output of "$$" command should be saved, this contains everything which you can manually set up if necessary.ER11: take extra care during the installation process to not "harm" the motor's axis. usually the ER11 is pretty tight and howtos mention that the motor should be cooled (by the freezer) and the ER11 should be warmed up before putting them together, to help the mounting process and to prevent unwanted distortion.
I put the CNC 2418 assembly guide to my share, for ones it is interesting.
@andrew said in CNC PCB milling:
the ER11 should be warmed up
how exactly? Heat gun?
I've put the motor assembly in the freezer....
-
I'll let it freeze overnight and then try it in the morning.
-
Controller: Proxmox VM - Home Assistant
MySensors GW: Arduino Uno - W5100 Ethernet, Gw Shield Nrf24l01+ 2,4Ghz
MySensors GW: Arduino Uno - Gw Shield RFM69, 433mhz
RFLink GW - Arduino Mega + RFLink Shield, 433mhz -
@sundberg84 see andrew's earlier post.
Freezing the motor axis makes it a bit smaller.
-
@sundberg84 And heating up the other part makes it expand and get bigger allowing the two to fit together easier. Has to do with tight tolerances.
-
@andrew
Since I probably have only one shot at this, how hot should I heat up the ER11 before trying to fit it onto the frozen spindle? Should it be burning hot, or is luke-warm enough?@neverdie unfortunately, as I mentioned, I don't have ER11 (yet), and I just read articles and vendor suggestions on the installation method, so I cannot provide experience based suggestions to that. as far as I remember nor concrete temperature was mentioned, so I would say you should not "overheat" it.
-
@neverdie unfortunately, as I mentioned, I don't have ER11 (yet), and I just read articles and vendor suggestions on the installation method, so I cannot provide experience based suggestions to that. as far as I remember nor concrete temperature was mentioned, so I would say you should not "overheat" it.
@andrew said in CNC PCB milling:
@neverdie unfortunately, as I mentioned, I don't have ER11 (yet), and I just read articles and vendor suggestions on the installation method, so I cannot provide experience based suggestions to that. as far as I remember nor concrete temperature was mentioned, so I would say you should not "overheat" it.
I slipped it on, no problem at all. After freezing the motor overnight, what I did was heat the ER11 with my wife's crafting hot air gun. I held it with an insulated glove as I warmed it up. When it started to become uncomfortable to hold with even the insulated glove, I slipped it on without any resistance.
Hopefully this info will help you when you receive yours.
-
I seem to be finished with the mechanical assembly:
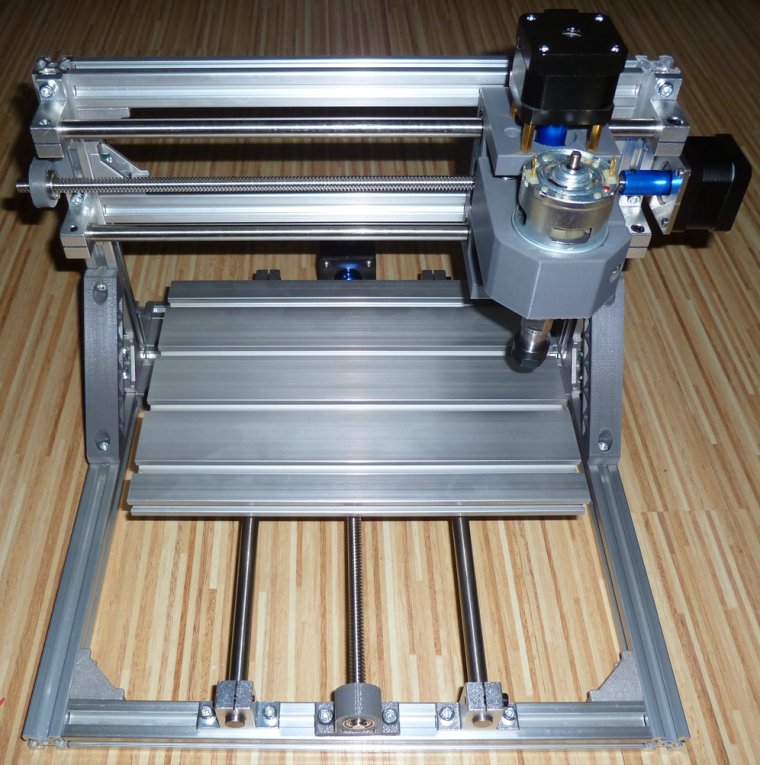
However, these washers came with the kit, and I'm not sure what they're for:
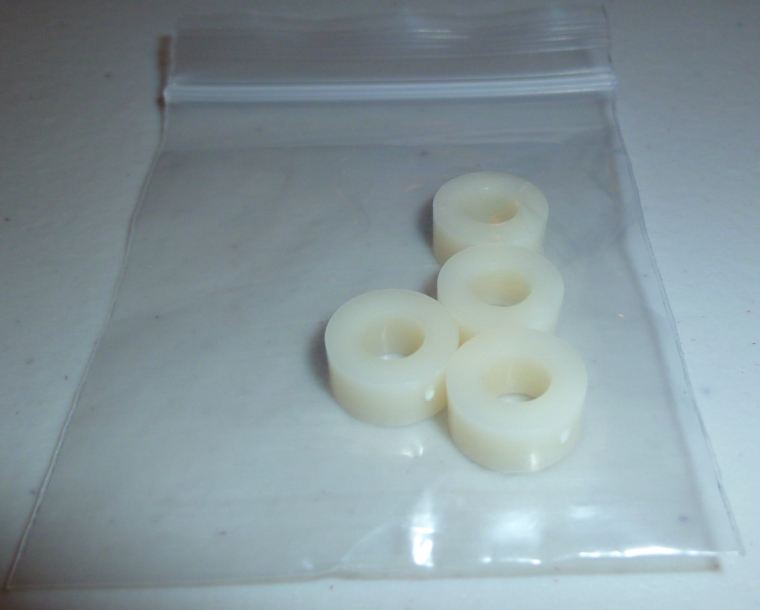
Anyone know? Are they for mounting the woodpecker board to the frame?Next I need to do the firmware upgrade and then wire things up.
-
I seem to be finished with the mechanical assembly:
However, these washers came with the kit, and I'm not sure what they're for:
Anyone know? Are they for mounting the woodpecker board to the frame?Next I need to do the firmware upgrade and then wire things up.
-
@andrew said in CNC PCB milling:
@neverdie unfortunately, as I mentioned, I don't have ER11 (yet), and I just read articles and vendor suggestions on the installation method, so I cannot provide experience based suggestions to that. as far as I remember nor concrete temperature was mentioned, so I would say you should not "overheat" it.
I slipped it on, no problem at all. After freezing the motor overnight, what I did was heat the ER11 with my wife's crafting hot air gun. I held it with an insulated glove as I warmed it up. When it started to become uncomfortable to hold with even the insulated glove, I slipped it on without any resistance.
Hopefully this info will help you when you receive yours.
@neverdie said in CNC PCB milling:
ER11
FYI - Was reading on another forum where the user was going to replace the ER11 with a larger version so he could use 8mm bits (fairly standard metric size for wood routing bits, but incredibly strong)...
Somebody pointed out to the guy that there are collets available for the ER11 specifically for 8mm shafted toolbits...
https://www.sorotec.de/shop/Spannzange-ER-11---8-00mm-DIN-6499B-4008E-Klasse-II.html -
I seem to be finished with the mechanical assembly:
However, these washers came with the kit, and I'm not sure what they're for:
Anyone know? Are they for mounting the woodpecker board to the frame?Next I need to do the firmware upgrade and then wire things up.
-
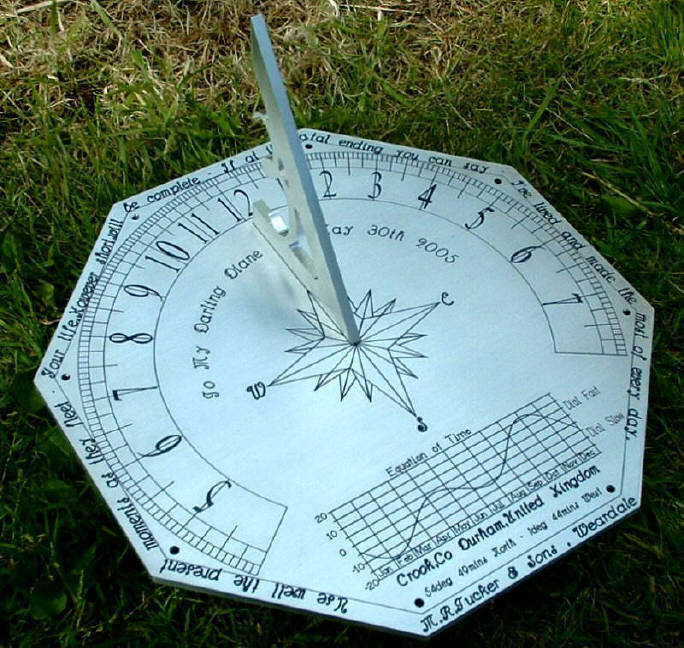
Carved this on my home made cnc router recently.
Bit off topic but good fun.
It is about 2ft diameter and 8" thick(old millstone)

-
@rmtucker said in CNC PCB milling:
@neverdie
You have gone quiet:relaxed:
Must be beavering away cutting pcb's?No, I've simply misplaced my Dragon AVR programmer for the firmware upgrade, so I need to hunt it down.
-
Anyway, once I do get the firmware upgraded and it wired up, what's the best way to start testing it? Do I need to learn GRBL as execuval seems to imply, or are there some simple tests I can run? I imagine some kind of calibration would be the need step, but I haven't read that far ahead because there's nothing to read (well, haven't googled it out yet either).
Hello! It looks like you're interested in this conversation, but you don't have an account yet.
Getting fed up of having to scroll through the same posts each visit? When you register for an account, you'll always come back to exactly where you were before, and choose to be notified of new replies (either via email, or push notification). You'll also be able to save bookmarks and upvote posts to show your appreciation to other community members.
With your input, this post could be even better 💗
Register Login