Skip to content
  • MySensors
  • OpenHardware.io
  • Categories
  • Recent
  • Tags
  • Popular
Skins
  • Light
  • Brite
  • Cerulean
  • Cosmo
  • Flatly
  • Journal
  • Litera
  • Lumen
  • Lux
  • Materia
  • Minty
  • Morph
  • Pulse
  • Sandstone
  • Simplex
  • Sketchy
  • Spacelab
  • United
  • Yeti
  • Zephyr
  • Dark
  • Cyborg
  • Darkly
  • Quartz
  • Slate
  • Solar
  • Superhero
  • Vapor

  • Default (No Skin)
  • No Skin
Collapse
Brand Logo
  1. Home
  2. My Project
  3. My Relay Module

My Relay Module

Scheduled Pinned Locked Moved My Project
21 Posts 8 Posters 24.1k Views 6 Watching
  • Oldest to Newest
  • Newest to Oldest
  • Most Votes
Reply
  • Reply as topic
Log in to reply
This topic has been deleted. Only users with topic management privileges can see it.
  • Michel - ItM Offline
    Michel - ItM Offline
    Michel - It
    wrote on last edited by Michel - It
    #11

    I downloaded this , https://github.com/mysensors/Arduino . I Submitted libraries entirely within the zip file in my briefcase Arduino library.
    however it from the library is the 1.5 readme. Where am I wrong ?
    il codice è il seguente

    #include <MySensor.h>
    
    #include <SPI.h>
    #include <Bounce2.h>
    
    #define RELAY_PIN 4 // Arduino Digital I/O pin number for relay
    #define BUTTON_PIN 3 // Arduino Digital I/O pin number for button
    #define CHILD_ID 1 // Id of the sensor child
    #define RELAY_ON 1
    #define RELAY_OFF 0
    
    Bounce debouncer = Bounce();
    int oldValue=0;
    bool state;
    MySensor gw;
    MyMessage msg(CHILD_ID,V_LIGHT);
    
    void setup()
    {
    gw.begin(incomingMessage, AUTO, true);
    
    // Send the sketch version information to the gateway and Controller
    gw.sendSketchInfo("Relay & Button", "1.0");
    
    // Setup the button
    pinMode(BUTTON_PIN,INPUT);
    // Activate internal pull-up
    digitalWrite(BUTTON_PIN,HIGH);
    
    // After setting up the button, setup debouncer
    debouncer.attach(BUTTON_PIN);
    debouncer.interval(5);
    
    // Register all sensors to gw (they will be created as child devices)
    gw.present(CHILD_ID, S_LIGHT);
    
    // Make sure relays are off when starting up
    digitalWrite(RELAY_PIN, RELAY_OFF);
    // Then set relay pins in output mode
    pinMode(RELAY_PIN, OUTPUT);
    
    // Set relay to last known state (using eeprom storage)
    state = gw.loadState(CHILD_ID);
    digitalWrite(RELAY_PIN, state?RELAY_ON:RELAY_OFF);
    }
    /*
    * Example on how to asynchronously check for new messages from gw
    */
    void loop()
    {
    gw.process();
    debouncer.update();
    // Get the update value
    int value = debouncer.read();
    if (value != oldValue && value==0) {
    gw.send(msg.set(state?false:true), true); // Send new state and request ack back
    }
    oldValue = value;
    }
    
    void incomingMessage(const MyMessage &message) {
    // We only expect one type of message from controller. But we better check anyway.
    if (message.isAck()) {
    Serial.println("This is an ack from gateway");
    }
    
    if (message.type == V_LIGHT) {
    // Change relay state
    state = message.getBool();
    digitalWrite(RELAY_PIN, state?RELAY_ON:RELAY_OFF);
    // Store state in eeprom
    gw.saveState(CHILD_ID, state);
    
    // Write some debug info
    Serial.print("Incoming change for sensor:");
    Serial.print(message.sensor);
    Serial.print(", New status: ");
    Serial.println(message.getBool());
    }
    }```
    1 Reply Last reply
    0
    • hekH Offline
      hekH Offline
      hek
      Admin
      wrote on last edited by
      #12

      mysensors.org/download/

      1 Reply Last reply
      0
      • Michel - ItM Offline
        Michel - ItM Offline
        Michel - It
        wrote on last edited by
        #13

        thank you! I apologize for my level , I hope to fix with your help.

        1 Reply Last reply
        0
        • Michel - ItM Offline
          Michel - ItM Offline
          Michel - It
          wrote on last edited by Michel - It
          #14

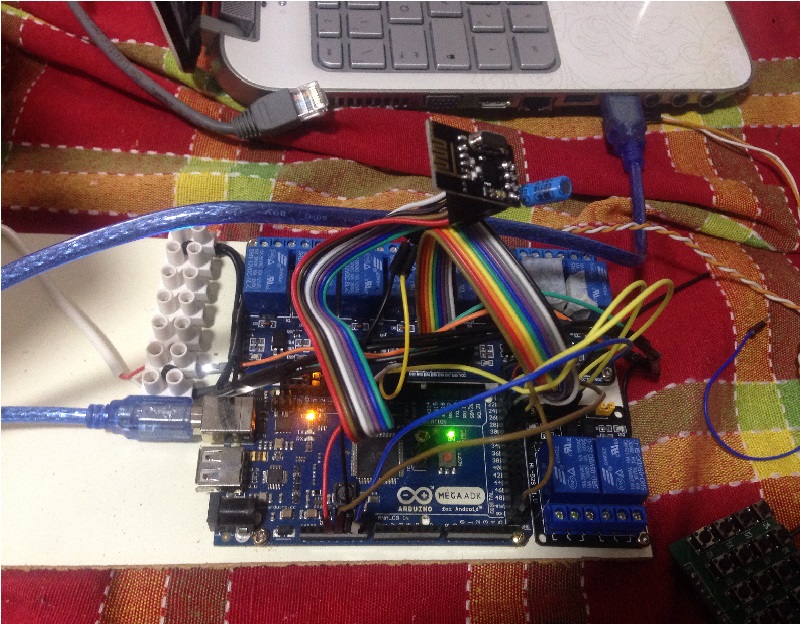
          Here is the improved code that I used on my Arduino Mega to create a home automation controller

          New optimized code to arduino mega

          https://codebender.cc/sketch:206446

          1 Reply Last reply
          0
          • Michel - ItM Offline
            Michel - ItM Offline
            Michel - It
            wrote on last edited by Michel - It
            #15

            Update: Forget it, the code works with Arduino Mini and 2 relay. I tried one after the code of Arduino Mega and not working. Something wrong but I do not know what I require help
            picture.jpg

            I found mistakes on Arduino Mega solvable at the following link
            http://forum.mysensors.org/topic/2161/the-mysensor-1-5-code-is-not-compiling-for-my-arduino-mega-2560-board/1
            but I do not have this kind of problem you can get support? I connected NRF24L01 to Arduino Mega, as if it were an Arduino Nano, right?

            1 Reply Last reply
            0
            • hekH Offline
              hekH Offline
              hek
              Admin
              wrote on last edited by
              #16

              The SPI pins has different pin numbers on the Mega.

              Here is an example that runs the the Mega:
              http://www.mysensors.org/build/scene_controller

              1 Reply Last reply
              0
              • Michel - ItM Offline
                Michel - ItM Offline
                Michel - It
                wrote on last edited by
                #17

                I connected the radio module as follows

                AtMega 2650 Arduino Step Down Module/Radio
                GND > GND
                5V > Step Down module VCC
                14 > SCK
                15 > MOSI
                16 > MISO
                17 > CE
                18 > CSN
                I tried but it did not work I tried to connect also IrQ
                2 > IRQ
                it did not work. I tried to connect to 3v3 with the capacitor. it did not work. I tried adding the line in the code
                #include <MyTransportNRF24.h>
                #include <MyHwATMega328.h>
                but to no avail. I am groping in the dark

                1 Reply Last reply
                0
                • hekH Offline
                  hekH Offline
                  hek
                  Admin
                  wrote on last edited by
                  #18

                  You haven't said what problem you experience. Logs or anything else...

                  1 Reply Last reply
                  0
                  • Michel - ItM Offline
                    Michel - ItM Offline
                    Michel - It
                    wrote on last edited by Michel - It
                    #19

                    I have "check wires" error on the serial arduino....
                    where do I fit in debug mode there is a guide?
                    I saw a video that uses MQTT program on mac.
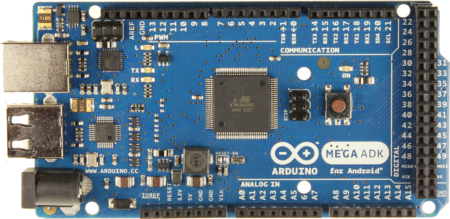
                    I have downloaded windows MYSController I can be of help? How do I connect my PC? It is all new and are a little confused. :dizzy_face: :u7a7a:

                    I "atmega adk" is a problem?
                    https://www.arduino.cc/en/uploads/Main/ArduinoADK_R3_Front_450px.jpg

                    1 Reply Last reply
                    0
                    • P Offline
                      P Offline
                      pjr
                      wrote on last edited by
                      #20

                      Have you defined using softspi since using those pins?

                      I'm using different pins with mega and everything started to work after adding capacitor to radio:
                      GND > GND
                      3.3 > VCC
                      52 > SCK
                      51 > MOSI
                      50 > MISO
                      9 > CE
                      10 > CSN
                      2 > IRQ

                      1 Reply Last reply
                      0
                      • Michel - ItM Offline
                        Michel - ItM Offline
                        Michel - It
                        wrote on last edited by Michel - It
                        #21

                        soon as I finish the project it will create a new post in the category myproject
                        @pjr unfortunately I read your seat now but I confirm that pins are those that use exact thank - @salvato that helped me as an angel.

                        the irq pin does not need to be connected

                        1 Reply Last reply
                        0
                        Reply
                        • Reply as topic
                        Log in to reply
                        • Oldest to Newest
                        • Newest to Oldest
                        • Most Votes


                        17

                        Online

                        11.7k

                        Users

                        11.2k

                        Topics

                        113.1k

                        Posts


                        Copyright 2025 TBD   |   Forum Guidelines   |   Privacy Policy   |   Terms of Service
                        • Login

                        • Don't have an account? Register

                        • Login or register to search.
                        • First post
                          Last post
                        0
                        • MySensors
                        • OpenHardware.io
                        • Categories
                        • Recent
                        • Tags
                        • Popular