Skip to content
  • MySensors
  • OpenHardware.io
  • Categories
  • Recent
  • Tags
  • Popular
Skins
  • Light
  • Brite
  • Cerulean
  • Cosmo
  • Flatly
  • Journal
  • Litera
  • Lumen
  • Lux
  • Materia
  • Minty
  • Morph
  • Pulse
  • Sandstone
  • Simplex
  • Sketchy
  • Spacelab
  • United
  • Yeti
  • Zephyr
  • Dark
  • Cyborg
  • Darkly
  • Quartz
  • Slate
  • Solar
  • Superhero
  • Vapor

  • Default (No Skin)
  • No Skin
Collapse
Brand Logo
  1. Home
  2. My Project
  3. My Relay Module

My Relay Module

Scheduled Pinned Locked Moved My Project
21 Posts 8 Posters 26.0k Views 6 Watching
  • Oldest to Newest
  • Newest to Oldest
  • Most Votes
Reply
  • Reply as topic
Log in to reply
This topic has been deleted. Only users with topic management privileges can see it.
  • Michel - ItM Offline
    Michel - ItM Offline
    Michel - It
    wrote on last edited by Michel - It
    #11

    I downloaded this , https://github.com/mysensors/Arduino . I Submitted libraries entirely within the zip file in my briefcase Arduino library.
    however it from the library is the 1.5 readme. Where am I wrong ?
    il codice è il seguente

    #include <MySensor.h>
    
    #include <SPI.h>
    #include <Bounce2.h>
    
    #define RELAY_PIN 4 // Arduino Digital I/O pin number for relay
    #define BUTTON_PIN 3 // Arduino Digital I/O pin number for button
    #define CHILD_ID 1 // Id of the sensor child
    #define RELAY_ON 1
    #define RELAY_OFF 0
    
    Bounce debouncer = Bounce();
    int oldValue=0;
    bool state;
    MySensor gw;
    MyMessage msg(CHILD_ID,V_LIGHT);
    
    void setup()
    {
    gw.begin(incomingMessage, AUTO, true);
    
    // Send the sketch version information to the gateway and Controller
    gw.sendSketchInfo("Relay & Button", "1.0");
    
    // Setup the button
    pinMode(BUTTON_PIN,INPUT);
    // Activate internal pull-up
    digitalWrite(BUTTON_PIN,HIGH);
    
    // After setting up the button, setup debouncer
    debouncer.attach(BUTTON_PIN);
    debouncer.interval(5);
    
    // Register all sensors to gw (they will be created as child devices)
    gw.present(CHILD_ID, S_LIGHT);
    
    // Make sure relays are off when starting up
    digitalWrite(RELAY_PIN, RELAY_OFF);
    // Then set relay pins in output mode
    pinMode(RELAY_PIN, OUTPUT);
    
    // Set relay to last known state (using eeprom storage)
    state = gw.loadState(CHILD_ID);
    digitalWrite(RELAY_PIN, state?RELAY_ON:RELAY_OFF);
    }
    /*
    * Example on how to asynchronously check for new messages from gw
    */
    void loop()
    {
    gw.process();
    debouncer.update();
    // Get the update value
    int value = debouncer.read();
    if (value != oldValue && value==0) {
    gw.send(msg.set(state?false:true), true); // Send new state and request ack back
    }
    oldValue = value;
    }
    
    void incomingMessage(const MyMessage &message) {
    // We only expect one type of message from controller. But we better check anyway.
    if (message.isAck()) {
    Serial.println("This is an ack from gateway");
    }
    
    if (message.type == V_LIGHT) {
    // Change relay state
    state = message.getBool();
    digitalWrite(RELAY_PIN, state?RELAY_ON:RELAY_OFF);
    // Store state in eeprom
    gw.saveState(CHILD_ID, state);
    
    // Write some debug info
    Serial.print("Incoming change for sensor:");
    Serial.print(message.sensor);
    Serial.print(", New status: ");
    Serial.println(message.getBool());
    }
    }```
    1 Reply Last reply
    0
    • H Offline
      H Offline
      hek
      Admin
      wrote on last edited by
      #12

      mysensors.org/download/

      1 Reply Last reply
      0
      • Michel - ItM Offline
        Michel - ItM Offline
        Michel - It
        wrote on last edited by
        #13

        thank you! I apologize for my level , I hope to fix with your help.

        1 Reply Last reply
        0
        • Michel - ItM Offline
          Michel - ItM Offline
          Michel - It
          wrote on last edited by Michel - It
          #14

          Here is the improved code that I used on my Arduino Mega to create a home automation controller

          New optimized code to arduino mega

          https://codebender.cc/sketch:206446

          1 Reply Last reply
          0
          • Michel - ItM Offline
            Michel - ItM Offline
            Michel - It
            wrote on last edited by Michel - It
            #15

            Update: Forget it, the code works with Arduino Mini and 2 relay. I tried one after the code of Arduino Mega and not working. Something wrong but I do not know what I require help
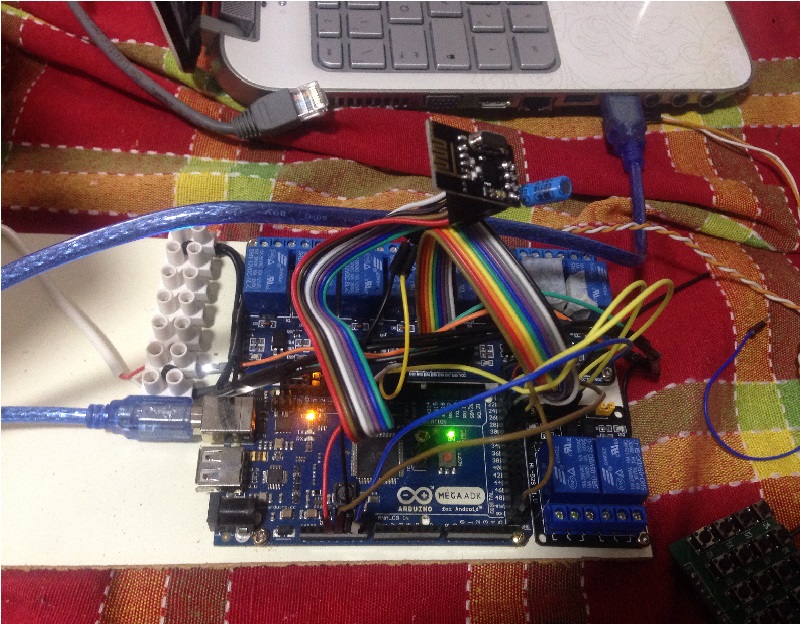
            picture.jpg

            I found mistakes on Arduino Mega solvable at the following link
            http://forum.mysensors.org/topic/2161/the-mysensor-1-5-code-is-not-compiling-for-my-arduino-mega-2560-board/1
            but I do not have this kind of problem you can get support? I connected NRF24L01 to Arduino Mega, as if it were an Arduino Nano, right?

            1 Reply Last reply
            0
            • H Offline
              H Offline
              hek
              Admin
              wrote on last edited by
              #16

              The SPI pins has different pin numbers on the Mega.

              Here is an example that runs the the Mega:
              http://www.mysensors.org/build/scene_controller

              1 Reply Last reply
              0
              • Michel - ItM Offline
                Michel - ItM Offline
                Michel - It
                wrote on last edited by
                #17

                I connected the radio module as follows

                AtMega 2650 Arduino Step Down Module/Radio
                GND > GND
                5V > Step Down module VCC
                14 > SCK
                15 > MOSI
                16 > MISO
                17 > CE
                18 > CSN
                I tried but it did not work I tried to connect also IrQ
                2 > IRQ
                it did not work. I tried to connect to 3v3 with the capacitor. it did not work. I tried adding the line in the code
                #include <MyTransportNRF24.h>
                #include <MyHwATMega328.h>
                but to no avail. I am groping in the dark

                1 Reply Last reply
                0
                • H Offline
                  H Offline
                  hek
                  Admin
                  wrote on last edited by
                  #18

                  You haven't said what problem you experience. Logs or anything else...

                  1 Reply Last reply
                  0
                  • Michel - ItM Offline
                    Michel - ItM Offline
                    Michel - It
                    wrote on last edited by Michel - It
                    #19

                    I have "check wires" error on the serial arduino....
                    where do I fit in debug mode there is a guide?
                    I saw a video that uses MQTT program on mac.
                    I have downloaded windows MYSController I can be of help? How do I connect my PC? It is all new and are a little confused. :dizzy_face: :u7a7a:

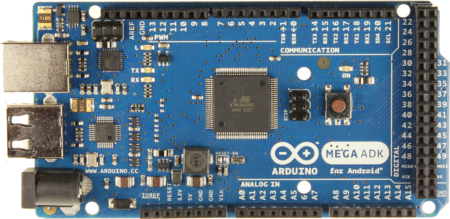
                    I "atmega adk" is a problem?
                    https://www.arduino.cc/en/uploads/Main/ArduinoADK_R3_Front_450px.jpg

                    1 Reply Last reply
                    0
                    • P Offline
                      P Offline
                      pjr
                      wrote on last edited by
                      #20

                      Have you defined using softspi since using those pins?

                      I'm using different pins with mega and everything started to work after adding capacitor to radio:
                      GND > GND
                      3.3 > VCC
                      52 > SCK
                      51 > MOSI
                      50 > MISO
                      9 > CE
                      10 > CSN
                      2 > IRQ

                      1 Reply Last reply
                      0
                      • Michel - ItM Offline
                        Michel - ItM Offline
                        Michel - It
                        wrote on last edited by Michel - It
                        #21

                        soon as I finish the project it will create a new post in the category myproject
                        @pjr unfortunately I read your seat now but I confirm that pins are those that use exact thank - @salvato that helped me as an angel.

                        the irq pin does not need to be connected

                        1 Reply Last reply
                        0

                        Hello! It looks like you're interested in this conversation, but you don't have an account yet.

                        Getting fed up of having to scroll through the same posts each visit? When you register for an account, you'll always come back to exactly where you were before, and choose to be notified of new replies (either via email, or push notification). You'll also be able to save bookmarks and upvote posts to show your appreciation to other community members.

                        With your input, this post could be even better 💗

                        Register Login
                        Reply
                        • Reply as topic
                        Log in to reply
                        • Oldest to Newest
                        • Newest to Oldest
                        • Most Votes


                        20

                        Online

                        12.0k

                        Users

                        11.2k

                        Topics

                        113.4k

                        Posts


                        Copyright 2025 TBD   |   Forum Guidelines   |   Privacy Policy   |   Terms of Service
                        • Login

                        • Don't have an account? Register

                        • Login or register to search.
                        • First post
                          Last post
                        0
                        • MySensors
                        • OpenHardware.io
                        • Categories
                        • Recent
                        • Tags
                        • Popular