Sensor for Vallox DigitSE RS485 ventilation system with integration into FHEM.
-
No, the Windows PC was only for testing and verifying that the RS485 Connection workes well.
My preferred solution would be this stick at the Raspberry Pi which is running the FHEM. Therefor I'd need a module to read the stream and interpret it in the FHEM format. Problem: I've never written a module. It would be possible somehow.. in some month. ;)
The alternate solution would be your mysensor system. Especially because its running and tested. Problem: The Hardware. I have no experience in arduino and absolutly no idea how to build such a board. Thats why I thought I could plug the stick to an arduino and make it magicly work. ;)
EDIT: Ok. It is easier than I thought to write this module. I'm working on it and the main functions should be finished this week. I'll publish it, if it is ready for testing.
Ah ok I see. Probably you can get some help in the fhem forum. I also thought about doing this using a raspi... you could use the library to write a standalone exe which reads the serial stuff from usb and sets the values in fhem using the webinterface.
-
Hi,
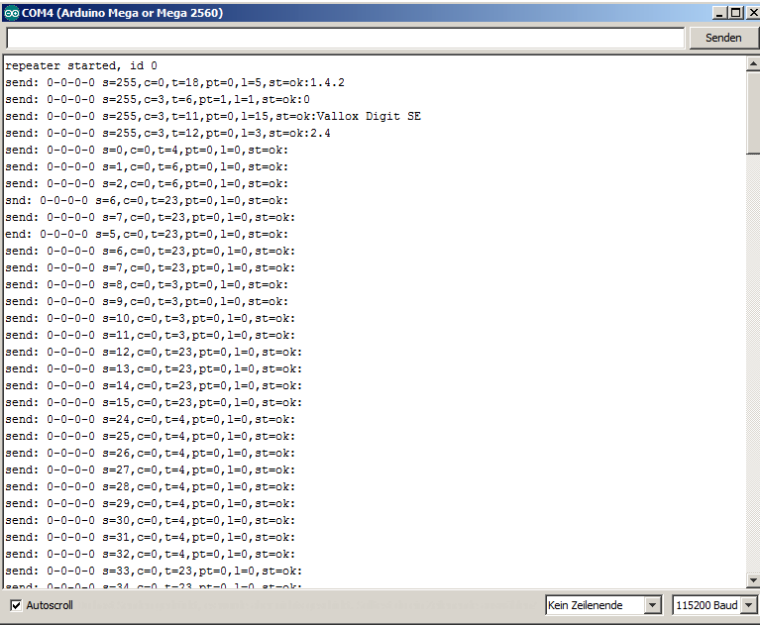
here is my output:Opening port Port open Starting repeater (RNNRA-, 2.0.0) TSM:INIT TSM:RADIO:OK TSP:ASSIGNID:OK (ID=100) TSM:FPAR TSP:MSG:SEND 100-100-255-255 s=255,c=3,t=7,pt=0,l=0,sg=0,ft=0,st=bc: TSP:MSG:READ 1-1-100 s=255,c=3,t=8,pt=1,l=1,sg=0:1 TSP:MSG:FPAR RES (ID=1, dist=1) TSP:MSG:PAR OK (ID=1, dist=2) TSP:MSG:READ 0-0-100 s=255,c=3,t=8,pt=1,l=1,sg=0:0 TSP:MSG:FPAR RES (ID=0, dist=0) TSP:MSG:PAR OK (ID=0, dist=1) TSP:MSG:READ 104-104-100 s=255,c=3,t=8,pt=1,l=1,sg=0:1 TSP:MSG:FPAR RES (ID=104, dist=1) TSP:MSG:READ 1-1-100 s=255,c=3,t=8,pt=1,l=1,sg=0:1 TSP:MSG:FPAR RES (ID=1, dist=1) TSM:FPAR:OK TSM:ID TSM:CHKID:OK (ID=100) TSM:UPL TSP:PING:SEND (dest=0) TSP:MSG:SEND 100-100-0-0 s=255,c=3,t=24,pt=1,l=1,sg=0,ft=0,st=ok:1 TSP:MSG:READ 0-0-100 s=255,c=3,t=25,pt=1,l=1,sg=0:1 TSP:MSG:PONG RECV (hops=1) TSP:CHKUPL:OK TSM:UPL:OK TSM:READY TSP:MSG:SEND 100-100-0-0 s=255,c=3,t=15,pt=6,l=2,sg=0,ft=0,st=ok:0100 !TSP:MSG:SEND 100-100-0-0 s=255,c=0,t=18,pt=0,l=5,sg=0,ft=0,st=fail:2.0.0 TSP:MSG:SEND 100-100-0-0 s=255,c=3,t=6,pt=1,l=1,sg=0,ft=1,st=ok:0 TSP:MSG:READ 0-0-100 s=255,c=3,t=6,pt=0,l=1,sg=0:M TSP:MSG:SEND 100-100-0-0 s=255,c=3,t=11,pt=0,l=15,sg=0,ft=0,st=ok:Vallox Digit SE TSP:MSG:SEND 100-100-0-0 s=255,c=3,t=12,pt=0,l=3,sg=0,ft=0,st=ok:2.5 TSP:MSG:SEND 100-100-0-0 s=0,c=0,t=4,pt=0,l=0,sg=0,ft=0,st=ok: TSP:MSG:SEND 100-100-0-0 s=1,c=0,t=6,pt=0,l=0,sg=0,ft=0,st=ok: TSP:MSG:SEND 100-100-0-0 s=2,c=0,t=6,pt=0,l=0,sg=0,ft=0,st=ok: TSP:MSG:SEND 100-100-0-0 s=3,c=0,t=6,pt=0,l=0,sg=0,ft=0,st=ok: TSP:MSG:SEND 100-100-0-0 s=4,c=0,t=6,pt=0,l=0,sg=0,ft=0,st=ok: TSP:MSG:SEND 100-100-0-0 s=5,c=0,t=23,pt=0,l=0,sg=0,ft=0,st=ok: TSP:MSG:SEND 100-100-0-0 s=6,c=0,t=23,pt=0,l=0,sg=0,ft=0,st=ok: TSP:MSG:SEND 100-100-0-0 s=7,c=0,t=23,pt=0,l=0,sg=0,ft=0,st=ok: TSP:MSG:SEND 100-100-0-0 s=8,c=0,t=3,pt=0,l=0,sg=0,ft=0,st=ok: TSP:MSG:SEND 100-100-0-0 s=9,c=0,t=3,pt=0,l=0,sg=0,ft=0,st=ok: TSP:MSG:SEND 100-100-0-0 s=10,c=0,t=3,pt=0,l=0,sg=0,ft=0,st=ok: TSP:MSG:SEND 100-100-0-0 s=11,c=0,t=3,pt=0,l=0,sg=0,ft=0,st=ok: TSP:MSG:SEND 100-100-0-0 s=12,c=0,t=23,pt=0,l=0,sg=0,ft=0,st=ok: TSP:MSG:SEND 100-100-0-0 s=13,c=0,t=23,pt=0,l=0,sg=0,ft=0,st=ok: TSP:MSG:SEND 100-100-0-0 s=14,c=0,t=23,pt=0,l=0,sg=0,ft=0,st=ok: TSP:MSG:SEND 100-100-0-0 s=15,c=0,t=23,pt=0,l=0,sg=0,ft=0,st=ok: TSP:MSG:SEND 100-100-0-0 s=24,c=0,t=4,pt=0,l=0,sg=0,ft=0,st=ok: TSP:MSG:SEND 100-100-0-0 s=25,c=0,t=4,pt=0,l=0,sg=0,ft=0,st=ok: TSP:MSG:SEND 100-100-0-0 s=26,c=0,t=4,pt=0,l=0,sg=0,ft=0,st=ok: TSP:MSG:SEND 100-100-0-0 s=27,c=0,t=4,pt=0,l=0,sg=0,ft=0,st=ok: TSP:MSG:SEND 100-100-0-0 s=28,c=0,t=4,pt=0,l=0,sg=0,ft=0,st=ok: TSP:MSG:SEND 100-100-0-0 s=29,c=0,t=4,pt=0,l=0,sg=0,ft=0,st=ok: TSP:MSG:SEND 100-100-0-0 s=30,c=0,t=4,pt=0,l=0,sg=0,ft=0,st=ok: TSP:MSG:SEND 100-100-0-0 s=31,c=0,t=4,pt=0,l=0,sg=0,ft=0,st=ok: TSP:MSG:SEND 100-100-0-0 s=32,c=0,t=4,pt=0,l=0,sg=0,ft=0,st=ok: TSP:MSG:SEND 100-100-0-0 s=33,c=0,t=23,pt=0,l=0,sg=0,ft=0,st=ok: TSP:MSG:SEND 100-100-0-0 s=34,c=0,t=23,pt=0,l=0,sg=0,ft=0,st=ok: TSP:MSG:SEND 100-100-0-0 s=35,c=0,t=23,pt=0,l=0,sg=0,ft=0,st=ok: TSP:MSG:SEND 100-100-0-0 s=36,c=0,t=23,pt=0,l=0,sg=0,ft=0,st=ok: TSP:MSG:SEND 100-100-0-0 s=37,c=0,t=23,pt=0,l=0,sg=0,ft=0,st=ok: TSP:MSG:SEND 100-100-0-0 s=38,c=0,t=23,pt=0,l=0,sg=0,ft=0,st=ok: TSP:MSG:SEND 100-100-0-0 s=39,c=0,t=23,pt=0,l=0,sg=0,ft=0,st=ok: TSP:MSG:SEND 100-100-0-0 s=40,c=0,t=4,pt=0,l=0,sg=0,ft=0,st=ok: TSP:MSG:SEND 100-100-0-0 s=41,c=0,t=23,pt=0,l=0,sg=0,ft=0,st=ok: TSP:MSG:SEND 100-100-0-0 s=42,c=0,t=23,pt=0,l=0,sg=0,ft=0,st=ok: TSP:MSG:SEND 100-100-0-0 s=43,c=0,t=23,pt=0,l=0,sg=0,ft=0,st=ok: TSP:MSG:SEND 100-100-0-0 s=44,c=0,t=23,pt=0,l=0,sg=0,ft=0,st=ok: TSP:MSG:SEND 100-100-0-0 s=45,c=0,t=23,pt=0,l=0,sg=0,ft=0,st=ok: TSP:MSG:SEND 100-100-0-0 s=46,c=0,t=23,pt=0,l=0,sg=0,ft=0,st=ok: TSP:MSG:SEND 100-100-0-0 s=47,c=0,t=23,pt=0,l=0,sg=0,ft=0,st=ok: TSP:MSG:SEND 100-100-0-0 s=48,c=0,t=23,pt=0,l=0,sg=0,ft=0,st=ok: TSP:MSG:SEND 100-100-0-0 s=49,c=0,t=23,pt=0,l=0,sg=0,ft=0,st=ok: Started cyclic update timer. Request registration... TSP:MSG:SEND 100-100-0-0 s=255,c=3,t=26,pt=1,l=1,sg=0,ft=0,st=ok:2 TSP:MSG:READ 0-0-100 s=255,c=3,t=27,pt=1,l=1,sg=0:1 Node registration=1 Init complete, id=100, parent=0, distance=1, registration=1 Dropped 0 Received telegram from 21->11 command=0 arg=A3 Received telegram from 11->21 command=A3 arg=29 Property 200 changed 41 Power state 1 TSP:MSG:SEND 100-100-0-0 s=8,c=1,t=2,pt=2,l=2,sg=0,ft=0,st=ok:1 CO2 adjust state 0 TSP:MSG:SEND 100-100-0-0 s=9,c=1,t=2,pt=2,l=2,sg=0,ft=0,st=ok:0 Humidity adjust state 0 TSP:MSG:SEND 100-100-0-0 s=10,c=1,t=2,pt=2,l=2,sg=0,ft=0,st=ok:0 Heating state 1 TSP:MSG:SEND 100-100-0-0 s=11,c=1,t=2,pt=2,l=2,sg=0,ft=0,st=ok:1 Filter guard indicator 0 TSP:MSG:SEND 100-100-0-0 s=12,c=1,t=24,pt=2,l=2,sg=0,ft=0,st=ok:0 Heating indicator 1 TSP:MSG:SEND 100-100-0-0 s=13,c=1,t=24,pt=2,l=2,sg=0,ft=0,st=ok:1 Fault indicator 0 TSP:MSG:SEND 100-100-0-0 s=14,c=1,t=24,pt=2,l=2,sg=0,ft=0,st=ok:0 Serivce reminder indicator 0 TSP:MSG:SEND 100-100-0-0 s=15,c=1,t=24,pt=2,l=2,sg=0,ft=0,st=ok:0 Received telegram from 21->11 command=0 arg=29 Received telegram from 11->21 command=29 arg=1 Received telegram from 21->11 command=0 arg=35 Received telegram from 11->21 command=35 arg=9D Temp incomming 19 TSP:MSG:SEND 100-100-0-0 s=4,c=1,t=0,pt=2,l=2,sg=0,ft=0,st=ok:19 Received telegram from 21->11 command=0 arg=71 Received telegram from 11->21 command=71 arg=0 Received telegram from 21->11 command=0 arg=A3 Received telegram from 11->21 command=A3 arg=29This is the output of the mysensors 2.0 version which can be downloaded from
https://github.com/windkh/mysensors/tree/master/ValloxSensorI wonder why your node has id=0.
-
Hi, my output ist now:
0 MCO:BGN:INIT REPEATER,CP=RNNRA--,VER=2.1.1
3 TSM:INIT
4 TSF:WUR:MS=0
12 TSM:INIT:TSP OK
13 TSF:SID:OK,ID=42
15 TSM:FPAR
52 TSF:MSG:SEND,42-42-255-255,s=255,c=3,t=7,pt=0,l=0,sg=0,ft=0,st=OK:
2059 !TSM:FPAR:NO REPLY
2061 TSM:FPAR
2098 TSF:MSG:SEND,42-42-255-255,s=255,c=3,t=7,pt=0,l=0,sg=0,ft=0,st=OK:
4105 !TSM:FPAR:NO REPLY
4107 TSM:FPAR
4143 TSF:MSG:SEND,42-42-255-255,s=255,c=3,t=7,pt=0,l=0,sg=0,ft=0,st=OK:
6151 !TSM:FPAR:NO REPLY
6153 TSM:FPAR
6189 TSF:MSG:SEND,42-42-255-255,s=255,c=3,t=7,pt=0,l=0,sg=0,ft=0,st=OK:
8197 !TSM:FPAR:FAIL
8198 TSM:FAIL:CNT=1
8200 TSM:FAIL:PDT
18203 TSM:FAIL:RE-INIT
18205 TSM:INIT
18212 TSM:INIT:TSP OK
18214 TSF:SID:OK,ID=42
18216 TSM:FPAR
18253 TSF:MSG:SEND,42-42-255-255,s=255,c=3,t=7,pt=0,l=0,sg=0,ft=0,st=OK:
20261 !TSM:FPAR:NO REPLY
20263 TSM:FPAR
20300 TSF:MSG:SEND,42-42-255-255,s=255,c=3,t=7,pt=0,l=0,sg=0,ft=0,st=OK:
22307 !TSM:FPAR:NO REPLY
22309 TSM:FPAR
22346 TSF:MSG:SEND,42-42-255-255,s=255,c=3,t=7,pt=0,l=0,sg=0,ft=0,st=OK:
24353 !TSM:FPAR:NO REPLY
24355 TSM:FPAR
24392 TSF:MSG:SEND,42-42-255-255,s=255,c=3,t=7,pt=0,l=0,sg=0,ft=0,st=OK:I get no reply from the Vallox.
Is your original Vallox controller online -
The "no reply" message is from the mysensors library, but I don't know what it means.
The line "started cyclic update timer" indicates that the sensor initialized successfully, but it is missing in your output.My latest code is online at
https://github.com/windkh/valloxserial/blob/master/examples/mysensors/ValloxSensor.ino -
For those who want to have the FHEM files here they are:
_MYSENSOR_Vallox.cfg
simply place the file in FHEM's subfolder FHEM and include it your fhem.cfg:include ./FHEM/_MYSENSOR_Vallox.cfgAnd here are the plot files which have to be placed in the subfolder www\gplot
SVG_FileLog_Vallox_6.gplot
SVG_FileLog_Vallox_5.gplot
SVG_FileLog_Vallox_4.gplot
SVG_FileLog_Vallox_3.gplot
SVG_FileLog_Vallox_2.gplot
SVG_FileLog_Vallox_1.gplotYou will likely have to adapt the room and group names, and of course the german names, sorry for that.
-
Hello Heinz, all,
first of all thank you for sharing your work in this thread!
I have not to much skills around programming and arduino, but was however able to build this and integrate my Vallox 90 SE into ioBroker. Absolutely Great!
You mentioned the bypass damper above and I see you have visualized it in fhem. I found the Value to set the Threshold temp for this (31), however I wonder where you got the actual bypass position from. Which Value shows if its open or closed?
I do not want to control it, i just would like to log the Position Status to see when it happens.Thanks a lot i feel blind :)
Hi @captaindork
sorry for delay,.... the position of the damper (which is the bypass) is indicated through a single bit of the multi purpose IO-Port 2. The library defines that as property 38 DamperMotorPositionProperty.
In the mysensors example it is published as
const uint8_t DAMPER_MOTOR_POSITION = 42;
The value is either 1 or 0.I mapped it in FHEM as follows
attr MYSENSOR_Vallox mapReading_DamperMotorPosition 42 value1define MYSENSOR_Vallox_DamperMotorPosition dummy attr MYSENSOR_Vallox_DamperMotorPosition alias WRG-Bypass attr MYSENSOR_Vallox_DamperMotorPosition devStateIcon 1:rc_GREEN 0:rc_BLANK attr MYSENSOR_Vallox_DamperMotorPosition event-on-update-reading state attr MYSENSOR_Vallox_DamperMotorPosition group Status attr MYSENSOR_Vallox_DamperMotorPosition icon vent_bypass attr MYSENSOR_Vallox_DamperMotorPosition room Lüftung attr MYSENSOR_Vallox_DamperMotorPosition sortby 3 define MYSENSOR_Vallox_DamperMotorPosition_Notify notify MYSENSOR_Vallox:DamperMotorPosition:.* { my $d = sprintf ("%.0f", ReadingsVal("MYSENSOR_Vallox","DamperMotorPosition", 0));; fhem("set MYSENSOR_Vallox_DamperMotorPosition $d");;} define MYSENSOR_Vallox_DamperMotorPosition_Notify2 at +*00:01:00 { my $d = sprintf "%.0f", ReadingsVal("MYSENSOR_Vallox","DamperMotorPosition", 0);; fhem("set MYSENSOR_Vallox_DamperMotorPosition $d");;} -
Ok ... after my holidays.
-
Well basically the part list is very simple
1x Arduino Mega 2560
1x NRF24L01+
1x Pushbutton
2x MAX485 Module TTL Switch Module (one for sender, one for receiver)
(e.g. https://protosupplies.com/product/max485-ttl-to-rs-485-interface-module/)The 1x Resistor 120Ohms is only neccessary if not already mounted on the MAX485 Module. It depends on what module
you bought. So have a look at the layout and check if there is a 120Ohms resistor mounted between pins A and B.
The module (https://protosupplies.com/product/max485-ttl-to-rs-485-interface-module/) already contains that resistor.Optionally you can add a capacitor between + and - to stabilize the voltage level if your power supply is a weak one.
Anyone will do like 10uF, 100uF... -
Note that you can make use of any MAX485 module that is suitable for the arduino (5V). Basically they are all the same except for a few minor tweaks like LEDs or other non relevant stuff.
-
I found this old thread and since I have a Vallox machine it's interesting. RS485 is new to me but MySensors isn't.
Can I have a node like this described by Heinz parallel with the "mickey mouse"-display? Using the display's connector? Or is it one or the other?
I'd feel better having both (manual display&buttons and connection to MySensors=>Domoticz, in my case).