Recently we had a Hackathon event at our office and where we showcase open source MySensors wireless network capability along with pimatic controller running on sweet pi.
D
Dheeraj Khajuria
@Dheeraj
Posts
-
Hackathon @Office showcasing Mysensors capability -
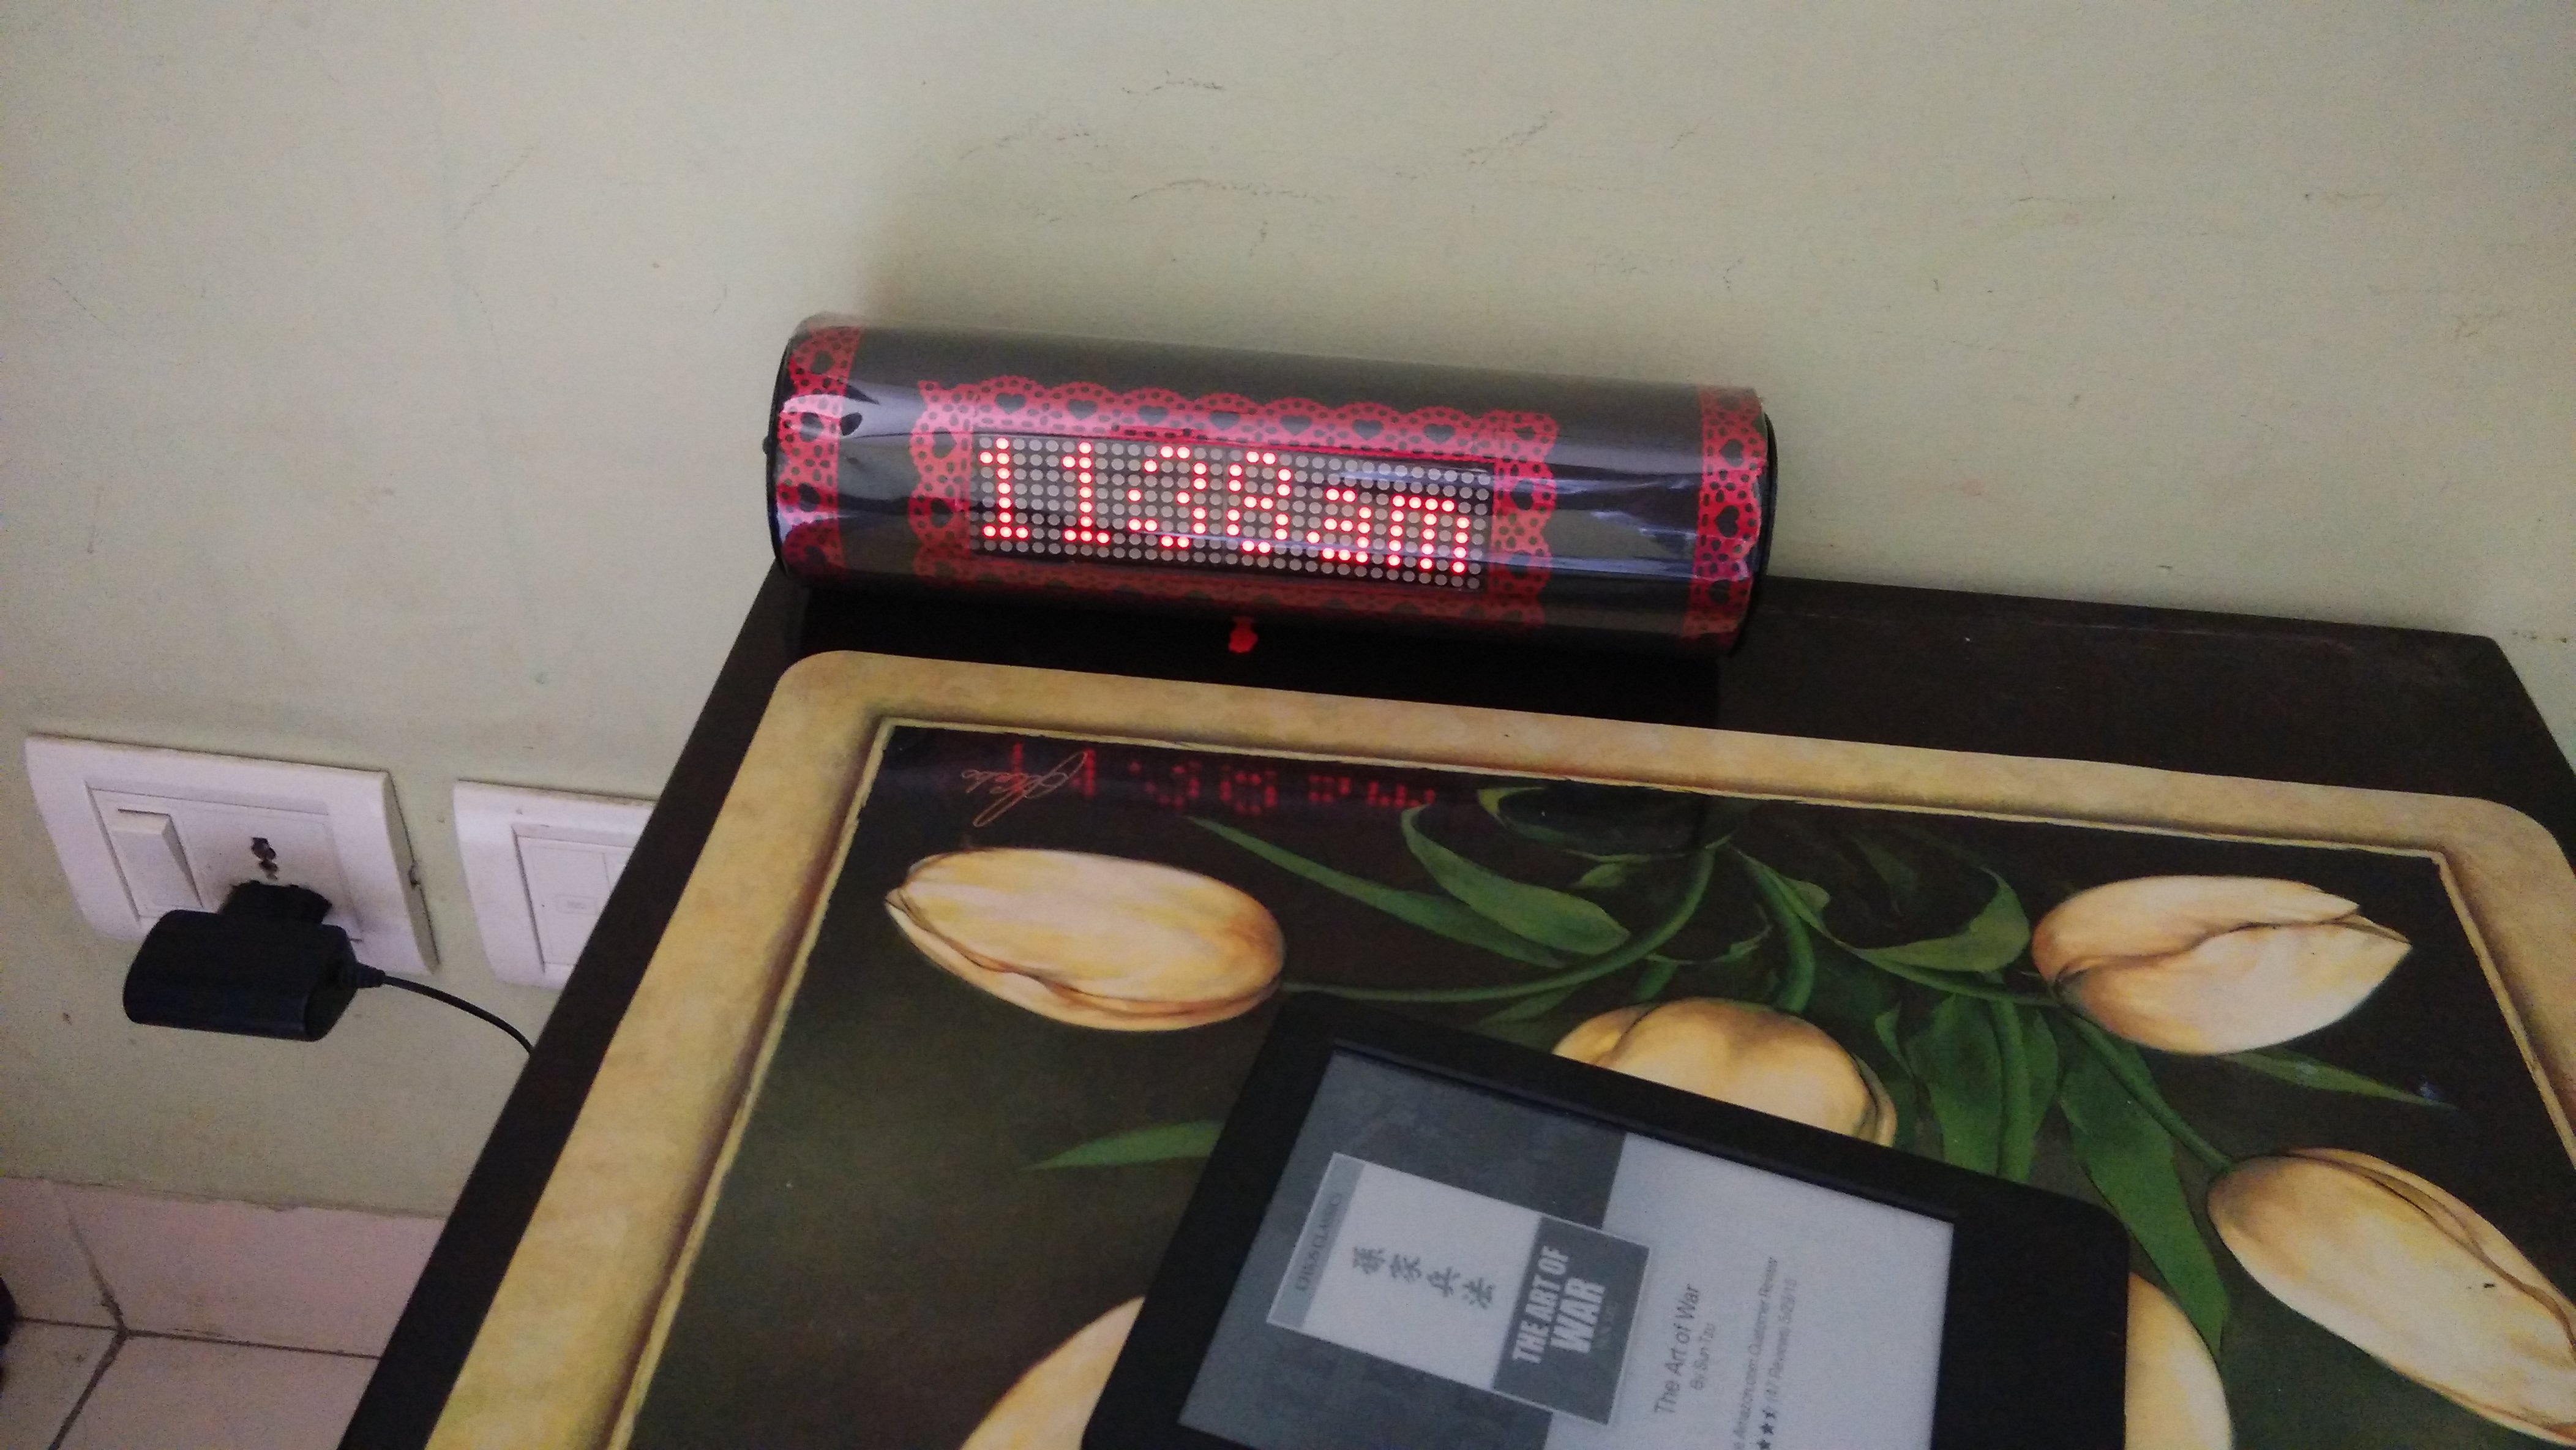
SmartClockSmartclock based on timer based mysensors node, which fetches time in unix second from pimatic controller.
Smartclock made from following components.
- 4 cascade matrix led 8x8.
- DHT11 for temperature
- Li polymer 4000 mh battery.
- PIR sensor for motion detection.
- Shuttle box.. :-)
- misc..
SmartDisplay shows following info based on controller 's rules.
- Time to office using bing map api.
- Outside home temp, hum etc.
- Online weather forecast information.
- Any online information can be displayed like stock tick etc.
Smartclock clock has temperature sensor DHT11 and a motion PIR sensor to detect movement.
-
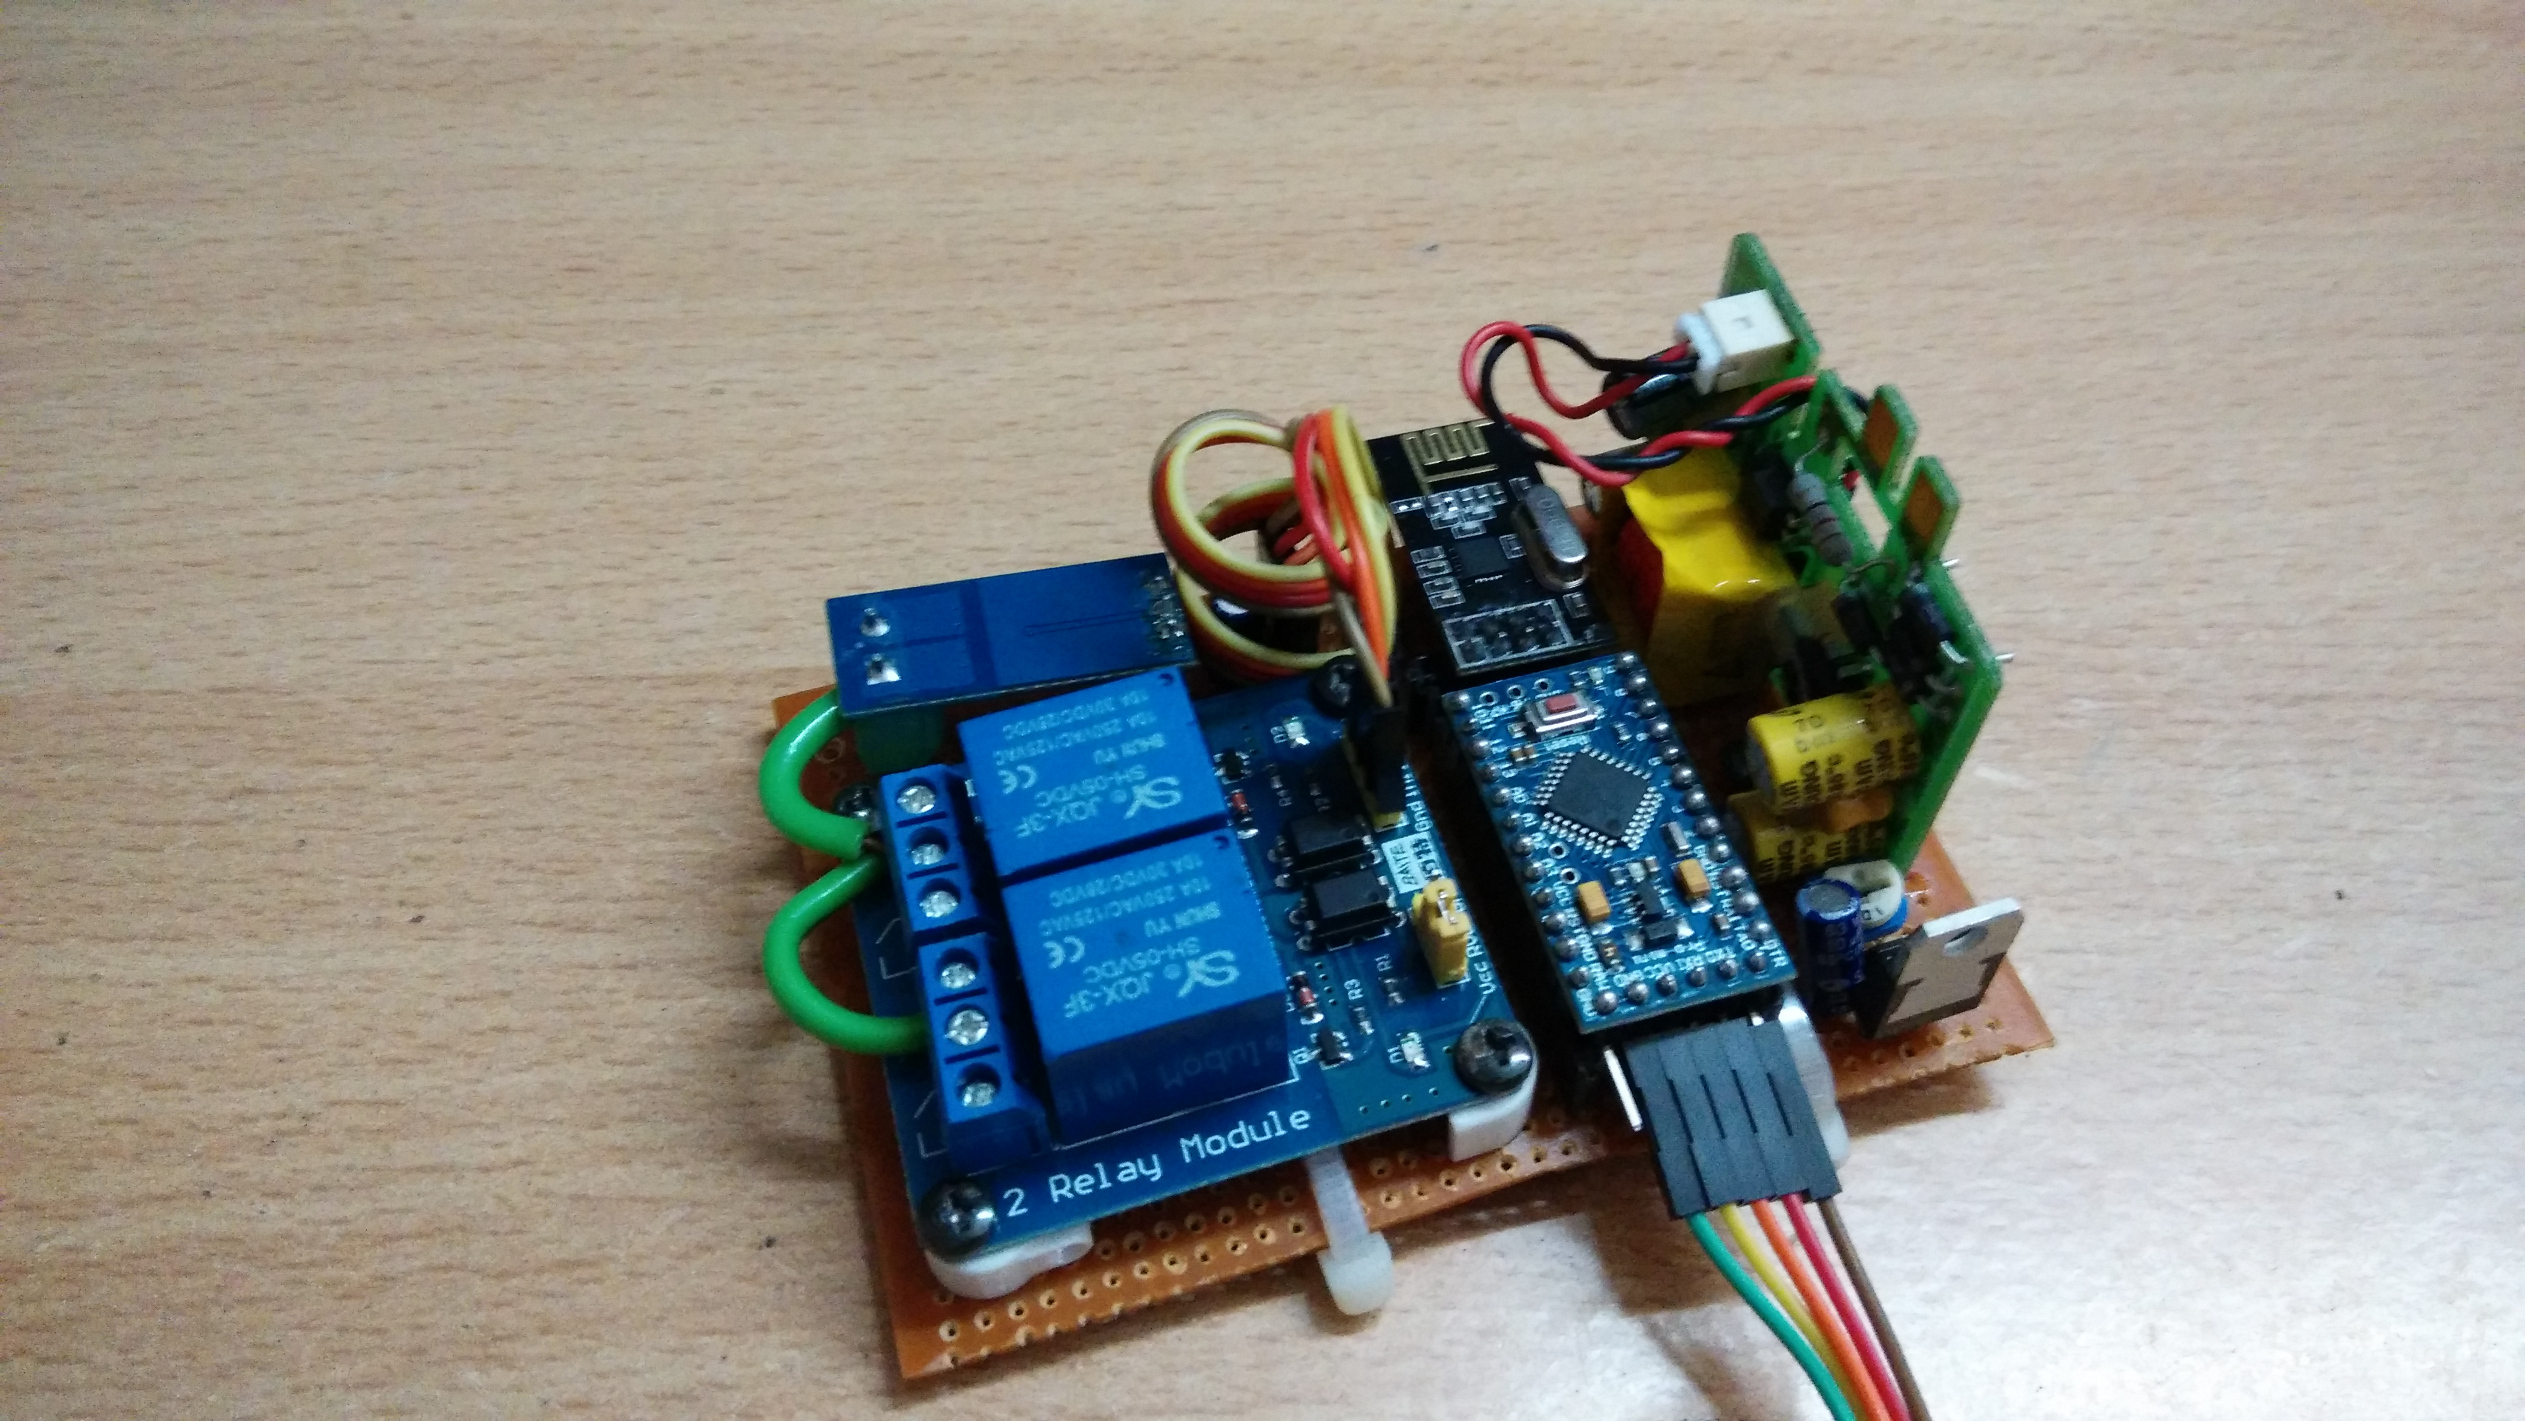
Relay with ACS712attempt over last week , circuit board with 2x relay actuator and hall current sensor ( acs712 ) and step down transformer. The most challenging part is how to pack your creation in a nice box. ;)
-
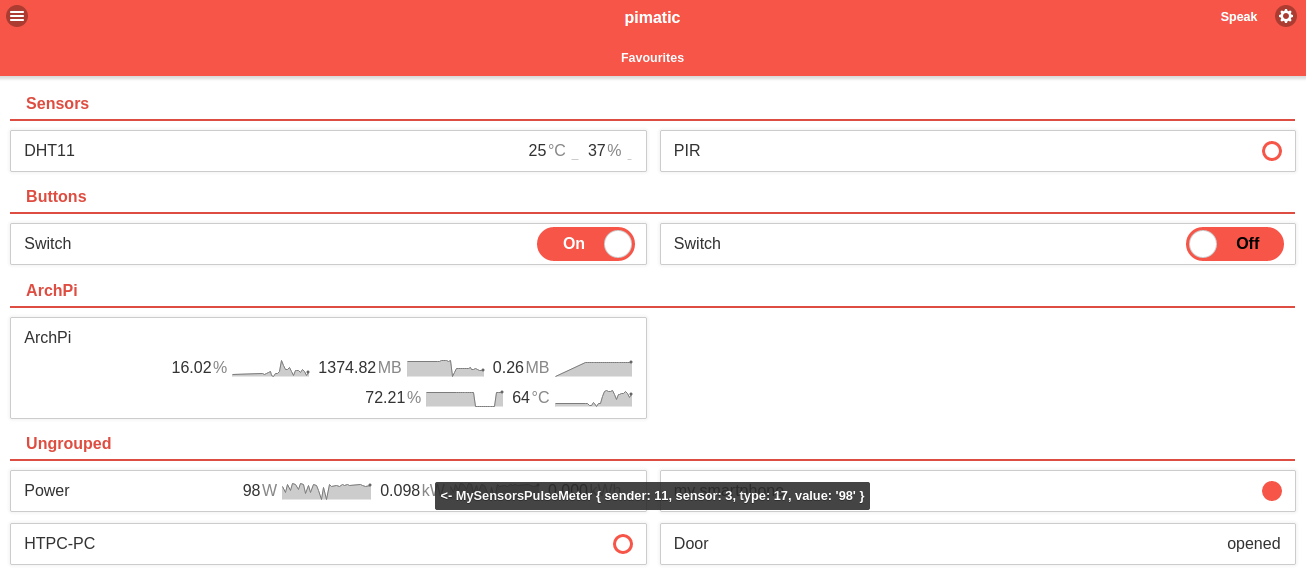
pimatic-mysensors controller pluginCreated controller plugin for pimatic https://github.com/DheerajKhajuria/pimatic-MySensors
pimatic is a home automation framework that runs on node.js. It provides a common extensible platform for home control and automation tasks.
Uniform interface
It defines several schemata for different home devices and sensors, so that all devices can be controlled uniform and are presented in a common interface.
Automation by rules
Automation tasks can be defined by rules in the form of "if this then that", where the "this" and the "that" part can be fully custemized by plugins. See the rule page for more details.
Web-based interface
The mobile frontend plugin provides a nice web frontend with a sensor overview, device control and rule definition. The web interface is build using express and jQuery Mobile.
Extensible
pimatic is extensible by various plugins adding features and integrating existing hardware and software.
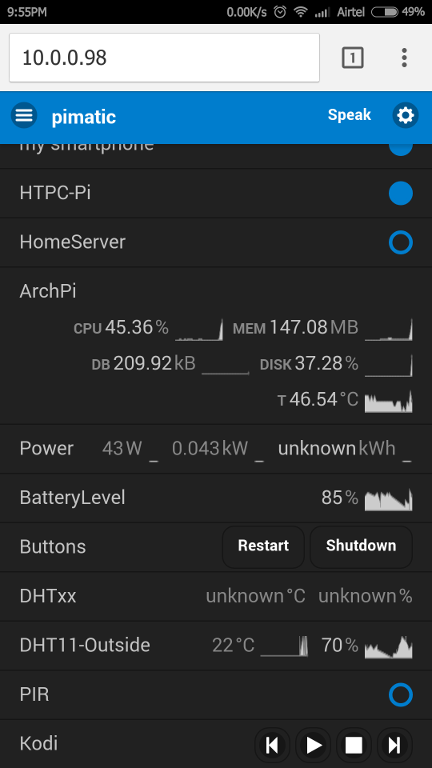
web based Interface
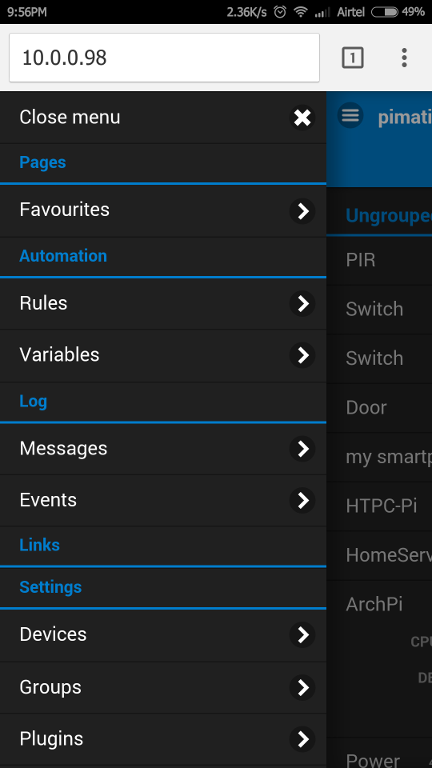
Flexible home Automation Rules
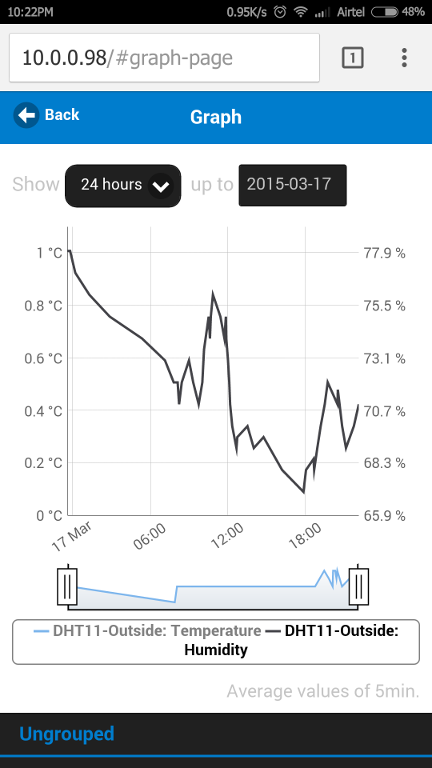
Graphs
Steps to install pimatic
Now I would say let's begin with setting up Pimatic from scratch :
You can either check the instructions on the Pimatic website http://www.pimatic.org/guide/getting-started/ or follow these steps.
If you are using a Raspberry Pi, get the latest Wheezy Image or what ever you like from here : http://downloads.raspberrypi.org
Then write this image with this tool Win32DiskImager to your SD-Card.
Now set up your Pi with sudo raspi-config and do the usual updates with
sudo apt-get update
sudo apt-get upgrade
sudo rpi-updateYou're ready to install Pimatic :) Go ahead with the following 19 steps :
1.) wget http://nodejs.org/dist/v0.10.24/node-v0.10.24-linux-arm-pi.tar.gz -P /tmp
2.) cd /usr/local
3.) sudo tar xzvf /tmp/node-v0.10.24-linux-arm-pi.tar.gz --strip=1
4.) sudo apt-get install build-essential
5.) mkdir /home/pi/pimatic-app
6.) cd /home/pi/
7.) npm install pimatic --prefix pimatic-app --production
8.) cd pimatic-app
9.) cp node_modules/pimatic/config_default.json config.json
10.) sudo nano /home/pi/pimatic-app/config.json (very important :insert admin password!!! otherwise pimatic won't start and comes up with an error message)11.) sudo chmod 777 /home/pi/pimatic-app/
12.) sudo reboot
13.) cd ./pimatic-app/node_modules/pimatic
14.) sudo npm link
15.) wget https://raw.github.com/pimatic/pimatic/master/install/pimatic-init-d
16.) sudo cp pimatic-init-d /etc/init.d/pimatic
17.) sudo chmod +x /etc/init.d/pimatic
18.) sudo chown root:root /etc/init.d/pimatic
19.) sudo update-rc.d pimatic defaultsNow you are ready to start pimatic for the first time!
There are three ways to start pimatic generally.Automatically at system start (since we daemonized Pimatic with the entries in init-d)
With the command sudo service pimatic start (will run Pimatic as daemon / service in the background)
With the command sudo pimatic.js (can be executed everywhere, since we globalized it)
For the first start i recommend to use option 3 since Pimatic will do some compiling and setting up things. this may take a while, so you are able to watch the debug outputs on the console screen and see what Pimatic is doing actually.
If you run sudo "service pimatic start" you won't get any debug messages since Pimatic will run in the background.When Pimatic is through with all the setup stuff, you will see a message like that :
Now you can access the Pimatic gui via browser by entering the IP of your pi and go ahead with the further setup = > Step 2 - GUI overview
For pimatic plugins : http://pimatic.org/pages/plugins/
Support following pimatic-mysensors sensors
-
Temperature and Humidity ( http://mysensors.org/build/humidity)
-
Temperature and Pressure ( http://mysensors.org/build/pressure)
-
Motion ( http://mysensors.org/build/motion )
-
Relay-Actuator ( http://www.mysensors.org/build/relay )
-
|TimeAware Sensor support ( Unix time seconds )
-
Binary buttom ( http://www.mysensors.org/build/binary )
-
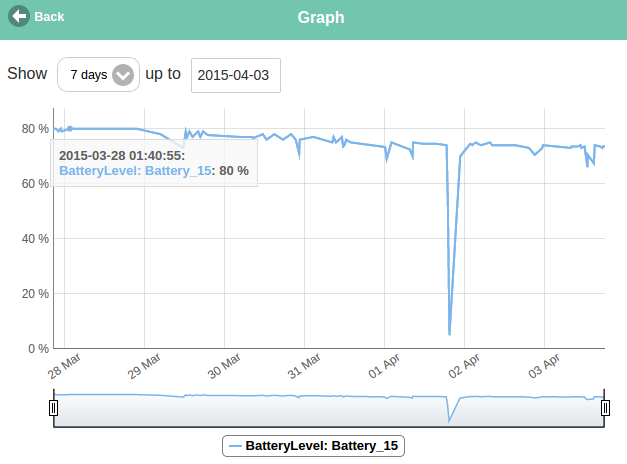
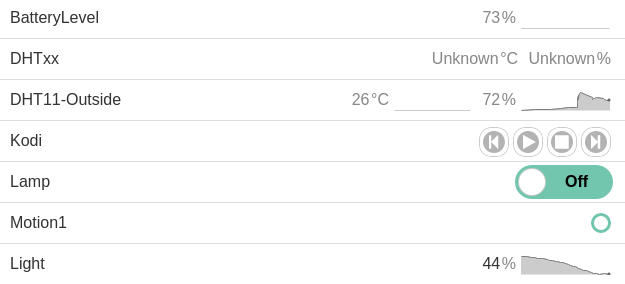
Battery level of sensors
-
PulseMeter ( experimental only support wattage )
-
Light Sensor
-
-
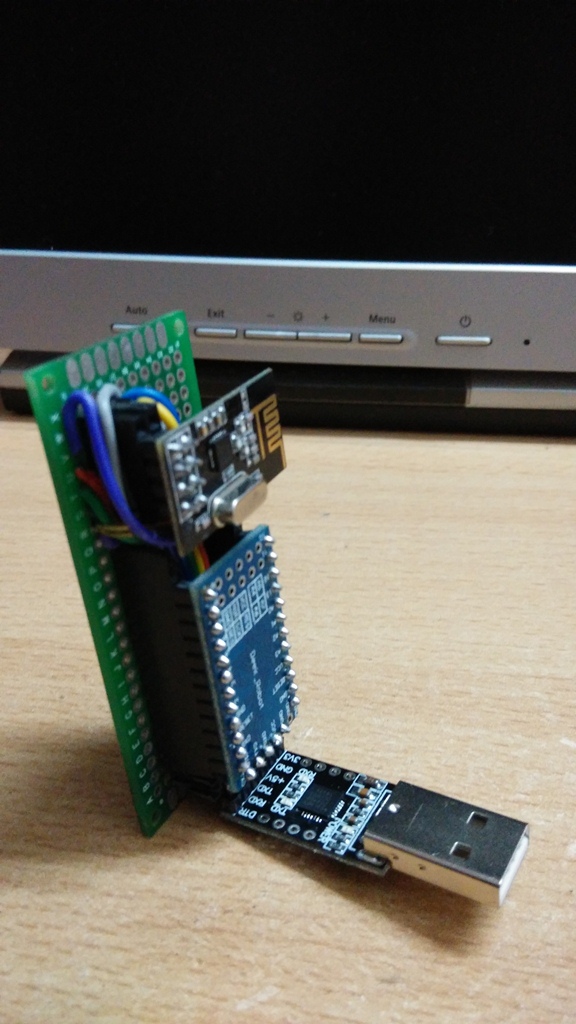
Handy Serial Gateway for testing.Yet another serial gateway working without wires clutter.
-
Node-Red as Controllerwhere are you storing the sensor data for presentation , stream. let me know which database you are using here? you can have another flows for sending the the request to sensor node via serial port. I tried it same some time back . may be i can share it here. :smiley:
-
pimatic-mysensors controller plugin@hek @bjornhallberg
added support for relay-actuator module :)Module supported..
Temperature and Humidity ( http://mysensors.org/build/humidity)
motion ( http://mysensors.org/build/motion )
Relay-Actuator ( http://www.mysensors.org/build/relay ) -
Temp/Humidity/Light Sensor on batteryAfter a long time tried making a node with temperature, relative humidity and light sensors.
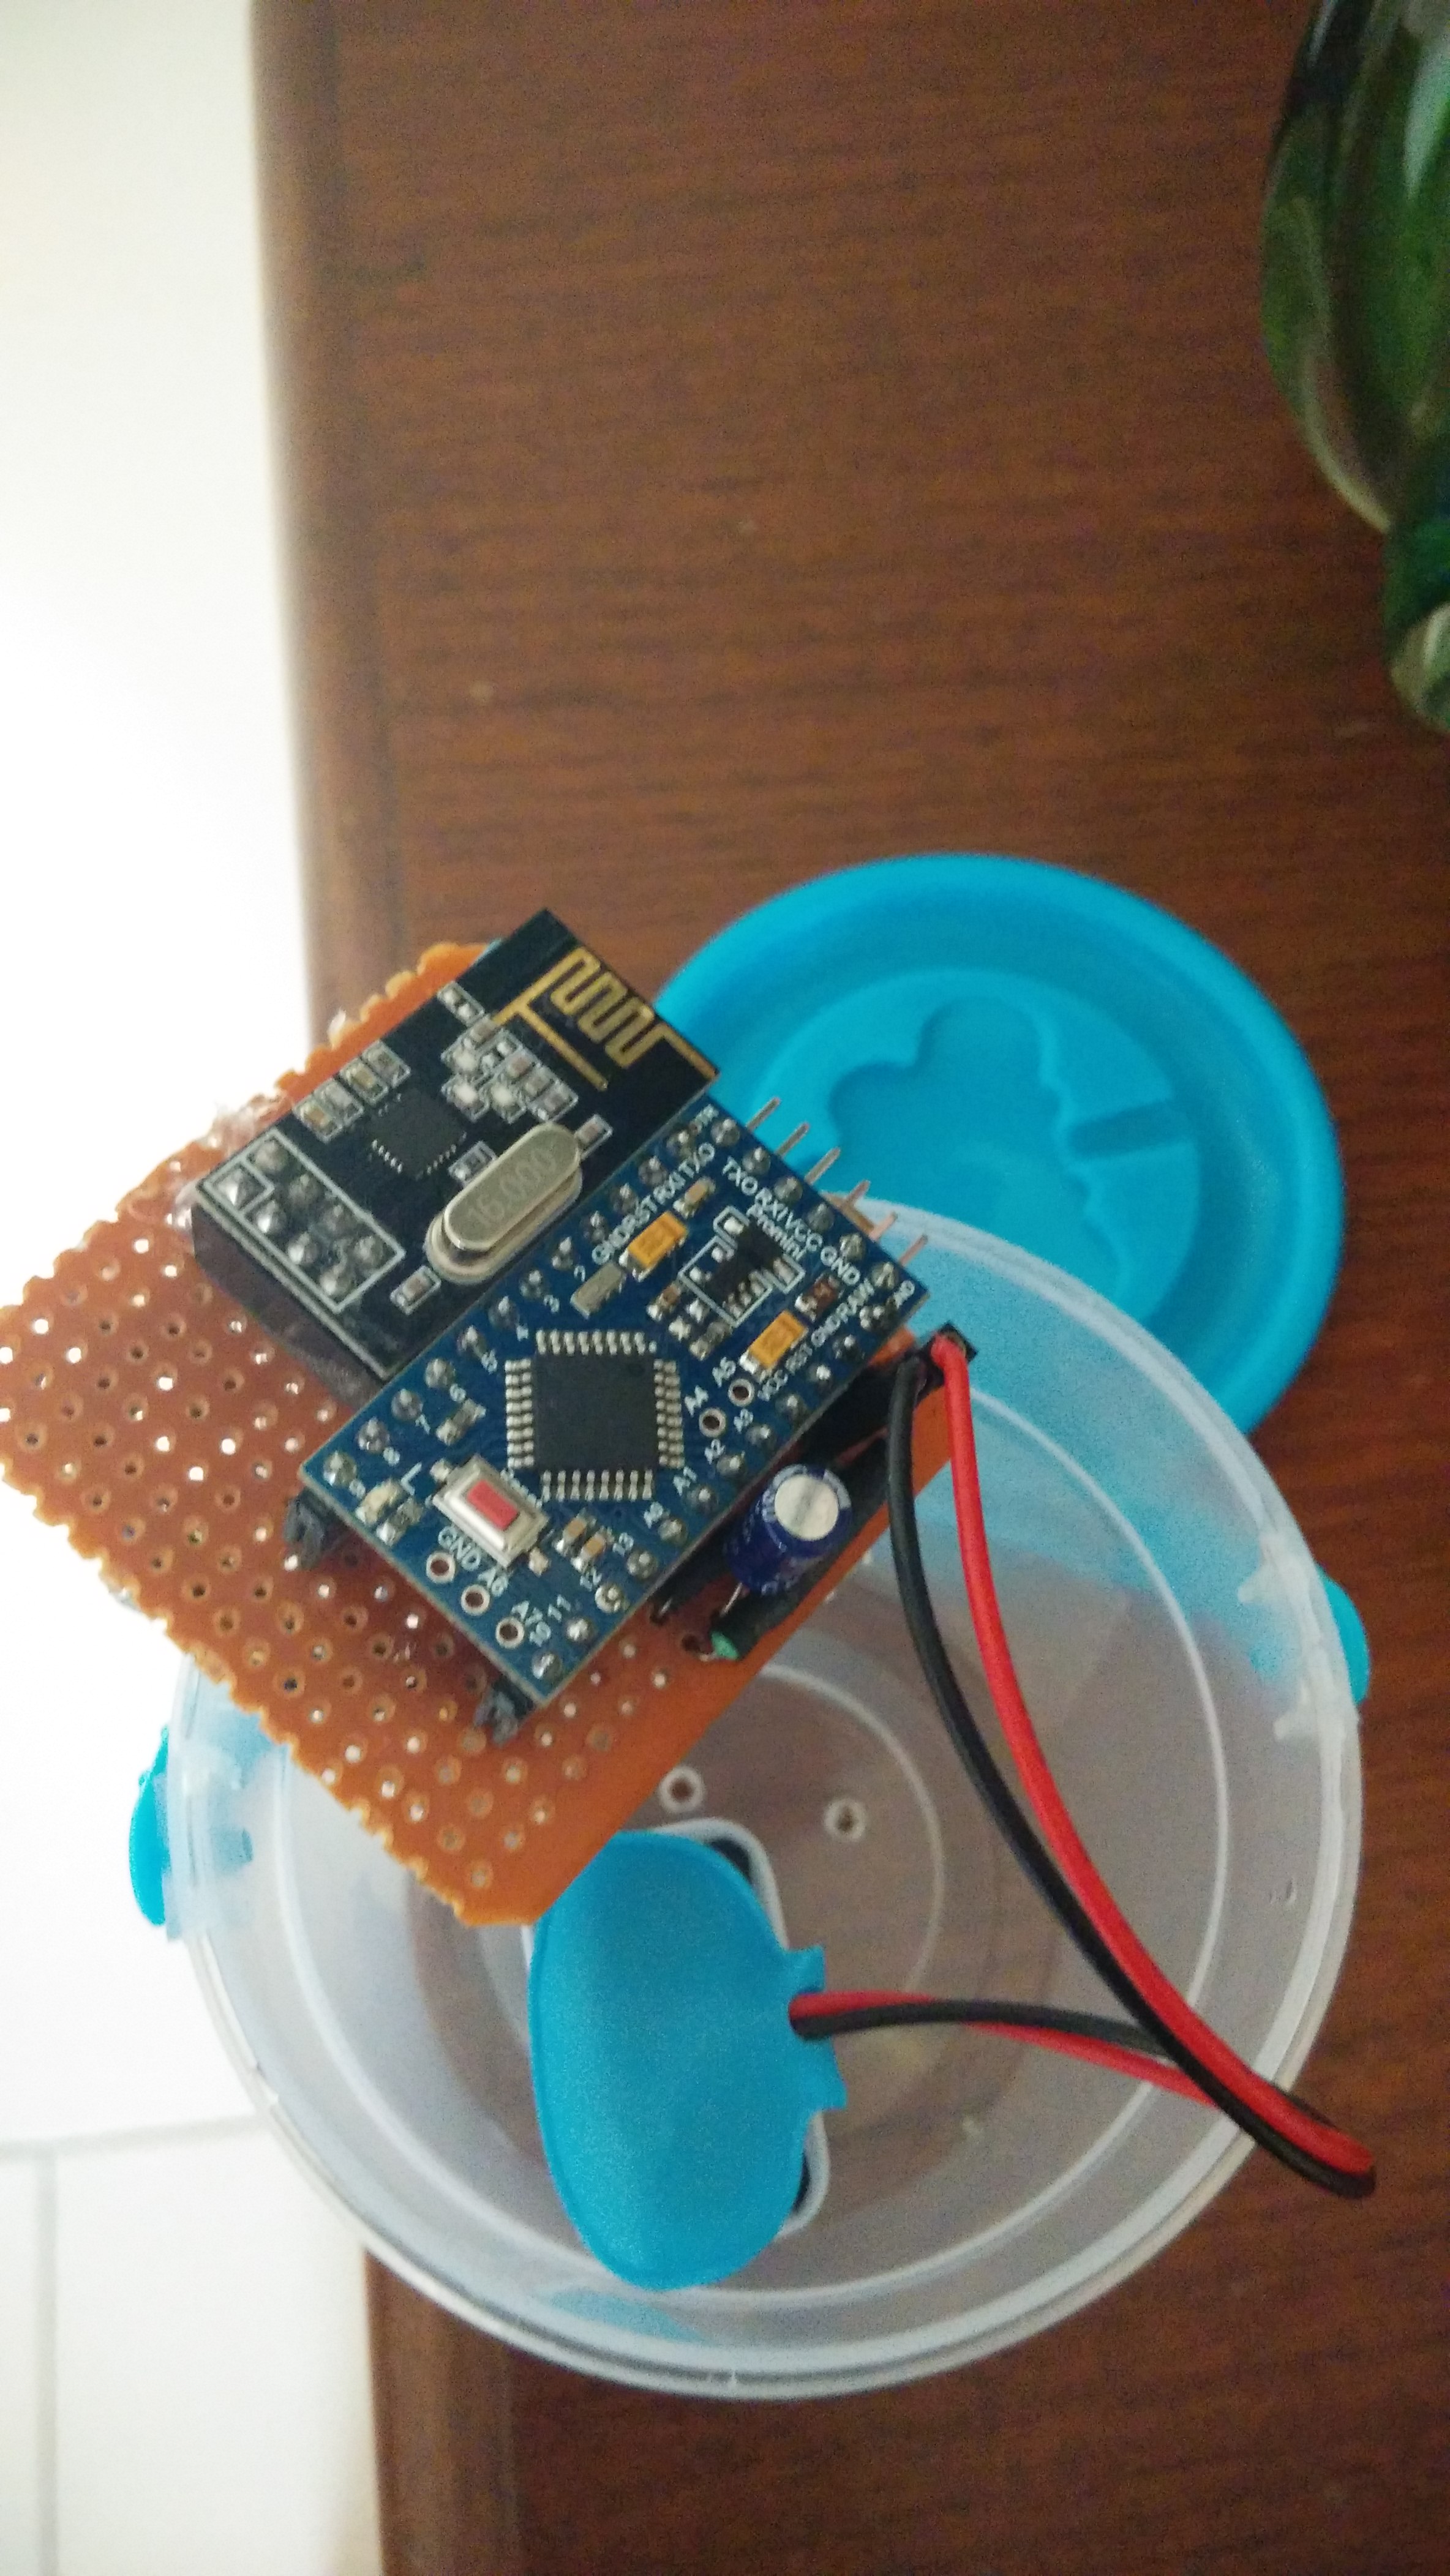
Running sensor node on 9v battery..actually i have bought ample of 9v batteries. sensor node is running for last 15 days.. ignore the dip in the battery levels due to non-battery mode .
LDR and DHT11 sensors connected on PCB..
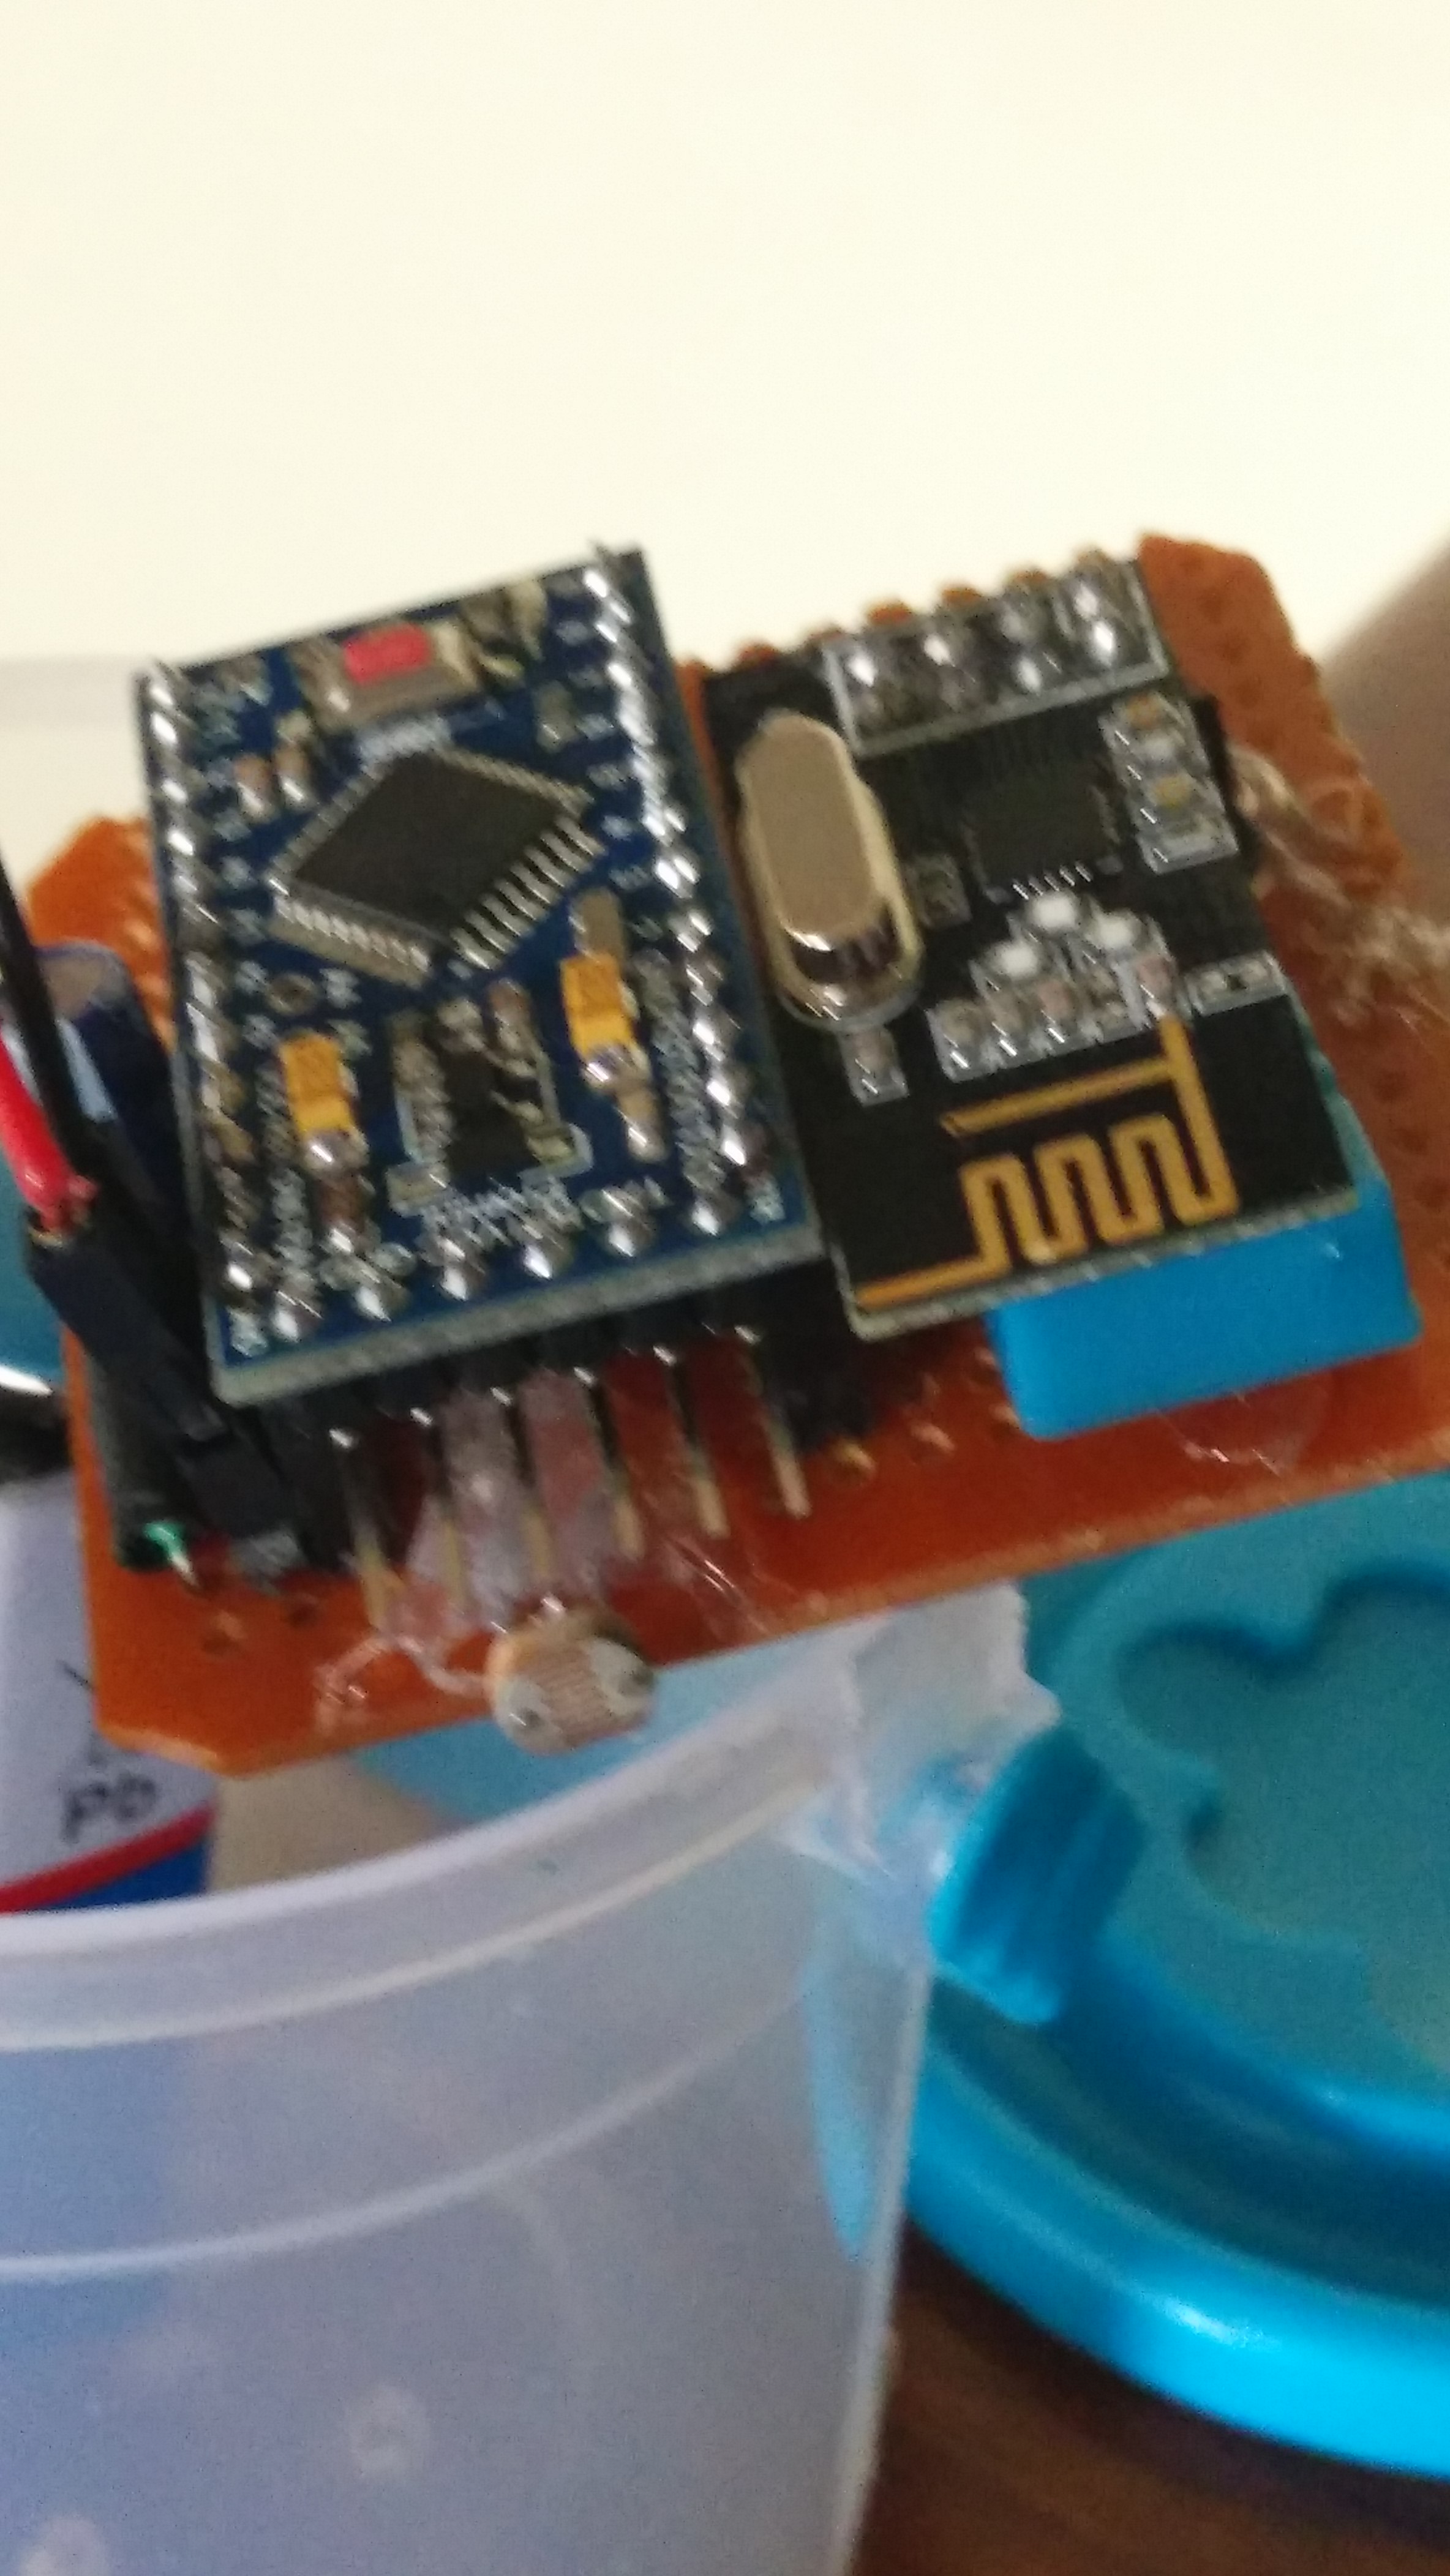
final product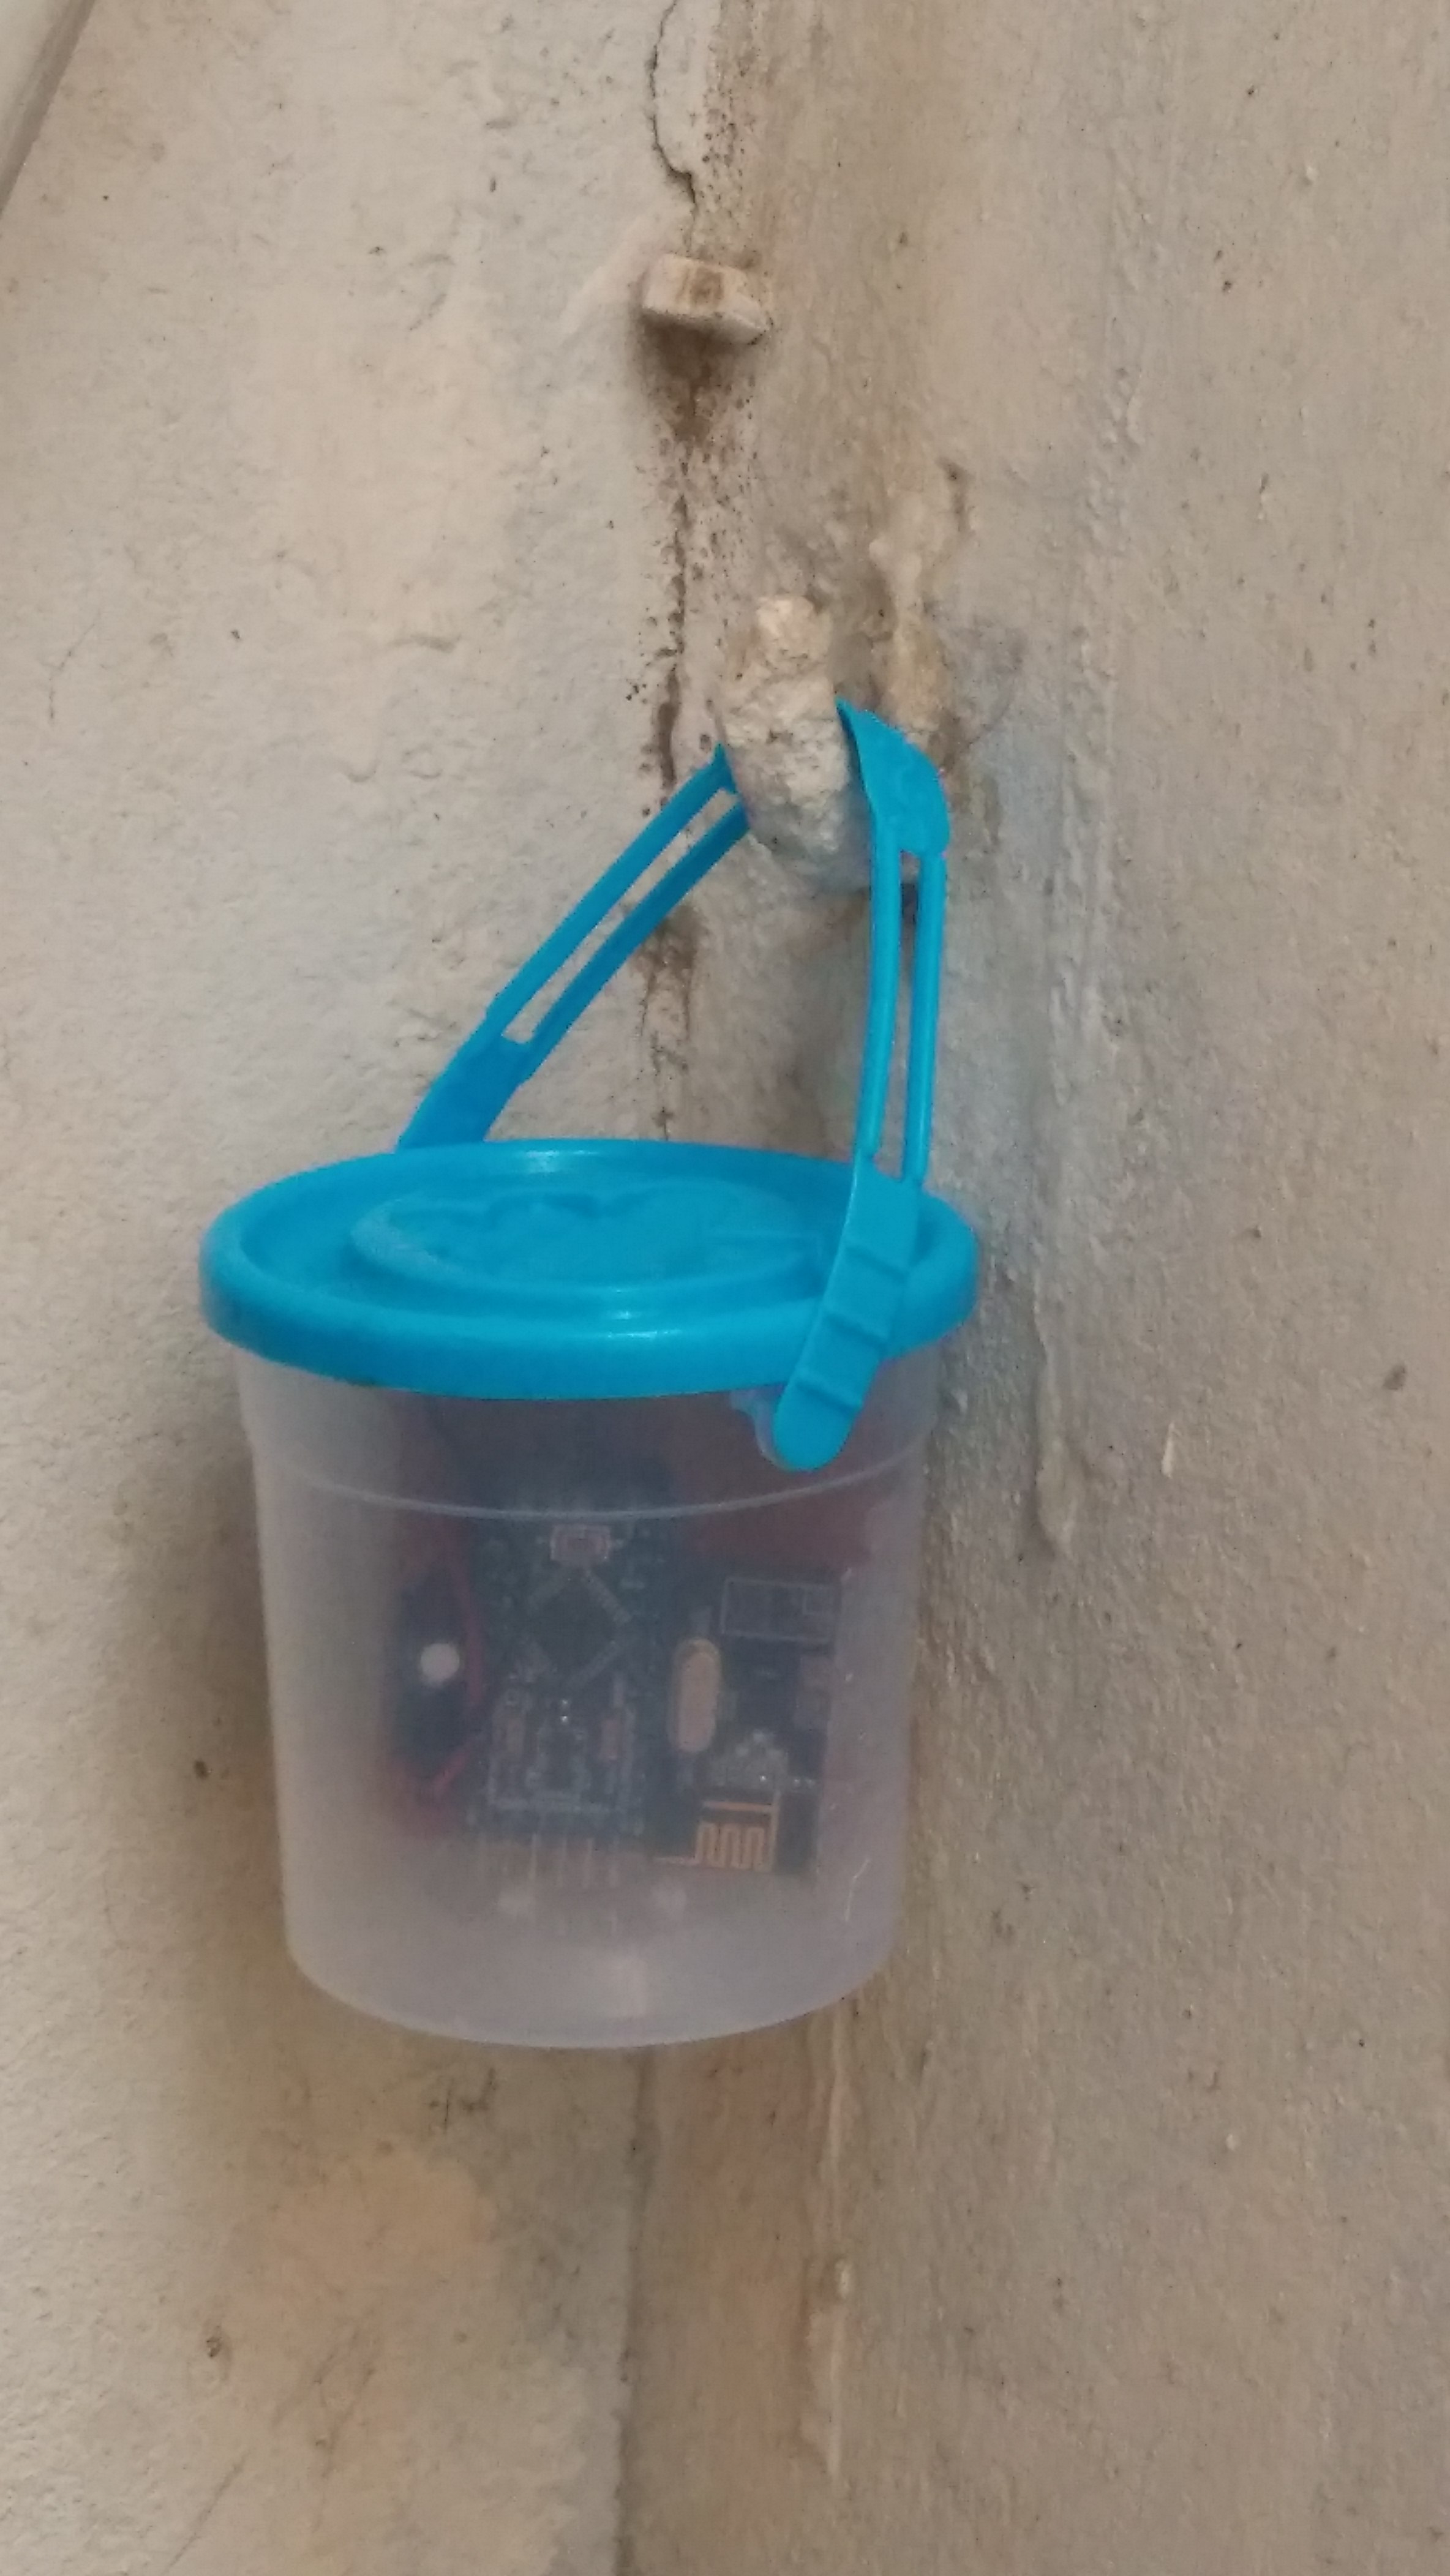
-
pimatic-mysensors controller plugin@ricardot
contact/door/light mysensor add to list.. just check :)
-
pimatic-mysensors controller plugin@jurasek connecting NRF24L01 to RPi directly is possible you will find good amount of references if you search this form.
-
pimatic-mysensors controller pluginNew version of plugin available. 0.8.21.
and a video to showcase its capability..