@Yveaux I wish i could come :)
D
Dheeraj Khajuria
@Dheeraj
Posts
-
MySensors booth at Eindhoven Maker Faire! -
MySensors booth at Eindhoven Maker Faire!Eindhoven is a nice city, I remember my visit there few years back..
-
pimatic-mysensors controller plugin@fahrettine said:
check whether you received any message ( serialport output ) on relay sensor node.
-
pimatic-mysensors controller plugin@BastienVH . check few things first.
- hardware wiring is correct and as per mysensor guide.
- what debug value "sensorValue" you are seeing on serial console if you debug your sensor node.
- check the debug log in pimatic
-
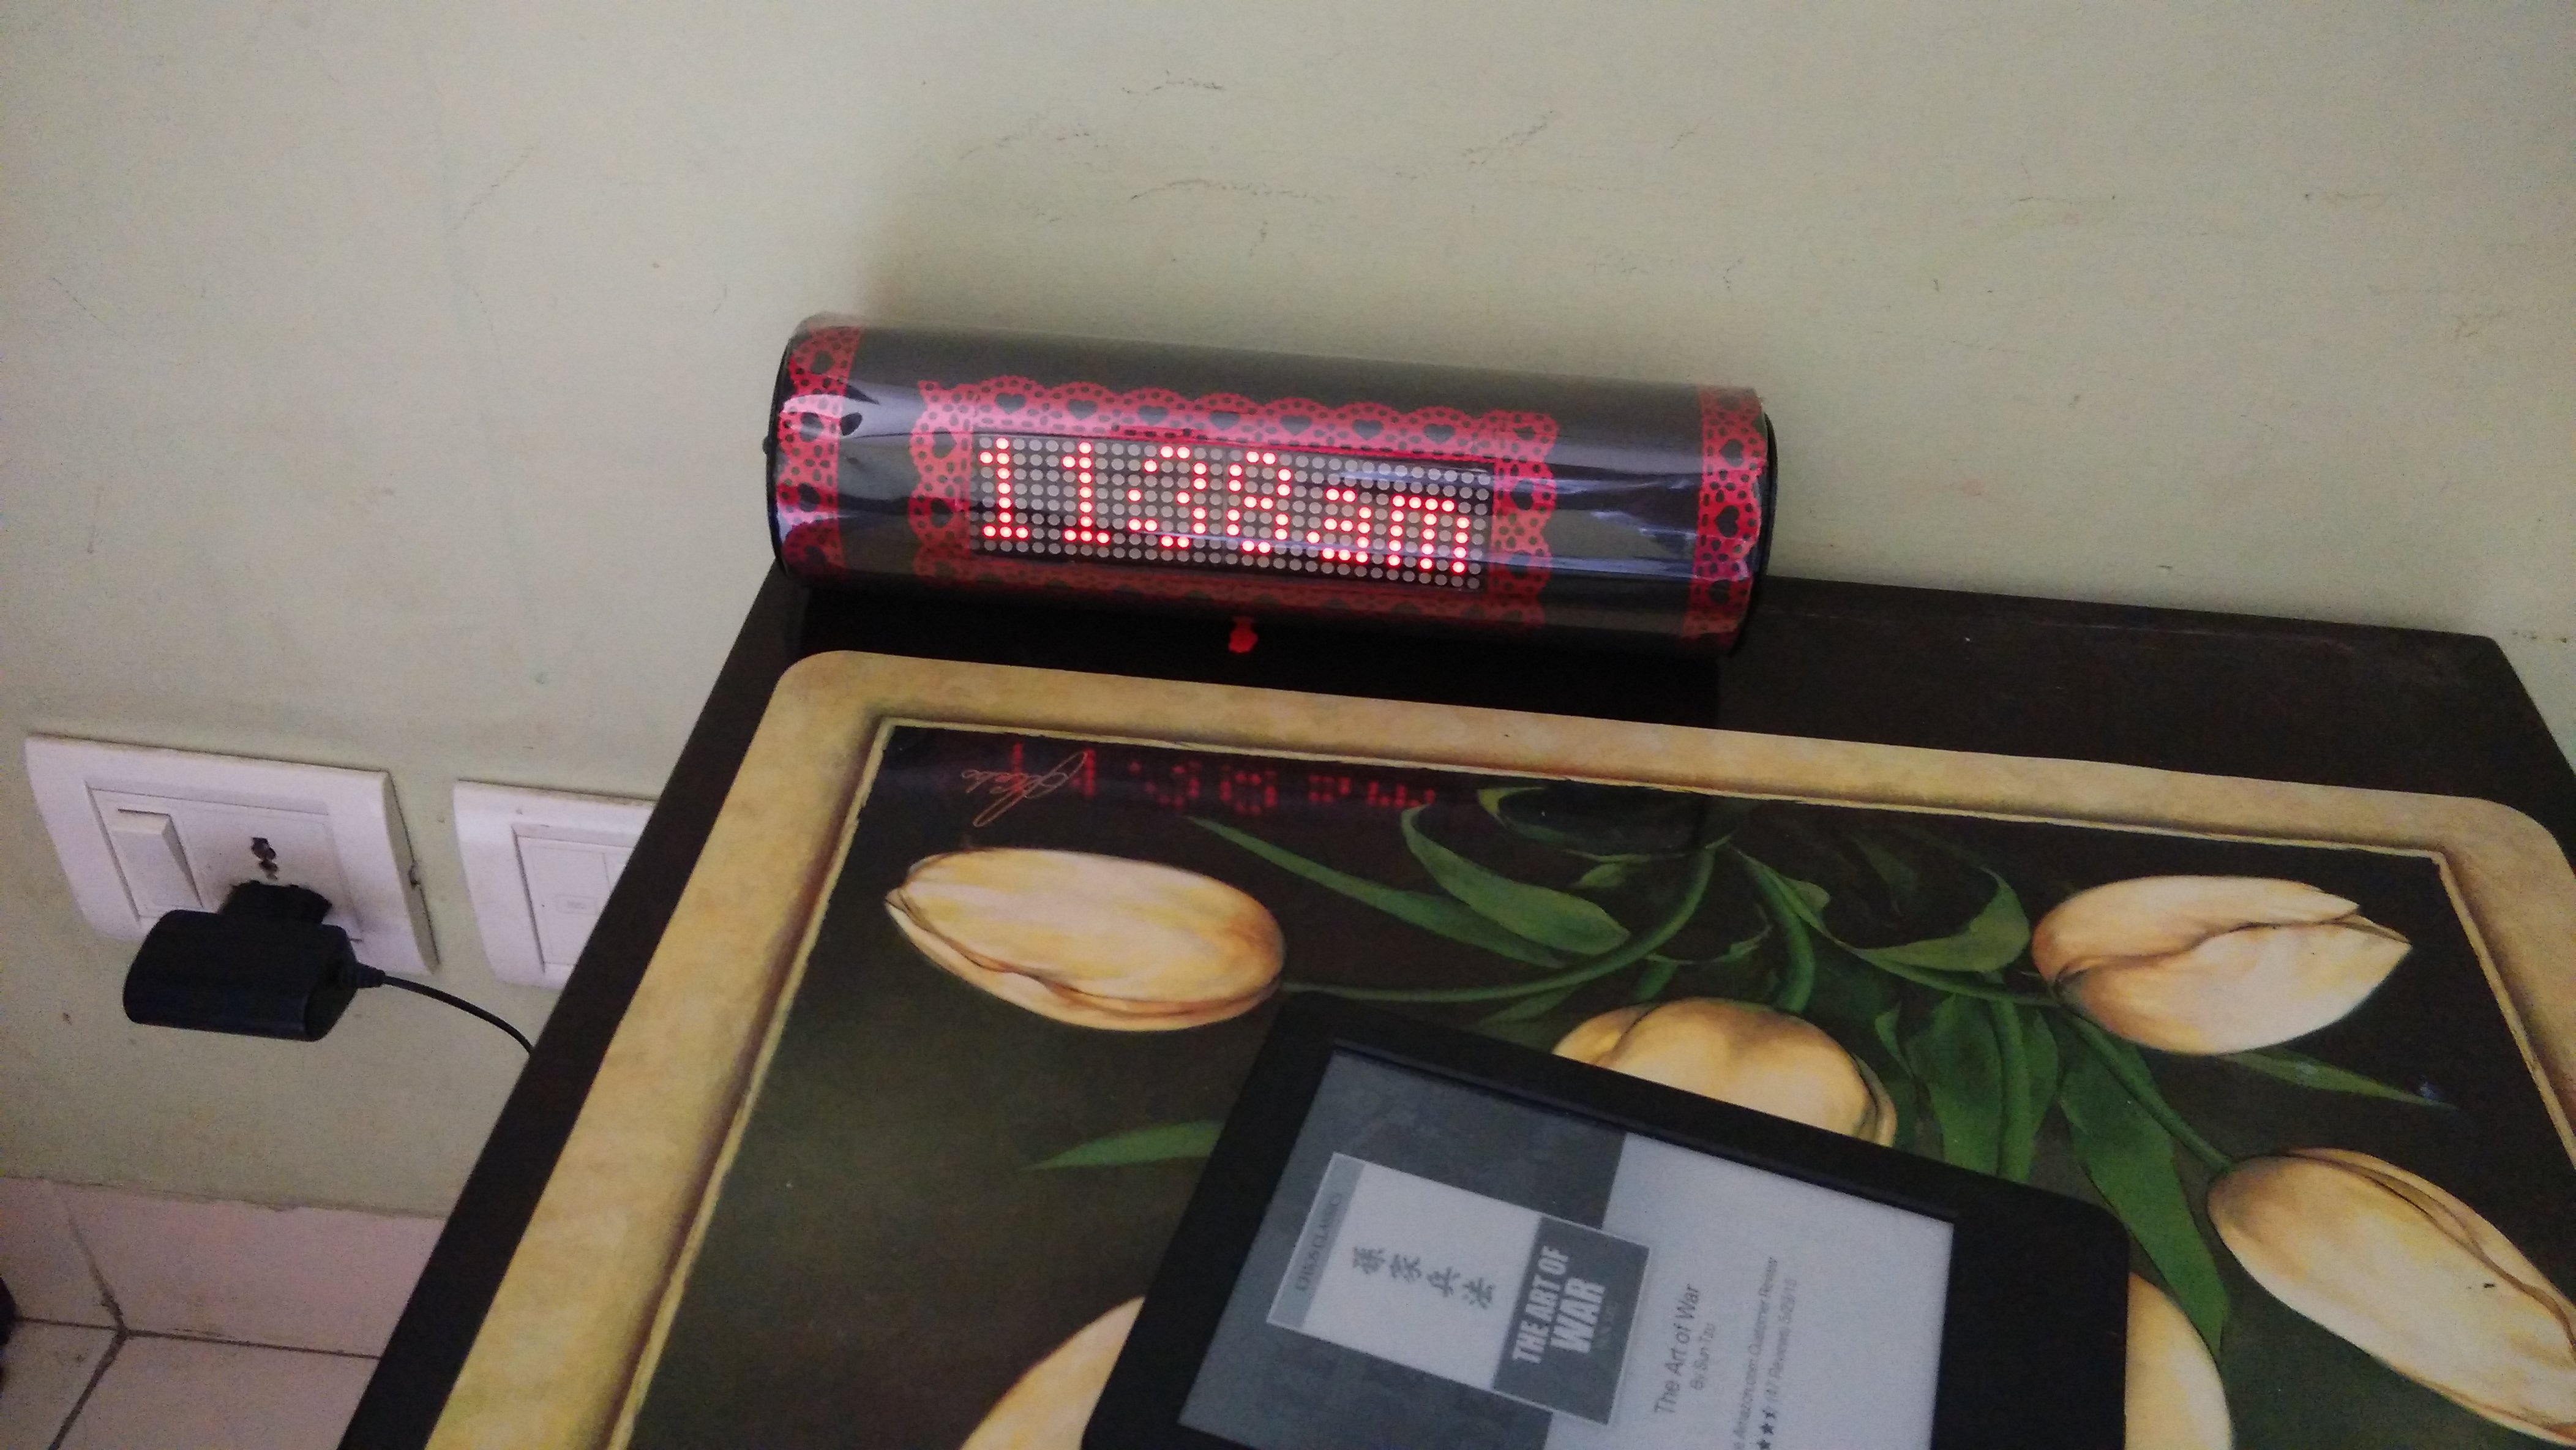
SmartClockSmartclock based on timer based mysensors node, which fetches time in unix second from pimatic controller.
Smartclock made from following components.
- 4 cascade matrix led 8x8.
- DHT11 for temperature
- Li polymer 4000 mh battery.
- PIR sensor for motion detection.
- Shuttle box.. :-)
- misc..
SmartDisplay shows following info based on controller 's rules.
- Time to office using bing map api.
- Outside home temp, hum etc.
- Online weather forecast information.
- Any online information can be displayed like stock tick etc.
Smartclock clock has temperature sensor DHT11 and a motion PIR sensor to detect movement.
-
pimatic-mysensors controller plugin@karl261 using ButtonsDevice as mentioned by Oitzu, you can achieve the point no. 1 . non off/on switch..
{
      "id": "mode",
      "name": "TV Mode",
      "class": "ButtonsDevice",
      "buttons": [
        {
          "id": "PVR",
         "text": "PVR"
        },
        {
          "id": "HTPC",
          "text": "HTPC"
        },
        {
          "id": "Chromecast",
          "text": "Chromecast"
        },
        {
          "id": "testing",
          "text": "RainBowCycle"
        },
      ]
    },
for point no. 2 you can use pimatic IFTTT rules to control (*hidden * relay switch button) moreover you can switch off optocoupler after 50 ms using rules.
- if you have some special requirement you are welcome to contribute..
-
pimatic-mysensors controller plugin@Oitzu sure will do it need some time..
-
pimatic-mysensors controller pluginNew version of plugin available. 0.8.21.
and a video to showcase its capability..
-
Hackathon @Office showcasing Mysensors capabilityRecently we had a Hackathon event at our office and where we showcase open source MySensors wireless network capability along with pimatic controller running on sweet pi.
-
Scrolling Text sensor node with new V_TEXTfound this library for scrolling effect https://code.google.com/p/arudino-maxmatrix-library/.
-
Project boxes for MySensor's nodes and gateway?@GertSanders purchased it from ebay, yes inside it is mini pro and nrf radio module ..
-
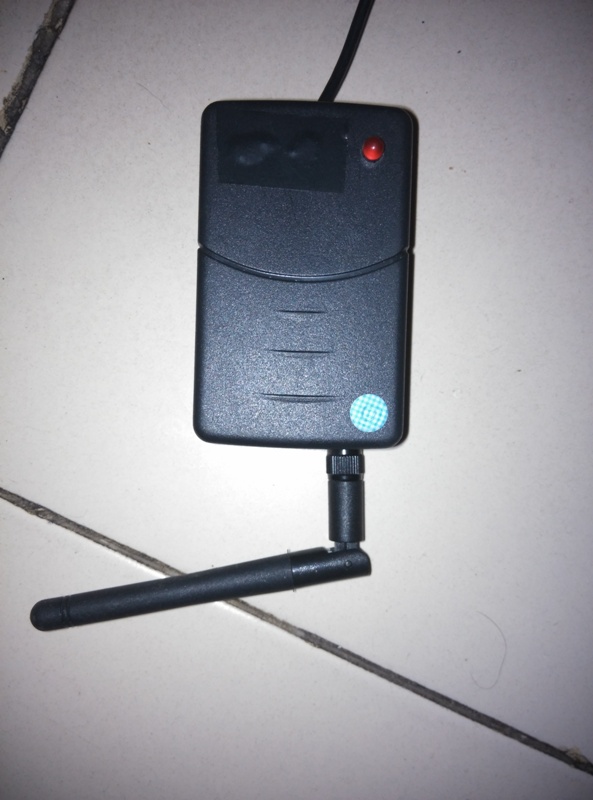
Project boxes for MySensor's nodes and gateway?My compact serialGateway with nrf201 long range , power indicator LED and USB cable connected to Pi.
-
Relay with ACS712@epierre .. nothing much .. used relay to control 2 devices and tried to calculate the power consumed ( in watts ) assume the input voltage is ~220v.
-
MySensors 1.5 Released@hek and team. congratulation on new milestone.
-
IR Blaster (progress)@blacey said:
using IR transmitter
I have gone through this link, and tried it recommendation of increasing the RAWBUF size and also used sample sketch which was not working for me , may be i was doing something wrong. Also, It uses raw IR signal and handling raw signal is not simple compare to IR hex code which are at max 32 bits. I wish IRlib, IRemote etc support handling of long IR signals. Any library which support it?
-
IR blaster for AC , TV etc.@Moshe-Livne the IR library i used is some how fails to decode and dump the AC IR signal received even after increasing the buffer size RAWBUF, not sure how broadlinks rm2 is working.. basically i used mini pro node as IR receiver/emitter .. the received IR hex codes ( bit, type NEC, etc ) are send to controller ( pimatic ) . Using pimatic Rules controlling electronic devices which sends IR hex code to node if rule is triggered.
-
IR Blaster (progress)Any one tried using IR transmitter to send IR signal to AC with mini pro ( 328p ) as mysensor node. I know mini pro have limited ram / rom support.
Note: AC remote send long IR signals which may not be completely captured by IR receivers connected to mini pro. may be one try on rasp pi but that's a last resort.
-
IR blaster for AC , TV etc.Any one tried using IR transmitter to send IR signal to AC with mini pro ( 328p ) as mysensor node. I know mini pro have limited ram / rom support.
Note: AC remote send long IR signals which may not be completely captured by IR receivers connected to mini pro. may be one try on rasp pi but that's a last resort.
-
pimatic-mysensors controller plugin@Mad-Moo latest code 0.8.17 is pushed to github. now everything is sync.
-
pimatic-mysensors controller pluginnewer version (0.8.15 ) of plugin release . support Acronym for devices . improves user experience.
