Navigation

    • Register
    • Login
    • OpenHardware.io
    • Categories
    • Recent
    • Tags
    • Popular
    1. Home
    2. drock1985
    3. Best
    • Profile
    • Following
    • Followers
    • Topics
    • Posts
    • Best
    • Groups

    Best posts made by drock1985

    • How To: 2 Door Chime Automation Hack (Thanks @petewill)

      Hi,

      This project, I aimed to have my door bell system connected to my home automation system. This was for two reasons. 1) I wanted a way to know if anyone was at my door without me being home ex. delivery truck driver. Alternatively, I play to place some Wifi cameras outside, and it would be nice to get a snapshot of whoever opens the door. The code is based off @petewill Doorbell Automation Hack (http://forum.mysensors.org/topic/2064/how-to-doorbell-automation-hack), and has been added a second door bell/relay and gw.send commands to the controller.

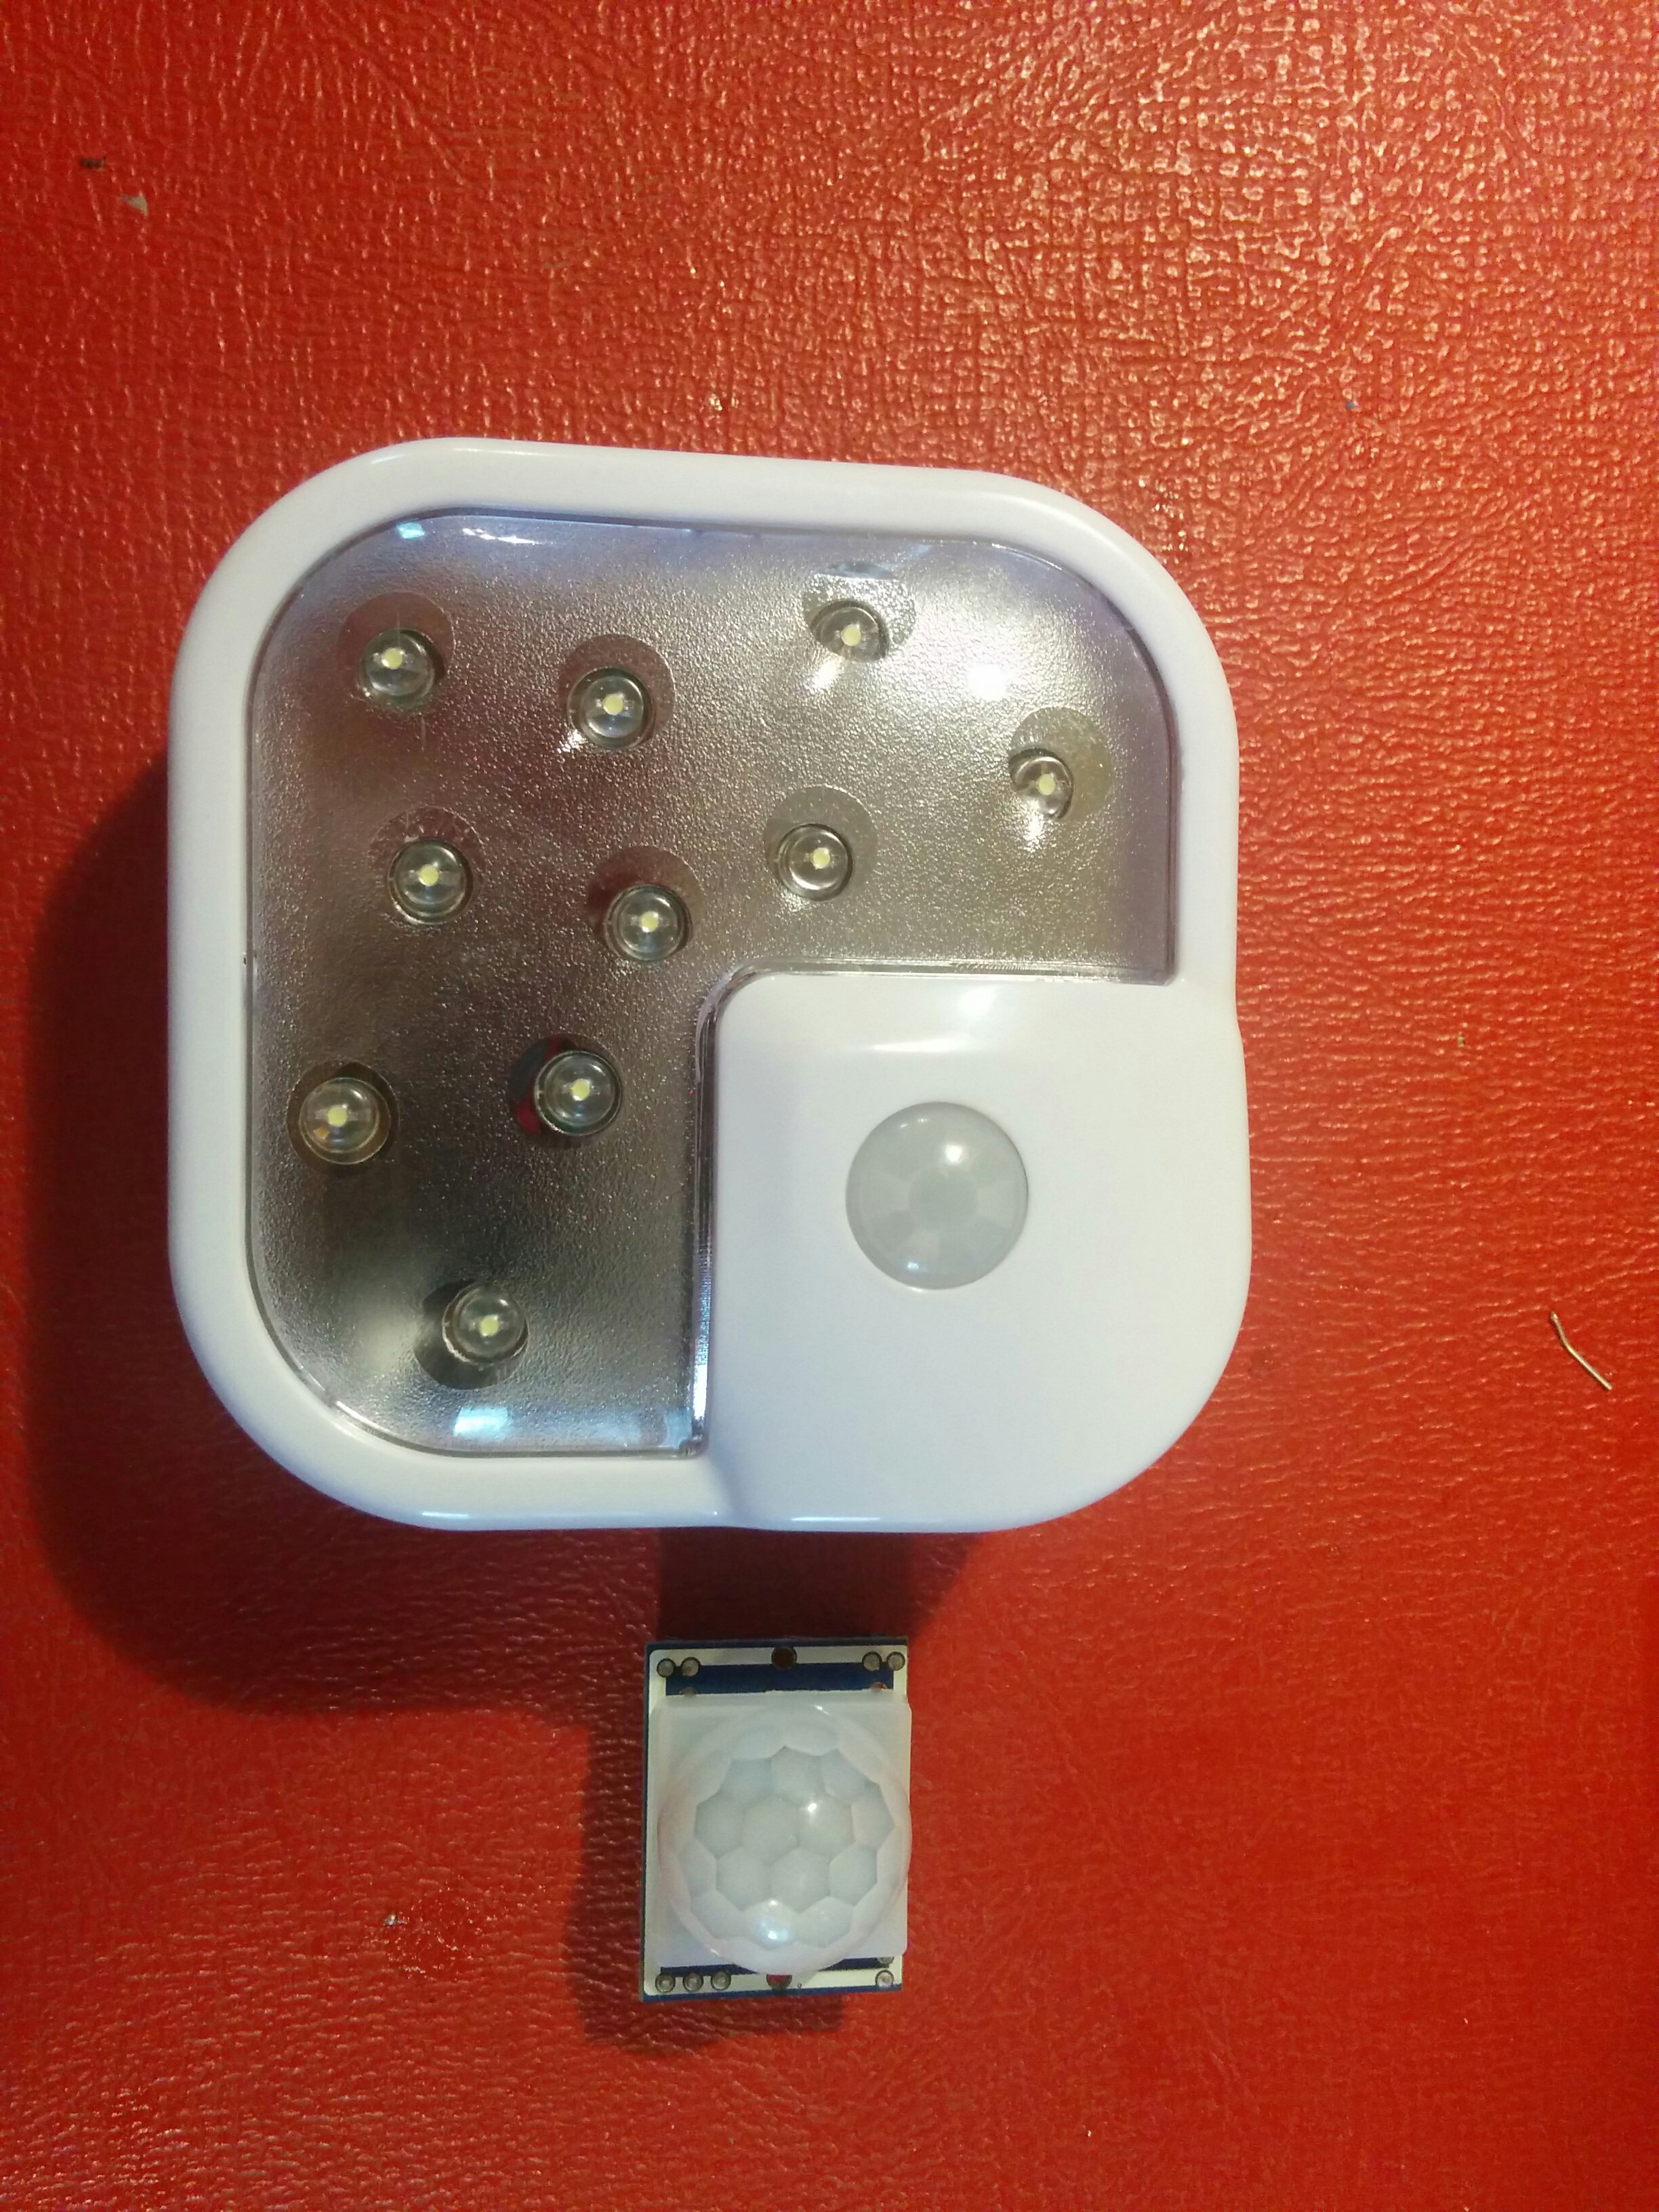
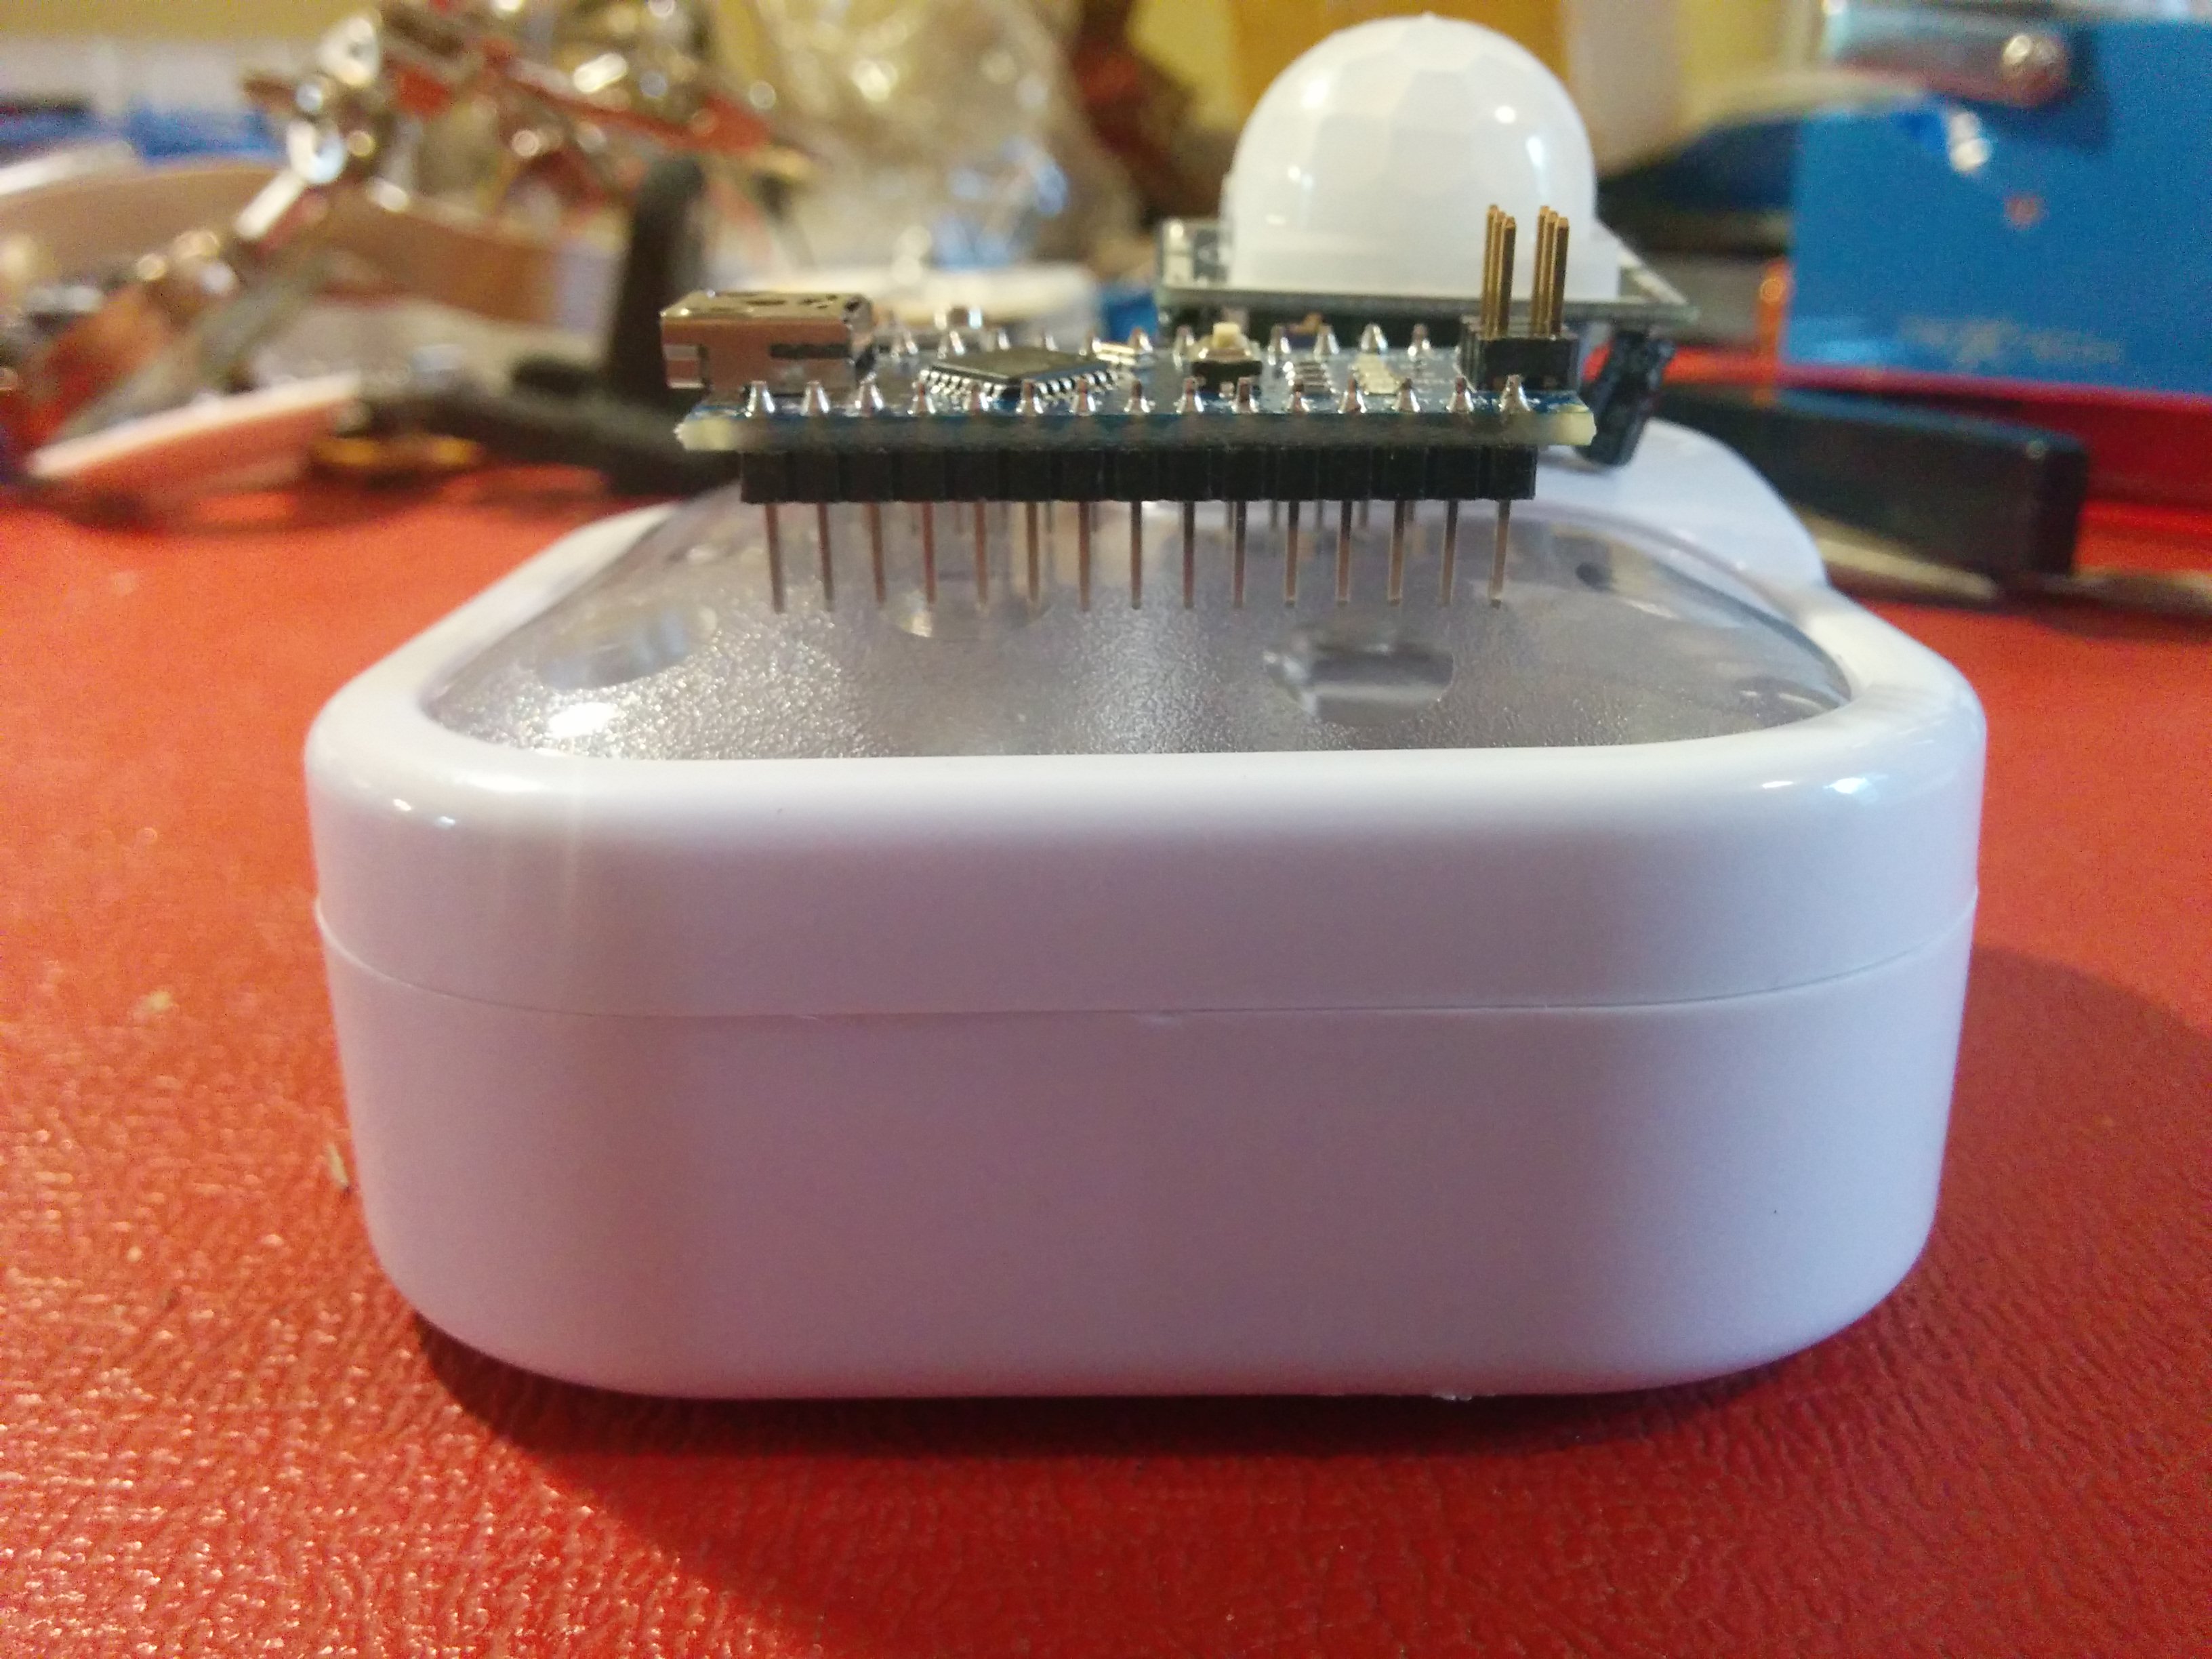
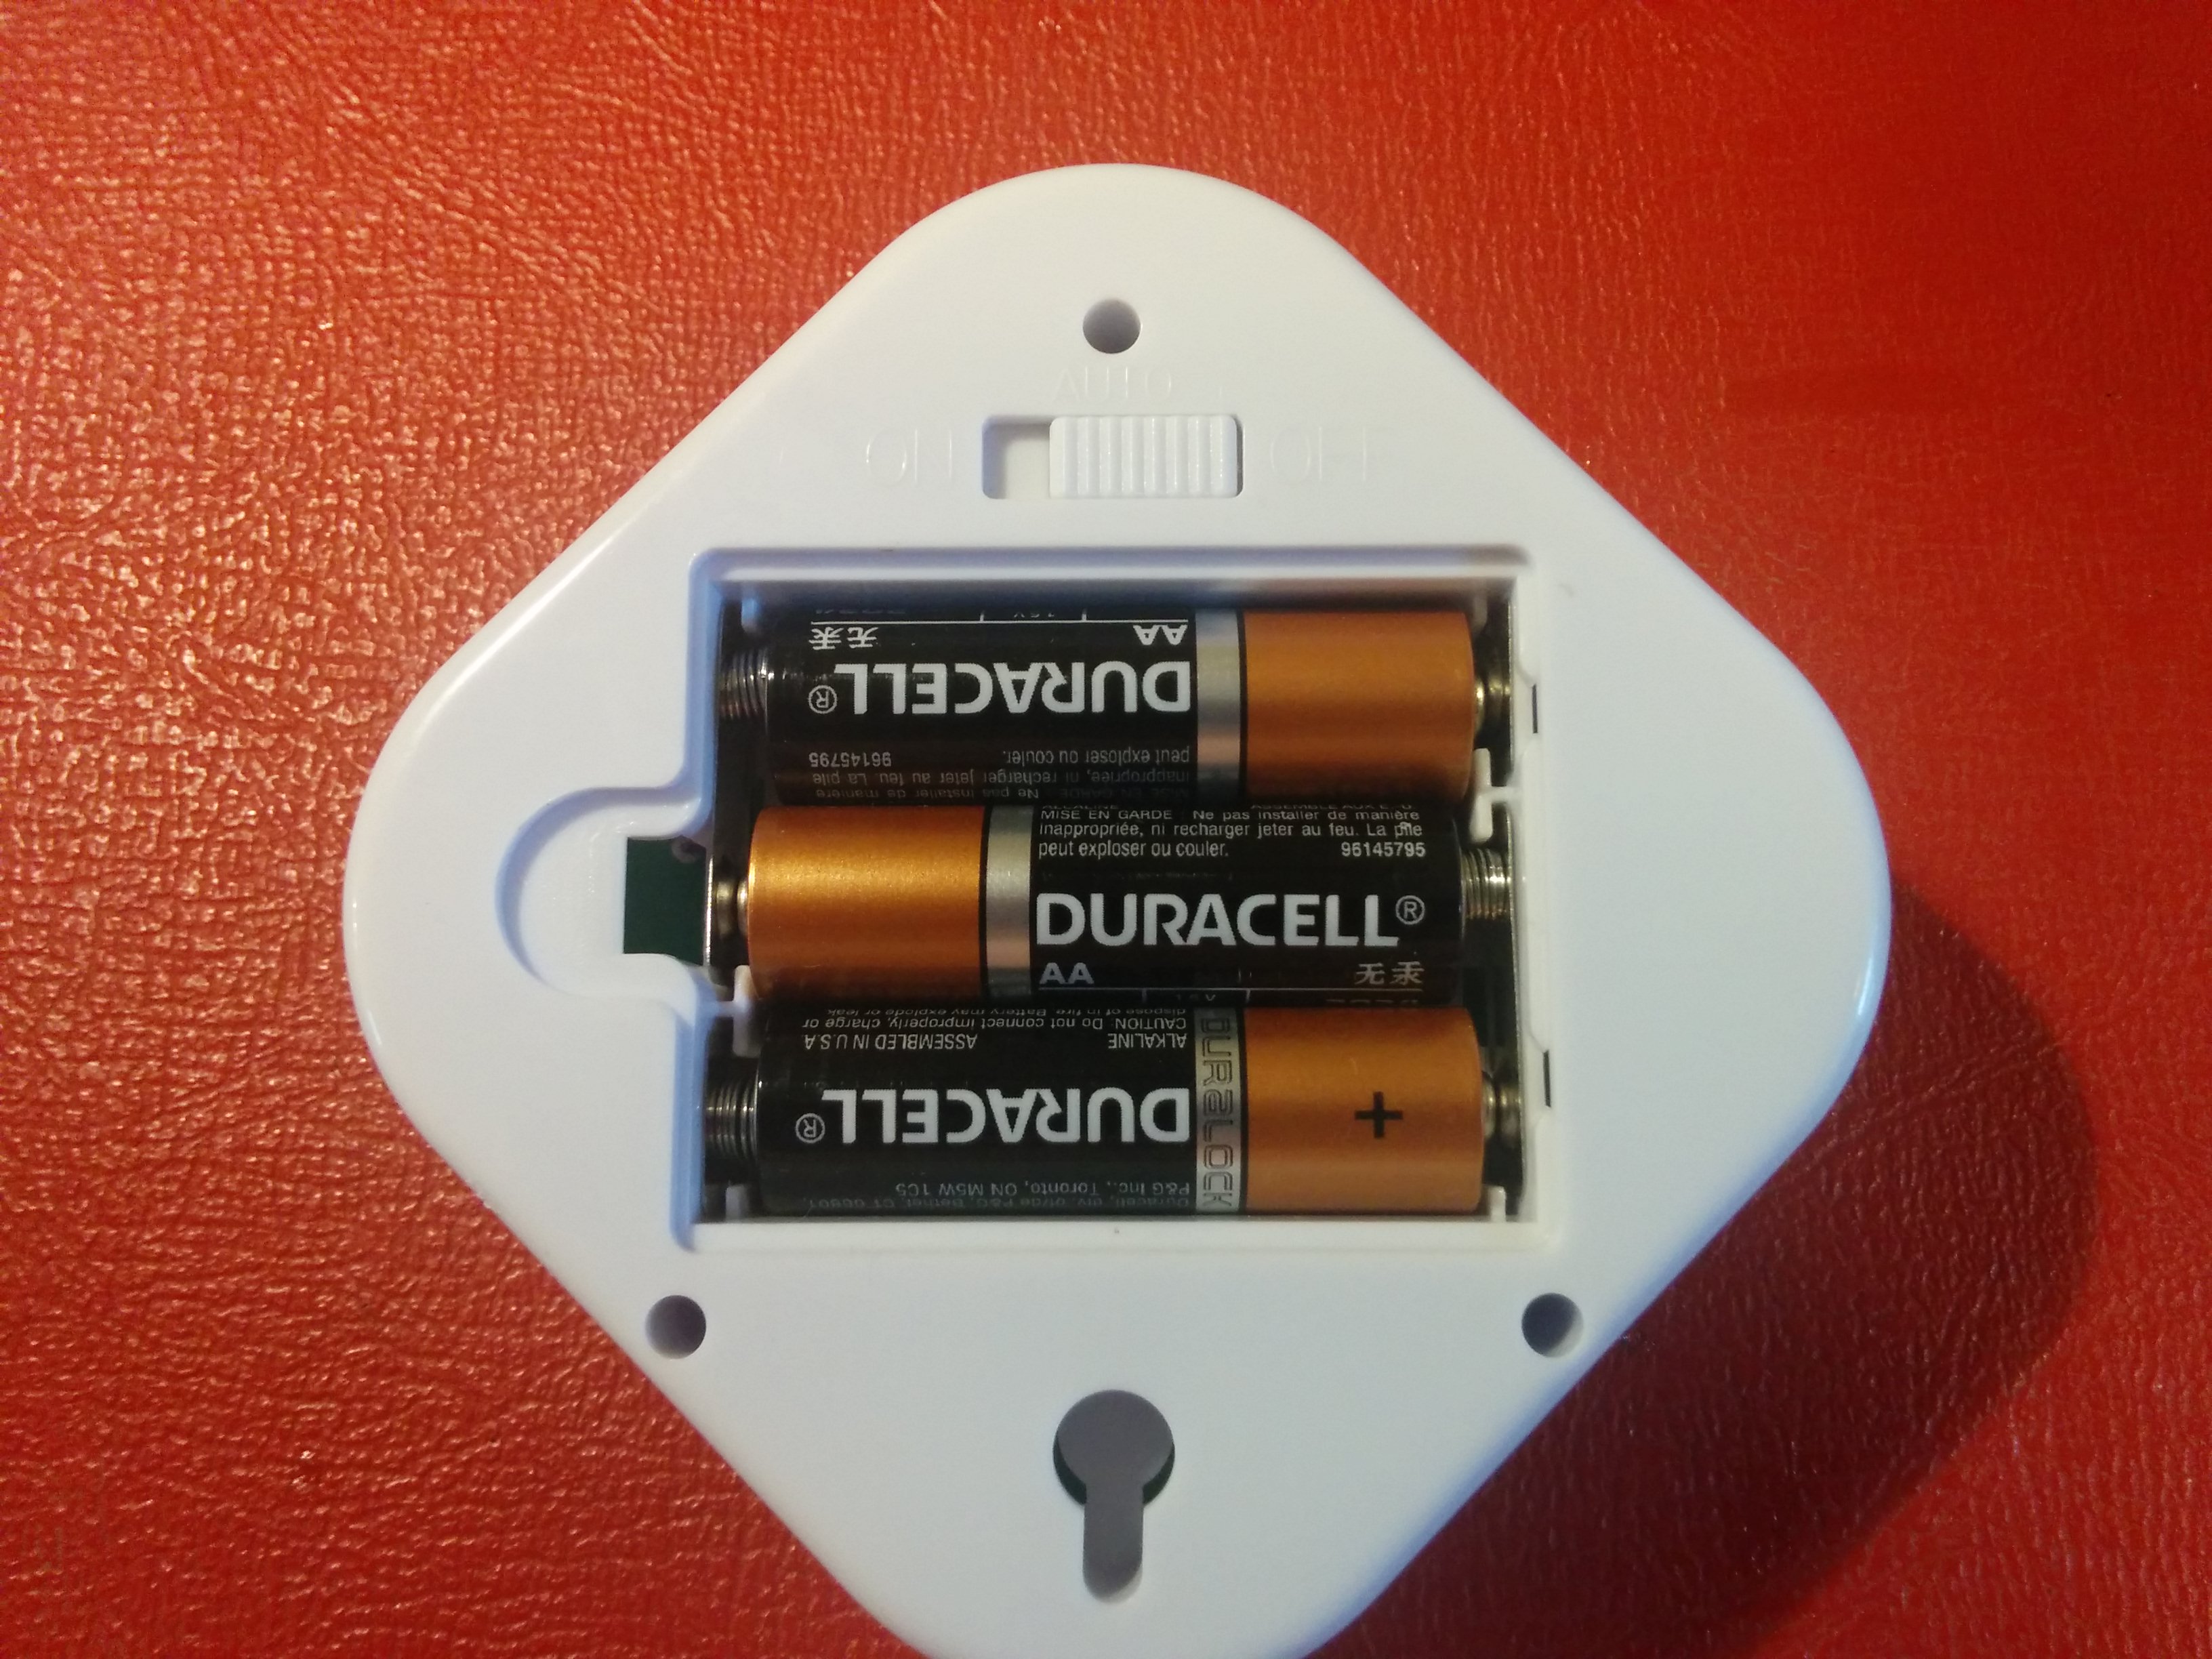
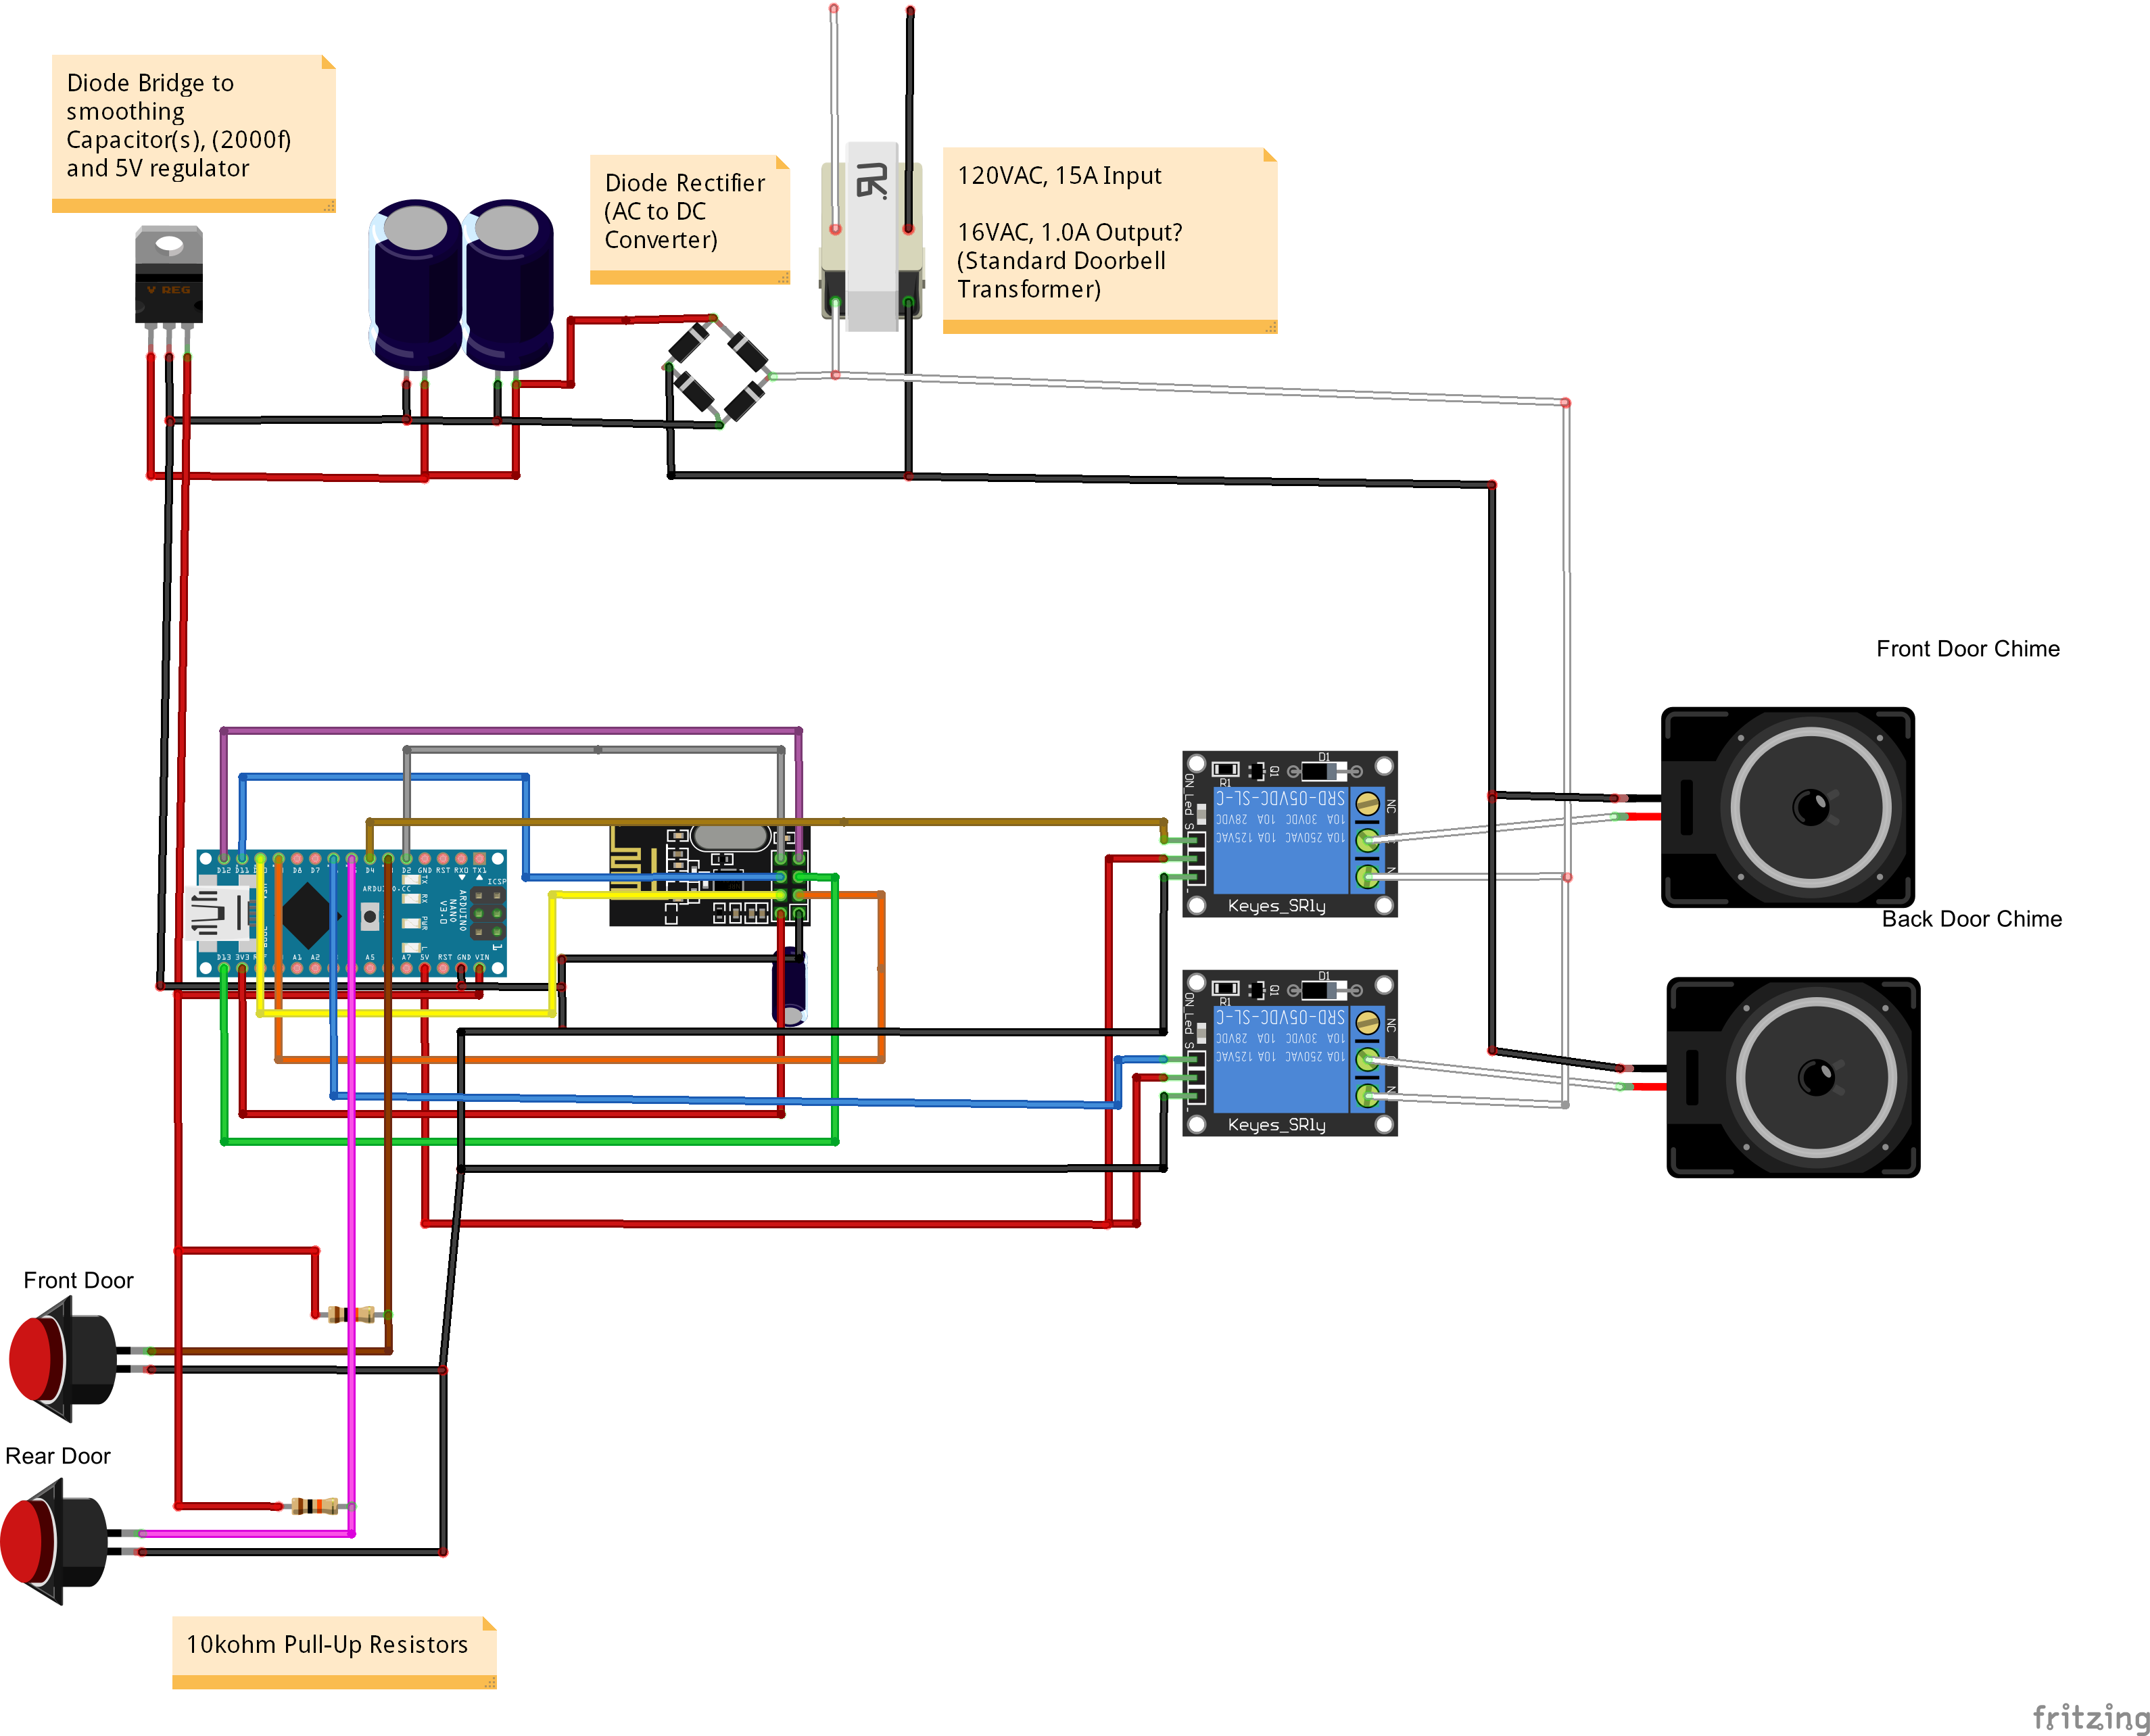
      This is my very first Arduino project outside of just download and go from the site so if there are any bugs please leave a detailed report and I will see what I can do. I just finished this on a breadboard, and plan to install it before tomorrow night (halloween) to see how many ghouls I get 🙂 . I will take some pictures of the completed build. See wiring diagram below as well.

      All was tested using MySensors Library V1.5 on Domoticz v2.3530

      Version 1.0 - Initial Release
      MySensors_2Door_Chime_bb.png

      Here is the code.

      /*
       * The MySensors Arduino library handles the wireless radio link and protocol
       * between your home built sensors/actuators and HA controller of choice.
       * The sensors forms a self healing radio network with optional repeaters. Each
       * repeater and gateway builds a routing tables in EEPROM which keeps track of the
       * network topology allowing messages to be routed to nodes.
       *
       * Created by Henrik Ekblad <henrik.ekblad@mysensors.org>
       * Copyright (C) 2013-2015 Sensnology AB
       * Full contributor list: https://github.com/mysensors/Arduino/graphs/contributors
       *
       * Documentation: http://www.mysensors.org
       * Support Forum: http://forum.mysensors.org
       *
       * This program is free software; you can redistribute it and/or
       * modify it under the terms of the GNU General Public License
       * version 2 as published by the Free Software Foundation.
       *
       *******************************
       *
       * REVISION HISTORY
       *  * 
       * Version 2.0 - ResentedPoet
       * 
       * Based on original concept/code by @petewill for 1 Door bell chime. See original thread
       * http://forum.mysensors.org/topic/2064/how-to-doorbell-automation-hack
       * This sketch is used to control a front and back doorbell ring with relays as well as send an
       * alert when the buttons are pressed. For front door, Connect the button to ground and digital
       * pin 3.  The relay controlling the doorbell is conntected to pin 4. For rear door bell
       * connect second button to ground and digital pin 5. The relay controlling that pin goes 
       * to pin 6.
        */
      
      
      #include <MySensor.h>
      #include <SPI.h>
      #include <Bounce2.h>
      
      #define NODE_ID AUTO // or set to AUTO if you want gw to assign a NODE_ID for you.
      
      #define DOORBELLF_PIN  3      // Arduino Digital I/O pin number for the front doorbell button 
      #define RELAYF_PIN  4         // Arduino Digital I/O pin number for the front door chime relay 
      #define DOORBELLF_CHILD_ID 0  //ID of the  front doorbell
      #define SWITCHF_CHILD_ID 1    // Id of the switch that will control front doorbell sound
      #define RELAYF_ON 1
      #define RELAYF_OFF 0
      #define DOORBELLB_PIN  5      // Arduino Digital I/O pin number for the back doorbell button 
      #define RELAYB_PIN  6         // Arduino Digital I/O pin number for the back door chime relay 
      #define DOORBELLB_CHILD_ID 2  //ID of the back doorbell
      #define SWITCHB_CHILD_ID 3    // Id of the switch that will control front doorbell sound
      #define RELAYB_ON 1
      #define RELAYB_OFF 0
      
      Bounce debouncerF = Bounce();
      Bounce debouncerB = Bounce();
      
      MySensor gw;
      MyMessage switchMsgF(SWITCHF_CHILD_ID, V_LIGHT);
      MyMessage doorbellMsgF(DOORBELLF_CHILD_ID, V_TRIPPED);
      MyMessage switchMsgB(SWITCHB_CHILD_ID, V_LIGHT);
      MyMessage doorbellMsgB(DOORBELLB_CHILD_ID, V_TRIPPED);
      
      unsigned int doorbellFDelay = 1000; // interval at which to keep the front doorbell button sensor triggered (milliseconds). This is used to stop people (kids) from pressing it too often
      unsigned int ringFTime = 450; //How long the front doorbell relay is on (in milliseconds)
      unsigned long doorbellFMillis;  //Used to keep track of the last front doorbell button press
      unsigned long doorbellFTimer;  //Used to keep track of front doorbell ring time
      byte doorbellFPreviousVal;  //Used to keep track of front doorbell button pressed state
      boolean ringDoorbellF;  //Used to initiate the ring front doorbell if statement
      boolean doorbellFSound; //Used to keep track if the front doorbell should sound or be silent.  Value recieved from doorbell on/off switch
      boolean doorbellFOff = true;  //Used to keep track of front doorbell ring state
      
      unsigned int doorbellBDelay = 1000; // interval at which to keep the back doorbell button sensor triggered (milliseconds). This is used to stop people (kids) from pressing it too often
      unsigned int ringBTime = 450; //How long the back doorbell relay is on (in milliseconds)
      unsigned long doorbellBMillis;  //Used to keep track of the last back doorbell button press
      unsigned long doorbellBTimer;  //Used to keep track of back doorbell ring time
      byte doorbellBPreviousVal;  //Used to keep track of back doorbell button pressed state
      boolean ringDoorbellB;  //Used to initiate the ring back doorbell if statement
      boolean doorbellBSound; //Used to keep track if the back doorbell should sound or be silent.  Value recieved from doorbell on/off switch
      boolean doorbellBOff = true;  //Used to keep track of back doorbell ring state
      
      void setup()
      {
        gw.begin(incomingMessage, NODE_ID);
      
        // Send the sketch version information to the gateway and Controller
        gw.sendSketchInfo("2 Door bell/chime Monitor", "1.0");
      
        // Setup the button and activate internal pull-up
        pinMode(DOORBELLF_PIN, INPUT_PULLUP);
        pinMode(DOORBELLB_PIN, INPUT_PULLUP);
      
        // After setting up the button, setup debouncer
        debouncerF.attach(DOORBELLF_PIN);
        debouncerB.attach(DOORBELLB_PIN);
        debouncerF.interval(5);
        debouncerB.interval(5);
      
        // Register all sensors to gw (they will be created as child devices)
        gw.present(SWITCHF_CHILD_ID, S_LIGHT);
        gw.present(DOORBELLF_CHILD_ID, S_MOTION);
        gw.present(SWITCHB_CHILD_ID, S_LIGHT);
        gw.present(DOORBELLB_CHILD_ID, S_MOTION);
      
        // Make sure relays are off when starting up
        digitalWrite(RELAYF_PIN, RELAYF_OFF);
        digitalWrite(RELAYB_PIN, RELAYB_OFF);
        // Then set relay pins in output mode
        pinMode(RELAYF_PIN, OUTPUT);
        pinMode(RELAYB_PIN, OUTPUT);
      
        // Set doorbellSound to last known state (using eeprom storage)
        doorbellFSound = gw.loadState(SWITCHF_CHILD_ID);
        doorbellBSound = gw.loadState(SWITCHB_CHILD_ID);
      }
      
      void loop()
      {
        gw.process();
          unsigned long currentMillis = millis();
        //Check to see if front doorbell button was pushed.
        if (currentMillis - doorbellFMillis > doorbellFDelay) //used to stop front doorbell from being pressed too frequently
        {
          debouncerF.update();
          // Read doorbell button value
          byte doorbellFDetect = !debouncerF.read();//read, then reverse the value so it will send correct trigger state to controller
      
          if (doorbellFDetect != doorbellFPreviousVal)
          {
            //Serial.print("doorbellFDetect Value: ");
            //Serial.println(doorbellFDetect);
            if (doorbellFDetect == 1)
            {
              ringDoorbellF = true;
              doorbellFTimer = currentMillis;
              gw.send(doorbellMsgF.set(doorbellFDetect?"1":"0"));  // Send tripped value to gw
            }
            doorbellFMillis = currentMillis;
            doorbellFPreviousVal = doorbellFDetect;
          }
        }
      
        if (ringDoorbellF)
        {
          if (doorbellFSound)
          {
            if (doorbellFOff)
            {
              digitalWrite(RELAYF_PIN, RELAYF_ON);
              //Serial.println("Front Doorbell sounded.");
              doorbellFOff = false;
            }
            else
            {
              if (currentMillis - doorbellFTimer > ringFTime)
              {
                ringDoorbellF = false;
                digitalWrite(RELAYF_PIN, RELAYF_OFF);
                //Serial.println("Front Doorbell off.");
                doorbellFOff = true;
              }
            }
          }
        }
        //Check to see if back doorbell button was pushed.
        if (currentMillis - doorbellBMillis > doorbellBDelay) //used to stop back doorbell from being pressed too frequently
        {
          debouncerB.update();
          // Read doorbell button value
          byte doorbellBDetect = !debouncerB.read();//read, then reverse the value so it will send correct trigger state to controller
      
          if (doorbellBDetect != doorbellBPreviousVal)
          {
            //Serial.print("doorbellBDetect Value: ");
            //Serial.println(doorbellBDetect);
            if (doorbellBDetect == 1)
            {
              ringDoorbellB = true;
              doorbellBTimer = currentMillis;
              gw.send(doorbellMsgB.set(doorbellBDetect?"1":"0"));  // Send tripped value to gw
            }
            doorbellBMillis = currentMillis;
            doorbellBPreviousVal = doorbellBDetect;
          }
        }
      
        if (ringDoorbellB)
        {
          if (doorbellBSound)
          {
            if (doorbellBOff)
            {
              digitalWrite(RELAYB_PIN, RELAYB_ON);
              //Serial.println("Back Doorbell sounded.");
              doorbellBOff = false;
            }
            else
            {
              if (currentMillis - doorbellBTimer > ringBTime)
              {
                ringDoorbellB = false;
                digitalWrite(RELAYB_PIN, RELAYB_OFF);
                //Serial.println("Back Doorbell off.");
                doorbellBOff = true;
              }
            }
          }
        }
      }
      
        void incomingMessage(const MyMessage & message) {
          // We only expect one type of message from controller. But we better check anyway.
          if (message.isAck()) {
            Serial.println("This is an ack from gateway");
          }
      
          if (message.type == V_LIGHT) {
            // Change relay state
            doorbellFSound = message.getBool();
            // Store state in eeprom
            gw.saveState(SWITCHF_CHILD_ID, doorbellFSound);
      
          if (message.type == V_LIGHT) {
            // Change relay state
            doorbellBSound = message.getBool();
            // Store state in eeprom
            gw.saveState(SWITCHB_CHILD_ID, doorbellBSound);
      
            // Write some debug info
            Serial.print("Incoming change for sensor:");
            Serial.print(message.sensor);
            Serial.print(", New status: ");
            Serial.println(message.getBool());
          }
        }
        }
      
      posted in My Project
      drock1985
      drock1985
    • RE: Need a refresher on presentation and HA

      @martinhjelmare

      Thanks, i finally got it. I went to the example you have on home-assistant.io and removed the button and added a second actuator. Works like it should now. You are the king!

      Final code for anyone whom it may help/want it.

      /*
       * Documentation: http://www.mysensors.org
       * Support Forum: http://forum.mysensors.org
       *
       * http://www.mysensors.org/build/relay
       * 
       * 
       *Holiday LED Lights MySensors Module, for MySensors v2.0 
       * Nothing fancy, just a two actuator (on/off) virtual switch for small
       * low powred LED strings that normally run from a battery pack. 
       * 
       * 
        */


      #define MY_DEBUG
      #define MY_RADIO_NRF24
      #define MY_REPEATER_FEATURE
      #define MY_NODE_ID 24 // or comment out for auto
      #include <SPI.h>
      #include <MySensors.h>
      
      #define MULTI_PIN  3 // Pin that Multi-Coloured LED string is connected to
      #define WHITE_PIN 5  // Pin that White LED string is connected to
      #define CHILD_ID_MULTI 1 // Child ID for Multi-Coloured LED String
      #define CHILD_ID_WHITE 2 // Child ID for White LED String
      #define MULTI_ON 1
      #define MULTI_OFF 0
      #define WHITE_ON 1
      #define WHITE_OFF 0
      
      
      bool stateMULTI = false; // Place holders for the loop function to register nodes in Home-Assistant
      bool initialValueSentMULTI = false;
      bool stateWHITE = false;
      bool initialValueSentWHITE = false;
      
      MyMessage msgMULTI(CHILD_ID_MULTI, V_STATUS); //Presentation of Switch for Multi-Coloured LEDS
      MyMessage msgWHITE(CHILD_ID_WHITE, V_STATUS); //Presentation of Switch for White LEDS
      
      void setup()
      {
        // Make sure relays are off when starting up
        digitalWrite(MULTI_PIN, MULTI_OFF);
        pinMode(MULTI_PIN, OUTPUT);
        digitalWrite(WHITE_PIN, WHITE_OFF);
        pinMode(WHITE_PIN, OUTPUT);
      }
      
      void presentation()  {
        sendSketchInfo("HolidayDeskLights", "1.0");
        present(CHILD_ID_MULTI, S_LIGHT);
        present(CHILD_ID_WHITE, S_LIGHT);
      }
      
      void loop()
      {
        if (!initialValueSentMULTI) {
          Serial.println("Sending initial value");
          send(msgMULTI.set(stateMULTI?MULTI_ON:MULTI_OFF));
          Serial.println("Requesting initial value from controller");
          request(CHILD_ID_MULTI, V_STATUS);
          wait(2000, C_SET, V_STATUS);
        }
      
          if (!initialValueSentWHITE) {
          Serial.println("Sending initial value");
          send(msgWHITE.set(stateWHITE?WHITE_ON:WHITE_OFF));
          Serial.println("Requesting initial value from controller");
          request(CHILD_ID_WHITE, V_STATUS);
          wait(2000, C_SET, V_STATUS);
        }
      
      }
      
      void receive(const MyMessage &message) {
        if (message.isAck()) {
           Serial.println("This is an ack from gateway");
        }
      
        if (message.type == V_STATUS && message.sensor == CHILD_ID_MULTI) {
          if (!initialValueSentMULTI) {
            Serial.println("Receiving initial value from controller");
            initialValueSentMULTI = true;
          }
          // Change relay state
          stateMULTI = (bool)message.getInt();
          digitalWrite(MULTI_PIN, stateMULTI?MULTI_ON:MULTI_OFF);
          send(msgMULTI.set(stateMULTI?MULTI_ON:MULTI_OFF));
        }
      
        if (message.type == V_STATUS && message.sensor == CHILD_ID_WHITE) {
          if (!initialValueSentWHITE) {
            Serial.println("Receiving initial value from controller");
            initialValueSentWHITE = true;
          }
          // Change relay state
          stateWHITE = (bool)message.getInt();
          digitalWrite(WHITE_PIN, stateWHITE?WHITE_ON:WHITE_OFF);
          send(msgWHITE.set(stateWHITE?WHITE_ON:WHITE_OFF));
        }
        
      }
      
      posted in Home Assistant
      drock1985
      drock1985
    • RE: 💬 MySensors Stable Node

      Wow, nice integration of the two largest PCB's @Koresh

      I'll be watching this thread for a while. I'm still not the most comfortable with soldering my own SMD components; but this is so tempting.

      The only thing I wish it had was a coax input for an optional external antenna.

      posted in OpenHardware.io
      drock1985
      drock1985
    • REQUEST: Tutorial/Step-by-step to install MySys bootloader

      Hi,

      Just throwing out a general request. Could someone please explain in a poke-yoke fashion way to flash the MySys bootloader to an Arduino (Uno/Nano/Micro/etc) to enable OTA updates and full functionality of the program? The reason I ask is I am completely new to firmware flashing on an Arduino; exception being using one as an ISP once to reflash the Arduino Bootloader (is that possible with MySys?)

      Thanks,

      posted in Troubleshooting
      drock1985
      drock1985
    • RE: How To: 2 Door Chime Automation Hack (Thanks @petewill)

      Hi @korttoma

      You are right, I did misplace those pull-up resistors on the diagram. I will update the original post with a proper fix.

      Thank you, much appreciated. 🙂

      posted in My Project
      drock1985
      drock1985
    • RE: Windows and configuration.yaml

      Might be the formatting of your configuration.yaml file. Spacing is very important. Try opening in notepad or a more text base/programmer environment (ex, Notepad++) and do a copy/paste from the info on the HA website. Edit as necessary.

      posted in Home Assistant
      drock1985
      drock1985
    • Ideas to detect car traffic in a driveway?

      Hi,

      I have a friend who owns a couple of greenhouses as a business. If no one is around in the greenhouse, he usually likes to sit inside until he sees someone down near them from his window, but he doesn't always hear/see people go in. He was asking me if there was any way I could think of to alert him to a car that would enter/exit his driveway. Mind you, he doesn't want to spend too much money on it and would rather do it himself since he has a farm and would have most of the tools on hand if needed.

      After doing some research, the only things I can think of that would reliably work would be either a induction-loop system similar to what traffic systems use to detect car rims (https://en.wikipedia.org/wiki/Induction_loop) but this would require running power to the source of the box/loop and don't really want to do that if possible. (http://hackaday.com/2014/04/04/building-an-inductive-loop-vehicle-detector/)

      So I was wondering if anyone was already doing such a project or was maybe looking into it? If not, I will probably recommend him the Open Hardware/Source induction loop and see what he thinks. It would be a fun project to do anyways :).

      posted in General Discussion
      drock1985
      drock1985
    • RE: Solar powered observation nesting box network

      Really fascinating stuff. Might have to look into this in the future sometime for my backyard.

      posted in My Project
      drock1985
      drock1985
    • Is it possible to delete specific nodes?

      Hi,

      I'm having some issues with one of the nodes in my network. I want to start over from scratch with this node (name, ID, etc) but I dont want to delete my entire sensor database. Is it possible to remove just the one entry? If so, anything special I should keep in mind?

      posted in Home Assistant
      drock1985
      drock1985
    • RE: Ideas to detect car traffic in a driveway?

      Hi @sundberg84 @Yveaux

      The width I have to cover is roughly 1.5 cars wide from what I can remember. I didn't take any exact measurements yet. The Radar and laserbeam ideas sound like good ideas to me. And the fact you use it as a counter sundberg gives me another idea to count customers.

      I'll look into both and probably order some parts for both. I have read the thread about the radar module and that sounds good if the 30 second timer could be somehow removed from the system (maybe adding a POT?).

      Another thing I need to figure out yet how to do is add a siren to the system for outside. I can use MySensors and direct node to node for inside if need be; but still a nice audible speaker for outside as well.

      Thanks again!

      posted in General Discussion
      drock1985
      drock1985
    • RE: OpenHAB, 230V Relays and external Switches

      hi @dgds

      Sounds like a fun project you have ahead. I don't use Openhab personally but I do use the relay+actuator (button) sketch for a lamp that I made some time ago. The light switch will show up in your home automation controller as a binary device (on or off, 1/0) and you can send and receive messages from there. You can also connect to the same Arduino a push button switch (ex. Tact button) so that you can toggle the switch physically instead. Pressing the tact button will also update your Openhab status accordingly.

      Also make sure for whatever relay you use to observe safe habits when working with mains voltage. I've seen some people have power supplies on this forum fry over time, and that would not be a good situation if you are doing a large amount of these.

      Also check out the openhardware.io subforum and website. There are a few users who are already working on such projects like this, and many that will work in commercially available fixtures that you may want. Ex. https://www.openhardware.io/view/77/AC-DC-double-solid-state-relay-module

      https://www.openhardware.io/view/13/In-Wall-ACDC-Pcb-for-MySensors

      posted in My Project
      drock1985
      drock1985
    • RE: Basic question: Light sensors

      @martinhjelmare

      Thanks martin. I think I got the code handled properly, but i'm getting a compile error.

      /**
       * The MySensors Arduino library handles the wireless radio link and protocol
       * between your home built sensors/actuators and HA controller of choice.
       * The sensors forms a self healing radio network with optional repeaters. Each
       * repeater and gateway builds a routing tables in EEPROM which keeps track of the
       * network topology allowing messages to be routed to nodes.
       *
       * Created by Henrik Ekblad <henrik.ekblad@mysensors.org>
       * Copyright (C) 2013-2015 Sensnology AB
       * Full contributor list: https://github.com/mysensors/Arduino/graphs/contributors
       *
       * Documentation: http://www.mysensors.org
       * Support Forum: http://forum.mysensors.org
       *
       * This program is free software; you can redistribute it and/or
       * modify it under the terms of the GNU General Public License
       * version 2 as published by the Free Software Foundation.
       *
       *******************************
       *
       * REVISION HISTORY
       * Version 1.0 - Derrick Rockwell (@Drock1985)
       * 
       * DESCRIPTION
       * 
       *
       */
      
      // Enable debug prints
      #define MY_DEBUG
      
      // Enable and select radio type attached
      #define MY_RADIO_NRF24
      //#define MY_RADIO_RFM69
      #define MY_NODE_ID 21
      #define MY_REPEATER_FEATURE //Enables Repeater feature for non-battery powered nodes. 
      #include <SPI.h>
      #include <MySensors.h>
      #include <DallasTemperature.h>
      #include <OneWire.h>
      #include <BH1750.h>
      #include <Wire.h>
      
      
      unsigned long SLEEP_TIME = 120000; // Sleep time between reports (in milliseconds)
      #define DIGITAL_INPUT_SENSOR 3   // The digital input you attached your motion sensor.  (Only 2 and 3 generates interrupt!)
      #define COMPARE_TEMP 1 // Send temperature only if changed? 1 = Yes 0 = No
      #define ONE_WIRE_BUS 4 // Pin where dallase sensor is connected 
      OneWire oneWire(ONE_WIRE_BUS); // Setup a oneWire instance to communicate with any OneWire devices (not just Maxim/Dallas temperature ICs)
      DallasTemperature sensors(&oneWire); // Pass the oneWire reference to Dallas Temperature. 
      int lastTemperature = 0;
      boolean receivedConfig = false;
      boolean metric = true;
      
      
      #define CHILD_ID_MOTION 1   // Id of the sensor child
      #define CHILD_ID_TEMP 2   // ID of Temperature Sensor
      #define CHILD_ID_LUX 3  // ID of Lux Sensor
      
      BH1750 lightSensor;
      
      // Initialize  messages
      MyMessage msgMotion(CHILD_ID_MOTION, V_TRIPPED);
      MyMessage msgTemp(CHILD_ID_TEMP, V_TEMP);
      MyMessage msgLux(CHILD_ID_LUX, V_LEVEL); //Sets up custom units (this case LUX for Light)
      MyMessage msgPrefix(CHILD_ID_LUX, V_UNIT_PREFIX); // Sends controller the LUX value instead of %
      
      uint16_t lastlux = 0;
      
      void setup()  
      {  
        pinMode(DIGITAL_INPUT_SENSOR, INPUT);      // sets the motion sensor digital pin as input
        lightSensor.begin();
        // Startup up the OneWire library
        sensors.begin();
        // requestTemperatures() will not block current thread
       sensors.setWaitForConversion(false);
        send(msgPrefix.set("Lux"));
        
      }
      
      void presentation()  {
        // Send the sketch version information to the gateway and Controller
        sendSketchInfo("LuxMotionTempSensor", "1.0");
      
        // Register all sensors to gw (they will be created as child devices)
        present(CHILD_ID_MOTION, S_MOTION);
        present(CHILD_ID_TEMP, S_TEMP);
        present(CHILD_ID_LUX, S_LIGHT_LEVEL);
      }
      
      void loop()     
      {     
       {     
        uint16_t lux = lightSensor.readLightLevel();// Get Lux value
        Serial.println(lux);
        if (lux != lastlux) {
            send(msgLux.set(lux));
            send(msgPrefix.set("Lux"));
            lastlux = lux;
        }}
      
         // Fetch temperatures from Dallas sensors
        sensors.requestTemperatures();
      
      
          // Fetch and round temperature to one decimal
          int temperature = (((sensors.getTempCByIndex(0)) * 10.)) / 10.;
          #if COMPARE_TEMP == 1
          if (lastTemperature != temperature && temperature != -127.00 && temperature != 85.00) {
          #else
          if (temperature != -127.00 && temperature != 85.00) {
          #endif
            // Send in the new temperature
            send(msgTemp.set(temperature,1));
            // Save new temperatures for next compare
            lastTemperature = temperature;
          }}
          // Read digital motion value
        boolean tripped = digitalRead(DIGITAL_INPUT_SENSOR) == HIGH; 
              
      //  Serial.println(tripped);
        send(msgMotion(tripped?"1":"0"));  // Send tripped value to gw 
      
        // Sleep until interrupt comes in on motion sensor. Send update every two minute.
        sleep(digitalPinToInterrupt(DIGITAL_INPUT_SENSOR), CHANGE, SLEEP_TIME);
      }


      I'll try it again tomorrow.

      Thank you again for pointing me in the right direction on custom units.

      posted in Home Assistant
      drock1985
      drock1985
    • RE: Ideas to detect car traffic in a driveway?

      @mfalkvidd

      Thanks. That explains it all pretty perfectly.

      posted in General Discussion
      drock1985
      drock1985
    • Need some help with a Multi-Sensor Node

      Hi,

      I'm working on making a multi-sensornode (PIR, Light, Temp and V_LIGHT (for night-light)), as well as a repeater node. So far though, I am having problems with the system reporting all the variables every second, instead of on change/every 10 seconds like I have in my sketch. I'm not sure where I am going wrong,. I need the device to only report changes, specifically on motion when it is detected, as well as to receive the V_STATUS message. Would someone please look over this and point me in the right direction? I've been looking at this off and on for a while now and I can't find anything that is majorly wrong.

      /**
       * The MySensors Arduino library handles the wireless radio link and protocol
       * between your home built sensors/actuators and HA controller of choice.
       * The sensors forms a self healing radio network with optional repeaters. Each
       * repeater and gateway builds a routing tables in EEPROM which keeps track of the
       * network topology allowing messages to be routed to nodes.
       *
       * Created by Henrik Ekblad <henrik.ekblad@mysensors.org>
       * Copyright (C) 2013-2015 Sensnology AB
       * Full contributor list: https://github.com/mysensors/Arduino/graphs/contributors
       *
       * Documentation: http://www.mysensors.org
       * Support Forum: http://forum.mysensors.org
       *
       * This program is free software; you can redistribute it and/or
       * modify it under the terms of the GNU General Public License
       * version 2 as published by the Free Software Foundation.
       *
       *******************************
       *
       * REVISION HISTORY
       * Version 1.0 - Derrick Rockwell (@Drock1985)
       * 
       * DESCRIPTION
       * 
       *
       */
      
      // Enable debug prints
      #define MY_DEBUG
      
      // Enable and select radio type attached
      #define MY_RADIO_NRF24
      //#define MY_RADIO_RFM69
      #define MY_NODE_ID 21
      #include <SPI.h>
      #include <MySensors.h>
      #include <DallasTemperature.h>
      #include <OneWire.h>
      #include <BH1750.h>
      #include <Wire.h>
      
      
      unsigned long SLEEP_TIME = 120000;    // Sleep time between reports (in milliseconds)
      #define DIGITAL_INPUT_SENSOR 3        // The digital input you attached your motion sensor.  (Only 2 and 3 generates interrupt!)
      #define COMPARE_TEMP 1                // Send temperature only if changed? 1 = Yes 0 = No
      #define ONE_WIRE_BUS 4                // Pin where dallase sensor is connected 
      #define LED_ARRAY_1 5                   // Pin that controls the LED Light array (does not need to be a PWM pin)
      #define LED_ARRAY_2 6
      #define MAX_ATTACHED_DS18B20 2
      // #define MY_REPEATER_FEATURE           //Enables Repeater feature for non-battery powered nodes. 
      OneWire oneWire(ONE_WIRE_BUS);        // Setup a oneWire instance to communicate with any OneWire devices (not just Maxim/Dallas temperature ICs)
      DallasTemperature sensors(&oneWire);  // Pass the oneWire reference to Dallas Temperature. 
      int lastTemperature = 0;
      int numSensors=0;
      boolean receivedConfig = false;
      boolean metric = true;
      
      
      #define CHILD_ID_MOTION 1   // ID of the sensor child
      #define CHILD_ID_TEMP 2     // ID of Temperature Sensor
      #define CHILD_ID_LUX 3      // ID of Lux Sensor
      #define CHILD_ID_LIGHT 4    // ID of LED light array
      
      #define LIGHT_ON 1
      #define LIGHT_OFF 0
      
      BH1750 lightSensor;
      
      // Initialize  messages
      MyMessage msgMotion(CHILD_ID_MOTION, V_TRIPPED);
      MyMessage msgTemp(CHILD_ID_TEMP, V_TEMP);
      MyMessage msgLux(CHILD_ID_LUX, V_LEVEL); //Sets up custom units (this case LUX for Light)
      MyMessage msgPrefix(CHILD_ID_LUX, V_UNIT_PREFIX); // Sends controller the LUX value instead of %
      MyMessage msgLight(CHILD_ID_LIGHT, V_STATUS);
      
      uint16_t lastlux = 0;
      int compareMotion = LOW;
      bool stateLight = 0; // Place holders for the loop function to register nodes in Home-Assistant
      bool initialValueSentLight = 0;
      
      void setup()  
      {  
        pinMode(DIGITAL_INPUT_SENSOR, INPUT);      // sets the motion sensor digital pin as input
        pinMode(LED_ARRAY_1, OUTPUT);                // sets the LED Array as an output
        pinMode(LED_ARRAY_2, OUTPUT);                // sets the LED Array as an output
        lightSensor.begin();
        // Startup up the OneWire library
        sensors.begin();
        // requestTemperatures() will not block current thread
        sensors.setWaitForConversion(false);
        send(msgPrefix.set("lux"));
      }
      
      void presentation()  {
        // Send the sketch version information to the gateway and Controller
        sendSketchInfo("LuxMotionTempSensor", "1.0");
      
        // Register all sensors to gw (they will be created as child devices)
        present(CHILD_ID_MOTION, S_MOTION);
        wait(150);
        present(CHILD_ID_TEMP, S_TEMP);
        wait(150);
        present(CHILD_ID_LUX, S_LIGHT_LEVEL);
        wait(150);
        present(CHILD_ID_LIGHT, S_LIGHT);
      }
      
      void loop()     
      {     
       
        if (!initialValueSentLight) {
          Serial.println("Sending initial value");
          send(msgLight.set(stateLight?LIGHT_ON:LIGHT_OFF));
          Serial.println("Requesting initial value from controller");
          request(CHILD_ID_LIGHT, V_STATUS);
          wait(2000, C_SET, V_STATUS);
        }
       
       {     
        uint16_t lux = lightSensor.readLightLevel();// Get Lux value
         
        if (lux != lastlux) {
          Serial.println(lux);
          Serial.println("Sending lux value");
            send(msgLux.set(lux));
            send(msgPrefix.set("lux"));
            lastlux = lux;
              }
              
       }
              
      
         // Fetch temperatures from Dallas sensors
        sensors.requestTemperatures();
      
      
          // Fetch and round temperature to one decimal
          int temperature = (((sensors.getTempCByIndex(0)) * 10.)) / 10.;
          if (lastTemperature != temperature && temperature != -127.00 && temperature != 85.00) 
          Serial.println(temperature);
          Serial.println("Sending temperature");{
           // Send in the new temperature
            send(msgTemp.set(temperature));
            // Save new temperatures for next compare
            lastTemperature = temperature;
          }
         // Read digital motion value
        boolean tripped = digitalRead(DIGITAL_INPUT_SENSOR) == HIGH; 
      //  if (compareMotion != tripped)  {
        Serial.println("Sending motion status");
        Serial.println(tripped);
        send(msgMotion.set(tripped?"1":"0"));  // Send tripped value to gw   
      //  compareMotion = tripped;
      //  }
      
      // sleep(digitalPinToInterrupt(DIGITAL_INPUT_SENSOR), CHANGE, SLEEP_TIME);
      
      }
      
      void receive(const MyMessage &message) {
        if (message.isAck()) {
           Serial.println("This is an ack from gateway");
        }
      
        if (message.type == V_STATUS && message.sensor == CHILD_ID_LIGHT) {
          if (!initialValueSentLight) {
            Serial.println("Receiving initial value from controller");
            initialValueSentLight = true;
          }
          // Change relay state
          stateLight = (bool)message.getInt();
          digitalWrite(LED_ARRAY_1, stateLight?LIGHT_ON:LIGHT_OFF);
          digitalWrite(LED_ARRAY_2, stateLight?LIGHT_ON:LIGHT_OFF);
          send(msgLight.set(stateLight?LIGHT_ON:LIGHT_OFF));
        }
      }
      

      Thanks,

      posted in My Project
      drock1985
      drock1985
    • RE: unable to open USB port

      @chilliman

      Go with the latest LTS build of Ubuntu. LTS stands for Long Term Support and guarantees security updates to that version for 5 years(?); and can be easily updated to the latest if you wish.

      Also depending on what you comfort level is with Linux in general. there are several other flavours/distributions of Ubuntu, including a Server edition that is completely text based and uses the least system resources.

      posted in Home Assistant
      drock1985
      drock1985
    • RE: Humble book bundle for electronics

      Thanks for the link @mfalkvidd , ordered. Should be some fun projects for the kid and I over the summer.

      posted in General Discussion
      drock1985
      drock1985
    • Future PIR Enclosure or existing PIR modification, not sure yet :)

      Hey friends!

      I've been on the hunt now for a cheap enclosure for the PIR motion sensors I plan to build. Was originally going to go with a snap together case and cut/hack it apart that I found at the dollar store, then I found this:

      IMG_20150822_110221.jpg

      It's an existing battery powered, PIR LED light! It's a nice unit on it's own, for $4.99 retail. It's powered by 3AA batteries in series, gives a total of roughly 4Volts when measured across the battery pack. The PIR sensor itself is a 110 degree motion sensor, but in all honesty I think it's closer to 90-95 from my testing. The 10 LED lights that it comes with aren't too bad either.

      Plan on doing some more testing with this on the weekend and see what ideas I come up with. Based on what testing I did so far (without opening the case), I would say the PIR sensor in this will have to go, and since these will be permanent fixtures in my house, probably use the battery pack room for the components. Not sure if I will keep the LED lights yet or not (maybe a secondary night-light?)

      Will keep posting in this thread as I go along. Here are a few more pics I got for ideas. 🙂

      IMG_20150822_110617.jpg IMG_20150822_110628.jpg IMG_20150822_110246.jpg

      posted in Enclosures / 3D Printing
      drock1985
      drock1985
    • RE: unable to open USB port

      @chilliman

      Not sure what else to tell you. Like Martin said, for a node to appear at all in HA; it must do two things. 1) send the full presentation on the node start. Easiest way to do that is to start HA, and after HA is fully started put power to your motion sensor. 2) It must send a valid sensor status. In the case of a motion sensor, I believe it is either 1 or 0 (1 being motion detected, 0 being none).

      The only thing I can see is maybe the / needs to be in front of home. Can't see it causing this many issues though.

      mysensors:
        gateways:
          - device: '/dev/ttyUSB0'
            persistence_file: '/home/pi/.homeassistant/mysensors.json'
            baud_rate: 115200
        debug: false
        persistence: true
      

      Other than that i'm not sure what else to suggest. If everything is configured right, it should see it. You may also want to check out the debug part of MySensors config and HA to better determine your issue. @martinhjelmare help me with that issue some time ago.

      posted in Home Assistant
      drock1985
      drock1985
    • RE: Adapter for RFM69 on NRF24L01+ pinout-header

      Thanks @alexsh1, that answers that.

      One other quick question. Other than ordering the PCB's from dirtypcb's; any other hardware for the board required? I know I will need wire for an antenna, but wasn't sure if there was any need for capacitors or resistors. I looked through the thread and found no parts list so i'm leaning towards no.

      Thanks again,

      posted in Hardware
      drock1985
      drock1985
    • RE: Laptop recommendation

      @tbowmo said:

      I've only got bad experience with acer aspire computers, the build quality is terrible, and usually they use outdated hw, and bloat it with unnecessary programs.

      I used to sell Computers (first job) and Acer Laptops were out biggest seller - and largest warranty claims. Stay away from Acer unless you plan on buying the Cadillac of extended warranties. If you are looking for build quality, I would recommend IBM (Bit pricey) or HP. We have been using HP computers where I work now for a few years now, and our laptops and desktops all have little to no issues with the overall build quality. Sometimes components fail (ex. hard drives) but that can happen with any PC.

      posted in General Discussion
      drock1985
      drock1985
    • RE: MySensors lights not functioning correctly since upgrade to 0.61.1

      Damn; I think I may have just fixed it. Changed USB ports......

      posted in Home Assistant
      drock1985
      drock1985
    • RE: Nice push buttons?

      I like using the cheap tact/momentary switches. Like you said, you know when you press them, and they come in various sizes/lengths. The downside is, not so aesthetic to the eyes, and can be problematic to mount. The best use for them in practice (imho) is soldered onto PCB board projects. That being said, in a pinch I've used them for manual relay switching and they are held in cases with glue and tape and still serve their purpose.

      I think the choice will come down to how you are applying it to your project. For example looking at the RGB button you posted. I imagine using the led as a status display for a temperature or water level node, and the push button a manual override. Would work well for small areas/enclosures.

      posted in Hardware
      drock1985
      drock1985