Checking mechanical locked doors by a battery-based windows/door sensor node
-
The trigger to start this project was remarking, for the umpteenth time in the morning, that the door had been unlocked again all night.
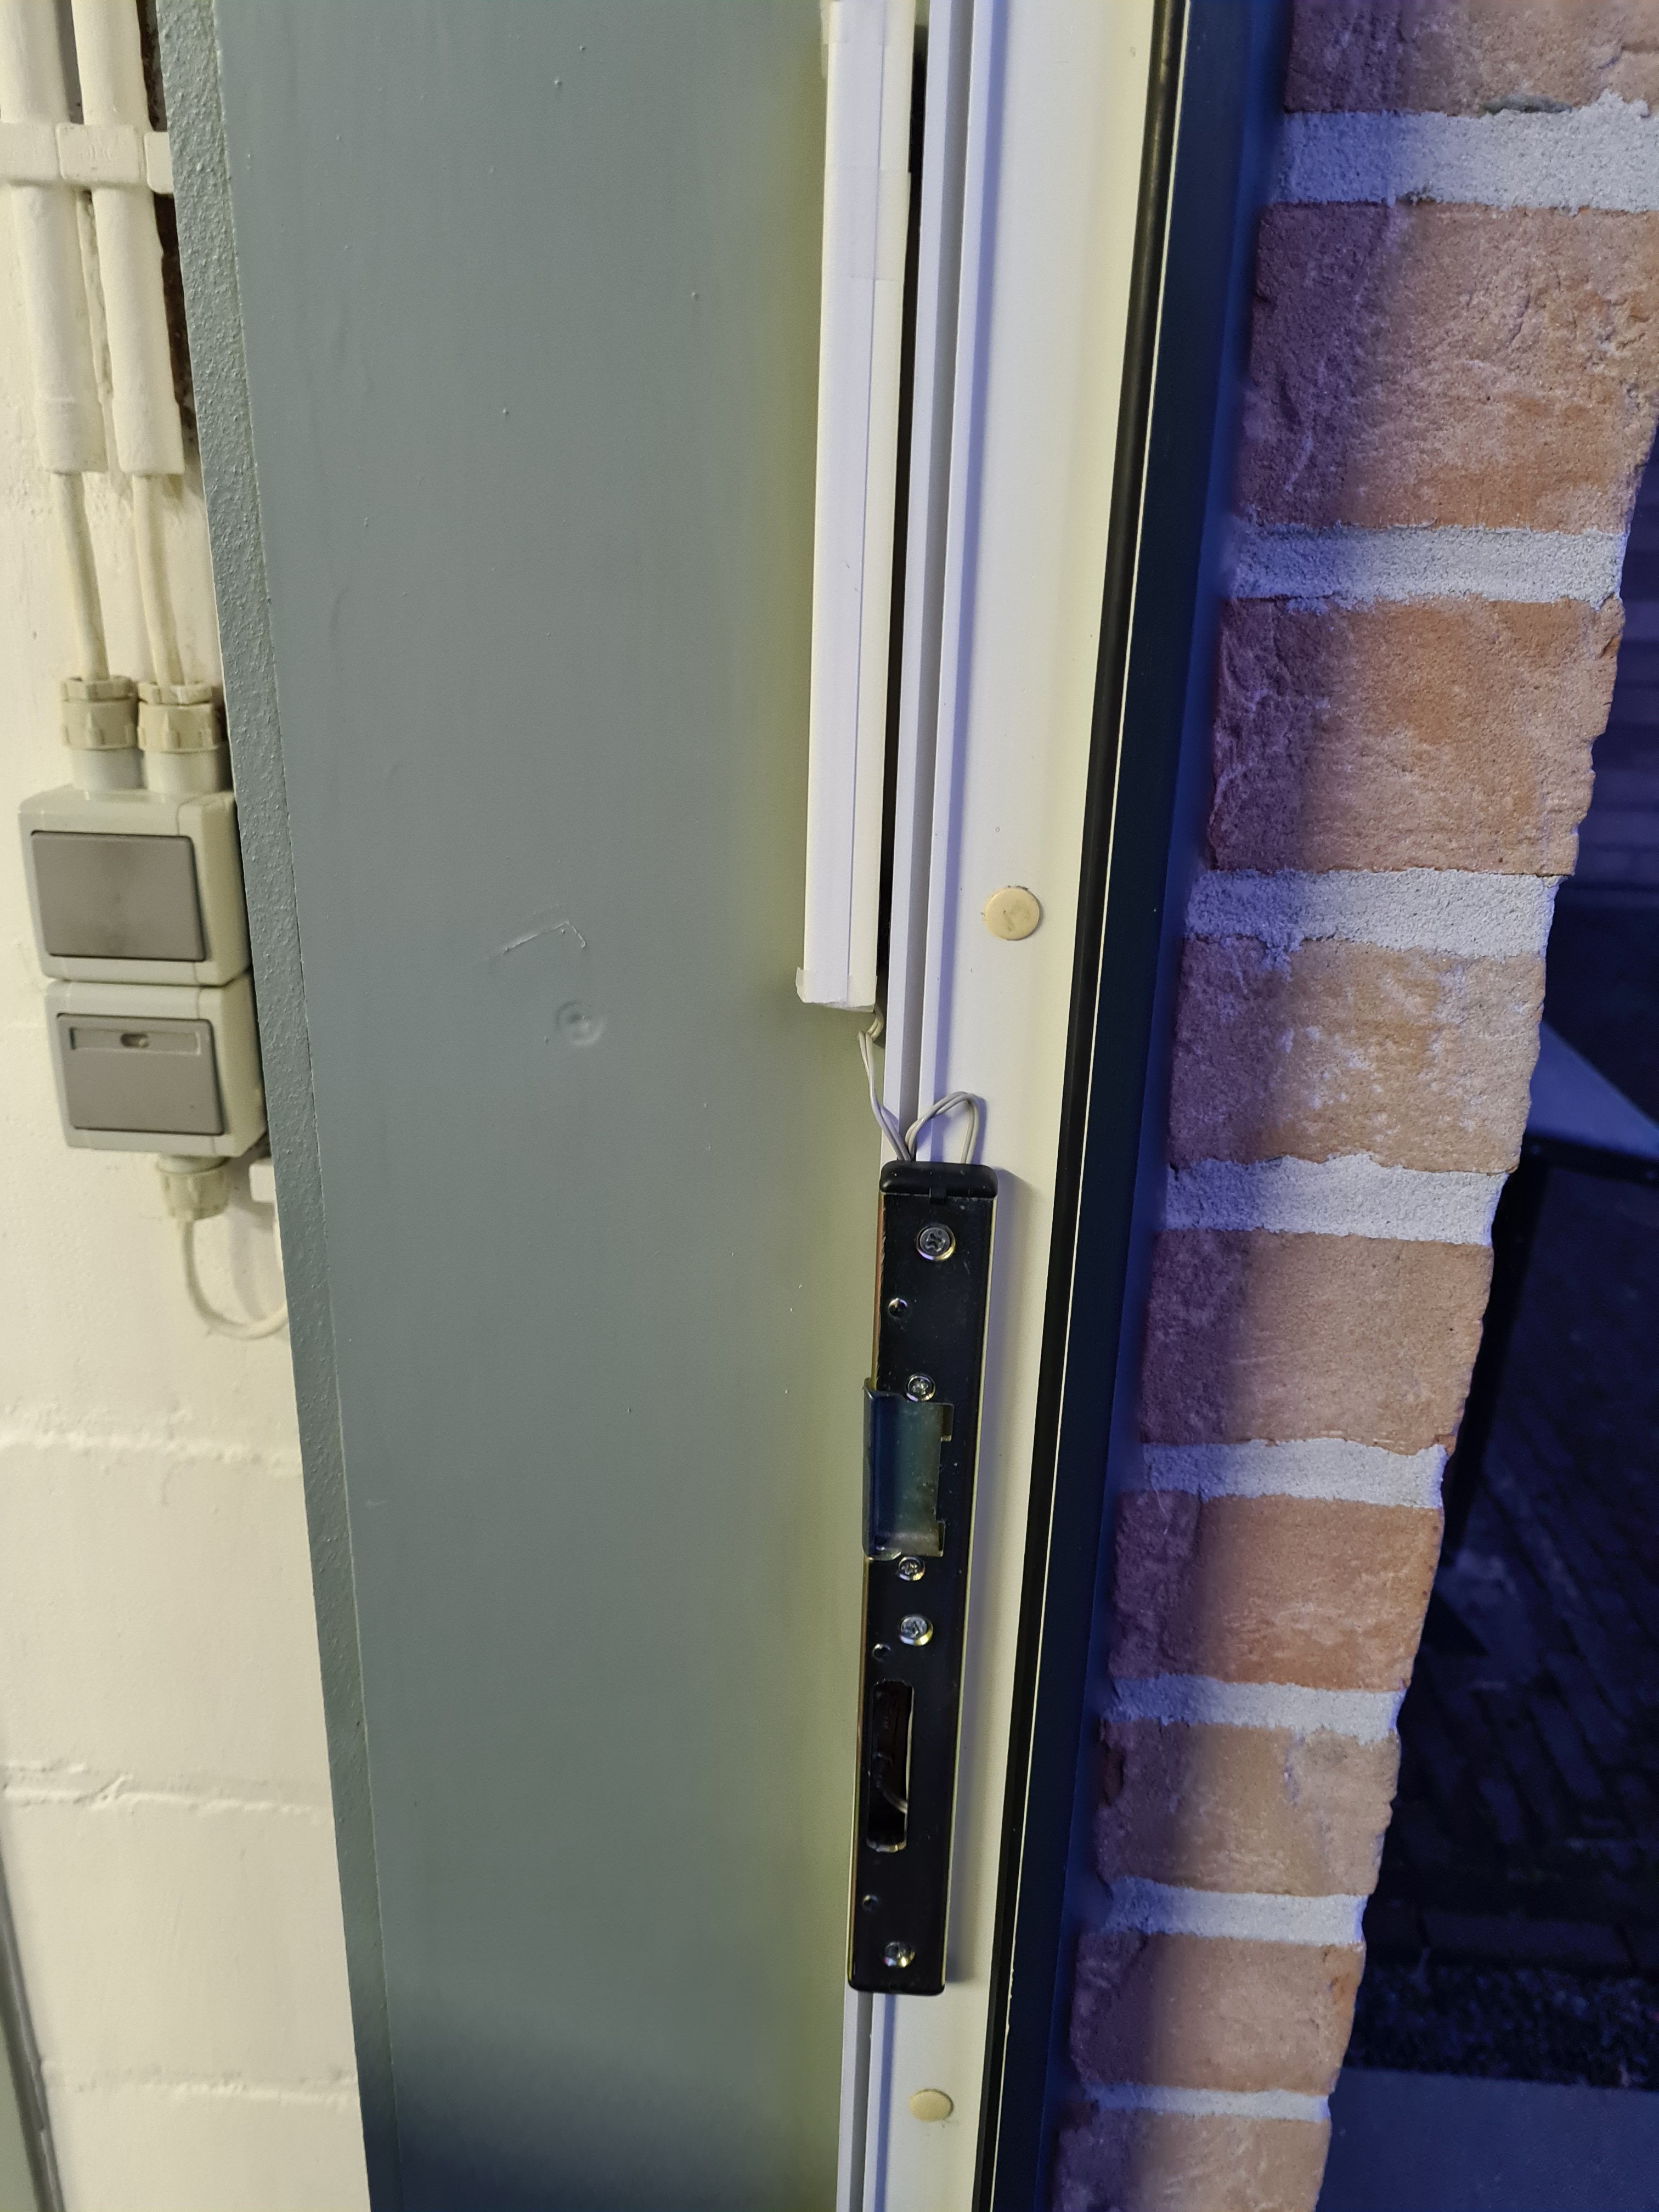
Replacing the mechanical locks on the 4 doors by electric locks was out of the question, too expensive and the need for electric cables that were not present.So, how to detect if a mechanical lock is closed?
The internet is an incredible source of ideas:
https://community.home-assistant.io/t/how-i-made-my-dumb-locks-a-little-smarter/55174
https://community.home-assistant.io/t/i-made-a-simple-lock-sensor-with-xiaomi-door-sensor-some-battery-holders-and-a-soldering-iron/49445
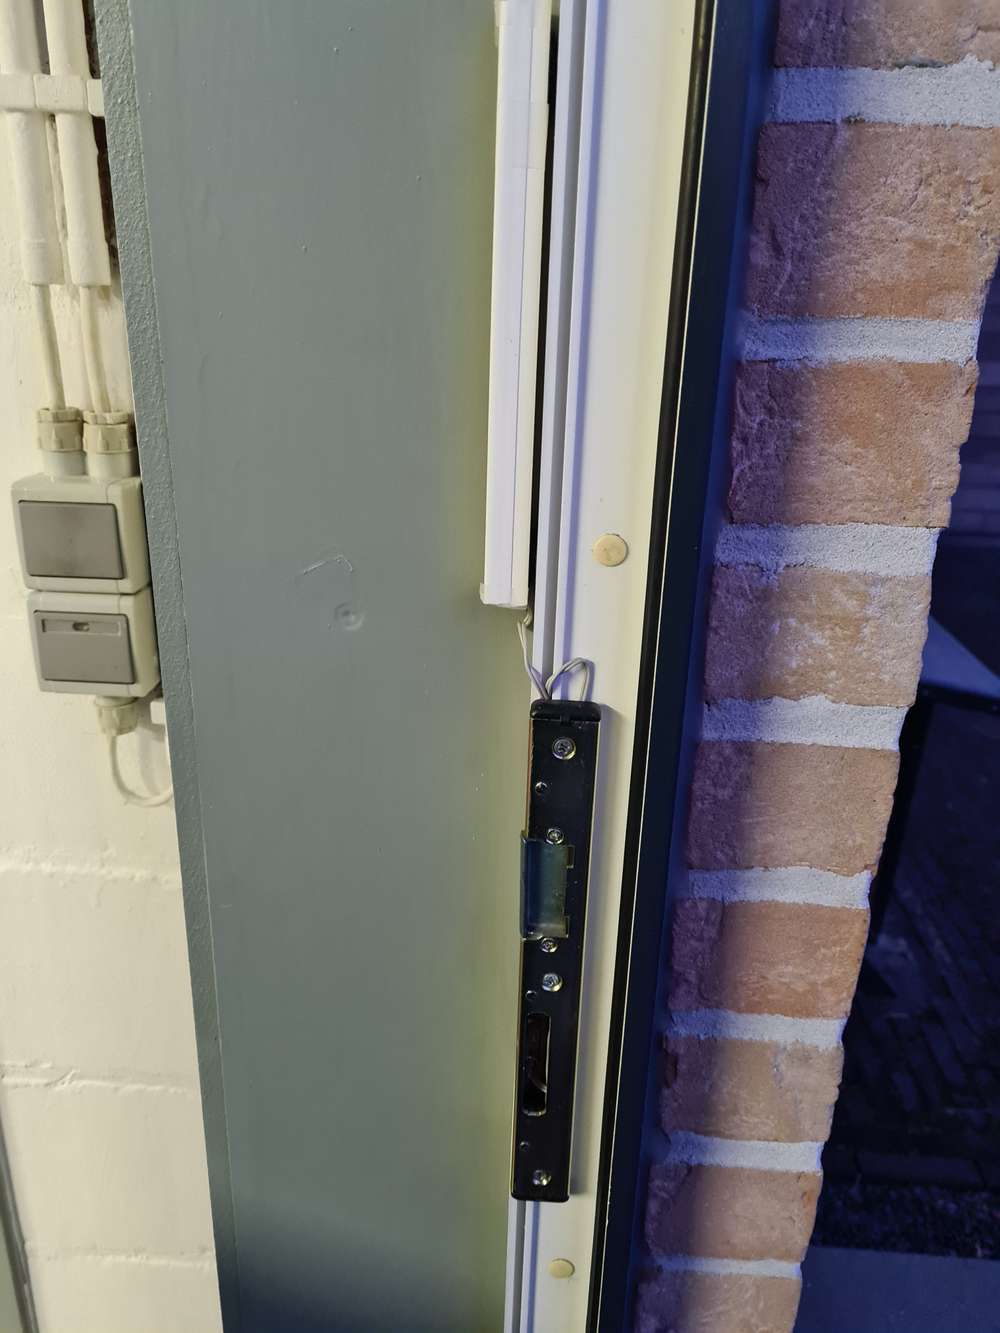
With this idea, let the bolt close a contact, I could use the standard window/door sensor node!
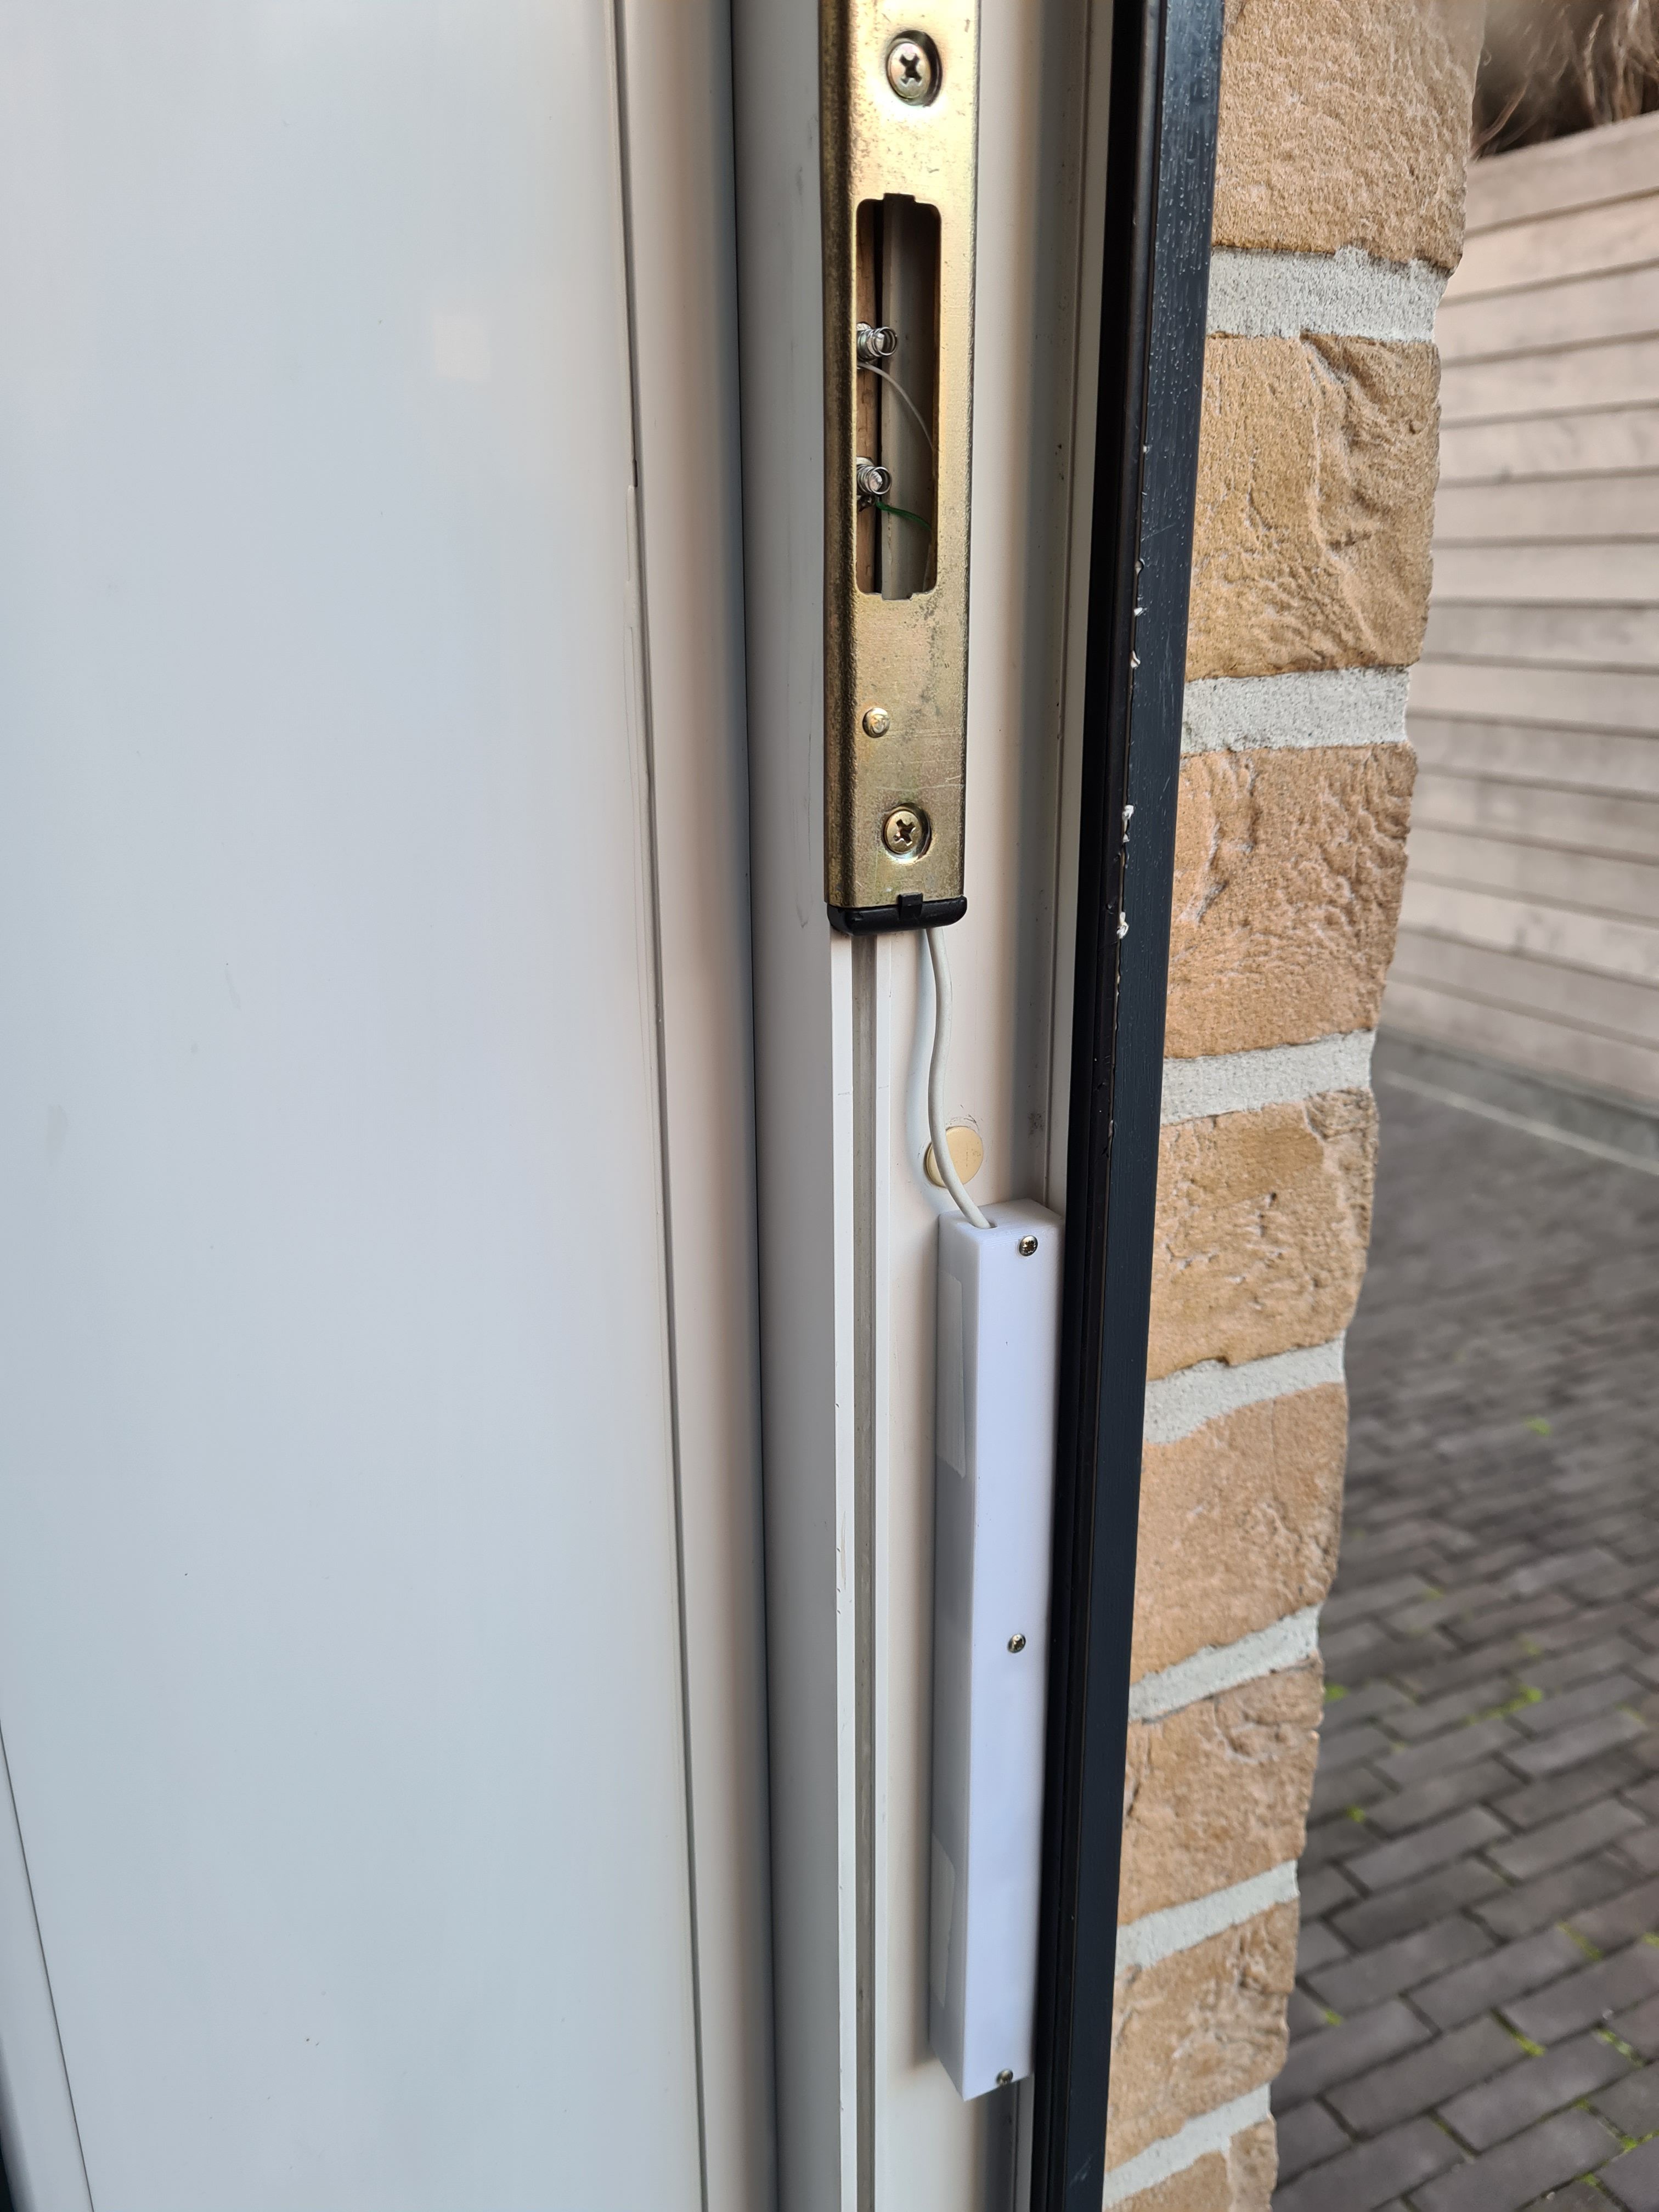
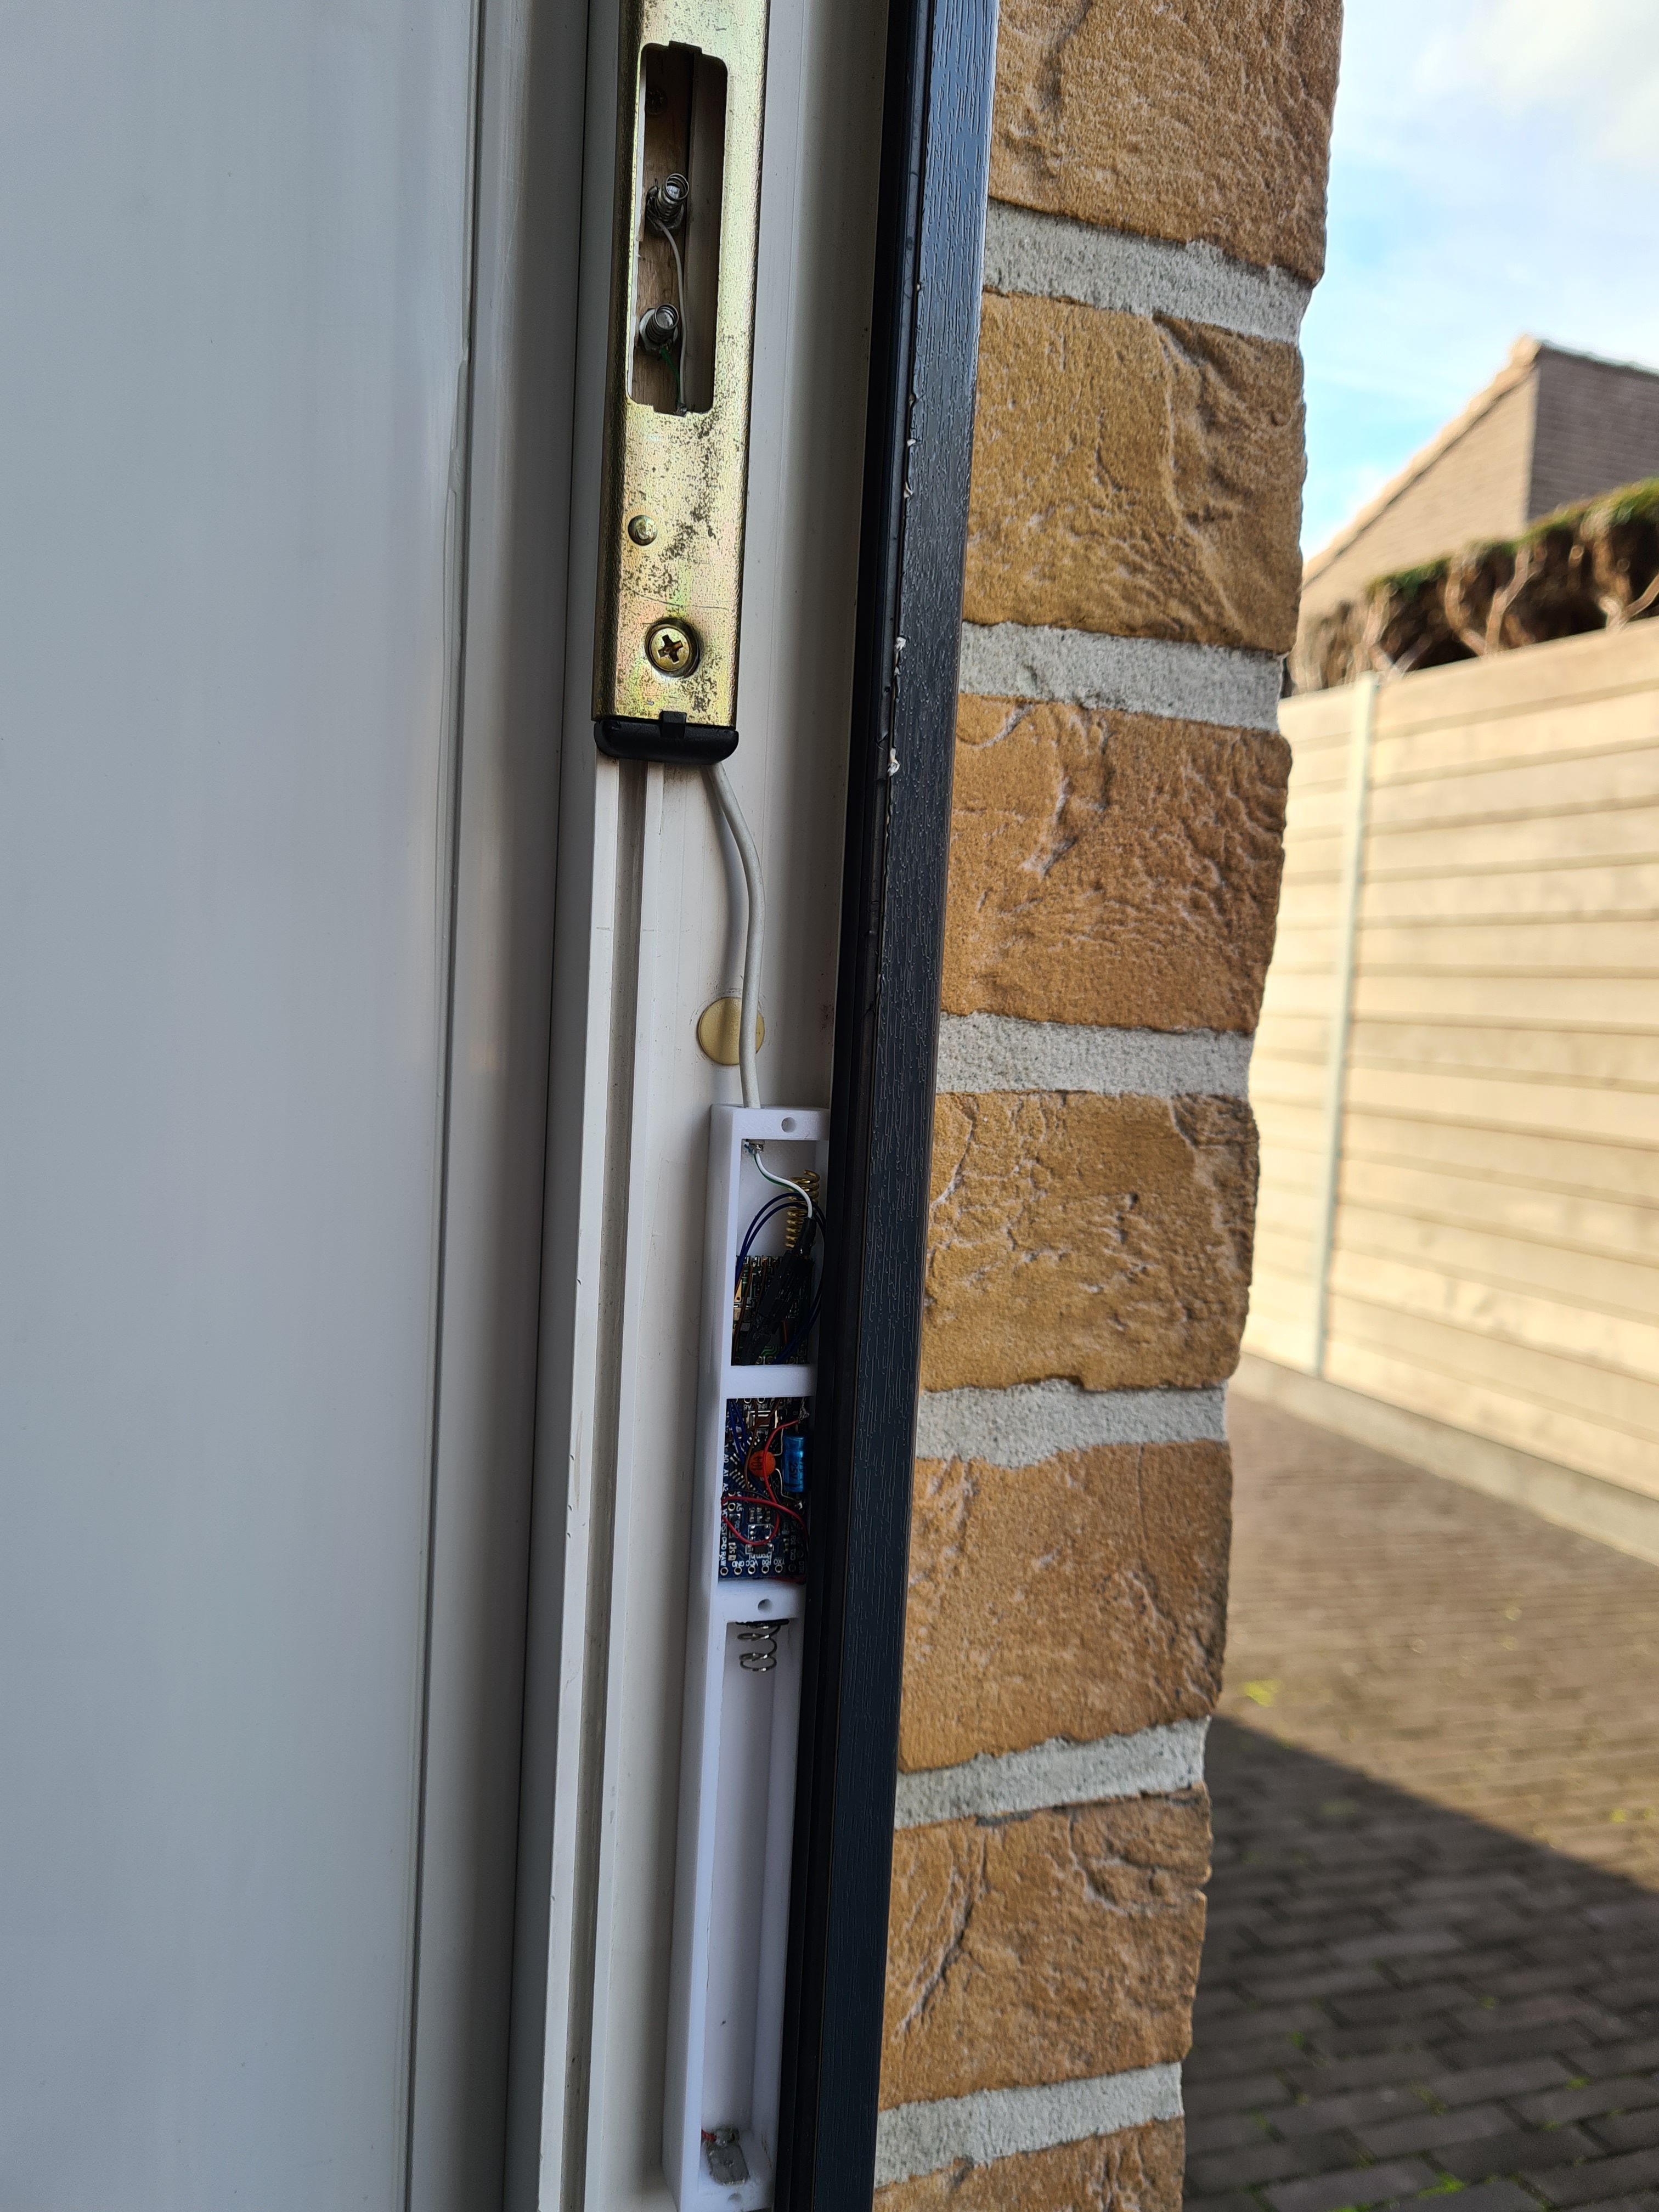
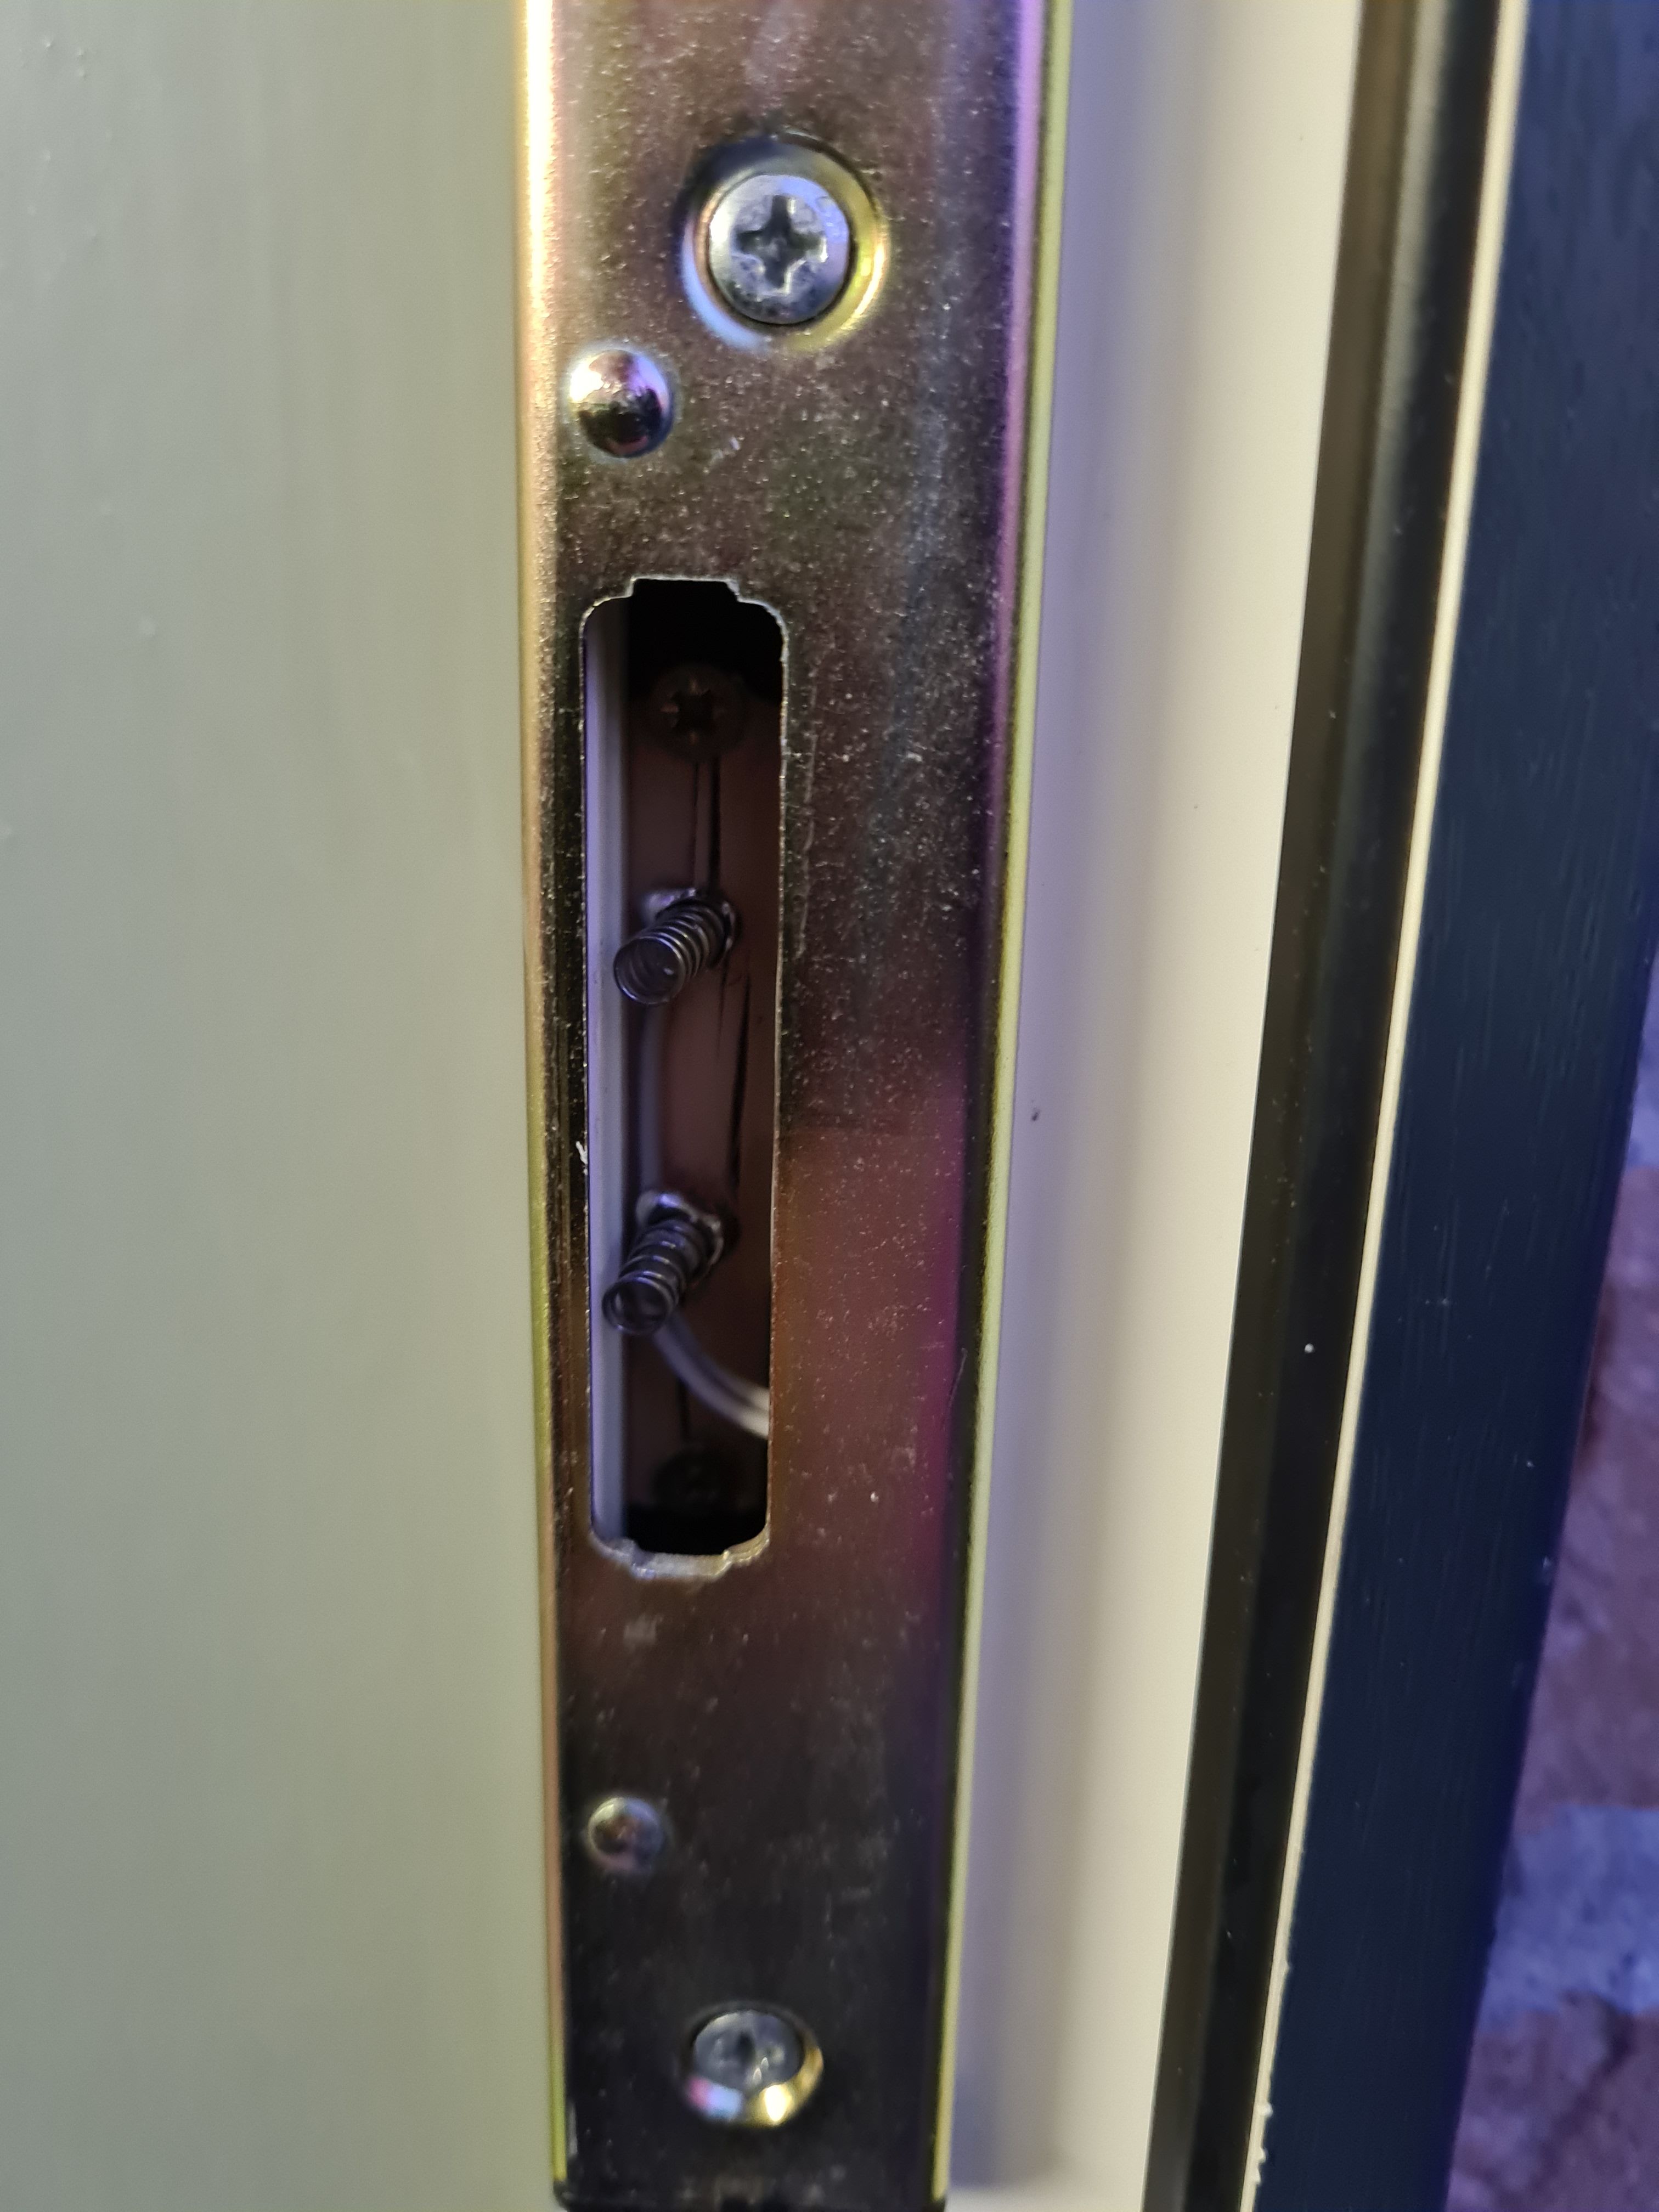
So I made my version by using springs I found in my junk bin mounted on a piece of wood, namely the wooden stick of an ice cream 😊
My first prototype was working, but not really a piece of art ☹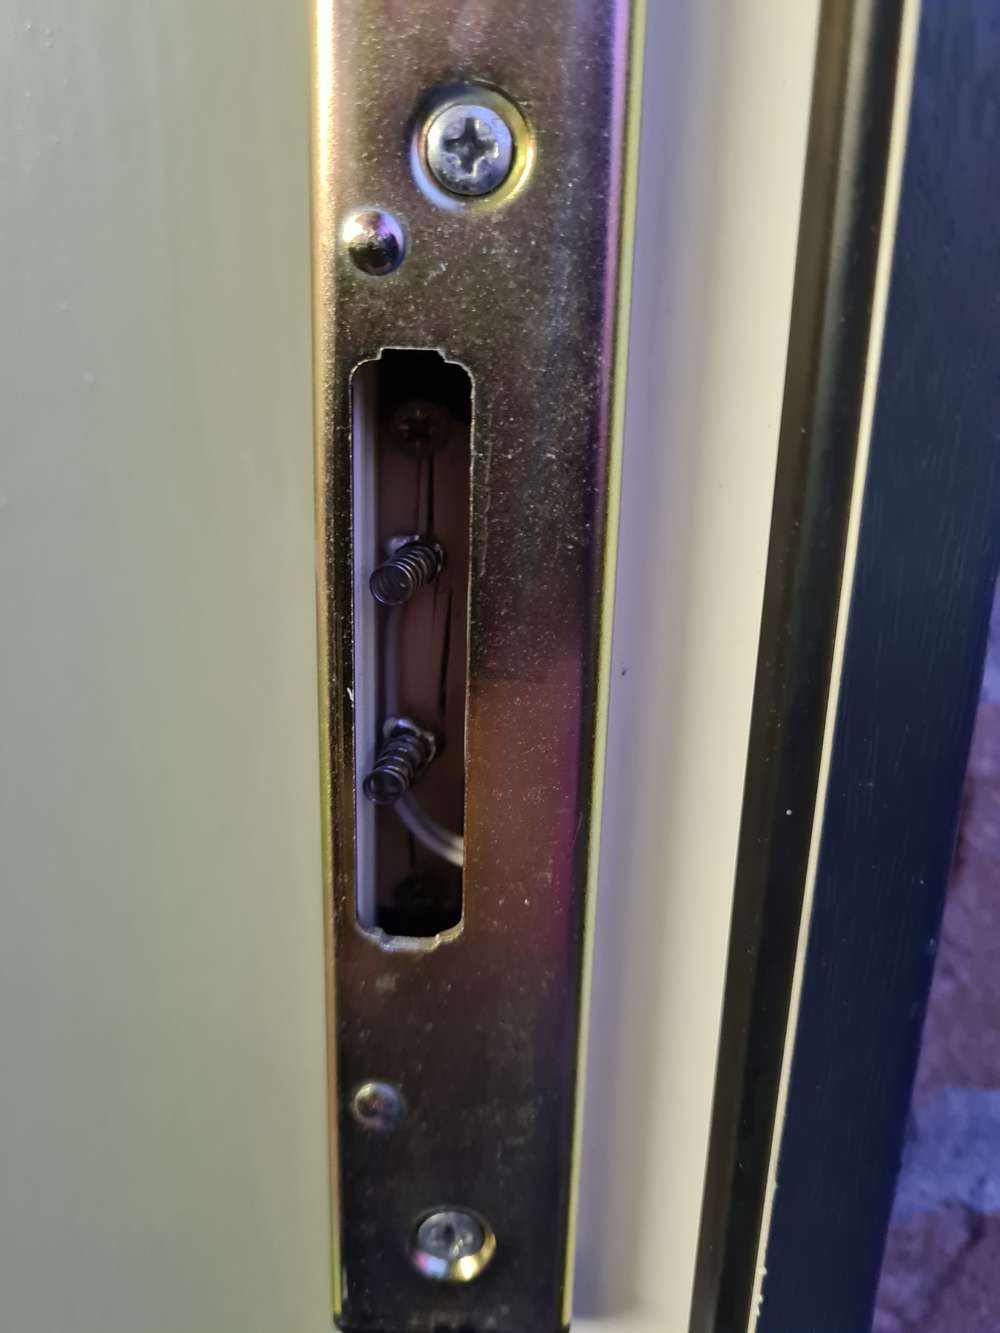
Remember to always drill holes because the wood of the stick splits very easily.I did use battery springs for my other nodes, they are stronger and easier to use.
The battery-based windows/door sensor node : hardware
I had never built a battery based node before, so as a first step, I did read the site article on the MySensors site: https://www.mysensors.org/build/battery
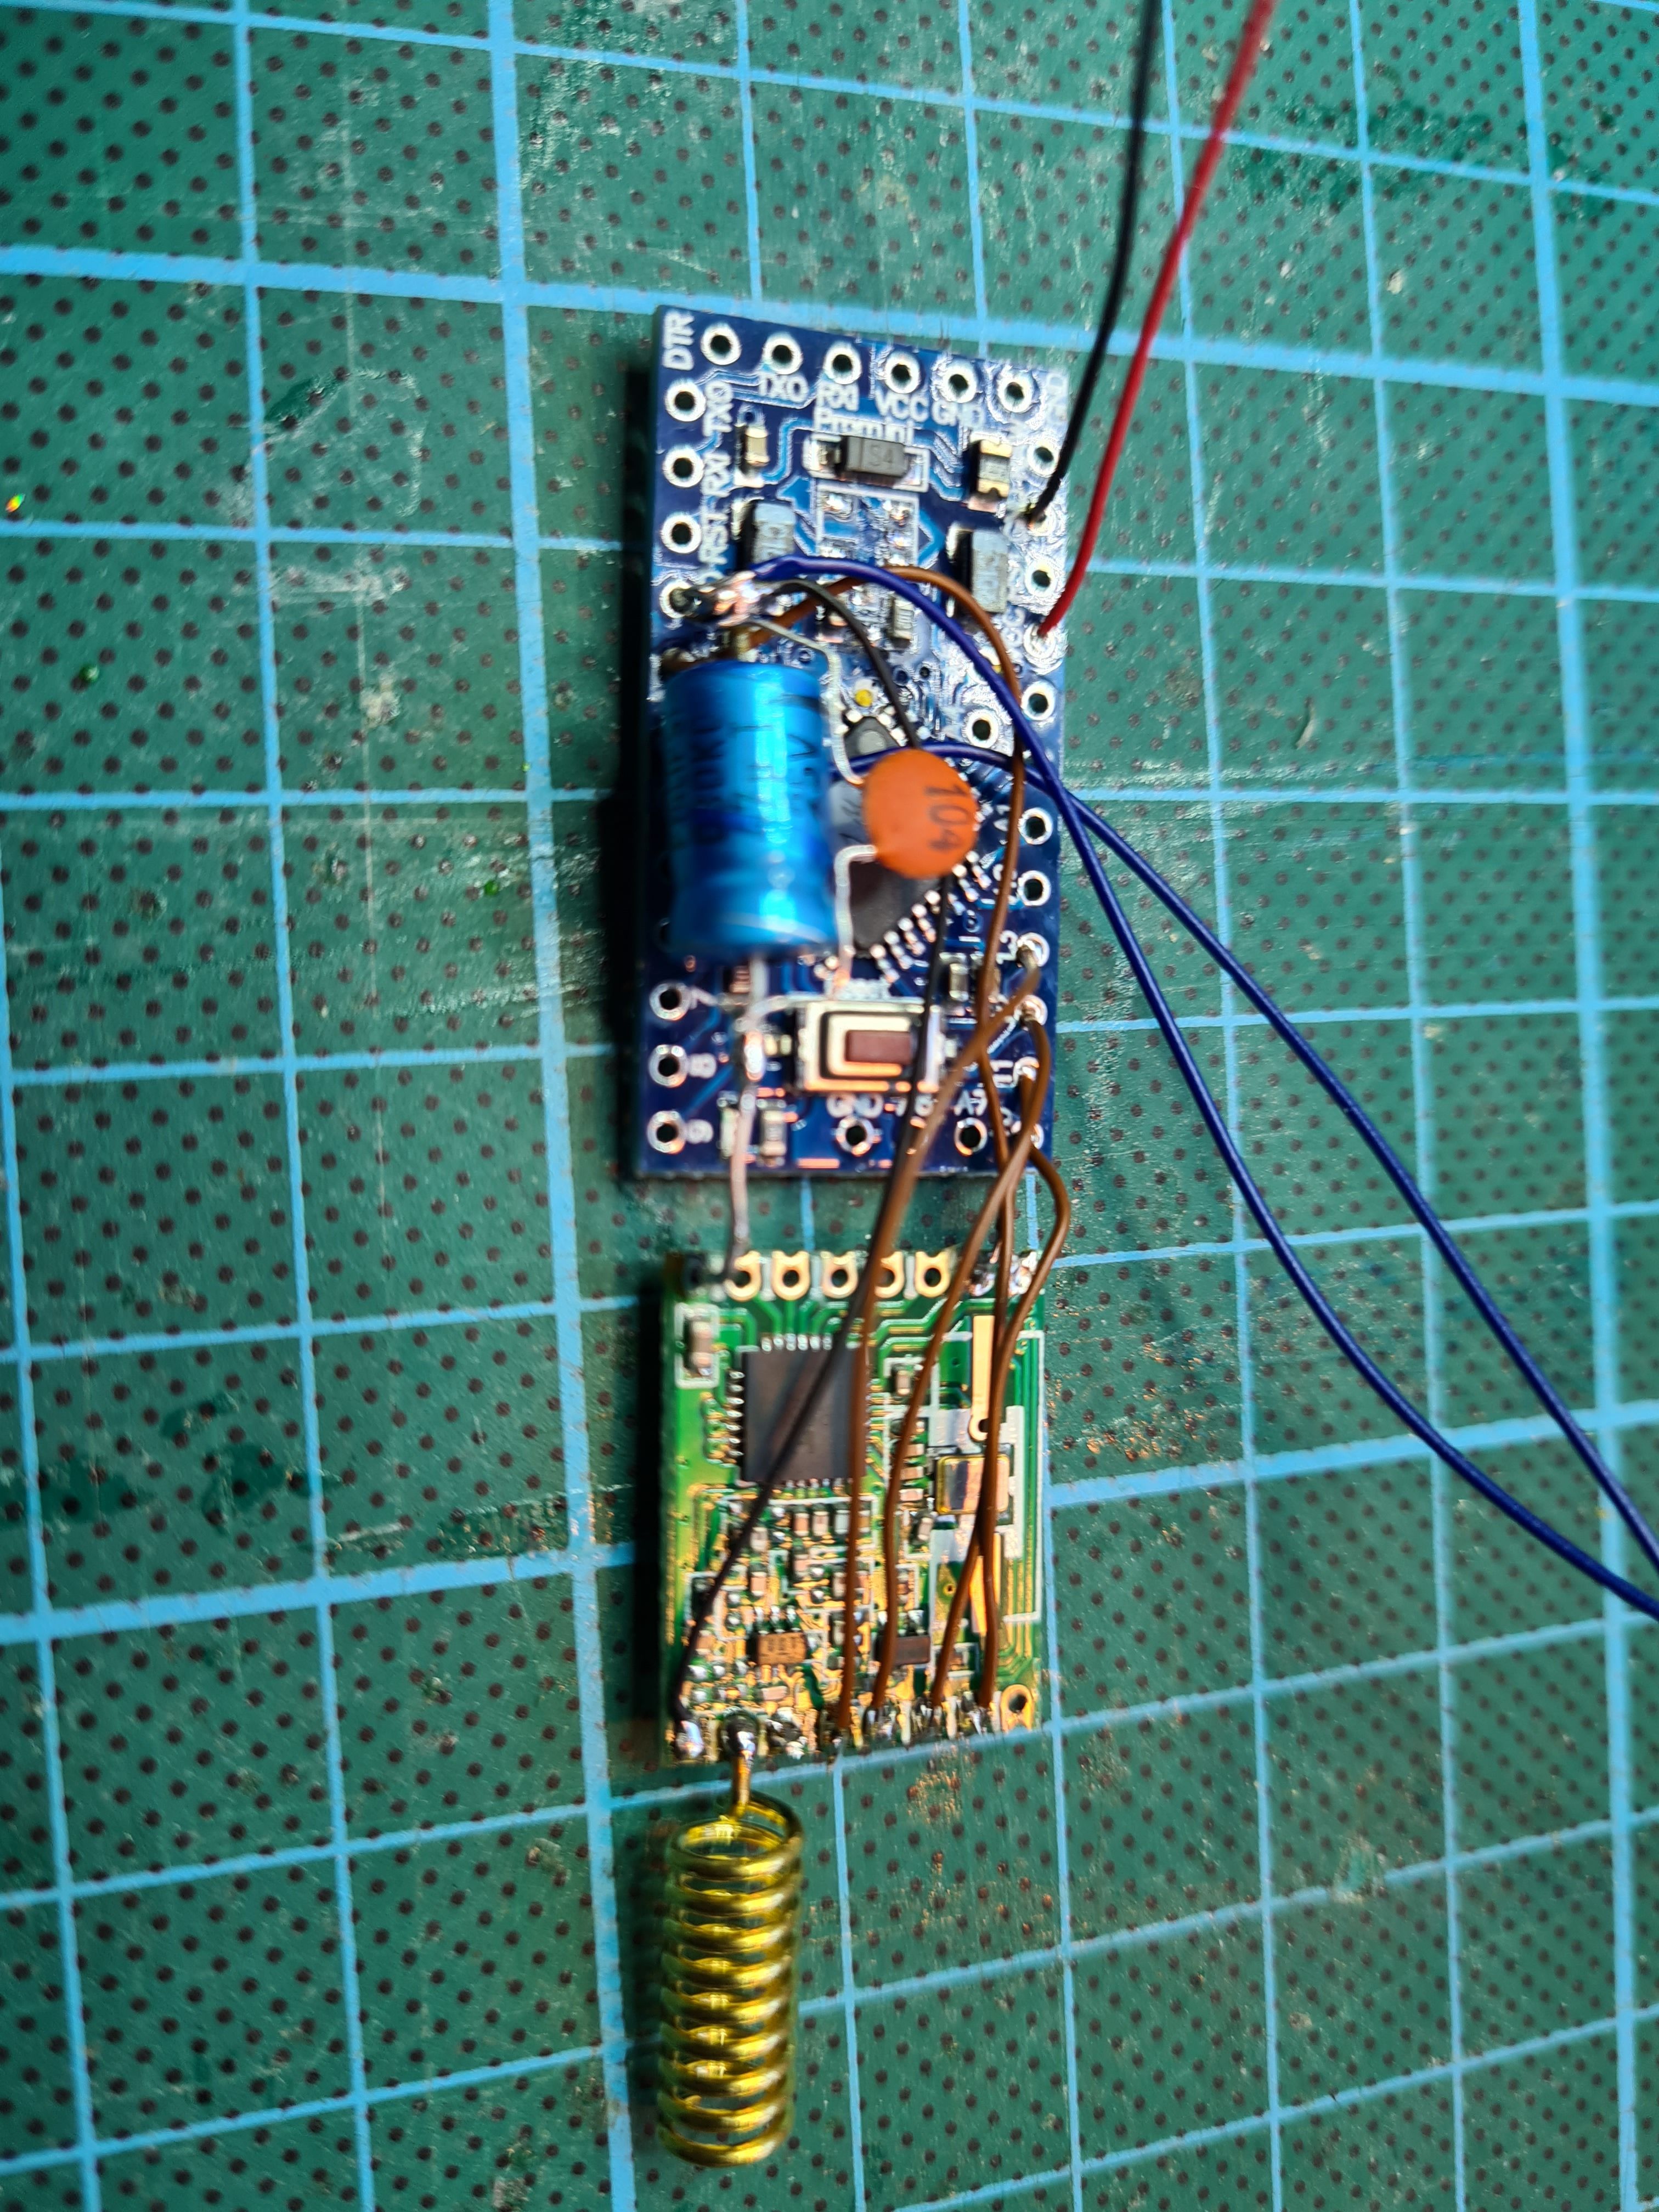
Luckily, I already had Pro Mini's and enough RFM69HW radios in stock.
Today I know that I did probably the wrong choice by using the Pro Mini’s. They are good in low consumption, but a bare bone 328P used like in this topic https://forum.mysensors.org/topic/2067/my-slim-2aa-battery-node is still better...
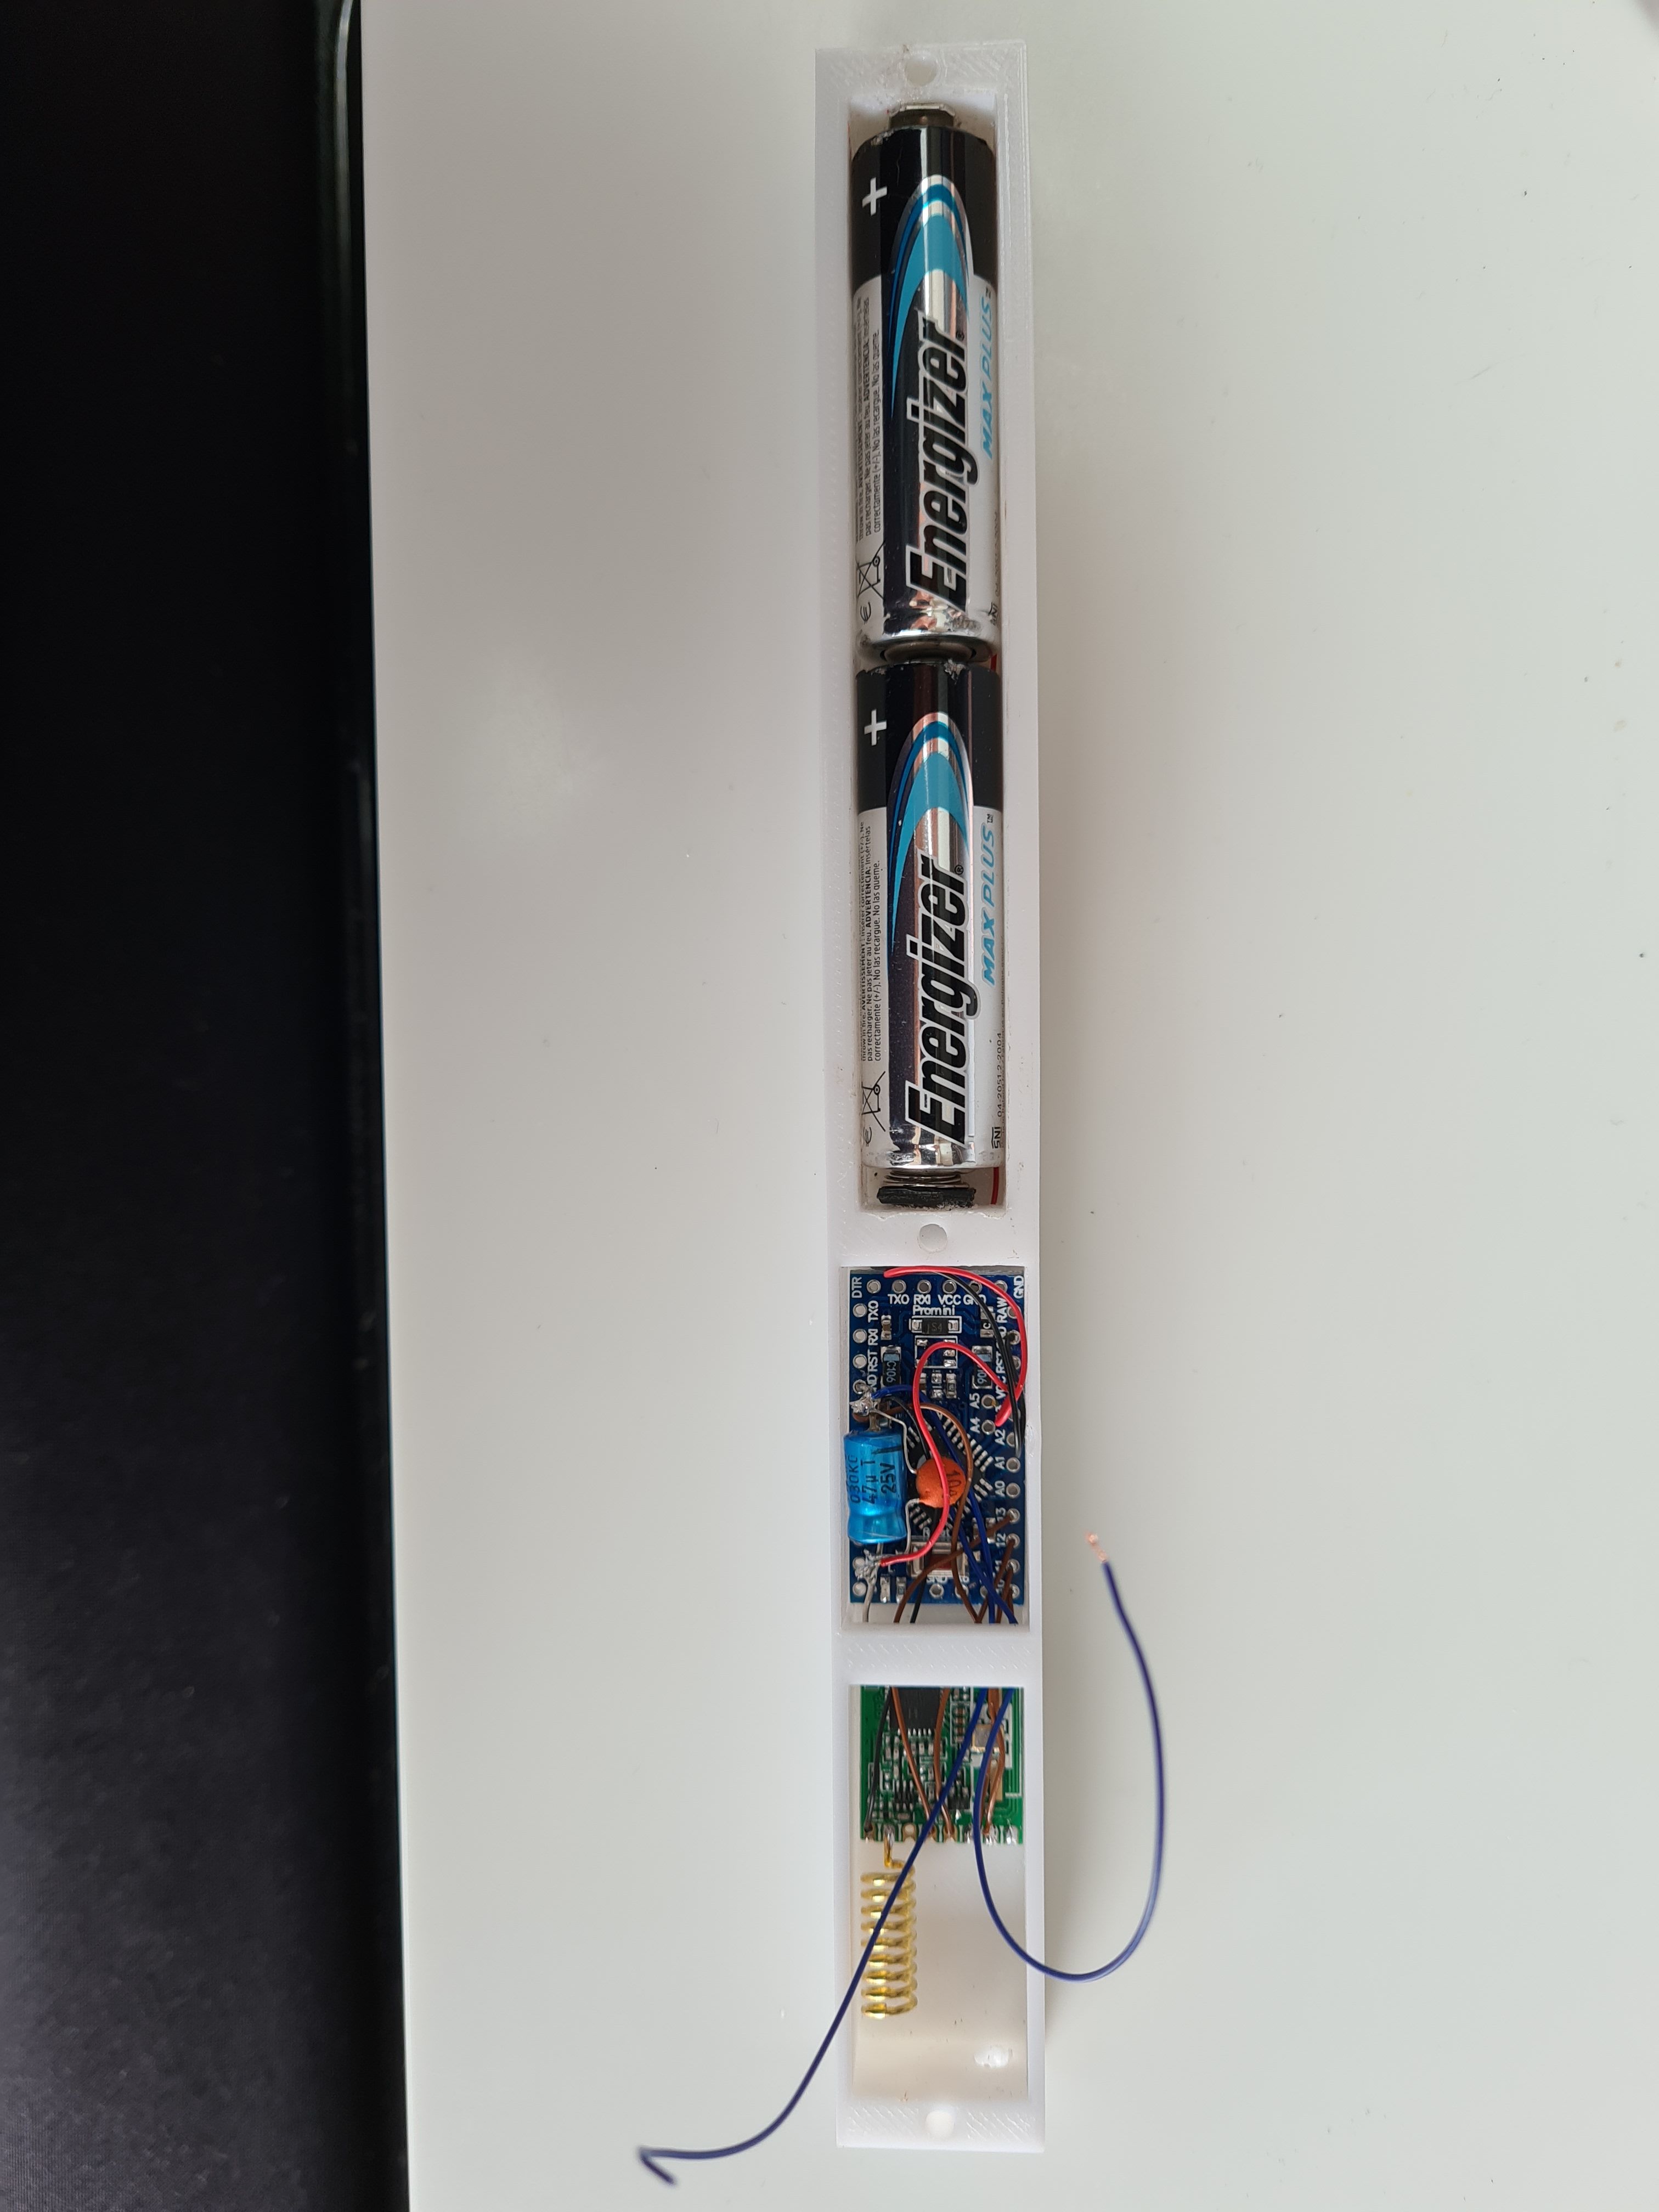
But we will see how far these Pro Mini’s will take us on 2x AA batteries!My first node was based on the idea to use the same enclosure as in the above topic. In Belgium these cable ducts are known under the name Legrand and I had a still a piece of more then 1 meter lying around, a surplus from the renovations.
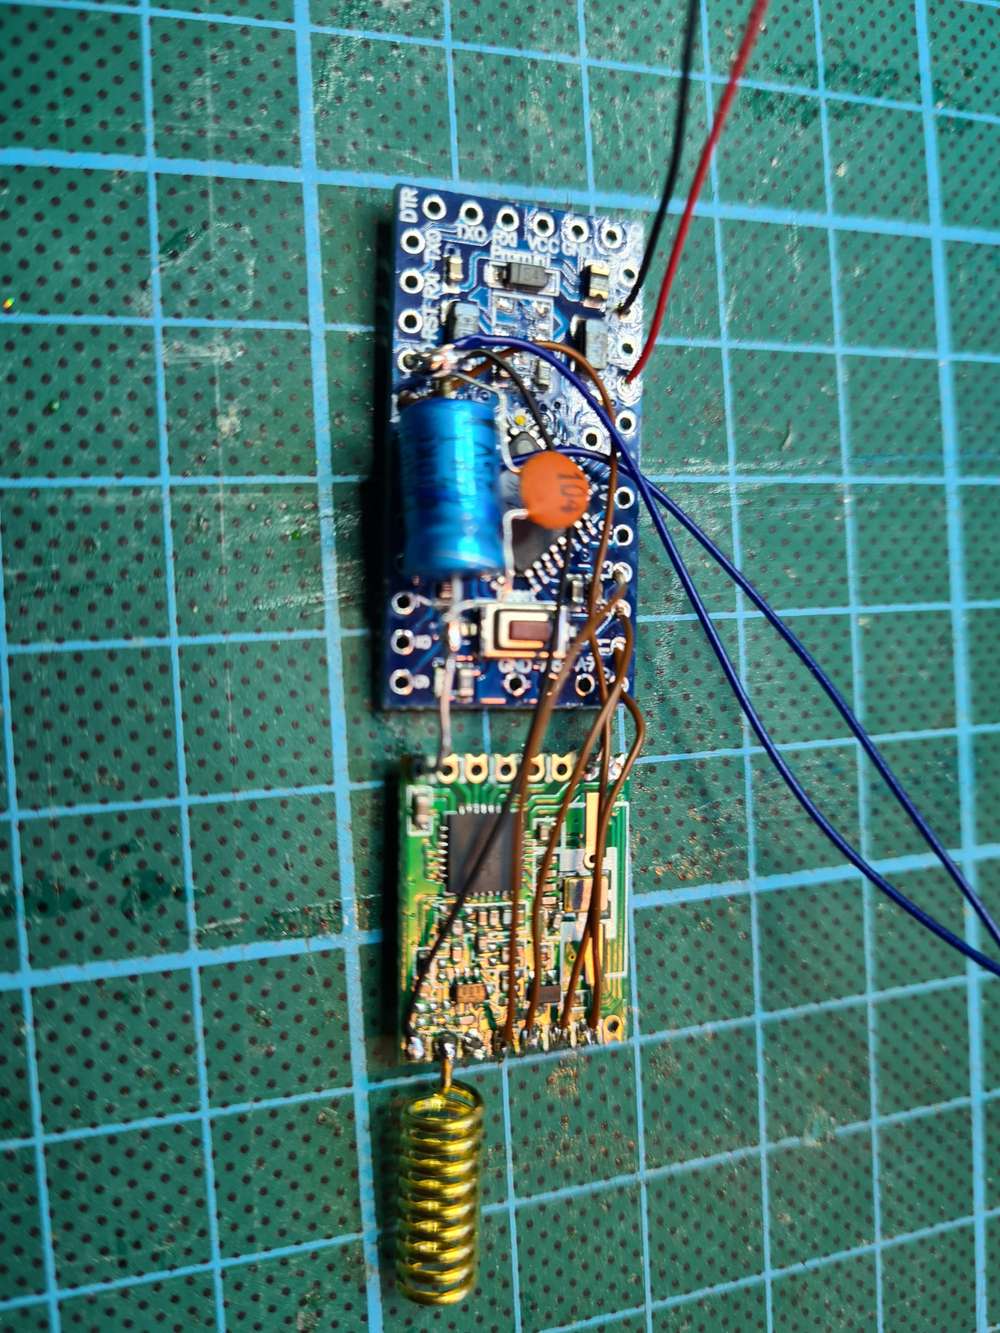
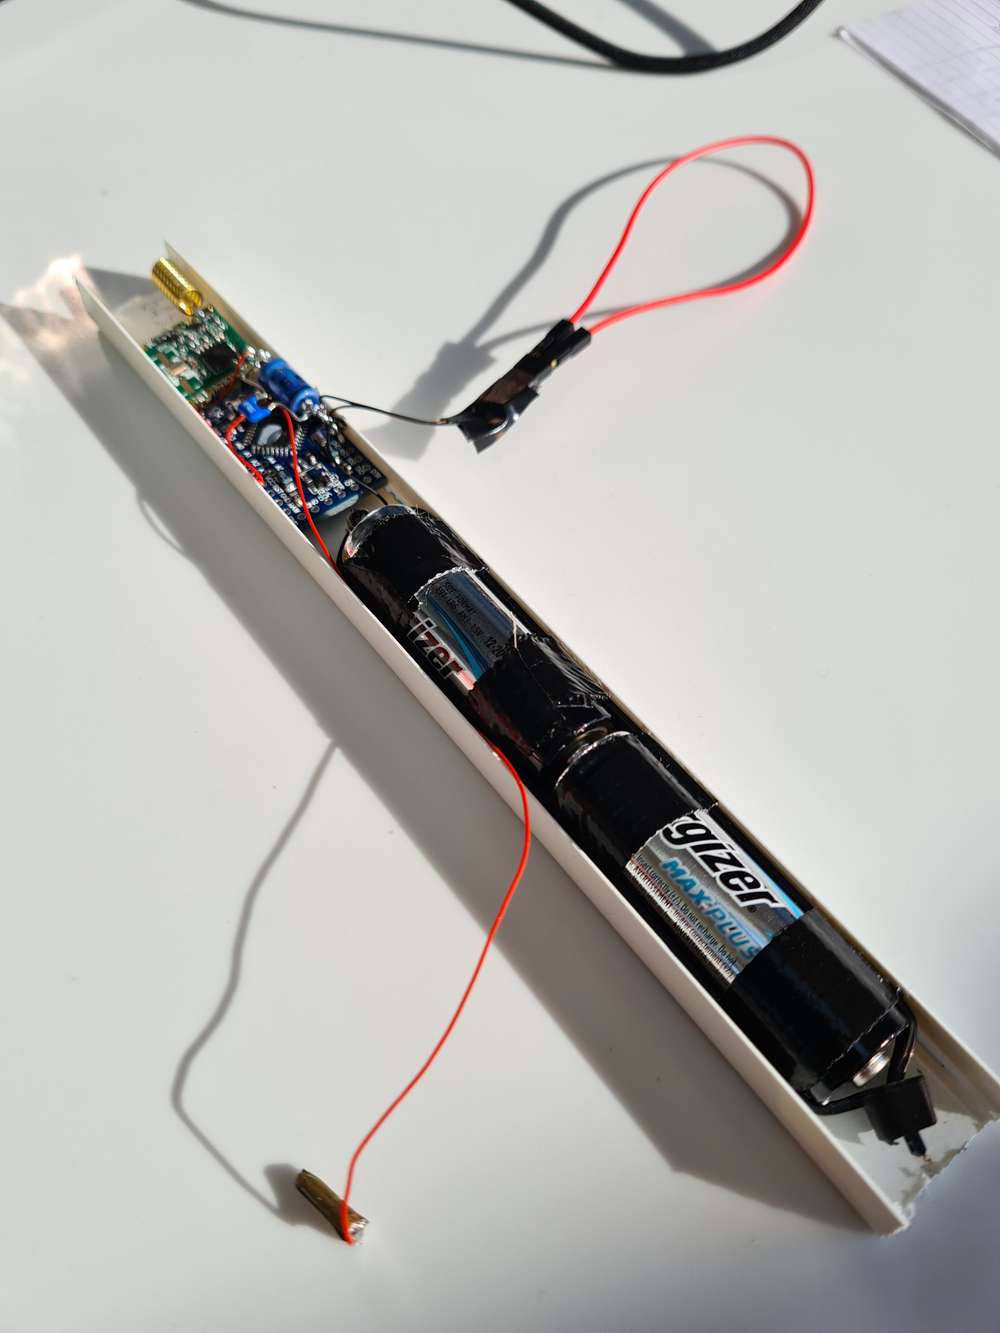
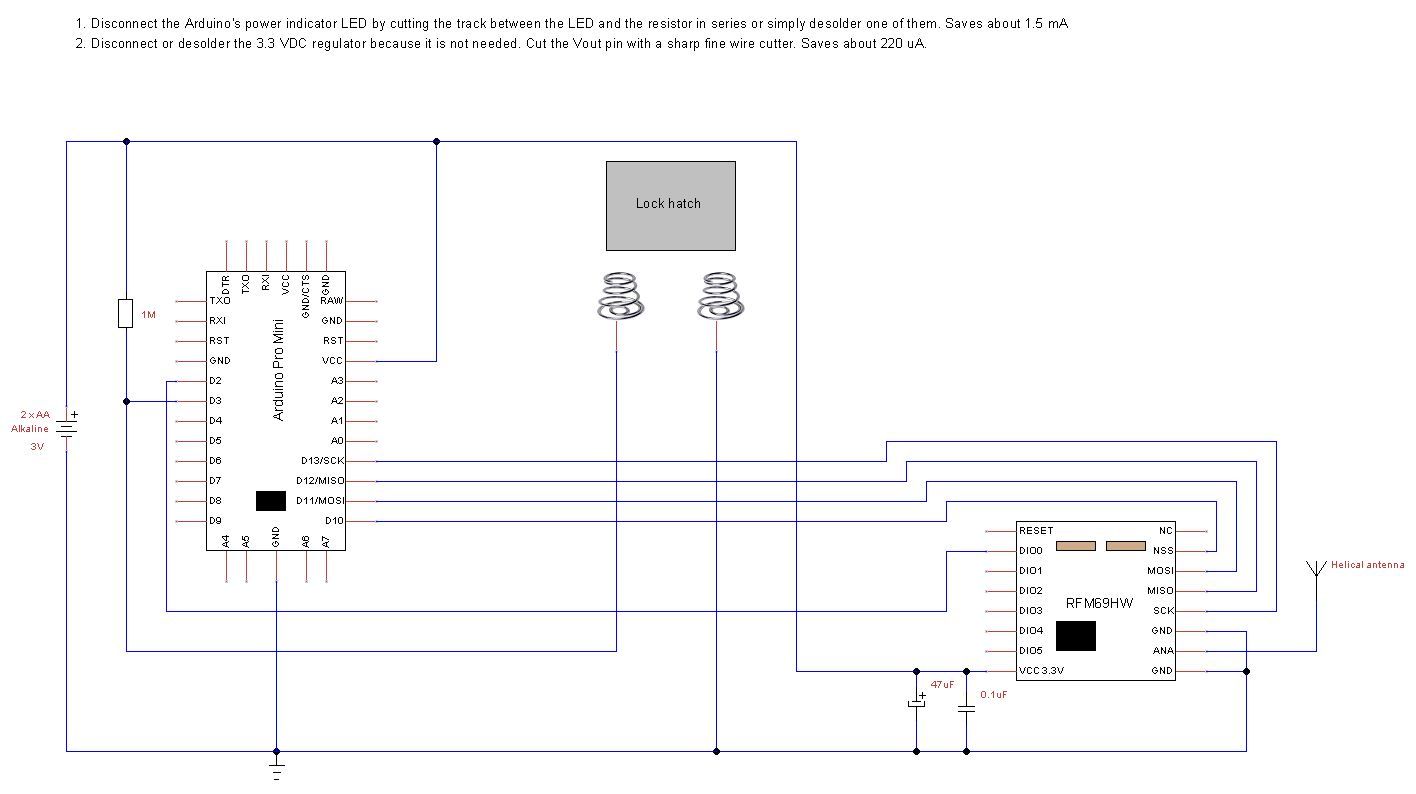
Because I used a Pro Mini and not a bare bone 328P, I was obliged to use 2 covers of the cable duct instead of a cover and base. The base of the cable duct was not broad enough for the Pro Mini.With the hardware tricks of the MySensor battery node site article on the Pro Mini, I could obtain a current consumption of 133µA in deep sleep (Modified Pro Mini, RFM69HW and the open contact).
To minimize the current with a closed contact, I did not use the internal pull-up resistor of the 329P (internal pullup resistor value around 30KOhm), but an external 1M ohm resistor. With closed contact and deep sleep, I have now around 136µA.
The battery-based windows/door sensor node : software
Besides the hardware modifications done at the Pro Mini, you can also do software modifications to save power consumption.
In the same topic https://forum.mysensors.org/topic/2067/my-slim-2aa-battery-node, the author @m26872 mentioned the use of a new bootloader with a 1MHz internal clock and a BOD (cpu brown out) disabled.Today (2020-12-28) we can use the github project MiniCore https://github.com/MCUdude/MiniCore to program our Arduino Pro Mini with the new bootloader. See the readme of the project MiniCore on Github. It explains everything: the theory, the installation and the Getting Started.
After installing MiniCore, I used following configuration:
- board : ATmega328
- clock : internal 1 MHz
- BOD : BOD 1.8V
- EEPROM : EEPROM retained
- Variant : 328P / 328PA
- Bootloader : Yes (UART0)
Remark 1
I did not disable completely the BOD. Why? I did read on forums that the processor could write garbage into the memory when below 1.8V, so for safety’s sake, I did set it to 1.8V.
Remark 2
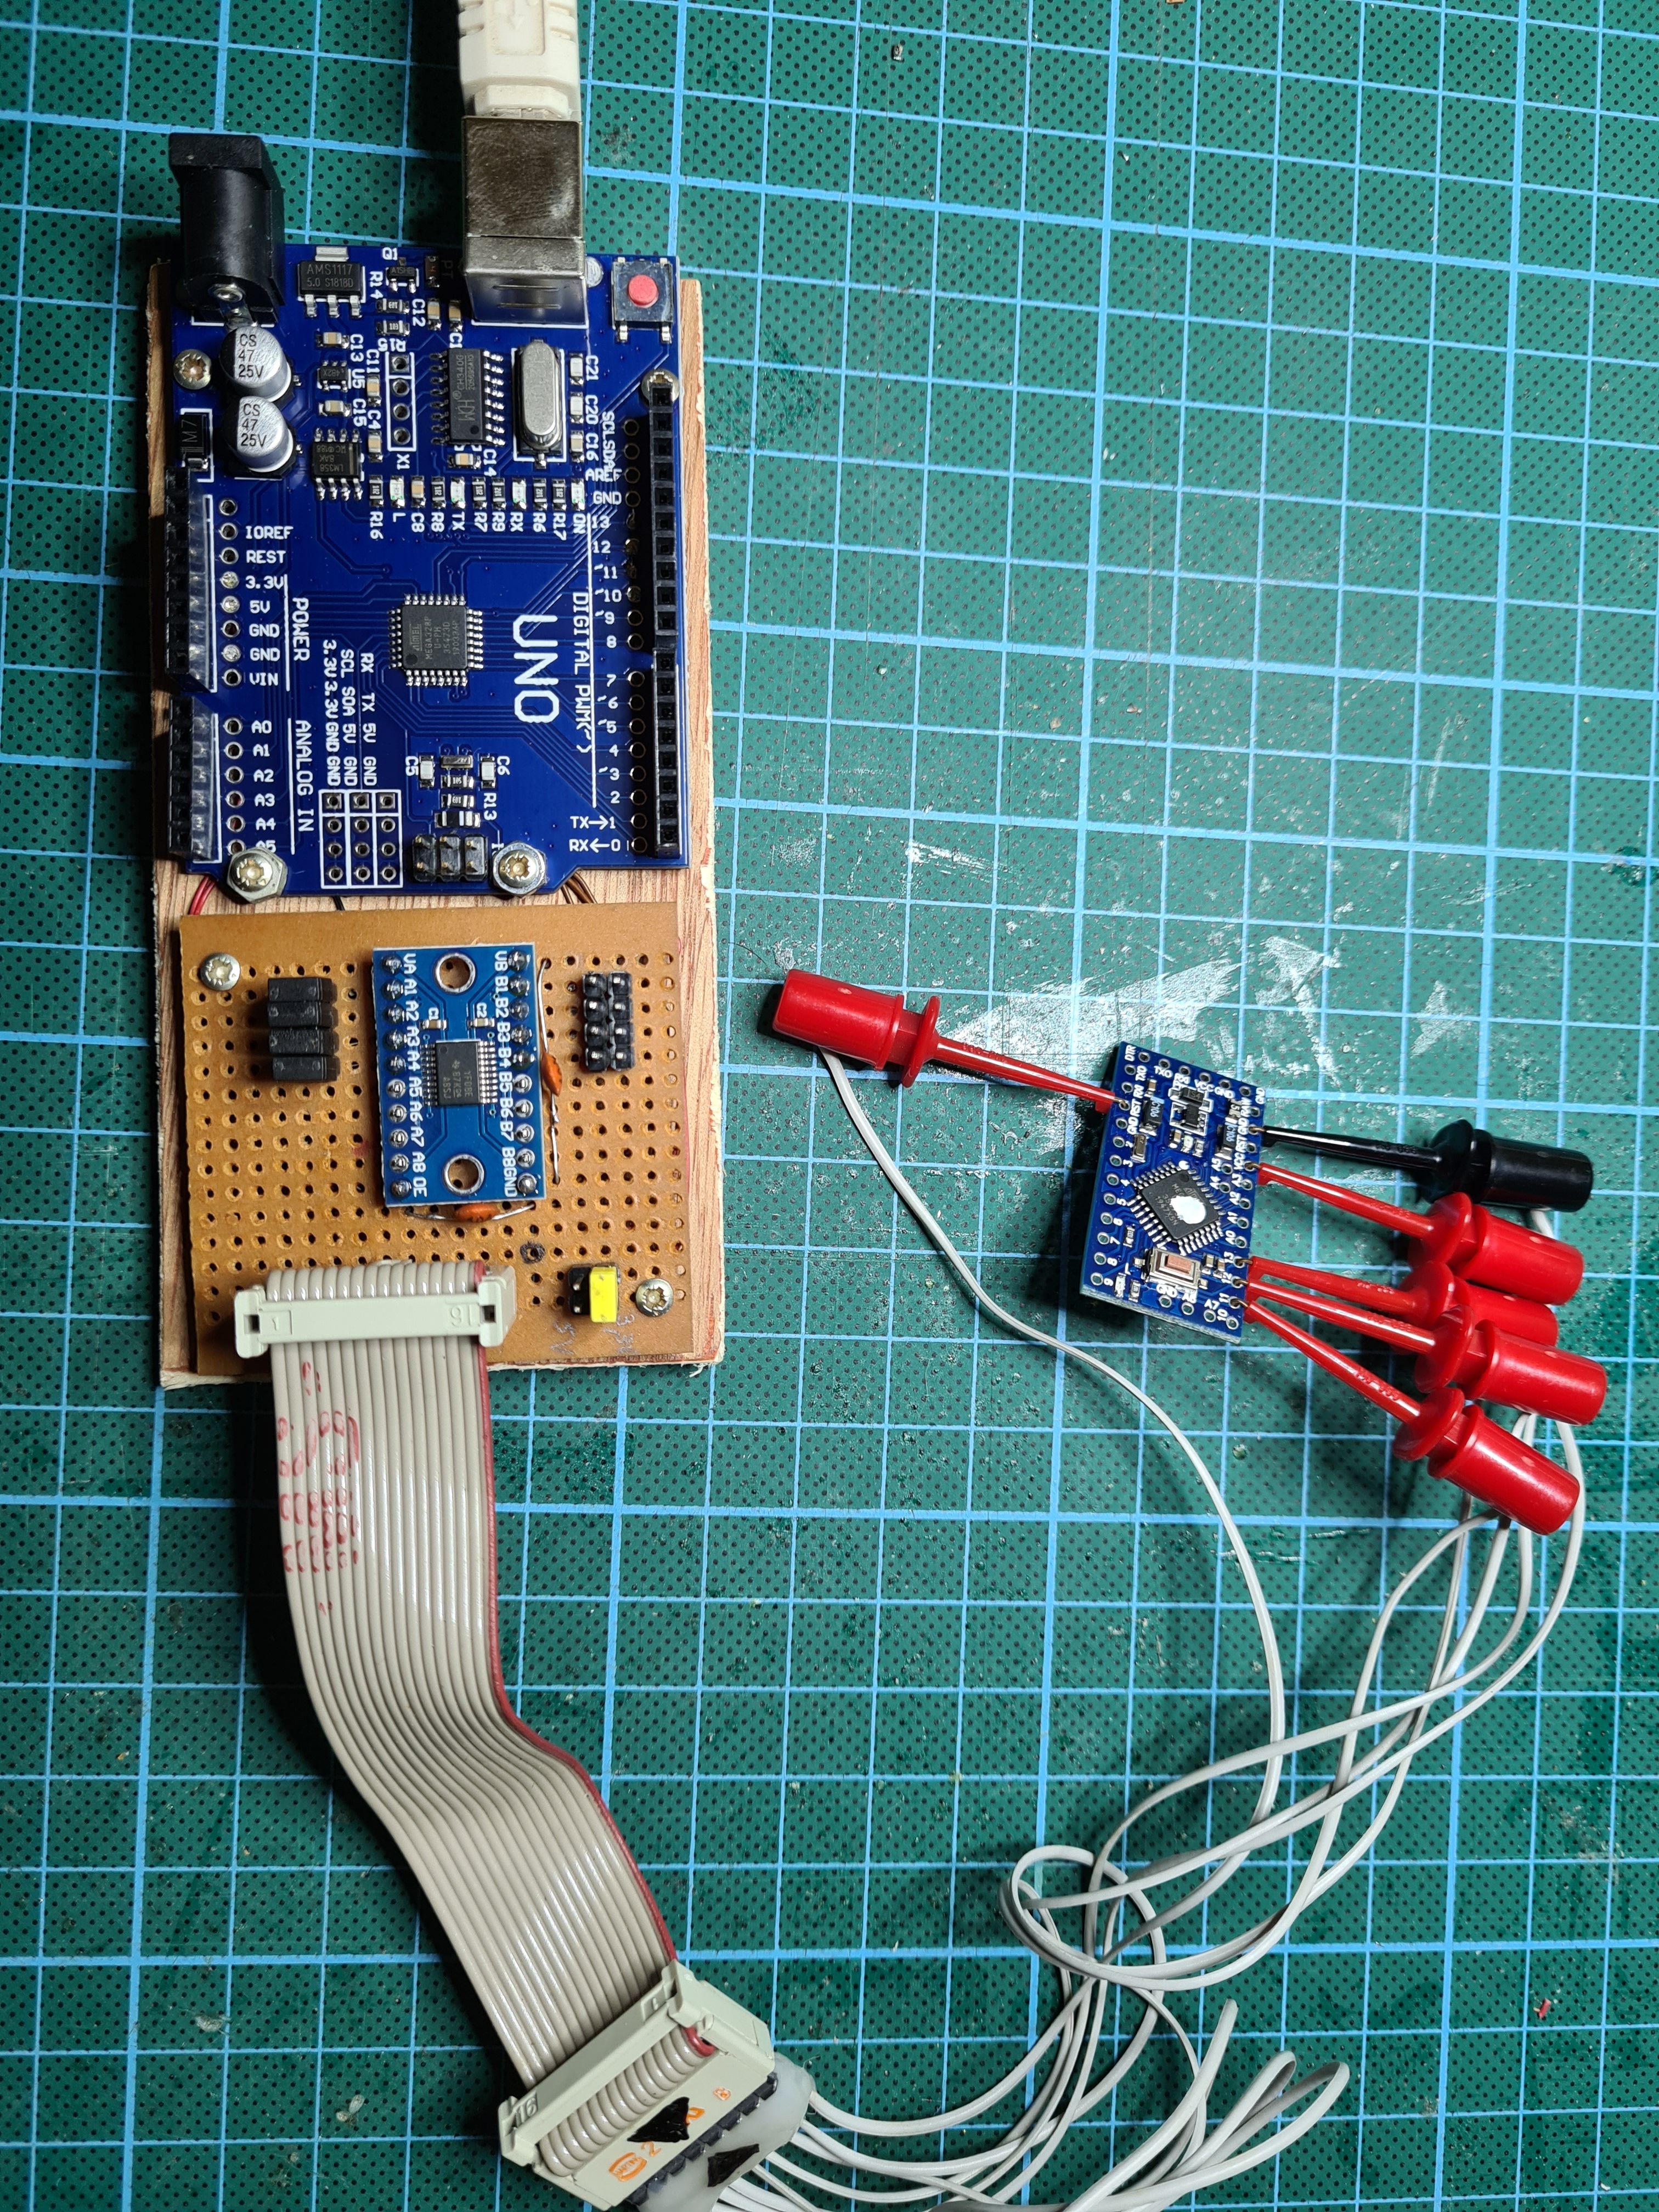
There are reports that using the Arduino Pro Mini at internal 1Mhz gives sometimes problems with the MySensors library. It was not clear to me if it was with the 1.x version of MySensors or the 2.x version, so I did take my chance and used 1MHz with the 2.3 version of MySensors. Till now, no problems!You must program the bootloader with an ISP. I used my ‘Arduino as ISP’. See https://forum.mysensors.org/topic/11444/using-an-arduino-uno-as-isp-for-programming-5v-and-3-3v-boards-without-soldering-the-needed-connections
Remark
If your pro mini is already connected to the RFM69HW radio, D11, D12 and D13 are used as MISO, MOSI and SCK for the radio.
These pins are also used to program the bootloader.
This will affect each other. The ISP programmer will not be able to detect the device ID and will fail. You must disconnect these 3 lines from the radio module, the time to (re)program the bootloader.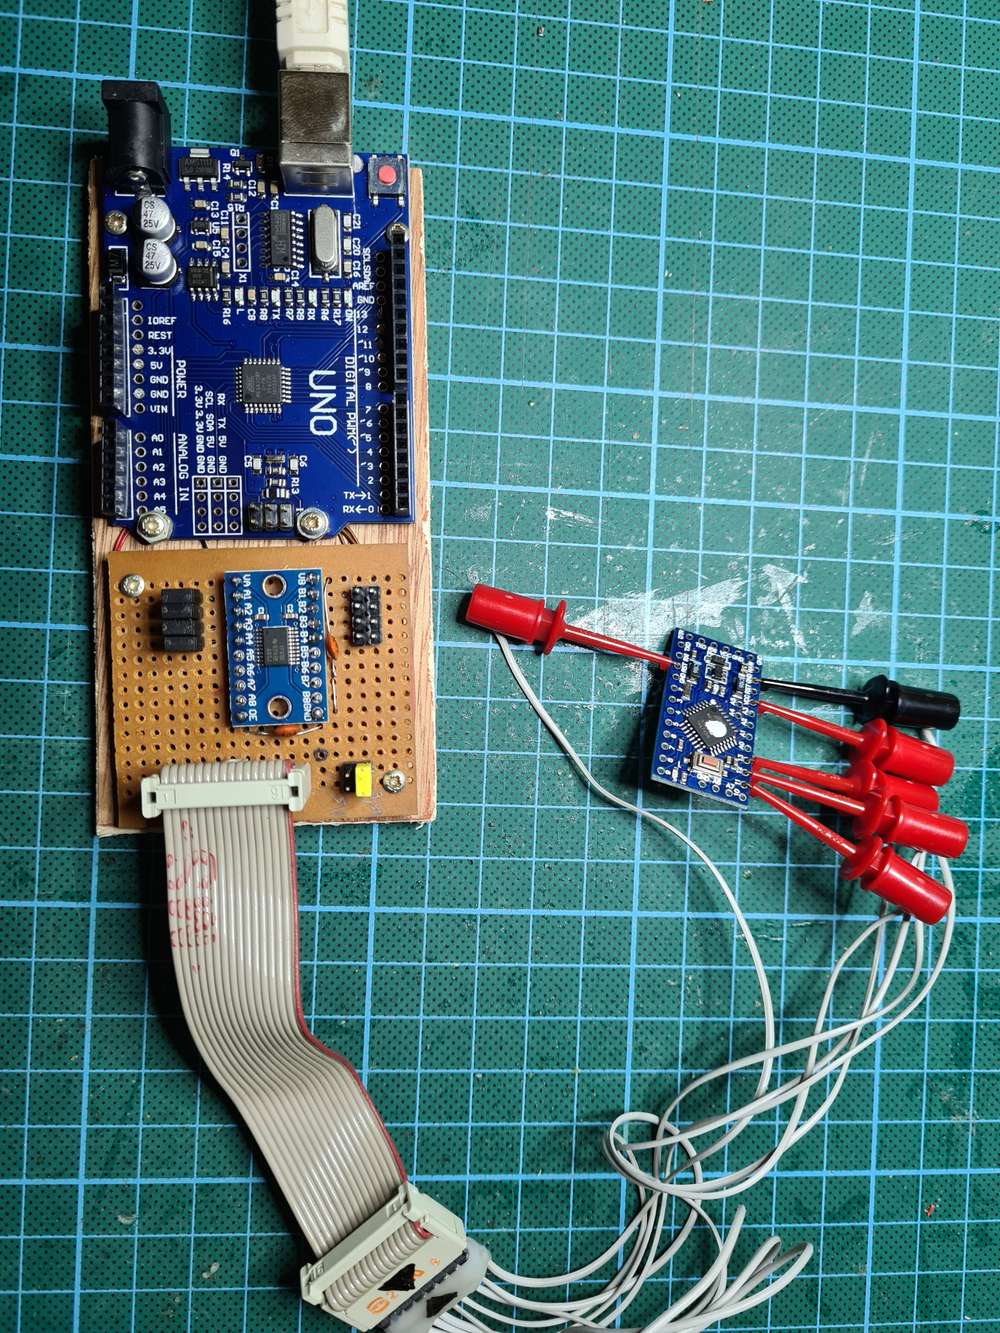
You can find the used sketch at https://github.com/ericvb/MySensorsArduinoSketches/tree/master/sketches/ArduinoProMiniLockDoorBatterySensorWithEncryptionGithub
So in a nutshell:
- first program the bootloader via minicore (Arduino IDE : burn bootloader)
- download the sketch via your normal USB to TTL programmer using the rx, tx, dtr, gnd pins (Arduino IDE : Upload)
The battery-based windows/door sensor node : 3D printing enclosure
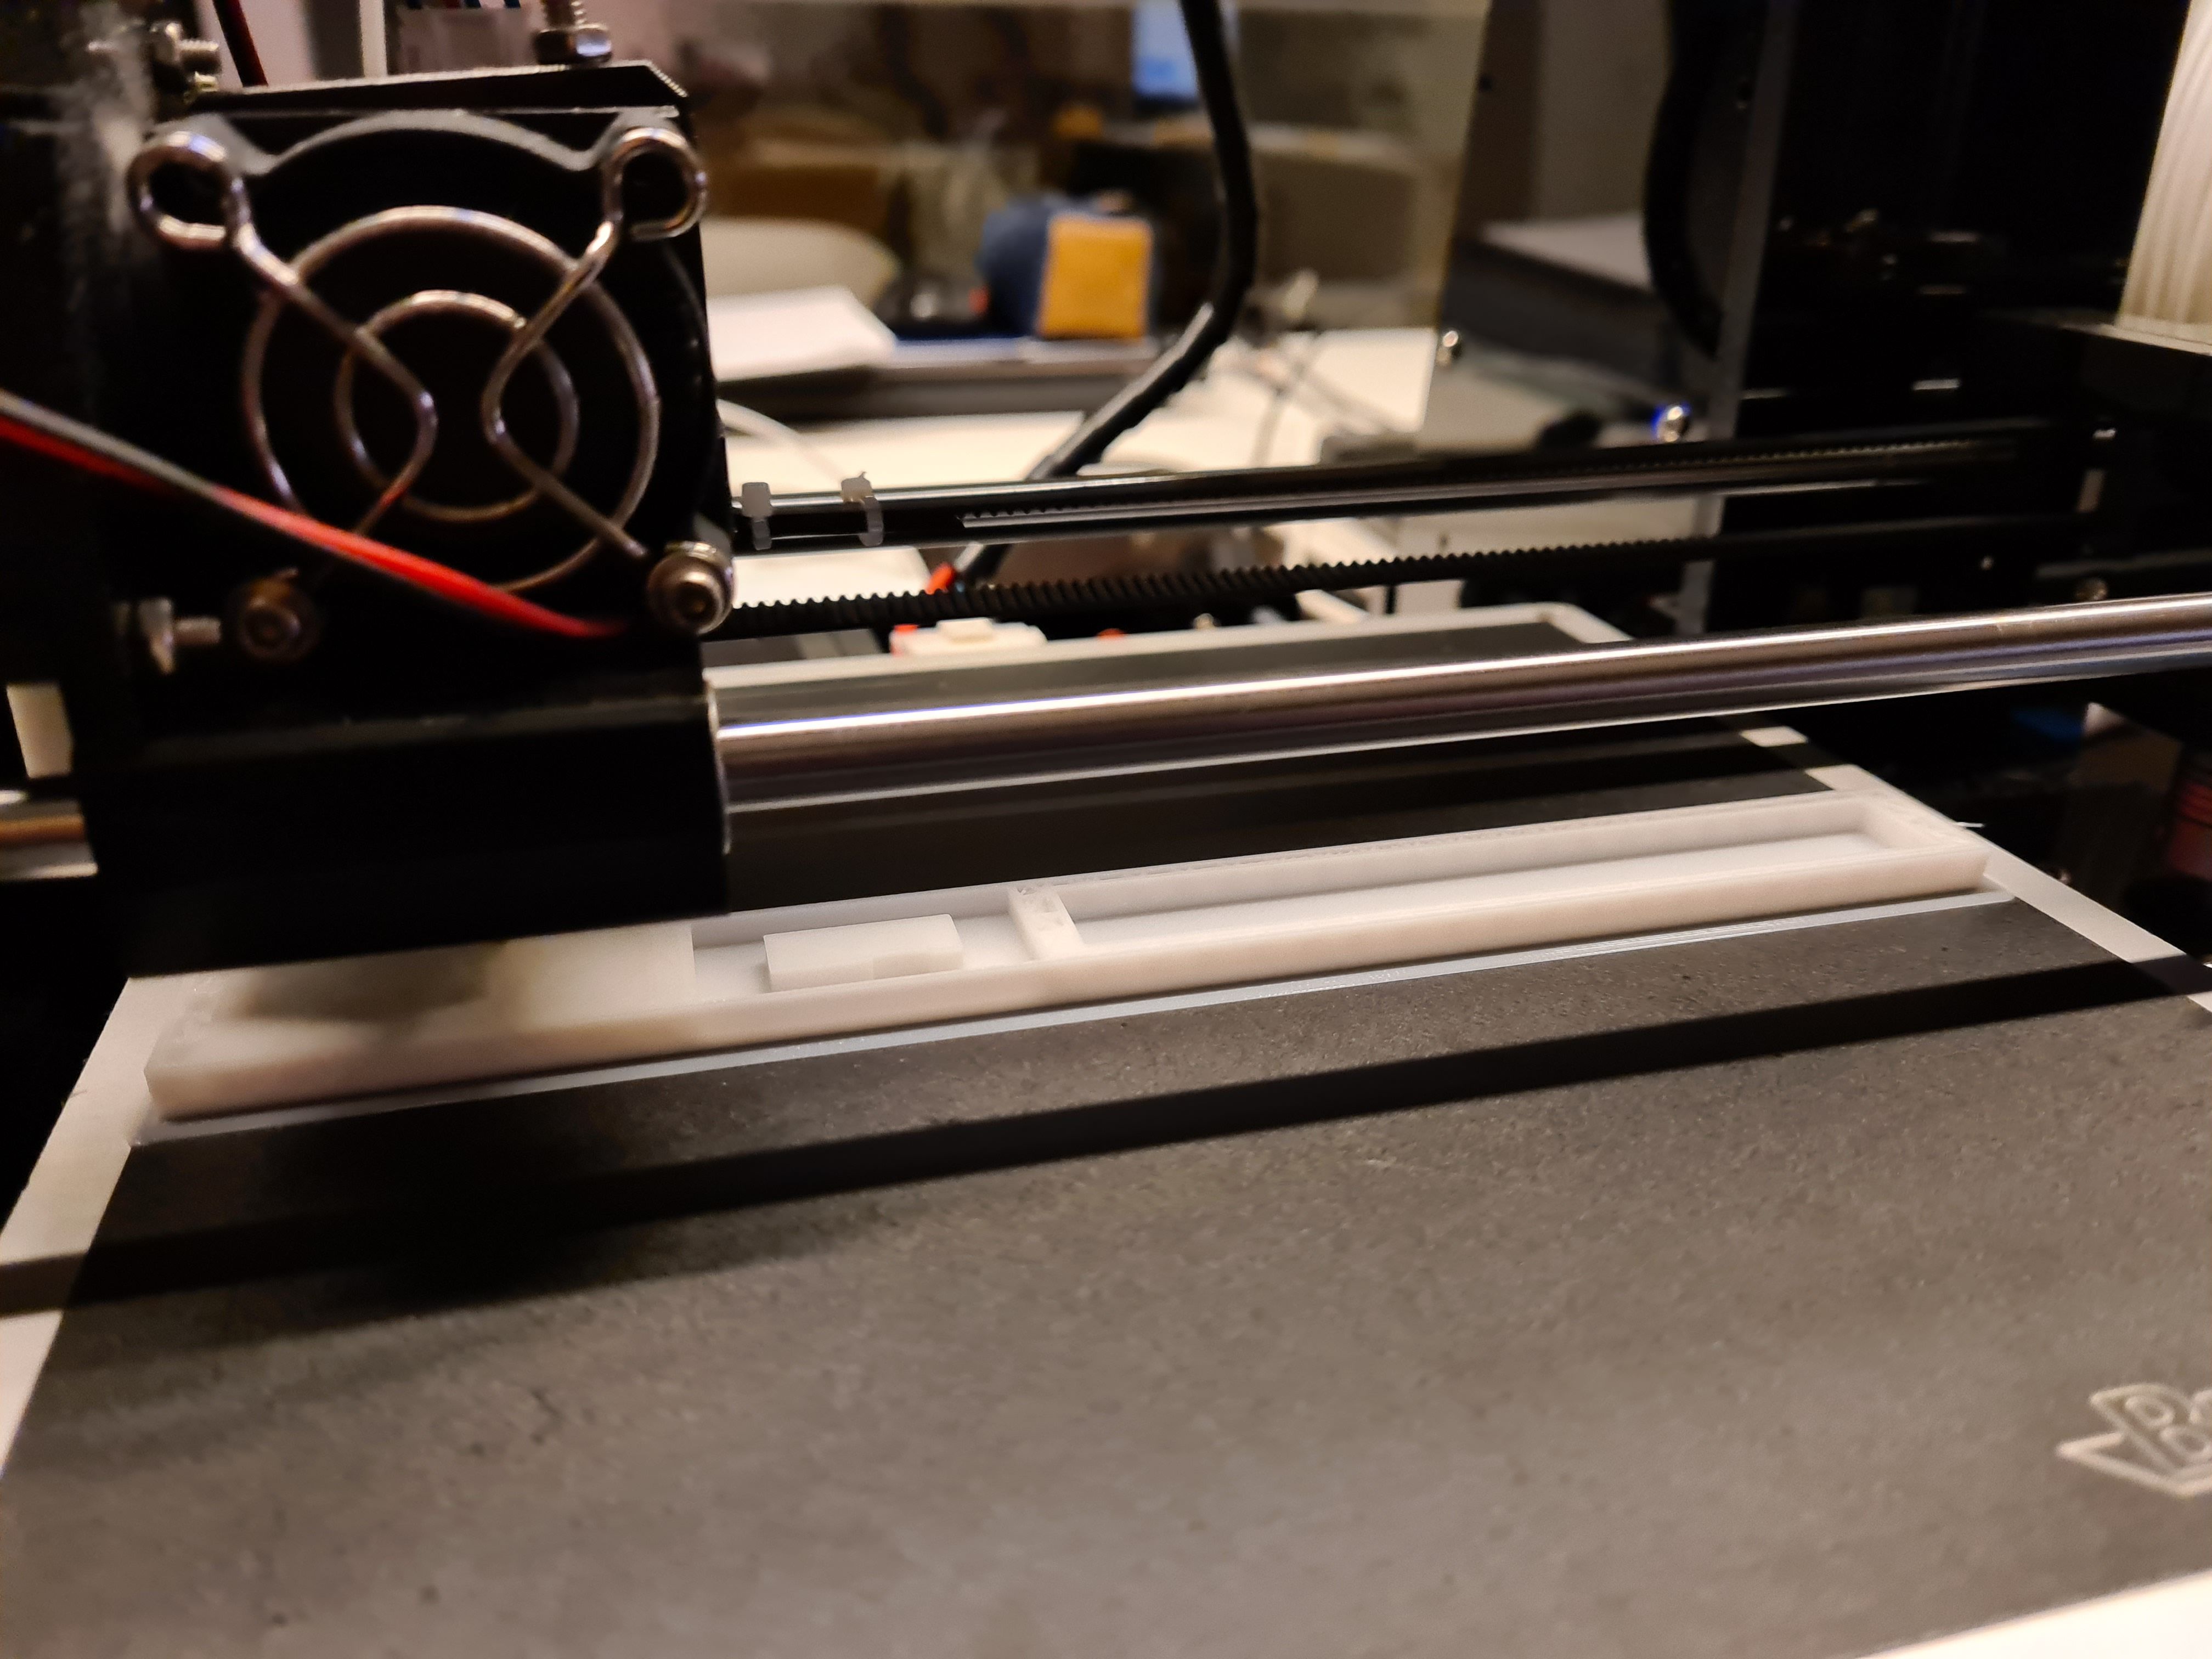
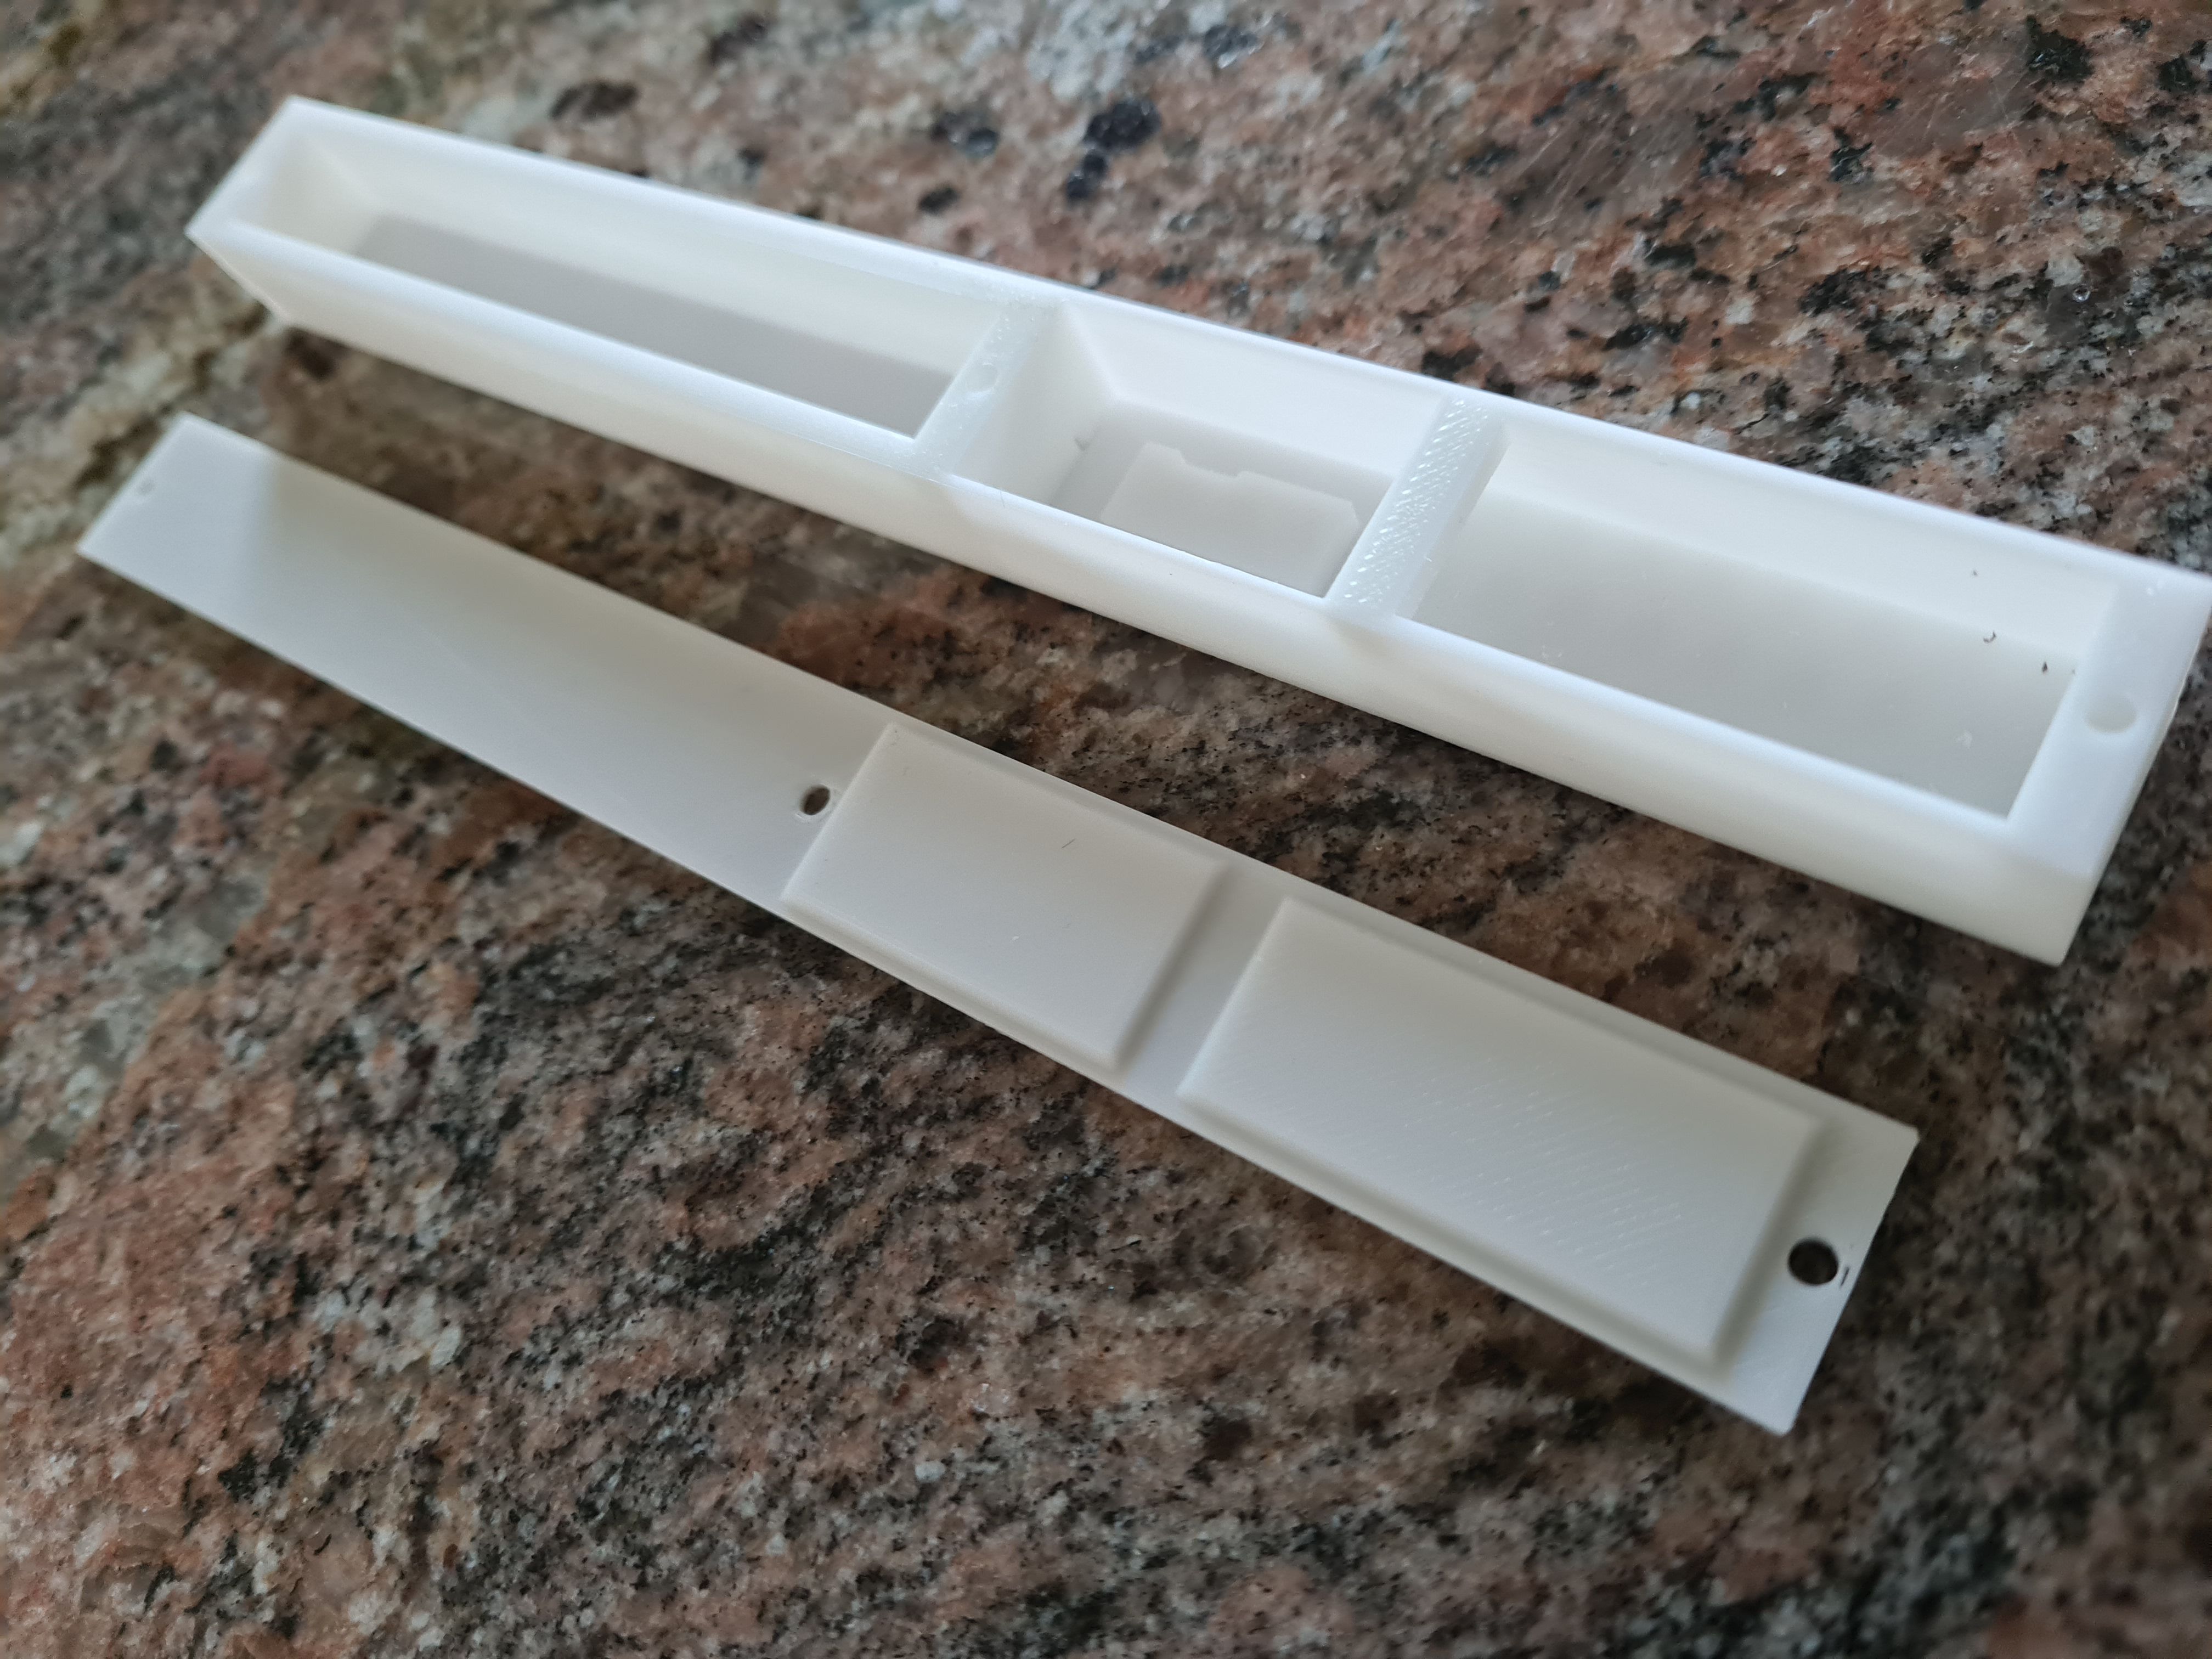
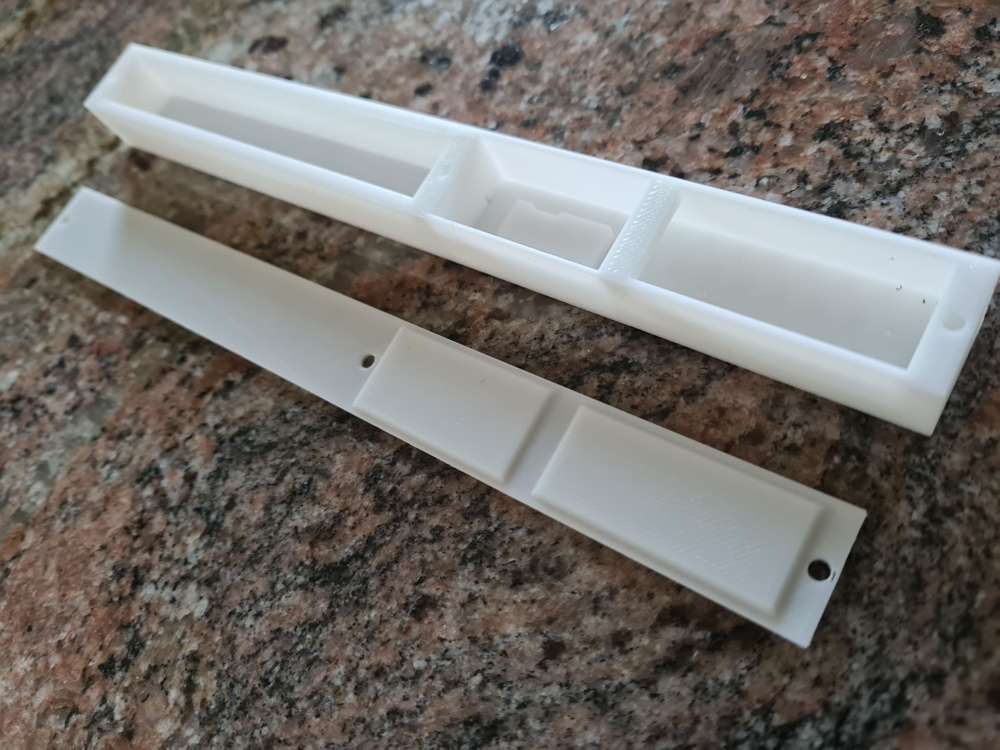
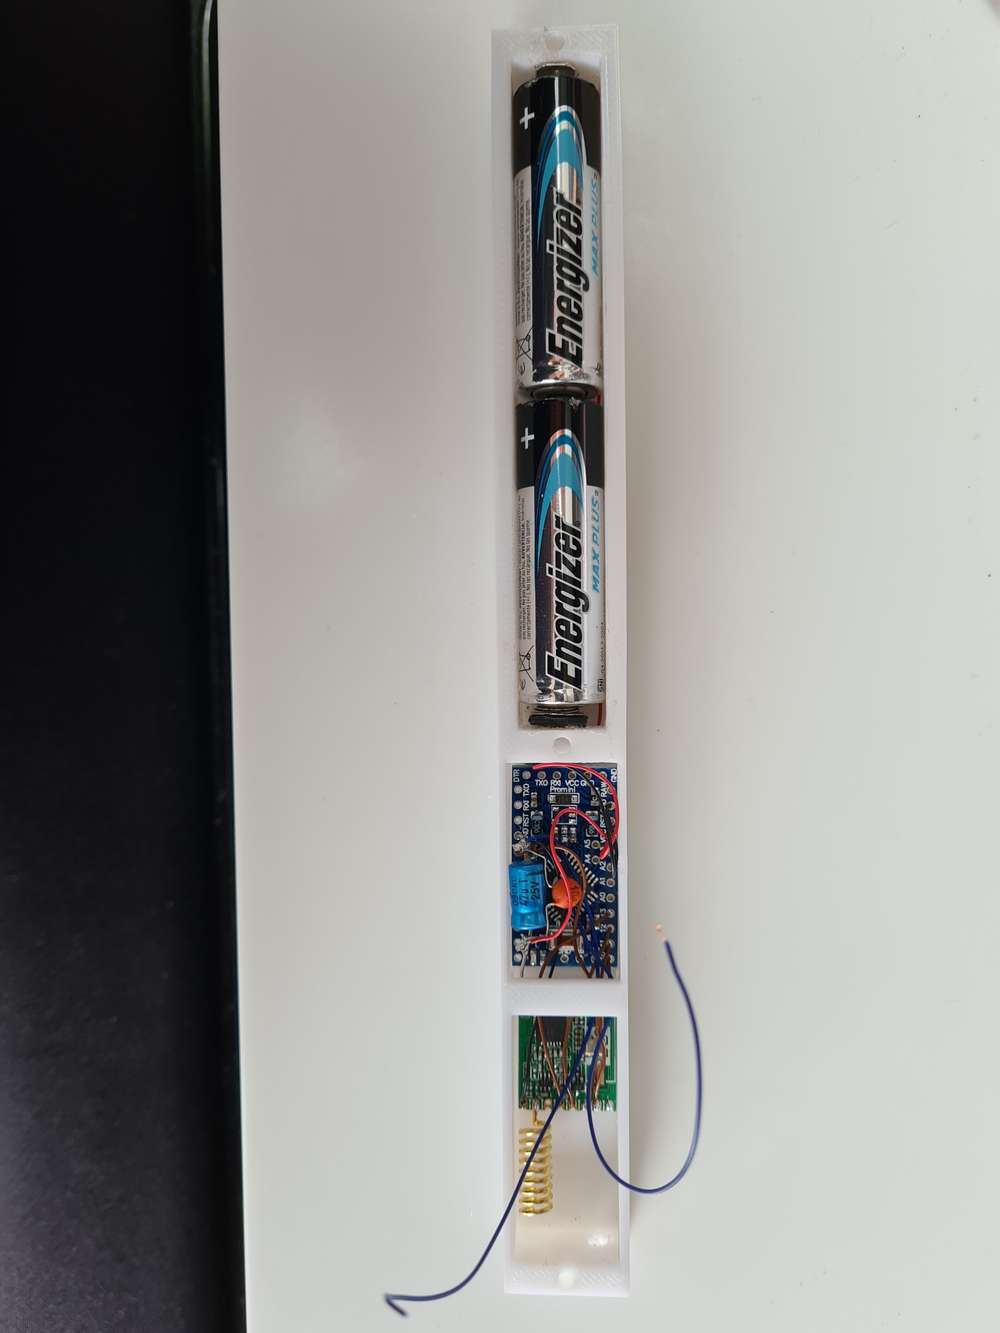
Because I had to use the cover of the cable duct as base for the Pro Mini, I decided to design a case with approximately the same dimensions.
The dimensions were dictated by the available space in the PVC door frame, the dimensions of the Pro Mini, the RFM69HW, the 2 AA batteries and the minimum possible printed thickness still solid by my 3D printer:- Length : 200mm
- Width: 20mm
- Height: 17mm
You can find the design (open source FreeCAD) and STL files at: https://www.thingiverse.com/thing:4659402
The last months the thingiverse website has many problems, designs are not visible, 404 messages, etc.
Post a note if you don't find the 'thing'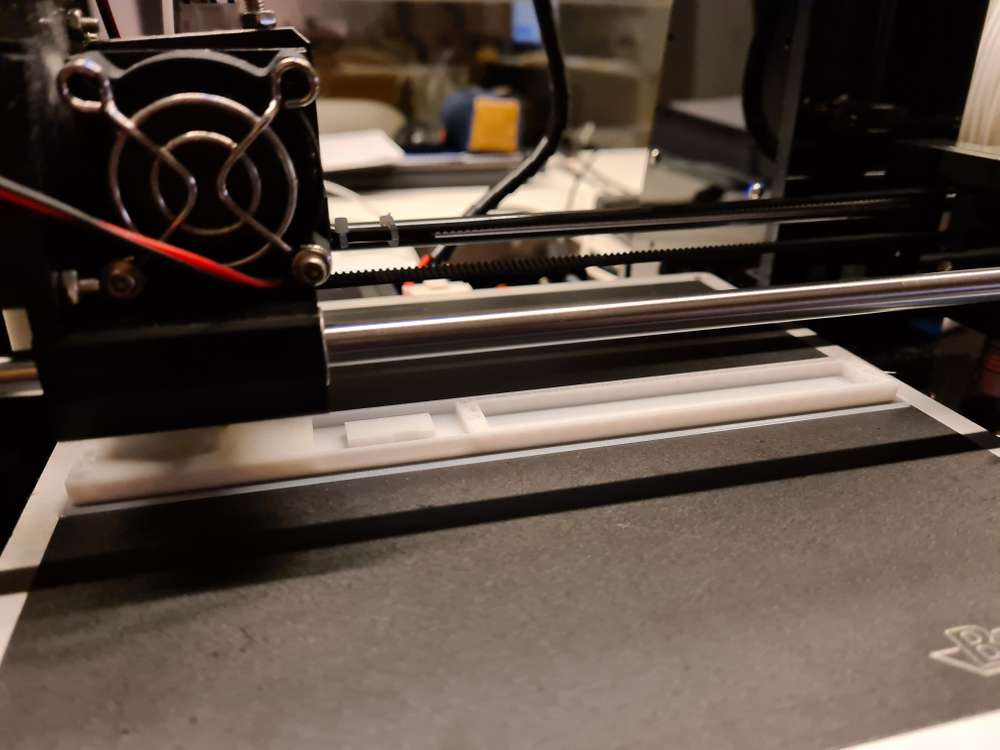
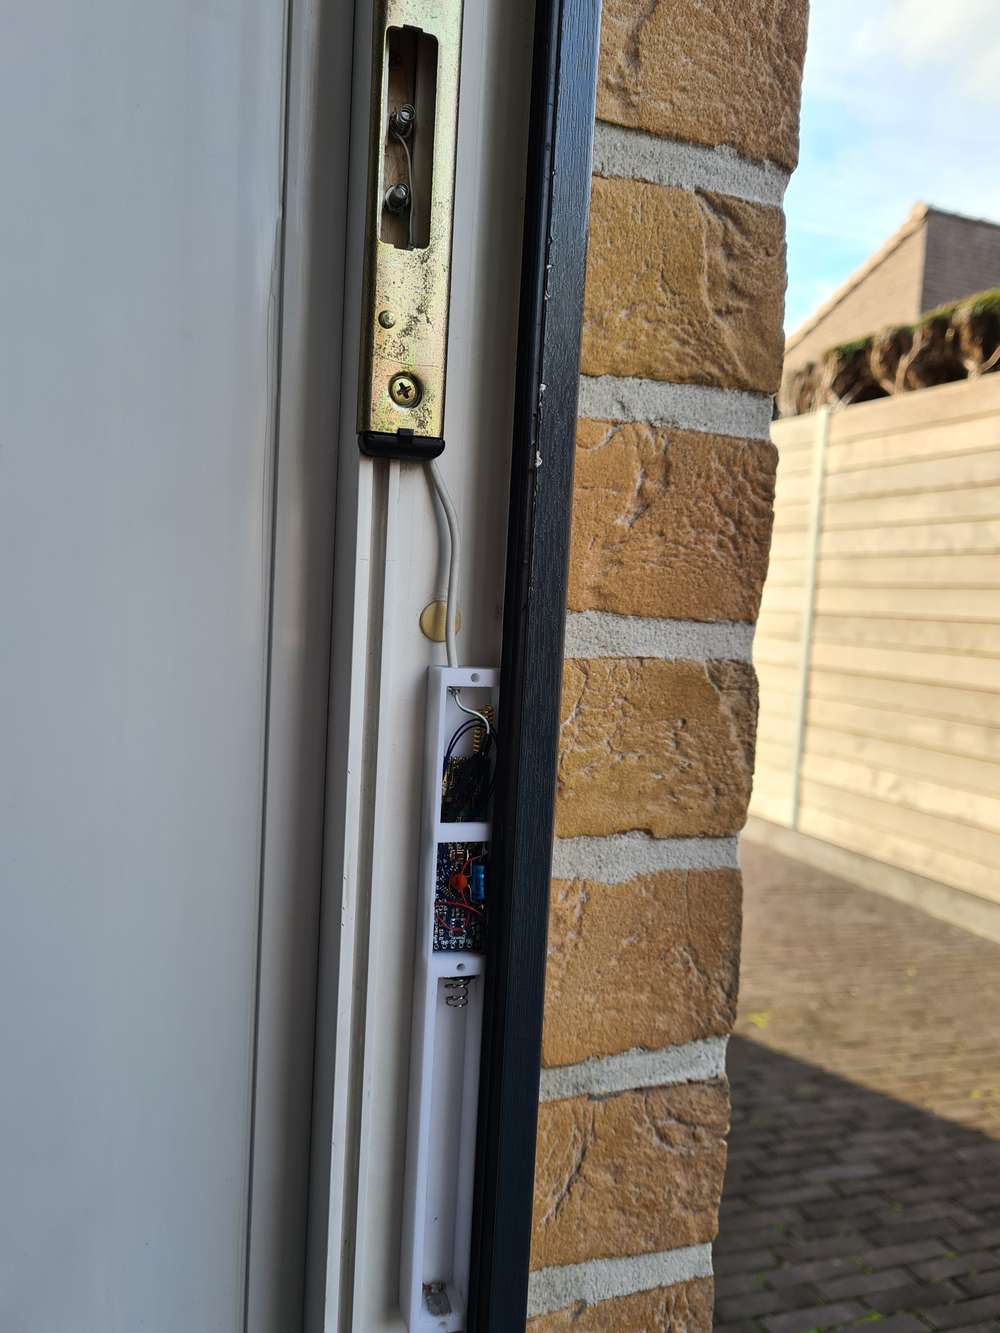
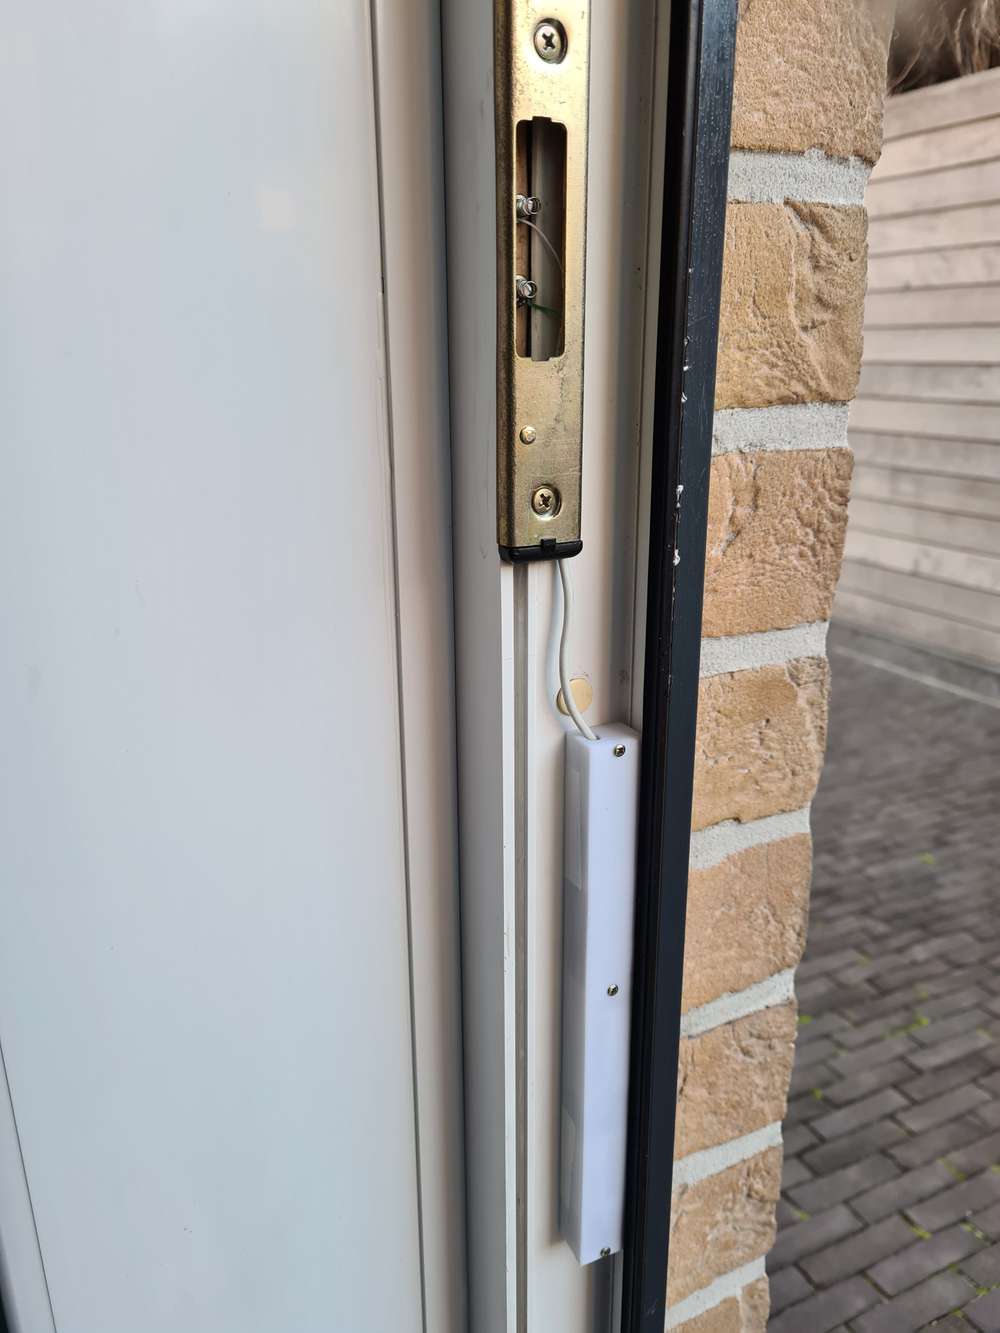
The sensor is fastened with Velcro strips to prevent damage to the door caused by using fixing screws.References
Via following links, you can find more information about minimal power consumption, bootloaders, etc.
Low power Pro Minihttps://www.mysensors.org/build/battery
https://forum.mysensors.org/topic/2067/my-slim-2aa-battery-node
https://forum.mysensors.org/topic/486/my-2aa-battery-sensor
https://iot-playground.com/blog/2-uncategorised/10-low-power-door-window-sensor
https://iot-playground.com/blog/2-uncategorised/9-arduino-low-power-sensor
http://www.gammon.com.au/power
https://www.iot-experiments.com/arduino-pro-mini-power-consumption/
https://forum.pimatic.org/topic/383/tips-battery-powered-sensors/Battery consumption
https://forum.mysensors.org/topic/10426/ds18b20-on-2xaaa-battery
https://andreasrohner.at/posts/Electronics/How-to-modify-an-Arduino-Pro-Mini-clone-for-low-power-consumption/Specific commercial hardware
https://www.canique.com (power efficient board with RFM69HW)
https://www.tindie.com/stores/easysensors/
https://www.tindie.com/products/vysocan/rfm69-radio-node-mini/Use of bootloaders
https://www.iot-experiments.com/arduino-pro-mini-1mhz-1-8v/
https://forum.mysensors.org/topic/7296/how-to-burn-fuses-so-that-pro-mini-3-3v-would-go-down-to-1-8v-solved/17
https://forum.mysensors.org/topic/3018/tutorial-how-to-burn-1mhz-8mhz-bootloader-using-arduino-ide-1-6-5-r5
https://forum.mysensors.org/topic/3657/mymultisensors/144
https://forum.mysensors.org/topic/5478/how-to-get-longest-battery-life/42 -
The trigger to start this project was remarking, for the umpteenth time in the morning, that the door had been unlocked again all night.
Replacing the mechanical locks on the 4 doors by electric locks was out of the question, too expensive and the need for electric cables that were not present.So, how to detect if a mechanical lock is closed?
The internet is an incredible source of ideas:
https://community.home-assistant.io/t/how-i-made-my-dumb-locks-a-little-smarter/55174
https://community.home-assistant.io/t/i-made-a-simple-lock-sensor-with-xiaomi-door-sensor-some-battery-holders-and-a-soldering-iron/49445
With this idea, let the bolt close a contact, I could use the standard window/door sensor node!
So I made my version by using springs I found in my junk bin mounted on a piece of wood, namely the wooden stick of an ice cream 😊
My first prototype was working, but not really a piece of art ☹
Remember to always drill holes because the wood of the stick splits very easily.I did use battery springs for my other nodes, they are stronger and easier to use.
The battery-based windows/door sensor node : hardware
I had never built a battery based node before, so as a first step, I did read the site article on the MySensors site: https://www.mysensors.org/build/battery
Luckily, I already had Pro Mini's and enough RFM69HW radios in stock.
Today I know that I did probably the wrong choice by using the Pro Mini’s. They are good in low consumption, but a bare bone 328P used like in this topic https://forum.mysensors.org/topic/2067/my-slim-2aa-battery-node is still better...
But we will see how far these Pro Mini’s will take us on 2x AA batteries!My first node was based on the idea to use the same enclosure as in the above topic. In Belgium these cable ducts are known under the name Legrand and I had a still a piece of more then 1 meter lying around, a surplus from the renovations.


Because I used a Pro Mini and not a bare bone 328P, I was obliged to use 2 covers of the cable duct instead of a cover and base. The base of the cable duct was not broad enough for the Pro Mini.With the hardware tricks of the MySensor battery node site article on the Pro Mini, I could obtain a current consumption of 133µA in deep sleep (Modified Pro Mini, RFM69HW and the open contact).
To minimize the current with a closed contact, I did not use the internal pull-up resistor of the 329P (internal pullup resistor value around 30KOhm), but an external 1M ohm resistor. With closed contact and deep sleep, I have now around 136µA.

The battery-based windows/door sensor node : software
Besides the hardware modifications done at the Pro Mini, you can also do software modifications to save power consumption.
In the same topic https://forum.mysensors.org/topic/2067/my-slim-2aa-battery-node, the author @m26872 mentioned the use of a new bootloader with a 1MHz internal clock and a BOD (cpu brown out) disabled.Today (2020-12-28) we can use the github project MiniCore https://github.com/MCUdude/MiniCore to program our Arduino Pro Mini with the new bootloader. See the readme of the project MiniCore on Github. It explains everything: the theory, the installation and the Getting Started.
After installing MiniCore, I used following configuration:
- board : ATmega328
- clock : internal 1 MHz
- BOD : BOD 1.8V
- EEPROM : EEPROM retained
- Variant : 328P / 328PA
- Bootloader : Yes (UART0)
Remark 1
I did not disable completely the BOD. Why? I did read on forums that the processor could write garbage into the memory when below 1.8V, so for safety’s sake, I did set it to 1.8V.
Remark 2
There are reports that using the Arduino Pro Mini at internal 1Mhz gives sometimes problems with the MySensors library. It was not clear to me if it was with the 1.x version of MySensors or the 2.x version, so I did take my chance and used 1MHz with the 2.3 version of MySensors. Till now, no problems!You must program the bootloader with an ISP. I used my ‘Arduino as ISP’. See https://forum.mysensors.org/topic/11444/using-an-arduino-uno-as-isp-for-programming-5v-and-3-3v-boards-without-soldering-the-needed-connections
Remark
If your pro mini is already connected to the RFM69HW radio, D11, D12 and D13 are used as MISO, MOSI and SCK for the radio.
These pins are also used to program the bootloader.
This will affect each other. The ISP programmer will not be able to detect the device ID and will fail. You must disconnect these 3 lines from the radio module, the time to (re)program the bootloader.
You can find the used sketch at https://github.com/ericvb/MySensorsArduinoSketches/tree/master/sketches/ArduinoProMiniLockDoorBatterySensorWithEncryptionGithub
So in a nutshell:
- first program the bootloader via minicore (Arduino IDE : burn bootloader)
- download the sketch via your normal USB to TTL programmer using the rx, tx, dtr, gnd pins (Arduino IDE : Upload)
The battery-based windows/door sensor node : 3D printing enclosure
Because I had to use the cover of the cable duct as base for the Pro Mini, I decided to design a case with approximately the same dimensions.
The dimensions were dictated by the available space in the PVC door frame, the dimensions of the Pro Mini, the RFM69HW, the 2 AA batteries and the minimum possible printed thickness still solid by my 3D printer:- Length : 200mm
- Width: 20mm
- Height: 17mm
You can find the design (open source FreeCAD) and STL files at: https://www.thingiverse.com/thing:4659402
The last months the thingiverse website has many problems, designs are not visible, 404 messages, etc.
Post a note if you don't find the 'thing'


The sensor is fastened with Velcro strips to prevent damage to the door caused by using fixing screws.References
Via following links, you can find more information about minimal power consumption, bootloaders, etc.
Low power Pro Minihttps://www.mysensors.org/build/battery
https://forum.mysensors.org/topic/2067/my-slim-2aa-battery-node
https://forum.mysensors.org/topic/486/my-2aa-battery-sensor
https://iot-playground.com/blog/2-uncategorised/10-low-power-door-window-sensor
https://iot-playground.com/blog/2-uncategorised/9-arduino-low-power-sensor
http://www.gammon.com.au/power
https://www.iot-experiments.com/arduino-pro-mini-power-consumption/
https://forum.pimatic.org/topic/383/tips-battery-powered-sensors/Battery consumption
https://forum.mysensors.org/topic/10426/ds18b20-on-2xaaa-battery
https://andreasrohner.at/posts/Electronics/How-to-modify-an-Arduino-Pro-Mini-clone-for-low-power-consumption/Specific commercial hardware
https://www.canique.com (power efficient board with RFM69HW)
https://www.tindie.com/stores/easysensors/
https://www.tindie.com/products/vysocan/rfm69-radio-node-mini/Use of bootloaders
https://www.iot-experiments.com/arduino-pro-mini-1mhz-1-8v/
https://forum.mysensors.org/topic/7296/how-to-burn-fuses-so-that-pro-mini-3-3v-would-go-down-to-1-8v-solved/17
https://forum.mysensors.org/topic/3018/tutorial-how-to-burn-1mhz-8mhz-bootloader-using-arduino-ide-1-6-5-r5
https://forum.mysensors.org/topic/3657/mymultisensors/144
https://forum.mysensors.org/topic/5478/how-to-get-longest-battery-life/42 -
@evb I wonder what the lock mechanism looks like. Is it a key? Or some knob that you turn around?
How long did it take you to design the case?
@canique The lock mechanism is a standard mechanical lock with a bolt and a normal key.
When you turn the key for closing the lock, the bolt comes forward and pushes the two springs inwards, shorting the two springs.I'm using normally FreeCad for designing mechanical engineering things (Blender for more artistic things, like my fontain basin: https://www.thingiverse.com/thing:3374672).
Because I'm not designing much, I spend most of my time remembering and finding out how to do things again ;-)
If I count every minute together with all the retries and corrections, 2 days, so let's say 16 hours?
(not counting the print time of the prototypes).
An experienced mechanical designer, when he have all the specs, can do this in less than an hour ;-) -
@evb said in Checking mechanical locked doors by a battery-based windows/door sensor node:
You can find the design (open source FreeCAD) and STL files at: https://www.thingiverse.com/thing:4659402
The last months the thingiverse website has many problems, designs are not visible, 404 messages, etc.
Post a note if you don't find the 'thing'Hi @evb, I'm seeing a 404, if you're able to link somewhere, would be interested to look at the files. No drama if not, cheers
-
We are approximately 2 years later, a little follow-up :-)
I had already noticed for a week of so that my 3 oldest sensors (including my prototype sensor) were no longer sending their status consistently. After checking the reported battery levels of the sensors I saw that there were around 50%, so that was normal... (50 % of 3V is 1.5V :-) , below the BOD of 1.8V)
So the sensors with this design worked for about 20 months on 2 normal AA batteries of 1.5 V, not bad :-)

