Skip to content
  • MySensors
  • OpenHardware.io
  • Categories
  • Recent
  • Tags
  • Popular
Skins
  • Light
  • Brite
  • Cerulean
  • Cosmo
  • Flatly
  • Journal
  • Litera
  • Lumen
  • Lux
  • Materia
  • Minty
  • Morph
  • Pulse
  • Sandstone
  • Simplex
  • Sketchy
  • Spacelab
  • United
  • Yeti
  • Zephyr
  • Dark
  • Cyborg
  • Darkly
  • Quartz
  • Slate
  • Solar
  • Superhero
  • Vapor

  • Default (No Skin)
  • No Skin
Collapse
Brand Logo
  1. Home
  2. General Discussion
  3. What did you build today (Pictures) ?

What did you build today (Pictures) ?

Scheduled Pinned Locked Moved General Discussion
1.1k Posts 105 Posters 202.5k Views 98 Watching
  • Oldest to Newest
  • Newest to Oldest
  • Most Votes
Reply
  • Reply as topic
Log in to reply
This topic has been deleted. Only users with topic management privileges can see it.
  • sinczeS Offline
    sinczeS Offline
    sincze
    MySensors Evangelist
    wrote on last edited by
    #291

    I found out that the brinks solution I build some time ago could be upgraded with a nice additional feature. 'Filter detection'.

    I created a cheat sheet as my device was equiped with RJ11 connector and 3 wires. I needed to convert it to RJ12 with filter detection.
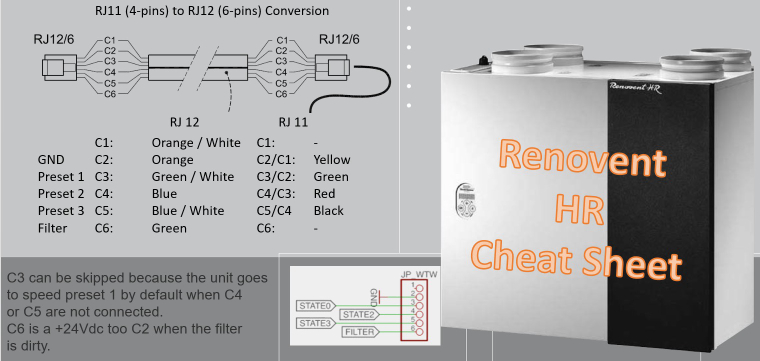
    0_1514922290404_WhatsApp Image 2018-01-02 at 20.40.46.jpeg

    A nice black conversion box Output wires are the same colour as the original RJ 1 wire. With 2 extra wires 3,3v or 5v for the digital 'one' on the arduino.
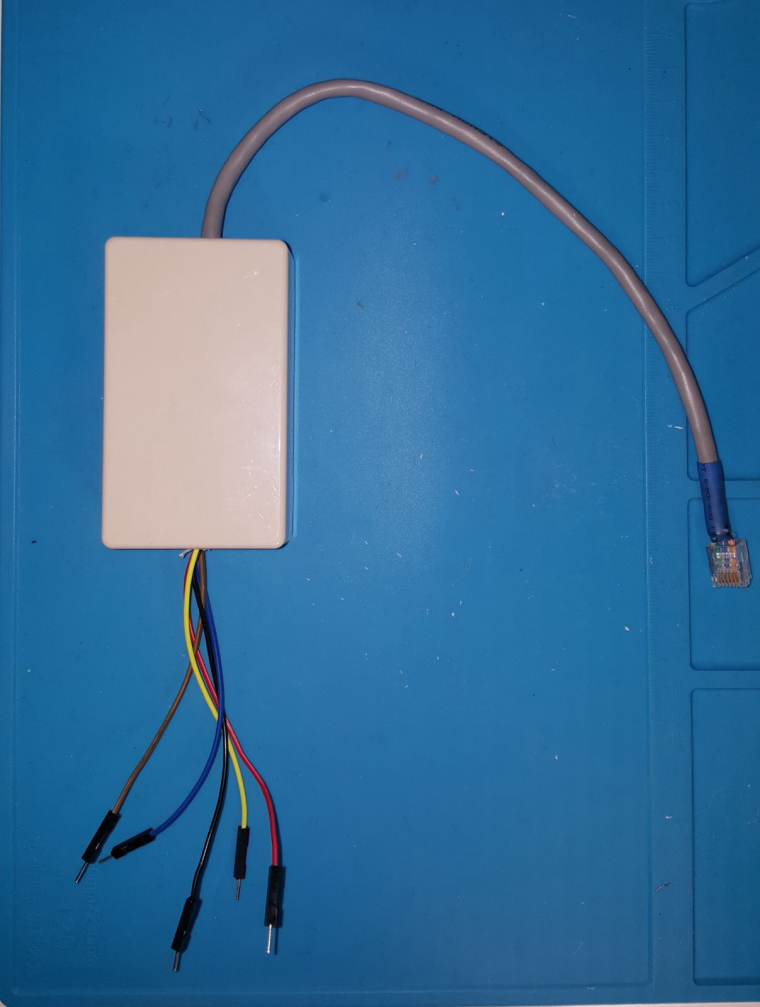
    0_1514922284342_WhatsApp Image 2018-01-02 at 20.38.14.jpeg

    1 Reply Last reply
    2
    • andrewA andrew

      0_1512830079874_small_20171119_155404.jpg 0_1512830092134_small_20171119_163354.jpg 0_1512830107562_small_20171119_163849.jpg 0_1512830119867_small_20171119_164745.jpg 0_1512830130032_small_20171119_165717.jpg 0_1512830150237_small_20171203_092353.jpg 0_1512830159490_small_20171203_163658.jpg 0_1512830169403_small_20171207_194213.jpg

      andrewA Offline
      andrewA Offline
      andrew
      wrote on last edited by
      #292

      @andrew said in What did you build today (Pictures) ?:
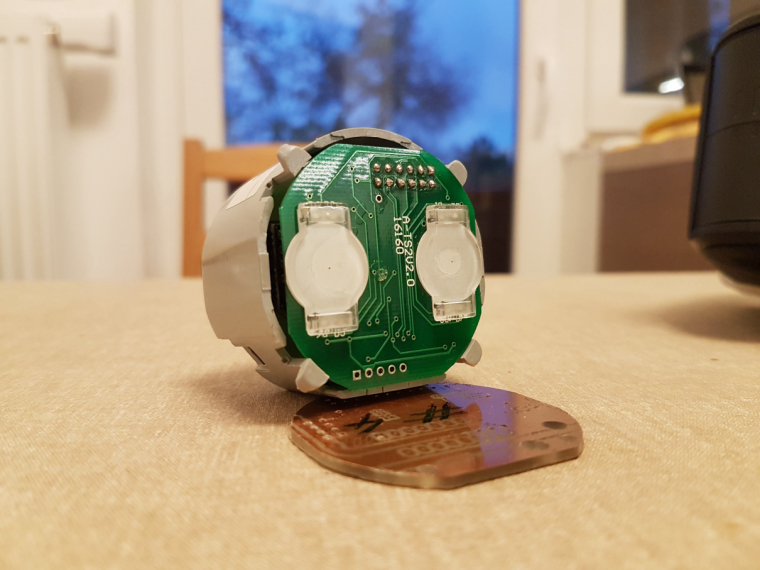
      0_1512830079874_small_20171119_155404.jpg 0_1512830092134_small_20171119_163354.jpg 0_1512830107562_small_20171119_163849.jpg 0_1512830119867_small_20171119_164745.jpg 0_1512830130032_small_20171119_165717.jpg 0_1512830150237_small_20171203_092353.jpg 0_1512830159490_small_20171203_163658.jpg 0_1512830169403_small_20171207_194213.jpg

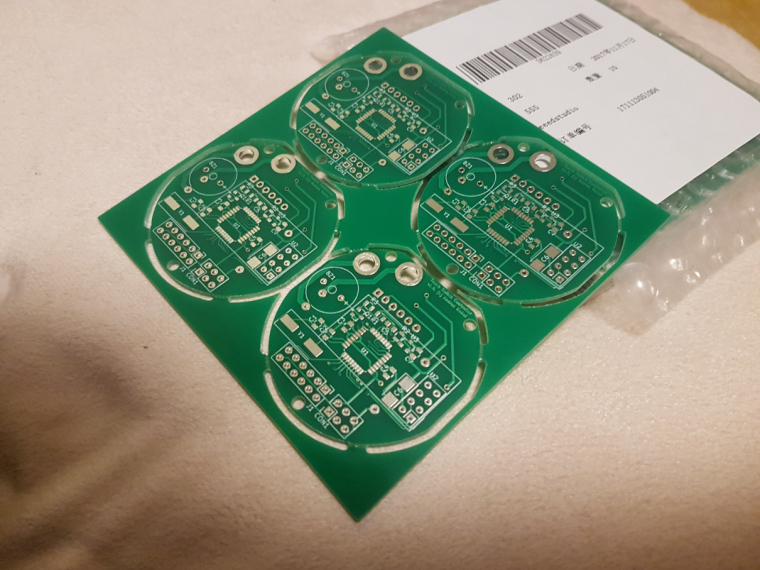
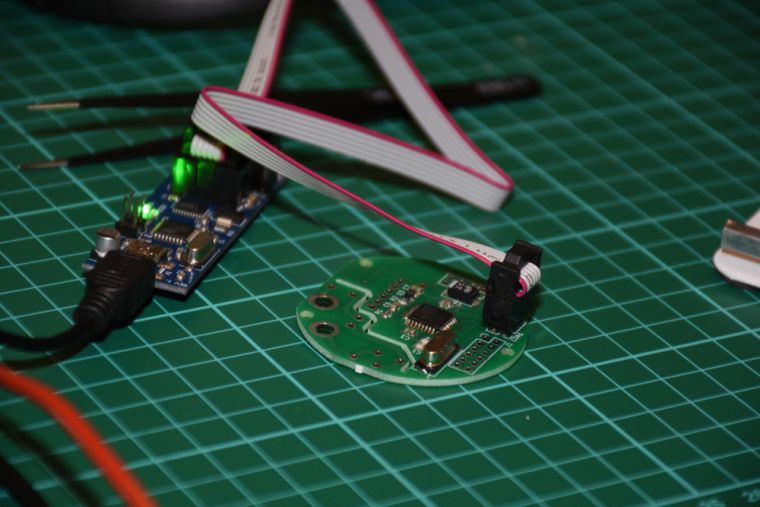
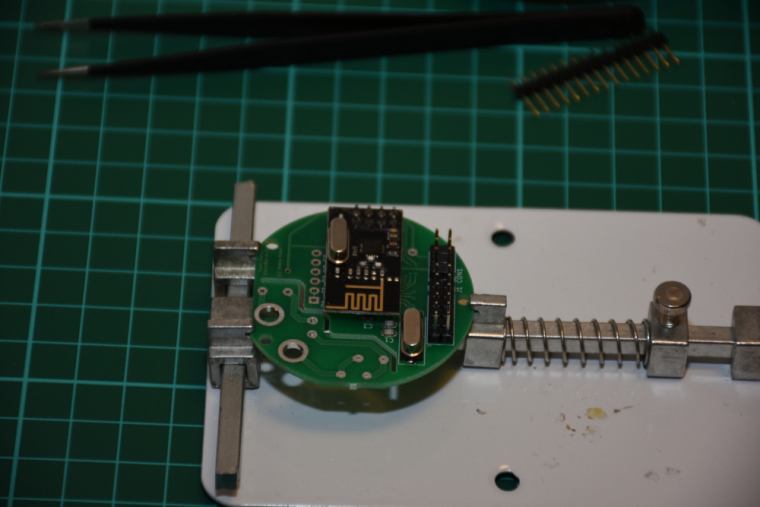
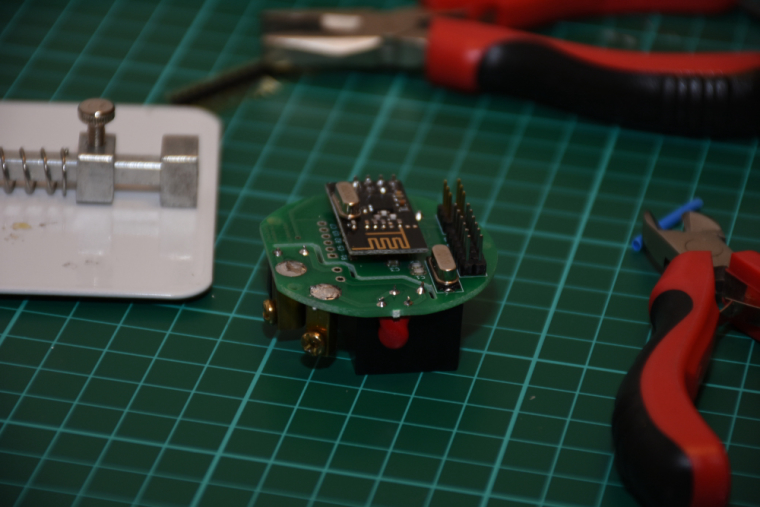
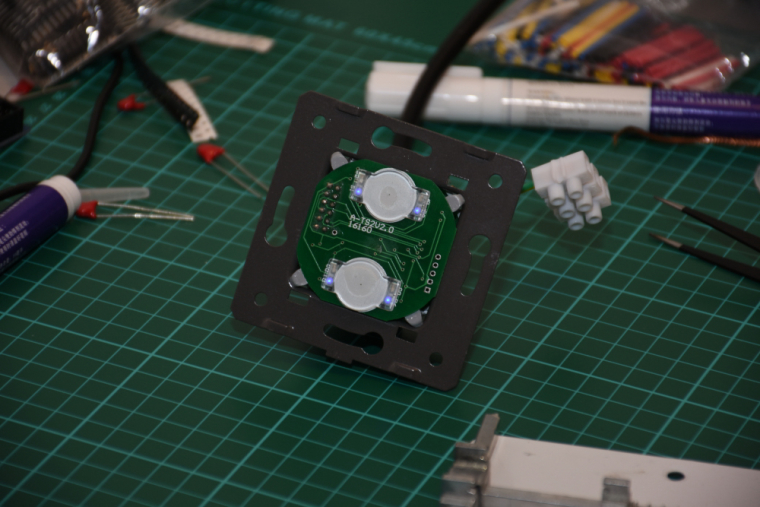
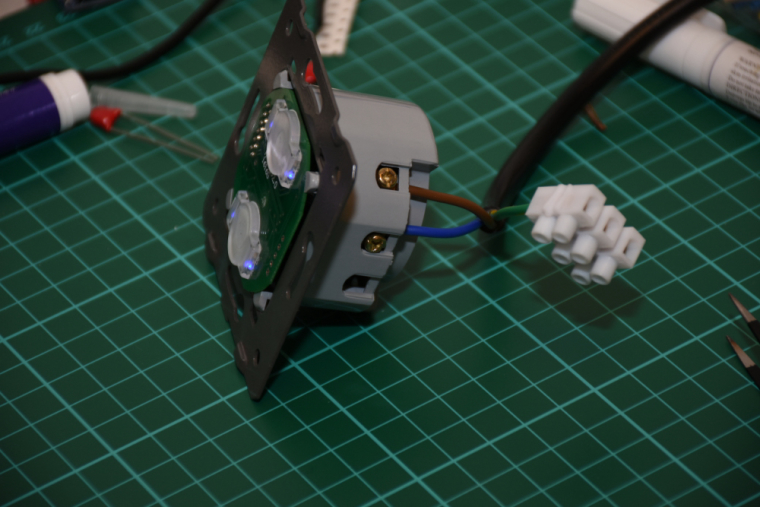
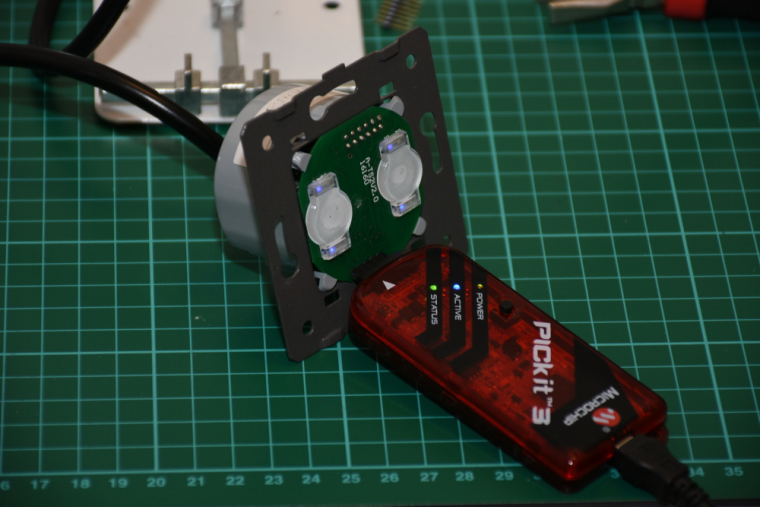
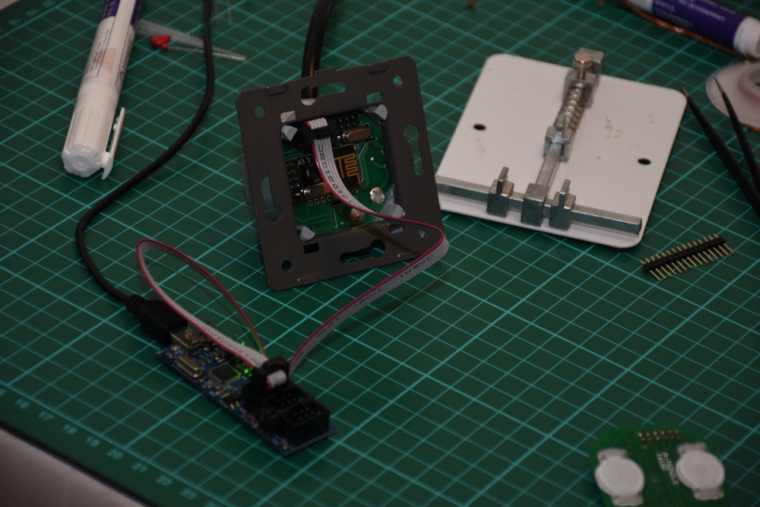
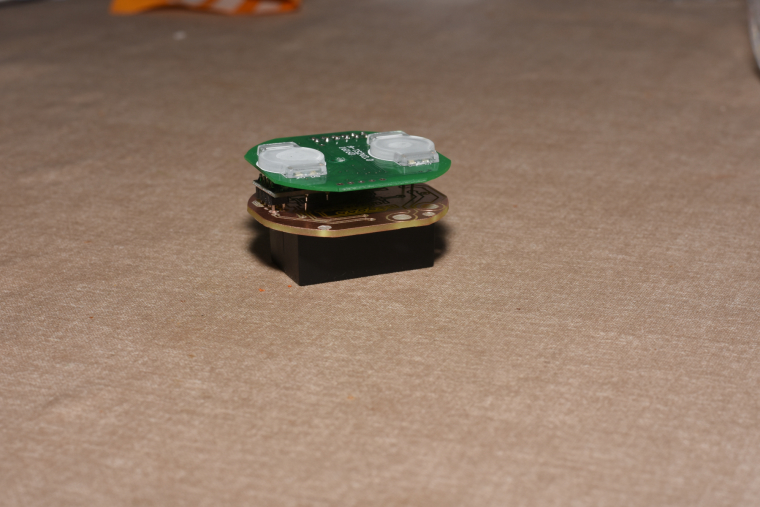
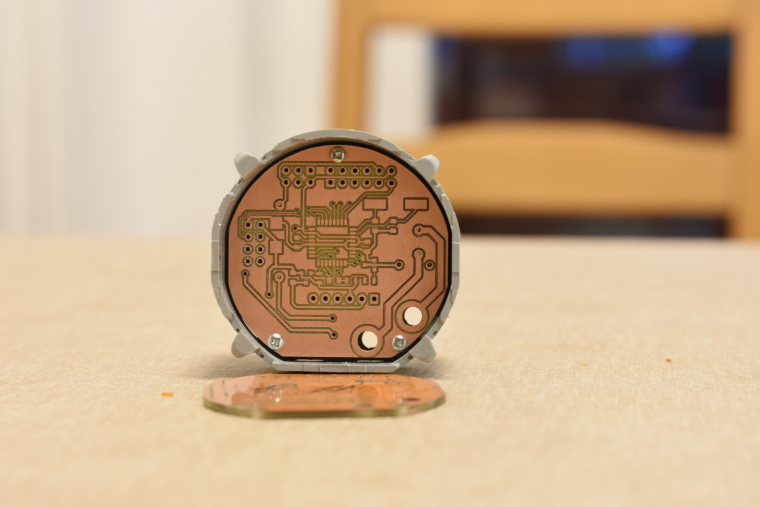
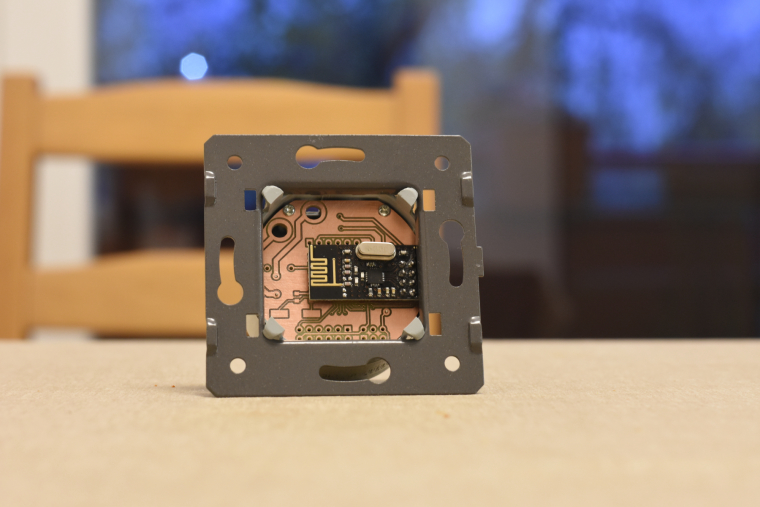
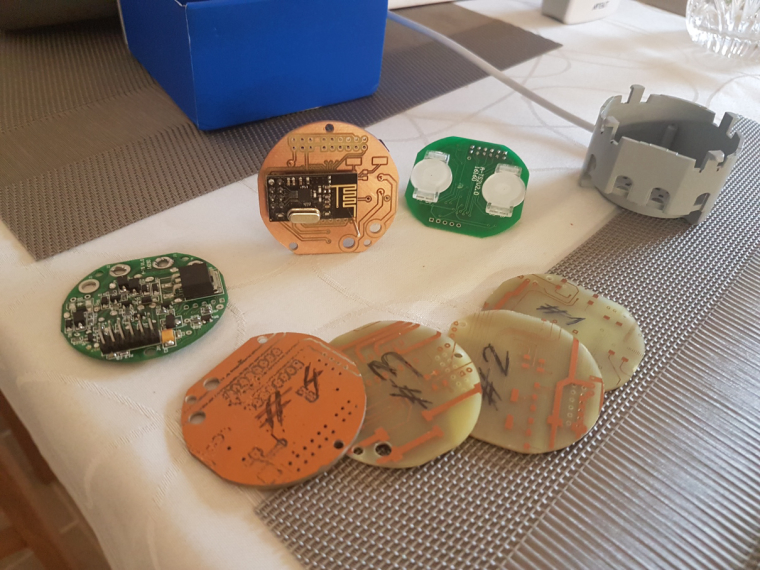
      so, it is ready. I mean ready to SW development :) both the schematic and pcb design is now confirmed and fortunately theory meets the practice :)

      0_1515090568483_small_small_20180103_235320.jpg

      0_1515090578447_small_small_20180104_001658.jpg

      0_1515090588886_small_small_20180104_003546.jpg

      0_1515090603769_small_small_20180104_003556.jpg

      0_1515090626947_small_small_20180104_004540.jpg

      0_1515090649476_small_small_20180104_004605.jpg

      0_1515090667193_small_small_20180104_004655.jpg

      0_1515090681698_small_small_20180104_005413.jpg

      0_1515090695413_small_small_20180104_005424.jpg

      0_1515090706426_small_small_20180104_010443.jpg

      0_1515090717200_small_small_20180104_010955.jpg

      it is assembled, programmed, tested, everything works as expected.
      I did not mount it to the wall so far (I'll need a controller and real actuators first), but there was no issue with the communication between two nrf modules (both with PCB antenna) from cca 6 meter distance + 2 walls (10 cm brick) in between.

      the touch panel's firmware will be enhanced as well as the controller's firmware, at the moment the touch sensing is reliable and a PoC code run on both of them for testing/debugging purposes. for the controller board I'm collecting additional information for the development on the following link:
      https://forum.mysensors.org/topic/8831/which-sensor-and-msg-type-for-switch-dimmer-node-sender-only

      YveauxY jeremushkaJ 2 Replies Last reply
      8
      • andrewA andrew

        @andrew said in What did you build today (Pictures) ?:
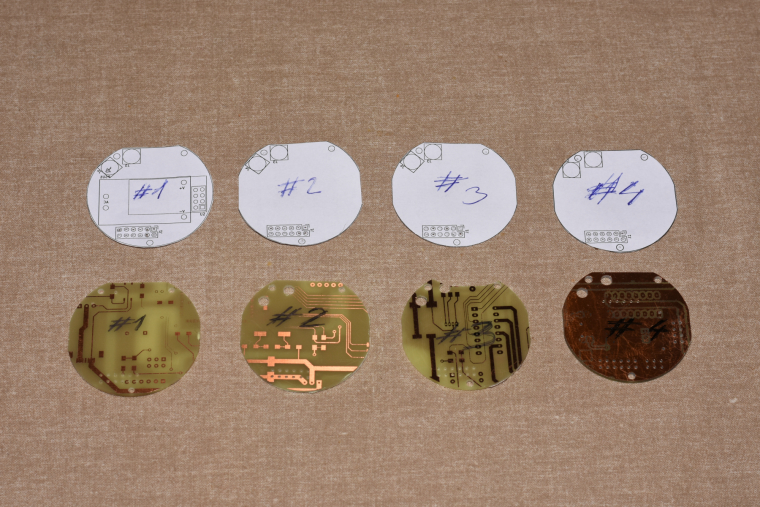
        0_1512830079874_small_20171119_155404.jpg 0_1512830092134_small_20171119_163354.jpg 0_1512830107562_small_20171119_163849.jpg 0_1512830119867_small_20171119_164745.jpg 0_1512830130032_small_20171119_165717.jpg 0_1512830150237_small_20171203_092353.jpg 0_1512830159490_small_20171203_163658.jpg 0_1512830169403_small_20171207_194213.jpg

        so, it is ready. I mean ready to SW development :) both the schematic and pcb design is now confirmed and fortunately theory meets the practice :)

        0_1515090568483_small_small_20180103_235320.jpg

        0_1515090578447_small_small_20180104_001658.jpg

        0_1515090588886_small_small_20180104_003546.jpg

        0_1515090603769_small_small_20180104_003556.jpg

        0_1515090626947_small_small_20180104_004540.jpg

        0_1515090649476_small_small_20180104_004605.jpg

        0_1515090667193_small_small_20180104_004655.jpg

        0_1515090681698_small_small_20180104_005413.jpg

        0_1515090695413_small_small_20180104_005424.jpg

        0_1515090706426_small_small_20180104_010443.jpg

        0_1515090717200_small_small_20180104_010955.jpg

        it is assembled, programmed, tested, everything works as expected.
        I did not mount it to the wall so far (I'll need a controller and real actuators first), but there was no issue with the communication between two nrf modules (both with PCB antenna) from cca 6 meter distance + 2 walls (10 cm brick) in between.

        the touch panel's firmware will be enhanced as well as the controller's firmware, at the moment the touch sensing is reliable and a PoC code run on both of them for testing/debugging purposes. for the controller board I'm collecting additional information for the development on the following link:
        https://forum.mysensors.org/topic/8831/which-sensor-and-msg-type-for-switch-dimmer-node-sender-only

        YveauxY Offline
        YveauxY Offline
        Yveaux
        Mod
        wrote on last edited by
        #293

        @andrew Nice work man!
        Where did you source the gray enclosure from?

        http://yveaux.blogspot.nl

        andrewA 1 Reply Last reply
        0
        • YveauxY Yveaux

          @andrew Nice work man!
          Where did you source the gray enclosure from?

          andrewA Offline
          andrewA Offline
          andrew
          wrote on last edited by
          #294

          @yveaux said in What did you build today (Pictures) ?:
          @andrew Nice work man!
          Where did you source the gray enclosure from?

          thanks! the cover is also part of the original livolo (well, in fact a chinese clone of livolo) touch switch.

          1 Reply Last reply
          0
          • andrewA Offline
            andrewA Offline
            andrew
            wrote on last edited by
            #295

            https://www.youtube.com/watch?v=l2aiqRqlwKo

            sinczeS 1 Reply Last reply
            4
            • andrewA andrew

              https://www.youtube.com/watch?v=l2aiqRqlwKo

              sinczeS Offline
              sinczeS Offline
              sincze
              MySensors Evangelist
              wrote on last edited by
              #296

              @andrew said in What did you build today (Pictures) ?:
              András Kabai

              Nice video András ;-)

              andrewA 1 Reply Last reply
              0
              • sinczeS sincze

                @andrew said in What did you build today (Pictures) ?:
                András Kabai

                Nice video András ;-)

                andrewA Offline
                andrewA Offline
                andrew
                wrote on last edited by
                #297

                @sincze thanks, Sandor ;)

                1 Reply Last reply
                0
                • NeverDieN Offline
                  NeverDieN Offline
                  NeverDie
                  Hero Member
                  wrote on last edited by
                  #298

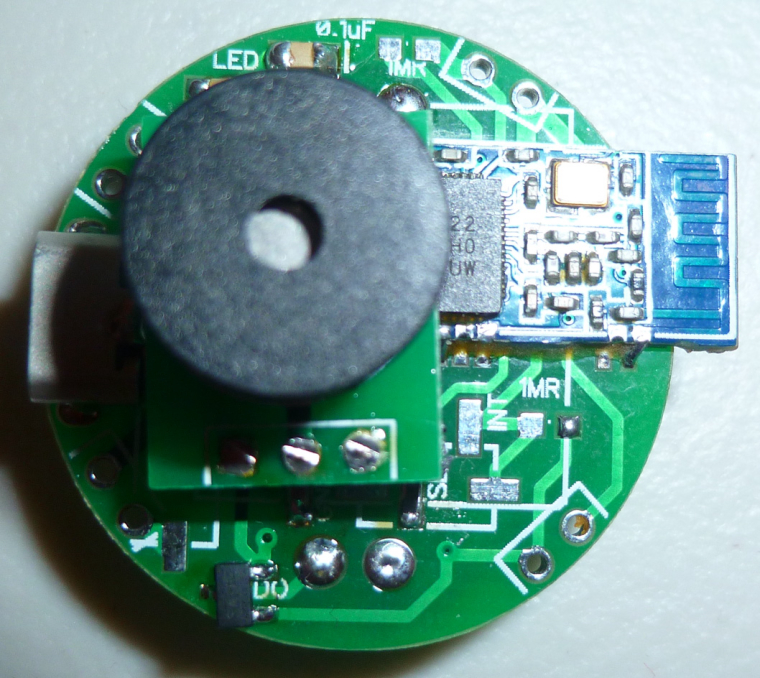
                  Added a buzzer to my nRF51822 coincell device to make a locator beacon. Attach the device to an object you tend to lose and it will make sounds when you activate it, allowing you to find it.
                  0_1515273198336_buzzer_beacon.jpg
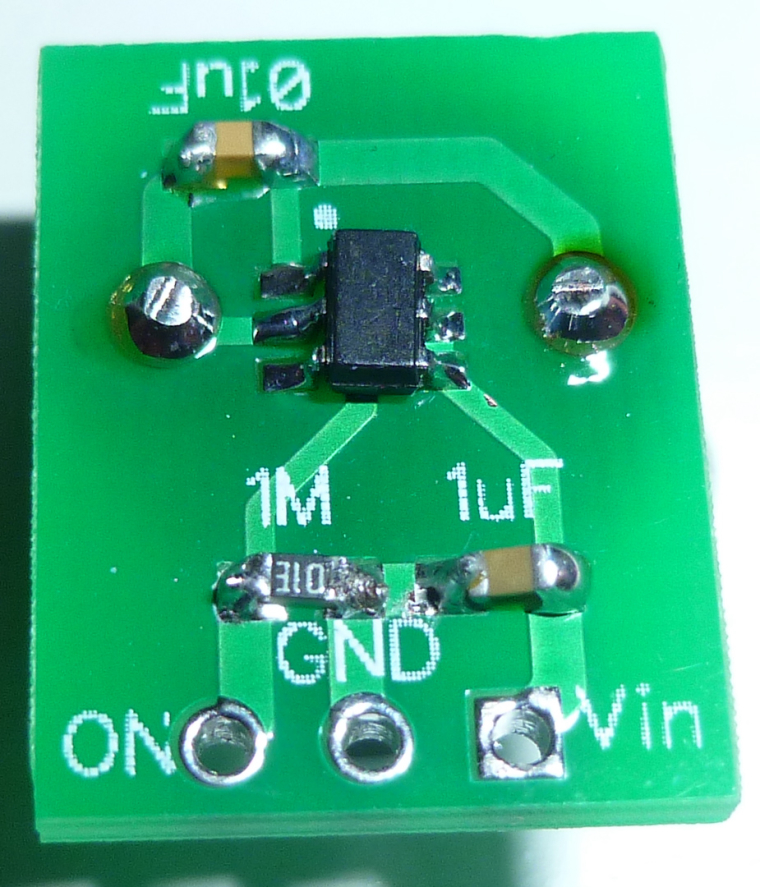
                  The buzzer is driven by a load switch, so that none of the nRF51822 pins are overloaded:
                  0_1515273260885_buzzer_board.jpg

                  andrewA 1 Reply Last reply
                  3
                  • NeverDieN NeverDie

                    Added a buzzer to my nRF51822 coincell device to make a locator beacon. Attach the device to an object you tend to lose and it will make sounds when you activate it, allowing you to find it.
                    0_1515273198336_buzzer_beacon.jpg
                    The buzzer is driven by a load switch, so that none of the nRF51822 pins are overloaded:
                    0_1515273260885_buzzer_board.jpg

                    andrewA Offline
                    andrewA Offline
                    andrew
                    wrote on last edited by
                    #299

                    @neverdie I hope that you made the prototyping with the cnc ;)

                    1 Reply Last reply
                    1
                    • sinczeS Offline
                      sinczeS Offline
                      sincze
                      MySensors Evangelist
                      wrote on last edited by
                      #300

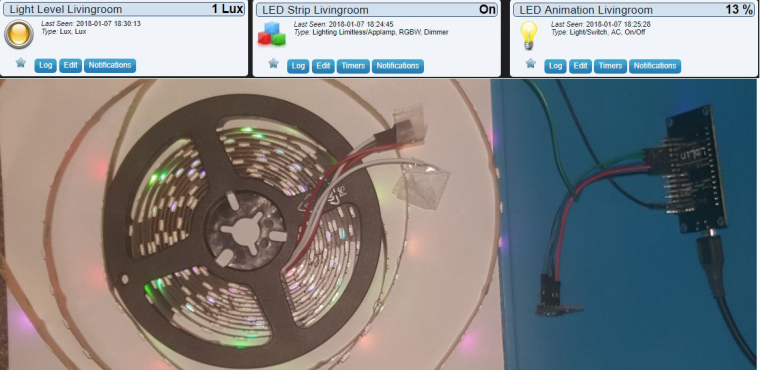
                      Finally, the last day of my holiday I managed to upload the Mysensors Sketch into the NodeMCU to control my 900 LEDS. It will also read the lux intensity in the livingroom. So if it is dark the lights will switch on.

                      0_1515346564306_NodeMCU Driving LED.jpg

                      All is based on @Yveaux Mysensors ESP Gateway port. On a rainy saterday last year @Yveaux and I found out we did not have to modify anything on the voltag level for driving the LEDS. ;)

                      The sketch includes all the Doll_House animations (around 55) that can be skipped through using an old 433mhz remote (or via interface directly ofcourse) Next stop... Installing 15 meters of LED in the livingroom. pffff ;-)

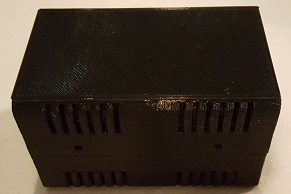
                      And putting everything inside this little box @Yveaux printed for me.
                      0_1515346955766_Box.jpeg

                      1 Reply Last reply
                      4
                      • scalzS Offline
                        scalzS Offline
                        scalz
                        Hardware Contributor
                        wrote on last edited by scalz
                        #301

                        Hi,

                        today I've almost finished a speaker build :) (it'll be a gift for family)

                        First, I would like to thx Paul Carmody who created the original design of these speakers : Overnight Sensation :clap: :+1:
                        https://sites.google.com/site/undefinition/diy-overnightsensations

                        I have just changed size and format (of course I kept the internal air volume which is very important)

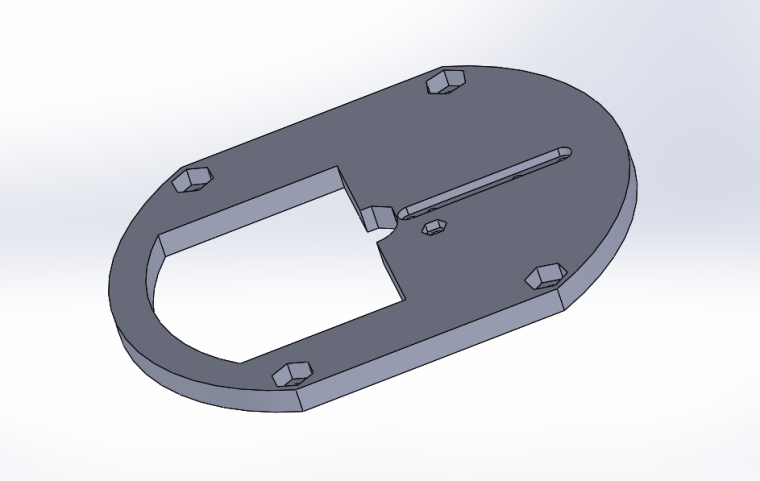
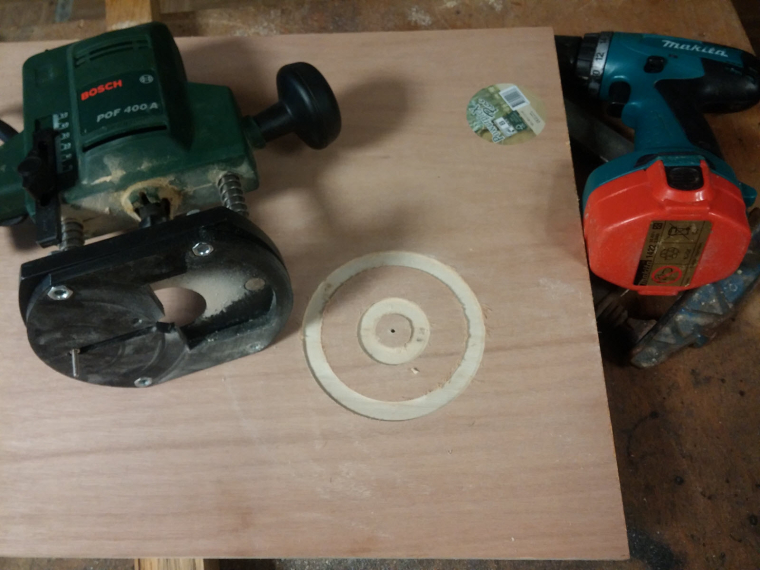
                        1. I designed&printed a simple circle jig for my router.
                          0_1515348466242_Pièce1.PNG
                          0_1515346505441_circle jig.jpg

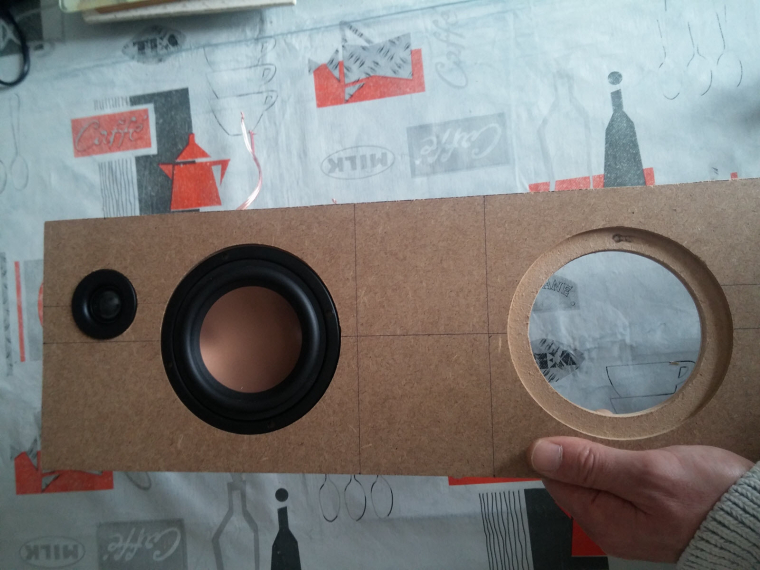
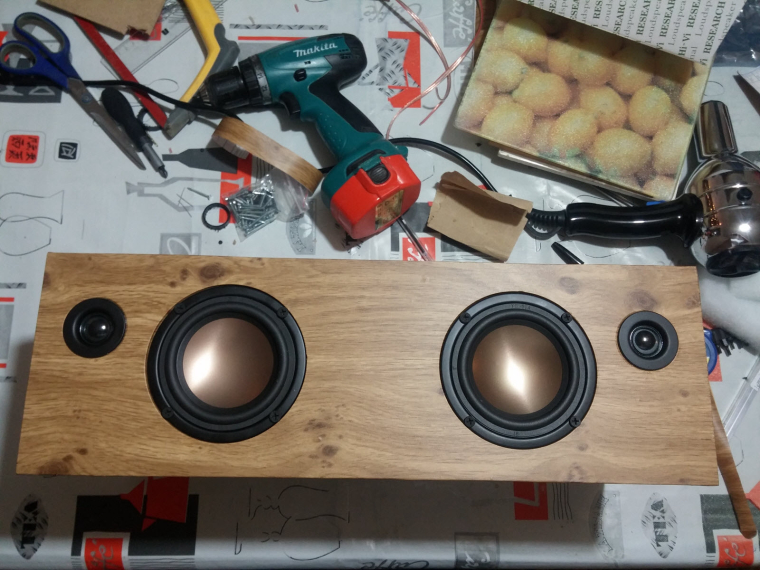
                        2. So speaker drivers can be flush on front plate
                          0_1515346542637_frontplate.jpg

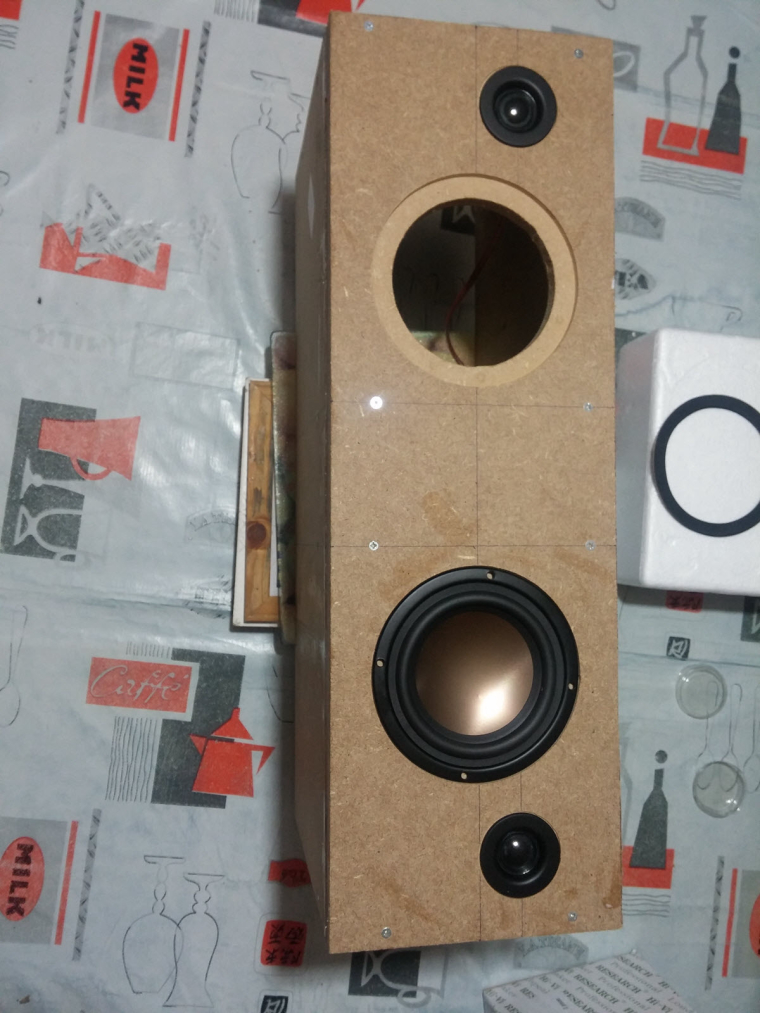
                        3. Assembled the box
                          0_1515346612578_speaker.jpg

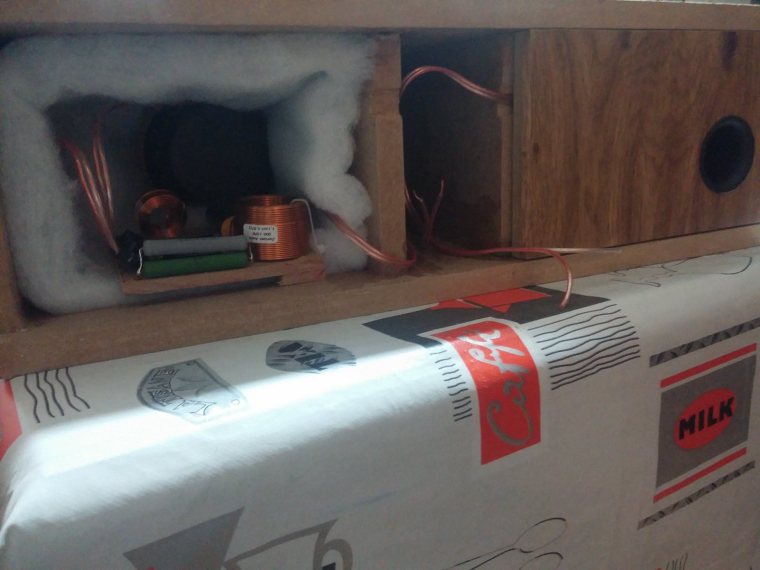
                        4. Crossover, port tube, foam
                          0_1515346694824_back.jpg
                          with a special place to fit some electronics like

                        • rpi (for Volumio/LMS client, or a voice assistant)
                        • cheap dac & 2x50w amp from aliexpress
                        1. Now vinyling. I need to change these ugly black screws too.
                          0_1515346789068_vinyling.jpg

                        Of course, I'm too excited (and not very patient ), so I've tested how they sound... Loud! Crystal sound with very nice boomboom :muscle:

                        Not finished, but in good way :)

                        zboblamontZ F 2 Replies Last reply
                        8
                        • scalzS scalz

                          Hi,

                          today I've almost finished a speaker build :) (it'll be a gift for family)

                          First, I would like to thx Paul Carmody who created the original design of these speakers : Overnight Sensation :clap: :+1:
                          https://sites.google.com/site/undefinition/diy-overnightsensations

                          I have just changed size and format (of course I kept the internal air volume which is very important)

                          1. I designed&printed a simple circle jig for my router.
                            0_1515348466242_Pièce1.PNG
                            0_1515346505441_circle jig.jpg

                          2. So speaker drivers can be flush on front plate
                            0_1515346542637_frontplate.jpg

                          3. Assembled the box
                            0_1515346612578_speaker.jpg

                          4. Crossover, port tube, foam
                            0_1515346694824_back.jpg
                            with a special place to fit some electronics like

                          • rpi (for Volumio/LMS client, or a voice assistant)
                          • cheap dac & 2x50w amp from aliexpress
                          1. Now vinyling. I need to change these ugly black screws too.
                            0_1515346789068_vinyling.jpg

                          Of course, I'm too excited (and not very patient ), so I've tested how they sound... Loud! Crystal sound with very nice boomboom :muscle:

                          Not finished, but in good way :)

                          zboblamontZ Offline
                          zboblamontZ Offline
                          zboblamont
                          wrote on last edited by
                          #302

                          @scalz I have to guess this is a centre speaker?
                          Some tidy inductors there on the crossover...
                          How times have changed, now you can PRINT a router jig, used to make them with a piece of plywood for circles smaller that the router radius... Centre was drilled and fitted with threaded rod so you could cut back the front of the baffle but also chamfer the back face of the speaker baffle before cutting out the opening...
                          Tidy enough, great when they get fired up....

                          scalzS 1 Reply Last reply
                          0
                          • Nca78N Offline
                            Nca78N Offline
                            Nca78
                            Hardware Contributor
                            wrote on last edited by
                            #303

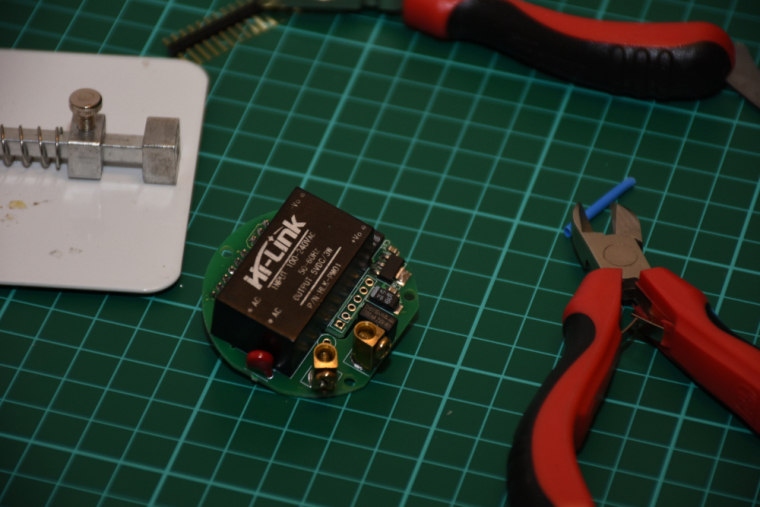
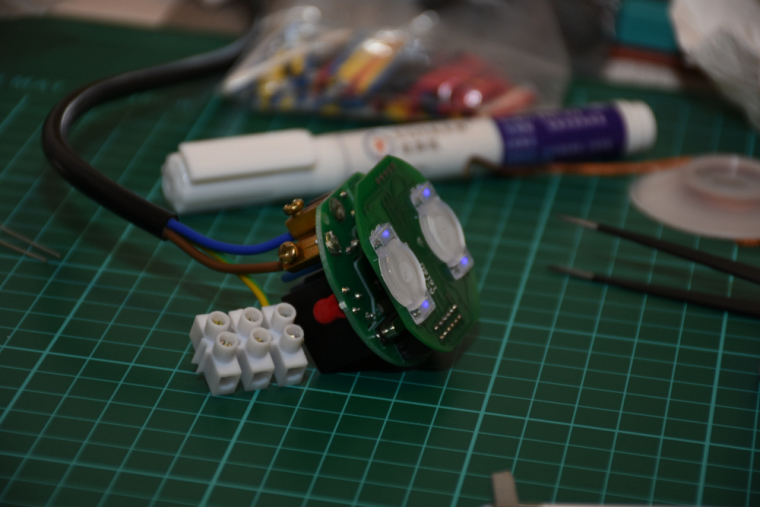
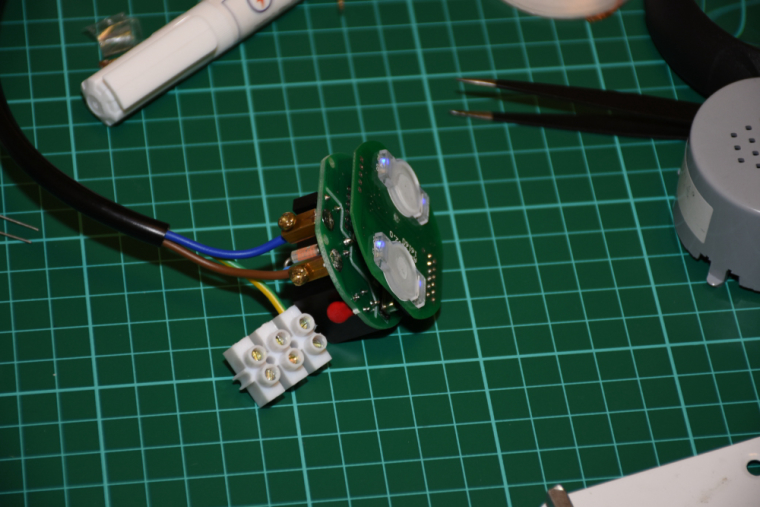
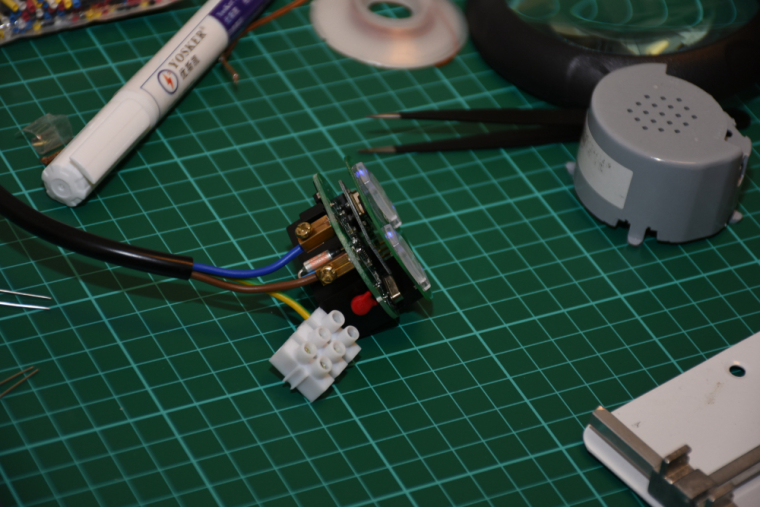
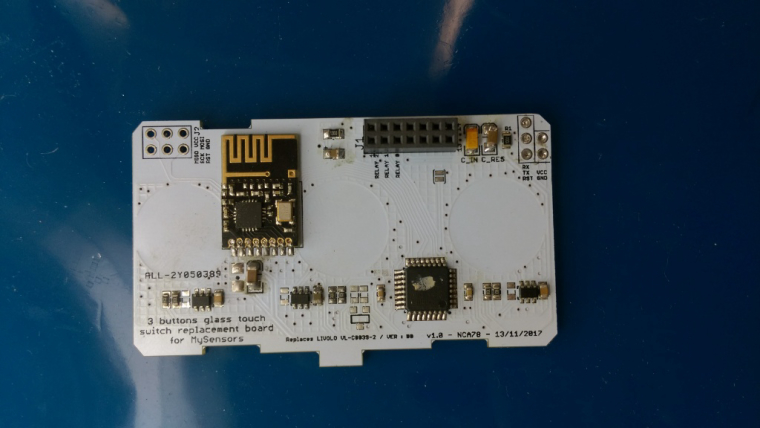
                            Today I (finally) finished a full working version of that old Livolo 3 buttons switch. I removed the RGB led on the central button as it's not visible, but the basic switch functionality with buttons/relays and blue/red status leds runs fine.
                            It's running with MYSBootloader, it's really convenient to update without having to switch of the fuse and unmount everything.
                            0_1515402234037_IMAG2135.jpg

                            A (quick) video, touch sensibility is perfect now, I'm really happy with it !
                            https://www.youtube.com/watch?v=G6yEdSyoMYw

                            1 Reply Last reply
                            6
                            • scalzS scalz

                              Hi,

                              today I've almost finished a speaker build :) (it'll be a gift for family)

                              First, I would like to thx Paul Carmody who created the original design of these speakers : Overnight Sensation :clap: :+1:
                              https://sites.google.com/site/undefinition/diy-overnightsensations

                              I have just changed size and format (of course I kept the internal air volume which is very important)

                              1. I designed&printed a simple circle jig for my router.
                                0_1515348466242_Pièce1.PNG
                                0_1515346505441_circle jig.jpg

                              2. So speaker drivers can be flush on front plate
                                0_1515346542637_frontplate.jpg

                              3. Assembled the box
                                0_1515346612578_speaker.jpg

                              4. Crossover, port tube, foam
                                0_1515346694824_back.jpg
                                with a special place to fit some electronics like

                              • rpi (for Volumio/LMS client, or a voice assistant)
                              • cheap dac & 2x50w amp from aliexpress
                              1. Now vinyling. I need to change these ugly black screws too.
                                0_1515346789068_vinyling.jpg

                              Of course, I'm too excited (and not very patient ), so I've tested how they sound... Loud! Crystal sound with very nice boomboom :muscle:

                              Not finished, but in good way :)

                              F Offline
                              F Offline
                              fredswed
                              wrote on last edited by
                              #304

                              @scalz That looks very neat and tempting indeed! A pair of Overnight Sensation has long been in the plans for my next (and first) speaker build. Where did you get the components?

                              1 Reply Last reply
                              0
                              • zboblamontZ zboblamont

                                @scalz I have to guess this is a centre speaker?
                                Some tidy inductors there on the crossover...
                                How times have changed, now you can PRINT a router jig, used to make them with a piece of plywood for circles smaller that the router radius... Centre was drilled and fitted with threaded rod so you could cut back the front of the baffle but also chamfer the back face of the speaker baffle before cutting out the opening...
                                Tidy enough, great when they get fired up....

                                scalzS Offline
                                scalzS Offline
                                scalz
                                Hardware Contributor
                                wrote on last edited by scalz
                                #305

                                @zboblamont
                                well actually it's setup as a standalone stereo speaker. I asked my brother (it's a gift for him) if he would prefer separated speakers (better for stereo). But he prefers like this, standalone with no wires, and his room won't be wide so it should be ok.
                                Yes, i know for the jigs in plywood, but i have a 3d printer, caliper; drawing, print and voilà :)
                                I like using cad software for checking assemblies in 3d etc, very handy, and it's more precise than my brain :).

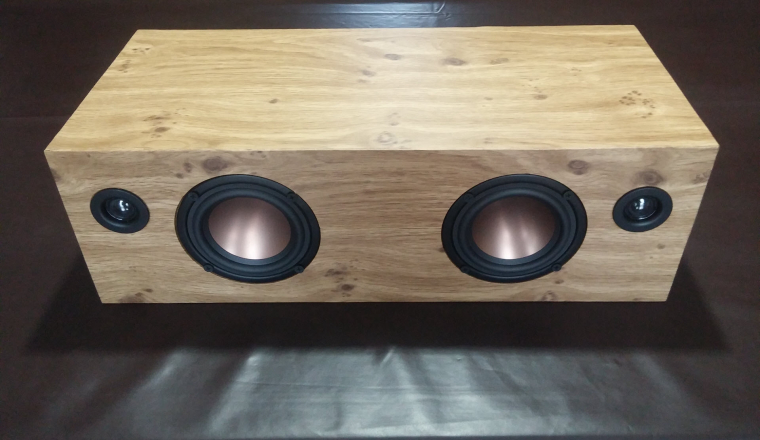
                                @fredswed yeah, it sounds very nice. when you hear it, then you know you made the good choice. Better than buying any of these 60 to >200$ smart speakers. I compared them with some others hifi speakers (jbl..) for fun, and still very impressive. Some of my friends are jealous. They want one, or more. Same for my others bro. They sound pretty loud imho, and would like to try a pair like that for fun
                                I ordered most of the parts at loudspeakerfreaks or audiohobby. if you live in USA, then it's better to give a try to parts express I think.

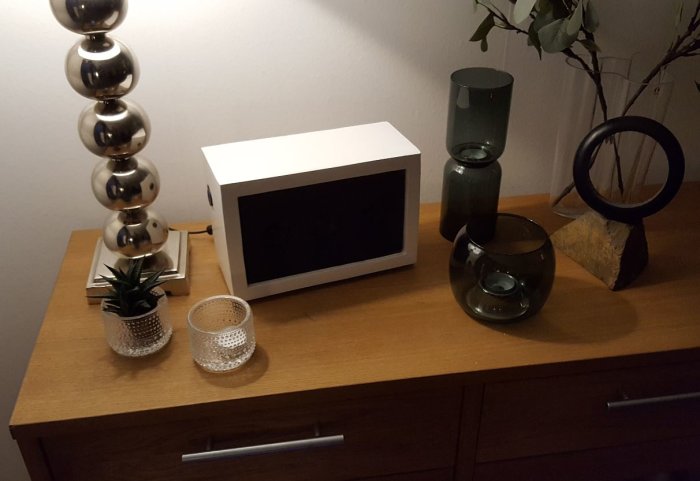
                                I finished the vinyling yesterday (my bro didn't want I roundish the corner). I now just need to add a rpi inside and connectors etc on back, not bad :)
                                0_1515489993664_finished.jpg

                                sundberg84S zboblamontZ 2 Replies Last reply
                                3
                                • scalzS scalz

                                  @zboblamont
                                  well actually it's setup as a standalone stereo speaker. I asked my brother (it's a gift for him) if he would prefer separated speakers (better for stereo). But he prefers like this, standalone with no wires, and his room won't be wide so it should be ok.
                                  Yes, i know for the jigs in plywood, but i have a 3d printer, caliper; drawing, print and voilà :)
                                  I like using cad software for checking assemblies in 3d etc, very handy, and it's more precise than my brain :).

                                  @fredswed yeah, it sounds very nice. when you hear it, then you know you made the good choice. Better than buying any of these 60 to >200$ smart speakers. I compared them with some others hifi speakers (jbl..) for fun, and still very impressive. Some of my friends are jealous. They want one, or more. Same for my others bro. They sound pretty loud imho, and would like to try a pair like that for fun
                                  I ordered most of the parts at loudspeakerfreaks or audiohobby. if you live in USA, then it's better to give a try to parts express I think.

                                  I finished the vinyling yesterday (my bro didn't want I roundish the corner). I now just need to add a rpi inside and connectors etc on back, not bad :)
                                  0_1515489993664_finished.jpg

                                  sundberg84S Offline
                                  sundberg84S Offline
                                  sundberg84
                                  Hardware Contributor
                                  wrote on last edited by
                                  #306

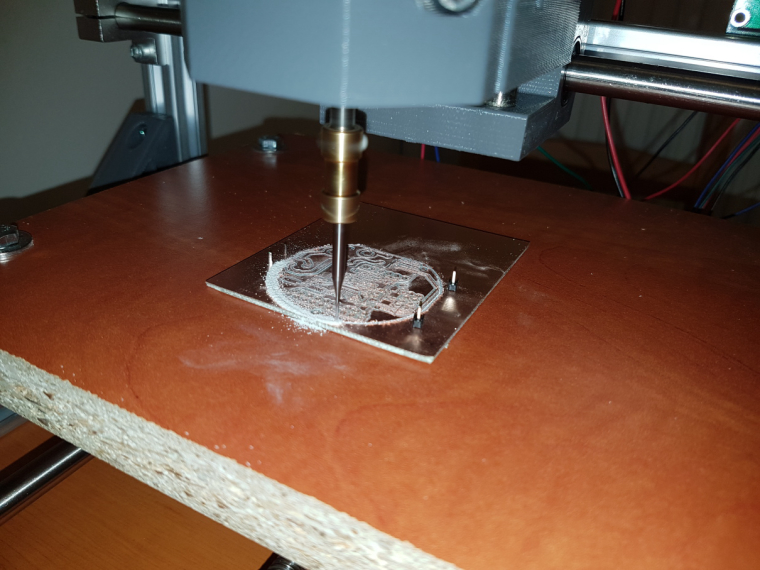
                                  @scalz - im using volumio (finished image for RPI) and happy with this. Just a tip...

                                  alt text

                                  Buildthread (Swedish)

                                  Controller: Proxmox VM - Home Assistant
                                  MySensors GW: Arduino Uno - W5100 Ethernet, Gw Shield Nrf24l01+ 2,4Ghz
                                  MySensors GW: Arduino Uno - Gw Shield RFM69, 433mhz
                                  RFLink GW - Arduino Mega + RFLink Shield, 433mhz

                                  scalzS 1 Reply Last reply
                                  0
                                  • sundberg84S sundberg84

                                    @scalz - im using volumio (finished image for RPI) and happy with this. Just a tip...

                                    alt text

                                    Buildthread (Swedish)

                                    scalzS Offline
                                    scalzS Offline
                                    scalz
                                    Hardware Contributor
                                    wrote on last edited by scalz
                                    #307

                                    @sundberg84 said in What did you build today (Pictures) ?:
                                    @scalz - im using volumio (finished image for RPI) and happy with this. Just a tip...

                                    same here with a few additional plugins ;) Agreed, volumio is sexy sw.

                                    your speaker looks nice :+1:

                                    I read and learnt a lot how to make diy speakers. It was very interesting learning curve, lot of parameters I didn't know before (and one of the most important rule is : tune your enclosure regarding speaker drivers specs, not the oppposite (there are software for calculating everything) Now I understand better the curves etc and where commercial stuff cheats. pretty cool

                                    sundberg84S 1 Reply Last reply
                                    2
                                    • scalzS scalz

                                      @sundberg84 said in What did you build today (Pictures) ?:
                                      @scalz - im using volumio (finished image for RPI) and happy with this. Just a tip...

                                      same here with a few additional plugins ;) Agreed, volumio is sexy sw.

                                      your speaker looks nice :+1:

                                      I read and learnt a lot how to make diy speakers. It was very interesting learning curve, lot of parameters I didn't know before (and one of the most important rule is : tune your enclosure regarding speaker drivers specs, not the oppposite (there are software for calculating everything) Now I understand better the curves etc and where commercial stuff cheats. pretty cool

                                      sundberg84S Offline
                                      sundberg84S Offline
                                      sundberg84
                                      Hardware Contributor
                                      wrote on last edited by sundberg84
                                      #308

                                      @scalz - this was my first project and I agree with you (because I didnt calculate much before). If you are looking for the best sound its incredible important... for me and this build I wanted a small enclosure in the kitchen but the sound is pretty impressive for such a small thing so Im happy even though I know it could have sounded better.

                                      Controller: Proxmox VM - Home Assistant
                                      MySensors GW: Arduino Uno - W5100 Ethernet, Gw Shield Nrf24l01+ 2,4Ghz
                                      MySensors GW: Arduino Uno - Gw Shield RFM69, 433mhz
                                      RFLink GW - Arduino Mega + RFLink Shield, 433mhz

                                      1 Reply Last reply
                                      2
                                      • scalzS scalz

                                        @zboblamont
                                        well actually it's setup as a standalone stereo speaker. I asked my brother (it's a gift for him) if he would prefer separated speakers (better for stereo). But he prefers like this, standalone with no wires, and his room won't be wide so it should be ok.
                                        Yes, i know for the jigs in plywood, but i have a 3d printer, caliper; drawing, print and voilà :)
                                        I like using cad software for checking assemblies in 3d etc, very handy, and it's more precise than my brain :).

                                        @fredswed yeah, it sounds very nice. when you hear it, then you know you made the good choice. Better than buying any of these 60 to >200$ smart speakers. I compared them with some others hifi speakers (jbl..) for fun, and still very impressive. Some of my friends are jealous. They want one, or more. Same for my others bro. They sound pretty loud imho, and would like to try a pair like that for fun
                                        I ordered most of the parts at loudspeakerfreaks or audiohobby. if you live in USA, then it's better to give a try to parts express I think.

                                        I finished the vinyling yesterday (my bro didn't want I roundish the corner). I now just need to add a rpi inside and connectors etc on back, not bad :)
                                        0_1515489993664_finished.jpg

                                        zboblamontZ Offline
                                        zboblamontZ Offline
                                        zboblamont
                                        wrote on last edited by
                                        #309

                                        @scalz Whatever, so long as your brother enjoys what he asked for, job done.
                                        Do I interpret your comment on "roundish the corner" as rounding over the front baffle edges? Sonically it can make a difference for imaging, but with drives this close I doubt it would be noticeable anyway, and would be a pain to vinyl let alone veneer....

                                        Almost 50 years I've been building speakers as a hobby....
                                        I'll finish them one day ;)

                                        1 Reply Last reply
                                        1
                                        • NeverDieN Offline
                                          NeverDieN Offline
                                          NeverDie
                                          Hero Member
                                          wrote on last edited by NeverDie
                                          #310

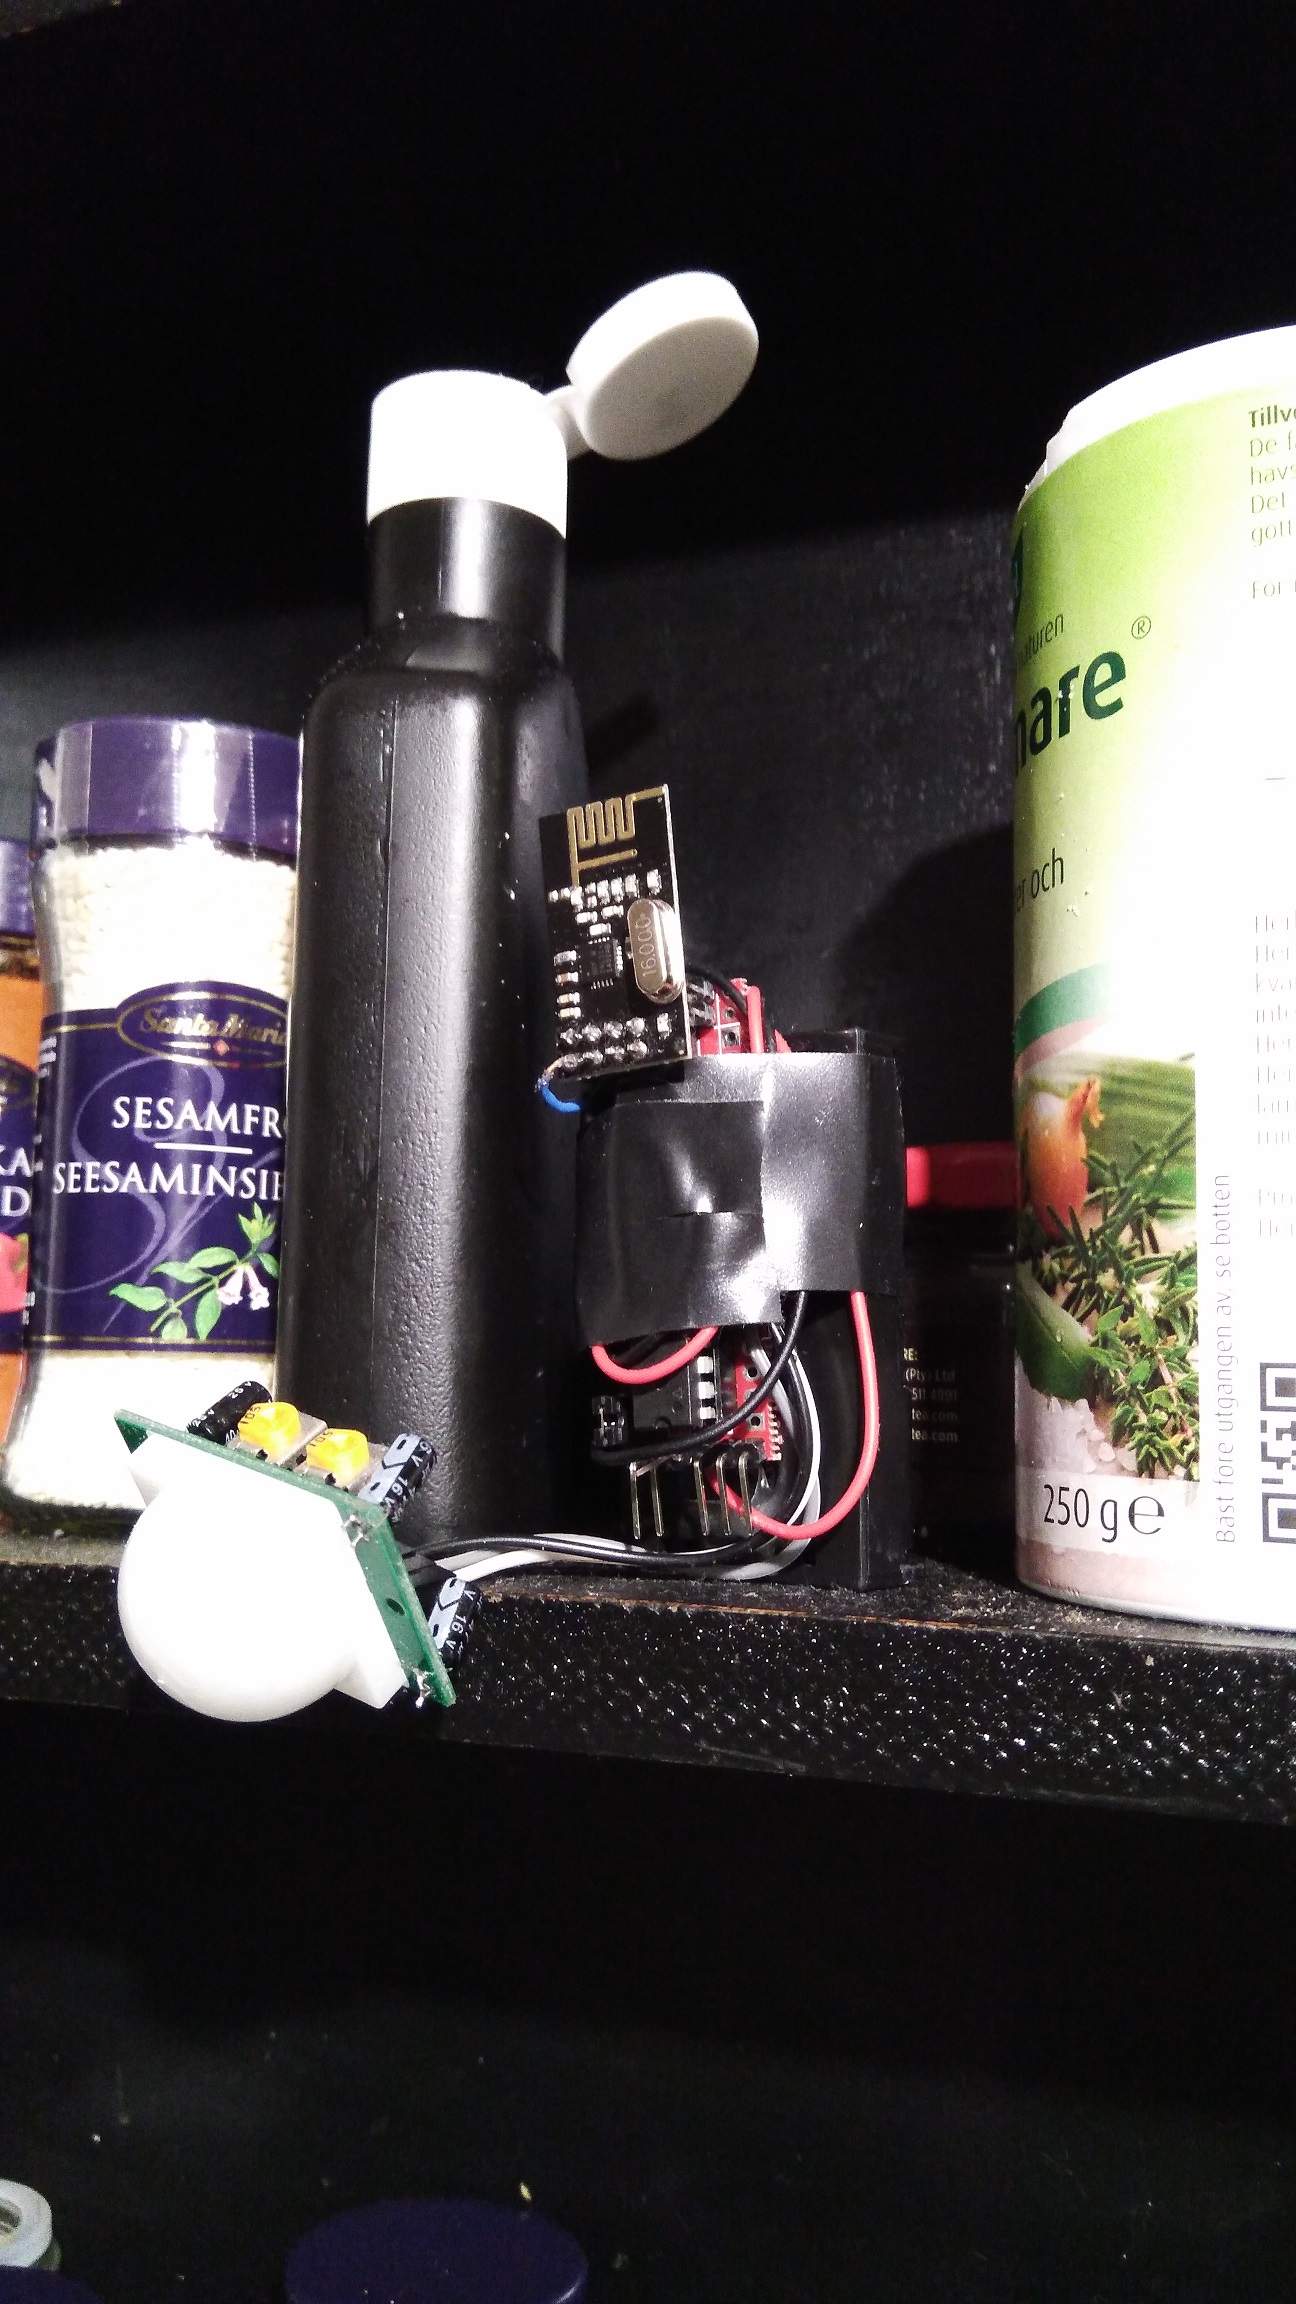
                                          Maybe you speaker geniuses can figure out the optimal enclosure for this tiny buzzer? https://www.aliexpress.com/item/2731HZ-3x4-5x1-9mm-Super-small-miniature-AAC-electromagnetic-DET402-G-1-SMD-Passive-buzzer-3/32839766133.html?spm=2114.search0204.3.177.AclxtY&ws_ab_test=searchweb0_0&aff_platform=aaf&cpt=1515527880409&sk=e2Vzr3v&aff_trace_key=7078a47c52334a31ac1f2c6cfa07a508-1515527880409-05187-e2Vzr3v&terminal_id=892660b32ab149c8a0ca840218581bea

                                          I find that if I cup my hand over it, it (somewhat counter-intuitively) gets a lot louder, so I guess the same principles are involved?

                                          It would be neat to have a very tiny buzzer like this available for use in projects, but I guess the enclosure design needs to be considered as well so as to get more volume out of it.

                                          F zboblamontZ 2 Replies Last reply
                                          0
                                          Reply
                                          • Reply as topic
                                          Log in to reply
                                          • Oldest to Newest
                                          • Newest to Oldest
                                          • Most Votes


                                          14

                                          Online

                                          11.7k

                                          Users

                                          11.2k

                                          Topics

                                          113.0k

                                          Posts


                                          Copyright 2019 TBD   |   Forum Guidelines   |   Privacy Policy   |   Terms of Service
                                          • Login

                                          • Don't have an account? Register

                                          • Login or register to search.
                                          • First post
                                            Last post
                                          0
                                          • MySensors
                                          • OpenHardware.io
                                          • Categories
                                          • Recent
                                          • Tags
                                          • Popular