💬 NRF2RFM69
-
@tbowmo
That's understandable :-)I received this email from dirtypcbs today:
"Thanks for ordering!
So here is the thing- please see attached screenshots. The only drill holes in this Gerber are the mouse bits(the pink layer, photo 001). The light green layer(photo 002) is the top solder mask layer. The problem is that no drills are specified in the solder pads or circles, which means that if we make the board exactly how the gerber is designed, all of the light green parts are solder pads and there WILL NOT be drill holes at the bottom of the solder pads, which seems wrong.
I checked this gerber in our system, and I couldn't find any other orders that included it. Even if we have made this board for other people, it doesn't mean that this back-and-forth didn't happen before. I suggest that you write the designer and forward this message and screenshot to him, so that he can update the design in case you order again in the future.
I am also going to include a screenshot of the whole design, and I hope that will be clear to you what the problem is."The attachments in the email are basically showing the same as the image I attached in my post above.
I don't find any design files for the panel layout in your git repository, just gerber files. I guess you don't have them anymore?
I will try to make a new panel layout myself, if I not succeed, I will just order single boards. -
If I remember right I used this gerber panelizer to place 3 of the normal gerber files on one board. You could do the same again, and re-create a panel.
-
Hi,
I ordered this board trough pcbway on 6th december and still didn't received it. I event did not received any confirmation email accept paypal payment confirmation. Did any one here ordered those boards with pcbway ? Do they send any information about the order ? -
What value should be the C1 SMD ? I don't have kicad, so I can't open the file. Just saw it the 3d sketch and realized I have to order some SMDs...
@joaoabs i use 10u and ir works ok.
-
First of all, thank you to the creator of this very convenient PCB.
I ordered 10 of those but got confused when I tried to make a RPi 3 gateway and Arduino node.In the "Connecting the Radio" guide, the instructions are to connect NRF's IRQ pin to Arduino No 2 pin.
This is where RFM's D100 pin is supposed to be connected. As far as I could tell from the PCB this is correct, as RFM's D100 pin is broken out to where NRF's IRQ pin is.However, in the "Building a Raspberry Pi Gateway" guide, it says to connect RFM's D100 pin to RPi's pin 22, which is where NRF's CE pin is supposed to be connected, not IRQ. As for IRQ, it says it's "optional", but if you do connect it, this should be to RPi's pin 15.
So, if you connect the radio to the RPi following the NRF instructions, you get a different circuit than if you connect it following the RFM instructions (and using the pin matching you get from the "connecting the radio" guide). When I did the former, the gateway wasn't working, but when I did the latter, it worked.
I don't know why this difference exists, but I think it's important to point out for anyone wanting to use the PCB with an RPi.
-
@symos IRQ is not utilised for nrf24l01+ in MySensors. There is a provision for future, but just ignore IRQ for now.
-
-
-
On a related note, if anyone is trying to get the NRF2RFM69 board or similar working with the awesome Sensebender Gateway and W5100 Ethernet board, here’s what I had to do today as far as the CS and IRQ defines are concerned.
[FYI: I’m coming back to MySensors after a long hiatus and am in the process of updating (some from v1.3!) all my gateways and sensors...]
Aside from the usual radio selection, I had use the new driver and point the RFM69 NSS and IRQ pins at the nRF CS and IRQ nets. Also, if you want to, you can point the RFM69 RESET pin at the nRF CE net:
#define MY_RFM69_NEW_DRIVER
#define MY_RF69_RESET 34  // Note: Should be MY_RFM69_RST_PIN, but this didn’t work.
#define MY_RFM69_IRQ_PIN 31
#define MY_RFM69_IRQ_NUM digitalPinToInterrupt(MY_RFM69_IRQ_PIN)
#define MY_RFM69_CS_PIN 29
#define MY_DEBUG_VERBOSE_RFM69  // Note: Only if you want to check the pins, RSSI, etc.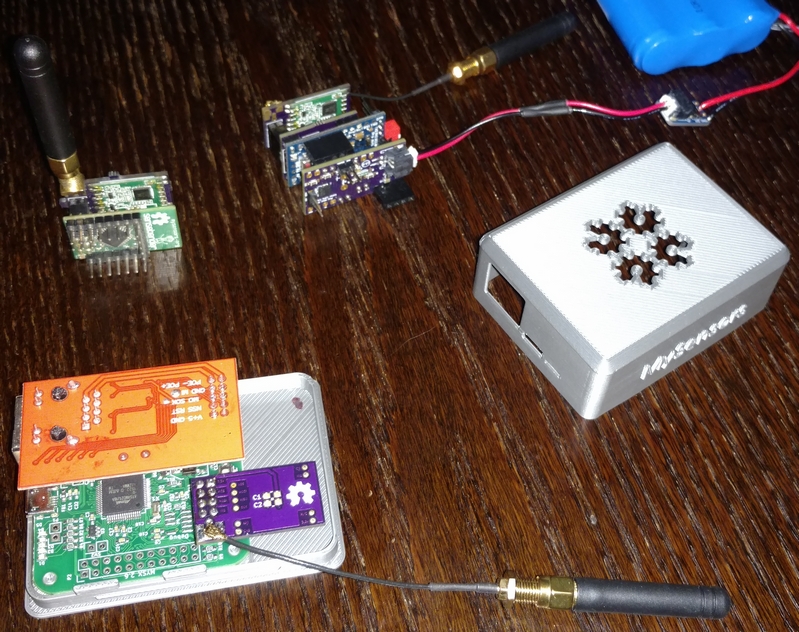
Hope that helps someone.
-
@symos IRQ is not utilised for nrf24l01+ in MySensors. There is a provision for future, but just ignore IRQ for now.
@alexsh1 Thanks, though I'm not sure you understood exactly what I'm saying.
If I connect the radio to the RPi 3 following the NRF instructions and using the NRF2RFM69 adapter, it is NOT working.For it to work, I MUST connect the "IRQ" pin of the NRF2RFM69 (which corresponds to RFM's D100 pin) to RPi's pin 22 (which is where CE is supposed to go, according to instructions) and leave CE unconnected.
So if someone is using the NRF2RFM69 adapter and tries to connect the radio to the RPi 3 as if it were an NRF, it won't work. I think this is confusing and that's why I posted it.
-
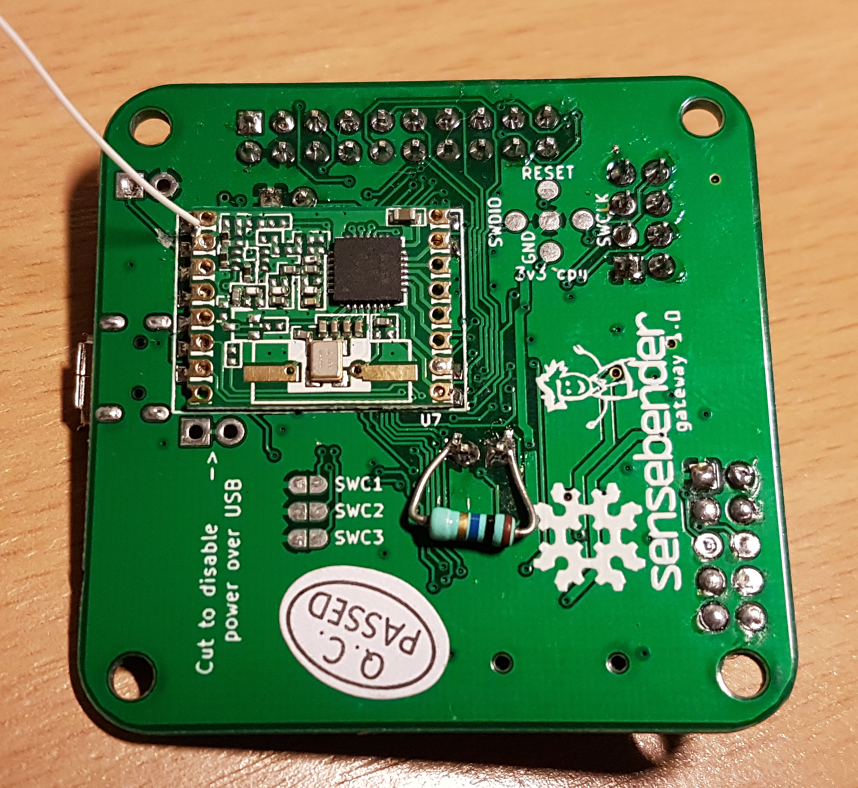
You do know that there is solder pads for RFM69HW on the back of the gateway, right? And the board defs for the gateway are configured to use those pins for the RFM69 by default.
Yes @tbowmo, I saw the solder pads on the back - although thanks for the reminder (and image @mfalkvidd)!
I’m not using those (yet) since I didn’t want to “permanently” attach one of my “precious” RFM69HWs to it whilst I’m tinkering with all these lovely new radios you now support. RFM95 next I hope, after checking out the FOTA and signing! You guys have really done great work!
I also wanted to range-test with a few different externally mounted antennas I had lying around and so I combined pads for a surface mount U.fl and edge SMA on my own NRF2RFM69.
Not a great deal of room around the SBGW’s pin breakout (P1) for a helical - although I really respect the design choices - so I figure I’ll probably breakout those pins to pigtail an SMA.
But this is getting a bit off-topic Re: NRF2RFM69 and probably better suited to the Sensebender Gateway thread.
Bringing it back on-topic a little:
Do you know if there is a version of this board that is pad-compatible with the C-versions of these HopeRF RFM69s before I go searching? (Since I believe the C-versions are also pad-compatible with the RFM95s…)
-
This post is deleted!
-
@acb
Hi @acb and others, regarding "Do you know if there is a version of this board that is pad-compatible with the C-versions of these HopeRF RFM69s before I go searching? (Since I believe the C-versions are also pad-compatible with the RFM95s…)" - did you find any alternative?
I'm in the same boat looking for an adapter from NRF24 to the footprint of RFM69*C = RFM95/96.
Thanks, Joost
Hello! It looks like you're interested in this conversation, but you don't have an account yet.
Getting fed up of having to scroll through the same posts each visit? When you register for an account, you'll always come back to exactly where you were before, and choose to be notified of new replies (either via email, or push notification). You'll also be able to save bookmarks and upvote posts to show your appreciation to other community members.
With your input, this post could be even better 💗
Register Login