Candle Manager - user-friendly web-based tool to program Arduino's
-
For a project I'm working on I've created a small tool that could be useful to everyone in the community. I'm sharing an early version for Christmas :-)
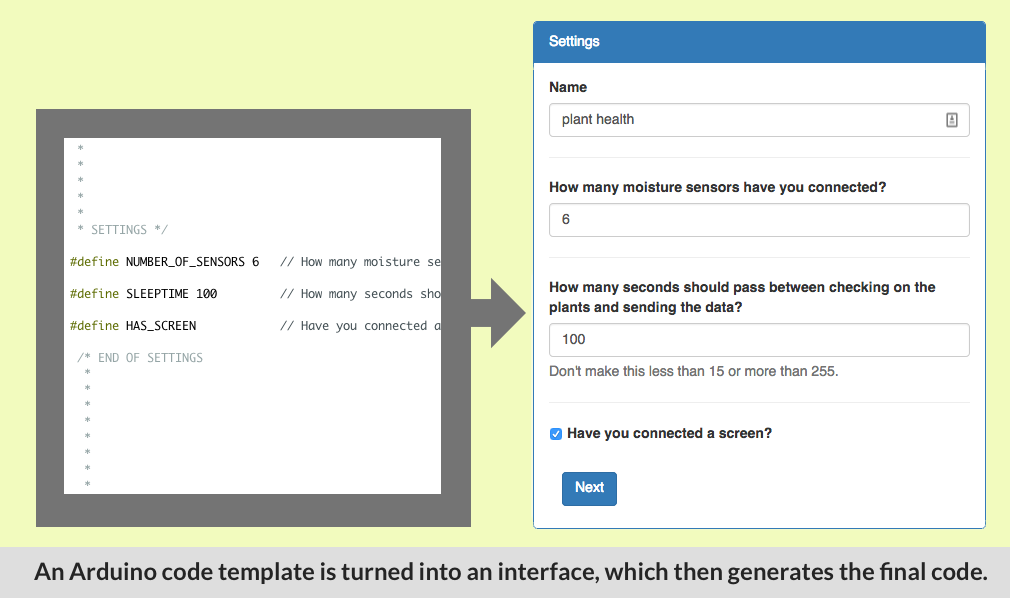
The tool is meant to be used with the Raspberry Pi. Through this web interface you can generate and upload code to a plugged in Arduino with the click of a few buttons.
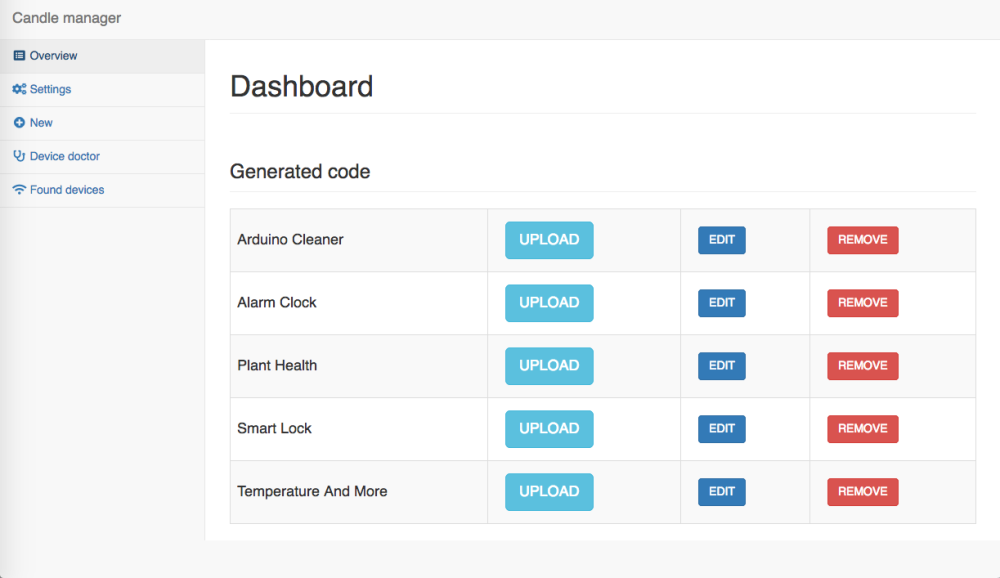
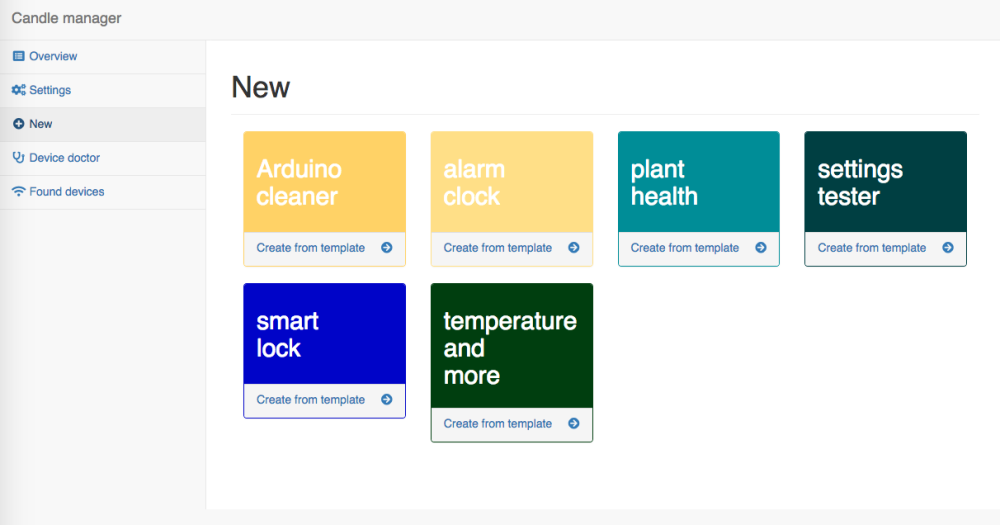
It takes code templates (which are just normal Arduino files), and transforms them into an easy to use interface so that users can change some settings.
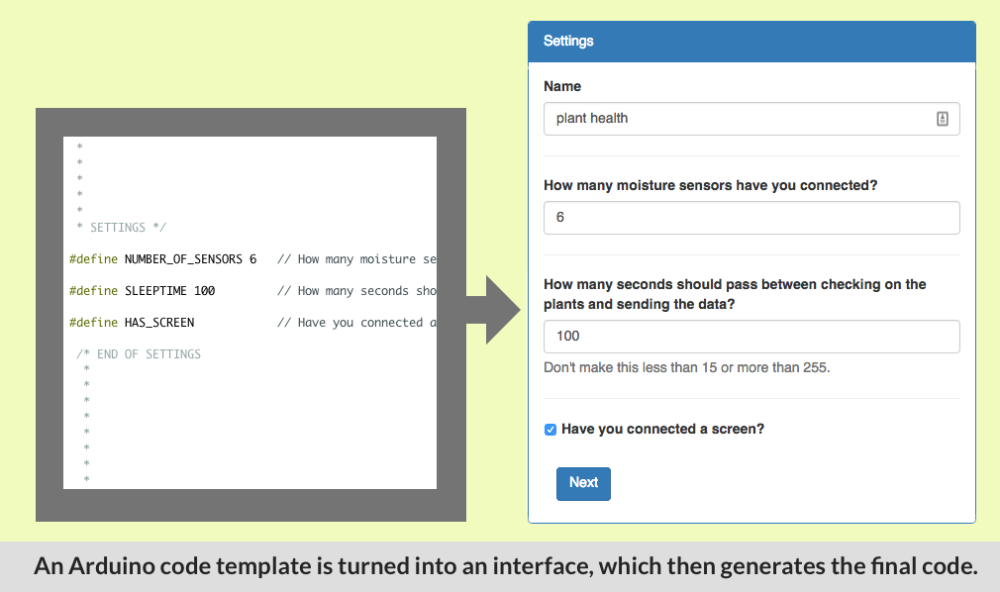
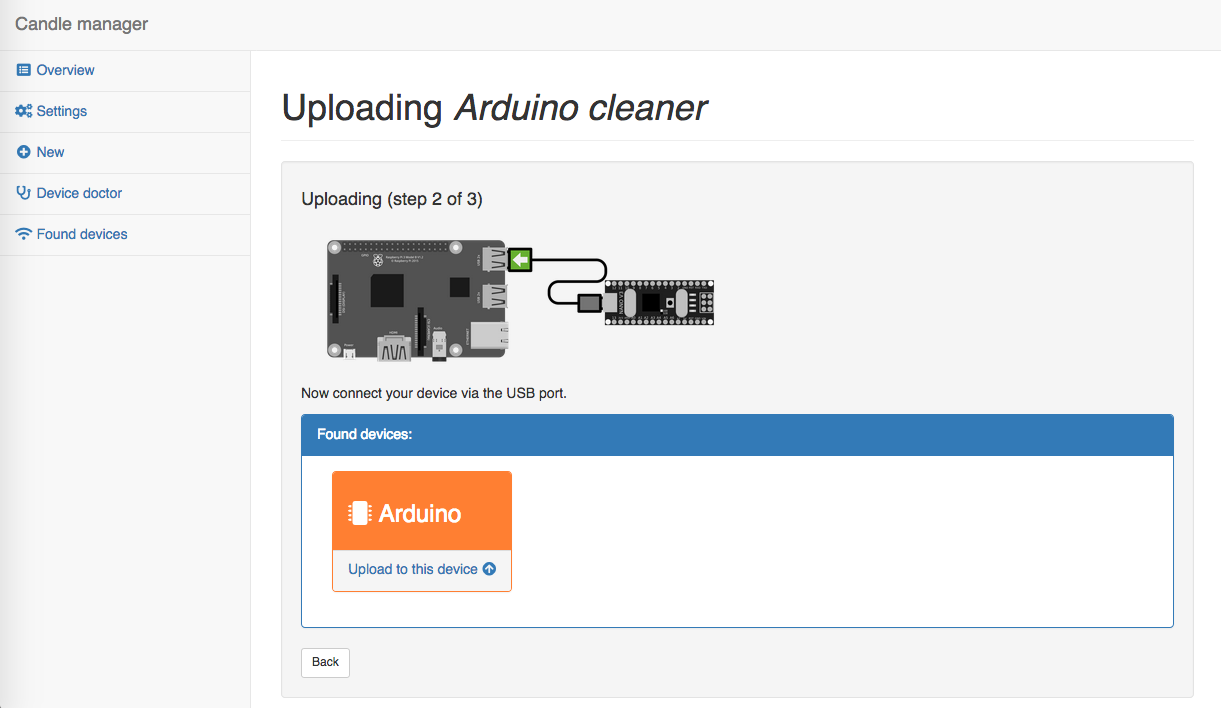
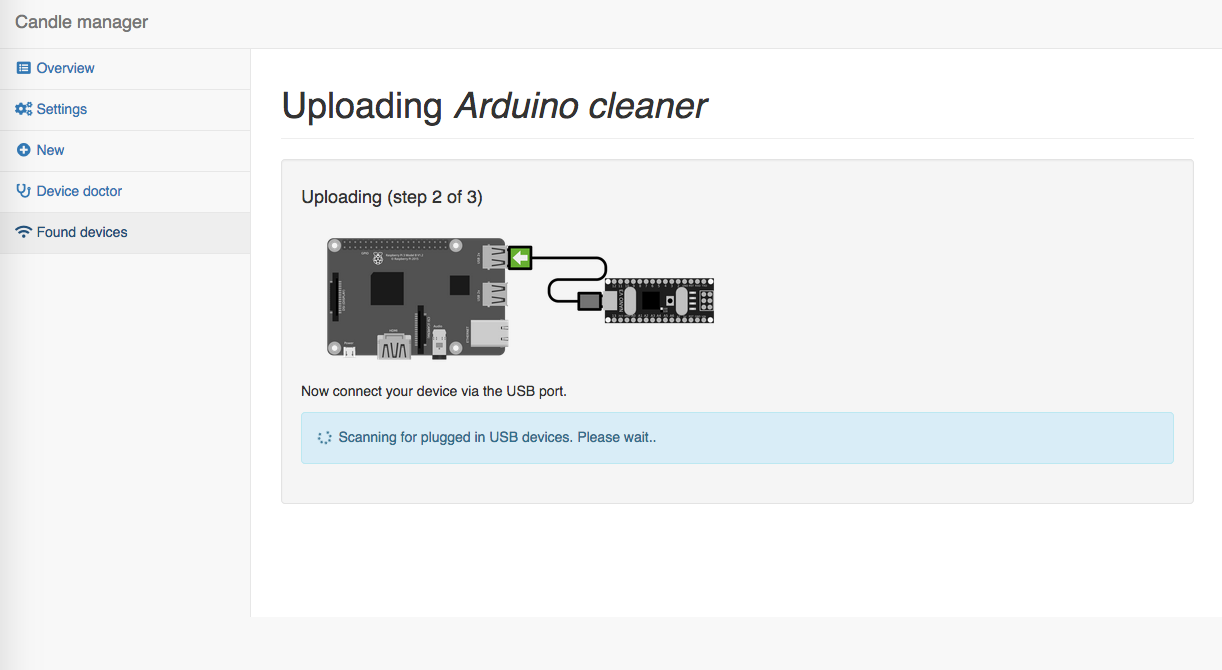
From the user's preferences new code is generated. This can then be uploaded with the upload wizard:
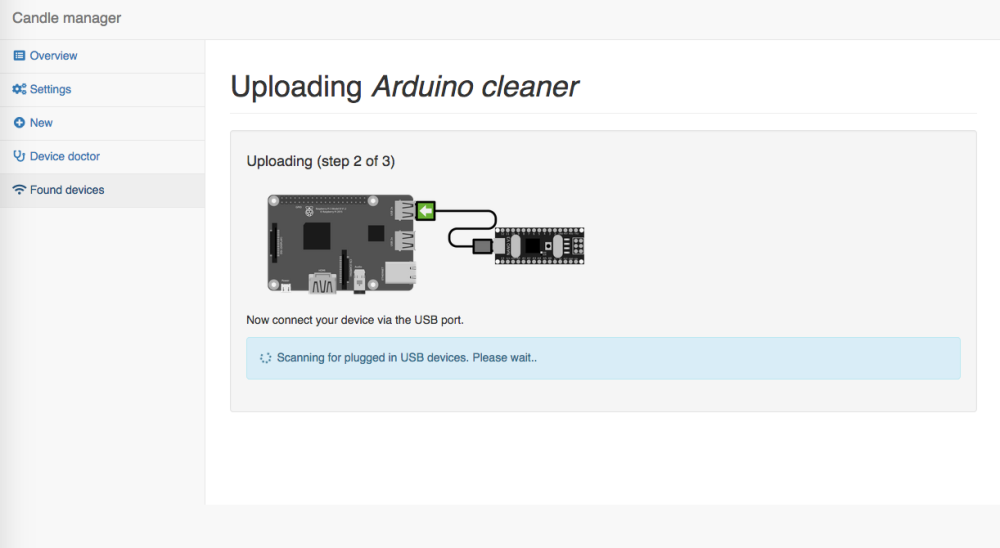
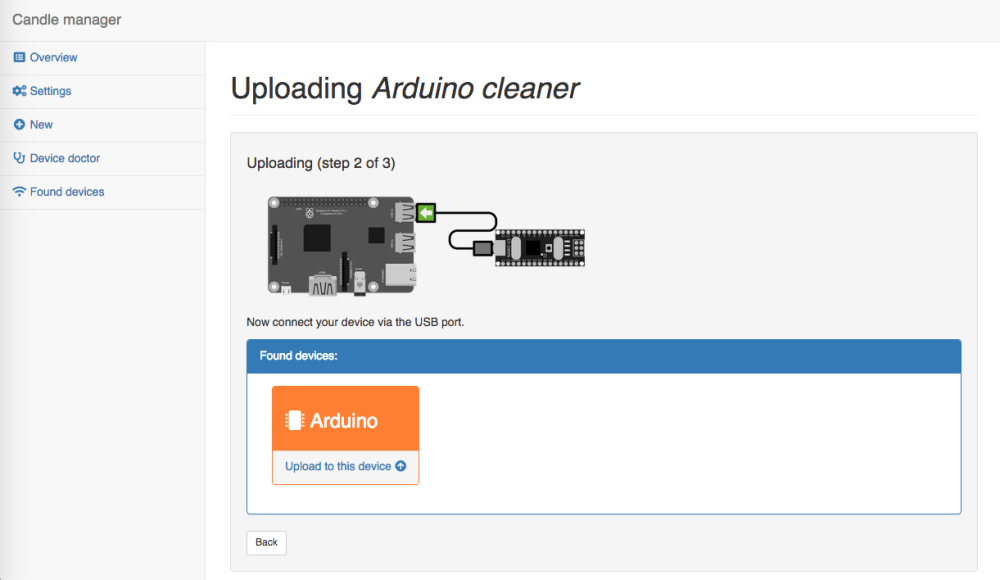
The user never has to see any code if they don't want to. But if they do it has a built in code editor too.
HOW DOES IT WORK?
It builds on the new Arduino Command Line Interface (CLI).
HTML5 <-> PHP <-> Arduino CLIWhat's is good for?
- Giving workshops. People no longer have to install the Arduino IDE on their laptops, but can instead connect to Raspberry Pi wifi hotspot.
- I'm developing it to be part of a privacy friendly smart home demonstrator that I've been working on for a while. I'm building it on top of MySensors, MySController-rs, Mozilla Gateway and the Arduino CLI.
MORE DETAILS
The code and more screenshots and details can be found here:
https://github.com/createcandle/Candle-manager -
For a project I'm working on I've created a small tool that could be useful to everyone in the community. I'm sharing an early version for Christmas :-)
The tool is meant to be used with the Raspberry Pi. Through this web interface you can generate and upload code to a plugged in Arduino with the click of a few buttons.


It takes code templates (which are just normal Arduino files), and transforms them into an easy to use interface so that users can change some settings.

From the user's preferences new code is generated. This can then be uploaded with the upload wizard:


The user never has to see any code if they don't want to. But if they do it has a built in code editor too.
HOW DOES IT WORK?
It builds on the new Arduino Command Line Interface (CLI).
HTML5 <-> PHP <-> Arduino CLIWhat's is good for?
- Giving workshops. People no longer have to install the Arduino IDE on their laptops, but can instead connect to Raspberry Pi wifi hotspot.
- I'm developing it to be part of a privacy friendly smart home demonstrator that I've been working on for a while. I'm building it on top of MySensors, MySController-rs, Mozilla Gateway and the Arduino CLI.
MORE DETAILS
The code and more screenshots and details can be found here:
https://github.com/createcandle/Candle-manager -
I'm hoping to have a go at this today. I have an old Raspberry Pi that I've never used sitting in my Arduino box. Because I've never used a Raspberry Pi before, I don't know what to do.... Do I need to install an operating system first? If so, which do you suggest?
-
@homer This is how I do it:
- First download the latest Mozilla WebThings Gateway image and burn that onto an SD card. Their guide will explain how to 'burn' it onto an SD card.
- Insert it into the pi and boot it up. After a while you will see a new WiFi network for the gateway. Connect to it and follow the steps. You can skip the step to make a subdomain at Mozilla.
- Once done, open
gateway.localin a browser that's on the same wifi network. You should now see the Mozilla Gateway interface. - Under settings -> development enable SSH.
- Open a terminal window and SSH into the device. Google how to do that. For linux/mac it's something like:
ssh pi@gateway.localand then enter the default passwordraspberry. - once logged in, you have to install PHP.
sudo apt-get install php5-fpm php5 -y- Next, copy the Candle Manager from Github onto the Pi.
git clone https://github.com/createcandle/Candle-manager.git
chmod +x ./Candle-manager/start.sh
./Candle-manager/start.sh
Now you should be able to go to
gateway.local:8023to see the Candle Manager.By default it comes with only one demo sketch. In the future you will be able to install a lot more. Arduino Sketches have to be properly formatted and placed in the 'sources' folder to be automatically presented in the Candle Manager interface. Examples of such sketches can be found here.
Basically, the variables that you want to be modifiable via the interface have to be placed in a special section. The description at the top of the sketch will also be shown in the interface. For example:
/*
 *
 * Temperature and more sensor
 *
 * This device can measure:
 * - temperature
 * - humidity
 * - airpressure (barometer).
 *
 *
 *
 * SETTINGS */

// You can enable and disable the settings below by adding or removing double slashes ( // ) in front of a line.

#define HAS_DISPLAY                                 // Did you connect a display?

//#define FAHRENHEIT                                  // Do you want temperature measurements to be in Fahrenheit?

//#define MY_SECURITY_SIMPLE_PASSWD "changeme"        // Be aware, the length of the password has an effect on memory use.


 /* END OF SETTINGS
 *
 *
 *
 */

// The actual sketch and other variables are placed here.

