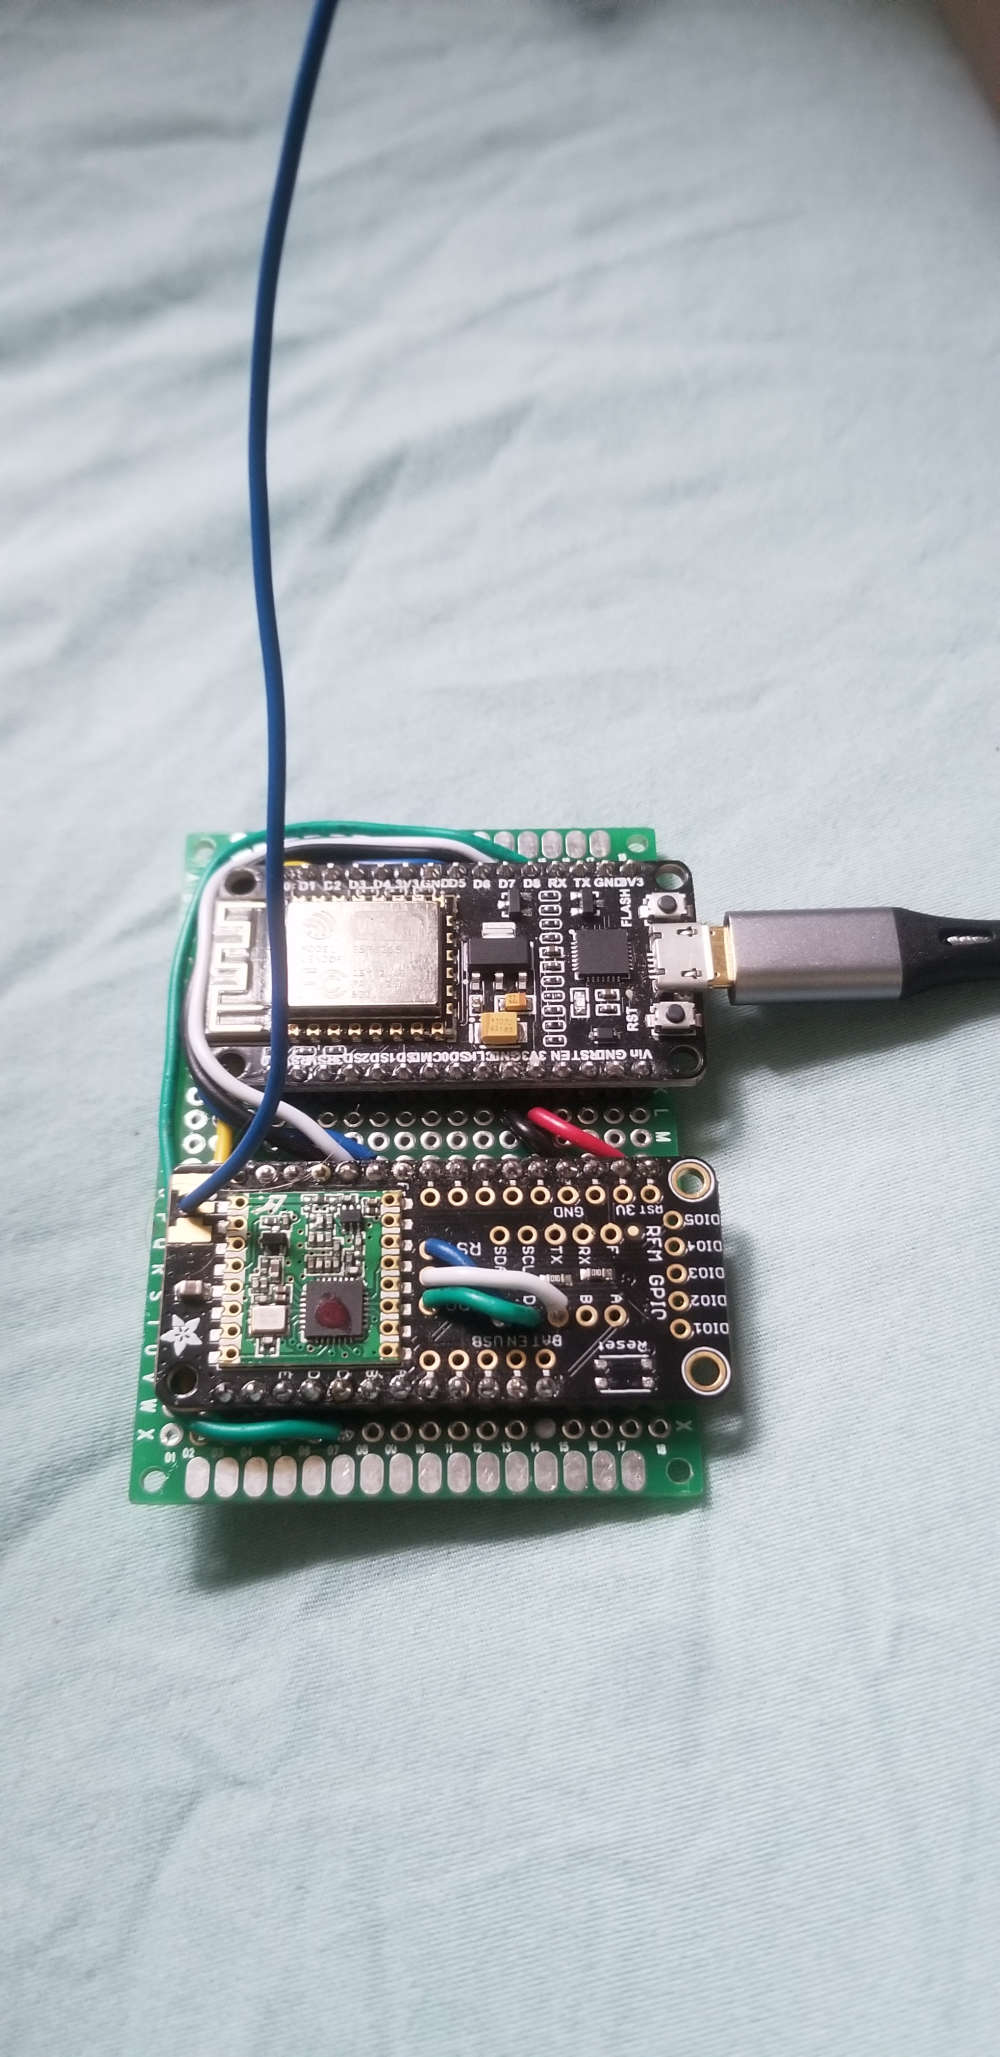
Skip to content
  • MySensors
  • OpenHardware.io
  • Categories
  • Recent
  • Tags
  • Popular
Skins
  • Light
  • Brite
  • Cerulean
  • Cosmo
  • Flatly
  • Journal
  • Litera
  • Lumen
  • Lux
  • Materia
  • Minty
  • Morph
  • Pulse
  • Sandstone
  • Simplex
  • Sketchy
  • Spacelab
  • United
  • Yeti
  • Zephyr
  • Dark
  • Cyborg
  • Darkly
  • Quartz
  • Slate
  • Solar
  • Superhero
  • Vapor

  • Default (No Skin)
  • No Skin
Collapse
Brand Logo
Andrew MaynardA

Andrew Maynard

@Andrew Maynard
About
Posts
29
Topics
4
Shares
0
Groups
0
Followers
0
Following
0

Posts

Recent Best Controversial

  • BME280 node connecting but not showing data
    Andrew MaynardA Andrew Maynard

    @mfalkvidd I took a glance at the embeddedadventures code on Github. They have a separate sketch for the samd21. Since I'm using a FeatherM0 could that be the reason why? I don't have the skills to decipher the differences. Once again I appreciate it!

    I added the serial print to the beginning of loop().

    15:37:58.624 -> At start of loop
    15:37:58.624 -> At start of loop
    15:37:58.624 -> At start of loop
    15:37:58.624 -> At start of loop
    15:37:58.624 -> At start of loop
    
    Troubleshooting

  • BME280 node connecting but not showing data
    Andrew MaynardA Andrew Maynard

    @itbeyond unfortunately I have the BME280 from Adafruit.

    Troubleshooting

  • What did you build today (Pictures) ?
    Andrew MaynardA Andrew Maynard

    @sundberg84 said in What did you build today (Pictures) ?:

    The rules are simple - keep it simple with one picture (or a few) with a small text including a small exp

    0_1539488433847_esplangatewah.jpg

    sick of breadboard so made the gateway more permanent. added a nice dc plug to it after pic

    General Discussion

  • BME280 node connecting but not showing data
    Andrew MaynardA Andrew Maynard

    @mfalkvidd of course! just add Serial.begin(115200);?

    // Enable debug prints to serial monitor
    #define MY_SERIALDEVICE Serial  // this will override Serial port define in MyHwSAMD.h file
    #define MY_DEBUG // used by MySensor (Print debug messages via serial)
    
    //#define MY_RFM69_NEW_DRIVER
    #define MY_RFM69_CSMA_LIMIT_DBM             (-95)      
    #define MY_RADIO_RFM69                            // Select Radio-Module RFM69
    #define MY_RFM69_FREQUENCY   (RFM69_433MHZ)
    #define MY_IS_RFM69HW                             // Module is high power (HW/HCW)
    //#define MY_RFM69_NETWORKID 100                 // leave out for gateway selection
    #define MY_NODE_ID 11                          // Node ID
    
    #define MY_RF69_SPI_CS 8                          // SPI CS PIN
    #define MY_RFM69_CS_PIN  8                            // SPI CS PIN
    #define MY_RF69_IRQ_PIN 3                         // IRQ PIN
    #define MY_RF69_IRQ_NUM 3                         // IRQ PIN NUM (for M0 it is the same as IRQ PIN. Will be obsolete in upcoming MySensors.h)
    #define MY_RFM69_RST_PIN 4 
    #define MY_DEFAULT_TX_LED_PIN 13                  // LED Pin for "Blink while sending"
    
    // Do you want this sensor to also be a repeater?
    // #define MY_REPEATER_FEATURE                    // Just remove the two slashes at the beginning of this line to also enable this sensor to act as a repeater for other sensors. If this node is on battery power, you probably shouldn't enable this.
    
    // Are you using this sensor on battery power?
    // #define BATTERY_POWERED                        // Just remove the two slashes at the beginning of this line if your node is battery powered. It will then go into deep sleep as much as possible. While it's sleeping it can't work as a repeater!
    
    // Would you like the sensor to generate a weather forecast based on the barometric pressure? 
    //#define GENERATE_FORECAST              // Just remove the two slashes at the beginning of this line to enable this feature.
    
    
    // LIBRARIES
    #include <SPI.h>                                  // A communication backbone, the Serial Peripheral Interface.
    #include <MySensors.h>                            // The MySensors library. Hurray!
    #include <Wire.h>                                 // Enables the Wire communication protocol.
    //#include <Adafruit_BME280.h>                    // alternative library you could try (DIY; no code for this is in here yet).
    //#include <SparkFunBME280.h>                     // alternative library you could try (DIY; no code for this is in here yet).
    #include <BME280_MOD-1022.h>                      // Bosch BME280 Embedded Adventures MOD-1022 weather multi-sensor Arduino code, written originally by Embedded Adventures. https://github.com/embeddedadventures/BME280
    
    
    // VARIABLES YOU CAN CHANGE
    const float ALTITUDE = 292;                        // Change this value to your location's altitude (in m). Use your smartphone GPS to get an accurate value, or use an online map.
    unsigned long BME280measurementInterval = 30000;  // Sleep time between reads for the BME sensor (in ms). Keep this value at 60000 if you have enabled the forecast feature, as the forecast algorithm needs a sample every minute.
    #define COMPARE_TEMP 1                            // Send temperature only if it changed? 1 = Yes 0 = No. Can save battery.
    float tempThreshold = 0.1;                        // How big a temperature difference has to minimally  be before an update is sent. Makes the sensor less precise, but also less jittery, and can save battery.
    #define COMPARE_HUM 1                             // Send temperature only if changed? 1 = Yes 0 = No. Can save battery.
    float humThreshold = 0.1;                         // How big a humidity difference has to minimally be before an update is sent. Makes the sensor less precise, but also less jittery, and can save battery.
    #define COMPARE_BARO 1                            // Send temperature only if changed? 1 = Yes 0 = No. Can save battery.
    float presThreshold = 0.1;                        // How big a barometric difference has to minimally be before an update is sent. Makes the sensor less precise, but also less jittery, and can save battery.
    
    
    //VARIABLES YOU PROBABLY SHOULDN'T CHANGE
    #define TEMP_CHILD_ID 0                // for MySensors. Within this node each sensortype should have its own ID number.
    #define HUM_CHILD_ID 1                // for MySensors. Within this node each sensortype should have its own ID number.
    #define BARO_CHILD_ID 2             // for MySensors. Within this node each sensortype should have its own ID number.
    float lastTemperature = -1;            // Stores the previous measurement, so it can be compared with a new measurement.
    float lastHumidity = -1;            // Stores the previous measurement, so it can be compared with a new measurement.
    float lastPressure = -1;            // Stores the previous measurement, so it can be compared with a new measurement.
    unsigned long BME280measurementSleepTime = 0;      // variable to store the calculated Sleep time if the node is battery powered.
    bool metric = true;                // Variable that stores if the sensor will output the temperature in Fahrenheit of Celsius. The gateway sends this preference to the node, so you dont need to change it here.
    bool receivedConfig = false;            // The MySensors gateway will tell the node if it should output in metric or not.
    
    #define CONVERSION_FACTOR (1.0/10.0)         // used by forecast algorithm to convert from Pa to kPa, by dividing hPa by 10.
    
    #ifdef GENERATE_FORECAST             //  Below you will find a lot of variables used by the forecast algorithm.
    const char *weather[] = { "stable", "sunny", "cloudy", "unstable", "thunderstorm", "unknown" };
    enum FORECAST
    {
     STABLE = 0,                     // "Stable Weather Pattern"
     SUNNY = 1,                      // "Slowly rising Good Weather", "Clear/Sunny "
     CLOUDY = 2,                     // "Slowly falling L-Pressure ", "Cloudy/Rain "
     UNSTABLE = 3,                   // "Quickly rising H-Press",     "Not Stable"
     THUNDERSTORM = 4,                 // "Quickly falling L-Press",    "Thunderstorm"
     UNKNOWN = 5                     // "Unknown (More Time needed)
    };
    int lastForecast = -1;                // Stores the previous forecast, so it can be compared with a new forecast.
    const int LAST_SAMPLES_COUNT = 5;
    float lastPressureSamples[LAST_SAMPLES_COUNT];
    int minuteCount = 0;                // Helps the forecst algorithm keep time.
    bool firstRound = true;                // Helps the forecast algorithm recognise if the sensor has just been powered up.
    float pressureAvg;                // Average value is used in forecast algorithm.
    float pressureAvg2;                // Average after 2 hours is used as reference value for the next iteration.
    float dP_dt;                    // Pressure delta over time
    #endif
    
    // MYSENSORS COMMUNICATION VARIABLES
    MyMessage temperatureMsg(TEMP_CHILD_ID, V_TEMP);
    MyMessage humidityMsg(HUM_CHILD_ID, V_HUM);
    MyMessage pressureMsg(BARO_CHILD_ID, V_PRESSURE);
    #ifdef GENERATE_FORECAST
    MyMessage forecastMsg(BARO_CHILD_ID, V_FORECAST);
    #endif
    
    
    void setup() {
     Wire.begin(); // Wire.begin(sda, scl) // starts the wire communication protocol, used to chat with the BME280 sensor.
     Serial.begin(115200); // for serial debugging over USB.
     Serial.println("Hello world, I am a sensor node.");
    
    #ifdef BATTERY_POWERED // If the node is battery powered, we'll let Sleep take over the scheduling.
      BME280measurementSleepTime = BME280measurementInterval;
      BME280measurementInterval = 0; // When the Arduino is asleep, millis doesn't increment anymore (time stops as it were). To fix this, we'll set the measurement interval time to 1, so that when the arduino wakes up it will immediately try to measure again.
    #endif
    
    }
    
    
    void presentation()  {
     // Send the sketch version information to the gateway and Controller
     sendSketchInfo("BME280 Sensor", "1.1");
    
     // Tell the MySensors gateway what kind of sensors this node has, and what their ID's on the node are, as defined in the code above.
     present(BARO_CHILD_ID, S_BARO);
     present(TEMP_CHILD_ID, S_TEMP);
     present(HUM_CHILD_ID, S_HUM);
    }
    
    
    void loop() {
    
     // You should not change these variables:
     static unsigned long previousBME280Millis = 0;  // Used to remember the time that the BME280 sensor was asked for a measurement.
     unsigned long currentMillis = millis();         // The time since the sensor started, counted in milliseconds. This script tries to avoid using the Sleep function, so that it could at the same time be a MySensors repeater.
     static boolean BME280shouldAsk = true;          // This is true when the time is right for a new measurement to be made.
     static boolean BME280justAsked = false;         // This indicates whether we have just asked the sensor module for a measurement, so the receiving part of the code (part 2) should be primed. This two-part construction helps to bridge the time where the BME280 module is busy, without blocking the entire node from doing anything else (like being a repeater, or working with other connected sensor modules).
    
    
     // PART 1. If enough time has passed, a new measurement should be taken:
     if (BME280shouldAsk == true && currentMillis - previousBME280Millis >= BME280measurementInterval) {
       previousBME280Millis = currentMillis; // store the current time as the previous measurement start time.
       BME280shouldAsk = false;
       Serial.println("");
       Serial.println("BME280 - Requesting new data from sensor module.");
       BME280.readCompensationParams();    // Need to read the NVM compensation parameters.
    
    #ifdef BATTERY_POWERED
       // After taking the measurement the chip goes back to sleep. This code is only enabled if you enabled BATTERY POWERED at the top of this script.
       // Oversampling settings (os1x, os2x, os4x, os8x or os16x).
       BME280.writeFilterCoefficient(fc_16);       // IIR Filter coefficient, higher numbers avoid sudden changes to be accounted for (such as slamming a door)
       BME280.writeOversamplingPressure(os16x);    // pressure x16
       BME280.writeOversamplingTemperature(os8x);  // temperature x8
       BME280.writeOversamplingHumidity(os8x);     // humidity x8
       BME280.writeMode(smForced);                 // Forced sample.  After taking the measurement the chip goes back to sleep.
    #else
       // Normal mode for regular automatic samples
       BME280.writeStandbyTime(tsb_0p5ms);         // tsb = 0.5ms
       BME280.writeFilterCoefficient(fc_16);       // IIR Filter coefficient 16
       BME280.writeOversamplingPressure(os16x);    // pressure x16
       BME280.writeOversamplingTemperature(os8x);  // temperature x8
       BME280.writeOversamplingHumidity(os8x);     // humidity x8
       BME280.writeMode(smNormal);
    #endif
    
       // As we exit part 1, in theory BME280.isMeasuring() should now be true.
       BME280justAsked = true;   
     }
    
    
     // Part 2. This will trigger if the sensor has just been asked for a measurement, and is also just done figuring out those measurements.
     if(BME280justAsked == true && BME280.isMeasuring() == false) { // 
       BME280justAsked = false; // makes sure we don't do this part again in the next pass through the main loop.
       Serial.println("BME280 - Sensor module has some new values ready:");
    
       // Read out the data - must do this before calling the getxxxxx routines
       BME280.readMeasurements();
    
       float temperature = BME280.getTemperatureMostAccurate();                    // Must get the temperature first.
       float humidity = BME280.getHumidityMostAccurate();                // Get the humidity.
       float pressure_local = BME280.getPressureMostAccurate();                    // Get pressure at current location
       float pressure = pressure_local/pow((1.0 - ( ALTITUDE / 44330.0 )), 5.255); // Adjust to sea level pressure using user altitude
    #ifdef GENERATE_FORECAST      
       int forecast = sample(pressure);                        // Run the forecast function with a new pressure update.
    #endif
    
       if (!metric) {
         // Convert temperature to fahrenheit
         temperature = temperature * 9.0 / 5.0 + 32.0;
       }
    
       // Useful for debugging
       Serial.print("BME280 - Temperature = ");
       Serial.print(temperature);
       Serial.println(metric ? " B0C" : " B0F");
       Serial.print("BME280 - Humidity = ");
       Serial.print(humidity);
       Serial.println(" %");
       Serial.print("BME280 - Pressure = ");
       Serial.print(pressure);
       Serial.println(" hPa");
    #ifdef GENERATE_FORECAST      
       Serial.print("BME280 - Forecast = ");
       Serial.println(weather[forecast]);
    #endif
    
       // Now, let's send the measurements to the gateway.
    
       // Send temperature
       if (COMPARE_TEMP == 1 && abs(temperature - lastTemperature) < tempThreshold) { // is the temperature difference bigger than the threshold?
         Serial.print(temperature - lastTemperature);
         Serial.print("- BME280 - Temperature difference too small, so not sending the new measurement to the gateway.\n");
       } else {
         Serial.print("BME280 - Sending the new temperature to the gateway.\n");
         send(temperatureMsg.set(temperature, 1));
         lastTemperature = temperature; // Save new temperatures to be able to compare in the next round.
       } 
    
       // Send humidity
       if (COMPARE_TEMP == 1 && abs(humidity - lastHumidity) < humThreshold) { // is the humidity difference bigger than the threshold?
         Serial.print(humidity - lastHumidity);
         Serial.println("- BME280 - Humidity difference too small, so not sending the new measurement to the gateway.");
       } else {
         Serial.println("BME280 - Sending the new humidity to the gateway.");
         send(humidityMsg.set(humidity, 1));
         lastHumidity = humidity; // Save new humidity to be able to compare in the next round.
       }
    
       // Send pressure
       if (COMPARE_TEMP == 1 && abs(pressure - lastPressure) < presThreshold) { // is the pressure difference bigger than the threshold?
         Serial.print(pressure - lastPressure);
         Serial.println("- BME280 - Pressure difference too small, so not sending the new measurement to the gateway.");
       } else {
         Serial.println("BME280 - Sending the new pressure to the gateway.");
         send(pressureMsg.set(pressure, 1));
         lastPressure = pressure; // Save new pressure to be able to compare in the next round.
       }
    
    #ifdef GENERATE_FORECAST
       // Send forecast
       if (forecast != lastForecast) {
         Serial.println("BME280 - Sending the latest forecast to the gateway.");      
         send(forecastMsg.set(weather[forecast]));
         lastForecast = forecast;
       }
    #endif 
    
     Serial.println("BME280 - Measurement complete. Going to wait until next measurement.");
     BME280shouldAsk = true; // Ready for the new round.
     }
    
    #ifdef BATTERY_POWERED
     // This code will only be included in the sketch if the BATTERY POWERED feature is enabled.
     if(BME280shouldAsk == true && BME280justAsked == false) { // Both parts are done, so we can let the sensor sleep again.
       unsigned long quicktimecheck = millis(); // To check how much time has passed since the beginning of being awake, and then calculate from that how long to sleep until the next intended measuring time, we need to know how many milliseconds have passed.
       unsigned long sleeptime = BME280measurementSleepTime - (quicktimecheck - previousBME280Millis); // How much time has passed already during the calculating? Subtract that from the intended interval time.
       Serial.println("BME280 - zzzzZZZZzzzzZZZZzzzz");
       sleep (sleeptime);
       Serial.println("BME280 - Waking up.");
     }
    #endif
    
    } // end of main loop.


    #ifdef GENERATE_FORECAST
    // These functions are only included if the forecast function is enables. The are used to generate a weater prediction by checking if the barometric pressure is rising or falling over time.
    
    float getLastPressureSamplesAverage()
    {
     float lastPressureSamplesAverage = 0;
     for (int i = 0; i < LAST_SAMPLES_COUNT; i++) {
       lastPressureSamplesAverage += lastPressureSamples[i];
     }
     lastPressureSamplesAverage /= LAST_SAMPLES_COUNT;
    
     return lastPressureSamplesAverage;
    }
    
    
    // Forecast algorithm found here
    // http://www.freescale.com/files/sensors/doc/app_note/AN3914.pdf
    // Pressure in hPa -->  forecast done by calculating kPa/h
    int sample(float pressure) {
     // Calculate the average of the last n minutes.
     int index = minuteCount % LAST_SAMPLES_COUNT;
     lastPressureSamples[index] = pressure;
    
     minuteCount++;
     if (minuteCount > 185) {
       minuteCount = 6;
     }
    
     if (minuteCount == 5) {
       pressureAvg = getLastPressureSamplesAverage();
     }
     else if (minuteCount == 35) {
       float lastPressureAvg = getLastPressureSamplesAverage();
       float change = (lastPressureAvg - pressureAvg) * CONVERSION_FACTOR;
       if (firstRound) { // first time initial 3 hour 
         dP_dt = change * 2; // note this is for t = 0.5hour
       }
       else {
         dP_dt = change / 1.5; // divide by 1.5 as this is the difference in time from 0 value.
       }
     }
     else if (minuteCount == 65) {
       float lastPressureAvg = getLastPressureSamplesAverage();
       float change = (lastPressureAvg - pressureAvg) * CONVERSION_FACTOR;
       if (firstRound) { //first time initial 3 hour
         dP_dt = change; //note this is for t = 1 hour
       }
       else {
         dP_dt = change / 2; //divide by 2 as this is the difference in time from 0 value
       }
     }
     else if (minuteCount == 95) {
       float lastPressureAvg = getLastPressureSamplesAverage();
       float change = (lastPressureAvg - pressureAvg) * CONVERSION_FACTOR;
       if (firstRound) { // first time initial 3 hour
         dP_dt = change / 1.5; // note this is for t = 1.5 hour
       }
       else {
         dP_dt = change / 2.5; // divide by 2.5 as this is the difference in time from 0 value
       }
     }
     else if (minuteCount == 125) {
       float lastPressureAvg = getLastPressureSamplesAverage();
       pressureAvg2 = lastPressureAvg; // store for later use.
       float change = (lastPressureAvg - pressureAvg) * CONVERSION_FACTOR;
       if (firstRound) { // first time initial 3 hour
         dP_dt = change / 2; // note this is for t = 2 hour
       }
       else {
         dP_dt = change / 3; // divide by 3 as this is the difference in time from 0 value
       }
     }
     else if (minuteCount == 155) {
       float lastPressureAvg = getLastPressureSamplesAverage();
       float change = (lastPressureAvg - pressureAvg) * CONVERSION_FACTOR;
       if (firstRound) { // first time initial 3 hour
         dP_dt = change / 2.5; // note this is for t = 2.5 hour
       } 
       else {
         dP_dt = change / 3.5; // divide by 3.5 as this is the difference in time from 0 value
       }
     }
     else if (minuteCount == 185) {
       float lastPressureAvg = getLastPressureSamplesAverage();
       float change = (lastPressureAvg - pressureAvg) * CONVERSION_FACTOR;
       if (firstRound) { // first time initial 3 hour
         dP_dt = change / 3; // note this is for t = 3 hour
       } 
       else {
         dP_dt = change / 4; // divide by 4 as this is the difference in time from 0 value
       }
       pressureAvg = pressureAvg2; // Equating the pressure at 0 to the pressure at 2 hour after 3 hours have past.
       firstRound = false; // flag to let you know that this is on the past 3 hour mark. Initialized to 0 outside main loop.
     }
    
     int forecast = UNKNOWN;
     if (minuteCount < 35 && firstRound) { //if time is less than 35 min on the first 3 hour interval.
       forecast = UNKNOWN;
     }
     else if (dP_dt < (-0.25)) {
       forecast = THUNDERSTORM;
     }
     else if (dP_dt > 0.25) {
       forecast = UNSTABLE;
     }
     else if ((dP_dt > (-0.25)) && (dP_dt < (-0.05))) {
       forecast = CLOUDY;
     }
     else if ((dP_dt > 0.05) && (dP_dt < 0.25))
     {
       forecast = SUNNY;
     }
     else if ((dP_dt >(-0.05)) && (dP_dt < 0.05)) {
       forecast = STABLE;
     }
     else {
       forecast = UNKNOWN;
     }
    
     // uncomment when debugging
     //Serial.print(F("BME280 - Forecast at minute "));
     //Serial.print(minuteCount);
     //Serial.print(F(" dP/dt = "));
     //Serial.print(dP_dt);
     //Serial.print(F("kPa/h --> "));
     //Serial.println(weather[forecast]);
    
     return forecast;
    }
    #endif```
    Troubleshooting

  • BME280 node connecting but not showing data
    Andrew MaynardA Andrew Maynard

    @mfalkvidd
    This is the log from the node

    6967 TSF:MSG:SEND,11-11-0-0,s=255,c=3,t=11,pt=0,l=13,sg=0,ft=0,st=OK:BME280 Sensor
    7199 TSF:MSG:SEND,11-11-0-0,s=255,c=3,t=12,pt=0,l=3,sg=0,ft=0,st=OK:1.1
    7599 TSF:MSG:SEND,11-11-0-0,s=2,c=0,t=8,pt=0,l=0,sg=0,ft=0,st=OK:
    7870 TSF:MSG:SEND,11-11-0-0,s=0,c=0,t=6,pt=0,l=0,sg=0,ft=0,st=OK:
    8006 TSF:MSG:SEND,11-11-0-0,s=1,c=0,t=7,pt=0,l=0,sg=0,ft=0,st=OK:
    21:27:27.336 -> 8016 MCO:REG:REQ
    8467 TSF:MSG:SEND,11-11-0-0,s=255,c=3,t=26,pt=1,l=1,sg=0,ft=0,st=OK:2
    8706 TSF:MSG:READ,0-0-11,s=255,c=3,t=27,pt=1,l=1,sg=0:1
    21:27:28.047 -> 8716 MCO:PIM:NODE REG=1
    21:27:28.047 -> 8726 MCO:BGN:STP
    21:27:28.047 -> Hello world, I am a sensor node.
    8736 MCO:BGN:INIT OK,TSP=1
    

    and this is the gateway log

    21:41:32.284 -> 398709 TSF:MSG:BC
    21:41:32.317 -> 398727 TSF:MSG:FPAR REQ,ID=11
    21:41:32.317 -> 398759 TSF:PNG:SEND,TO=0
    21:41:32.351 -> 398785 TSF:CKU:OK
    21:41:32.386 -> 398804 TSF:MSG:GWL OK
    399978 TSF:MSG:SEND,0-0-11-11,s=255,c=3,t=8,pt=1,l=1,sg=0,ft=0,st=OK:0
    402053 TSF:MSG:READ,11-11-0,s=255,c=3,t=24,pt=1,l=1,sg=0:1
    21:41:35.701 -> 402114 TSF:MSG:PINGED,ID=11,HP=1
    403464 !TSF:MSG:SEND,0-0-11-11,s=255,c=3,t=25,pt=1,l=1,sg=0,ft=0,st=NACK:1
    405699 TSF:MSG:READ,11-11-0,s=255,c=3,t=24,pt=1,l=1,sg=0:1
    21:41:39.338 -> 405761 TSF:MSG:PINGED,ID=11,HP=1
    405830 TSF:MSG:SEND,0-0-11-11,s=255,c=3,t=25,pt=1,l=1,sg=0,ft=0,st=OK:1
    405990 GWT:RFC:C=0,MSG=0;0;3;0;18;PING
    406152 TSF:MSG:READ,11-11-0,s=255,c=3,t=15,pt=6,l=2,sg=0:0100
    406435 TSF:MSG:SEND,0-0-11-11,s=255,c=3,t=15,pt=6,l=2,sg=0,ft=0,st=OK:0100
    406693 TSF:MSG:READ,11-11-0,s=255,c=0,t=17,pt=0,l=5,sg=0:2.3.0
    406998 TSF:MSG:READ,11-11-0,s=255,c=3,t=6,pt=1,l=1,sg=0:0
    407996 GWT:RFC:C=0,MSG=11;255;3;0;6;M
    21:41:41.612 -> 408053 TSF:MSG:SEND,0-0-11-11,s=255,c=3,t=6,pt=0,l=1,sg=0,ft=0,st=OK:M
    408346 TSF:MSG:READ,11-11-0,s=255,c=3,t=11,pt=0,l=13,sg=0:BME280 Sensor
    408612 TSF:MSG:READ,11-11-0,s=255,c=3,t=12,pt=0,l=3,sg=0:1.1
    408932 TSF:MSG:READ,11-11-0,s=2,c=0,t=8,pt=0,l=0,sg=0:
    409188 TSF:MSG:READ,11-11-0,s=0,c=0,t=6,pt=0,l=0,sg=0:
    409418 TSF:MSG:READ,11-11-0,s=1,c=0,t=7,pt=0,l=0,sg=0:
    409728 TSF:MSG:READ,11-11-0,s=255,c=3,t=26,pt=1,l=1,sg=0:2
    409817 TSF:MSG:SEND,0-0-11-11,s=255,c=3,t=27,pt=1,l=1,sg=0,ft=0,st=OK:1
    415992 GWT:RFC:C=0,MSG=0;0;3;0;18;PING
    425993 GWT:RFC:C=0,MSG=0;0;3;0;18;PING
    

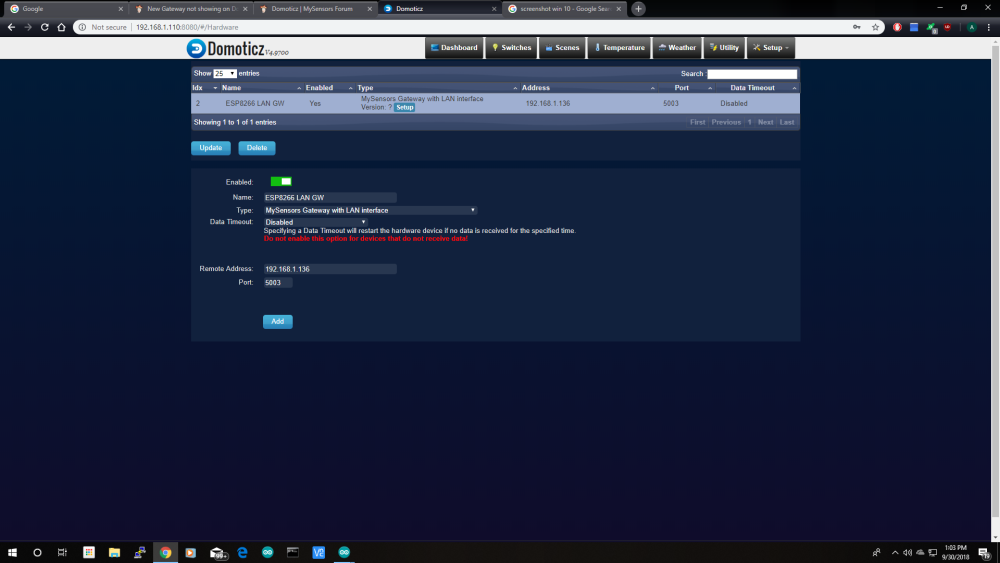
    no changes are needed for the code right? besides the obvious radio configuration

    Troubleshooting

  • BME280 node connecting but not showing data
    Andrew MaynardA Andrew Maynard

    So i'm using the PressureSensor.ino sketch. With BME280 and a featherM0 rfm69. The node connects and shows up on domoticz but the childs are not showing data. Any ideas?

    I'm using the #include <BME280_MOD-1022.h> library

    
    2018-10-08 02:22:55.923 (ESP8266 LAN GW) Temp + Humidity (TempHum)
    2018-10-08 02:23:00.920 Status: MySensors: Node: 2, Sketch Name: BME280 Sensor
    2018-10-08 02:23:00.921 Status: MySensors: Node: 2, Sketch Version: 1.1
    2018-10-08 02:23:02.928 (ESP8266 LAN GW) Temp + Humidity (TempHum)
    2018-10-08 02:23:07.985 Status: Incoming connection from: 192.168.1.1```
    Troubleshooting

  • Blink on nodeMCU / RFM69 gateway
    Andrew MaynardA Andrew Maynard

    @rmh same here

    Hardware nodemcu gateway mqtt rfm69hw blink

  • New Gateway not showing on Domoticz
    Andrew MaynardA Andrew Maynard

    Once again thanks for your help! of course it works now lol. i soldered it back together and it works perfectly!

    Domoticz

  • New Gateway not showing on Domoticz
    Andrew MaynardA Andrew Maynard

    This is the gateway sketch. I desoldered the rfm69 module and still no change.

    // Enable debug prints to serial monitor
    #define MY_DEBUG
    
    // Use a bit lower baudrate for serial prints on ESP8266 than default in MyConfig.h
    #define MY_BAUD_RATE 9600
    
    // Enables and select radio type (if attached)
    #define MY_IS_RFM69HW                             // Module is high power (HW/HCW)
    #define MY_RFM69_FREQUENCY   (RFM69_433MHZ)
    #define MY_RADIO_RFM69                            // Select Radio-Module RFM69
    #define MY_RFM69_CSMA_LIMIT_DBM             (-95)      
    
    #define MY_RFM69_CS_PIN D8                            // SPI CS PIN
    #define MY_RF69_IRQ_PIN D1                         // IRQ PIN
    #define MY_RF69_IRQ_NUM D1                         // IRQ PIN NUM (for M0 it is the same as IRQ PIN. Will be obsolete in upcoming MySensors.h)
    
    
    #define MY_GATEWAY_ESP8266
    
    // Set WIFI SSID and password
    #define MY_WIFI_SSID "xxx"
    #define MY_WIFI_PASSWORD "xxxx"
    
    // Enable UDP communication
    #define MY_USE_UDP  // If using UDP you need to set MY_CONTROLLER_IP_ADDRESS below
    
    // Set the hostname for the WiFi Client. This is the hostname
    // it will pass to the DHCP server if not static.
    //#define MY_HOSTNAME "sensor-gateway"
    
    // Enable MY_IP_ADDRESS here if you want a static ip address (no DHCP)
    //#define MY_IP_ADDRESS 192,168,178,87
    
    // If using static ip you can define Gateway and Subnet address as well
    //#define MY_IP_GATEWAY_ADDRESS 192,168,178,1
    //#define MY_IP_SUBNET_ADDRESS 255,255,255,0
    
    // The port to keep open on node server mode
    #define MY_PORT 5003
    
    // How many clients should be able to connect to this gateway (default 1)
    #define MY_GATEWAY_MAX_CLIENTS 2
    
    // Controller ip address. Enables client mode (default is "server" mode).
    // Also enable this if MY_USE_UDP is used and you want sensor data sent somewhere.
    #define MY_CONTROLLER_IP_ADDRESS 192, 168, 1, 110
    
    // Enable inclusion mode
    //#define MY_INCLUSION_MODE_FEATURE
    
    // Enable Inclusion mode button on gateway
    //#define MY_INCLUSION_BUTTON_FEATURE
    // Set inclusion mode duration (in seconds)
    //#define MY_INCLUSION_MODE_DURATION 60
    // Digital pin used for inclusion mode button
    //#define MY_INCLUSION_MODE_BUTTON_PIN D1
    
    // Set blinking period
    //#define MY_DEFAULT_LED_BLINK_PERIOD 300
    
    // Flash leds on rx/tx/err
    // Led pins used if blinking feature is enabled above
    //#define MY_DEFAULT_ERR_LED_PIN 2  // Error led pin
    //#define MY_DEFAULT_RX_LED_PIN  2  // Receive led pin
    //#define MY_DEFAULT_TX_LED_PIN  2  // the PCB, on board LED
    
    #if defined(MY_USE_UDP)
    #include <WiFiUdp.h>
    #endif
    
    #include <ESP8266WiFi.h>
    #include <MySensors.h>
    
    void setup()
    {
    	// Setup locally attached sensors
    }
    
    void presentation()
    {
    	// Present locally attached sensors here
    }
    
    void loop()
    {
    	// Send locally attached sensors data here
    }```
    Domoticz

  • New Gateway not showing on Domoticz
    Andrew MaynardA Andrew Maynard

    Thanks for responding!

    Domoticz Log

    2018-09-30 16:52:49.919 Error: MySensors: Can not connect to: 192.168.1.136:5003
    2018-09-30 16:53:19.921 Status: TCP: Reconnecting...
    2018-09-30 16:53:23.922 Status: TCP: Connection problem (Unable to connect to specified IP/Port)
    2018-09-30 16:53:23.922 Status: TCP: Reconnecting in 30 seconds...
    2018-09-30 16:53:23.922 Error: MySensors: Can not connect to: 192.168.1.136:5003
    2018-09-30 16:53:53.925 Status: TCP: Reconnecting...
    2018-09-30 16:53:57.926 Status: TCP: Connection problem (Unable to connect to specified IP/Port)
    2018-09-30 16:53:57.926 Status: TCP: Reconnecting in 30 seconds...
    2018-09-30 16:53:57.926 Error: MySensors: Can not connect to: 192.168.1.136:5003
    

    At one point it was working great. First time was extremely simple to set up. only difference is the actual esp8266. Therefore new IP address and no setup info. Everything is soldered together. Im about to desolder it and switch.
    0_1538327383352_Screenshot (1).png

    Domoticz

  • New Gateway not showing on Domoticz
    Andrew MaynardA Andrew Maynard

    I cant for the life of me get this gateway connected lol. The logs look good except the domoticz. i've gone through documentation again just to be sure.

    MCO:BGN:INIT GW,CP=RRNGE---,VER=2.3.0
    20:14:04.851 -> 92 TSF:LRT:OK
    107 TSM:INIT
    20:14:04.886 -> 120 TSF:WUR:MS=0
    20:14:04.886 -> 140 TSM:INIT:TSP OK
    20:14:04.919 -> 161 TSM:INIT:GW MODE
    20:14:04.952 -> scandone
    20:14:04.952 -> state: 0 -> 2 (b0)
    20:14:04.986 -> state: 2 -> 3 (0)
    20:14:04.986 -> state: 3 -> 5 (10)
    20:14:05.020 -> add 0
    20:14:05.020 -> aid 2
    20:14:05.020 -> cnt 
    20:14:05.020 -> 269 TSM:READY:ID=0,PAR=0,DIS=0
    20:14:05.053 -> 301 MCO:REG:NOT NEEDED
    20:14:05.087 -> 
    20:14:05.087 -> connected with Maynard 2.4g, channel 3
    20:14:05.121 -> dhcp client start...
    20:14:05.156 -> ip:192.168.1.136,mask:255.255.255.0,gw:192.168.1.1
    scandone
    943 GWT:TIN:CONNECTING...
    20:14:05.734 -> 970 GWT:TIN:IP: 192.168.1.136
    20:14:05.769 -> 1002 MCO:BGN:STP
    20:14:05.769 -> 1020 MCO:BGN:INIT OK,TSP=1
    pm open,type:2 0
    36017 TSF:MSG:READ,10-10-255,s=255,c=3,t=7,pt=0,l=0,sg=0:
    20:14:40.856 -> 36077 TSF:MSG:BC
    20:14:40.856 -> 36095 TSF:MSG:FPAR REQ,ID=10
    20:14:40.891 -> 36126 TSF:PNG:SEND,TO=0
    20:14:40.924 -> 36151 TSF:CKU:OK
    20:14:40.924 -> 36169 TSF:MSG:GWL OK
    37406 TSF:MSG:SEND,0-0-10-10,s=255,c=3,t=8,pt=1,l=1,sg=0,ft=0,st=OK:0
    39296 TSF:MSG:READ,10-10-0,s=255,c=3,t=24,pt=1,l=1,sg=0:1
    20:14:44.130 -> 39357 TSF:MSG:PINGED,ID=10,HP=1
    20:14:44.164 -> 39416 TSF:MSG:SEND,0-0-10-10,s=255,c=3,t=25,pt=1,l=1,sg=0,ft=0,st=OK:1
    39678 TSF:MSG:READ,10-10-0,s=255,c=3,t=15,pt=6,l=2,sg=0:0100
    39757 TSF:MSG:SEND,0-0-10-10,s=255,c=3,t=15,pt=6,l=2,sg=0,ft=0,st=OK:0100```
    Domoticz

  • RFM69HCW Feather M0 MQTT
    Andrew MaynardA Andrew Maynard

    Would it be wise to close this and move it to Domoticz MySensors forum? It looks like its an issue with mqtt or domoticz.

    Troubleshooting

  • RFM69HCW Feather M0 MQTT
    Andrew MaynardA Andrew Maynard

    @mfalkvidd I switched gateway to esp8266

    451843 GWT:TPS:TOPIC=domoticz/out/MyMQTT/100/1/1/0/0,MSG SENT
    452390 TSF:MSG:READ,100-100-0,s=0,c=1,t=1,pt=7,l=5,sg=0:45.7
    452454 GWT:TPS:TOPIC=domoticz/out/MyMQTT/100/0/1/0/1,MSG SENT
    453679 TSF:MSG:READ,100-100-0,s=1,c=1,t=0,pt=7,l=5,sg=0:77.5
    453743 GWT:TPS:TOPIC=domoticz/out/MyMQTT/100/1/1/0/0,MSG SENT
    

    Im still not seeing it on the domoticz log

    2018-08-05 18:37:30.458 Error: Esp8266 MQTT Gateway hardware (5) nothing received for more than 5 Minutes!....
    2018-08-05 18:37:31.459 Error: Restarting: Esp8266 MQTT Gateway
    2018-08-05 18:37:32.293 Status: MQTT: Worker stopped...
    2018-08-05 18:37:33.295 Status: MQTT: Connecting to 192.168.1.110:1883
    2018-08-05 18:37:33.396 Status: MQTT: connected to: 192.168.1.110:1883
    2018-08-05 18:37:33.396 Status: MySensorsMQTT: connected to: 192.168.1.110:1883
    2018-08-05 18:37:33.497 Status: MQTT: Subscribed
    

    When i try to test it using

    pi@raspberrypi3:~ $ mosquitto_sub -v -t 'domoticz/out/MyMQTT'


    nothing happens and freezes cmd prompt. it does publish though

    pi@raspberrypi3:~ $ mosquitto_pub -t 'domoticz/in/MyMQTT' -m '0,29'
    

    I have to be missing something stupid!

    Troubleshooting

  • Mega 2560 Pro + W5100 + NRF24 Gateway
    Andrew MaynardA Andrew Maynard

    Im jealous! Im stuck on the gateway not receiving messages.

    Troubleshooting

  • RFM69HCW Feather M0 MQTT
    Andrew MaynardA Andrew Maynard

    @mfalkvidd I will try it on an esp8266 tomorrow and see if anything changes. When going back versions is there anything else i need to do besides deleting directory and going through ./configure again? I will try the 2.2 version first. I already went from 2.3.1 to 2.3.0.

    Troubleshooting

  • RFM69HCW Feather M0 MQTT
    Andrew MaynardA Andrew Maynard

    @scalz YES!!! I think that was the problem on the Feather m0 side. still not receiving messages though. i did test it out with

    pi@raspberrypi3:~ $ mosquitto_pub -t 'domoticz/in/MyMQTT' -m '0,29'
    

    I see it in the domoticz log.

    2018-08-05 02:17:49.130 Status: MySensorsMQTT: connected to: 192.168.1.110:1883
    2018-08-05 02:17:49.230 Status: MQTT: Subscribed
    2018-08-05 02:17:55.937 Status: MQTT: Worker stopped...
    2018-08-05 02:17:56.939 Status: MQTT: Connecting to 192.168.1.110:1883
    2018-08-05 02:17:57.040 Status: MQTT: connected to: 192.168.1.110:1883
    2018-08-05 02:17:57.040 Status: MySensorsMQTT: connected to: 192.168.1.110:1883
    2018-08-05 02:17:57.141 Status: MQTT: Subscribed
    2018-08-05 02:45:42.707 MySensorsMQTT: Topic: domoticz/in/MyMQTT, Message: 0,29
    

    I figure it cant hurt to show my ./configure.

    pi@raspberrypi3:~ $ ./configure --my-gateway=mqtt --my-controller-ip-address=192.168.1.110 --my-mqtt-publish-topic-prefix=domoticz/out/MyMQTT --my-mqtt-subscribe-topic-prefix=domoticz/in/MyMQTT --my-mqtt-client-id=pi  --my-transport=rfm69 --my-rfm69-frequency=433 --my-is-rfm69hw^C
    

    Am I missing something? Is there a something specific I should enter below for my client id?

    --my-mqtt-client-id=pi 
    

    Thanks again for responding. I appreciate it!

    Troubleshooting

  • RFM69HCW Feather M0 MQTT
    Andrew MaynardA Andrew Maynard

    This is the debug from the gateway.
    If for some reason the transceiver isn't working it should say in debug, correct?

    Aug 02 01:17:32 INFO  Starting gateway...
    Aug 02 01:17:32 INFO  Protocol version - 2.3.1-alpha
    Aug 02 01:17:32 DEBUG MCO:BGN:INIT GW,CP=RPNGL---,VER=2.3.1-alpha
    Aug 02 01:17:32 DEBUG TSF:LRT:OK
    Aug 02 01:17:32 DEBUG TSM:INIT
    Aug 02 01:17:32 DEBUG TSF:WUR:MS=0
    Aug 02 01:17:32 DEBUG TSM:INIT:TSP OK
    Aug 02 01:17:32 DEBUG TSM:INIT:GW MODE
    Aug 02 01:17:32 DEBUG TSM:READY:ID=0,PAR=0,DIS=0
    Aug 02 01:17:32 DEBUG MCO:REG:NOT NEEDED
    Aug 02 01:17:32 DEBUG MCO:BGN:STP
    Aug 02 01:17:32 DEBUG MCO:BGN:INIT OK,TSP=1
    Aug 02 01:17:32 DEBUG GWT:RMQ:MQTT RECONNECT
    Aug 02 01:17:32 DEBUG connected to 192.168.1.110
    Aug 02 01:17:32 DEBUG GWT:RMQ:MQTT CONNECTED
    Aug 02 01:17:32 DEBUG GWT:TPS:TOPIC=domoticz/out/MyMQTT/0/255/0/0/18,MSG SENT
    
    Troubleshooting

  • RFM69HCW Feather M0 MQTT
    Andrew MaynardA Andrew Maynard

    I'm on the beginner side so it seems a little easier to change a few things in the esp8266gateway sketch and go.

    Troubleshooting
  • Login

  • Don't have an account? Register

  • Login or register to search.
  • First post
    Last post
0
  • MySensors
  • OpenHardware.io
  • Categories
  • Recent
  • Tags
  • Popular