Skip to content
  • MySensors
  • OpenHardware.io
  • Categories
  • Recent
  • Tags
  • Popular
Skins
  • Light
  • Brite
  • Cerulean
  • Cosmo
  • Flatly
  • Journal
  • Litera
  • Lumen
  • Lux
  • Materia
  • Minty
  • Morph
  • Pulse
  • Sandstone
  • Simplex
  • Sketchy
  • Spacelab
  • United
  • Yeti
  • Zephyr
  • Dark
  • Cyborg
  • Darkly
  • Quartz
  • Slate
  • Solar
  • Superhero
  • Vapor

  • Default (No Skin)
  • No Skin
Collapse
Brand Logo
BulldogLowellB

BulldogLowell

@BulldogLowell
Contest Winner
About
Posts
814
Topics
29
Shares
0
Groups
1
Followers
9
Following
1

Posts

Recent Best Controversial

  • Irrigation Controller (up to 16 valves with Shift Registers)
    BulldogLowellB BulldogLowell

    I put together an extension of the multi-Relay controller for use as a controller for your irrigation project if you have more zones than available pins on your Arduino.

    This sketch features the following:

    • Allows you to cycle through All zones or individual zone control.
    • Use the (n+1)th device to activate each zone in numeric sequence (zero to n) using
      Variable1 as the "ON" time in minutes in each of the vera devices created.
    • Use the individual zone controller to activate a single zone. This feature uses
      Variable2 as the "ON" time for each individual device/zone.
    • Connect according to pinout in the sketch and uses an 74HC595 (or equiv) Shift Register as to
      allow the MySensors standard radio configuration and still leave available digital pins
    • Compiles to ~12,000 Bytes, so will run on any Arduino
    • Turning on any zone will stop the current process and begin that particular process.
    • Turning off any zone will stop the current process and turn off all zones.
    • Sketch must collect your desired intervals so it takes several minutes to startup.
    • If you change your desired time intervals for your zones, simply restart your arduino
      and it will self update to reflect those changes.

    Example, I am using with 8 relays:

    This will create 9 devices. Zero through 7 are the individual relays. Eight is the Sequencer, so to speak (refer to attachment).

    Once you create this and add it using the gateway, go to each of zero through 7 and edit Variable1 and Variable2 for what time you want to use for the Sequencer or Zone respectively. Then save the settings. Then, restart your arduino; your arduino will extract these settings and save them to an array.

    When you turn on device 8 (aka the Sequencer) the relays will actuate in order from zero to seven, each one staying on for the period entered in the Variable1 field. There is a 5 second delay at the start of a new zone to allow for the valves to hydraulically reset.

    When you turn on any of devices zero through 7, it will run that zone only for the period of time entered in Variable2.

    Selecting any new zone (0-8) will stop the current process and start as per above.

    Hope you have a use for it. If you see any opportunity to improve, or find a bug, let me know.

    Jim
    modified. Attached wrong file, whoops!

    Sprinkler.ino

    My Project

  • DailyTimer library for Arduino
    BulldogLowellB BulldogLowell

    I recently updated my DailyTimer library for Arduino which provides tools to set daily timers for control of devices such as lamps, appliances, etc. I hope someone else will find this useful. There is also a Particle version.

    I developed this primarily for automatically (device level) firing time-based events on certain days of the week (configurable).

    Any contribution is welcome.

    Something about the library:

    A library that will allow you to control daily events.

    Provides tools to set daily timers for control of devices such as lamps, appliances, etc. Developed primarilary for houshold presence simulation.

    Allows for setting ON and OFF times, days of the week (i.e. weekends, weekdays, Fridays) and the use of random on/off times.

    Timers may bridge midnight, simply enter times accordingly.

    Can automatically set correct timer state on powerup or schedule changes.

    Random start and/or end times.

    Randomly set days of week.

    Select custom days of the week.

    Set a timed event with just the start time as a trigger.

    you can return the active days (e.g. in the case of setting random days).

    Dynamically set your start or end time (i.e. using some type of celestial function or web or server call to determine Sunrise or Sunset times)

    Development

  • Vera Helper with Arduino
    BulldogLowellB BulldogLowell

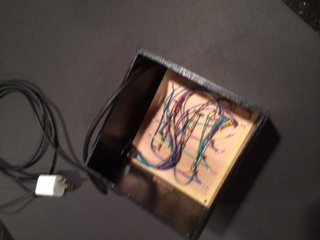
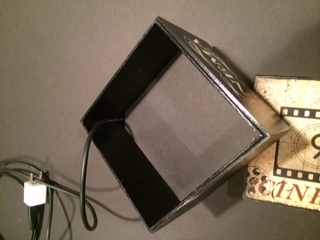
    I've been interested in augmenting my network with Ethernet and WiFi devices for some time. So, just messing around with an Uno and an Ethernet Shield, I built a device that can (without the RF integration)

    • Control any Vera device through HTTP Commands

    • Can be controlled by VERA luup or any wget style command

    • be a sensor on my network

    • be an independant/agnostic layer with equal footing with My Sensors

    • be dependable

    I'm not all the way there yet, but i built a sensor that can talk to my Vera, controlling vera devices and can be controlled by vera.

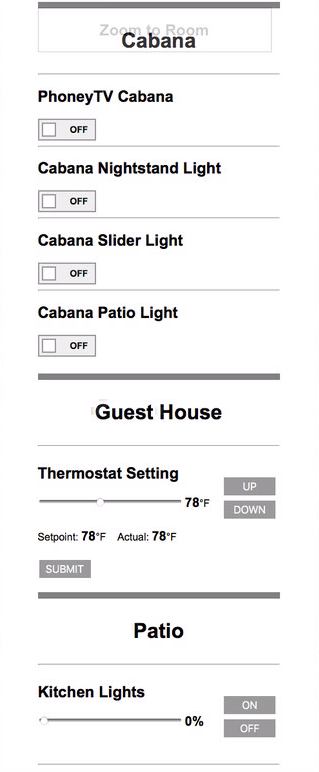
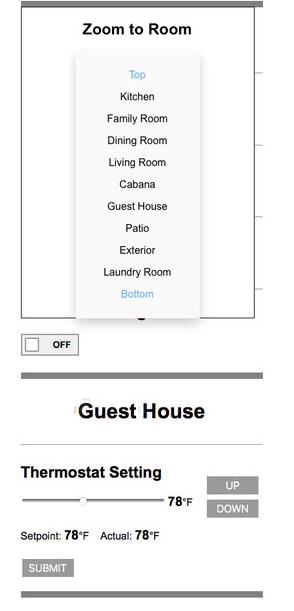
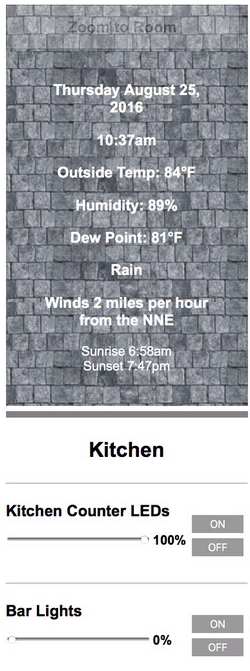
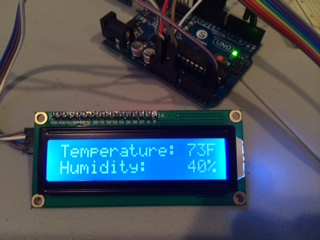
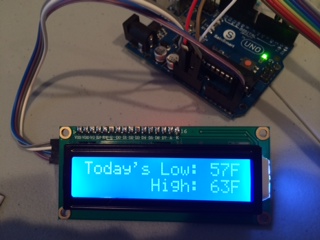
    This is the web page it creates:

    Screen Shot 2014-12-06 at 3.46.02 PM.png

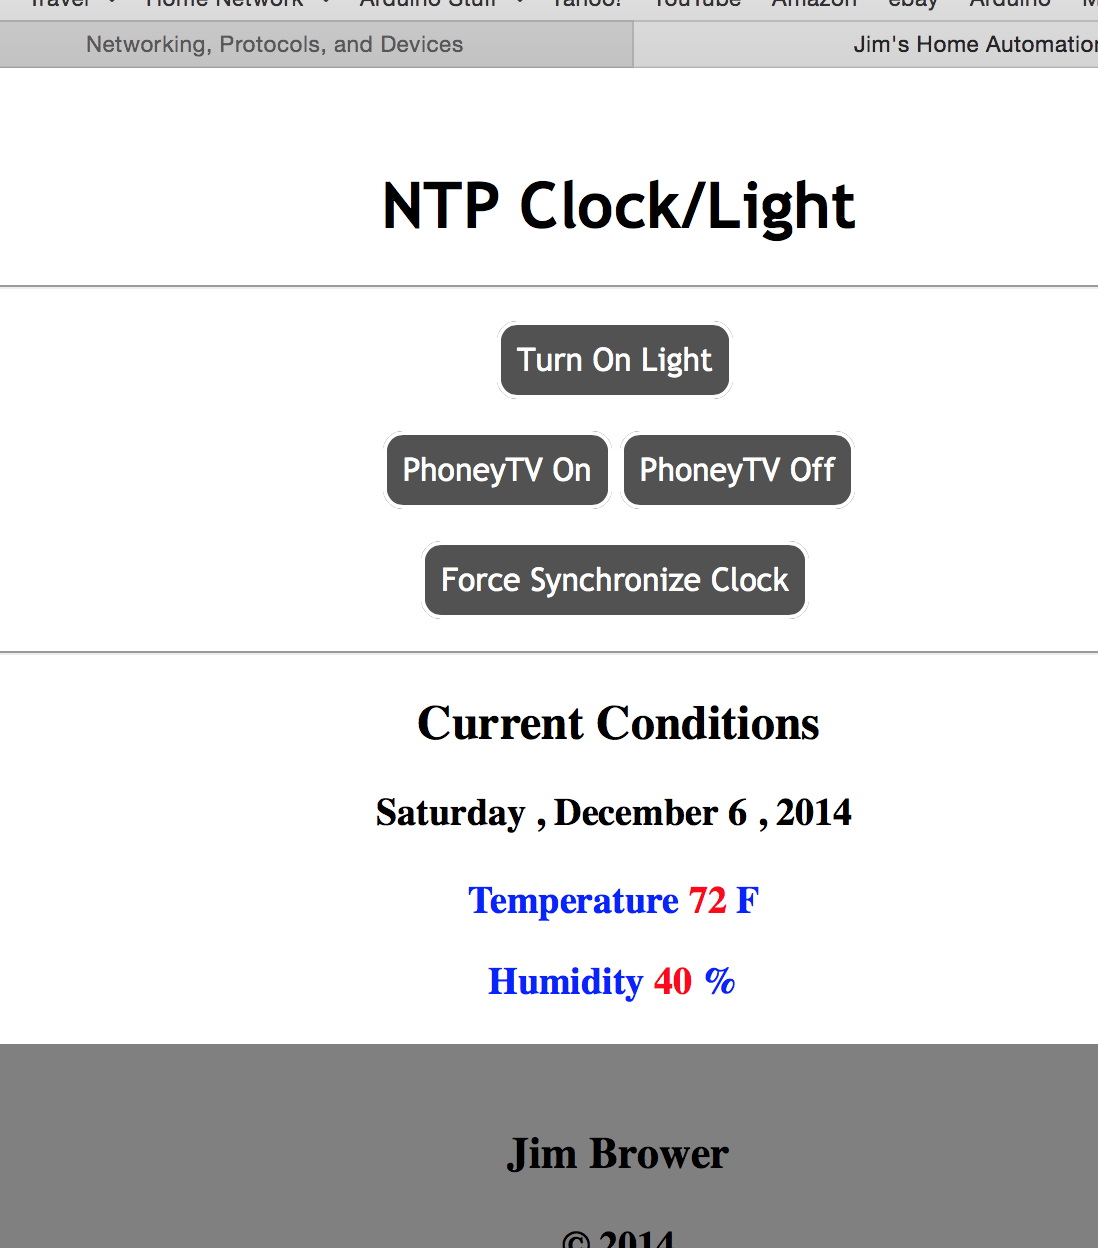
    this sketch allow you to turn on/off a relay via a webpage or Vera, and control a vera device.

    take a look:

    https://www.youtube.com/watch?v=d1kxQCuZEJI

    #include <Wire.h>
    #include <EEPROM.h>
    #include <SPI.h>         
    #include <Ethernet.h>
    #include <EthernetUdp.h>
    #include <utility/w5100.h>
    #include <Time.h>
    #include <Timezone.h>
    #include <LiquidCrystal_I2C.h>
    #include "DHT.h"
    
    //#define DEBUG_ON
    #define LED_PIN 8
    #define DHT_SENSOR_PIN 7
    
    #ifdef DEBUG_ON
    #define DEBUG_PRINT(x)   Serial.print(x)
    #define DEBUG_PRINTLN(x) Serial.println(x)
    #define SERIAL_START(x)  Serial.begin(x)
    #else
    #define DEBUG_PRINT(x)
    #define DEBUG_PRINTLN(x)
    #define SERIAL_START(x)
    #endif
    //
    boolean lightOn;
    DHT dht;
    //
    LiquidCrystal_I2C lcd(0x27, 16, 2);
    uint8_t clock[8] = {0x0,0xe,0x15,0x17,0x11,0xe,0x0}; // I'm-fetching-time-indicator for LCD display
    //
    EthernetUDP Udp;
    EthernetServer server(80);
    uint8_t mac[] = { 0xDE, 0xDE, 0xDE, 0xDE, 0xDE, 0xDE };
    unsigned int localPort = 8888;
    IPAddress timeServer(132, 163, 4, 101); // time-a.timefreq.bldrdoc.gov NTP server  // IPAddress timeServer(132, 163, 4, 102); // time-b.timefreq.bldrdoc.gov NTP server  // IPAddress timeServer(132, 163, 4, 103); // time-c.timefreq.bldrdoc.gov NTP server
    const int NTP_PACKET_SIZE = 48; // NTP time stamp is in the first 48 bytes of the message
    byte packetBuffer[ NTP_PACKET_SIZE]; //buffer to hold incoming and outgoing packets 
    byte socketStat[MAX_SOCK_NUM];
    //
    char myString[100];
    byte locator = 0;
    EthernetClient client;
    const byte myserver[] = { 192,168,1,59 };
    //
    const char *dayOfWeek[] = {"Null","Sunday ","Monday ", "Tuesday ", "Wednesday ", "Thursday ", "Friday ", "Saturday "};
    const char *monthString[] = {"NULL", "January", "February", "March", "April", "May", "June", "July", "August","September", "October", "November", "December"};
    // 
    TimeChangeRule usEDT = {"EDT", Second, Sun, Mar, 2, -240};  //Eastern Daylight Time = UTC - 4 hours
    TimeChangeRule usEST = {"EST", First, Sun, Nov, 2, -300};   //Eastern Standard Time = UTC - 5 hours
    Timezone usET(usEDT, usEST);
    TimeChangeRule *tcr;
    boolean forceClockUpdate = true;
    //
    void setup() 
    {
      SERIAL_START(9600);
      lightOn = EEPROM.read(0);
      pinMode(LED_PIN, OUTPUT);
      dht.setup(DHT_SENSOR_PIN);
      digitalWrite(LED_PIN, lightOn);
      //
      DEBUG_PRINTLN(F("configuring ethernet"));
      if (Ethernet.begin(mac) == 0) // start Ethernet and UDP
      {
        DEBUG_PRINTLN(F("Failed to configure Ethernet using DHCP")); 
        while(true){}
      }
      server.begin();
      Udp.begin(localPort);
      //
      lcd.init();
      lcd.clear();
      lightOn? lcd.backlight() : lcd.noBacklight();
      lcd.createChar(0, clock);
    }
    //
    void loop()
    {
      updateLCD();
      getNTPtime();
      webControl();
    }
    //
    void updateLCD()
    {
      static int lastSecond; 
      time_t rightNow = now();
      if (second(rightNow) != lastSecond)
      {
        lcd.setCursor(0,0);
        lcd.print(F("Time:"));
        DEBUG_PRINT(F("Time:"));
        lcd.print(hourFormat12(rightNow) < 10 ? F(" ") : F(""));
        DEBUG_PRINT(hourFormat12(rightNow) < 10 ? F(" ") : F(""));
        lcd.print(hourFormat12(rightNow));
        DEBUG_PRINT(hourFormat12(rightNow));
        lcd.print(minute(rightNow) < 10 ? F(":0") : F(":"));
        DEBUG_PRINT(minute(rightNow) < 10 ? F(":0") : F(":"));
        lcd.print(minute(rightNow));
        DEBUG_PRINT(minute(rightNow));
        lcd.print(second(rightNow) < 10 ? F(":0") : F(":"));
        DEBUG_PRINT(second(rightNow) < 10 ? F(":0") : F(":"));
        lcd.print(second(rightNow));
        DEBUG_PRINT(second(rightNow));
        lcd.print(isAM() ? "am" : "pm");
        DEBUG_PRINT(isAM() ? " am " : " pm ");
        lcd.setCursor(0,1);
        lcd.print(dayOfWeek[weekday(rightNow)]);
        DEBUG_PRINTLN(dayOfWeek[weekday(rightNow)]);
        lcd.print(F("      "));
        lcd.setCursor(11,1);
        lcd.print(month(rightNow) < 10 ? F(" ") : F(""));
        lcd.print(month(rightNow));
        lcd.print(day(rightNow) < 10 ? F("/0") : F("/"));
        lcd.print(day(rightNow));
      }
      lastSecond = second(rightNow);
    }
    //unsigned long
    void sendNTPpacket(IPAddress& address) // Send an NTP request to the time server at the given address 
    {
      memset(packetBuffer, 0, NTP_PACKET_SIZE); 
      packetBuffer[0] = 0b11100011;   // LI, Version, Mode
      packetBuffer[1] = 0;            // Stratum, or type of clock
      packetBuffer[2] = 6;            // Polling Interval
      packetBuffer[3] = 0xEC;         // Peer Clock Precision
      packetBuffer[12]  = 49; 
      packetBuffer[13]  = 0x4E;
      packetBuffer[14]  = 49;
      packetBuffer[15]  = 52;           
      Udp.beginPacket(address, 123); //NTP requests are to port 123
      Udp.write(packetBuffer,NTP_PACKET_SIZE);
      Udp.endPacket(); 
    }
    //
    void receiveTime(unsigned long newTime)
    {
      DEBUG_PRINT(F("Time value received: "));
      int lastSecond = second();
      int lastMinute = minute();
      int lastHour = hour();
      setTime(newTime);
      if ((second() != lastSecond) || (minute() != lastMinute) || (hour() != lastHour))
      {
        DEBUG_PRINTLN(F("Clock updated...."));
        DEBUG_PRINT(F("Sensor's time currently set to:"));
        DEBUG_PRINT(hourFormat12() < 10? F(" 0") : F(" "));
        DEBUG_PRINT(hourFormat12());
        DEBUG_PRINT(minute() < 10? F(":0") : F(":"));
        DEBUG_PRINT(minute());
        DEBUG_PRINTLN(isAM()? F("am") : F("pm"));
        DEBUG_PRINT(month());
        DEBUG_PRINT(F("/"));
        DEBUG_PRINT(day());
        DEBUG_PRINT(F("/"));
        DEBUG_PRINTLN(year());
        DEBUG_PRINTLN(dayOfWeek[weekday()]);
      }
      lcd.setCursor(15,0);
      lcd.print(F(" "));
    }
    //
    void getNTPtime()
    {
      static unsigned long lastUpdateTime;
      const unsigned long interval = 60000UL;
      if ((millis() - lastUpdateTime >= interval) || forceClockUpdate)
      {
        lcd.setCursor(15,0);
        lcd.write(0);
        sendNTPpacket(timeServer); // send an NTP packet to a time server
        delay(1000);  
        if (Udp.parsePacket()) 
        {  
          Udp.read(packetBuffer,NTP_PACKET_SIZE);  // read the packet into the buffer
          unsigned long highWord = word(packetBuffer[40], packetBuffer[41]);
          unsigned long lowWord = word(packetBuffer[42], packetBuffer[43]);  
          unsigned long secsSince1900 = highWord << 16 | lowWord;  
          DEBUG_PRINT(F("Seconds since Jan 1 1900 = "));
          DEBUG_PRINTLN(secsSince1900);               
          DEBUG_PRINT(F("Unix time = "));
          time_t utcEpoch = secsSince1900 - 2208988800UL;//seventyYears = 2208988800UL
          DEBUG_PRINTLN(utcEpoch);                               
          receiveTime(usET.toLocal(utcEpoch, &tcr) + 2);  //about 2 seconds to call for time
        }
        if (!forceClockUpdate)
        {
          lastUpdateTime += interval;
        }
        forceClockUpdate = false;
      }
    }
    //
    void webControl()
    {
      EthernetClient client = server.available();
      if (client) 
      {
        while (client.connected()) 
        {
          if (client.available()) 
          {
            char c = client.read();
            if (locator < 100)
            {
              myString[locator] = c;
              locator++;
              myString[locator] = '\0'; 
            }
            if (c == '\n') //if HTTP request has ended
            {
              DEBUG_PRINTLN(F("MyString ="));
              DEBUG_PRINTLN(myString);
              client.println(F("HTTP/1.1 200 OK")); //new page
              client.println(F("Content-Type: text/html"));
              client.println();
              client.println(F("<HTML>"));
              client.println(F("<HEAD>"));
              client.println(F("<meta name='apple-mobile-web-app-capable' content='yes' />"));
              client.println(F("<meta name='apple-mobile-web-app-status-bar-style' content='black-translucent' />"));
              client.println(F("<link rel='stylesheet' type='text/css' href='http://homeautocss.net84.net/a.css' />"));
              client.println(F("<TITLE>Jim's Home Automation</TITLE>"));
              client.println(F("</HEAD>"));
              client.println(F("<BODY>"));
              client.println(F("<H1>NTP Clock/Light</H1>"));
              client.println(F("<hr />"));
              client.println(F("<br />"));
              client.println(F("<a href=\"/?ledOn\"\">Light On</a>"));
              client.println(F("<a href=\"/?ledOff\"\">Light Off</a><br />"));  
              client.println(F("<br />"));
              client.println(F("<br />"));
              client.println(F("<a href=\"/?phoneyOn\"\">PhoneyTV On</a>"));
              client.println(F("<a href=\"/?phoneyOff\"\">PhoneyTV Off</a><br />"));  
              client.println(F("<br />"));
              client.println(F("<br />"));
              client.println(F("<a href=\"/?syncClock\"\">Force Synchronize Clock</a>"));
              client.println(F("<br />"));
              client.println(F("<br />"));
              client.println(F("<hr />"));
              client.println(F("<H2>Current Conditions</H2>"));
              client.println(F("<H3>"));
              client.println(dayOfWeek[weekday()]);
              client.println(F(","));
              client.println(monthString[month()]);
              client.println(F(" "));
              client.println(day());
              client.println(F(","));
              client.println(year());
              client.println(F("<br />"));
              client.println(F("<br />"));
              client.println(F("<font color=\"blue\">Temperature</font>"));
              client.println(F("<font color=\"red\">"));
              client.println((int)floor(dht.toFahrenheit(dht.getTemperature()) + 0.5), 1);
              client.println(F("</font>"));
              client.println(F("<font color=\"blue\">F</font>"));
              client.println(F("<br />"));
              client.println(F("<H3><font color=\"blue\">Humidity</font>"));
              client.println(F("<font color=\"red\">"));
              client.println((int)floor(dht.getHumidity() + 0.5), 1);
              client.println(F("</font>"));
              client.println(F("<font color=\"blue\">%</font>"));
              client.println(F("<br />"));
              client.println(F("<div style=\"background-color:grey;"));
              client.print(F(" color:black; margin:20px; padding:20px;\">"));
              client.println(F("<h3>Jim Brower</h3>"));
              client.println(F("<p>"));
              client.println("&#169");
              client.println(F(" 2014"));
              client.println(F("</p>"));
              client.println(F("</div>"));
              client.println(F("</BODY>"));
              client.println(F("</HTML>"));
              delay(1);
              client.stop();
              if(strstr(myString, "?ledOn")) // control arduino pin and LCD backlight //checks for 'on'
              {
                lightOn = true;
                EEPROM.write(0,0xFF);
                digitalWrite(LED_PIN, HIGH);
                lcd.backlight();
                DEBUG_PRINTLN(F("Led On"));
              }
              if(strstr(myString, "?ledOff")) // compliment to above
              {
                lightOn = false;
                EEPROM.write(0,0x00);
                digitalWrite(LED_PIN, LOW);
                lcd.noBacklight();
                DEBUG_PRINTLN(F("Led Off"));
              }
              else if (strstr(myString, "?syncClock"))
              {
                forceClockUpdate = true;
                DEBUG_PRINTLN(F("Sync Set"));
              }
              else if (strstr(myString, "?phoneyOn"))
              {
                phoneyTV(true);
                DEBUG_PRINTLN(F("PhoneyTV On"));
              }
              else if (strstr(myString, "?phoneyOff"))
              {
                phoneyTV(false);
                DEBUG_PRINTLN(F("PhoneyTV Off"));
              }
              myString[0] = '\0'; //clearing string for next read
              locator = 0;
            }
          }
        }
      }
    }
    //
    void phoneyTV(boolean status)
    {
      ShowSockStatus();
      if (client.connect(myserver, 3480)) //starts client connection, checks for connection
      {  
        DEBUG_PRINTLN(F("connected"));
        client.print(F("GET /data_request?"));
        client.print(F("id=action&output_format=xml"));
        client.print(F("&DeviceNum=88"));
        client.print(F("&serviceId=urn:upnp-org:"));
        client.print(F("serviceId:SwitchPower1"));
        client.print(F("&action=SetTarget"));
        client.print(F("&newTargetValue="));
        client.print(status ? F("1") : F("0"));
        client.println(F(" HTTP/1.1"));
        client.println(F("Connection: close"));  //close 1.1 persistent connection  
        client.println(); //end of get request
        delay(1);
        client.stop();
      }
    }
    
    void ShowSockStatus()
    {
      for (int i = 0; i < MAX_SOCK_NUM; i++) {
        DEBUG_PRINT(F("Socket#"));
        DEBUG_PRINT(i);
        uint8_t s = W5100.readSnSR(i);
        socketStat[i] = s;
        DEBUG_PRINT(F(":0x"));
        #ifdef DEBUG_ON
        Serial.print(s,16);
        #endif
        DEBUG_PRINT(F(" "));
        DEBUG_PRINT(W5100.readSnPORT(i));
        DEBUG_PRINT(F(" D:"));
        uint8_t dip[4];
        W5100.readSnDIPR(i, dip);
        for (int j=0; j<4; j++) {
          Serial.print(dip[j],10);
          if (j<3) Serial.print(".");
        }
        DEBUG_PRINT(F("("));
        DEBUG_PRINT(W5100.readSnDPORT(i));
        DEBUG_PRINT(F(")"));
      }
    }
    
    My Project

  • Best dimmable countertop lights?
    BulldogLowellB BulldogLowell

    @mfalkvidd

    I used these on Amazon. By and large the reviews are spot on... but I installed inside a molding strip that I routed out like this and mounted underneath, to make it have a finished look. You can see the molding in the photo below, just inboard of the doors. I used a clear adhesive to augment the not-great adhesive backing that the strips come with, something like a bead of hot glue down each side of the milled out molding.

    0_1458770884571_FullSizeRender.jpg
    and the finished product like this... though the color is horribly off on my iPhone photo. It looks much warmer to the eye in real life.
    0_1458771159855_FullSizeRender-1.jpg
    Most importantly, they allow for a lot of light and a happy wife!

    Photo from the other side shows the LED's above as well, though not completed for the left hand island:
    0_1458772094442_FullSizeRender-2.jpg
    Again, the Colors are all wrong!!

    Hardware led dimmer light

  • Web App for Simple Control of my Home Automation kludge
    BulldogLowellB BulldogLowell

    Like a lot of forum members, I have a lot of automation in my house. It sometimes creates issues for guests who don't have a familiarity with home automation and my wife!

    I don't want to give total control of the house to guests, but I wanted them to have a tool that will allow them to control my hybrid system (Vera and a bunch of Particle Photon controlled devices and other gadgets) without having to download an app, which would allow them total control of my house and I have to enter my security keys.

    So, I wrote a web app which is hosted on my mac mini server and it is accessible to anyone I let onto my private LAN, only while they are on the LAN.

    It took me a while to do this, having never done anything in HTML/CSS/JavaScript/PHP, but it turns out that it is all pretty easy to do. The most difficult part was getting the status data from Vera, because of its particular preferences of handling cross-domain Ajax calls. I eventually created a PHP proxy and well, it all came together after that.

    when the website loads, it makess an Ajax call to my Vera and updates the state of every device. Plus, it also gets the state of each of the Particle Photon devices I can control/monitor. I also go get all of the local weather conditions, as you can see below.

    If anyone is interested in working on something similar or building off of this project, I'm happy to share my code. I'm certain that it would offer a lot of utility to the MySensors crowd, especially where they are using Vera's ugly UI.

    Here are a few screen shots off my web browser and iOS device:

    different devices including control of my thermostats (they can only control within a range) and dimmer in the outdoor kitchen:

    0_1472135355783_Screen Shot 2016-08-25 at 10.15.27.png

    Another shot including the drop down "Zoom to Room" menu:

    0_1472135410798_Screen Shot 2016-08-25 at 10.16.27.png

    Local Conditions:

    0_1472135865680_Screen Shot 2016-08-25 at 10.36.59.png

    My Project

  • What did you build today (Pictures) ?
    BulldogLowellB BulldogLowell

    @dbemowsk said in What did you build today (Pictures) ?:

    Seeing the falling stars at the end of the Adafruit test code made me think of rain or snow falling. Something like that might go outside the limits of the pro minis memory, but hey, never hurts to try.

    Hey Nice Work!

    I see you are using I2C, vs SPI... that may be why your display is so much slower than the demo in the Adafruit video.

    Can't wait to see the final board!

    General Discussion

  • Waterproof Temp Sensor with dht humidty/temp sensor
    BulldogLowellB BulldogLowell

    @cleight

    try this...

    start here:

    boolean metric = true; 
    

    with

    boolean metric = false;
    

    and comment out this line:

    metric = gw.getConfig().isMetric;
    
    My Project

  • Web App for Simple Control of my Home Automation kludge
    BulldogLowellB BulldogLowell

    @TheoL

    So, my little app connects to Particle devices using their RESTful API, Ajax looks like this, which control my PhoneyTV (Particle version here) and a LED dimmer:

    example of a getter:

    function getParticleData(){
    	var requestURL = "https://api.spark.io/v1/devices/" + deviceID + "/" + getFunc + "/?access_token=" + accessToken;
    	$.getJSON(requestURL, function(json) {
    		document.getElementById("range").innerHTML = json.result + "%";
    		document.getElementById("myRange").value = json.result;
    	});
    	var myURL = "https://api.spark.io/v1/devices/" + phoneyID + "/" + phoneyVariable + "/?access_token=" + accessToken;
    	$.getJSON(myURL, function(data) {
    	var state = parseInt(data.result);
    	console.log("phoneyTV state =" + state);
    	document.getElementById("phoneyTV").checked = ((state == 1)? true : false);
    	});
    }
    

    and a setter:

    function sendDimmerValue() {
        var newValue = document.getElementById("range").innerHTML;
        var request = new XMLHttpRequest();
        var data = 'params=' + newValue + '&access_token=' + accessToken;
        var url = 'https://api.particle.io/v1/devices/' + dev_id + '/setDimLevel/';
        request.open('POST', url, true);
        request.setRequestHeader('Content-Type', 'application/x-www-form-urlencoded; charset=UTF-8');
        request.send(data);
    }
    

    no extra url encoding needed here but for Vera you must, for example:

    function sendThermostatValue(tStat) {
    	console.log("pressed");
        var newValue = document.getElementById(tStat.reading).innerHTML;
        var request = new XMLHttpRequest();
        var url = 'http://10.0.1.15/proxy.php?url=http%3A%2F%2F10.0.1.25%3A3480%2Fdata_request%3Fid%3Daction%26output_format%3Dxml%26DeviceNum%3D' + tStat.deviceNum + '%26serviceId%3Durn%3Aupnp-org%3AserviceId%3ATemperatureSetpoint1_Cool%26action%3DSetCurrentSetpoint%26NewCurrentSetpoint%3D' + newValue;
    	console.log(url);
        request.open('GET', url);
        request.send();
    }
    

    My code doesn't dynamically create devices (yet) rather, it is static HTML. My next improvement would be to build device classes, poll Vera for relevant device types and build the UI dynamically.

    @sundberg84,

    I started with a simple web page with a single value... once I learned how to make an AJAX call to Vera, it was easy to call any variable I wanted, especially because of Vera's native JSON output.

    If Domoticz API supports JSON, well it will be a breeze for you.

    Since there are a few people interested I can post something. If we get a Vera person interested, the Javascript I wrote will give them a big step in the right direction.

    My Project

  • IR Switch for Luminara Candle Automation (repost with video, photos and final sketch)
    BulldogLowellB BulldogLowell

    Wow this is an old topic!

    But... I was working on a project and thought that anyone who was looking for a NeoPixel candle example that isn't blocking, well this would be the place. It flickers and flutters like a real candle. The only thing is that the flame isn't illuminated like these nice Luminaras, but I'm too cheap to buy them!

    Keep in mind that my example here uses GRB LEDs, but you merely need to reorder the variables in order to get this working for RGB. Plus the Time Library is not Arduino, so you will have to play with that too for a good randomSeed().

    It looks pretty realistic with even a single neoPixel in a sheet of A4 paper rolled into a cylinder. I'll post a video when I can.

    Have fun with it:

    #include "neopixel.h"
    
    enum CandleStates{
      BURN_CANDLE,
      FLICKER_CANDLE,
      FLUTTER_CANDLE,
      MODES_MAX_CANDLE
    };
    
    enum PixelSelect{
      EVERY_PIXEL,
      SINGLE_PIXEL,
    };
    
    class Candle : public Adafruit_NeoPixel
    {
      public:
        Candle(uint16_t count, uint8_t pin, uint8_t type);
        Candle(uint16_t count, uint8_t pin, uint8_t type, PixelSelect pixel, uint32_t pixNum = 0);
        ~Candle(){};
        void update();
    
      private:
        bool fire(uint8_t greenDropValue, uint32_t cycleTime);
    
        PixelSelect _pixelMode = EVERY_PIXEL;
        uint32_t _pixNum = 0;
        CandleStates _mode;
        uint32_t _lastModeChange;
        uint32_t _modeDuration;
    
        uint8_t _redPx = 255;
        uint8_t _bluePx = 10; //10 for 5v, 15 for 3.3v
        uint8_t _grnHigh = 100; //110-120 for 5v, 135 for 3.3v
        uint8_t _grnPx = 100;
    
        uint32_t _lastBurnUpdate = 0;
        int _direction = 1;
    };
    
    Candle::Candle(uint16_t count, uint8_t pin, uint8_t type) : Adafruit_NeoPixel(count, pin, type)
    {
      randomSeed(Time.now() + micros());
      _mode = BURN_CANDLE;
    }
    
    Candle::Candle(uint16_t count, uint8_t pin, uint8_t type, PixelSelect pixel, uint32_t pixNum) : Adafruit_NeoPixel(count, pin, type)
    {
      _pixelMode = pixel;
      _pixNum = pixNum;
    }
    
    void Candle::update()
    {
      if(millis() - _lastModeChange > _modeDuration)
      {
        _mode = static_cast<CandleStates>(random(MODES_MAX_CANDLE));
        _modeDuration = random(1000, 8000);
        _lastModeChange = millis();
        //Serial.printlnf("New state: %d\tTime: %d", static_cast<int>(_mode), _modeDuration);
      }
      switch(_mode)
      {
        case BURN_CANDLE:
          this->fire(10, 120);
          break;
        case FLICKER_CANDLE:
          this->fire(15, 120);
          break;
        case FLUTTER_CANDLE:
          this->fire(30, 120);
          break;
      };
    }
    
    bool Candle::fire(uint8_t greenDropValue, uint32_t cycleTime)
    {
      int currentMillis = millis();
      if(currentMillis - _lastBurnUpdate > (cycleTime / greenDropValue / 2))
      {
        _grnPx = constrain(_grnPx += _direction, _grnHigh - greenDropValue, _grnHigh);
        if(_grnPx == _grnHigh - greenDropValue or _grnPx == _grnHigh)
        {
          _direction *= -1;
        }
        switch (_pixelMode)
        {
          case EVERY_PIXEL:
            for(int i = 0; i < this->numPixels(); i++)
            {
              this->setPixelColor(i, _grnPx, _redPx, _bluePx);
            }
            break;
          case SINGLE_PIXEL:
            this->setPixelColor(_pixNum, _grnPx, _redPx, _bluePx);
            break;
        }
        this->show();
        _lastBurnUpdate = currentMillis;
      }
    }
    
    #define PIXEL_COUNT 2
    #define PIXEL_PIN D2
    #define PIXEL_TYPE WS2812B    // I'M USING GRB WS2821B's here
    
    Candle candle = Candle(PIXEL_COUNT, PIXEL_PIN, PIXEL_TYPE, SINGLE_PIXEL);
    
    void setup(void)
    {
      Serial.begin(115200);
      pinMode(13, OUTPUT);
      candle.begin();
      candle.show();
      Serial.println("Started program");
    }
    
    void loop(void)
    {
      candle.update();
      static uint32_t lastFlashMillis = 0;
      if(millis() - lastFlashMillis > 250)
      {
        digitalWrite(13, !digitalRead(13));
        lastFlashMillis = millis();
      }
    }
    
    My Project ir blaster ir code

  • Getting numbers from Vera to a sensor
    BulldogLowellB BulldogLowell

    @axillent

    Again, thanks for the help.

    I attached some photos of the display if anyone is interested. The sketch has not been simplified test, but it works so if you are at all interested, you have a good place to start:

    // Humidity and Temperature Sensor with LCD Display
    // Retrieves Temperature, Humidity and today's Hi/Low from Vera and displays it on an LCD alongside with Room Temperature and Humidity.
    //Updates Vera with Temp and Humidity just like any other sensor
    #include <Sleep_n0m1.h>
    #include <SPI.h>
    #include <EEPROM.h>  
    #include <RF24.h>
    #include <Sensor.h>  
    #include <DHT.h> 
    #include <Wire.h> 
    #include <LiquidCrystal_I2C.h>
    //
    LiquidCrystal_I2C lcd(0x27,20,4);  // set the LCD address to 0x20 for a 16 chars and 2 line display
    //
    #define CHILD_ID_HUM 0
    #define CHILD_ID_TEMP 1
    #define HUMIDITY_SENSOR_DIGITAL_PIN 4
    unsigned long SLEEP_TIME = 5; // Sleep time between reads (in seconds)
    //
    Sensor gw;
    DHT dht;
    Sleep sleep;
    float lastTemp;
    float lastHum;
    float temperature;
    float humidity;
    float temp;
    boolean metric = false;
    int OutdoorHumidity;
    int OutdoorTemp;
    int TodayLow;
    int TodayHigh;
    int counter = 60;
    //
    void setup()  
    { 
      Serial.begin(9600);
      gw.begin();
      dht.setup(HUMIDITY_SENSOR_DIGITAL_PIN); 
      gw.sendSketchInfo("Humidity", "1.0");
      gw.sendSensorPresentation(CHILD_ID_HUM, S_HUM); 
      gw.sendSensorPresentation(CHILD_ID_TEMP, S_TEMP);
      gw.getStatus(CHILD_ID_HUM, V_VAR1);
      gw.getStatus(CHILD_ID_TEMP,V_VAR1);//current exterior temperature
      gw.getStatus(CHILD_ID_TEMP,V_VAR2);//today's high temperature
      gw.getStatus(CHILD_ID_TEMP,V_VAR3);//today's low temperature
      //
      lcd.init(); // initialize the lcd 
      // Print a message to the LCD.
      lcd.backlight();
      lcd.setCursor(0,0);
      lcd.print("    Welcome!");
      lcd.setCursor(0,1);
      lcd.print("      Home");
      delay(2000);
      lcd.clear();
      lcd.setCursor(0,0);
      lcd.print("    Wireless");
      lcd.setCursor(0,1);
      lcd.print("  WeatherWatch");
      delay(2000);
    }
    //
    void loop()      
    {  
      delay(dht.getMinimumSamplingPeriod());
      if (counter == 60){
        gw.getStatus(CHILD_ID_HUM, V_VAR1);
        HumStatus(gw.getMessage());
        gw.getStatus(CHILD_ID_TEMP, V_VAR1);
        TempStatus(gw.getMessage());
        gw.getStatus(CHILD_ID_TEMP, V_VAR2);
        LowStatus(gw.getMessage());
        gw.getStatus(CHILD_ID_TEMP, V_VAR3);
        HighStatus(gw.getMessage());
        counter = 0;
      }
      temperature = dht.getTemperature();
      temp = dht.toFahrenheit(temperature);
      if (isnan(temperature)) {
          Serial.println("Failed reading temperature from DHT");
      } else if (temperature != lastTemp) {
        lastTemp = temperature;
         if (!metric) {
          temperature = dht.toFahrenheit(temperature);
        }
        gw.sendVariable(CHILD_ID_TEMP, V_TEMP, temperature, 1);
          Serial.print("T: ");
          Serial.println(temperature);
      }
      humidity = dht.getHumidity();
      if (isnan(humidity)) {
          Serial.println("Failed reading humidity from DHT");
      } else if (humidity != lastHum) {
           lastHum = humidity;
          gw.sendVariable(CHILD_ID_HUM, V_HUM, humidity, 1);
          Serial.print("H: ");
          Serial.println(humidity);
      }
      // Power down the radio.  Note that the radio will get powered back up
      // on the next write() call.
      delay(1000); //delay to allow serial to fully print before sleep
      gw.powerDown();
      sleep.pwrDownMode(); //set sleep mode
      sleep.sleepDelay(SLEEP_TIME * 1000); //sleep for: sleepTime
      updateOutsideTemp();
      updateOutsideHumid();
      delay(3000);
      updateLow();
      updateHigh();
      delay(3000);
      updateTemp();
      updateHumid();
      counter = (counter + 1);
    }
    void updateTemp(){
      lcd.setCursor(0,0);
      lcd.print("Temperature: ");
      lcd.print(round(temp));
      lcd.print("F ");
    }
    void updateLow(){
      lcd.setCursor(0,0);
      lcd.print("Today's Low: ");
      lcd.print(round(TodayLow));
      lcd.print("F ");
    }
    void updateHigh(){
      lcd.setCursor(0,1);
      lcd.print("       High: ");
      lcd.print(round(TodayHigh));
      lcd.print("F ");
    }
    void updateHumid(){
      lcd.setCursor(0,1);
      lcd.print("Humidity:    ");
      lcd.print(round(humidity));
      lcd.print("% ");
    }
    void updateOutsideTemp(){
      lcd.setCursor(0,0);
      lcd.print("Outside Temp:");
      lcd.print(OutdoorTemp);
      lcd.print("F ");
    }
    void updateOutsideHumid(){
      //getStatus(CHILD_ID_HUM, V_VAR1);
      lcd.setCursor(0,1);
      lcd.print("Humidity:    ");
      lcd.print(OutdoorHumidity);
      lcd.print("% ");
    }
    void HumStatus(message_s message){
      if (message.header.type==V_VAR1) {
         OutdoorHumidity = atoi(message.data);
       }
    }
    void TempStatus(message_s message){
      if (message.header.type==V_VAR1) {
         OutdoorTemp = atoi(message.data);
       }
    }
    void LowStatus(message_s message){
      if (message.header.type==V_VAR2) {
         TodayLow = atoi(message.data);
       }
    }
    void HighStatus(message_s message){
      if (message.header.type==V_VAR3) {
         TodayHigh = atoi(message.data);
       }
    }
    

    Have fun with it and let me know if you have any ideas to improve or take it further!

    photo.JPG
    photo2.JPG
    photo3.JPG

    Hardware

  • [closed] How to differentiate Arduino Pro Mini 3v3 and 5v?
    BulldogLowellB BulldogLowell

    Or very easily...

    apply between 5 and 12VDC to Vin and ground (attach to USB)

    Read voltage at Vcc and ground...

    the 3.3V pro mini will read 3.3V, and if it is a 5V, well you will read 5.

    General Discussion

  • Mailbox Sensor
    BulldogLowellB BulldogLowell

    I mentioned this on the Vera site, thought I'd post some Photos.

    I get a pouch notification when the mailman makes his delivery.

    I finally have it working with the off the shelf Digital light sensor sketch and PLEG to notice the light change.

    photo 1-1.JPG photo 2-1.JPG photo 3-1.JPG photo 4-1.JPG photo 5.PNG

    My Project

  • The new ESP8266 WIFI models
    BulldogLowellB BulldogLowell

    @ServiceXp

    Just received a few, and will start messing with them while on holidays... I've seen progress on a few threads out there.

    Hardware

  • Hi everyone
    BulldogLowellB BulldogLowell

    @candylion

    Hi! most of us here have an interest in home automation, computers, sensors, hobby electronics and such.

    that's why we are hanging out at the MySensors forum, not flying to Ibiza to hang with David Gates while listening to Green Day. :)

    General Discussion

  • PhoneyTV for Vera is Here!
    BulldogLowellB BulldogLowell

    So here is a fun project for you to build... introducing PhoneyTV for Vera.

    PhoneyTV is a Home Automation connected security device that mimics the ambient light produced by a television. This makes your house appear to be occupied and will hopefully deter would-be robbers from trying to enter your house.

    Some highlights:

    • Utilizes the MySensors basic sketch for relays, therefore controllable by Vera.
      Energy efficient versus actually leaving a TV on. My 12x 1/2watt LEDs are burning average of about 5 watts with the PWM... a nightlight basically.
      It I can be BRIGHT with 12 10mm LED's produces the light of a 50in LCD TV, in my observation.
      Utilizes 6 channels featuring 3 PWM pins in order to vary the intensity of blues and whites.
      Uses no Delays, rather it uses a timer to produce its random flickering while maintaining terrific radio connection.
      Is customizable to allow you to adjust your PhoneyTV to behave to your specific preferences.
      Is EASY to make... It can be 100% powered by your Arduino and with exception of the actual LED's (I used 12pcs of 1/2watt super-bright 10mm LED's) only requires a board and a few resistors (be careful with this red LEDs).
      It can be powered with an old cell phone charger or any 7-12V power supply.
      You can create a custom, fun housing to camouflage or highlight your PhoneyTV. I repurposed a box that has been sitting on a shelf empty for a while. It is nice because when it is not in use, it can be invisible.
      You can breadboard it on your UNO in under 45 minutes and depending on your box, build in in one evening.
      It can be improved... While this produces a pretty realistic effect, nothing is preventing you from adding more to it like dimming or even multiplexing.
      It is inexpensive versus buying something like FakeTV, where after $30, you will still have to add Home Automation ready outlet if you want to control it. I used a Nano, but you could try a ProMini and save a few bucks.
      Is expandable. Why not add a Thermometer, Hygrometer or Barometer? For a few more dollars you can monitor the room you keep your Phoney TV in.

    I have attached some photos of the approach I took to build the physical box, of course there are many possibilities for you to consider and build.

    I'll post the sketch in an update...

    I want to give credit to DeltaNu1142 for the inspiration and the idea, thanks!

    photo 3-5.JPG photo 4-5.JPG photo 2-3.JPG photo 3-4.JPG photo 4-4.JPG photo 5-1.JPG photo 3-3.JPG photo 4-3.JPG photo 1-2.JPG photo 2-2.JPG photo 3-2.JPG photo 4-2.JPG

    My Project

  • Power usage with a Pro Mini as sensor node(Humidity & Temperature!)
    BulldogLowellB BulldogLowell

    @EasyIoT if you poll every hour, it will outlive Noah. (OK, maybe Shem)

    Hardware

  • Another famous and talented Ekblad!!!
    BulldogLowellB BulldogLowell

    Screen Shot 2015-06-24 at 10.06.25 PM.png

    General Discussion

  • Weather Station with Scene Activator!!!
    BulldogLowellB BulldogLowell

    you will have a lot of fun building this one.

    ADDED: Check out the youtube video.

    This Weather Station will display your indoor and outdoor environmental conditions but features some hot capabilities...

    Send a Short Message to the LCD from Vera by adding another variable and populating it with whatever you like on Vera.

    Using it in the bedroom and you want to turn the backlight off to get a good night sleep? It has that. Just use scenes or PLEG to toggle a variable on the hygrometer device to turn it on or off at specified times.

    Want to trigger a scene or initiate some other action from PLEG? It has that. Just use PLEG or Luup to monitor a variable on the hygrometer device to do cool things like:

    Put your house into Night mode
    Turn off all your lights
    Open your window coverings
    Turn on your Stereo, TV, or even a tea kettle
    Close your Garage door...
    in fact... this little button can be set up to do whatever you can setup in Vera!!!

    I have attached the sketch, so you are just a few tiny components away from having this all on your nightstand or on your desk.

    1: You will need to hardware debounce your switch but can be done with two extra components available for just a few shekels at your local electronics supplier. diagram attached.
    2: Arduino Nano, Uno or Pro Mini.
    3: Hygrometer/thermometer sensor
    4: LCD display I got mine on ebay
    5: A few wires
    6: A Button
    7: Moisture/Temperature sensor like this

    If you plan on building a simple hygrometer/thermometer... build this one instead, and make it really cool and powerful.

    Have Fun!

    *6-May EDIT
    I was having a couple small issues still with the debounce so added it in the sketch. I took the humidity and temp and put into a function and added the call the to setup. I didn't notice that it was delayed quite a bit getting T&H.
    *
    Debounce.pngWeatherDisplayPBSceneController.ino

    My Project

  • Aluminium Case for MySensors
    BulldogLowellB BulldogLowell

    @allanvbcrew

    aluminum is paramagnetic, meaning it will become magnetic when exposed to magnetic fields. So, it can affect the transmission of radio waves.

    However, it is only slightly paramagnetic, but if it is doped with certain other metals (it is common to alloy aluminum to make it easier to extrude, die-cast or otherwise form) it may affect the degree of its paramagnetic properties.

    If you use aluminum, and it is very very thin, you may be able to transmit radio waves through just fine. It is probably better though to design in an elegant transition to plastic, wood or some other nonmagnetic material so your radio waves may penetrate.

    shorterer answer... try it and let us know :)

    Hardware wireless case sensor

  • Total noob's question about building a PWM light controller
    BulldogLowellB BulldogLowell

    @JoeStrout said:

    What's really bugging me, I guess, is that it seems a bit rube-goldbergish to fill my house with (1) WiFi signals at 2.4 GHz, (2) Z-Wave signals at 900 MHz, and (3) MySensors signals at 2.4 GHz again

    those waves are there already!!!

    ;)

    @JoeStrout said:

    instead throw on a WiFi module and speak to it directly

    you can certainly just create a WiFi or ethernet device with Arduino that can talk to your Vera controller.

    I did a kind of scene controller that works over ethernet... dimming LEDs and all. If you want, I'll share the code...

    When you get there, you can get some help here too. A lot of forum members have created Lua code to be able to do what you want (i.e. dimmer).

    General Discussion arduino z-wave noob
  • Login

  • Don't have an account? Register

  • Login or register to search.
  • First post
    Last post
0
  • MySensors
  • OpenHardware.io
  • Categories
  • Recent
  • Tags
  • Popular