Navigation

    • Register
    • Login
    • OpenHardware.io
    • Categories
    • Recent
    • Tags
    • Popular
    1. Home
    2. BulldogLowell
    3. Posts
    • Profile
    • Following
    • Followers
    • Topics
    • Posts
    • Best
    • Groups

    Posts made by BulldogLowell

    • RE: Battery percentage on door contact sensor erratic (sent on interrupt)

      As the analog pins share a single A2D, rapid use of it can cause the previous read to impact the next. A common workaround in this situation is to read twice on each input, ignoring the first.

      try that:

      // read analog pin
        (void) analogRead(BATTERY_SENSE_PIN);
        int sensorValue = analogRead(BATTERY_SENSE_PIN);
        // calculate battery voltage
        float vBat  = static_cast<float>(sensorValue * (V_MAX/1023));
      
      posted in Development
      BulldogLowell
      BulldogLowell
    • RE: What did you build today (Pictures) ?

      @dbemowsk said in What did you build today (Pictures) ?:

      Seeing the falling stars at the end of the Adafruit test code made me think of rain or snow falling. Something like that might go outside the limits of the pro minis memory, but hey, never hurts to try.

      Hey Nice Work!

      I see you are using I2C, vs SPI... that may be why your display is so much slower than the demo in the Adafruit video.

      Can't wait to see the final board!

      posted in General Discussion
      BulldogLowell
      BulldogLowell
    • RE: Using object from another file

      @mfalkvidd said in Using object from another file:

      @BulldogLowell I was hoping to avoid including ArduinoLog in all .h files, but there seems to be no way around that.

      what's the problem with adding the #include directive? It is a dependency by definition....

      posted in Development
      BulldogLowell
      BulldogLowell
    • RE: Using object from another file

      Where is Log declared?

      it is a global and defined in the CPP file for the Logging class:

      Logging Log = Logging();
      

      so, if it is Global... why the heck can't it be accessed in the Configuration class? Well each set of files is a different translation unit...

      Have you tried adding

      #include <ArduinoLog.h>
      

      in your

      "Configuration.h"
      

      class?

      posted in Development
      BulldogLowell
      BulldogLowell
    • RE: No luck with ethernet Gateway

      @gohan said in No luck with ethernet Gateway:

      Try latest mysensors development library, then if problem persists try a different UNO or downgrade boards definitions to 1.6.11 or 1.6.13 and see if it still has problems. Did you try to remove code for each of the sensors at a time in order to figure out if it's a specific sensor?

      take heed to this advice... did you modify the boards definition in your Arduino IDE?

      posted in Troubleshooting
      BulldogLowell
      BulldogLowell
    • RE: Why text-based communication???

      @4Project said in Why text-based communication???:

      Does that mean all the communication is always destined/sourced to/from the controller?

      I think that is explained in the network topology.

      If you want to send a message node-to-node, you could try to manage it through your gateway or a repeater.

      posted in Development
      BulldogLowell
      BulldogLowell
    • 3G Serial Bridge for Vera

      I wanted to share a project that I did for my Vera using the Particle Electron and a Nano... I think that the MySensors skill set transfers to Particle, so I'm hopeful some of you brave souls may try to pull this off!

      It is all documented here on my Git Repo. Ideas, suggestions and contributions welcome!

      0_1505768172165_VeraMainPanel.png

      0_1505768093992_VeraControlPanel.png

      0_1505768135162_ThreeGeeRocks.png

      I have a vacation home that I use Vera to control events. I, like a lot of other folks, have been a victim of:

      1. Power is out and I don't know.... I only find out when I try to log on 😠
      2. Vera is stalled, likewise, I only find out when I try to log on
      3. I've lost my connection the the internet. Again, how do I know that this happened? 😕

      I've recently developed a device (hardware & . Software) that allows me to detect all of these very difficult-to-detect events, for example:

      My Device lost Internet connectivity
      In this case, the device will detect the loss of internet and send a message via 3G network, circumventing the "How do I send a message if my Internet is down" paradox.

      My device (or home) has lost power
      In this case, the device will repeatedly remind me at a fixed interval until power is restored. The device has a LiPo battery which can send messages for days, even if there is no power.

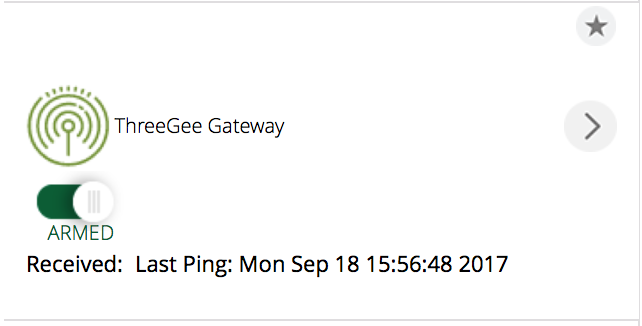
      My Vera 3G gateway is not communicating with Vera
      If this happens you can create a notification which Vera can send

      My Vera is inactive, stalled or otherwise not properly functioning.
      When this happens, the 3G gateway can automatically power-cycle my Vera after some user-defined period of inactivity. (coming soon)

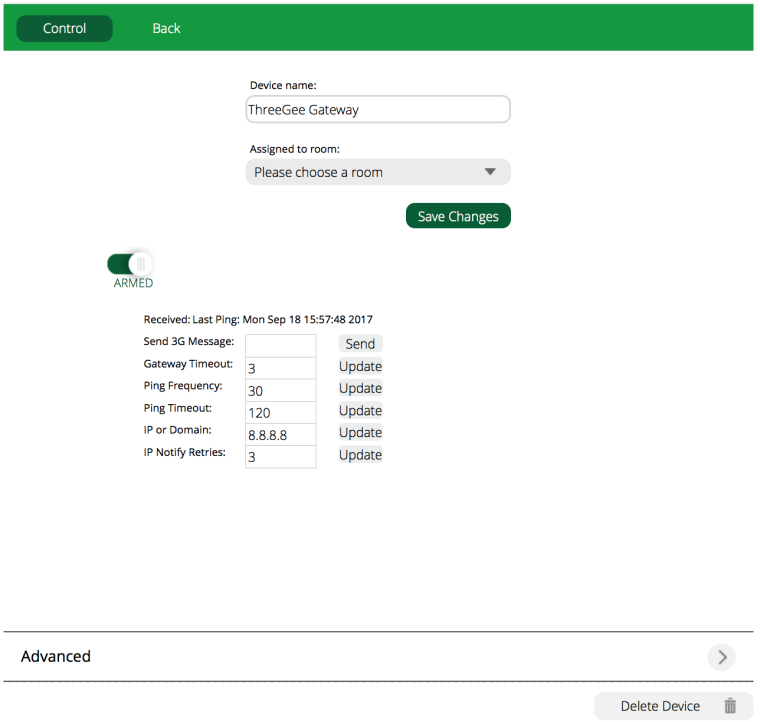
      The device can send SMS messages (during events as above or ad hoc by creating your own events using scenes or PLEG) or similarly use a service like Pushover to send a notification to any mobile (or desktop). I'm using Pushover direct to my Mobile device.

      I've developed a plugin that enables a new device to be set up in minutes.

      With such a configuration, I am using a 3G SIM/plan that costs $3.00 per month... about the cost of a cup of coffee. But you can use any SIM/plan you like.

      While I built mine on my own, because of the low operating cost, I realized that others may have an interest in building such a device. I was considering developing a PCB and providing a list of all the components necessary to build a device. I may even design a 3D printable case if there is enough interest.

      So, I'm looking to see if there is any interest and based on that, provide (sell) a kit that anyone can use. So, if you have an interest please let me know by responding to this post. If you are great at PCB dev, then even better, I can use your help!

      It is cool... and just what many of forum participants have been asking for.

      posted in My Project
      BulldogLowell
      BulldogLowell
    • RE: SoCal help completing a MySensor system

      @ensbusiness said in SoCal help completing a MySensor system:

      Then I try adding a wireless sensor using the libraries from MySensor for the Atmega328P Pro-mini's and nRF2401's I already decided to use even before I found MySensors. The problem is that I can't seem to get the Pro-mini/nRF2401 combinations to send any usable data at all, either between two test units, let alone back to a Pi

      I think you are missing the point... you won't be sending messages peer-to-peer with my sensors. Rather, each sensor communicates through the gateway.

      @ensbusiness said in SoCal help completing a MySensor system:

      Adding a sensor to the Pi is what I already have up and running. I don't need or use a Controller for that.

      Again, focus on the radio bits first and forget about your Pi connected sensor for now.

      Read the docs... and wire up the gateway and a sensor exactly like the docs explain for the Pi gateway. Then, post some photos of your rig and the exact code you are using.

      posted in General Discussion
      BulldogLowell
      BulldogLowell
    • RE: SoCal help completing a MySensor system

      @ensbusiness

      I'm not sure you understand.

      Build the Raspberry Pi gateway, and then a single sensor. Get that working, the very clear instructions are in the MySensors docs...

      The rest (adding additional wireless nodes or connecting a sensor to your Pi) is trivial.

      posted in General Discussion
      BulldogLowell
      BulldogLowell
    • RE: SoCal help completing a MySensor system

      @ensbusiness

      Have you started with the Raspberry Pi Gateway?

      that should be relatively easy... get your gateway working with one sensor first, and forget about the attached sensors for the time being.

      posted in General Discussion
      BulldogLowell
      BulldogLowell
    • RE: SoCal help completing a MySensor system

      @ensbusiness

      What kind of help do you need? Are you looking for someone to help you program sensors, or are you looking for someone to program a gateway? Perhaps you can provide a little more detail.

      posted in General Discussion
      BulldogLowell
      BulldogLowell
    • RE: VH400 Moisture sensor question

      @Rhoditis said in VH400 Moisture sensor question:

      The reading of the sensor is perfectly stable but while monitoring it, it seems that the reading on the voltmeter sticks to a value until a significant change in value is reached.

      Probably some hysteresis programming in the volt meter...

      did you try to monitor the voltage with your arduino sensor yet?

      posted in Hardware
      BulldogLowell
      BulldogLowell
    • RE: 💬 Relay

      @amemo06

      I only wanted to raise the fact void receive(const MyMessage &message) may lead to trouble as 'message' content may change during processing of that function.

      As I already explained... message cannot change during the function, because of constness.

      The message handler is being called again from within itself (i.e. from wait()). You would then processing any new messages on that call. It looks as if the function may not be designed to perform recursively as you are trying to do in your code, so that would explain your unexpected/undefined results.

      So yes, block during the relay's holding state or use another non-blocking method (i.e. flag or timer/callback) as you mentioned. Fully process each message before allowing the library to handle subsequent message calls.

      😉

      posted in Announcements
      BulldogLowell
      BulldogLowell
    • RE: 💬 Relay

      @amemo06

      You should treat the message like an ISR... get in and out so that you don't have another message colliding while you are in the function.

      Get rid of that wait(). I couldn't find the source for that function but you could try to just use delay() to block while you hold the relay.

      otherwise just set a flag to handle the relay event in loop() or use a Timer/callback like the MsTimer2 Library

      example:

      #include <MsTimer2.h>
      
      const byte onButton = 5;
      
      void setup()
      {
        Serial.begin(9600);
        pinMode(13, OUTPUT);
        pinMode(onButton, INPUT_PULLUP);
      }
      
      void loop()
      {
        if(onButtonPressed())
        {
         flashLedThirteen(5000);
        }
      }
      
      bool onButtonPressed(void)
      {
        static unsigned long lastMillis = 0;
        static byte lastPress = HIGH;
        byte currentPress = digitalRead(onButton);
        if(currentPress != lastPress)
        {
          if(millis() - lastMillis < 200) return false;
          lastPress = currentPress;
          if(currentPress == LOW)
          {
            Serial.println(" button press detected!");
            lastMillis = millis();
            return true;
          }
        }
        return false;
      }
      
      void flashLedThirteen(int ledTime)
      {
        digitalWrite(13, HIGH);
        Serial.println("LED ON");
        // sets a new timer callback function
        MsTimer2::set(ledTime, [] {  // the square brackets define the start of the anonymous callback function which is executed after 5000 milliseconds in this example
          digitalWrite(13, LOW);
          Serial.println("Timer expired...");
          Serial.println("LED OFF");
          MsTimer2::stop();
        }); // the curly brace defines the end of the anonymous callback function
        MsTimer2::start();
      }
      
      posted in Announcements
      BulldogLowell
      BulldogLowell
    • RE: 💬 Relay

      @amemo06

      void receive(const MyMessage &message)
      

      Because of the const keyword this is a const reference or said another way, a reference to a constant. The const keyword guarantees that the function may not change the object.

      So, I wonder what your real issue is....

      posted in Announcements
      BulldogLowell
      BulldogLowell
    • RE: Relay with button wihtout ackn from controller

      @Markus.

      I think that is how your original sketch works!

      Unless the gateway isn't functioning.

      You can always leave the function in both places.

      posted in Troubleshooting
      BulldogLowell
      BulldogLowell
    • RE: Relay with button wihtout ackn from controller

      @Markus. said in Relay with button wihtout ackn from controller:

      How can i get this working without to wait for the Controllers ack ?

      right now, the device

      1. waits for a button press
      2. sends a message to your controller with the new state
      3. waits for the message type (V_LIGHT) to acknowledge the state change and updates the relay

      if you want to change the state of the relay on the button press (isn't clear to me that you want to do that) you need to move:

      digitalWrite(RELAY_PIN, state?RELAY_ON:RELAY_OFF);
      

      inside the button press state change event:

      if (value != oldValue && value==0) 
      {
        send(msg.set(state?false:true), true); // Send new state and request ack back
        digitalWrite(RELAY_PIN, state ? RELAY_ON : RELAY_OFF);
      }
      

      this would allow you to update the relay regardless of the connection to the gateway.

      posted in Troubleshooting
      BulldogLowell
      BulldogLowell
    • RE: Adding 4th dimmer. Struggle.

      I can't test this but something like:

      #define SN "Four Fader Test"
      #define SV "0.1a"
      
      #define NUMBER_OF_DIMMERS 4
      
      //System settings
      #define MY_RADIO_NRF24
      #define MY_RF24_CE_PIN 8 //ADDED
      #define MY_NODE_ID 71
      
      #include <MySensors.h>
      #include <SPI.h>
      #include "Fade.h"
      
      MyMessage dimmer[NUMBER_OF_DIMMERS];
      MyMessage light[NUMBER_OF_DIMMERS];
      
      Fade fader[NUMBER_OF_DIMMERS];
      byte leds[NUMBER_OF_DIMMERS] = {3, 5, 6, 9};
      
      void before()
      {
        int i = 0;
        for (auto fdr : fader)
        {
          fdr = Fade(leds[i++], 10, 0, 255, MILLIS_TIMER); // led speed 5 milliseconds/step; pwm at 0 min and 255 max  (MILLIS_TIMER)
          fdr.begin();
        }
        i = 0;
        for (auto msg : dimmer)
          msg = MyMessage(i++, S_DIMMER);
        i = 0;
        for (auto msg : light)
          msg = MyMessage(i++, S_BINARY);
      }
      void presentation()
      {
        sendSketchInfo(SN, SV);
        int i = 0;
        for (auto d : dimmer)
          present(i++, S_DIMMER);
      }
      
      void setup()
      {
        Serial.begin(9600);
        Serial.println(F("Setup Complete..."));
      }
      
      void loop()
      {
        uint32_t currentMillis = millis();
        for (auto fdr : fader)
          fdr.update(currentMillis);
      }
      
      void receive(const MyMessage &message)
      {
        if (message.type == V_STATUS || message.type == V_PERCENTAGE)
        {
          int requestedLevel = atoi(message.data);
          if (message.type == V_STATUS)
            requestedLevel = requestedLevel ? 100 : 0;
          else
            requestedLevel = constrain(requestedLevel, 0, 100);
          fader[message.sensor].setTarget(map(requestedLevel, 0, 100, 0, 255));
          send(light[message.sensor].set(requestedLevel > 0 ? 1 : 0));
          send(dimmer[message.sensor].set(requestedLevel));
        }
      }
      

      I used my non-blocking Fade.h:

      #ifndef Fade_h
      #define Fade_h
      
      #include <Arduino.h>
      
      enum timer{
        MILLIS_TIMER, 
        MICROS_TIMER
      };
      
      class Fade
      {
        public:
          Fade() {};
          Fade(int pin, uint32_t timeStep = 15, uint8_t minVal = 0, uint8_t maxVal = 255, timer timerSelect = MILLIS_TIMER);
          void begin(); 
          void setTarget(int to);
          void update();
          void update(uint32_t time);
          uint8_t getMin();
          uint8_t getMax();
          uint8_t getCurrent();
          uint32_t readSpeed();
          uint32_t writeSpeed(uint32_t time);
          uint8_t getSetpoint();
        private:
          uint8_t _min;
          uint8_t _max;
          uint8_t _targetFade;
          uint8_t _pwmRate;
          uint32_t _time;
          uint32_t _last;
          uint8_t _pin;
          bool _microsTimer;
      };
      
      #endif
      

      and my Fade.cpp:

      
      #include "Fade.h"
      #include <Arduino.h>
      
      Fade::Fade(int pin, uint32_t timeStep, uint8_t minVal, uint8_t maxVal, timer timerSelect)
      {
        _pin = pin;
        _time = timeStep;
        _min = minVal;
        _max = maxVal;
        analogWrite(_pin, _min);
        _pwmRate = _min;
        _microsTimer = timerSelect;
      }
      
      void Fade::begin()
      {
        analogWrite(_pin, _min);
      }
      
      void Fade::setTarget(int to)
      {
        _targetFade = (uint8_t) constrain(to, _min, _max);
      
        this->update();
      }
      
      void Fade::update()
      {
        this->update(_microsTimer? micros() : millis());
      }
      
      void Fade::update(uint32_t time)
      {
        if (time - _time > _last)
        {
          _last = time;
          if (_pwmRate > _targetFade) analogWrite(_pin, --_pwmRate);
          if (_pwmRate < _targetFade) analogWrite(_pin, ++_pwmRate);
        }
      }
      
      uint8_t Fade::getSetpoint()
      {
        return _targetFade;
      }
      
      uint8_t Fade::getCurrent()
      {
        return _pwmRate;
      }
      
      uint32_t Fade::readSpeed()
      {
        return _time;
      }
      
      uint32_t Fade::writeSpeed(uint32_t time)
      {
        _time = time;
      }
      
      uint8_t Fade::getMin()
      {
        return _min;
      }
      
      uint8_t Fade::getMax()
      {
        return _max;
      }
      
      
      posted in Troubleshooting
      BulldogLowell
      BulldogLowell
    • RE: Adding 4th dimmer. Struggle.

      @rejoe2 said in Adding 4th dimmer. Struggle.:

      I completely agree with @BulldogLowell : Better use arrays for nodes like yours. Good example: https://forum.mysensors.org/topic/4847/multi-button-relay-sketch/33#

      and I don't like the blocking nature of the fading. that should be refactored.

      plus, the fyi the Bounce2 library has another constructor which sets pinMode...
      instead of this:

        pinMode(BUTTON_PIN1,INPUT);
        digitalWrite(BUTTON_PIN1, HIGH);
      
      //...
      debouncer_1.attach(BUTTON_PIN1);
        debouncer_1.interval(5);
      

      just this:

      debouncer_1.attach(BUTTON_PIN1, INPUT_PULLUP);
      debouncer_1.interval(5);
      

      i'll post an alternative if I get the chance...

      posted in Troubleshooting
      BulldogLowell
      BulldogLowell
    • RE: Adding 4th dimmer. Struggle.

      @moskovskiy82

      Sorry, I meant that your code could be extremely simplified by using arrays.

      Yours is a good example of how it is much harder to refactor in the case (like yours) where you simply need to add one more of some object.

      things like this can be problematic:

      #define DIMMER_NODE_1 0
      #define DIMMER_NODE_2 1
      #define DIMMER_NODE_3 2
      #define DIMMER_NODE_4 3 //ADDED
      

      where 1 = 0, 2 = 1, etc.... it is not very intuitive

      I cannot find the problem in your code... are you sure you are wired up correctly?

      posted in Troubleshooting
      BulldogLowell
      BulldogLowell
    • RE: Adding 4th dimmer. Struggle.

      Its probably a good time to start learning about arrays.

      posted in Troubleshooting
      BulldogLowell
      BulldogLowell
    • DailyTimer library for Arduino

      I recently updated my DailyTimer library for Arduino which provides tools to set daily timers for control of devices such as lamps, appliances, etc. I hope someone else will find this useful. There is also a Particle version.

      I developed this primarily for automatically (device level) firing time-based events on certain days of the week (configurable).

      Any contribution is welcome.

      Something about the library:

      A library that will allow you to control daily events.

      Provides tools to set daily timers for control of devices such as lamps, appliances, etc. Developed primarilary for houshold presence simulation.

      Allows for setting ON and OFF times, days of the week (i.e. weekends, weekdays, Fridays) and the use of random on/off times.

      Timers may bridge midnight, simply enter times accordingly.

      Can automatically set correct timer state on powerup or schedule changes.

      Random start and/or end times.

      Randomly set days of week.

      Select custom days of the week.

      Set a timed event with just the start time as a trigger.

      you can return the active days (e.g. in the case of setting random days).

      Dynamically set your start or end time (i.e. using some type of celestial function or web or server call to determine Sunrise or Sunset times)

      posted in Development
      BulldogLowell
      BulldogLowell
    • RE: MultiSensor - relays, temp, hum, PIR, gesture with various controller overrides

      @dbemowsk said in MultiSensor - relays, temp, hum, PIR, gesture with various controller overrides:

      ... I think it is best to use compiler variables. They get rid of the needless use of variable storage space, even if the sketch is small. IMHO, program variables should be used for values that may/will change in your sketch

      The problem with using the #define directive for a constant is that they are not strongly typed. That is, suppose you are making a comparison, you may not realize that you are comparing a signed to unsigned number.

      You can see this if you compile this example with verbose on:

      #define LIMIT 6
      const unsigned int limit = 6;
      
      void setup() 
      {
        int myVar = 5;
        if(myVar > LIMIT){};
        if(myVar > limit){};
      }
      
      void loop() {}
      

      in C++, it is generally preferred to use the const keyword over a #define directive; both methods will store the "variable" in FLASH, saving SRAM as you pointed out.

      There is (of course) a lot of discourse on this topic (see Stack Overflow).

      So there are benefits to using #define. A #define at the top of a program does usually get seen by the programmer (or you, later on, after a hiatus) where they/you may not notice a regular definition on a quick glance #define sort of sticks out in the crowd.

      Perhaps that is why you see so much of the #define directive in Arduino programming.

      posted in Development
      BulldogLowell
      BulldogLowell
    • RE: MultiSensor - relays, temp, hum, PIR, gesture with various controller overrides

      @Ben-Andrewes said in MultiSensor - relays, temp, hum, PIR, gesture with various controller overrides:

      #ifdef SerialPrints
        Serial.println("First boot checks completed");
      

      whoopsie... you missed a few.

      as a side note,

      if you have two identical string constants... the compiler is smart enough to evaluate them as such and store only one and access it accordingly.

      also, the following expression means wherever preprocessor sees an argument wrapped in DEBUG_PRINT(), it should replace it with that argument wrapped in Serial.print():

      #define DEBUG_PRINT(x)   Serial.print(x)
      

      this expression, on the other hand, means wherever preprocessor sees an argument wrapped in DEBUG_PRINT(), it should replace it with nothing:

      #define DEBUG_PRINT(x)
      

      @dbemowsk said in MultiSensor - relays, temp, hum, PIR, gesture with various controller overrides:

      @Ben-Andrewes said in MultiSensor - temp, hum, PIR, gesture with various controller overrides:

      Sorry for all the questions but I am trying to get my head around compiling vs programming and then how I can use it to make things more efficient...

      No need to be sorry, we all learn, even me. When I first saw that bit of code, I too thought it was genius.

      My understanding of things is that lines that start with a hashtag are dealt with by the compiler and are not compiled into the program, to a point. Here is an example.

      they are actually preprocessor directives, and that happens before compilation.

      posted in Development
      BulldogLowell
      BulldogLowell
    • RE: MultiSensor - relays, temp, hum, PIR, gesture with various controller overrides

      @Ben-Andrewes said in MultiSensor - temp, hum, PIR, gesture with various controller overrides:

      you do it here:

      Serial.println(F("APDS-9960 initialization complete"));
      

      but not here:

      Serial.println("Relay status requested from Domoticz");
      

      You shouuld wrap every every every string constant in the F Macro

      posted in Development
      BulldogLowell
      BulldogLowell
    • RE: building the Ethernet gateway

      @evertos

      I had the restart problem, and tried the advice here regarding the Arduino IDE's Board Manager.

      posted in Troubleshooting
      BulldogLowell
      BulldogLowell
    • RE: Vera MySensors plugin : Cannot send command - communications error

      @korttoma

      I'm using MySensors 2.0.0, which was the default when I downloaded using the Arduino IDE's library manager. I'll probably linger here a while until i learn all of the MySensors abstractions. It is nice and easy now.

      I'm using Arduino 1.8.2, which is almost C++ 11. I really like the latest version, I'll just keep using the AVR Boards 1.6.11 for my MySensors projects.

      @peterjackson set me straight, and all is working well. I'm up and running with all of the MySensors nodes I've built. It is a drag updating some of my devices; many were not built for easy access to the USB serial connectors. I have only myself to blame for that.

      I'd been working mainly with WiFi devices lately, but they get expensive if all you want is basic functionality, the MySensors backbone is perfect.

      Built any cool projects lately?

      posted in Troubleshooting
      BulldogLowell
      BulldogLowell
    • RE: Video How To - Phoney TV

      I had to update my firmware for MySensors version 2.0.0, I thought I would post it in case anyone comes across this post...

      /*
       * PhoneyTV v3.2.0
       *
       * This Sketch illuminates 6 sets of LED's in a random fashion as to mimic the
       * light eminating from a television.  It is intended to make an empty home,
       * or an empty section of a home, appear to be occupied by someone watching
       * TV.  As an alternative to a real television left on, this uses less than 1%
       * of the electrical energy.
       *
       * With the use of the MySensors plugin and gateway, PhoneyTV is intended to
       * be used with a controller (e.g. Vera or Raspberry PI).
       *
       * Sketch does not use any delays to create the random blinking as a way to
       * assure that communication back to the gateway is as unaffected as possible.
       *
       * You can adjust the length of the blink interval and its "twitchyness" by
       * modifying the random number generators, if you prefer more/less 'motion' in
       * in your unit.  The lines are highlighted in the code, play around to create the
       * random effect you like.
       *
       * Sketch takes advantage of available PWM on pins 3, 5 & 6 using the white/blue LEDs
       * to allow fluctuations in the intensity of the light, enhancing the PhoneyTV's
       * realistic light effects.
       *
       * Created 12-APR-2014
       * Free for distrubution
       * Credit should be given to MySensors.org for their base code for relay control
       * and for the radio configuration.  Thanks Guys.
       *
       * 29-May-2014
       * Version 2:  Simplified the code, removing all redundant relay setup from original
       * code.  Added an on/off momentary pushputton option to be set up on pin 2.  Inproved
       * the dark dips for longer duration (can be configured) at intervals.
       *
       * 6-Jun-2015
       * Version 3.1
       * Updated for MySensors V1.4.1
       * Contributed by Jim (BulldogLowell@gmail.com) Inspired by Josh >> Deltanu1142@gmail.com
       *
       * Version 3.2.0 updated for MySensors 2.0.0 by Jim (BulldogLowell@gmail.com)
       * How to video: https://youtu.be/p37qnl8Kjfc
       */
      // Enable debug prints to serial monitor
      #define MY_DEBUG 
      
      // Enable and select radio type attached
      #define MY_RADIO_NRF24
      //#define MY_RADIO_RFM69
      
      // Enable repeater functionality for this node
      //#define MY_REPEATER_FEATURE
      
      #include <SPI.h>
      #include <MySensors.h>
      #include <Bounce2.h>
      
      #define RADIO_RESET_DELAY_TIME 20
      
      #define DEBUG_ON
      
      #ifdef DEBUG_ON
      #define DEBUG_PRINT(x)   Serial.print(x)
      #define DEBUG_PRINTLN(x) Serial.println(x)
      #define SERIAL_START(x)  Serial.begin(x)
      #else
      #define DEBUG_PRINT(x)
      #define DEBUG_PRINTLN(x)
      #define SERIAL_START(x)
      #endif
      
      const byte buttonPin = 2;
      const byte ledPin3 =  3;      // White using PWM
      const byte ledPin4 =  4;      // Red
      const byte ledPin5 =  5;      // Blue using PWM
      const byte ledPin6 =  6;      // Blue using PWM
      const byte ledPin7 =  7;      // Green
      const byte ledPin8 =  8;      // White (No PWM)
      
      Bounce debouncer = Bounce();
      byte oldValue = 0;
      boolean state = false;
      boolean oldState = false;
      int dipInterval = 10;
      unsigned int darkTime = 250;
      unsigned long currentDipTime;
      unsigned long dipStartTime;
      unsigned long currentMillis;
      byte ledState = LOW;
      unsigned long previousMillis = 0UL;
      byte led = 5;
      unsigned long interval = 2000UL;
      unsigned int twitch = 50;
      int dipCount = 0;
      int analogLevel = 100;
      boolean timeToDip = false;
      boolean gotAck=false;
      MyMessage msg(1,V_LIGHT);
      
      void before() 
      { 
        state = loadState(1)? 1 : 0;
      }
      
      
      void setup()
      {
        SERIAL_START(115200);
        pinMode(ledPin3, OUTPUT);
        pinMode(ledPin4, OUTPUT);
        pinMode(ledPin5, OUTPUT);
        pinMode(ledPin6, OUTPUT);
        pinMode(ledPin7, OUTPUT);
        pinMode(ledPin8, OUTPUT);
        pinMode(buttonPin, INPUT_PULLUP);
        //
        debouncer.attach(buttonPin);
        debouncer.interval(50);
        //
        DEBUG_PRINTLN(F("Sensor Presentation Complete"));
      }
      
      void presentation()  
      {   
        // Send the sketch version information to the gateway and Controller
        sendSketchInfo("PhoneyTV", "1.5");
        present(1, S_LIGHT);
      }
      
      void loop()
      {
        debouncer.update();
        byte value = debouncer.read();
        if (value != oldValue && value == 0)
        {
        state = !state;
        send(msg.set(state ? 1 : 0));
      //  while(!gotAck)
      //  {
      //    gw.send(msg.set(state), true);
      //    gw.wait(RADIO_RESET_DELAY_TIME);
      //  }
      //  gotAck = false;
        DEBUG_PRINT(F("State Changed to:"));
        DEBUG_PRINTLN(state? F("PhoneyTV ON") : F("PhoneyTV OFF"));
        }
        oldValue = value;
        if (state)
        {
        if (timeToDip == false)
        {
          currentMillis = millis();
          if (currentMillis - previousMillis > interval)
          {
          previousMillis = currentMillis;
          interval = random(750, 4001); //Adjusts the interval for more/less frequent random light changes
          twitch = random(40, 100); // Twitch provides motion effect but can be a bit much if too high
          dipCount++;
          }
          if (currentMillis - previousMillis < twitch)
          {
          led = random(3, 9);
          analogLevel = random(50, 255); // set the range of the 3 pwm leds
          ledState = !ledState;
          switch (led) //for the three PWM pins
          {
            case 3:
            pwmWrite();
            break;
            case 5:
            pwmWrite();
            break;
            case 6:
            pwmWrite();
            break;
            default:
            digitalWrite(led, ledState);
          }
          if (dipCount > dipInterval)
          {
            timeToDip = true;
            dipCount = 0;
            dipStartTime = millis();
            darkTime = random(50, 150);
            dipInterval = random(5, 250); // cycles of flicker
          }
          }
        }
        else
        {
          DEBUG_PRINTLN(F("Dip Time"));
          currentDipTime = millis();
          if (currentDipTime - dipStartTime < darkTime)
          {
          for (int i = 3; i < 9; i++)
          {
            digitalWrite(i, LOW);
          }
          }
          else
          {
          timeToDip = false;
          }
        }
        }
        else
        {
        if (state != oldState)
        {
          for (int i = 3; i < 9; i++)
          {
          digitalWrite(i, LOW);
          }
        }
        }
        oldState = state;
      }
      
      void receive(const MyMessage &message) {
        // We only expect one type of message from controller. But we better check anyway.
        if (message.type==V_LIGHT) {
           // Change relay state
           state = message.getBool()? 1 : 0;
           // Store state in eeprom
           saveState(message.sensor, message.getBool());
           // Write some debug info
           Serial.print("Incoming change for sensor:");
           Serial.print(message.sensor);
           Serial.print(", New status: ");
           Serial.println(message.getBool());
         } 
      }
      
      void pwmWrite()
      {
        if (ledState == HIGH) 
        {
        analogWrite(led, analogLevel);
        }
        else 
        {
        digitalWrite(led, LOW);
        }
      }
      
      posted in My Project
      BulldogLowell
      BulldogLowell
    • RE: Vera MySensors plugin : Cannot send command - communications error

      @korttoma

      Hey Tomas! It has been a while. I didn't notice your post at first glance.

      Thanks for the response. As I mentioned above, compiling under the older version Board Manager worked well (and as I mentioned, I had to rewire the device!).

      I'm now on version 1.5 for the Vera plugin, but Arduino IDE is 2.0.0 which was the default when I added it with the Arduino IDE's library manager. Would you recommend another version?

      Switching all of my sketches over to the new library version went well, and I am up and running. I really like the way the latest version is structured. MySensors has come a long way since its genesis. I also like that it is part of the Arduino IDE's Library toolset; very nice @hek .

      It is great to hear from you!

      Jim

      posted in Troubleshooting
      BulldogLowell
      BulldogLowell
    • RE: Vera MySensors plugin : Cannot send command - communications error

      @peterjackson said in MySensors plugin : Cannot send command - communications error:

      Arduino AVT Boards

      Thank you, I did exactly as you said and it now works, I can toggle inclusion mode on my controller.

      Must I now use the 1.6.11 Board Manager for all my nodes?

      posted in Troubleshooting
      BulldogLowell
      BulldogLowell
    • RE: Vera MySensors plugin : Cannot send command - communications error

      So, keeping with the communication with myself...

      I was able to properly connect the gateway switching some pins around, I guess that happened sometime in the last couple of major upgrades. The ethernet gateway (I was using for mire than two years( I'd assumed was wired properly.

      Gateway is now on v1.5, my Vera UI7 can see it with no communication issues.

      However, I now have the problem of Can't Press start for inclusion on Gateway which folks advised to downgrade the Arduino IDE and compile the Gateway using Arduino IDE 1.6.11.

      I tried that but it will not compile.

      Can someone (anyone) tell me how to compile the Ethernet Gateway for Version 1.5 such that it will not suffer from the IDE bug and reset when I press the include button in my connected Vera?

      The instructions just tell you to download the latest version of the IDE...

      😞

      posted in Troubleshooting
      BulldogLowell
      BulldogLowell
    • RE: Vera MySensors plugin : Cannot send command - communications error

      I've tried removing and reloading the plugin, but no worky...

      Anyone have suggestions? I'm using the Arduino W5100 Arduino Shield...

      posted in Troubleshooting
      BulldogLowell
      BulldogLowell
    • Vera MySensors plugin : Cannot send command - communications error

      After a couple year hiatus I'm trying to update my MySensors network to the latest version. My Vera controller crapped out, otherwise I'd still be very happy with my older version... now I have to re-learn (fun).

      Starting with the Ethernet Gateway, after using this code:

      // Enable debug prints to serial monitor
      #define MY_DEBUG
      
      // Enable and select radio type attached
      #define MY_RADIO_NRF24
      //#define MY_RADIO_RFM69
      
      // Enable gateway ethernet module type
      #define MY_GATEWAY_W5100
      
      // W5100 Ethernet module SPI enable (optional if using a shield/module that manages SPI_EN signal)
      //#define MY_W5100_SPI_EN 4
      
      // Enable Soft SPI for NRF radio (note different radio wiring is required)
      // The W5100 ethernet module seems to have a hard time co-operate with
      // radio on the same spi bus.
      #if !defined(MY_W5100_SPI_EN) && !defined(ARDUINO_ARCH_SAMD)
      #define MY_SOFTSPI
      #define MY_SOFT_SPI_SCK_PIN 14
      #define MY_SOFT_SPI_MISO_PIN 16
      #define MY_SOFT_SPI_MOSI_PIN 15
      #endif
      
      // When W5100 is connected we have to move CE/CSN pins for NRF radio
      #ifndef MY_RF24_CE_PIN
      #define MY_RF24_CE_PIN 5
      #endif
      #ifndef MY_RF24_CS_PIN
      #define MY_RF24_CS_PIN 6
      #endif
      
      // Enable UDP communication
      //#define MY_USE_UDP  // If using UDP you need to set MY_CONTROLLER_IP_ADDRESS below
      
      // Enable MY_IP_ADDRESS here if you want a static ip address (no DHCP)
      //#define MY_IP_ADDRESS 10,0,1,5
      
      // If using static ip you can define Gateway and Subnet address as well
      //#define MY_IP_GATEWAY_ADDRESS 192,168,178,1
      //#define MY_IP_SUBNET_ADDRESS 255,255,255,0
      
      // Renewal period if using DHCP
      //#define MY_IP_RENEWAL_INTERVAL 60000
      
      // The port to keep open on node server mode / or port to contact in client mode
      #define MY_PORT 5003
      
      // Controller ip address. Enables client mode (default is "server" mode).
      // Also enable this if MY_USE_UDP is used and you want sensor data sent somewhere.
      //#define MY_CONTROLLER_IP_ADDRESS 192, 168, 178, 254
      
      // The MAC address can be anything you want but should be unique on your network.
      // Newer boards have a MAC address printed on the underside of the PCB, which you can (optionally) use.
      // Note that most of the Ardunio examples use  "DEAD BEEF FEED" for the MAC address.
      #define MY_MAC_ADDRESS 0xDE, 0xAD, 0xBE, 0xEF, 0xFE, 0xED
      
      // Enable inclusion mode
      //#define MY_INCLUSION_MODE_FEATURE
      // Enable Inclusion mode button on gateway
      //#define MY_INCLUSION_BUTTON_FEATURE
      // Set inclusion mode duration (in seconds)
      //#define MY_INCLUSION_MODE_DURATION 60
      // Digital pin used for inclusion mode button
      //#define MY_INCLUSION_MODE_BUTTON_PIN  3
      
      // Set blinking period
      #define MY_DEFAULT_LED_BLINK_PERIOD 300
      
      // Flash leds on rx/tx/err
      // Uncomment to override default HW configurations
      //#define MY_DEFAULT_ERR_LED_PIN 7  // Error led pin
      //#define MY_DEFAULT_RX_LED_PIN  8  // Receive led pin
      //#define MY_DEFAULT_TX_LED_PIN  9  // Transmit led pin
      
      #if defined(MY_USE_UDP)
      #include <EthernetUdp.h>
      #endif
      #include <Ethernet.h>
      #include <MySensors.h>
      
      void setup()
      {
          // Setup locally attached sensors
      }
      
      void presentation()
      {
          // Present locally attached sensors here
      }
      
      void loop()
      {
          // Send locally attached sensors data here
      }
      

      and Vera version 1.7.855, I am able to see the connection in the plugin:
      0_1501103065697_Screen Shot 2017-07-26 at 16.13.09.png

      but I am getting this nasty error after the Luup loads:

      0_1501103154989_Screen Shot 2017-07-26 at 16.12.09.png

      the Serial debug from the gateway displays only this:

      0_1501103207331_Screen Shot 2017-07-26 at 17.06.29.png

      anyone seen anything like this?

      posted in Troubleshooting
      BulldogLowell
      BulldogLowell
    • RE: Irrigation Controller (up to 16 valves with Shift Registers)

      @dbemowsk

      good to see you found it. I haven't looked at the code for two years, and mine is still working. (@petewill 's demo worked well too). there must have been some change that managed its way into the source

      maybe look on GitHub and do a pull request if you the problem is there...

      posted in My Project
      BulldogLowell
      BulldogLowell
    • RE: Irrigation Controller (up to 16 valves with Shift Registers)

      @dbemowsk

      yes, weird...

      posted in My Project
      BulldogLowell
      BulldogLowell
    • RE: Irrigation Controller (up to 16 valves with Shift Registers)

      @Black-Cat said in Irrigation Controller (up to 16 valves with Shift Registers):

      Z-Uno

      wicked cool...

      I'm in North America, so I have to stand by!

      You you should be able to easily port this for use with Z-Uno...

      posted in My Project
      BulldogLowell
      BulldogLowell
    • RE: Irrigation Controller (up to 16 valves with Shift Registers)

      @dbemowsk

      what's happening in the Serial debug?

      posted in My Project
      BulldogLowell
      BulldogLowell
    • RE: Tipping bucket rain gauge

      @dbemowsk

      I like it a lot. I'm guessing that the depth is about 2in on the sides, which I'm sure that will be OK to avoid splashing out.

      If you live near trees, you may want to think about how to keep leaves out . A screen or pointy things will also keep out any animals!

      your printer must be plenty big to get that 8in diameter funnel... nice!

      posted in Hardware
      BulldogLowell
      BulldogLowell
    • RE: Tipping bucket rain gauge

      sorry for the late response!!!

      those rings is where I glued my magnet!

      posted in Hardware
      BulldogLowell
      BulldogLowell
    • RE: Tipping bucket rain gauge

      @dbemowsk

      I made that as a project for a maker-faire. As I recall, I was benchmarking Netatmo.

      My personal rain gauge is the typical 8 inch. I'm in a very tropical environment with lots of rain, so I went with an 8in as to not overflow. Plus, I put some sharp pins to keep the birds out!

      posted in Hardware
      BulldogLowell
      BulldogLowell
    • RE: Tipping bucket rain gauge

      @dbemowsk said in Tipping bucket rain gauge:

      @BulldogLowell Do you know where I can find information on that standard?

      I tried using google...

      NOAA standard Rain Guage

      the style you bought is OK (I built one like that) but two observations:

      1. The projected area is small - sample size is not that great and won't be as accurate, if that is any concern to you. It may not even measure in some cases.
      2. the cup itself is very shallow, and rain will easily splatter out of the device and not get measured. That would also affect its accuracy.
      posted in Hardware
      BulldogLowell
      BulldogLowell
    • RE: Tipping bucket rain gauge

      @dbemowsk

      the most important thin is really the diameter of the bucket. There are standards for that (8in in the US).

      Once you know how many tips per millimeter of rain you are good. you need to test it to calibrate it. The energy in the falling droplets and surface tension affect the volume of the water per tip. I sprayed rain-x on the inner cone of the funnel so that all the droplets dribble down. you can lose some to evaporation if you have a very light rain and the weather is hot.

      Put a calibration method into your program, and you will be fine.

      can't wait to see your final design!

      posted in Hardware
      BulldogLowell
      BulldogLowell
    • RE: IR Switch for Luminara Candle Automation (repost with video, photos and final sketch)

      Wow this is an old topic!

      But... I was working on a project and thought that anyone who was looking for a NeoPixel candle example that isn't blocking, well this would be the place. It flickers and flutters like a real candle. The only thing is that the flame isn't illuminated like these nice Luminaras, but I'm too cheap to buy them!

      Keep in mind that my example here uses GRB LEDs, but you merely need to reorder the variables in order to get this working for RGB. Plus the Time Library is not Arduino, so you will have to play with that too for a good randomSeed().

      It looks pretty realistic with even a single neoPixel in a sheet of A4 paper rolled into a cylinder. I'll post a video when I can.

      Have fun with it:

      #include "neopixel.h"
      
      enum CandleStates{
        BURN_CANDLE,
        FLICKER_CANDLE,
        FLUTTER_CANDLE,
        MODES_MAX_CANDLE
      };
      
      enum PixelSelect{
        EVERY_PIXEL,
        SINGLE_PIXEL,
      };
      
      class Candle : public Adafruit_NeoPixel
      {
        public:
          Candle(uint16_t count, uint8_t pin, uint8_t type);
          Candle(uint16_t count, uint8_t pin, uint8_t type, PixelSelect pixel, uint32_t pixNum = 0);
          ~Candle(){};
          void update();
      
        private:
          bool fire(uint8_t greenDropValue, uint32_t cycleTime);
      
          PixelSelect _pixelMode = EVERY_PIXEL;
          uint32_t _pixNum = 0;
          CandleStates _mode;
          uint32_t _lastModeChange;
          uint32_t _modeDuration;
      
          uint8_t _redPx = 255;
          uint8_t _bluePx = 10; //10 for 5v, 15 for 3.3v
          uint8_t _grnHigh = 100; //110-120 for 5v, 135 for 3.3v
          uint8_t _grnPx = 100;
      
          uint32_t _lastBurnUpdate = 0;
          int _direction = 1;
      };
      
      Candle::Candle(uint16_t count, uint8_t pin, uint8_t type) : Adafruit_NeoPixel(count, pin, type)
      {
        randomSeed(Time.now() + micros());
        _mode = BURN_CANDLE;
      }
      
      Candle::Candle(uint16_t count, uint8_t pin, uint8_t type, PixelSelect pixel, uint32_t pixNum) : Adafruit_NeoPixel(count, pin, type)
      {
        _pixelMode = pixel;
        _pixNum = pixNum;
      }
      
      void Candle::update()
      {
        if(millis() - _lastModeChange > _modeDuration)
        {
          _mode = static_cast<CandleStates>(random(MODES_MAX_CANDLE));
          _modeDuration = random(1000, 8000);
          _lastModeChange = millis();
          //Serial.printlnf("New state: %d\tTime: %d", static_cast<int>(_mode), _modeDuration);
        }
        switch(_mode)
        {
          case BURN_CANDLE:
            this->fire(10, 120);
            break;
          case FLICKER_CANDLE:
            this->fire(15, 120);
            break;
          case FLUTTER_CANDLE:
            this->fire(30, 120);
            break;
        };
      }
      
      bool Candle::fire(uint8_t greenDropValue, uint32_t cycleTime)
      {
        int currentMillis = millis();
        if(currentMillis - _lastBurnUpdate > (cycleTime / greenDropValue / 2))
        {
          _grnPx = constrain(_grnPx += _direction, _grnHigh - greenDropValue, _grnHigh);
          if(_grnPx == _grnHigh - greenDropValue or _grnPx == _grnHigh)
          {
            _direction *= -1;
          }
          switch (_pixelMode)
          {
            case EVERY_PIXEL:
              for(int i = 0; i < this->numPixels(); i++)
              {
                this->setPixelColor(i, _grnPx, _redPx, _bluePx);
              }
              break;
            case SINGLE_PIXEL:
              this->setPixelColor(_pixNum, _grnPx, _redPx, _bluePx);
              break;
          }
          this->show();
          _lastBurnUpdate = currentMillis;
        }
      }
      
      #define PIXEL_COUNT 2
      #define PIXEL_PIN D2
      #define PIXEL_TYPE WS2812B    // I'M USING GRB WS2821B's here
      
      Candle candle = Candle(PIXEL_COUNT, PIXEL_PIN, PIXEL_TYPE, SINGLE_PIXEL);
      
      void setup(void)
      {
        Serial.begin(115200);
        pinMode(13, OUTPUT);
        candle.begin();
        candle.show();
        Serial.println("Started program");
      }
      
      void loop(void)
      {
        candle.update();
        static uint32_t lastFlashMillis = 0;
        if(millis() - lastFlashMillis > 250)
        {
          digitalWrite(13, !digitalRead(13));
          lastFlashMillis = millis();
        }
      }
      
      posted in My Project
      BulldogLowell
      BulldogLowell
    • RE: Multiple DHT22 in one sensor for greenhouse (newbee question)

      @turborick

      Sorry, I've yet to upgrade to latest version of MySensors libraries.

      posted in Troubleshooting
      BulldogLowell
      BulldogLowell
    • RE: Irrigation Controller (up to 16 valves with Shift Registers)

      @Huczas

      try adding a delay in various places in setup() start with 5 or even 10 seconds.

      posted in My Project
      BulldogLowell
      BulldogLowell
    • RE: Irrigation Controller (up to 16 valves with Shift Registers)

      @petewill

      which can be easily substituted by a flux capacitor.

      😉

      posted in My Project
      BulldogLowell
      BulldogLowell
    • RE: 💬 Rain Gauge

      @hek @hoefoigel ,

      I coded the basic sensor and @petewill added the rest and updated... Sorry I cannot be helpful!

      posted in Announcements
      BulldogLowell
      BulldogLowell
    • RE: Irrigation Controller (up to 16 valves with Shift Registers)

      @wasam

      There are several examples out there (either here or in the Arduino forum) of how to combine sketches for added functionality. Fortunately, you are starting with my code that is already non-blocking and uses little in the way of system resources so it should be straightforward from here.

      The community here (including me) can assist in giving you what you want.

      first thing is the hardware... assuming your using metric means you are 220VAC... you need a person familiar with mains switching to help you out there!

      posted in My Project
      BulldogLowell
      BulldogLowell
    • RE: Domotiocz + Rain gauge

      @TheoL

      Great to see this project continuing to grow legs!

      posted in Domoticz
      BulldogLowell
      BulldogLowell
    • RE: Web App for Simple Control of my Home Automation kludge

      @TheoL

      I don't really use scenes, as most of what I do with Vera is using PLEG.

      But yes, that is a good idea. Look for updates that will include alarm setting and my garage door states. I just haven't gotten that far yet!

      posted in My Project
      BulldogLowell
      BulldogLowell
    • RE: Web App for Simple Control of my Home Automation kludge

      and the style sheet (style.css) reference this in HTML: <link rel="stylesheet" type="text/css" href="style.css" />

      .onoffswitch {
          position: relative; width: 90px;
          -webkit-user-select:none; -moz-user-select:none; -ms-user-select: none;
      }
      .onoffswitch-checkbox {
          display: none;
      }
      .onoffswitch-label {
          display: block; overflow: hidden; cursor: pointer;
          border: 2px solid #999999; border-radius: 0px;
      }
      .onoffswitch-inner {
          display: block; width: 200%; margin-left: -100%;
          transition: margin 0.3s ease-in 0s;
      }
      .onoffswitch-inner:before, .onoffswitch-inner:after {
          display: block; float: left; width: 50%; height: 30px; padding: 0; line-height: 30px;
          font-size: 14px; color: white; font-family: Trebuchet, Arial, sans-serif; font-weight: bold;
          box-sizing: border-box;
      }
      .onoffswitch-inner:before {
          content: "ON";
          padding-left: 10px;
          background-color: #888E8F; color: #FFFFFF;
      }
      .onoffswitch-inner:after {
          content: "OFF";
          padding-right: 10px;
          background-color: #EEEEEE; color: #000000;
          text-align: right;
      }
      .onoffswitch-switch {
          display: block; width: 18px; margin: 6px;
          background: #FFFFFF;
          position: absolute; top: 0; bottom: 0;
          right: 56px;
          border: 2px solid #999999; border-radius: 0px;
          transition: all 0.3s ease-in 0s; 
      }
      .onoffswitch-checkbox:checked + .onoffswitch-label .onoffswitch-inner {
          margin-left: 0;
      }
      .onoffswitch-checkbox:checked + .onoffswitch-label .onoffswitch-switch {
          right: 0px; 
      }
      
      .button{
      	background-color: #999999;
      	border: none;
      	color: white;
      	padding: 5px 10px;
      	text-align: center;
      	text-decoration: none;
      	display: inline-block;
      	font-size: 16px;
      	margin: 4px 2px;
      	cursor: pointer;
      	width: 80px;
      }
      
      .readings{
      	font-size: 125%;
      	font-weight: bold;
      }
      
      .dropdown {
          position: relative;
          display: inline-block;
      }
      
      .dropdown-content {
          display: none;
          position: center;
          background-color: #f9f9f9;
          min-width: 160px;
          box-shadow: 0px 8px 16px 0px rgba(0,0,0,0.2);
          padding: 12px 16px;
          z-index: 1;
      }
      
      .dropdown-content a {
          color: black;
          /*padding: 12px 16px;*/
          text-decoration: none;
          display: block;
      }
      
      .dropdown:hover .dropdown-content {
          display: block;
      }
      
      .dropdown:hover .dropdown-content {
          display: block;
      }
      
      
      #body {
      	width: 375px;
      	font-family: arial, helvetica, sans-serif;
      }
      
      #container {
      	font-family: arial, helvetica, sans-serif;
      	color: black;
      	width: 375px;
      	margin-left: auto;
      	margin-right: auto;
      	background-color: white;
      }
      
      #banner {
      	width: 360px;
      	position: fixed;
      	z-index: 1000;
      	margin-left: auto;
      	margin-right: auto;
      	/* left: 50%;*/
      	/* margin-left: -50%;*/
      	text-align: center;
      	background-color: white;
      	border: 1px solid black;
      	opacity: 1;
       }
      
      #header {
      	font-size: 125%;
      	padding: 50px;
      	background-image: url("GreyBrick.jpg");
      	background-position: center center;
      	text-align: center;
      	color: white;
      	}
      
      #rooms{
      
      }
      
      #kitchen{
      
      }
      
      #ledSlider{
      	float: left;
      }
      
      #ledButtons{
        float: right;
      }
      
      #space2{
      	clear: left;
      }
      
      #kitchenSlider{
      	float: left;
      }
      
      #kitchenBarButton{
      	float: right;
      }
      
      #space1{
        clear: left;
      }
      
      #pubTableSlider{
      
      	float: left;
      }
      
      #pubTableButton{
      	float: right;
      }
      
      #kitchAccent{
      	clear: left;
      }
      
      #livingRoom{
      
      }
      
      #livingRoomThermostatSlider{
      	float: left;
      }
      
      #livingRoomThermButtons{
        float: right;
      }
      
      #livingRoomElements{
      	clear: left;
      }
      
      #cabana{
      
      }
      
      #cabanaElements {
      
      }
      
      #family {
      
      }
      
      #guesthouse {
      
      }
      
      #guestThermSlider{
      	float: left;
      }
      
      #guestThermButtons{
        float: right;
      }
      #Patio{
      	clear:left;
      }
      #outdoorSlider{
      	float: left;
      }
      
      #extKitchenButton{
      	float: right;
      }
      #space{
      	clear: left;
      }
      
      #cabanaSlider{
      
      	float: left;
      }
      
      #cabanaButton{
      	float: right;
      }
      
      #patioRadioButtons{
      	clear: left;
      }
      
      #exterior{
      
      }
      
      #laundryRoom{
      
      }
      
      #tstatSlider {
      	float: left;
      }
      
      #tstatButtons {
        float: right;
      
      }
      
      #laundryRadioButtons{
      	clear: left;
      }
      
      #footer{
        clear: left;
        padding: 150px;
        background-image: url("PaulRevere.jpg");
        background-position: center center;
      }
      
      #footer-content {
          color: white;
        	position: absolute;
          bottom: 350px;
          left: 0;
          width: 100%;
      }


      place the two files into a directory and open the html file with your browser:

      0_1472257008754_Screen Shot 2016-08-26 at 20.16.20.png

      it should render... minus the image files

      hopefully, you can get from this enough to create a few devices, like a binary switch and maybe a dimmer!

      then we can move onto the (kinda-more-tough) JavaScript.

      posted in My Project
      BulldogLowell
      BulldogLowell
    • RE: Web App for Simple Control of my Home Automation kludge

      OK, so I think I'll throw this all up onto GitHub as a starting point. For the Vera folks out there, I'll put a basic example of how to get user data via Ajax, using PHP proxy.

      here is a little HTML for folks to play with:

      <!DOCTYPE html>
      <html lang="en">
      
      <head>
            <title>mYHome Controller</title>
            <link rel="icon" href="penguin.png">
            <link rel="stylesheet" type="text/css" href="style.css" />
            <meta name="viewport" content="width=device-width, initial-scale=1.0, user-scalable=0">
            <script src="https://ajax.googleapis.com/ajax/libs/jquery/3.1.0/jquery.min.js" ></script>
            <script src="support.js"</script>
            <script src="https://code.jquery.com/jquery-3.1.0.min.js"></script>
      </head>
      
      <body style="cursor:wait">
      
      <script>
      $('body').on("click", ".dropdown", function() {
      	$('.dropdown-content').toggle();
      	$('#banner').fadeTo(900, $('#banner').css("opacity") == "1" ? "0.20" : "1");  // 900 milliseconds
      });
      </script>
      
          <p id="controller"></p>
          <div id="container">
             <div id="banner">
               <div class="dropdown">
                 <h2><span id="mySpan" class="select-room" onclick="true" >Zoom to Room</span></h2>
                 <div class="dropdown-content" id="menucontainer">
                   <p><a href="#top"><font color=#58ACFA>Top</font></a></p>
                   <p><a href="#kitchen">Kitchen</a></p>
                   <p><a href="#family">Family Room</a></p>
                   <p><a href="#diningRoom">Dining Room</a></p>
                   <p><a href="#livingRoom">Living Room</a></p>
                   <p><a href="#cabana">Cabana</a></p>
                   <p><a href="#guesthouse">Guest House</a></p>
                   <p><a href="#Patio">Patio</a></p>
                   <p><a href="#exterior">Exterior</a></p>
                   <p><a href="#laundryRoom">Laundry Room</a></p>
                   <p><a href="#footer"><font color=#58ACFA>Bottom</font></a></p>
                 </div>
                </div>
             </div>
      
             <div id="header">
                <br />
                <br />
                <h3>
                   <p id="todayDate"></p>
                </h3>
                <h3>
                   <p id="currentTime"></p>
                </h3>
                <h3>
                   <p id="currentTemp">Outside Temp: --&deg;F</p>
                </h3>
                <h3>
                   <p id="currentHumidity">Humidity --%</p>
                </h3>
                <h3>
                   <p id="currentDewPoint">Dew Point: --&deg;F</p>
                   <p id="currentConditions">--</p>
                   Winds <a id="windSpeed">--</a> miles per hour from the <a id="windDir">---<a>
                </h3>
                Sunrise <a id="sunriseTime">6:30</a><br>
                Sunset <a id="sunsetTime">6:30pm</a>
      
             </div>
      
             <div id="rooms">
                <div id="kitchen">
                   <hr size="10" NOSHADE>
                   <h1>
                      <p align="center">Kitchen</p>
                   </h1>
                   <hr />
                   <div id="ledTool">
                      <div id="ledSlider">
                         <h2>Kitchen Counter LEDs</h2>
                         <input id="myRange" type="range" style="width: 220px; height 40px" min="0" max="100" value="50" step = "5" list="settings" oninput="showValue(this.value+ '%') " onchange="sendValue(this.value+ '%')">
                         <datalist id="settings">
                            <option>0</option>
                            <option>10</option>
                            <option>20</option>
                            <option>30</option>
                            <option>40</option>
                            <option>50</option>
                            <option>60</option>
                            <option>70</option>
                            <option>80</option>
                            <option>90</option>
                            <option>100</option>
                         </datalist>
                         <span id="range" class="readings">--</span>
                         <br/> <br/>
                         <br /><br />
                      </div>
                      <div id="ledButtons">
                         <br />
                         <br />
                         <input type="button" class="button" value="ON" onclick="setDimmerPower(100)">
                         <br />
                         <input type="button" class="button" value="OFF" onclick="setDimmerPower(0)">
                      </div>
                   </div>
                   <div id = "space2">
                      <hr />
                </div>
      
                <div id = kitchenSlider>
                   <h2>Bar Lights</h2>
                   <input id="kitchenBarRange" type="range" style="width: 220px; height 40px" min="0" max="100" value="50" step = "5" list="settings" oninput="setVeraValue(this.value, kitchenBarLight.spanID, kitchenBarLight.deviceNumber, kitchenBarLight.rangeID)" onchange="setVeraValue(this.value, kitchenBarLight.spanID, kitchenBarLight.deviceNumber, kitchenBarLight.rangeID)">
                   <datalist id="settings">
                      <option>0</option>
                      <option>10</option>
                      <option>20</option>
                      <option>30</option>
                      <option>40</option>
                      <option>50</option>
                      <option>60</option>
                      <option>70</option>
                      <option>80</option>
                      <option>90</option>
                      <option>100</option>
                   </datalist>
                   <span id = "kitchenDimVal" class="readings">--%</span>
                   <br/> <br/>
                   <br /><br />
                </div>
      
                <div id="kitchenBarButton">
                   <br />
                   <br />
                   <input type="button" class="button" value="ON" onclick="showVeraValue(100, kitchenBarLight.spanID, kitchenBarLight.deviceNumber, kitchenBarLight.rangeID)">
                   <br />
                   <input type="button" class="button" value="OFF" onclick="showVeraValue(0, kitchenBarLight.spanID, kitchenBarLight.deviceNumber, kitchenBarLight.rangeID)">
                </div>
      
                <div>
                   <div id = "space1">
                      <hr />
                   </div>
                </div>
      
                <div id = pubTableSlider>
                   <h2>Pub Table Dimmer</h2>
                   <input id="pubTableRange" type="range" style="width: 220px; height 40px" min="0" max="100" value="50" step = "5" list="settings" oninput="setVeraValue(this.value, pubTableLight.spanID, pubTableLight.deviceNumber, pubTableLight.rangeID) " onchange="setVeraValue(this.value, pubTableLight.spanID, pubTableLight.deviceNumber, pubTableLight.rangeID)">
                   <datalist id="settings">
                      <option>0</option>
                      <option>10</option>
                      <option>20</option>
                      <option>30</option>
                      <option>40</option>
                      <option>50</option>
                      <option>60</option>
                      <option>70</option>
                      <option>80</option>
                      <option>90</option>
                      <option>100</option>
                   </datalist>
                   <span id = "pubTableDimVal" class="readings">--%</span>
                   <br/> <br/>
                   <br /><br />
                </div>
      
                <div id="pubTableButton">
                   <br />
                   <br />
                   <input type="button" class="button" value="ON" onclick="showVeraValue(100, pubTableLight.spanID,pubTableLight.deviceNumber, pubTableLight.rangeID)">
                   <br />
                   <input type="button" class="button" value="OFF" onclick="showVeraValue(0, pubTableLight.spanID,pubTableLight.deviceNumber, pubTableLight.rangeID)">
                </div>
      
                <div id="kitchAccent">
                   <hr />
                   <h2>Kitchen Accent Lights</h2>
                   <div class="onoffswitch">
      			  <input type="checkbox" name="onoffswitch" class="onoffswitch-checkbox" id="kitchenAccent" onclick="handleToggle(this);" >
      			  <label class="onoffswitch-label" for="kitchenAccent">
      				<span class="onoffswitch-inner"></span>
      				<span class="onoffswitch-switch"></span>
      			</label>
      			</div><br>
                </div>
      
             <div id="family">
                <hr size="10" NOSHADE>
                <h1>
                   <p align="center">Family Room</p>
                </h1>
                <hr />
                <h2>Family Room Accent Lights</h2>
                <div class="onoffswitch">
      			  <input type="checkbox" name="onoffswitch" class="onoffswitch-checkbox" id="faamilyRoomAccent" onclick="handleToggle(this);" >
      			  <label class="onoffswitch-label" for="faamilyRoomAccent">
      				<span class="onoffswitch-inner"></span>
      				<span class="onoffswitch-switch"></span>
      			</label>
      			</div><br>
             </div>
      
             <div id="diningRoom">
                <hr size="10" NOSHADE>
                <h1>
                   <p align="center">Dining Room</p>
                </h1>
                <hr />
                <h2>Dining Room Table</h2>
                <div class="onoffswitch">
      			  <input type="checkbox" name="onoffswitch" class="onoffswitch-checkbox" id="diningLights" onclick="handleToggle(this);" >
      			  <label class="onoffswitch-label" for="diningLights">
      				<span class="onoffswitch-inner"></span>
      				<span class="onoffswitch-switch"></span>
      			</label>
      			</div><br>
             </div>
      
             <div id="livingRoom">
                <hr size="10" NOSHADE>
                <h1>
                   <p align="center">Living Room</p>
                </h1>
                <hr />
                <div id="livingRoomThermostatSlider">
                   <h2>Thermostat Setting</h2>
                   <input id="tstatRange2" type="range" style="width: 220px; height 40px" min=72 max=86 value=76 step = 1.0 list="increments4" oninput="updateThermostatValue(this.id, this.value)" onchange="updateThermostatValue(this.id, this.value)">
                   <datalist id="increments4">
                      <option>72</option>
                      <option>74</option>
                      <option>76</option>
                      <option>78</option>
                      <option>80</option>
                      <option>82</option>
                      <option>84</option>
                      <option>86</option>
                   </datalist>
                   <span id="range2" class="readings">--</span>&deg;F
                   </br> </br>Setpoint:
                   <span id="setpoint2" class="readings">--</span>&deg;F
                   &nbsp;&nbsp;&nbsp;Actual:
                   <span id="current2" class="readings">--</span>&deg;F
                   &nbsp;&nbsp;&nbsp;<span id="snowFlake2"><font size=6>&#10052;</font></span>
                   </br> </br>
                   <input type="button" class="button" onclick="sendThermostatValue(thermostat[2])" value = SUBMIT />
                   </br></br>
                </div>
                <div id="livingRoomThermButtons">
                   <br />
                   <br />
                   <input type="button" class="button" value="UP" onclick="thermostatUP(thermostat[2])">
                   <br />
                   <input type="button" class="button" value="DOWN" onclick="thermostatDOWN(thermostat[2])">
                </div>
             </div>
                <div id="livingRoomElements">
                <hr />
                <h2>End Tables</h2>
                
      					  <div class="onoffswitch">
      						  <input type="checkbox" name="onoffswitch" class="onoffswitch-checkbox" id="endTables" onclick="handleToggle(this);" >
      						  <label class="onoffswitch-label" for="endTables">
      							<span class="onoffswitch-inner"></span>
      							<span class="onoffswitch-switch"></span>
      						</label>
      						</div>
      					  <hr />
      					  <h2>Portrait Lamp</h2>
      					  <div class="onoffswitch">
      						<input type="checkbox" name="onoffswitch" class="onoffswitch-checkbox" id="portraitLamp" onclick="handleToggle(this);" >
      						<label class="onoffswitch-label" for="portraitLamp">
      							<span class="onoffswitch-inner"></span>
      							<span class="onoffswitch-switch"></span>
      						</label>
      						</div>
      					  <hr />
      					  <h2>Wall Art</h2>
      					  <div class="onoffswitch">
      						<input type="checkbox" name="onoffswitch" class="onoffswitch-checkbox" id="wallArt" onclick="handleToggle(this);" >
      						<label class="onoffswitch-label" for="wallArt">
      							<span class="onoffswitch-inner"></span>
      							<span class="onoffswitch-switch"></span>
      						</label>
      						</div>
      					  <hr />
      					  <h2>Floor Lamp</h2>
      						<div class="onoffswitch">
      						<input type="checkbox" name="onoffswitch" class="onoffswitch-checkbox" id="floorLamp" onclick="handleToggle(this);" >
      						<label class="onoffswitch-label" for="floorLamp">
      							<span class="onoffswitch-inner"></span>
      							<span class="onoffswitch-switch"></span>
      						</label>
      						</div>
      					  <hr />
      					  <h2>Master Hallway</h2>
      					  <div class="onoffswitch">
      						<input type="checkbox" name="onoffswitch" class="onoffswitch-checkbox" id="masterHallway" onclick="handleToggle(this);" >
      						<label class="onoffswitch-label" for="masterHallway">
      							<span class="onoffswitch-inner"></span>
      							<span class="onoffswitch-switch"></span>
      						</label>
      						</div>
      					  <hr />
      					  <h2>Main Entrance</h2>
      					  <div class="onoffswitch">
      						<input type="checkbox" name="onoffswitch" class="onoffswitch-checkbox" id="mainEntrance" onclick="handleToggle(this);" >
      						<label class="onoffswitch-label" for="mainEntrance">
      							<span class="onoffswitch-inner"></span>
      							<span class="onoffswitch-switch"></span>
      						</label>
      						</div><br>
      				   </div>
      		</div>
             <div id="cabana">
                <hr size="10" NOSHADE>
                <h1>
                   <p align="center">Cabana</p>
                </h1>
      
                <div id="cabanaElements">
                   <hr />
                   <h2>PhoneyTV Cabana</h2>
                   <div class="onoffswitch">
      			<input type="checkbox" name="onoffswitch" class="onoffswitch-checkbox" id="phoneyTV" onclick="handlePhoneyTV(this);" >
      			<label class="onoffswitch-label" for="phoneyTV">
      				<span class="onoffswitch-inner"></span>
      				<span class="onoffswitch-switch"></span>
      			</label>
      
      			</div>
                   <hr />
                   <h2>Cabana Nightstand Light</h2>
                   <div class="onoffswitch">
      			<input type="checkbox" name="onoffswitch" class="onoffswitch-checkbox" id="cabanaNightstand" onclick="handleToggle(this);" >
      			<label class="onoffswitch-label" for="cabanaNightstand">
      				<span class="onoffswitch-inner"></span>
      				<span class="onoffswitch-switch"></span>
      			</label>
      			</div>
                   <hr />
                   <h2>Cabana Slider Light</h2>
                   <div class="onoffswitch">
      			<input type="checkbox" name="onoffswitch" class="onoffswitch-checkbox" id="cabanaSlider" onclick="handleToggle(this);" >
      			<label class="onoffswitch-label" for="cabanaSlider">
      				<span class="onoffswitch-inner"></span>
      				<span class="onoffswitch-switch"></span>
      			</label>
      			</div>
                   <hr />
                   <h2>Cabana Patio Light</h2>
                   <div class="onoffswitch">
      			<input type="checkbox" name="onoffswitch" class="onoffswitch-checkbox" id="cabanaPatio" onclick="handleToggle(this);" >
      			<label class="onoffswitch-label" for="cabanaPatio">
      				<span class="onoffswitch-inner"></span>
      				<span class="onoffswitch-switch"></span>
      			</label>
      			</div><br>
                </div>
             </div>
      
             <div id="guesthouse">
                <hr size="10" NOSHADE>
                <h1>
                   <p align="center">Guest House</p>
                </h1>
                <hr />
                <div id="guestThermSlider">
                   <h2>Thermostat Setting</h2>
                   <input id="tstatRange1" type="range" style="width: 220px; height 40px" min=72 max=86 value=76 step = 1.0 list="increments3" oninput="updateThermostatValue(this.id, this.value)" onchange="updateThermostatValue(this.id, this.value)">
                   <datalist id="increments3">
                      <option>72</option>
                      <option>74</option>
                      <option>76</option>
                      <option>78</option>
                      <option>80</option>
                      <option>82</option>
                      <option>84</option>
                      <option>86</option>
                   </datalist>
                   <span id="range1" class="readings">76</span>&deg;F
                   <br/> <br/>Setpoint:
                   <span id="setpoint1" class="readings">--</span>&deg;F
                   &nbsp;&nbsp;&nbsp;Actual:
                   <span id="current1" class="readings">--</span>&deg;F
                   &nbsp;&nbsp;&nbsp;<span id="snowFlake1"><font size=6>&#10052;</font></span>
                   <br/> <br/>
                   <input type="button" class="button" onclick="sendThermostatValue(thermostat[1])" value = SUBMIT />
                   <br/><br/>
                </div>
                <div id="guestThermButtons">
                   <br />
                   <br />
                   <input type="button" class="button" value="UP" onclick="thermostatUP(thermostat[1])">
                   <br />
                   <input type="button" class="button" value="DOWN" onclick="thermostatDOWN(thermostat[1])">
                </div>
             </div>
      
             <div id="Patio">
                <hr size="10" NOSHADE>
                <h1>
                   <p align="center">Patio</p>
                </h1>
                <hr />
                <div id="patioElements">
                   <div id = outdoorSlider>
                      <h2>Kitchen Lights</h2>
                      <input id="outdoorKitchenRange" type="range" style="width: 220px; height 40px" min="0" max="100" value="50" step = "5" list="settings" oninput="setVeraValue(this.value, outdoorKitchenDimmer.spanID, outdoorKitchenDimmer.deviceNumber, outdoorKitchenDimmer.rangeID)" onchange="setVeraValue(this.value, outdoorKitchenDimmer.spanID, outdoorKitchenDimmer.deviceNumber, outdoorKitchenDimmer.rangeID)">
                      <datalist id="settings">
                         <option>0</option>
                         <option>10</option>
                         <option>20</option>
                         <option>30</option>
                         <option>40</option>
                         <option>50</option>
                         <option>60</option>
                         <option>70</option>
                         <option>80</option>
                         <option>90</option>
                         <option>100</option>
                      </datalist>
                      <span id = "outdoorKitchenDimVal" class="readings">--%</span>
                      <br/> <br/>
                      <br /><br />
                   </div>
                   <div id="extKitchenButton">
                      <br />
                      <br />
                      <input type="button" class="button" value="ON" onclick="showVeraValue(100, outdoorKitchenDimmer.spanID, outdoorKitchenDimmer.deviceNumber, outdoorKitchenDimmer.rangeID)">
                      <br />
                      <input type="button" class="button" value="OFF" onclick="showVeraValue(0, outdoorKitchenDimmer.spanID, outdoorKitchenDimmer.deviceNumber, outdoorKitchenDimmer.rangeID)">
                   </div>
      
                   <div id="space">
                      <hr />
                      </div/>
                      <div id = cabanaSlider>
                         <h2>Cabana Dimmer</h2>
                         <input id="cabanaRange" type="range" style="width: 220px; height 40px" min="0" max="100" value="50" step = "5" list="settings" oninput="setVeraValue(this.value, cabanaDimmer.spanID, cabanaDimmer.deviceNumber, cabanaDimmer.rangeID) " onchange="setVeraValue(this.value, cabanaDimmer.spanID, cabanaDimmer.deviceNumber, cabanaDimmer.rangeID)">
                         <datalist id="settings">
                            <option>0</option>
                            <option>10</option>
                            <option>20</option>
                            <option>30</option>
                            <option>40</option>
                            <option>50</option>
                            <option>60</option>
                            <option>70</option>
                            <option>80</option>
                            <option>90</option>
                            <option>100</option>
                         </datalist>
                         <span id = "cabanaDimVal" class="readings">--%</span>
                         <br/> <br/>
                         <br /><br />
                      </div>
                      <div id="cabanaButton">
                         <br />
                         <br />
                         <input type="button" class="button" value="ON" onclick="showVeraValue(100, cabanaDimmer.spanID,cabanaDimmer.deviceNumber, cabanaDimmer.rangeID)">
                         <br />
                         <input type="button" class="button" value="OFF" onclick="showVeraValue(0, cabanaDimmer.spanID,cabanaDimmer.deviceNumber, cabanaDimmer.rangeID)">
                      </div>
                      <div id = "patioRadioButtons">
                         <hr />
                         <h2>Under Counter Lights</h2>
                         <div class="onoffswitch">
      					<input type="checkbox" name="onoffswitch" class="onoffswitch-checkbox" id="ropeLights" onclick="handleToggle(this);" >
      					<label class="onoffswitch-label" for="ropeLights">
      						<span class="onoffswitch-inner"></span>
      						<span class="onoffswitch-switch"></span>
      					</label>
      					</div>
                         <hr />
                         <h2>Flood Lights</h2>
                         <div class="onoffswitch">
      					<input type="checkbox" name="onoffswitch" class="onoffswitch-checkbox" id="mainFloodLights" onclick="handleToggle(this);" >
      					<label class="onoffswitch-label" for="mainFloodLights">
      						<span class="onoffswitch-inner"></span>
      						<span class="onoffswitch-switch"></span>
      					</label>
      					</div>
                         <hr />
                         <h2>Master Slider</h2>
                         <div class="onoffswitch">
      					<input type="checkbox" name="onoffswitch" class="onoffswitch-checkbox" id="masterSlider" onclick="handleToggle(this);" >
      					<label class="onoffswitch-label" for="masterSlider">
      						<span class="onoffswitch-inner"></span>
      						<span class="onoffswitch-switch"></span>
      					</label>
      					</div>
                         <hr />
                         <h2>Pool Light</h2>
                          <div class="onoffswitch">
      					<input type="checkbox" name="onoffswitch" class="onoffswitch-checkbox" id="poolLight" onclick="handleToggle(this);" >
      					<label class="onoffswitch-label" for="poolLight">
      						<span class="onoffswitch-inner"></span>
      						<span class="onoffswitch-switch"></span>
      					</label>
      					</div>
                         <hr />
                         <h2>Pergola</h2>
                          <div class="onoffswitch">
      					<input type="checkbox" name="onoffswitch" class="onoffswitch-checkbox" id="pergola" onclick="handleToggle(this);" >
      					<label class="onoffswitch-label" for="pergola">
      						<span class="onoffswitch-inner"></span>
      						<span class="onoffswitch-switch"></span>
      					</label>
      					</div>
                         <hr />
                         <h2>Television</h2>
                          <div class="onoffswitch">
      					<input type="checkbox" name="onoffswitch" class="onoffswitch-checkbox" id="television" onclick="handleToggle(this);" >
      					<label class="onoffswitch-label" for="television">
      						<span class="onoffswitch-inner"></span>
      						<span class="onoffswitch-switch"></span>
      					</label>
      					</div>
                         <hr />
                         <h2>Cabana Slider</h2>
                         <div class="onoffswitch">
      					<input type="checkbox" name="onoffswitch" class="onoffswitch-checkbox" id="cabanaSlidingDoor" onclick="handleToggle(this);" >
      					<label class="onoffswitch-label" for="cabanaSlidingDoor">
      						<span class="onoffswitch-inner"></span>
      						<span class="onoffswitch-switch"></span>
      					</label>
      					</div><br>
                      </div>
                   </div>
                </div>
             </div>
      
             <div id="exterior">
               <hr size="10" NOSHADE>
               <h1>
                  <p align="center">Exterior Lights</p>
               </h1>
      
               <div id = "exteriorRadioButtons">
                  <hr />
                  <h2>Front Door Garage</h2>
                  <div class="onoffswitch">
      				<input type="checkbox" name="onoffswitch" class="onoffswitch-checkbox" id="frontDoorGarage" onclick="handleToggle(this);" >
      				<label class="onoffswitch-label" for="frontDoorGarage">
      					<span class="onoffswitch-inner"></span>
      					<span class="onoffswitch-switch"></span>
      				</label>
      			</div>
                  <hr />
                  <h2>Guest Flood Lights</h2>
                  <div class="onoffswitch">
      				<input type="checkbox" name="onoffswitch" class="onoffswitch-checkbox" id="guestFloodLights" onclick="handleToggle(this);" >
      				<label class="onoffswitch-label" for="guestFloodLights">
      					<span class="onoffswitch-inner"></span>
      					<span class="onoffswitch-switch"></span>
      				</label>
      			</div>
                  <hr />
                  <h2>Guest House Garage</h2>
                  <div class="onoffswitch">
      				<input type="checkbox" name="onoffswitch" class="onoffswitch-checkbox" id="guestHouseGarage" onclick="handleToggle(this);" >
      				<label class="onoffswitch-label" for="guestHouseGarage">
      					<span class="onoffswitch-inner"></span>
      					<span class="onoffswitch-switch"></span>
      				</label>
      			</div>
                  <hr />
                  <h2>Storage Room</h2>
                  <div class="onoffswitch">
      				<input type="checkbox" name="onoffswitch" class="onoffswitch-checkbox" id="storageRoom" onclick="handleToggle(this);" >
      				<label class="onoffswitch-label" for="storageRoom">
      					<span class="onoffswitch-inner"></span>
      					<span class="onoffswitch-switch"></span>
      				</label>
      			</div>
                  <hr />
                  <h2>Back Yard</h2>
                  <div class="onoffswitch">
      				<input type="checkbox" name="onoffswitch" class="onoffswitch-checkbox" id="backYard" onclick="handleToggle(this);" >
      				<label class="onoffswitch-label" for="backYard">
      					<span class="onoffswitch-inner"></span>
      					<span class="onoffswitch-switch"></span>
      				</label>
      			</div>
                  <hr />
                  <h2>Fountain</h2>
                  <div class="onoffswitch">
      				<input type="checkbox" name="onoffswitch" class="onoffswitch-checkbox" id="fountain" onclick="handleToggle(this);" >
      				<label class="onoffswitch-label" for="fountain">
      					<span class="onoffswitch-inner"></span>
      					<span class="onoffswitch-switch"></span>
      				</label>
      			</div>
                  <hr />
                  <h2>Pool Pump</h2>
                  <div class="onoffswitch">
      				<input type="checkbox" name="onoffswitch" class="onoffswitch-checkbox" id="poolPump" onclick="handleToggle(this);" >
      				<label class="onoffswitch-label" for="poolPump">
      					<span class="onoffswitch-inner"></span>
      					<span class="onoffswitch-switch"></span>
      				</label>
      			</div><br>
      
               </div>
             </div>
      
             <div id="laundryRoom">
               <hr size="10" NOSHADE>
               <h1>
                  <p align="center">Laundry Room</p></h1>
                         <hr />
                <div id="mainThermostat">
                   <div id="tstatSlider">
                      <h2>Thermostat Setting</h2>
                      <input id="tstatRange0" type="range" style="width: 220px; height 40px" min=72 max=86 value=76 step = 1.0 list="increments2" oninput="updateThermostatValue(this.id, this.value)" onchange="updateThermostatValue(this.id, this.value)">
                      <datalist id="increments2">
                         <option>72</option>
                         <option>74</option>
                         <option>76</option>
                         <option>78</option>
                         <option>80</option>
                         <option>82</option>
                         <option>84</option>
                         <option>86</option>
                      </datalist>
                      <span id="range0" class="readings">76</span>&deg;F
                      <br/> <br/>Setpoint:
                      <span id="setpoint0" class="readings">--</span>&deg;F
                      &nbsp;&nbsp;&nbsp;Actual:
                      <span id="current0" class="readings">--</span>&deg;F
                      &nbsp;&nbsp;&nbsp;<span id="snowFlake0"><font size=6>&#10052;</font></span>
                      <br/> <br/>
      
                      <input type="button" class="button" onclick="sendThermostatValue(thermostat[0])" value = SUBMIT />
                      <br /><br />
                   </div>
                   <div id="tstatButtons">
                      <br />
                      <br />
                      <input type="button" class="button" value="UP" onclick="thermostatUP(thermostat[0])">
                      <br />
                      <input type="button" class="button" value="DOWN" onclick="thermostatDOWN(thermostat[0])">
                   </div>
                </div>
      
               <div id = "laundryRadioButtons">
                  <hr />
                  <h2>Laundry Room Lights</h2>
                  <div class="onoffswitch">
      				<input type="checkbox" name="onoffswitch" class="onoffswitch-checkbox" id="laundryLight" onclick="handleToggle(this);" >
      				<label class="onoffswitch-label" for="laundryLight">
      					<span class="onoffswitch-inner"></span>
      					<span class="onoffswitch-switch"></span>
      				</label>
      			</div>
                  <hr />
                  <h2>Laundry Hallway Outlet</h2>
                  <div class="onoffswitch">
      				<input type="checkbox" name="onoffswitch" class="onoffswitch-checkbox" id="laundryOutlet" onclick="handleToggle(this);" >
      				<label class="onoffswitch-label" for="laundryOutlet">
      					<span class="onoffswitch-inner"></span>
      					<span class="onoffswitch-switch"></span>
      				</label>
      			</div><br>
               </div>
             </div>
      
             <div id="footer">
                <br><br><br><br>
                <p><font color="white">Copyright &copy; 2016, Jim Brower</font></p>
             </div>
             <div id="gutter">
                <a href="mailto:bulldoglowell@gmail.com?subject=Suggestions"><font color=#58ACFA>Send suggestions for improvements</font><a>
             </div>
          </div>
      </body>
      
      </html>
      
      
      posted in My Project
      BulldogLowell
      BulldogLowell
    • RE: Web App for Simple Control of my Home Automation kludge

      @TheoL

      So, my little app connects to Particle devices using their RESTful API, Ajax looks like this, which control my PhoneyTV (Particle version here) and a LED dimmer:

      example of a getter:

      function getParticleData(){
      	var requestURL = "https://api.spark.io/v1/devices/" + deviceID + "/" + getFunc + "/?access_token=" + accessToken;
      	$.getJSON(requestURL, function(json) {
      		document.getElementById("range").innerHTML = json.result + "%";
      		document.getElementById("myRange").value = json.result;
      	});
      	var myURL = "https://api.spark.io/v1/devices/" + phoneyID + "/" + phoneyVariable + "/?access_token=" + accessToken;
      	$.getJSON(myURL, function(data) {
      	var state = parseInt(data.result);
      	console.log("phoneyTV state =" + state);
      	document.getElementById("phoneyTV").checked = ((state == 1)? true : false);
      	});
      }
      

      and a setter:

      function sendDimmerValue() {
          var newValue = document.getElementById("range").innerHTML;
          var request = new XMLHttpRequest();
          var data = 'params=' + newValue + '&access_token=' + accessToken;
          var url = 'https://api.particle.io/v1/devices/' + dev_id + '/setDimLevel/';
          request.open('POST', url, true);
          request.setRequestHeader('Content-Type', 'application/x-www-form-urlencoded; charset=UTF-8');
          request.send(data);
      }
      

      no extra url encoding needed here but for Vera you must, for example:

      function sendThermostatValue(tStat) {
      	console.log("pressed");
          var newValue = document.getElementById(tStat.reading).innerHTML;
          var request = new XMLHttpRequest();
          var url = 'http://10.0.1.15/proxy.php?url=http%3A%2F%2F10.0.1.25%3A3480%2Fdata_request%3Fid%3Daction%26output_format%3Dxml%26DeviceNum%3D' + tStat.deviceNum + '%26serviceId%3Durn%3Aupnp-org%3AserviceId%3ATemperatureSetpoint1_Cool%26action%3DSetCurrentSetpoint%26NewCurrentSetpoint%3D' + newValue;
      	console.log(url);
          request.open('GET', url);
          request.send();
      }
      

      My code doesn't dynamically create devices (yet) rather, it is static HTML. My next improvement would be to build device classes, poll Vera for relevant device types and build the UI dynamically.

      @sundberg84,

      I started with a simple web page with a single value... once I learned how to make an AJAX call to Vera, it was easy to call any variable I wanted, especially because of Vera's native JSON output.

      If Domoticz API supports JSON, well it will be a breeze for you.

      Since there are a few people interested I can post something. If we get a Vera person interested, the Javascript I wrote will give them a big step in the right direction.

      posted in My Project
      BulldogLowell
      BulldogLowell
    • Web App for Simple Control of my Home Automation kludge

      Like a lot of forum members, I have a lot of automation in my house. It sometimes creates issues for guests who don't have a familiarity with home automation and my wife!

      I don't want to give total control of the house to guests, but I wanted them to have a tool that will allow them to control my hybrid system (Vera and a bunch of Particle Photon controlled devices and other gadgets) without having to download an app, which would allow them total control of my house and I have to enter my security keys.

      So, I wrote a web app which is hosted on my mac mini server and it is accessible to anyone I let onto my private LAN, only while they are on the LAN.

      It took me a while to do this, having never done anything in HTML/CSS/JavaScript/PHP, but it turns out that it is all pretty easy to do. The most difficult part was getting the status data from Vera, because of its particular preferences of handling cross-domain Ajax calls. I eventually created a PHP proxy and well, it all came together after that.

      when the website loads, it makess an Ajax call to my Vera and updates the state of every device. Plus, it also gets the state of each of the Particle Photon devices I can control/monitor. I also go get all of the local weather conditions, as you can see below.

      If anyone is interested in working on something similar or building off of this project, I'm happy to share my code. I'm certain that it would offer a lot of utility to the MySensors crowd, especially where they are using Vera's ugly UI.

      Here are a few screen shots off my web browser and iOS device:

      different devices including control of my thermostats (they can only control within a range) and dimmer in the outdoor kitchen:

      0_1472135355783_Screen Shot 2016-08-25 at 10.15.27.png

      Another shot including the drop down "Zoom to Room" menu:

      0_1472135410798_Screen Shot 2016-08-25 at 10.16.27.png

      Local Conditions:

      0_1472135865680_Screen Shot 2016-08-25 at 10.36.59.png

      posted in My Project
      BulldogLowell
      BulldogLowell
    • RE: Help converting 24VAC to 5VDC

      @Sparkman said:

      @petewill I've used these to convert from 24VAC to 5VDC: http://www.ebay.com/itm/321472165477. They are a bit more expensive, but allow for a large range of AC/DC input to 5VDC. There's also a similar one for 12VDC.

      Cheers
      Al

      👍

      posted in Hardware
      BulldogLowell
      BulldogLowell
    • RE: Bathwater temperature sensor

      0_1464390787539_Screen Shot 2016-05-27 at 7.12.24 PM.png

      Kelvin or Celcius?

      Nice project, I think I might use it for my pool...

      where did you get the laser cut acrylic?

      posted in My Project
      BulldogLowell
      BulldogLowell
    • RE: Ideas to detect car traffic in a driveway?

      break beam

      posted in General Discussion
      BulldogLowell
      BulldogLowell
    • RE: Backlit Dimmable LED Mirror with Motion Sensor

      @csa02221862 said:

      @petewill Yes that's what I'm talking about. Just wondering how the code was modified to discretely control the 3 zones.

      you want with or without the buttons?

      If with, how would the buttons work?

      posted in My Project
      BulldogLowell
      BulldogLowell
    • RE: Multiple DHT22 in one sensor for greenhouse (newbee question)

      @Dick

      Sorry for the late response...

      I created two instances of the DHT object, using pointers, so that's a little beyond a beginner (but also not hard to do). The [i] is the for-loop index, I put the two sensors into an array to simplify the code (but a little harder for new person to understand).

      My advice is to go through the Arduino learning sections on their websites and search for C++ tutorials on the web, there are many good ones.

      Try this and see if it 1) sets up the two temperature and two humidity devices on your controller and 2) does it transmit the temperatures?

      #include <SPI.h>
      #include <MySensor.h>
      #include <DHT.h>
      
      #define NUM_SENSORS 2
      
      unsigned long SLEEP_TIME = 3000UL; // Sleep time between reads (in milliseconds)
      
      MySensor gw;
      MyMessage tempMssg(0, V_TEMP);
      MyMessage humMssg(NUM_SENSORS, V_HUM);
      
      byte tempID[NUM_SENSORS] = {0,1};
      byte humID[NUM_SENSORS] = {2,3};
      
      
      DHT* dht[NUM_SENSORS];
      byte sensorPin[NUM_SENSORS] = {3, 4};
      float lastTemp[NUM_SENSORS] = {0.0, 0.0};
      float lastHum[NUM_SENSORS] = {0.0, 0.0};
      
      boolean metric = true;
      
      void setup()
      {
        Serial.begin(9600);
        gw.begin();
        for (int i = 0; i < NUM_SENSORS; i++)
        {
          dht[i] = new DHT;
          dht[i]->setup(sensorPin[i]);
        }
      
        gw.sendSketchInfo("Humidity", "1.0");
        
        for (int i = 0; i < NUM_SENSORS; i++)
        {
          gw.present(tempID[i], S_TEMP);
          gw.present(humID[i], S_HUM);
        }
        
        metric = gw.getConfig().isMetric;
        Serial.println(F("Setup Complete."));
      }
      
      void loop()
      {
        for (int i = 0; i < NUM_SENSORS; i++)
        {
          delay(dht[i]->getMinimumSamplingPeriod());
          float temperature = dht[i]->getTemperature();
          if (isnan(temperature))
          {
            Serial.print(F("Failed reading temperature from DHT"));
            Serial.println(i);
          }
          else if (temperature != lastTemp[i])
          {
            lastTemp[i] = temperature;
            if (!metric)
            {
              temperature = dht[i]->toFahrenheit(temperature);
            }
            gw.send(tempMssg.setSensor(i).set(temperature, false));  // no ack
            Serial.print(F("T"));
            Serial.print(i);
            Serial.print(F("= "));
            Serial.println(temperature);
          }
          float humidity = dht[i]->getHumidity();
          if (isnan(humidity)) 
          {
            Serial.print("Failed reading humidity from DHT");
            Serial.println(i);
          } 
          else if (humidity != lastHum[i]) 
          {
            lastHum[i] = humidity;
            gw.send(humMssg.setSensor(i).set(humidity, false));  // no ack
            Serial.print(F("H"));
            Serial.print(i);
            Serial.print(F("= "));
            Serial.println(humidity);
          }
        }
        gw.sleep(SLEEP_TIME); //sleep a bit
      }
      

      I cannot test it but hopefully we can get it working for you.

      posted in Troubleshooting
      BulldogLowell
      BulldogLowell
    • RE: Multiple DHT22 in one sensor for greenhouse (newbee question)

      @Dick

      This (untested) should work to check the temp and humidity:

      #include <SPI.h>
      #include <MySensor.h>
      #include <DHT.h>
      
      #define CHILD_ID_HUM1 0
      #define CHILD_ID_HUM2 1
      #define CHILD_ID_TEMP1 3
      #define CHILD_ID_TEMP2 4
      
      unsigned long SLEEP_TIME = 3000; // Sleep time between reads (in milliseconds)
      
      MySensor gw;
      DHT*  dht[2];
      byte sensorPin[2] = {3, 4};
      float lastTemp[2] = {0.0, 0.0};
      float lastHum[2] = {0.0, 0.0};
      
      boolean metric = true;
      //MyMessage msgHum(CHILD_ID_HUM1, V_HUM);
      //MyMessage msgTemp(CHILD_ID_TEMP1, V_TEMP);
      
      void setup()
      {
        gw.begin();
        for (int i = 0; i < 2; i++)
        {
          dht[i] = new DHT;
          dht[i]->setup(sensorPin[i]);
        }
      
        gw.sendSketchInfo("Humidity", "1.0");
      
        gw.present(CHILD_ID_HUM1, S_HUM);
        gw.present(CHILD_ID_HUM2, S_HUM);
        gw.present(CHILD_ID_TEMP1, S_TEMP);
        gw.present(CHILD_ID_TEMP1, S_TEMP);
      
        metric = gw.getConfig().isMetric;
      }
      
      void loop()
      {
        for (int i = 0; i < 2; i++)
        {
          delay(dht[i]->getMinimumSamplingPeriod());
          float temperature = dht[i]->getTemperature();
          if (isnan(temperature))
          {
            Serial.print(F("Failed reading temperature from DHT"));
            Serial.println(i);
          }
          else if (temperature != lastTemp[i])
          {
            lastTemp[i] = temperature;
            if (!metric)
            {
              temperature = dht[i]->toFahrenheit(temperature);
            }
            //gw.send(msgTemp.set(temperature, i));
            Serial.print(F("T"));
            Serial.print(i);
            Serial.print(F("= "));
            Serial.println(temperature);
          }
          float humidity = dht[i]->getHumidity();
          if (isnan(humidity)) 
          {
            Serial.print("Failed reading humidity from DHT");
            Serial.println(i);
          } 
          else if (humidity != lastHum[i]) 
          {
            lastHum[i] = humidity;
            //gw.send(msgHum.set(humidity, 1));
            Serial.print(F("H"));
            Serial.print(i);
            Serial.print(F("= "));
            Serial.println(humidity);
          }
        }
        gw.sleep(SLEEP_TIME); //sleep a bit
      }
      

      if you can test it using the Serial Monitor, we can then get the radio commands working (not complete yet)

      posted in Troubleshooting
      BulldogLowell
      BulldogLowell
    • RE: problem in SoilMoistSensor

      @Reza

      you should show the output of the Serial Monitor.

      There may be a variable overflowing...

      posted in Troubleshooting
      BulldogLowell
      BulldogLowell
    • RE: problem in SoilMoistSensor

      @Reza said:

      this is not true .i test with full water and few water and no water but Numbers in disarray for example first secend is -8% and next 2% and next -16% and next 24% and next -7% . . .

      I don't know what "this is not true" is meant to say...

      As I mentioned, I cannot test. Perhaps you could show the Serial output using this modification of the sketch, changing the sleep in loop() to this:

      delay(1000);
      
      posted in Troubleshooting
      BulldogLowell
      BulldogLowell
    • RE: problem in SoilMoistSensor

      @Reza

      well, I have no way of testing 😞

      but I would do like this:

      #include <math.h> // Conversion equation from resistance to %
      #include <SPI.h>
      #include <MySensor.h>
      #include "CircularBuffer.h"
      
      #define NUM_READS 10 // Number of sensor reads for filtering
      #define CHILD_ID 0
      
      CircularBuffer forward(NUM_READS);
      CircularBuffer reverse(NUM_READS);
      
      MySensor gw; // Arduino initialization
      MyMessage msg(CHILD_ID, V_LEVEL);
      
      unsigned long SLEEP_TIME = 30000; // Sleep time between reads (in milliseconds)
      
      long buffer[NUM_READS];
      
      const long knownResistor = 4700; // Constant value of known resistor in Ohms
      
      void setup() 
      {
        Serial.begin(9600);
        gw.begin();
        gw.sendSketchInfo("Soil Moisture Sensor Reverse Polarity", "1.0");
        gw.present(CHILD_ID, S_HUM);
        pinMode(6, OUTPUT);
        pinMode(7, OUTPUT);
      }
      
      void loop() 
      {
        forward.addElement(measure(6, 7, 1));
        reverse.addElement(measure(7, 6, 0));
        Serial.print ("forward average:");
        Serial.println (forward.mean());
        Serial.print ("reverse average:");
        Serial.println (reverse.mean());
      
        float sensor1 = long((forward.mean() + reverse.mean()) / 2.0);
      
        Serial.print ("resistance bias =" );
        Serial.println (forward.mean() - reverse.mean());
        Serial.print ("sensor bias compensated value = ");
        Serial.println (sensor1);
        Serial.println ();
      
        gw.send(msg.set((long int)ceil(sensor1)));
        gw.sleep(SLEEP_TIME);
      }
      
      long int measure (int phase_b, int phase_a, int analog_input)
      {
        for (int i = 0; i < NUM_READS; i++) 
        {
          // Read 1 pair of voltage values
          digitalWrite(phase_a, HIGH);                 // set the voltage supply on
          delayMicroseconds(25);
          long int supplyVoltage = analogRead(analog_input);   // read the supply voltage
          delayMicroseconds(25);
          digitalWrite(phase_a, LOW);                  // set the voltage supply off
          delay(1);
      
          digitalWrite(phase_b, HIGH);                 // set the voltage supply on
          delayMicroseconds(25);
          long int sensorVoltage = analogRead(analog_input);   // read the sensor voltage
          delayMicroseconds(25);
          digitalWrite(phase_b, LOW);                  // set the voltage supply off
          delay(1);
          return long((knownResistor * (supplyVoltage - sensorVoltage ) / sensorVoltage));
        }
      }
      

      1: Start wiht a new sketch
      2: add two tabs to the sketch like this:
      0_1461843649311_Screen Shot 2016-04-28 at 7.40.08 AM.png
      3: paste these library files into the two tabs:
      CircularBuffer.h

      #ifndef CircularBuffer_h
      #define CircularBuffer_h
      
      #include <Arduino.h>
      
      class CircularBuffer {
        public:
          CircularBuffer(size_t size);
          void addElement(float newElement);
          float mean();
          float maxVal();
          float minVal();
          float sigma();
          size_t numElements();
          float arrayElement(int location);
      
        private:
          float* array;
          float* next;
          size_t size;
          int index = 0;
          int num_elements = 0;
      };
      
      #endif
      

      CircularBuffer.cpp

      #include "CircularBuffer.h"
      #include <Arduino.h>
      
      CircularBuffer::CircularBuffer(size_t arraySize)
      {
        size = arraySize;
        array = new float[arraySize];
        next = &array[0];
      }
      
      void CircularBuffer::addElement(float newElement)
      {
        *next = newElement;
        index++;
        if (index >= size)
        {
          index = 0;
        }
        next = &array[index];
        if (++num_elements > size)
        {
          num_elements = size;
        }
      }
      
      float CircularBuffer::arrayElement(int location)
      {
        return array[location];
      }
      
      
      float CircularBuffer::mean()
      {
        float average = 0;
        for (int i = 0; i < num_elements; i++)
        {
          average += array[i];
        }
        return average / num_elements;
      }
      
      size_t CircularBuffer::numElements()
      {
        return num_elements;
      }
      
      float CircularBuffer::maxVal()
      {
        float maximum;
        for (int i = 0; i < num_elements; i++)
        {
          if (i == 0)
          {
            maximum = array[0];
          }
          else if (array[i] > maximum)
          {
            maximum =  array[i];
          }
        }
        return maximum;
      }
      float CircularBuffer::minVal()
      {
        float minimum;
        for (int i = 0; i < num_elements; i++)
        {
          if (i == 0)
          {
            minimum = array[0];
          }
          else if (array[i] < minimum)
          {
            minimum =  array[i];
          }
        }
        return minimum;
      }
      float CircularBuffer::sigma()
      {
        float average = mean();
        float sigma = 0;
        for(int i = 0; i < min(size, num_elements) ; i++)
        {
          sigma += ((array[i] - average) * (array[i] - average));
        }
        return sqrt(sigma / min(size, num_elements));
      }
      
      posted in Troubleshooting
      BulldogLowell
      BulldogLowell
    • RE: problem in SoilMoistSensor

      @Reza

      Well, I really don't like a few things in that sketch, like the struct that is never used, for example.

      or using a global variable as an array index:

      int i; // Simple index variable
      

      or superfluous nonsense comments:

      // initialize serial communications at 9600 bps:
        Serial.begin(115200);
      

      The other thing is that the "average" function may be using junk until you take 10 readings, and that takes 5 minutes to clear out:

      long buffer[NUM_READS];
      

      try this instead which will initialize the array to zeroes:

      long buffer[NUM_READS] = {0};
      

      also, we ought to modify the addReading() and average() functions to size itself for the first 9 readings....

      There may be other datatype issues, but let's start here.

      posted in Troubleshooting
      BulldogLowell
      BulldogLowell
    • RE: problem in SoilMoistSensor

      @Reza

      why not post the sketch you are using?

      posted in Troubleshooting
      BulldogLowell
      BulldogLowell
    • RE: Irrigation Controller (up to 16 valves with Shift Registers)

      @rechin304 said:

      Well, that's not the point.
      I will have 4 zones that need different type of water needs. For example one zone will be with micro irrigation watering, another one with lawn sprinkler. i do not understand why not to start all zones at once and they wi finish according to the time set and not to start one after other. Another thing is why to wait for a zone to finish when you trigger another one.

      I see your point an understand your questions. The purpose of zone cycling is to be able to have enough pressure in each zone independently while also having pressure for household use. Drawing water to every zone (in my case 9) makes the pressure so low, there may not be enough to open the individual pop-up valves, much less fill the washing machine.

      The wait period (which you may set) is there to allow the time for hydraulic actuation of solenoid valves. These types of valves close slowly, and since they are in a manifold, the next valve to start opens faster if the water pressure at the manifold is allowed time to reach normal static pressure.

      The beauty of open source is that you get to do it your way. If you have the pressure to run all your valves at the same time, with enough to spare to take a shower, then you are fortunate!

      So, did you add another 'switch' to your controller to send the all zone command?

      posted in My Project
      BulldogLowell
      BulldogLowell
    • RE: Irrigation Controller (up to 16 valves with Shift Registers)

      @rechin304

      have you tried changing the eight to one?

      #define NUMBER_OF_VALVES 8  // Change this to set your valve count up to 16.
      

      trigger all your relays with the same output.

      posted in My Project
      BulldogLowell
      BulldogLowell
    • RE: Good-looking way to control dimmer?

      @mfalkvidd

      I haven't tried it yet but always thought one of these distance sensors, hidden away under a counter or shelf could be a great interactive dimmer control.

      I haven't tried yet but I ought to. The programming should be relatively easy, I would think. Look for the presence of a reflection in the operating range of 2-25cm (they sell other ranges) for a time and adjust by moving nearer-to or further-from the sensor.

      Or, just wave past it to turn on/off and hold hand over it to fade up/down slowly.

      posted in General Discussion
      BulldogLowell
      BulldogLowell
    • RE: MySensors Contest Winners 2016

      👏

      great work!

      posted in Announcements
      BulldogLowell
      BulldogLowell
    • RE: MySensors Controlled LED Accent Lighting (and/or Christmas Lights?)

      @TRS-80 said:

      Only problem is, FastLED does not support RGBW LED strips, yet. 😕 Although they state that this is something they are working on.

      You may not have liked the White in the RGBW strips. Many folks tune the white for warmth by adding some red!

      I'm sure you can find a nice white somewhere in your RGB strip.

      both libraries you mention are great places to start and end.

      You can certainly use the Adafruit Neopixel library to fade your LEDs, it just isn't built into the library. I have to say, programming that in was a challenge. If you need pointers on that once you get yours, I'm happy to assist.

      posted in My Project
      BulldogLowell
      BulldogLowell
    • RE: Irrigation Controller (up to 16 valves with Shift Registers)

      @Mark-Jefford

      hmmm... are your relays ACTIVE HIGH (actuate wiht a 5V signal) or ACTIVE LOW (actuate when brought to ground) type?

      posted in My Project
      BulldogLowell
      BulldogLowell
    • RE: MySensors Controlled LED Accent Lighting (and/or Christmas Lights?)

      @TRS-80

      +1 for having such a kickass username...

      there are many ledstrip examples here, you may have to do a bit of searching:

      posted in My Project
      BulldogLowell
      BulldogLowell
    • RE: Irrigation Controller (up to 16 valves with Shift Registers)

      @Mark-Jefford said:

      one thing to note the shift register 0b0000000010000000 does not seem to work, will work out a plan around this as i need to run a 12 pump off the relay bank to draw water from the water butt.

      Can you explain more? is there a bug?

      posted in My Project
      BulldogLowell
      BulldogLowell
    • RE: Decimals not appear at Vera UI

      @rabeliyo

      yes, but you shouldn't need to cast a float to a float like you are doing here:

      gw.send(msgVoltBat.set((float)VoltLevelBat,2),1);
      

      also, because of the way floating point numbers work:

      if (VoltLevelBat != lastVoltLevelBat) {
      

      may be a LOT more frequently than you may actually wish. Consider just updating the controller with a simple timer instead.

      posted in Vera
      BulldogLowell
      BulldogLowell
    • RE: Irrigation Controller (up to 16 valves with Shift Registers)

      @johnecy

      const int latchPin = 8;
      

      I think you should be OK to try that

      posted in My Project
      BulldogLowell
      BulldogLowell
    • RE: The Awesome Electric Range (Stove) Monitoring Device

      nice project...

      Even better if you can hide all that. Wives are funny about kitchens!

      posted in OpenHardware.io
      BulldogLowell
      BulldogLowell
    • RE: Best dimmable countertop lights?

      @Samuel235 said:

      Just one of many ideas, the possibilties are endless. I'de always go for RGB leds over just white, allows for more customisation while able to still give you the same white as the white leds.

      ... unless, as in my use case, colors are not needed.

      I'm too stingy to pay for the unused dry powder!

      😉

      posted in Hardware
      BulldogLowell
      BulldogLowell
    • RE: Irrigation Controller (up to 16 valves with Shift Registers)

      @Mark-Jefford

      In that case, I would just treat each zone as a separate relay/lamp and use Openhab to control the individual ON times... I think.

      posted in My Project
      BulldogLowell
      BulldogLowell
    • RE: Best dimmable countertop lights?

      @Samuel235

      nice idea!

      posted in Hardware
      BulldogLowell
      BulldogLowell
    • RE: Best dimmable countertop lights?

      @korttoma

      Hey Tomas!!

      I'd love to add color, but my wife says "NO!"

      what ledstrip ddi you use? My kids are eager to use color, so I may do the under-bed ledstrip for my daughter.

      posted in Hardware
      BulldogLowell
      BulldogLowell
    • RE: Best dimmable countertop lights?

      @mfalkvidd

      I used these on Amazon. By and large the reviews are spot on... but I installed inside a molding strip that I routed out like this and mounted underneath, to make it have a finished look. You can see the molding in the photo below, just inboard of the doors. I used a clear adhesive to augment the not-great adhesive backing that the strips come with, something like a bead of hot glue down each side of the milled out molding.

      0_1458770884571_FullSizeRender.jpg
      and the finished product like this... though the color is horribly off on my iPhone photo. It looks much warmer to the eye in real life.
      0_1458771159855_FullSizeRender-1.jpg
      Most importantly, they allow for a lot of light and a happy wife!

      Photo from the other side shows the LED's above as well, though not completed for the left hand island:
      0_1458772094442_FullSizeRender-2.jpg
      Again, the Colors are all wrong!!

      posted in Hardware
      BulldogLowell
      BulldogLowell
    • RE: Best dimmable countertop lights?

      Hey @mfalkvidd,

      I was working on a similar project with @petewill and worked up a non-blocking version of @blacey code which allows you to use the dimmer controller as a repeating node.

      here is what I came up with, sorry the class wasn't pulled out into a header/implementation file.

      It does compile and I have tested it, some notes on how to use in the code...

      have fun building your project, whichever LEDs you choose.

      /**
       * The MySensors Arduino library handles the wireless radio link and protocol
       * between your home built sensors/actuators and HA controller of choice.
       * The sensors forms a self healing radio network with optional repeaters. Each
       * repeater and gateway builds a routing tables in EEPROM which keeps track of the
       * network topology allowing messages to be routed to nodes.
       *
       * Created by Henrik Ekblad <henrik.ekblad@mysensors.org>
       * Copyright (C) 2013-2015 Sensnology AB
       * Full contributor list: https://github.com/mysensors/Arduino/graphs/contributors
       *
       * Documentation: http://www.mysensors.org
       * Support Forum: http://forum.mysensors.org
       *
       * This program is free software; you can redistribute it and/or
       * modify it under the terms of the GNU General Public License
       * version 2 as published by the Free Software Foundation.
       *
       *******************************
       *
       * REVISION HISTORY
       * Version 1.0 - February 15, 2014 - Bruce Lacey
       * Version 1.1 - August 13, 2014 - Converted to 1.4 (hek)
       * Version 1.2 - December 7, 2015 - converted to non-blocking code to facilitate multiple outputs and repeater node (pseudo-threading) <bulldoglowell>
       *
       * DESCRIPTION
       * This sketch provides a Dimmable LED Light using PWM and based Henrik Ekblad
       * <henrik.ekblad@gmail.com> Vera Arduino Sensor project.
       * Developed by Bruce Lacey, inspired by Hek's MySensor's example sketches.
       *
       * The circuit uses a MOSFET for Pulse-Wave-Modulation to dim the attached LED or LED strip(s).
       * The MOSFET Gate pin is connected to Arduino pin 3 (LED_PIN), the MOSFET Drain pin is connected
       * to the LED negative terminal and the MOSFET Source pin is connected to ground.
       *
       * This sketch is extensible to support more than one MOSFET/PWM dimmer per circuit.
       * http://www.mysensors.org/build/dimmer
       */
       
      #define SN "DimmableLED"
      #define SV "1.1"
      
      #include <MySensor.h>
      #include <SPI.h>
      
      #define LED_PIN_0 3      // Arduino PWM capable pin attached to MOSFET Gate pin
      #define LED_PIN_1 4      
      
      #define FADE_DELAY 15  // Delay in ms for each percentage fade up/down (10ms = 1s full-range dim)
      
      class Fade
      {
        public:
          Fade() {};
          ~Fade() {};
          Fade(int pin, uint32_t timeStep = 15, uint8_t min = 0, uint8_t max = 255);
          void 
            write(int to),
            update(void),
            update(uint32_t time),
            begin(void),
            begin(int pin, uint32_t timeStep = 15),
            begin(int pin, uint32_t timeStep = 15, uint8_t min = 0, uint8_t max = 255);
          uint8_t 
            read(void),
            getSetpoint(void);
          uint32_t 
            readSpeed(void),
            writeSpeed(uint32_t time);  
            
        private:
          uint8_t 
            _min,
            _max,
            _targetFade,
            _pwmRate,
            _pin;
          uint32_t 
            _timeStep,
            _last;
      };
      
      Fade::Fade(int pin, uint32_t timeStep, uint8_t min, uint8_t max)
      {
        _pin = pin;
        _timeStep = timeStep;
        _min = min;
        _max = max;
        pinMode(_pin, OUTPUT);
        analogWrite(_pin, _min);
        _pwmRate = _min;
      }
      
      void Fade::begin(void)
      {
        pinMode(_pin, OUTPUT);
      }
      
      void Fade::begin(int pin, uint32_t timeStep)
      {
        _pin = pin;
        _timeStep = timeStep;
        _min = 0;
        _max = 255;
        pinMode(_pin, OUTPUT);
        analogWrite(_pin, _min);
        _pwmRate = _min;
      }
      void Fade::begin(int pin, uint32_t timeStep, uint8_t min, uint8_t max)
      {
        _pin = pin;
        _timeStep = timeStep;
        _min = min;
        _max = max;
        pinMode(_pin, OUTPUT);
        analogWrite(_pin, _min);
        _pwmRate = _min;
      }
      
      void Fade::write(int to)
      {
        _targetFade = (uint8_t) constrain(to, _min, _max);
        this->update();
      }
      
      void Fade::update()
      {
        this->update(millis());
      }
      
      void Fade::update(uint32_t time)
      {
        if (time - _timeStep > _last)
        {
          _last = time;
          if (_pwmRate > _targetFade) analogWrite(_pin, --_pwmRate);
          if (_pwmRate < _targetFade) analogWrite(_pin, ++_pwmRate);
        }
      }
      
      uint8_t Fade::getSetpoint()
      {
        return _targetFade;
      }
      
      uint8_t Fade::read()
      {
        return _pwmRate;
      }
      
      uint32_t Fade::readSpeed()
      {
        return _timeStep;
      }
      
      uint32_t Fade::writeSpeed(uint32_t time)
      {
        _timeStep = time;
      }
      
      Fade led[2];   // Create two Fade objects, led[0] & led[1]
      MySensor gw;
      
      MyMessage dimmer0Msg(0, V_DIMMER);
      MyMessage lightM0sg(0, V_LIGHT);
      MyMessage dimmer1Msg(1, V_DIMMER);
      MyMessage light1Msg(1, V_LIGHT);
       
      void setup()
      {
        //Serial.begin(9600);
        led[0].begin(LED_PIN_0, FADE_DELAY, 0, 255);  // initialize the Fade objects
        led[0].write(0);                              // set initial value to "off"
        led[1].begin(LED_PIN_1, FADE_DELAY, 0, 255);
        led[1].write(0);
        gw.begin(incomingMessage, true);
        gw.present( 0, S_DIMMER );
        gw.request( 0, V_DIMMER );
        gw.present( 1, S_DIMMER );
        gw.request( 1, V_DIMMER );
        gw.sendSketchInfo(SN, SV);
      }
      
      void loop()
      {
        gw.process();
        led[0].update();  // must keep this command in loop for every Fade object
        led[1].update();  // calling update transitions the PWM towards the setpoint, without blocking
      }
      
      void incomingMessage(const MyMessage &message)
      {
        if (message.type == V_LIGHT || message.type == V_DIMMER)
        {
          int requestedLevel = atoi(message.data);
          requestedLevel *= ( message.type == V_LIGHT ? 100 : 1 );  
          requestedLevel = requestedLevel > 100 ? 100 : requestedLevel;
          requestedLevel = requestedLevel < 0   ? 0   : requestedLevel;
          
          Serial.print(F("Changing led["));
          Serial.print(message.sensor);
          Serial.print(F("] level to "));
          Serial.print(requestedLevel);
          Serial.print(F(" from "));
          Serial.println(map(led[message.sensor].getSetpoint(), 0, 255, 0, 100));
          
          led[message.sensor].write(map(requestedLevel, 0, 100, 0, 255));
        }
      }
      
      posted in Hardware
      BulldogLowell
      BulldogLowell
    • RE: Irrigation Controller (up to 16 valves with Shift Registers)

      @fusion_man

      why not just post your code? I'm sure the guy who wrote the original code won't mind, if you include his original notes and credits.

      posted in My Project
      BulldogLowell
      BulldogLowell
    • RE: Trying to make sense of Serial display

      @NotTooTechy said:

      but what is all the other stuff? I also mentioned I am writing my own Controller and surely that might have implied that I have been programming for a while as it is not a trivial task. As it happens that "while" is about 40 years.

      0;0;3;0;9;read: 23-23-0 s=255,c= < This mishmash
      3,t=11,pt=0,l=8,sg=0:Humidity< This mishmash
      23;255;3;0;11;Humidity< This mishmash
      0;0;3;0;9;read: 23-23-0 s=255,c=3,t=12,pt=0,l=3,sg=0:1.0< This mishmash
      23;255;3;0;12;1.0 < aaahhhh finally, data!

      but, in the API it describes exactly what the "mishmash" is! It contains Node ID's, sensor ID's and other critical data for you to sort the messages... plus the data. 😉

      posted in General Discussion
      BulldogLowell
      BulldogLowell
    • RE: Trying to make sense of Serial display

      @NotTooTechy

      Have you read the Serial API?

      posted in General Discussion
      BulldogLowell
      BulldogLowell
    • RE: Rain Guage

      @mrc-core

      I guess I'd need to see a schematic or a good photo.

      can you generate a simple interrupt with a pushbutton and a resistor?

      posted in My Project
      BulldogLowell
      BulldogLowell
    • RE: Rain Guage

      @mrc-core

      to PULL UP, yes.

      posted in My Project
      BulldogLowell
      BulldogLowell
    • RE: Rain Guage

      @mrc-core

      if you don't pull up/down the signal, you may get floating voltages and spurious interrupts occurring.

      try to use the internal pullup

      pinMode(yourInterruptPin, INPUT_PULLUP);
      

      if that does not work try an external 10kOhm resistor to pull it up/down for your switch.

      posted in My Project
      BulldogLowell
      BulldogLowell
    • RE: Rain Guage

      @mrc-core

      No PULLUP or PULLDOWN resistor?

      posted in My Project
      BulldogLowell
      BulldogLowell
    • RE: Irrigation Controller (up to 16 valves with Shift Registers)

      @fusion_man

      maybe we can add a rain sensor this season. It is a good idea to include it.

      posted in My Project
      BulldogLowell
      BulldogLowell
    • RE: Rain Guage

      @mrc-core

      how is it connected electronically?

      posted in My Project
      BulldogLowell
      BulldogLowell
    • RE: Irrigation Controller (up to 16 valves with Shift Registers)

      If you are worried about Program Space you can turn off Serial debug to rid yourself of a bunch of overhead in the sketch. I am not using String class so there is PLENTY of RAM and I've been using this for a while with no stack corruption issues:

      #define DEBUG_ON   // comment out to surpress serial monitor output
      

      if you propose to turn ON the master valve when each valve is cycled on, then I believe all you need to do is add that valve to the bitmask (logical OR) each time you updateRelays().

      void updateRelays(int value)
      {
        if(value)
        {
          value |= 0b0000000010000000;  // master is the eighth relay, there are 7 controlled in this example (active HIGH in this example)
        }
        digitalWrite(latchPin, LOW);
        shiftOut(dataPin, clockPin, MSBFIRST, highByte(value));
        shiftOut(dataPin, clockPin, MSBFIRST, lowByte(value));
        digitalWrite(latchPin, HIGH);
      }
      

      not tested

      posted in My Project
      BulldogLowell
      BulldogLowell
    • RE: Parking Sensor problem

      @mikeg291

      It could be that transient sound waves are reflecting/scattering around and affecting the readings. The NewPing library states that 29milliseconds should be the shortest delay between reads.

      Sound travels a little more than one foot in 1millisecond so you have an inherent delay in an empty garage; 15 feet each way, for example is about 30milliseconds from ping to read.

      So, if you insert a delay(50) after you obtain the distance you may leave enough time for all of the sound to be absorbed or reflected away.

      void loop()
      {
        unsigned long now = millis();
        
        unsigned int fullDist = (sonar.ping_median() / US_ROUNDTRIP_CM);
      //  Serial.println(fullDist);
        int displayDist = min(fullDist, MAX_DISTANCE);
        if (displayDist == 0 && skipZero<10) {
          // Try to filter zero readings
          skipZero++;
          return;
        }
        delay(50);  // try this
        // etcetera
      
      posted in Troubleshooting
      BulldogLowell
      BulldogLowell
    • RE: Propane Fuel Level Sensor to Vera

      If you are up to the task, you could also consider modifying an existing implementation of a Vera sensor.

      LightLevel (IMHO) is a particularly un-sexy implementation! Dimmer on the other hand, well at least it dresses for the party, even if it isn't particularly pretty. (In the world of Vera's GUI it's probably Scarlett Johansson!)

      There is lots of assistance on the Vera forum on how to change the html and json implementation files.

      posted in Vera
      BulldogLowell
      BulldogLowell
    • RE: Why do you monitor your temp and humidity ?

      similar to @sundberg84 , remote monitoring of my home while I'm away; very humid climate at certain times of year.

      There is no hygrometer in my thermostat, so I monitor humidity (which creeps up when the A/C is inactive). MySensors is connected to my home automation, so my system can respond if the humidity creeps up by turning on the A/C and drawing down the moisture. You cannot do that with temperature monitoring alone unless you keep the temp at a level where you know your moisture level has to be low.

      My crawlspace basement has a dehumidifier, and that is humidity controlled. I keep an eye on that, though it is just a notification if things get wonky.

      Another use is turning on the bathroom vent when the humidity rises. My kids/guests neglect to do that when using the shower and significant moisture condenses everywhere. It takes a lot of time for that to evaporate and so it increases the humidity in the house over time. That humidity stays, even if the A/C is working.

      I also have a couple that just sit there monitoring. Maybe I just got too excited and overdid it a bit. 😉

      posted in General Discussion
      BulldogLowell
      BulldogLowell
    • RE: [Need help] Intercom project

      @chrishiscox said:

      As this is the outside box,

      Looks to me like this is the indoor unit

      posted in My Project
      BulldogLowell
      BulldogLowell
    • RE: [Need help] Intercom project

      I'm guessing one of the four wires that go to the handset (RJ22) will carry the signal to 'ring' the speaker in the handset.

      try your multimeter on each of those four and ground while the door button is pressed.

      posted in My Project
      BulldogLowell
      BulldogLowell
    • RE: Video How To - Phoney TV

      BIG improvement to the old design using the picture frame, Pete!!!

      posted in My Project
      BulldogLowell
      BulldogLowell
    • RE: MySensor collides with LowPower's SLEEP_ enum

      @SiLeX

      have you checked out the API?

      posted in Bug Reports
      BulldogLowell
      BulldogLowell
    • RE: How To - Doorbell Automation Hack

      @drock1985

      I think your code is a little hard to get through, but you need two instances of the Bounce library if you want to manage two buttons:

        debouncer.attach(DOORBELL1_PIN);
        debouncer.attach(DOORBELL2_PIN);
      

      do this instead:

      //...
      Bounce debouncePin1 = Bounce();
      Bounce debouncePin2 = Bounce();
      //...
      void setup()
      {
        //...
        debouncePin1.attach(DOORBELL1_PIN);
        debouncePin1.interval(5);
        debouncePin2.attach(DOORBELL2_PIN);
        debouncePin2.interval(5);
        //...
      }
      

      and update the state with:

      debouncerPin1.update();
      

      get it?

      alternatively you could use an array:

      Bounce debouncer[2] = Bounce();
      

      it would make your code a lot easier, but you have to understand arrays and Classes or you will be a little lost.

      posted in My Project
      BulldogLowell
      BulldogLowell