Skip to content
  • MySensors
  • OpenHardware.io
  • Categories
  • Recent
  • Tags
  • Popular
Skins
  • Light
  • Brite
  • Cerulean
  • Cosmo
  • Flatly
  • Journal
  • Litera
  • Lumen
  • Lux
  • Materia
  • Minty
  • Morph
  • Pulse
  • Sandstone
  • Simplex
  • Sketchy
  • Spacelab
  • United
  • Yeti
  • Zephyr
  • Dark
  • Cyborg
  • Darkly
  • Quartz
  • Slate
  • Solar
  • Superhero
  • Vapor

  • Default (No Skin)
  • No Skin
Collapse
Brand Logo
D

Dalhoj

@Dalhoj
About
Posts
26
Topics
4
Shares
0
Groups
0
Followers
0
Following
0

Posts

Recent Best Controversial

  • What did you build today (Pictures) ?
    D Dalhoj

    Hi
    Its been a long time since I made something Mysensors.

    But now I made my first WIFI node with led dimmer. Using the ESP8266 NodeMCU.

    I use the VeraPlus and made a new Mysensors Device, and put in the IP of the NodeMCU.

    This is not my last wifi node. I am thinking of making a motion/temp sensor next :-)

    alt text

    and the box.

    alt text

    General Discussion

  • Infrared Temp Sensor
    D Dalhoj

    Maybe for floor heating, then you dont have to place anything on the floor, and can have a thermostat on the wall, but messure on the floor.

    Hardware

  • SceneController
    D Dalhoj

    Its a danish enclosure: http://www.lk.dk/produkter/afbrydermateriel-lk-fuga/lk-fuga/antibakteriel/underlag/baseline-2-modul-346dd488/ for the button one and: http://www.lk.dk/produkter/afbrydermateriel-lk-fuga/lk-fuga/antibakteriel/underlag/baseline-1-modul-hvid/ for the top one.

    Its a danish department of Schneider Electric called LK(Lauritz Knudsen)

    Development

  • motion and relay
    D Dalhoj

    Hey maybe you can modify this sketch:

    http://forum.mysensors.org/topic/902/relay-motion-multisensor

    My Project

  • Repeater not working - How to?
    D Dalhoj

    Hi I think I have the same problem, so just to be clear

    To get a static parent I'll write:(here parant 4)

    gw.begin(NULL, AUTO, false, 4);

    Or can I leave out false, is it default and write:

    gw.begin(NULL, AUTO, , 4); ????

    regards
    Dalhoj

    General Discussion

  • Project boxes for MySensor's nodes and gateway?
    D Dalhoj

    This is my gateway.
    image.jpeg

    Enclosures / 3D Printing

  • Relay / Motion Multisensor
    D Dalhoj

    @madmax good idea I have some DHT22 lying around. But I have not tried making a multi sensor with them.

    Have You tried the skech from the site, I tried it and it work on mine?

    My Project motion relay multisensor

  • Problem with node reciving data
    D Dalhoj

    It's on a arduino uno, and it's powerd via the usb, som my laptop.

    Do you think I should try an extern power supply?

    My Project

  • Problem with node reciving data
    D Dalhoj

    OK

    Now I have come a step further.

    When I remote everything from the loop() besides the process() I can recive date from the gateway.

    The question now is how to get it on the display, and change between the data, say every 2 sec.

    My Project

  • Problem with node reciving data
    D Dalhoj

    OK so far so good

    I tryed the new code you posted @hek, but still no luck

    Then I changed the gw.begin() to:

    gw.begin(incomingMessage);
    

    Then I could see things on the display :-)

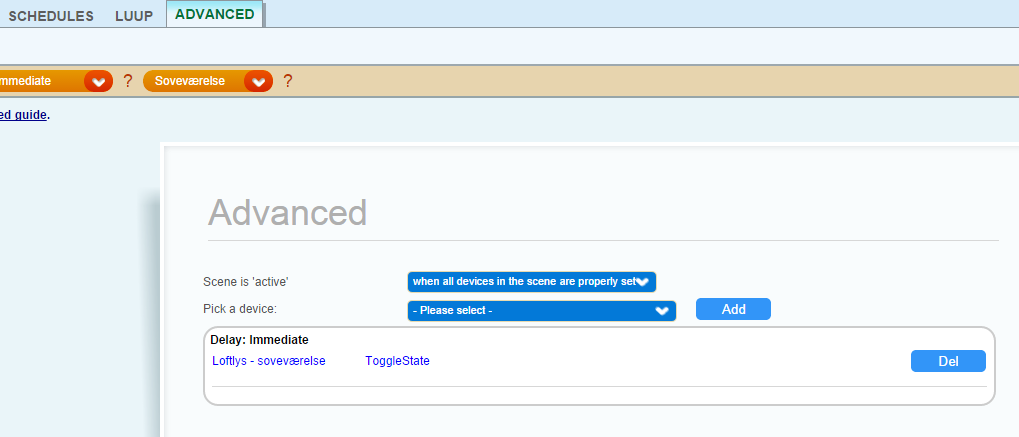
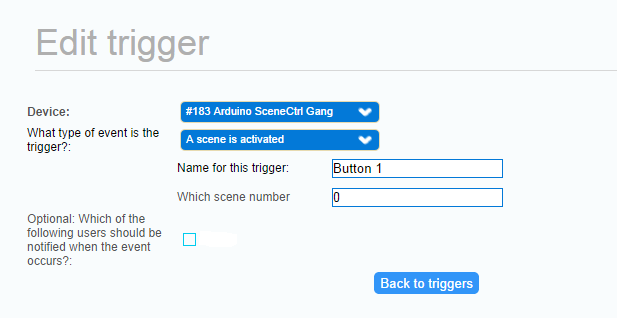
    Then the question comes to how to send from vera to the node?

    I tryed to do as here: Mysensor forum
    I used this code:

    luup.call_action("urn:upnp-arduino-cc:serviceId:arduino1", "SendCommand", {radioId="10;255", variableId="VAR_1", value=88}, 260)
    

    The problem is when I run the code the serial monitor looks like this:

    sensor started, id 10
    send: 10-10-0-0 s=255,c=0,t=17,pt=0,l=3,st=ok:1.4
    send: 10-10-0-0 s=255,c=3,t=6,pt=1,l=1,st=ok:0
    read: 0-0-10 s=255,c=3,t=6,pt=0,l=2:M
    send: 10-10-0-0 s=255,c=3,t=11,pt=0,l=7,st=ok:Display
    send: 10-10-0-0 s=255,c=3,t=12,pt=0,l=3,st=ok:1.0
    send: 10-10-0-0 s=3,c=0,t=25,pt=0,l=3,st=ok:1.4
    send: 10-10-0-0 s=255,c=3,t=11,pt=0,l=7,st=ok:Display
    send: 10-10-0-0 s=255,c=3,t=12,pt=0,l=3,st=ok:1.0
    send: 10-10-0-0 s=3,c=0,t=25,pt=0,l=3,st=ok:1.4
    send: 10-10-0-0 s=255,c=3,t=11,pt=0,l=7,st=ok:Display
    send: 10-10-0-0 s=255,c=3,t=12,pt=0,l=3,st=ok:1.0
    send: 10-10-0-0 s=3,c=0,t=25,pt=0,l=3,st=ok:1.4
    send: 10-10-0-0 s=255,c=3,t=11,pt=0,l=7,st=ok:Display
    send: 10-10-0-0 s=255,c=3,t=12,pt=0,l=3,st=ok:1.0
    send: 10-10-0-0 s=3,c=0,t=25,pt=0,l=3,st=ok:1.4
    send: 10-10-0-0 s=255,c=3,t=11,pt=0,l=7,st=ok:Display
    send: 10-10-0-0 s=255,c=3,t=12,pt=0,l=3,st=ok:1.0
    send: 10-10-0-0 s=3,c=0,t=25,pt=0,l=3,st=ok:1.4
    send: 10-10-0-0 s=255,c=3,t=11,pt=0,l=7,st=ok:Display
    send: 10-10-0-0 s=255,c=3,t=12,pt=0,l=3,st=ok:1.0
    send: 10-10-0-0 s=3,c=0,t=25,pt=0,l=3,st=ok:1.4


    And its like the node restarts, and not recives any data.

    I also changed from the string to int, in the var1. so this the code as it is now:

    // Simple SceneController With Dispaly
    
    #include <MySensor.h>
    #include <SPI.h>
    #include <Bounce2.h>
    // Display START
    #include <Wire.h>
    #include <Adafruit_GFX.h>
    #include <Adafruit_SSD1306.h>
    
    //// If using software SPI (the default case):
    #define OLED_MOSI   3 //D1
    #define OLED_CLK   4 //D0
    #define OLED_DC    5 //DC
    #define OLED_CS    6 //CS
    #define OLED_RESET 7 //res
    Adafruit_SSD1306 display(OLED_MOSI, OLED_CLK, OLED_DC, OLED_RESET, OLED_CS);
    
    #define NUMFLAKES 10
    #define XPOS 0
    #define YPOS 1
    #define DELTAY 2
    
    #define LOGO16_GLCD_HEIGHT 16 
    #define LOGO16_GLCD_WIDTH  16 
    static const unsigned char PROGMEM logo16_glcd_bmp[] =
    { B00000000, B11000000,
      B00000001, B11000000,
      B00000001, B11000000,
      B00000011, B11100000,
      B11110011, B11100000,
      B11111110, B11111000,
      B01111110, B11111111,
      B00110011, B10011111,
      B00011111, B11111100,
      B00001101, B01110000,
      B00011011, B10100000,
      B00111111, B11100000,
      B00111111, B11110000,
      B01111100, B11110000,
      B01110000, B01110000,
      B00000000, B00110000 };
    
    #if (SSD1306_LCDHEIGHT != 64)
    #error("Height incorrect, please fix Adafruit_SSD1306.h!");
    #endif
    // Display END
    
    int VAR1 = 99;
    
    #define CHILD_ID 3
    // PIN for the buttons
    byte buttons[] = {14, 15, 16, 17, 18, 19};
    #define NUMBUTTONS sizeof(buttons)
    byte pressed[NUMBUTTONS], justpressed[NUMBUTTONS], justreleased[NUMBUTTONS];
    
    MySensor gw;
    
    Bounce debouncer[NUMBUTTONS];
    
    int oldValue[NUMBUTTONS];
    
    MyMessage msgOn(CHILD_ID,V_SCENE_ON);
    MyMessage msgOff(CHILD_ID,V_SCENE_OFF);
    MyMessage msg(CHILD_ID,V_VAR1);
    void setup()  
    {  
      gw.begin(incomingMessage);
      
      /// Make input & enable pull-up resistors on switch pins
      for (short i=0; i < NUMBUTTONS; i++){
    
        pinMode(buttons[i], INPUT);
        digitalWrite(buttons[i], HIGH);
        oldValue[i] = -1;
        // After setting up the button, setup debouncer
        debouncer[i].attach(buttons[i]);
        debouncer[i].interval(5);
        
        // Send the Sketch Version Information to the Gateway
      gw.sendSketchInfo("Display", "1.0");
      // Register binary input sensor to gw (they will be created as child devices)
      gw.present(CHILD_ID, S_SCENE_CONTROLLER); 
      
    //Display START
    // by default, we'll generate the high voltage from the 3.3v line internally! (neat!)
      display.begin(SSD1306_SWITCHCAPVCC);
      // init done
    //Display END
      }
      
    }
    
    //  Check if digital input has changed and send in new value
    void loop()  
    {
      
      // Alway process incoming messages whenever possible
      gw.process();
      
      for (short i=0; i < NUMBUTTONS; i++){
        debouncer[i].update();
        // Get the update value
        int value = debouncer[i].read();
    
        if (value != oldValue[i]) {
           // Send in the new value
           if (value==HIGH) {
             //gw.send(msgOff.set(i));
           }
           else {
             gw.send(msgOn.set(i));
           }
           oldValue[i] = value;
        }
      }
      
    //Display
    
       // Clear the buffer.
      display.clearDisplay();
    
      display.setTextSize(2);
      display.setTextColor(WHITE);
      display.setCursor(0,0);
      display.println("Test 1");
      display.display();
      delay(2000);
      
      // Clear the buffer.
      display.clearDisplay();
    
      display.setTextSize(2);
      display.setTextColor(WHITE);
      display.setCursor(0,0);
      display.println("Test");
      display.setTextColor(BLACK, WHITE); // 'inverted' text
      display.println("2");
      display.display();
      delay(2000);
      
      // Clear the buffer.
      display.clearDisplay();
      
        display.setTextSize(2);
      display.setTextColor(WHITE);
      display.setCursor(0,0);
      display.println(VAR1);
      display.display();
      delay(2000);
      
      // Clear the buffer.
      display.clearDisplay();
    }
    
    
    void incomingMessage(const MyMessage &message) {
      // We only expect one type of message from controller. But we better check anyway.
      if (message.type==V_VAR1) {
         VAR1 = atoi(message.data);
       } 
    }
    /*
    void incomingMessage(const MyMessage &message) {
      // We only expect one type of message from controller. But we better check anyway.
      if (message.type==V_VAR1) {
         Serial.println( message.getString());
       } 
    }
    */
    
    My Project

  • Problem with node reciving data
    D Dalhoj

    I found that the problem starts when I add

    gw.begin(incomingMessage, AUTO, true);
    

    insted of:

    gw.begin();
    

    even when I try to use:

    gw.begin(NULL, AUTO, true);
    

    Its like the sketch freezes, and I cant see anything on the display or in the serial monitor.
    When I go back to gw.begin() the display Again starts showing the Things in the loop ()

    Why can that be?

    My Project

  • Problem with node reciving data
    D Dalhoj

    Hi I'm trying to make a scene controller with a display, witch show info from my Vera.

    The sketch works fine as long im not trying to recive data from the gateway.
    so the problem is how to get data from the gateway using the V_VAR1 in my case. later I would like to use all 5 variables.

    Below is my code:

    // Simple SceneController With Dispaly
    
    #include <MySensor.h>
    #include <SPI.h>
    #include <Bounce2.h>
    // Display START
    #include <Wire.h>
    #include <Adafruit_GFX.h>
    #include <Adafruit_SSD1306.h>
    
    //// If using software SPI (the default case):
    #define OLED_MOSI   3 //D1
    #define OLED_CLK   4 //D0
    #define OLED_DC    5 //DC
    #define OLED_CS    6 //CS
    #define OLED_RESET 7 //res
    Adafruit_SSD1306 display(OLED_MOSI, OLED_CLK, OLED_DC, OLED_RESET, OLED_CS);
    
    #define NUMFLAKES 10
    #define XPOS 0
    #define YPOS 1
    #define DELTAY 2
    
    #define LOGO16_GLCD_HEIGHT 16 
    #define LOGO16_GLCD_WIDTH  16 
    static const unsigned char PROGMEM logo16_glcd_bmp[] =
    { B00000000, B11000000,
      B00000001, B11000000,
      B00000001, B11000000,
      B00000011, B11100000,
      B11110011, B11100000,
      B11111110, B11111000,
      B01111110, B11111111,
      B00110011, B10011111,
      B00011111, B11111100,
      B00001101, B01110000,
      B00011011, B10100000,
      B00111111, B11100000,
      B00111111, B11110000,
      B01111100, B11110000,
      B01110000, B01110000,
      B00000000, B00110000 };
    
    #if (SSD1306_LCDHEIGHT != 64)
    #error("Height incorrect, please fix Adafruit_SSD1306.h!");
    #endif
    // Display END
    
    String VAR1 = "Error";
    
    #define CHILD_ID 3
    // PIN for the buttons
    byte buttons[] = {3, 4, 5, 6, 7, 8     };
    #define NUMBUTTONS sizeof(buttons)
    byte pressed[NUMBUTTONS], justpressed[NUMBUTTONS], justreleased[NUMBUTTONS];
    
    MySensor gw;
    
    Bounce debouncer[NUMBUTTONS];
    
    int oldValue[NUMBUTTONS];
    
    MyMessage msgOn(CHILD_ID,V_SCENE_ON);
    MyMessage msgOff(CHILD_ID,V_SCENE_OFF);
    MyMessage msg(CHILD_ID,V_VAR1);
    void setup()  
    {  
      gw.begin(incomingMessage, AUTO, true);
    
      /// Make input & enable pull-up resistors on switch pins
      for (short i=0; i < NUMBUTTONS; i++){
    
        pinMode(buttons[i], INPUT);
        digitalWrite(buttons[i], HIGH);
        oldValue[i] = -1;
        // After setting up the button, setup debouncer
        debouncer[i].attach(buttons[i]);
        debouncer[i].interval(5);
        
        // Send the Sketch Version Information to the Gateway
      gw.sendSketchInfo("Display", "1.0");
      // Register binary input sensor to gw (they will be created as child devices)
      gw.present(CHILD_ID, S_SCENE_CONTROLLER); 
      
    //Display START
    // by default, we'll generate the high voltage from the 3.3v line internally! (neat!)
      display.begin(SSD1306_SWITCHCAPVCC);
      // init done
    //Display END
      }
      
    }
    
    //  Check if digital input has changed and send in new value
    void loop()  
    {
      
      // Alway process incoming messages whenever possible
      gw.process();
      
      for (short i=0; i < NUMBUTTONS; i++){
        debouncer[i].update();
        // Get the update value
        int value = debouncer[i].read();
    
        if (value != oldValue[i]) {
           // Send in the new value
           if (value==HIGH) {
             //gw.send(msgOff.set(i));
           }
           else {
             gw.send(msgOn.set(i));
           }
           oldValue[i] = value;
        }
      }
      
    //Display
    
       // Clear the buffer.
      display.clearDisplay();
    
      display.setTextSize(2);
      display.setTextColor(WHITE);
      display.setCursor(0,0);
      display.println("Test 1");
      display.display();
      delay(2000);
      
      // Clear the buffer.
      display.clearDisplay();
    
      display.setTextSize(2);
      display.setTextColor(WHITE);
      display.setCursor(0,0);
      display.println("Test");
      display.setTextColor(BLACK, WHITE); // 'inverted' text
      display.println("2");
      display.display();
      delay(2000);
      
      // Clear the buffer.
      display.clearDisplay();
      
        display.setTextSize(2);
      display.setTextColor(WHITE);
      display.setCursor(0,0);
      display.println(VAR1);
      display.display();
      delay(2000);
      
      // Clear the buffer.
      display.clearDisplay();
    }
    
    
    void incomingMessage(const MyMessage &message) {
      // We only expect one type of message from controller. But we better check anyway.
      if (message.type==V_VAR1) {
         VAR1 = String(message.data);
       } 
    }
    

    Regards ;-)

    My Project

  • Relay / Motion Multisensor
    D Dalhoj

    @ServiceXp @hek Here just a little update

    I have now glued all parts to the box, and added a plastic cover over the part with 230V

    Billede 30-01-15 18.44.44.jpg
    Billede 30-01-15 18.47.20.jpg

    so now nothing should be able to touch and it looks a bit nicer.

    My Project motion relay multisensor

  • Relay / Motion Multisensor
    D Dalhoj

    Hi, I thought I would share my newest project with you Guys.
    This project is a multisensory, containing a relay and a motion sensor.

    The project is powered by 230V and has a small 5V power supply in the box as well.
    What I used:
    HC-SR501 PIR
    1 channel relay
    Arduino Pro Mini 5V
    NRF24L01+
    AMS1117 5V-3.3V Step Down Module
    1A 5V Power Supply from Ebay

    Code:
    MultiSensor_Relay_Motion.ino

    Pictures:
    image2.jpeg
    image1.jpeg
    image3.jpeg image5.jpeg image6.jpeg

    The Multisensor is used in my basement room, and turns on the light if there is motion, when I enter the room.
    The logic is made by PLEG on a Vera3

    My Project motion relay multisensor

  • Scene Controller
    D Dalhoj

    Very nice

    Development

  • SceneController
    D Dalhoj

    @hek said:

    I mean that the Arduino checks if user presses button for one sec and send the SCENE_OFF. You probably shouldn't let Vera handle this.

    I would make the Arduino send ie. for button 1 send scene ID 0 at short press and scene ID 1 for long press and so on.

    @Nuubi Here is two of my scene controllers:

    The first one is installed in my bedtable upload-c29b281d-083c-4b73-a4df-b27240ee9e31 
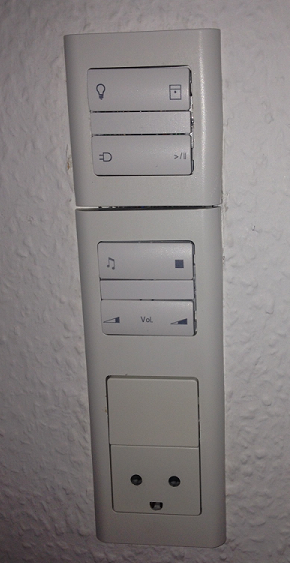
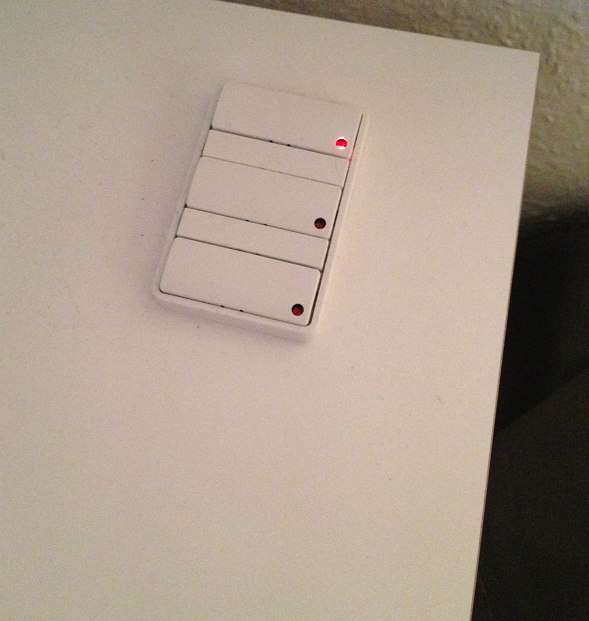
and is a combination of a scenecontroller and a relaysensor for controling the 3 leds.

    The 2. is installed in the living room, and is a 8 button scenecontroller.
    upload-aee5fc51-3dea-4a00-b592-db58744e1e87
    It controlles

    • the lights in the living room
    • Blinds Open / Close
    • a power outlet On/Off
    • pause/plays my XBMC Medie Center
    • starts my Yamaha reciver and starts playing net radio
    • stops the radion again and turn of the reciver
    • turns up / down the volume on the reciver

    That is what I use it for at the moment.

    Development

  • SceneController
    D Dalhoj

    I dont know if you can have a 1 sec press!

    but i uses LUUP and a simple ex could be turn on a lamp and if the lamp if on turn it off:

    local relay1 = 114 --Light ID

    local relay1_status = luup.variable_get("urn:upnp-org:serviceId:SwitchPower1", "Status", relay1) --Status of Light

    if (relay1_status == "0") then
    luup.call_action("urn:upnp-org:serviceId:SwitchPower1","SetTarget",{ newTargetValue="1" }, relay1)
    else
    luup.call_action("urn:upnp-org:serviceId:SwitchPower1","SetTarget",{ newTargetValue="0" }, relay1)
    end

    Or you can use a toggle from the advanced scene menu:
    upload-cb06931d-0aaa-4ee3-b90f-345180b5247c

    That is how I do it.

    Development

  • SceneController
    D Dalhoj

    Hi

    After the Node and Scenecontroller shows up in the Vera UI you have to create a scene and then asign the scenecontroller as a trigger:
    arduino_trigger.png

    For button 1 the scene number is 0
    for button 2 the scene number is 1 and so on.

    Hope is helps ;-)

    Development

  • Relays and Scene Controller on same Node v1.4
    D Dalhoj

    Hi again

    I think so to, here is the new code.

    Scene_Controller_6_buttons_and_5_Relays.ino

    I reduced the relays to 3, and all the devices is in vera, but the relay status update is stile slow / not happing

    The scene controller has now child id = 0 and the relays 1-3.

    My Project scene controlle relay multisensor

  • Relays and Scene Controller on same Node v1.4
    D Dalhoj

    I can now see that the relays not allways are in sync on the vera. Some times when I press the ON button in the Vera GUI the still displays as OFF but the relay is on. Sometimes it changes to ON in the GUI after 5-10 sec. sometimes it never changes.

    About the Toggle I mean when you create a new scene in Vera, there is the "Advanced" tab where I add the arduino relay sensor and choose "ToggleState" from the dropdown menu. I cant get it to work,

    My Project scene controlle relay multisensor
  • Login

  • Don't have an account? Register

  • Login or register to search.
  • First post
    Last post
0
  • MySensors
  • OpenHardware.io
  • Categories
  • Recent
  • Tags
  • Popular