3D Printing - slicing issues
-
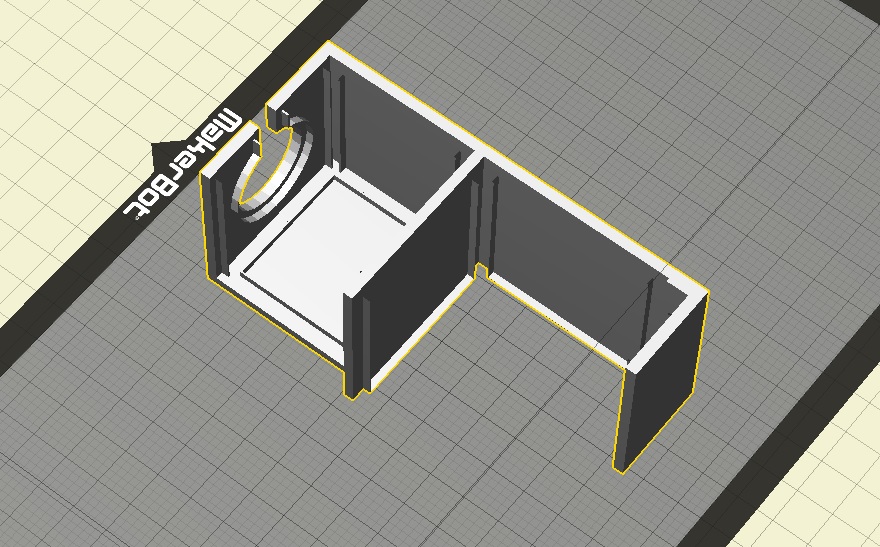
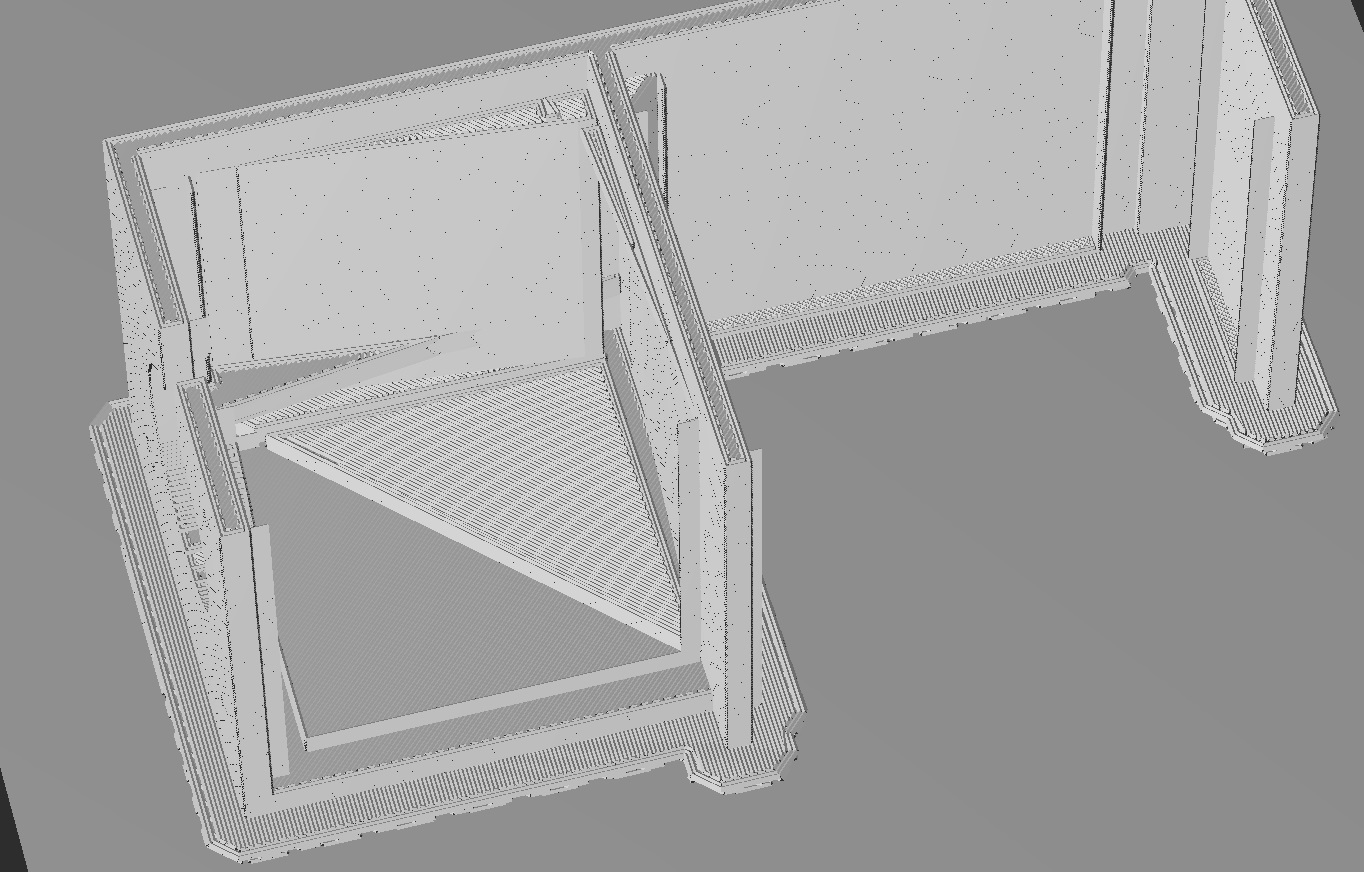
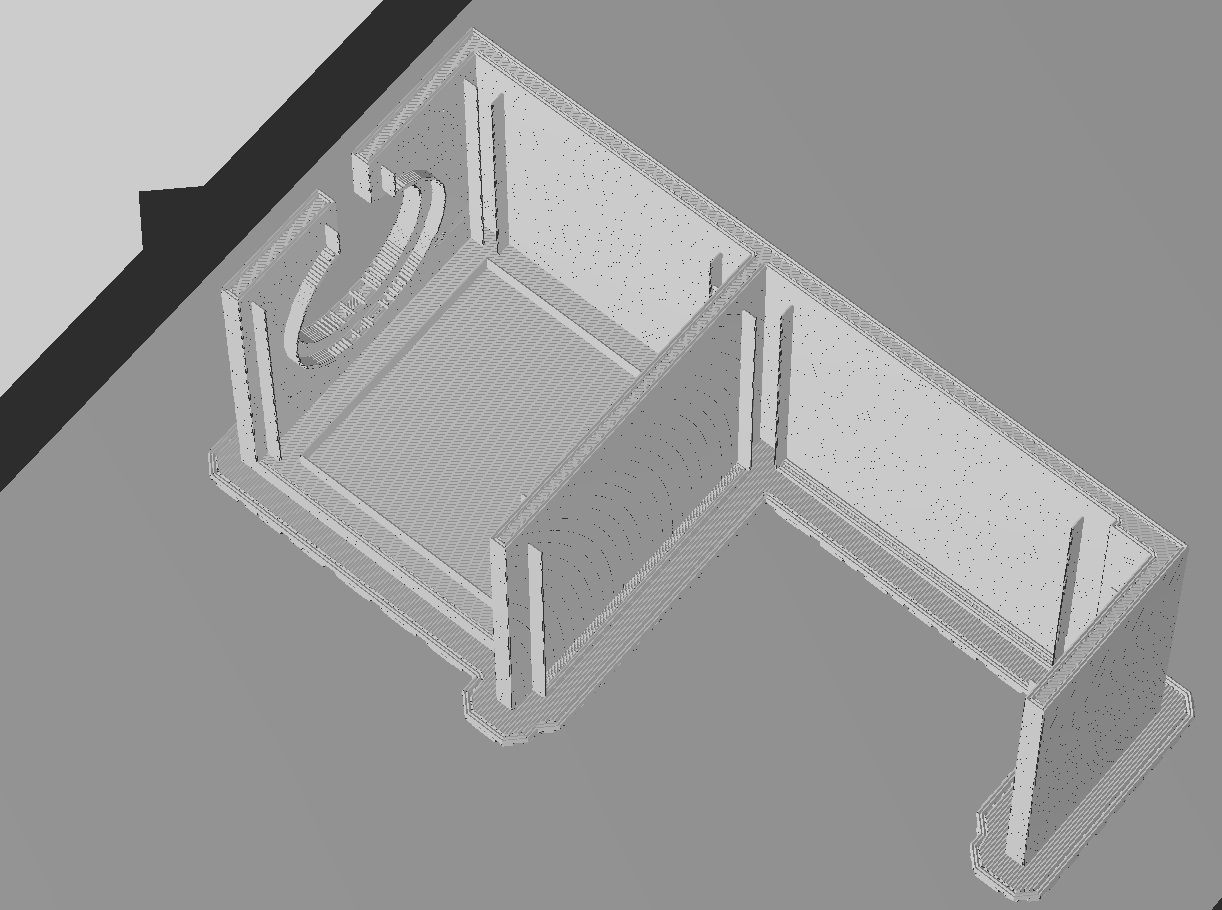
I'm having some troubles with a 3D model that I'm going to print and I'm wondering if anyone has any expertise on the matter (or knows of a forum where someone might be able to help).
For some reason when the printer path file is generated, random areas seem to get filled (I don't have any supports enabled). I'm using MakerBot software and I've attached some pictures to explain what I'm talking about:
Any help would be appreciated!
Edit: I'm using SketchUp and after some further reading I realized it may be causing some issues since it models surfaces and not solids.
-
@hek said:
Not sure SketchUp is the best tool for modelling.
Have you tried Blender?
I think you're right. I just happened to start using sketchup (without knowing much about it) and didn't feel like going to a new tool. That being said, I figured out what the issue is. Since sketchup is a surface modelling software, it can really confuse some of the plugins which export STL files. That being said, you need to be extremely particular about making sure there are no inverted faces (outside is actually outside) and things are grouped appropriately. I went through and 'cleaned up' my model file and it turned out much better now.
-
I'm having some troubles with a 3D model that I'm going to print and I'm wondering if anyone has any expertise on the matter (or knows of a forum where someone might be able to help).
For some reason when the printer path file is generated, random areas seem to get filled (I don't have any supports enabled). I'm using MakerBot software and I've attached some pictures to explain what I'm talking about:
Any help would be appreciated!
Edit: I'm using SketchUp and after some further reading I realized it may be causing some issues since it models surfaces and not solids.
-
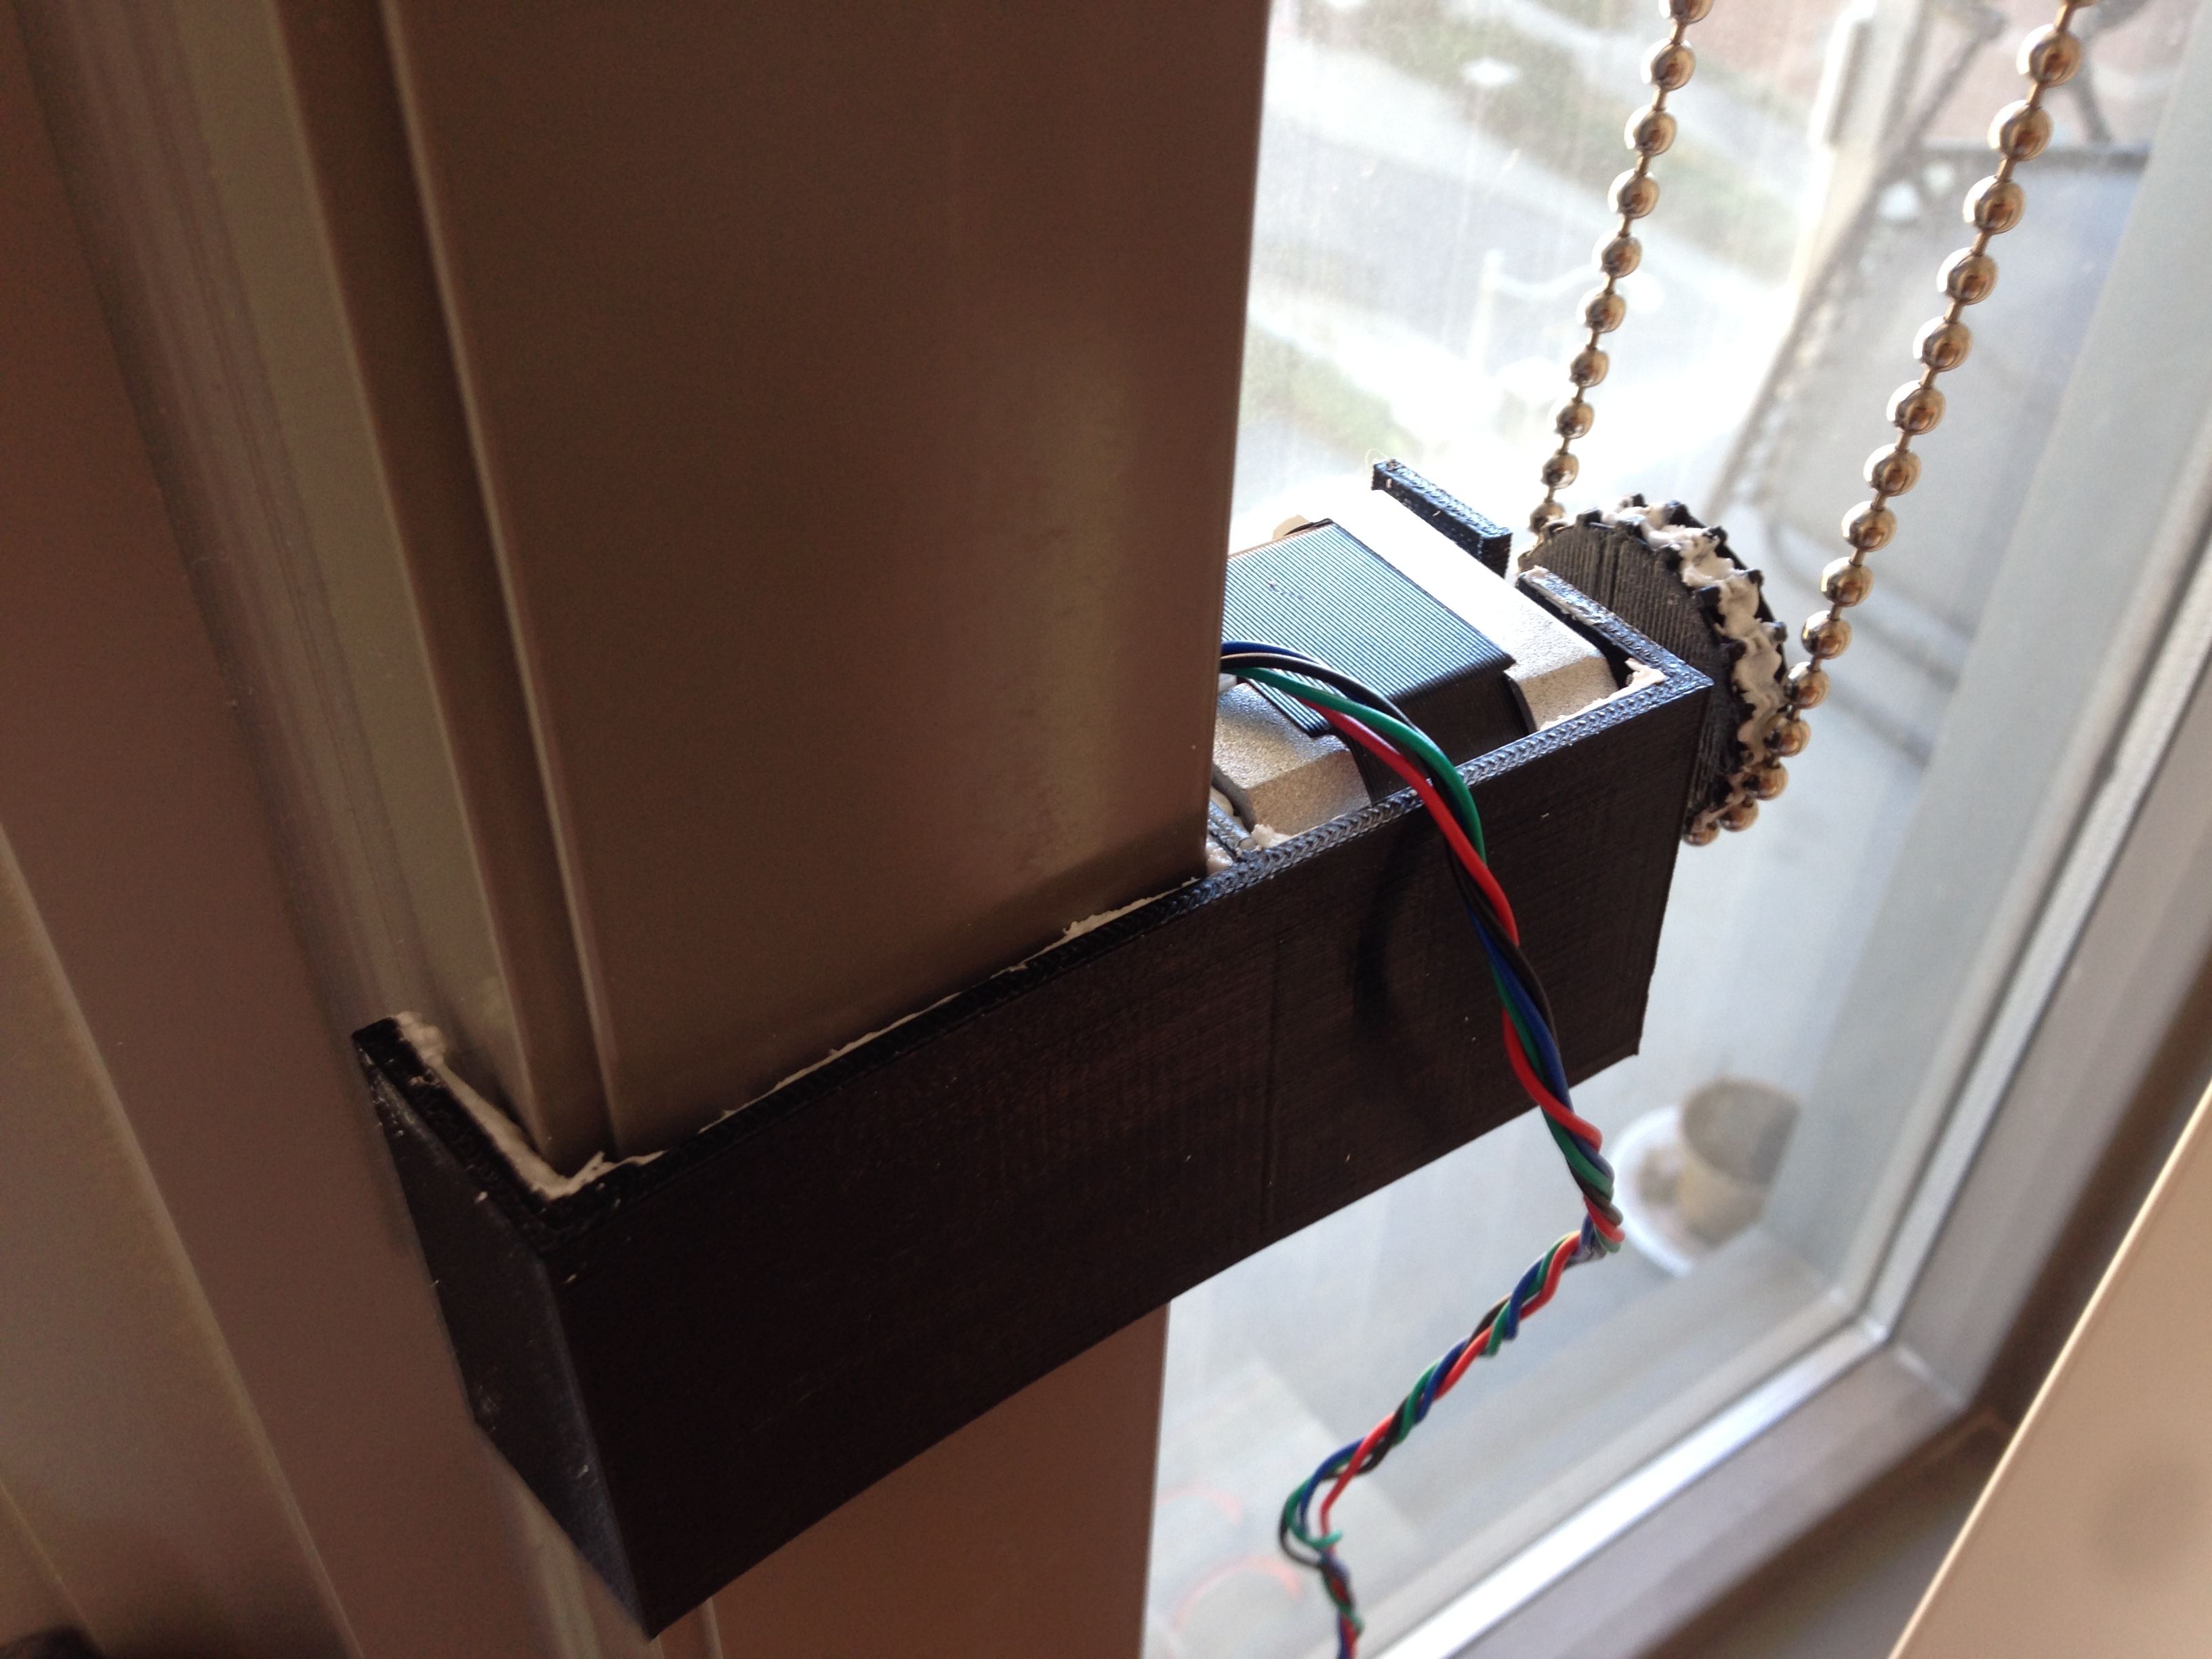
It'll be a bit hard to explain in words, but I'll do my best! My condo has a metal frame around the window (which contains vertical blinds). The right side of the bracket will mount onto this frame while the left side will hold the stepper motor. I have a gear for the stepper to connect it to the ball-chain of my vertical blinds. The little inlays that are on each surface are going to hold some sort of rubber material (for now, I think I'm going to use silicon caulking). I'm going to fill them in and then smooth them out with a putty knife. This has two purposes: provide traction so it doesn't slip off the window frame, and also try to minimize vibrations to keep the noise down.
I'll post a picture when its all done (in the other blinds thread), assuming that it works.
-
It'll be a bit hard to explain in words, but I'll do my best! My condo has a metal frame around the window (which contains vertical blinds). The right side of the bracket will mount onto this frame while the left side will hold the stepper motor. I have a gear for the stepper to connect it to the ball-chain of my vertical blinds. The little inlays that are on each surface are going to hold some sort of rubber material (for now, I think I'm going to use silicon caulking). I'm going to fill them in and then smooth them out with a putty knife. This has two purposes: provide traction so it doesn't slip off the window frame, and also try to minimize vibrations to keep the noise down.
I'll post a picture when its all done (in the other blinds thread), assuming that it works.
Hello! It looks like you're interested in this conversation, but you don't have an account yet.
Getting fed up of having to scroll through the same posts each visit? When you register for an account, you'll always come back to exactly where you were before, and choose to be notified of new replies (either via email, or push notification). You'll also be able to save bookmarks and upvote posts to show your appreciation to other community members.
With your input, this post could be even better 💗
Register Login