What did you build today (Pictures) ?

-
If someone would be interested:
Enclosure
Ard. Mega enclosure
Raspberry enclosureHad to do some modifications for the mega, but the cost of this enclosure was more than worth it.
Hmz.. normaly don't buy stuff at conrad but apparently they have good prices on cases... 😏
-
-
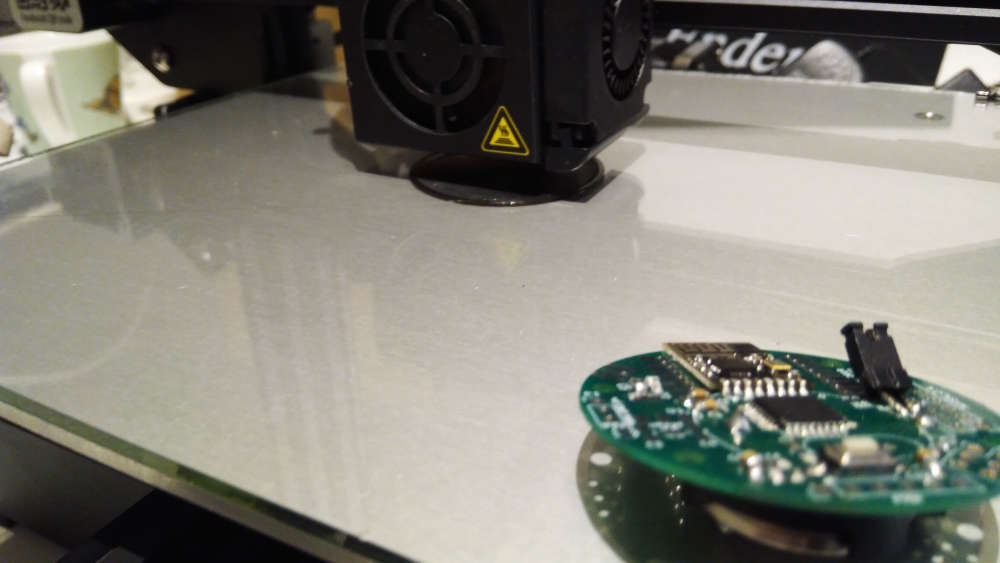
Testing a CCS811 CO2 sensor. It seems to use less power then the MH-Z14A I am using now. The CCS811 may even run on battery. I will compare measurements of these two sensors with a Netatmo sensor. The sensors have to burn in for two days bevore I start the comparison.
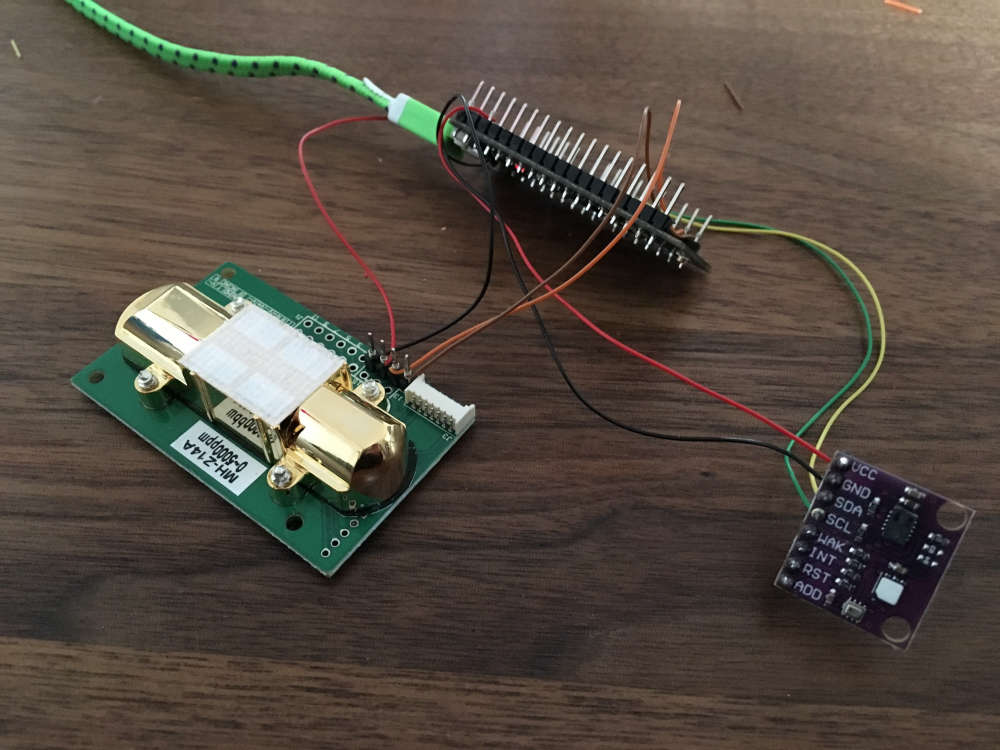
The CCS811 breakout board I use hast temp, hum and barometer sensors (and the CO2). -
Testing a CCS811 CO2 sensor. It seems to use less power then the MH-Z14A I am using now. The CCS811 may even run on battery. I will compare measurements of these two sensors with a Netatmo sensor. The sensors have to burn in for two days bevore I start the comparison.
The CCS811 breakout board I use hast temp, hum and barometer sensors (and the CO2).@fotofieber said in What did you build today (Pictures) ?:
Testing a CCS811 CO2 sensor.
Unfortunately this is not a CO2 sensor. It's only a VOC sensor giving an estimated eCO2 value. It's useful to tell you if your room needs ventilation, but not much more. And as even the VOC part is not calibrated it's only good for relative measurement.
AFAIK the only similar sensors which are calibrated and give absolute values are SGP30 and BME680.
If you want to measure CO2 you need a CO2 sensor and it's going to consume a lot of power, at least too much for a battery powered sensor.[edit] there's also the MiCS-VZ-89TE TVOC sensor, they claim to have a curve of eCO2 not too far from NDIR sensor in their datasheet. But that datasheet is strangely poor in details, they didn't even put any electrical characteristics...
https://sgx.cdistore.com/datasheets/sgx/MiCS-VZ-89TE_V1.0.pdf -
I don't think I ever managed to get it right the first revision.
-
I don't think I ever managed to get it right the first revision.
But it's something...
-
But it's something...
@sundberg84 you should print the board on paper, stick it on a piece cardboard and cut. Then check if size is good, you can even put the "big" components on it by sticking the pins through the cardboard to make sure you'll have enough space.
-
@sundberg84 you should print the board on paper, stick it on a piece cardboard and cut. Then check if size is good, you can even put the "big" components on it by sticking the pins through the cardboard to make sure you'll have enough space.
@nca78 great tip! But it's more common it's a schematic or footprint error. The outline "should" be the easy part even if I messed up.
-
@fotofieber said in What did you build today (Pictures) ?:
Testing a CCS811 CO2 sensor.
Unfortunately this is not a CO2 sensor. It's only a VOC sensor giving an estimated eCO2 value. It's useful to tell you if your room needs ventilation, but not much more. And as even the VOC part is not calibrated it's only good for relative measurement.
AFAIK the only similar sensors which are calibrated and give absolute values are SGP30 and BME680.
If you want to measure CO2 you need a CO2 sensor and it's going to consume a lot of power, at least too much for a battery powered sensor.[edit] there's also the MiCS-VZ-89TE TVOC sensor, they claim to have a curve of eCO2 not too far from NDIR sensor in their datasheet. But that datasheet is strangely poor in details, they didn't even put any electrical characteristics...
https://sgx.cdistore.com/datasheets/sgx/MiCS-VZ-89TE_V1.0.pdf@nca78 said in What did you build today (Pictures) ?:
@fotofieber said in What did you build today (Pictures) ?:
Testing a CCS811 CO2 sensor.
Unfortunately this is not a CO2 sensor. It's only a VOC sensor giving an estimated eCO2 value. It's useful to tell you if your room needs ventilation, but not much more. And as even the VOC part is not calibrated it's only good for relative measurement.
My tests will show, how far away I am with this sensor in my indoor usage scenario.
My Netatmo sensors claim to measure CO2 and are battery powered. They seem to calibrate themselves to the lowest level they measure in 24 hours. This behaviour seems to be similar with the CCS811. The Netatmo sensors seem quite close to my MH-Z14A.
In the datasheet for the CCS811 I have read, that you can't use them in your green house, because of its self calibration. Netatmo may have the same restriction too.
AFAIK the only similar sensors which are calibrated and give absolute values are SGP30 and BME680.
I have ordered a SGP30 some days ago and will test it too. The BME680 needs binary code linked which is a no go for me. (As a gift I would take it into my test setup. :) )
If you want to measure CO2 you need a CO2 sensor and it's going to consume a lot of power, at least too much for a battery powered sensor.
The problem with high power sensors is, that they produce heat, which can make your temperature measurements unusable. :(
As my CO2 sensors have a color led to show air quality, they are mains powered anyway.
[edit] there's also the MiCS-VZ-89TE TVOC sensor, they claim to have a curve of eCO2 not too far from NDIR sensor in their datasheet. But that datasheet is strangely poor in details, they didn't even put any electrical characteristics...
https://sgx.cdistore.com/datasheets/sgx/MiCS-VZ-89TE_V1.0.pdfThank you for the link. I have ordered one for my test setup. They are really expensive, about twice the price of the MH-Z14A, the SGP30 or the CCS811.
Other CO2 sensors I should use in my test setup?
I like the MH-Z14A and depending on my tests may stay with them.
EDIT: ordered a MHZ-19 for the tests
-
@nca78 said in What did you build today (Pictures) ?:
@fotofieber said in What did you build today (Pictures) ?:
Testing a CCS811 CO2 sensor.
Unfortunately this is not a CO2 sensor. It's only a VOC sensor giving an estimated eCO2 value. It's useful to tell you if your room needs ventilation, but not much more. And as even the VOC part is not calibrated it's only good for relative measurement.
My tests will show, how far away I am with this sensor in my indoor usage scenario.
My Netatmo sensors claim to measure CO2 and are battery powered. They seem to calibrate themselves to the lowest level they measure in 24 hours. This behaviour seems to be similar with the CCS811. The Netatmo sensors seem quite close to my MH-Z14A.
In the datasheet for the CCS811 I have read, that you can't use them in your green house, because of its self calibration. Netatmo may have the same restriction too.
AFAIK the only similar sensors which are calibrated and give absolute values are SGP30 and BME680.
I have ordered a SGP30 some days ago and will test it too. The BME680 needs binary code linked which is a no go for me. (As a gift I would take it into my test setup. :) )
If you want to measure CO2 you need a CO2 sensor and it's going to consume a lot of power, at least too much for a battery powered sensor.
The problem with high power sensors is, that they produce heat, which can make your temperature measurements unusable. :(
As my CO2 sensors have a color led to show air quality, they are mains powered anyway.
[edit] there's also the MiCS-VZ-89TE TVOC sensor, they claim to have a curve of eCO2 not too far from NDIR sensor in their datasheet. But that datasheet is strangely poor in details, they didn't even put any electrical characteristics...
https://sgx.cdistore.com/datasheets/sgx/MiCS-VZ-89TE_V1.0.pdfThank you for the link. I have ordered one for my test setup. They are really expensive, about twice the price of the MH-Z14A, the SGP30 or the CCS811.
Other CO2 sensors I should use in my test setup?
I like the MH-Z14A and depending on my tests may stay with them.
EDIT: ordered a MHZ-19 for the tests
@fotofieber said in What did you build today (Pictures) ?:
EDIT: ordered a MHZ-19 for the tests
Make sure you order a MHZ-19B, it uses less power and has fixed an autocalibration problem.
SenseAir S8 has a better calibration process using several days, so if you don't ventilate your room during 24h it will not use a wrong reference level and report wrong values.And about BME680 there are boards on AliExpress with included STM32 Cortex M0+, basically it's the same than the MiCS-VZ-89. Search for GY-MCU680V1.
-
@fotofieber said in What did you build today (Pictures) ?:
EDIT: ordered a MHZ-19 for the tests
Make sure you order a MHZ-19B, it uses less power and has fixed an autocalibration problem.
SenseAir S8 has a better calibration process using several days, so if you don't ventilate your room during 24h it will not use a wrong reference level and report wrong values.And about BME680 there are boards on AliExpress with included STM32 Cortex M0+, basically it's the same than the MiCS-VZ-89. Search for GY-MCU680V1.
@nca78 said in What did you build today (Pictures) ?:
And about BME680 there are boards on AliExpress with included STM32 Cortex M0+, basically it's the same than the MiCS-VZ-89. Search for GY-MCU680V1.
Thx, ordered one on aliexpress. Hope I have time to test when they arrive... :)
EDIT: first results, hope CCS811 will calibrate better in the next two days

-
-
-
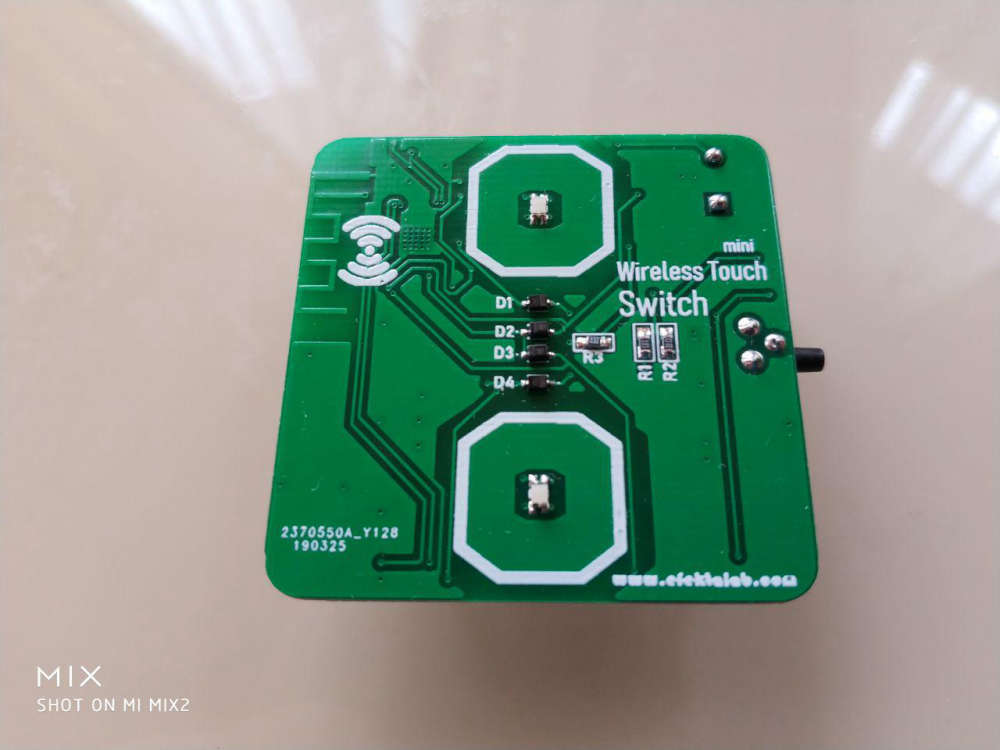
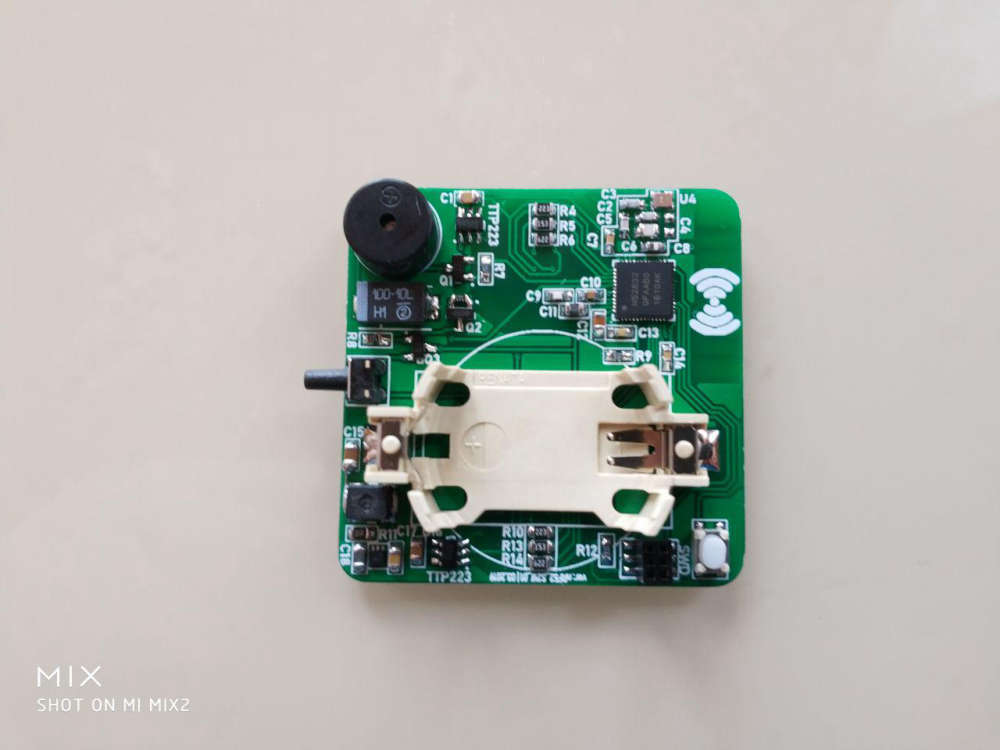
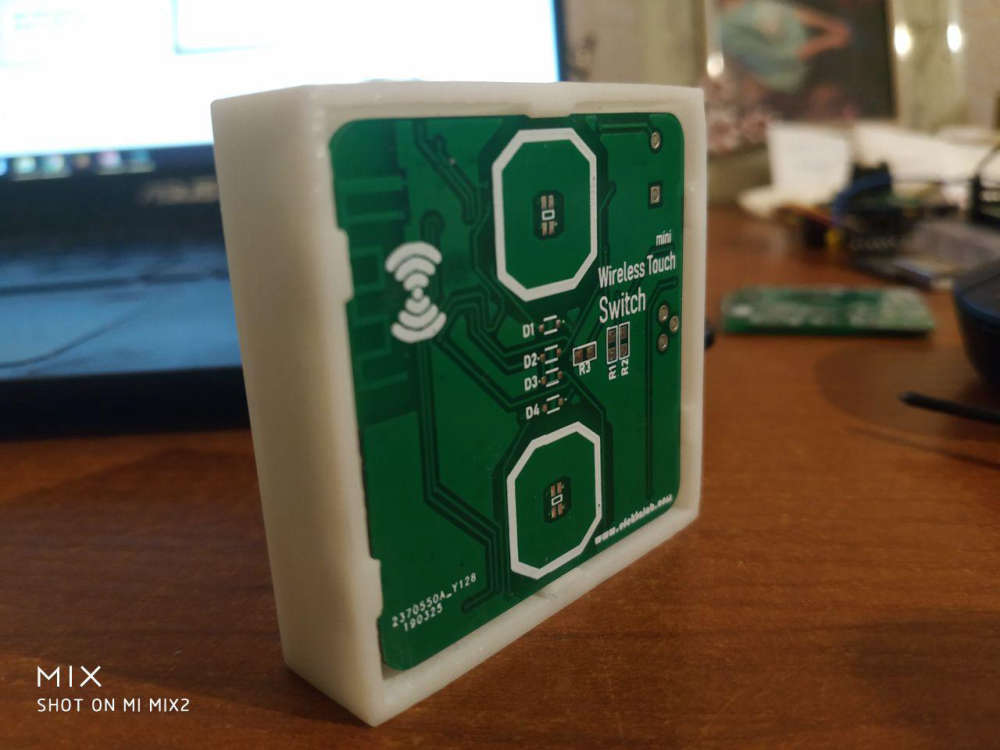
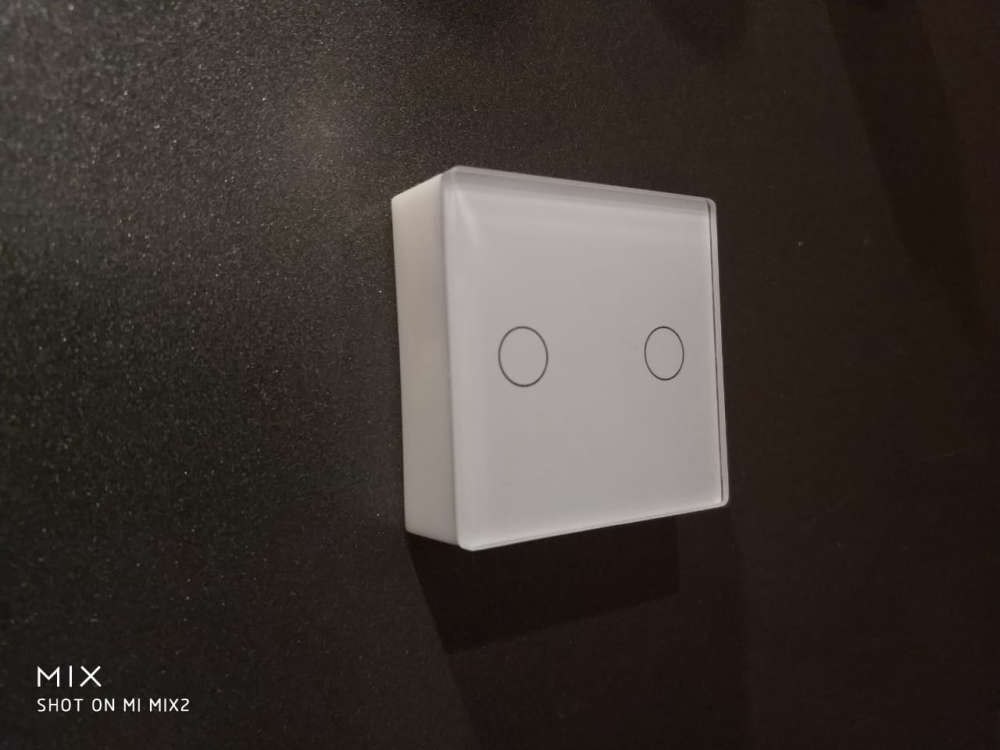
@petewill said in What did you build today (Pictures) ?:
@berkseo nice! What did you use for the capacitive sensor? MPR121?
TTP223s in top left and top right corners ;)
@berkseo I'm curious about that, why not use the capacitive touch function of the NRF52832 ?
-
@petewill said in What did you build today (Pictures) ?:
@berkseo nice! What did you use for the capacitive sensor? MPR121?
TTP223s in top left and top right corners ;)
@berkseo I'm curious about that, why not use the capacitive touch function of the NRF52832 ?
@nca78 said in What did you build today (Pictures) ?:
I'm curious about that, why not use the capacitive touch function of the NRF52832 ?
Ttp223 chips suit me. Very stable stuff. When I tried to do it on amtel328, these mcu also had this feature (almost all mcu have this feature). But it was not very stable. I'm not sure that a stable device using the mcu 52832 would be possible. If there is an example of a stable software implementation, I would be happy to test it, and then it would be clear to do it without external capacitive chips or not.

Hello! It looks like you're interested in this conversation, but you don't have an account yet.
Getting fed up of having to scroll through the same posts each visit? When you register for an account, you'll always come back to exactly where you were before, and choose to be notified of new replies (either via email, or push notification). You'll also be able to save bookmarks and upvote posts to show your appreciation to other community members.
With your input, this post could be even better 💗
Register Login