Thanks, at least one of the nodes started working!
Will try to update another one today.
Thanks, at least one of the nodes started working!
Will try to update another one today.
Hi!
I just migrated my Home Assistant from RPi to VMware vsphere virtual appliance. I didn't get the current Arduino Uno serial gateway to work via passing through the device in VMware (Zigbee stick works great this way).
So I did a ESP8266 gateway since I had a board available. I got it flashed and I think the ESP talks with radio and HA talks with the gateway but my nodes won't work. I tried to remove the .json file, no help (just removed the entities from HA).
All I get in serial monitor of the gateway is this (over and over):
gwt:rfc:c=0,msg=0;255;3;0;2;
What should I try next? All my nodes have statically assigned node ID's. I'm not 100% sure what the version of mysensors they have but I think it is 2.2.something
How should I handle in code the issue that my relay is active when pulled to the ground (logical 0) and in Home Assistant it is the opposite.
Hi!
Going through examples and forum topics I've noticed that I'm using the wrong S-type and V-type.
I'm writing a new version of the code with S_LIGHT and V_LIGHT so there is now dimmer functionality (which I don't need).
Let's see if this helps.
Finally! Thanks @Boots33 !
I think mysensors is a great platform but simple tutorials are needed.
Hi!
I'm building my first mysensors node and have one problem before I can move it to production. The node is referred here: https://forum.mysensors.org/topic/9863/my-very-first-mysensors-node/3
It works perfectly reading temperature, humidity and the door status.
But with the light switch if HA goes to a state where light status is "on" but brightness is "0" it doesn't respond until I manually set the brightness to "100". I tried this with mysensors library version 2.3.1 and 2.2.0 but the behaviour is the same. My gateway version is 2.1.0
Here is the code for the node. There is nothing special on HA end. I'm running hass.io latest version 0.84.6 and lovelace GUI. Sorry for the comments in the code, they are part english and part finnish :)
Just this issue to solve and one package from China and I'll get the power supplys and nodes ready. Then pretty soon I'll have 10 mysensors nodes running! I already started with some Sonoff's in the middle froor, four now installed and one waiting for a suitable application.
 /*
  * NODE ID: 2
  * Tämä on alasisäeteisen node jossa on:
  * - DHT22 -> lämpö ja kosteus
  * - Releohjaus sisäeteisen valoille (kytkin+rele)
  * - Ovitunnistin (hall-anturi)
  * Kytkennät:
  * - 5=DHT22
  * - 4=Releohjaus
  * - 3=Yläkerran valokytkin
  * - 6=Alakerran valokytkin
  * - 2=Ovitunnistin
  */

// Enable debug prints
//#define MY_DEBUG

// Noden ID (oltava kaikissa eri!!)
#define MY_NODE_ID 2

// Enable and select radio type attached
#define MY_RADIO_RF24
//#define MY_RADIO_RFM69

#define MY_REPEATER_FEATURE

#include <SPI.h>
#include <MySensors.h>
#include <Bounce2.h>
#include <DHT.h>
#include <SimpleTimer.h>

#define DOOR_PIN  2 // Ovikytkin
#define BUTTON_PIN  3  // Yläkerran valokytkin
#define BUTTON_PIN_2  6  // Alakerran valokytkin
#define RELAY_PIN  4 // Rele (valo)
#define DHT_DATA_PIN 5 // Lämpötila-anturi DHT22

#define CHILD_ID_LIGHT 1
#define CHILD_ID_HUM 2
#define CHILD_ID_TEMP 3
#define CHILD_ID_DOOR 4

#define LIGHT_OFF 0
#define LIGHT_ON 1

#define RELAY_ON 0
#define RELAY_OFF 1

#define DOOR_CLOSED 0
#define DOOR_OPEN 1

#define SENSOR_TEMP_OFFSET 0 // DHT22 lämpötilan offsetti

#define SN "kellari_sisaeteinen"
#define SV "1.2"

// Force sending an update of the temperature after n sensor reads, so a controller showing the
// timestamp of the last update doesn't show something like 3 hours in the unlikely case, that
// the value didn't change since;
// i.e. the sensor would force sending an update every UPDATE_INTERVAL*FORCE_UPDATE_N_READS [ms]
static const uint8_t FORCE_UPDATE_N_READS = 10;

float lastTemp;
float lastHum;
uint8_t nNoUpdatesTemp;
uint8_t nNoUpdatesHum;
bool metric = true;

int16_t last_state = LIGHT_OFF;
int16_t last_dim = 0;

// Yläkerran valokytkimen luku
Bounce debouncer = Bounce();

// Alakerran valokytkimen luku
Bounce debouncer_2 = Bounce();

// Ovikytkimen luku
Bounce ovidebouncer = Bounce();

// Lämpötila-anturin oliot
DHT dht;
SimpleTimer timer;

MyMessage light_msg( CHILD_ID_LIGHT, V_STATUS );
MyMessage dimmer_msg( CHILD_ID_LIGHT, V_PERCENTAGE );
MyMessage msgHum(CHILD_ID_HUM, V_HUM);
MyMessage msgTemp(CHILD_ID_TEMP, V_TEMP);
MyMessage msgOvi(CHILD_ID_DOOR, V_TRIPPED);

void setup()
{
  dht.setup(DHT_DATA_PIN); // set data pin of DHT sensor
  // Sleep for the time of the minimum sampling period to give the sensor time to power up
  // (otherwise, timeout errors might occure for the first reading)
  sleep(dht.getMinimumSamplingPeriod());

  update_light();
  //Serial.println( "Node ready to receive messages..." );

  // Setup the buttons
  pinMode(BUTTON_PIN,INPUT);
  pinMode(BUTTON_PIN_2,INPUT);
  // Activate internal pull-up
  digitalWrite(BUTTON_PIN,HIGH);
  digitalWrite(BUTTON_PIN_2,HIGH);

  // Make sure relays are off when starting up
  digitalWrite(RELAY_PIN, RELAY_OFF);
  // Then set relay pins in output mode
  pinMode(RELAY_PIN, OUTPUT);

  // Yläkerran valokytkin
  debouncer.attach(BUTTON_PIN, INPUT_PULLUP);
  debouncer.interval(25);

  // Alakerran valokytkin
  debouncer_2.attach(BUTTON_PIN_2, INPUT_PULLUP);
  debouncer_2.interval(25);

  // Ovikytkin
  ovidebouncer.attach(DOOR_PIN, INPUT_PULLUP);
  ovidebouncer.interval(25);

  // Timer lämpötila-anturin lukemista varten (millisekunteja) eli luetaan 1min välein
  timer.setInterval(60000, lampotilaLuku);
}

void loop()
{
  //In MySensors2.x, first message must come from within loop()
  static bool first_message_sent = false;
  if ( first_message_sent == false )
  {
    //Serial.println( "Sending initial state..." );
    send_dimmer_message();
    send_status_message();
    lampotilaLuku();
    send(msgOvi.set(DOOR_CLOSED));
    first_message_sent = true;
  }

  debouncer.update(); // Update the Bounce instance (yläkerran valokytkin)

  // Laskevan reunan tunnistus (yläkerran valokytkin)
  if ( debouncer.fell() )
  {
    //Serial.println( "Laskeva reuna" );
    nappiPainettu(); // Valon ohjaus
  }

  // Nousevan reunan tunnistus (yläkerran valokytkin)
  if ( debouncer.rose() )
  {
    //Serial.println( "Nouseva reuna" );
    nappiPainettu(); // Valon ohjaus
  }

  debouncer_2.update(); // Update the Bounce instance (alakerran valokytkin)

  // Laskevan reunan tunnistus (alakerran valokytkin)
  if ( debouncer_2.fell() )
  {
    //Serial.println( "Laskeva reuna" );
    nappiPainettu(); // Valon ohjaus
  }

  // Nousevan reunan tunnistus (alakerran valokytkin)
  if ( debouncer_2.rose() )
  {
    //Serial.println( "Nouseva reuna" );
    nappiPainettu(); // Valon ohjaus
  }

  // Ovitunnistimen luku
  if (ovidebouncer.update())
  {
    // Get the update value.
    int value = ovidebouncer.read();
    // Send in the new value.
    //Serial.println( "Oven status muuttui" );
    send(msgOvi.set(value==HIGH ? 1 : 0));
  }

  // Lämpötila-anturin timer pyörii..
  timer.run();
}

void presentation()
{
  // Send the sketch version information to the gateway
  sendSketchInfo( SN, SV );
  present( CHILD_ID_LIGHT, S_DIMMER );
  present(CHILD_ID_HUM, S_HUM);
  present(CHILD_ID_TEMP, S_TEMP);
  present(CHILD_ID_DOOR, S_DOOR);

  metric = true; // Lämpötila-anturi
}

// Vastaanotetaan HA:lta komentoja
void receive(const MyMessage &message)
{
  //When receiving a V_STATUS command, switch the light between OFF
  //and the last received dimmer value
  // Tämä on ON/OFF viesti HA:lta
  if ( message.type == V_STATUS )
  {
    //Serial.println( "V_STATUS command received..." );

    int lstate = message.getInt();
    if (( lstate < 0 ) || ( lstate > 1 )) {
      //Serial.println( "V_STATUS data invalid (should be 0/1)" );
      return;
    }
    last_state = lstate;

    //If last dimmer state is zero, set dimmer to 100
    if (( last_state == LIGHT_ON ) && ( last_dim == 0 ))
    {
      last_dim=100;
    }

    //Update constroller status
    send_status_message();

  }
  // Tämä on himmennys viesti HA:lta
  else if ( message.type == V_PERCENTAGE )
  {
    //Serial.println( "V_PERCENTAGE command received..." );
    int dim_value = constrain( message.getInt(), 0, 100 );
    if ( dim_value == 0 ) {
      last_state = LIGHT_OFF;

      //Update constroller with dimmer value & status
      send_dimmer_message();
      send_status_message();
    }
    else
    {
      last_state = LIGHT_ON;
      last_dim = dim_value;

      //Update constroller with dimmer value
      send_dimmer_message();
    }

  }
  else
  {
    //Serial.println( "Invalid command received..." );
    return;
  }

  //Here you set the actual light state/level
  update_light();
}

// Releen ohjaus statuksen perusteella
void update_light()
{
  if ( last_state == LIGHT_OFF )
  {
    //Serial.println( "Light state: OFF" );
    digitalWrite(RELAY_PIN, RELAY_OFF);
  }
  else
  {
    //Serial.print( "Light state: ON, Level: " );
    //Serial.println( last_dim );
    digitalWrite(RELAY_PIN, RELAY_ON);
  }
}

// Lähetetään HA:lle dimmer arvo
void send_dimmer_message()
{
  send( dimmer_msg.set( last_dim ) );
}

// Lähetetään HA:lle valon status (ON/OFF)
void send_status_message()
{
  if ( last_state == LIGHT_OFF ) {
    send( light_msg.set( (int16_t)0) );
  } else {
    send( light_msg.set( (int16_t)1) );
  }
}

// Luetaan DHT22 arvot
void lampotilaLuku()
{
  // Force reading sensor, so it works also after sleep()
  dht.readSensor(true);

  // Get temperature from DHT library
  float temperature = dht.getTemperature();
  if (isnan(temperature)) {
    //Serial.println("Failed reading temperature from DHT!");
  } else if (temperature != lastTemp || nNoUpdatesTemp == FORCE_UPDATE_N_READS) {
    // Only send temperature if it changed since the last measurement or if we didn't send an update for n times
    lastTemp = temperature;
    if (!metric) {
      temperature = dht.toFahrenheit(temperature);
    }
    // Reset no updates counter
    nNoUpdatesTemp = 0;
    temperature += SENSOR_TEMP_OFFSET;
    send(msgTemp.set(temperature, 1));

    #ifdef MY_DEBUG
    //Serial.print("T: ");
    //Serial.println(temperature);
    #endif
  } else {
    // Increase no update counter if the temperature stayed the same
    nNoUpdatesTemp++;
  }

  // Get humidity from DHT library
  float humidity = dht.getHumidity();
  if (isnan(humidity)) {
    //Serial.println("Failed reading humidity from DHT");
  } else if (humidity != lastHum || nNoUpdatesHum == FORCE_UPDATE_N_READS) {
    // Only send humidity if it changed since the last measurement or if we didn't send an update for n times
    lastHum = humidity;
    // Reset no updates counter
    nNoUpdatesHum = 0;
    send(msgHum.set(humidity, 1));

    #ifdef MY_DEBUG
    //Serial.print("H: ");
    //Serial.println(humidity);
    #endif
  } else {
    // Increase no update counter if the humidity stayed the same
    nNoUpdatesHum++;
  }
}

// Napin painon jälkeen valon ohjaus ja statuksen päivitys
void nappiPainettu()
{
  if (last_state == LIGHT_ON)
  {
    //Serial.println( "Valo OFF napista" );
    last_state = LIGHT_OFF;
    last_dim=0;
    update_light(); // Releen toggle
  }
  else
  {
    //Serial.println( "Valo ON napista" );
    last_state = LIGHT_ON;
    last_dim=100;
    update_light(); // Releen toggle
  }
  //Serial.println( "Lahetetaan HA:lle uusi status" );
  send_status_message(); // Lähetä HA:lle uusi status (ON/OFF)
  send_dimmer_message(); // Lähetä HA:lle uusi dim arvo (0/100)
}
Here are parts concerning from configuration.yaml file:
# Mysensors serial gateway config
mysensors:
  gateways:
    - device: '/dev/ttyACM0'
      baud_rate: 115200
      persistence_file: '/config/mysensors.json'
  optimistic: false
  persistence: true
  version: 2.0
I have problem now with Home Assistant and this node. It works perfectly reading temperature, humidity and the door status.
But with the light switch if HA goes to a state where light status is "on" but brightness is "0" it doesn't respond until I manually set the brightness to "100". I tried this with mysensors library version 2.3.1 and 2.2.0 but the behaviour is the same. My gateway version is 2.1.0
Here is the code for the node. There is nothing special on HA end. I'm running hass.io latest version 0.84.6 and lovelace GUI. Sorry for the comments in the code, they are part english and part finnish :)
Just this issue to solve and one package from China and I'll get the power supplys and nodes ready. Then pretty soon I'll have 10 mysensors nodes running! I already started with some Sonoff's in the middle froor, four now installed and one waiting for a suitable application.
 /*
  * NODE ID: 2
  * Tämä on alasisäeteisen node jossa on:
  * - DHT22 -> lämpö ja kosteus
  * - Releohjaus sisäeteisen valoille (kytkin+rele)
  * - Ovitunnistin (hall-anturi)
  * Kytkennät:
  * - 5=DHT22
  * - 4=Releohjaus
  * - 3=Yläkerran valokytkin
  * - 6=Alakerran valokytkin
  * - 2=Ovitunnistin
  */

// Enable debug prints
//#define MY_DEBUG

// Noden ID (oltava kaikissa eri!!)
#define MY_NODE_ID 2

// Enable and select radio type attached
#define MY_RADIO_RF24
//#define MY_RADIO_RFM69

#define MY_REPEATER_FEATURE

#include <SPI.h>
#include <MySensors.h>
#include <Bounce2.h>
#include <DHT.h>
#include <SimpleTimer.h>

#define DOOR_PIN  2 // Ovikytkin
#define BUTTON_PIN  3  // Yläkerran valokytkin
#define BUTTON_PIN_2  6  // Alakerran valokytkin
#define RELAY_PIN  4 // Rele (valo)
#define DHT_DATA_PIN 5 // Lämpötila-anturi DHT22

#define CHILD_ID_LIGHT 1
#define CHILD_ID_HUM 2
#define CHILD_ID_TEMP 3
#define CHILD_ID_DOOR 4

#define LIGHT_OFF 0
#define LIGHT_ON 1

#define RELAY_ON 0
#define RELAY_OFF 1

#define DOOR_CLOSED 0
#define DOOR_OPEN 1

#define SENSOR_TEMP_OFFSET 0 // DHT22 lämpötilan offsetti

#define SN "kellari_sisaeteinen"
#define SV "1.2"

// Force sending an update of the temperature after n sensor reads, so a controller showing the
// timestamp of the last update doesn't show something like 3 hours in the unlikely case, that
// the value didn't change since;
// i.e. the sensor would force sending an update every UPDATE_INTERVAL*FORCE_UPDATE_N_READS [ms]
static const uint8_t FORCE_UPDATE_N_READS = 10;

float lastTemp;
float lastHum;
uint8_t nNoUpdatesTemp;
uint8_t nNoUpdatesHum;
bool metric = true;

int16_t last_state = LIGHT_OFF;
int16_t last_dim = 0;

// Yläkerran valokytkimen luku
Bounce debouncer = Bounce();

// Alakerran valokytkimen luku
Bounce debouncer_2 = Bounce();

// Ovikytkimen luku
Bounce ovidebouncer = Bounce();

// Lämpötila-anturin oliot
DHT dht;
SimpleTimer timer;

MyMessage light_msg( CHILD_ID_LIGHT, V_STATUS );
MyMessage dimmer_msg( CHILD_ID_LIGHT, V_PERCENTAGE );
MyMessage msgHum(CHILD_ID_HUM, V_HUM);
MyMessage msgTemp(CHILD_ID_TEMP, V_TEMP);
MyMessage msgOvi(CHILD_ID_DOOR, V_TRIPPED);

void setup()
{
  dht.setup(DHT_DATA_PIN); // set data pin of DHT sensor
  // Sleep for the time of the minimum sampling period to give the sensor time to power up
  // (otherwise, timeout errors might occure for the first reading)
  sleep(dht.getMinimumSamplingPeriod());

  update_light();
  //Serial.println( "Node ready to receive messages..." );

  // Setup the buttons
  pinMode(BUTTON_PIN,INPUT);
  pinMode(BUTTON_PIN_2,INPUT);
  // Activate internal pull-up
  digitalWrite(BUTTON_PIN,HIGH);
  digitalWrite(BUTTON_PIN_2,HIGH);

  // Make sure relays are off when starting up
  digitalWrite(RELAY_PIN, RELAY_OFF);
  // Then set relay pins in output mode
  pinMode(RELAY_PIN, OUTPUT);

  // Yläkerran valokytkin
  debouncer.attach(BUTTON_PIN, INPUT_PULLUP);
  debouncer.interval(25);

  // Alakerran valokytkin
  debouncer_2.attach(BUTTON_PIN_2, INPUT_PULLUP);
  debouncer_2.interval(25);

  // Ovikytkin
  ovidebouncer.attach(DOOR_PIN, INPUT_PULLUP);
  ovidebouncer.interval(25);

  // Timer lämpötila-anturin lukemista varten (millisekunteja) eli luetaan 1min välein
  timer.setInterval(60000, lampotilaLuku);
}

void loop()
{
  //In MySensors2.x, first message must come from within loop()
  static bool first_message_sent = false;
  if ( first_message_sent == false )
  {
    //Serial.println( "Sending initial state..." );
    send_dimmer_message();
    send_status_message();
    lampotilaLuku();
    send(msgOvi.set(DOOR_CLOSED));
    first_message_sent = true;
  }

  debouncer.update(); // Update the Bounce instance (yläkerran valokytkin)

  // Laskevan reunan tunnistus (yläkerran valokytkin)
  if ( debouncer.fell() )
  {
    //Serial.println( "Laskeva reuna" );
    nappiPainettu(); // Valon ohjaus
  }

  // Nousevan reunan tunnistus (yläkerran valokytkin)
  if ( debouncer.rose() )
  {
    //Serial.println( "Nouseva reuna" );
    nappiPainettu(); // Valon ohjaus
  }

  debouncer_2.update(); // Update the Bounce instance (alakerran valokytkin)

  // Laskevan reunan tunnistus (alakerran valokytkin)
  if ( debouncer_2.fell() )
  {
    //Serial.println( "Laskeva reuna" );
    nappiPainettu(); // Valon ohjaus
  }

  // Nousevan reunan tunnistus (alakerran valokytkin)
  if ( debouncer_2.rose() )
  {
    //Serial.println( "Nouseva reuna" );
    nappiPainettu(); // Valon ohjaus
  }

  // Ovitunnistimen luku
  if (ovidebouncer.update())
  {
    // Get the update value.
    int value = ovidebouncer.read();
    // Send in the new value.
    //Serial.println( "Oven status muuttui" );
    send(msgOvi.set(value==HIGH ? 1 : 0));
  }

  // Lämpötila-anturin timer pyörii..
  timer.run();
}

void presentation()
{
  // Send the sketch version information to the gateway
  sendSketchInfo( SN, SV );
  present( CHILD_ID_LIGHT, S_DIMMER );
  present(CHILD_ID_HUM, S_HUM);
  present(CHILD_ID_TEMP, S_TEMP);
  present(CHILD_ID_DOOR, S_DOOR);

  metric = true; // Lämpötila-anturi
}

// Vastaanotetaan HA:lta komentoja
void receive(const MyMessage &message)
{
  //When receiving a V_STATUS command, switch the light between OFF
  //and the last received dimmer value
  // Tämä on ON/OFF viesti HA:lta
  if ( message.type == V_STATUS )
  {
    //Serial.println( "V_STATUS command received..." );

    int lstate = message.getInt();
    if (( lstate < 0 ) || ( lstate > 1 )) {
      //Serial.println( "V_STATUS data invalid (should be 0/1)" );
      return;
    }
    last_state = lstate;

    //If last dimmer state is zero, set dimmer to 100
    if (( last_state == LIGHT_ON ) && ( last_dim == 0 ))
    {
      last_dim=100;
    }

    //Update constroller status
    send_status_message();

  }
  // Tämä on himmennys viesti HA:lta
  else if ( message.type == V_PERCENTAGE )
  {
    //Serial.println( "V_PERCENTAGE command received..." );
    int dim_value = constrain( message.getInt(), 0, 100 );
    if ( dim_value == 0 ) {
      last_state = LIGHT_OFF;

      //Update constroller with dimmer value & status
      send_dimmer_message();
      send_status_message();
    }
    else
    {
      last_state = LIGHT_ON;
      last_dim = dim_value;

      //Update constroller with dimmer value
      send_dimmer_message();
    }

  }
  else
  {
    //Serial.println( "Invalid command received..." );
    return;
  }

  //Here you set the actual light state/level
  update_light();
}

// Releen ohjaus statuksen perusteella
void update_light()
{
  if ( last_state == LIGHT_OFF )
  {
    //Serial.println( "Light state: OFF" );
    digitalWrite(RELAY_PIN, RELAY_OFF);
  }
  else
  {
    //Serial.print( "Light state: ON, Level: " );
    //Serial.println( last_dim );
    digitalWrite(RELAY_PIN, RELAY_ON);
  }
}

// Lähetetään HA:lle dimmer arvo
void send_dimmer_message()
{
  send( dimmer_msg.set( last_dim ) );
}

// Lähetetään HA:lle valon status (ON/OFF)
void send_status_message()
{
  if ( last_state == LIGHT_OFF ) {
    send( light_msg.set( (int16_t)0) );
  } else {
    send( light_msg.set( (int16_t)1) );
  }
}

// Luetaan DHT22 arvot
void lampotilaLuku()
{
  // Force reading sensor, so it works also after sleep()
  dht.readSensor(true);

  // Get temperature from DHT library
  float temperature = dht.getTemperature();
  if (isnan(temperature)) {
    //Serial.println("Failed reading temperature from DHT!");
  } else if (temperature != lastTemp || nNoUpdatesTemp == FORCE_UPDATE_N_READS) {
    // Only send temperature if it changed since the last measurement or if we didn't send an update for n times
    lastTemp = temperature;
    if (!metric) {
      temperature = dht.toFahrenheit(temperature);
    }
    // Reset no updates counter
    nNoUpdatesTemp = 0;
    temperature += SENSOR_TEMP_OFFSET;
    send(msgTemp.set(temperature, 1));

    #ifdef MY_DEBUG
    //Serial.print("T: ");
    //Serial.println(temperature);
    #endif
  } else {
    // Increase no update counter if the temperature stayed the same
    nNoUpdatesTemp++;
  }

  // Get humidity from DHT library
  float humidity = dht.getHumidity();
  if (isnan(humidity)) {
    //Serial.println("Failed reading humidity from DHT");
  } else if (humidity != lastHum || nNoUpdatesHum == FORCE_UPDATE_N_READS) {
    // Only send humidity if it changed since the last measurement or if we didn't send an update for n times
    lastHum = humidity;
    // Reset no updates counter
    nNoUpdatesHum = 0;
    send(msgHum.set(humidity, 1));

    #ifdef MY_DEBUG
    //Serial.print("H: ");
    //Serial.println(humidity);
    #endif
  } else {
    // Increase no update counter if the humidity stayed the same
    nNoUpdatesHum++;
  }
}

// Napin painon jälkeen valon ohjaus ja statuksen päivitys
void nappiPainettu()
{
  if (last_state == LIGHT_ON)
  {
    //Serial.println( "Valo OFF napista" );
    last_state = LIGHT_OFF;
    last_dim=0;
    update_light(); // Releen toggle
  }
  else
  {
    //Serial.println( "Valo ON napista" );
    last_state = LIGHT_ON;
    last_dim=100;
    update_light(); // Releen toggle
  }
  //Serial.println( "Lahetetaan HA:lle uusi status" );
  send_status_message(); // Lähetä HA:lle uusi status (ON/OFF)
  send_dimmer_message(); // Lähetä HA:lle uusi dim arvo (0/100)
}
Here are parts concerning from configuration.yaml file:
# Mysensors serial gateway config
mysensors:
  gateways:
    - device: '/dev/ttyACM0'
      baud_rate: 115200
      persistence_file: '/config/mysensors.json'
  optimistic: false
  persistence: true
  version: 2.0
Yes I know its possible with ESP8266 but I want to do it with a mysensors node. Any ideas on how to execute it?
Hi!
I'm starting my home automation journey and the architecture will be autonomous mysensors-nodes also controlled by Home Assistant.
Maybe some sonoff's for some special needs.
My house has 3 floors and the middle floor is 100% renovated 5 years ago so there I have to make compromises but the other two floors we are renovating and also recabling all the electrics so it's easy to get all cables routed to a central place for automation control.
I already have Home Assistant running a few months and its collecting sensor data from my geothermal heat pump, UPS device and some software running on my home server.
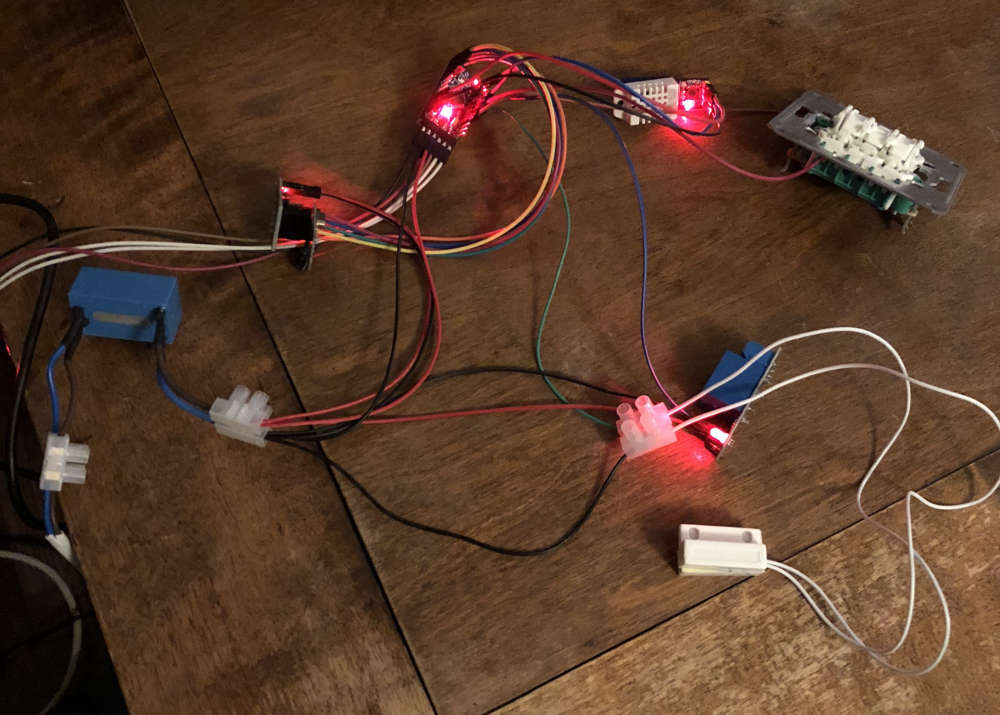
This first node is a kind on POC and wife approval node. It goes to a hallway in my basement which we are renovating at the moment.
The node has:
The idea is to make the system fault tolerant and not dependant of Home Assistant which I have to update from time to time and which runs on RPi3 which can fail.
Other nodes I'm planning:
Hi!
I would very much like to use addressable RGB LED strips with fastled-library like Ben is using here with ESP8266 https://www.youtube.com/watch?v=9KI36GTgwuQ
I really have no idea on where to start. I guess its easy to switch on/off the strip but how am I able to change to different fastled-modes?
@gohan ok but at the moment the gateway runs on Arduino Uno. So I have to switch to RasPi?
Or can I buy another Uno and use RFM69 with it? But does Home Assistant support multiple MySensors gateways?
@skywatch So I would have 2 gateways? One for indoor sensors and one for outdoor sensors?
Would it be possible to have NRF24 and RFM69 chips on the same gateway?
So I could use the RFM69 with nodes that are farther away?
@skywatch There is maybe 30m between the buildings and the gateway is on the other side of my house so 10m of indoor space and lots of walls...
Yes the gateway has the PA LNA version. I guess it's ok to mix these?
I'm taking 5V from the UNO to RF module via this adapter: https://www.aliexpress.com/item/New-Socket-Adapter-plate-Board-for-8Pin-NRF24L01-Wireless-Transceive-module-51/32655936568.html?spm=a2g0s.9042311.0.0.IAzDGk
I'm planning to maybe place a couple of nodes to the outside wall of my house so maybe using these as repeaters might solve the problem..
At the moment I only have one PA LNA version but I'm about to place an order this weekend.
@martinhjelmare ok, I'll get a proper power supply. I have a capasitor welded to the radio module. The gateway has the model with the stick antenna.
I have tried how far the demo sensor node works (it has the std module with the antenna on the PCB) and it works anywhere in my 3 story house.
But when I moved it to a building next to my house it didn't work. The distance was maybe 40m.
Should I experiment with the setting #define MY_RF24_PA_LEVEL ?
What does this require from the HW?
@martinhjelmare The gateway (Uno) is powered from the USB port of the RPi3 which runs Home Assistant. Should I use a external power supply?
Hi!
I managed to get the node to work by rebooting everything. Maybe the controller and gateway must be alive before the sensor send its presentation?
But thanks for the help anyway!
I'm exited to start building my homeautomation now that I have all the connection working from end to end.
The first task is to replace my room thermostats with intelligent ones but I think I'll continue it in a different topic.
Mikko
Hi all!
I'm just about to get my first sensor readout to Home Assistant but something is wrong and I need your help.
I now have Home Assistant running on Raspberry Pi 3 and an Arduino Uno acting as a serial gateway flashed with the example gateway sketch. And one sensor node on Pro Mini with DHT22 attached and flashed with the example DHT sketch.
From examining the logs I can see that Home Assistant is able to connect to the gateway:
2017-11-14 22:35:03 INFO (Thread-13) [mysensors.gateway_serial] Trying to connect to /dev/ttyACM0
2017-11-14 22:35:03 INFO (Thread-13) [mysensors.gateway_serial] /dev/ttyACM0 is open...
2017-11-14 22:35:03 INFO (Thread-13) [mysensors.gateway_serial] Connected to /dev/ttyACM0
And I can see that the gateway is talking to Home Assistant
2017-11-14 22:35:05 DEBUG (Thread-13) [mysensors] n:0 c:255 t:3 s:9 p:MCO:BGN:INIT GW,CP=RNNGA--,VER=2.1.0
2017-11-14 22:35:05 DEBUG (Thread-13) [mysensors] n:0 c:255 t:3 s:9 p:TSM:INIT
2017-11-14 22:35:05 DEBUG (Thread-13) [mysensors] n:0 c:255 t:3 s:9 p:TSF:WUR:MS=0
2017-11-14 22:35:05 DEBUG (Thread-13) [mysensors] n:0 c:255 t:3 s:9 p:TSM:INIT:TSP OK
2017-11-14 22:35:05 DEBUG (Thread-13) [mysensors] n:0 c:255 t:3 s:9 p:TSM:INIT:GW MODE
2017-11-14 22:35:05 DEBUG (Thread-13) [mysensors] n:0 c:255 t:3 s:9 p:TSM:READY:ID=0,PAR=0,DIS=0
2017-11-14 22:35:05 DEBUG (Thread-13) [mysensors] n:0 c:255 t:3 s:9 p:MCO:REG:NOT NEEDED
2017-11-14 22:35:05 INFO (Thread-13) [mysensors] n:0 c:255 t:3 s:14 p:Gateway startup complete.
2017-11-14 22:35:05 DEBUG (Thread-13) [homeassistant.components.mysensors] Node update: node 0 child 255
2017-11-14 22:35:05 DEBUG (Thread-13) [homeassistant.components.mysensors] Not a child update for node 0
2017-11-14 22:35:05 DEBUG (Thread-13) [mysensors] Handle queue with call <bound method SerialGateway.logic of SerialGateway>(('0;255;0;0;18;2.1.0\n',), {}) took 0.190 seconds
2017-11-14 22:35:05 DEBUG (Thread-13) [mysensors] n:0 c:255 t:3 s:9 p:MCO:BGN:STP
2017-11-14 22:35:05 DEBUG (Thread-13) [mysensors] n:0 c:255 t:3 s:9 p:MCO:BGN:INIT OK,TSP=1
2017-11-14 22:35:05 DEBUG (Thread-13) [mysensors] n:0 c:255 t:3 s:9 p:TSF:MSG:SEND,0-0-255-255,s=255,c=3,t=20,pt=0,l=0,sg=0,ft=0,st=OK:
But after this all that happens is that this goes on over and over
2017-11-14 22:45:27 DEBUG (Thread-13) [mysensors] n:0 c:255 t:3 s:9 p:TSF:MSG:READ,1-1-0,s=0,c=1,t=1,pt=7,l=5,sg=0:39.6
2017-11-14 22:45:27 WARNING (Thread-13) [mysensors] Node 1 is unknown
2017-11-14 22:45:27 INFO (Thread-13) [mysensors] Requesting new presentation for node 1
2017-11-14 22:45:27 DEBUG (Thread-13) [mysensors] n:0 c:255 t:3 s:9 p:!TSF:MSG:SEND,0-0-1-1,s=255,c=3,t=19,pt=0,l=0,sg=0,ft=0,st=NACK:
2017-11-14 22:45:27 DEBUG (Thread-13) [mysensors] n:0 c:255 t:3 s:9 p:MCO:BGN:INIT GW,CP=RNNGA--,VER=2.1.0
2017-11-14 22:45:27 DEBUG (Thread-13) [mysensors] n:0 c:255 t:3 s:9 p:TSM:INIT
2017-11-14 22:45:27 DEBUG (Thread-13) [mysensors] n:0 c:255 t:3 s:9 p:TSF:WUR:MS=0
2017-11-14 22:45:27 DEBUG (Thread-13) [mysensors] n:0 c:255 t:3 s:9 p:TSM:INIT:TSP OK
2017-11-14 22:45:27 DEBUG (Thread-13) [mysensors] n:0 c:255 t:3 s:9 p:TSM:INIT:GW MODE
2017-11-14 22:45:27 DEBUG (Thread-13) [mysensors] n:0 c:255 t:3 s:9 p:TSM:READY:ID=0,PAR=0,DIS=0
2017-11-14 22:45:27 DEBUG (Thread-13) [mysensors] n:0 c:255 t:3 s:9 p:MCO:REG:NOT NEEDED
2017-11-14 22:45:27 INFO (Thread-13) [mysensors] n:0 c:255 t:3 s:14 p:Gateway startup complete.
2017-11-14 22:45:27 DEBUG (Thread-13) [mysensors] n:0 c:255 t:3 s:9 p:MCO:BGN:STP
2017-11-14 22:45:27 DEBUG (Thread-13) [mysensors] n:0 c:255 t:3 s:9 p:MCO:BGN:INIT OK,TSP=1
2017-11-14 22:45:27 DEBUG (Thread-13) [mysensors] n:0 c:255 t:3 s:9 p:TSF:MSG:SEND,0-0-255-255,s=255,c=3,t=20,pt=0,l=0,sg=0,ft=0,st=OK:
Here is my HA configuration:
mysensors:
  gateways:
    - device: '/dev/ttyACM0'
      baud_rate: 115200
      persistence_file: '/home/homeassistant/.homeassistant/mysensors2.json'
  optimistic: false
  persistence: true
  version: 2.0

logger:
  default: info
  logs:
    homeassistant.components.mysensors: debug
    mysensors: debug
And the contents of the "mysensors2.json" persistence file
{"0": {"sketch_name": null, "children": {}, "sensor_id": 0, "battery_level": 0, "sketch_version": null, "type": 18, "protocol_version": "2.1.0"}}
So what should I investigate next? Is there perhaps something missing from the example from https://www.mysensors.org/build/humidity ?
In the example there is defined only child ID's not the node ID's. Shouldn't these come from the controller (HA) ?
Thanks for your help, I hope you my explanations make sense.
Hi!
This project has been on hold since I burned my FTDI adapter. Back to you in a few weeks when a new one arrives from China :)
Yes I have. When I upload the sample scetch from HA site I get this from serial monitor:
#!⸮⸮⸮0 MCO:BGN:INIT REPEATER,CP=RNNRA--,VER=2.1.1
3 TSM:INIT
4 TSF:WUR:MS=0
11 TSM:INIT:TSP OK
13 TSM:INIT:STATID=1
15 TSF:SID:OK,ID=1
17 TSM:FPAR
53 TSF:MSG:SEND,1-1-255-255,s=255,c=3,t=7,pt=0,l=0,sg=0,ft=0,st=OK:
2060 !TSM:FPAR:NO REPLY
2062 TSM:FPAR
2098 TSF:MSG:SEND,1-1-255-255,s=255,c=3,t=7,pt=0,l=0,sg=0,ft=0,st=OK:
4106 !TSM:FPAR:NO REPLY
4108 TSM:FPAR
4144 TSF:MSG:SEND,1-1-255-255,s=255,c=3,t=7,pt=0,l=0,sg=0,ft=0,st=OK:
6152 !TSM:FPAR:NO REPLY
6154 TSM:FPAR
6190 TSF:MSG:SEND,1-1-255-255,s=255,c=3,t=7,pt=0,l=0,sg=0,ft=0,st=OK:
8198 !TSM:FPAR:FAIL
8199 TSM:FAIL:CNT=1
8201 TSM:FAIL:PDT
18204 TSM:FAIL:RE-INIT
18206 TSM:INIT
18213 TSM:INIT:TSP OK
18215 TSM:INIT:STATID=1
18217 TSF:SID:OK,ID=1
Now I have no idea where to start debugging this. In the scetch there is some lines that should print status messages to serial line but I can't see any of those.
What should I check next? I don't know if the node even has radio access to the gateway.
Hi!
Thanks to great help from the community I've managed to set up an ethernet gateway using Arduino UNO and a W5100 ethernet shield.
Now I'm building my first sensor node based on Arduino Pro Mini but I have no idea on how to proceed. I'm using Home Assistant as my controller.
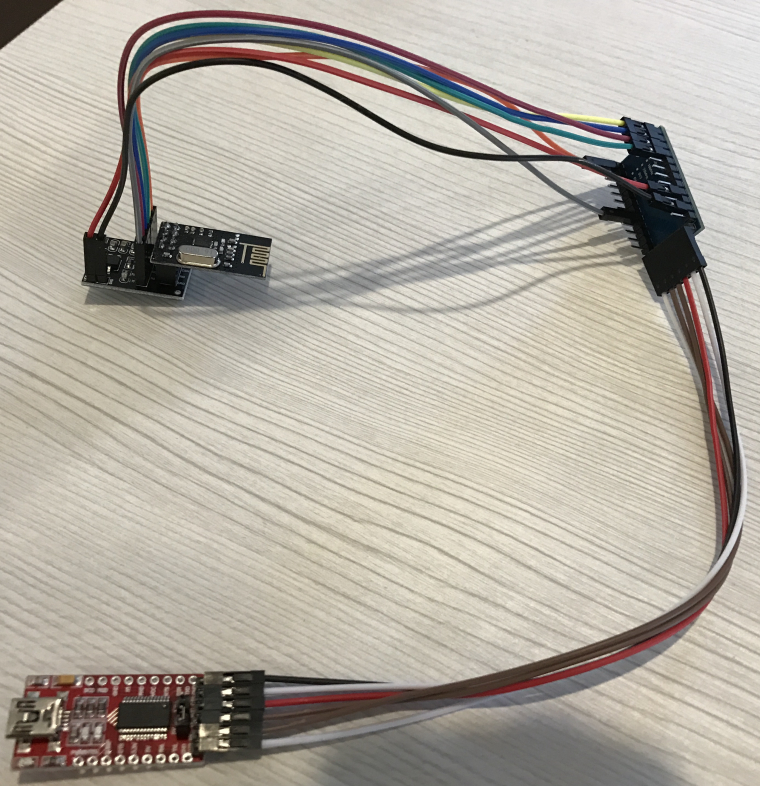
I've made a sample sensor assembled with dupont cables to test different sensors before building real nodes. I am able to program it with the FTDI adapter but have no idea on how to present it to Home Assistant or even know if its communicating with the gateway.
I couldn't find a tutorial online on how to integrate MySensors and Home Assistant, please help.
Here's a picture of my POC sensor node (a cap to the radio module will be soldered today after I visit the local electronics store to resupply my stock).