💬 The Harvester: ultimate power supply for the Raybeacon DK


  • Hero Member

    If you haven't already, you may want to consider spv1040 instead of spv1050. From what I read previously, spv1050 is aimed more for outdoor light harvesting, whereas spv1040 can still thrive with less available energy indoors than the spv1050 can.

    Anyhow, either way, I look forward to hearing how your design pans out, as well as whatever you might learn along the way! Sounds like you'll be having a lot of fun with this, so, please do keep us posted as you start making progress.


  • Hi @neverdie, thanks for your comment! Well, from what I've found in datasheets the SPV1050 was designed for ultra-low power apps and is very efficient in low light conditions, when SPV1040 is capable to gain up to 3W and its step-up converter is more suitable for outdoors. I've also considered bq25504 and LTC3103, but found that they seem isolate battery from the output where the load is expected to be. In contrast, the SPV1050 implements very simple approach by connecting the store and the battery via a FET - this allowed to connect main load parallel to the battery (where by fact it is) and disable integrated LDOs. Another advantage of the SPV1050 is that it's omnivorous - can accept input up to 18V (although I've configured it for 12V) and officially supports TEGs.

    But to be honest, never tried anything from the list so will eventually post my findings 🙂 So far the Raybeacon was finally assembled and sent to Nordic for tuning - you may have noticed updated pics on its page. So hope to advance the project status from preview to beta by the end of the year.


  • Hero Member

    @mishka I was going from memory, so I may have mixed the two of them up. Sounds like you're on top of it, which is great.


  • Hero Member

    @Mishka Have you been able to test the spv1050 yet, and if so, how did it go?

    One of the things I like about the spv1050 is that on paper it has a buck-boost configuration with a very wide input range of 0.15v to 18v. It seems that most chips that can work with as little as 0.15v as input are boost only, which makes them not as versatile as the spv1050.

    The cold boot minimum voltage for the buck-boost configuration is 2.6v, however, so you'd want it to default to boost-only mode if it runs out of juice. In boost-only mode, the cold-boot voltage would be 0.5v.

    Which leads to a quandary: how does one know in a cold-boot scenario what the input voltage would be? In theory it could be quite high (if, say, you walked into a dark room and flipped on a light switch), but if you set it conservatively for that kind of scenario, you risk missing start-up opportunities where lower voltages are available and would have been enough had boot-only been the default.


  • @NeverDie From my understanding it's a game of the harvesting source. In boost configuration V_in must be lower than the end of charge V_eoc value which limits possible input to low voltage sources only, such as a TEG or some PV panels.

    On the other hand for buck-boost configuration there is the cold-boot voltage indeed. It's also somewhat unclear how it will maintain V_store when V_in later drops below 2.6V.

    I've ordered number of KXOB25_02X8F panels to give it a try with one, two, and three "solar bits" in series. The Harvester board is configured to V_oc = 12V so it's also interesting to check how well this will work in a single panel configuration. The panels and boards are somewhere on the way (China Post), hope to build everything in early February.


  • Hero Member

    @Mishka Please do let us know how your testing goes once you get your parts together.

    I've tried "solar bits" of the type you linked. FWIW, I found they perform quite well with sunlight but surprisingly poorly on indoor LED lighting (where, say, one of the keychain scavenged solar cells seems to perform relatively better). Just FYI, depending on what light source you are planning to use. In that regard, perhaps there's a further dependency on the type of indoor LED one has. I have no data on that, as I've only tried what I currently have installed, which are from CREE.


  • @NeverDie Thanks for the info! I've never used IXYS cells before - chose them mostly for the size. The harvesting IC and the SoC are very low power so I hope there's will be a chance to reach a usable configuration indoors. Anyhow, will share my measurements, of course.


  • @NeverDie Just received the KXOB25-02X8F panels. In short - you was right, and I was too optimistic about indoor lights.

    Generally speaking, the pannel works really not bad and looks extremely handy. However, in order to achieve the desired 2.6V it has to be illuminated with greatly above 1000 lux which roughly equals bright supermarket or factory lights. And yes, it seem differentiates LED lamps from the sun.

    Accordingly to my (totally uncalibrated) luxmeter:

    • Living room room: 50 lx - 0.4 V
    • Overcast daylight, indoors: 250 lx - 1.4 V
    • Supermarket lights: 1300 - 2.0V
    • Overcast daylight, street: 2000 lx - 2.7V

    Therefore, it's safe to say that two of 02X8F would make it acceptably work in buck-boost configuration. By acceptable I mean it could charge an ML2032 battery, but batteryless operation is quite limited indeed.

    This pushes me to review use-cases for the Harvester. It has two input sources - first one is spv1050, and another one is MIC5205 3.2V LDO. I'm thinking about switching the spv1050 to boost configuration and cover only PV and TEG sources from 75 mV to 3.6V. At the same time LDO could handle sources capable to deliver 2.0V and above (2.0-3.2V with battery removed, and 3.2V to 16V with or without a battery). The point here is that at higher voltages there is likely a more capable source so MPPT might not be required.

    Such, although less flexible, one or two KXOB25-05X3F, 30mW each, and a "supercap" should be enough to power the nRF52 (and even an extra module) without the need of a battery. For more demanding applications, up to five KXOB25-14X1F could be used delivering 150mW in total. With 3.2V, 70mA limit on the spv1050 battery pin it sounds like a good match.

    Another option is to make the Harvester configurable via solder jumpers. This will put four more jumpers on top of it (and there are five on the back side already). Well, although possible, sounds too complicated as for one inch board.

    Any thoughts?

    P.S. I'm going to assembly a buck/boost board anyway so we can compare later.


  • Hero Member

    @Mishka Well, since you ask, I think the EM8500 would be interesting to try: https://www.emmicroelectronic.com/sites/default/files/products/datasheets/8500-ds.pdf

    I only recently discovered it, but the datasheet says it can self-start with an input voltage of 300mv and a mere 3 microwatts. Once started, the datasheet says it can continue functioning on as little as 100mv and 1 microwatt. It also claims to include MPPT.

    The other one that would be interesting to try would be the EM8900, which can self start with an input voltage as low as 5mv, which is, AFAIK, the lowest of any available commercial chip.
    https://www.emmicroelectronic.com/sites/default/files/products/datasheets/8900-ds.pdf
    However, for a solar cell as small as your solar bit, it would require extra circuitry to operate it in burst mode, because at 5mv the micro-ampere requirements would likely exceed what your solar bit could deliver on a continuous basis. It's the same issue as with the LTC3108: https://www.openhardware.io/view/732/Extreme-Energy-Harvester

    I haven't yet tried a solar cell scavenged from a solar calculator, but that might be interesting to try as well, since presumably those are well designed to work with indoor lighting and have been perfected over decades for that use since the 1970's. Unfortunately, I don't know of any that can be purchased outright instead of as part of a solar calculator, like say the FX-260 or similar. Maybe someone reading this knows of a source?

    Though it's cheating, the last option would be to use a long-lived button battery purely to avoid cold-boot scenarios and to manage the collection of real solar power during those times. I imagine that such a battery could be quite small if limited to that type of use. Some such batteries might last as long as 40 years, such as Tadiran. That said, if it were deprived of light for long enough, it would probably run the battery down sooner than desired, so I don't like this option.


  • @NeverDie Thanks for the hint! At first glance, EM8500 looks like a highly integrated solution for embedded devices.

    What I like: very efficient for tiny, highly embedded applications, built-in USB charger (cool), can complement primary battery (super cool), programmable (including MPPT and battery thresholds) with EPROM support.

    Unfortunately, for the same reasons it will be very hard to use it as an addon module. First of all, it requires the battery to be exclusively attached to the harvester IC. In contrast, spv1050 has much simpler circuit where STORE on the module can be conned to battery on the main board.

    Next, ultra low-power capabilities of the EM8500 come at cost of its upper limits - 1.8V max for harvesting source, 20mA for LDO. Choosing PV for such device would be even harder than satisfy 3.2V requirement for boost-only spv1050. Since nRF52 may consume about 20mA at 3V, it might be tricky to run it batteryless, especially when some other devices are sitting on the line.

    Also, I2C bus will occupy two of six I/O. Well, fair enough. The spv1050 also has status lines for battery charge and battery connection. But they are completely optional and are off by default. Broadly speaking, the spv1050 is completely transparent to its load.

    So my impression is that the IC is very cool indeed, but it just doesn't fit this particular project. At least in its current form.


  • @NeverDie Use additional battery is an interesting idea. My only concern is that the harvester IC will drain it if connected to input. On the other hand it looks like the IC will work just fine as long the STORE has some voltage. And the STORE is connected to battery, which is charged by the harvester IC - i.e. the rechargeable battery is exactly the battery used to prevent IC from shutting down. But perhaps I missed something - still have no boards for test.

    Regarding solar cells from a calculator - yeah, that was my first intent, but have no solar calculator out there. Taking in account that such a calculator costs three times less than this SolarBIT thing I have no excuse for not to buy one from a local store - going to fix that tomorrow 🙂


  • Okay, grabbed cheapest calculator from a store. It turned out to be EATES DC-837, priced below $4. Surprisingly well made, it uses monocrystalline amorphous PV cell and one AAA battery, connected via a dual diode. This means the calculator should be able to work from as low as 1V, and the PV panel should not cause overvoltage at the same time.

    The panel size is 12.6x37.8 mm. It looks really inexpensive and is made of glass, protected with paint on the back.
    SC-1338 front SC-1338 back

    Despite that, the panel works damn good. Such, I was able to get 1.8V from it in a room with dim lights (about 50 lux). At the same time, short circuit current was about 5.9 µA. Exposed to bright sun it resulted in 3.2V open circuit, and 3 mA at short circuit. I reached limit with 1200 lumens torch at 5 cm distance - Voc=3.25V and Isc=7.2 mA.

    I did similar measurements for KXOB25-02X8F. This time my torch forced the panel to Voc=5V and Isc=11mA which somewhat differs from datasheet. Results are on the charts below:

    IV Chart II Chart


  • Hero Member

    @Mishka Looks very promising!

    Thanks for posting the charts and the photo. I tried googling the "SC-1338-4" but found no datasheet, no sellers, nothing. I'm guessing the SC probably stands for "solar cell". Is it by any chance 13mm x 38mm in size? I'm only guessing, but perhaps the 4 is a reference to 4v, which is perhaps the voltage at maximum solar illumination. In that case, what appears to be a part number ("SC-1338-4") is actually just a generic description of the part, not a true manufacturer part number.

    The only other clue as to which solar cell is might be is perhaps a barely visible logo in your photo of the cell. The logo looks like the mirror image of "CAT" with a kind of triangle pushing up the bottom of the "A" letter.

    By the way, it looks like an interesting source for truly tiny scavenged solar cells might be solar watches:
    alt text
    That solar cell looks tinier than any that I've ever seen for sale.


  • @NeverDie You're absolutely right. The cell size is 12.6x37.8 mm which explains 1338. I also agree with your guess on 4V. The CAT is just reflection of my phone.

    Well, I'm impressed that a noname manufacturer managed to make such a useful cell. BTW calculator consumption is roughly 5 µW - pretty neat too 🙂

    Regarding solar watches - they should be fine to charge battery, but I'm in doubt they have enough capacity to power on anything so advanced like nRF52 - I hope should be feasible with the SCNE.

    Grr, the boards are out of radar - last track is 2019 December, 29.


  • @NeverDie said in 💬 The Harvester: ultimate power supply for the Raybeacon DK:

    That solar cell looks tinier than any that I've ever seen for sale.

    https://www.sparkfun.com/products/9541

    Not sure where to go with this though 🙂


  • Hero Member

    Maybe the reason solar cells like the SC-1338-4 are so elusive to find in the usual parts market is that the manufacturer is basically just buying a relatively cheap 5x5 or 6x6 inch slice of monocrystal that probably looks like:
    alt text
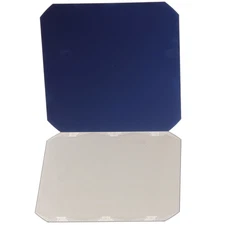
    and then carefully breaking it into bits of such a size that when wired together they exactly fit whatever net size the buyer wants. Though I've never tried it, I presume that you or I could be doing very small scale "manufacturing" ourselves if we were so inclined. Obviously some people make their own DIY 100w panels this way, but from what I've seen those people do so by soldering foil tapes across the front face of the monocrystalline slices, which presumably these cells would be too small to do. Hmmmm...., this now has me curious as to exactly how the bits get wired together. Anyway, provided they're not too hard to make, the upside to DIY'ding small solar cell planels would be getting any size/voltage combination we want plus freedom from having to scavenge pre-made cells from pricier consumer products.


  • Hero Member

    @Mishka Looks as though an array of BPW34 can actually be packaged together fairly tightly.
    alt text
    It still wastes some real estate, but not as badly as what I had imagined.

    I suspect they wouldn't do well under indoor LED lighting though, as they seem to have peak sensitivity at around 900nm, which is infrared.


  • Hero Member

    @Mishka The specs on the fx-260 solar calculator says it needs at least 50 lux for adequate power, but Dave Jones tested it on youtube and found that 20 lux was sufficient. Unfortunately, he didn't measured the shorted current, so it's hard to know how it compares to the cell on the solar calculator that you tested.


  • @NeverDie The cell probably is not so sophisticated as the one installed in the fx-260. Also, from four visible sections only three are working. Sigh.

    It seems the calculator can acceptably work as long as it supplied with 1.3V or more. This roughly estimates to 40 lux for this particular PV cell. However, the display is the resource hog - every additional digit causes voltage drop. Usable number of digits - five or less. After reset the calculator draws 3µA. Every "8" adds up 0.1µA thus reaching PV short circuit values very soon. The IC seems completely unregulated - at higher voltages it draws proportionally more, up to 1mA.

    It's also possible to gain little bit more power (about 70mV) if bypass polarity protection diode. However, it might be rather better to employ 10µF capacitor to compensate for keypress actions. With 92µF it's also possible to enter longer numbers, but you have to type them fast, then store the number in memory, then quickly clear display and wait until the capacitor charges. Now you can type another number, press operation, and, finally, MR and = to calculate result 🤙


  • Hero Member

    @Mishka This youtube video ranks the various different types of solar cell technologies:
    Most Efficient Solar Cells and Panels in 2020 – 06:07
    — Synergy Files

    According to it, the Spectrolab XTE-LILT would be the highest performing, and as a bonus it does its best when under low light conditions, where it has 37% efficiency--head and shoulders above any other brand. Not quite double the performance of the best monocrystals, but almost. However, so far I haven't found it for sale anywhere.


  • @NeverDie Well, looks like that is the space mission panel 👾 👾 👾 Won't be cheap anyway. On the other hand recently I seen a lot of news about so called nighttime photovoltaic power, who knows how fast it can be delivered to market.

    In a meanwhile, I had a chance to play with the Harvester board. Please don't consider everything below as any serious test or a comprehensive review - I just rather tried to understand how the modules are working and what can I get from them.

    Following our prior discussion, I've assembled one board in buck-boost mode (the original PCB), and have tweaked another one to the boost configuration. The only solar panels I have are:

    • IXYS KX0B25-02X8F. Single panel is annoyingly weak so I connected two of them in series.
    • The SCNE SC-1338 from the test above.
    • SORBO SB-3077. A big (79x40) panel from solar torch. Didn't tested it like the other two, but noticed about 6V from it.

    For the load there is 1500µF 4V tantalum capacitor installed. V_uvp threshold has been set to 2.2V, and V_eoc to 3.2V. Please also note, the MPPT resistor values were set to V_oc=12V (which is too high for all the tested panels) and no adjustments were made to them for any of the tests.

    Most of the tests I made in the evening at home where LED lights are the most common source. I used light sensor on my phone to measure light illuminance. Looks like it gives more or less sensible values; such, 50 lux corresponds to a dim light, 250 lux is an office light or indoors illuminance in cloudy day, 1000 lux is outdoors light in cloud day - similar values I've seen in tables over the Internet. After checking illuminance I placed solar panels in the same area and measured most important voltages:

    • V_pv - PV panel voltage when it is under load (but see my comments)
    • V_store - voltage at the spv1050 store capacitors (2x47µF)
    • V_out - voltage on the output capacitor (1500µF)

    For low light conditions I waited several minutes for the capacitors to charge and read values only when the system became saturated (or at least look so). Results and my notes are represented in the following table:

    Harvester behaviour in dependency of LED light intensity

    The spv1050 datasheet provides quite detailed description on how it works. The only interesting question was - what happens in buck-boost mode if the harvester cannot maintain V_store voltage anymore due to low illuminance. I found that store and the load will be connected as long as V_out>2.2V. After that, spv1050 will shut down the DC/DC and connect PV to the store. I think DC/DC was on because panel voltage raises up from 0.25V to 0.52V when the store disconnects from the load. Why is it 2.2V and not 2.6V as specified in the datasheet, I don't know.

    Another interesting test was how much time it will require to charge the 1500µF capacitor to 3.2V. For that I tried different panels with both buck-boost and boost boards. Please note, since the boost board has 4V limit (due to the tantalum capacitor) and pair of the IXYSes are capable to produce up to 8V, I've skipped this couple. The results are in the table below:

    Capacitor charge time

    You was absolutely right when expressed the concern on the SolarBit panels - they work much better in the sunlight. The SCNE seem also prefers full spectrum to my LEDs.

    Evaluate whether this is a good or bad result is possible when considering the load itself. Accordingly to the Nordic, the nRF52840 will consume about 32µC
    per heavyweight BLE event, for example, when running at 2.2V (lowest possible value for the spv1050) and sending +8dBm advertisements. For tiny packets it may be as low as 5µC.

    The tantalum capacitor stores 1500µF*3.2V = 4800µC - exactly this amount was delivered by the spv1050. This roughly equals to 150 advertisements, or 960 connection packets. If ignore other waste (like sleeping current) and assume 5 minutes as an average result on SCNE-alike panel (indoors, daylight), the system should be able to advertise once every two seconds or send small data packets once every 1/3 second without discharging a battery.

    Of course, more light means more power, and there is the night too, but with proper panel and correct location I think it should be possible to maintain positive power balance.

    So which configuration to prefer - boost or buck-boost? I still have no simple answer.

    The boost is good when you're working in low-light conditions and can keep it low-voltage. I also have impression that the spv1050 is sensitive to the current it can get from a panel. Therefore a couple of single cell panels (i.e low voltage, high current) might be the right choice. On the other hand, it's risky to attach high voltage panels to the boost harvester - neither battery not capacitor will tolerate 6V.

    The buck-boost configuration has no such drawback - any panel you may find on attic will very likely to work. Another advantage you might have noticed is that it delivers faster. When fast is fast enough - it depends. But in the low-light when it may took up to 30 minutes to charge a 1500µF capacitor the boost advantage is not so obvious.


  • And couple of words about the Harvester LDO - it works. Also, being connected right to the spv1050 store it could be used to bootstrap the harvester, but if connected full time it will soak about 8µA which is too much for a battery powered board. So still kinda hack, and its primary purpose is to supply the board via USB.

    Couple of Harvesters


  • Hero Member

    Your results are consistent with what I've seen with other harvesters.

    1. Their #1 goal is to get out of the cold boot mode and to a voltage level where regular electronics can power up, resulting in much more efficient energy harvesting. So, until that minimum voltage is reached, they typically keep all their energy and don't output any. I think that's the right approach, so I have no beef with that.
    2. I'm not a fan of built-in LDO's either, and for the same reason: in a marginal situation, you don't want to waste any more operational or quiescent current than you have to.

    You might enjoy this eevblog video, where the Dave Jones measurements show that the FX260 can handily power its LCD display in idle mode with just 2v and 2ua, and just barely so at 1v and 1.5ua:

    EEVblog #389 - Casio Calculator Investigation – 16:15
    — EEVblog

    It seems to keep its memory alive, for awhile at least, on less than that after the LCD display has gone blank.

    I've read that TI made a series of calculators (mostly in the 1980's) called the "anylite" series, which were designed to function without a battery in pretty much even dim indoor light. They used bigger than average solar cells. Asdie from their size, I'm not sure if there was anything special about them. Maybe. I haven't tried one myself, but I suspect so. However, It appears to me that these days though TI has gone the "hybrid" route of stuffing a battery in there, and the size of their solar cell is a lot smaller now. I'm not sure what the value of that is, other than simply extending battery life. The FX260 is one of the few that still offer the solar-only with no battery option. Its LCD display is quite crisp, so it doesn't appear to suffer from doing so.


  • @NeverDie What I meant is that in addition to internal LDOs in the SPV1050, there is also the MIC5205 3.2V which is sourced from the USB (can accept up to 16V). This LDO output can be connected to the spv1050 store capacitors via relevant solder jumper on the board bottom, and when connected and not powered it draws about 8µA from the store. So the jumper is kind of requirement.

    I've enjoyed the calculators video. BTW my calculator from which I took the solar panel has similar characteristics. Regarding reuse of calculator panels, first of all they must match the application voltage. If speaking about the nRF52, it has to be 1.8V to 3.6V (or up to 5.5V), but a small panel can't supply it under load. Also, the radio can draw up to 16 mA which is possible only with larger panels. Of course, a capacitor can fix online use of a solar panel, but in order to work with lights off a secondary battery required, hence the solar charger.

    And now it runs out into a game of coulombs. Today I've tested the boards in direct sun light. They charge the 1500µF capacitor in few seconds and then just idling. It looks like this power excess is more suitable for a battery rather a small capacitor. But a 2032 size supercapacitor could also make it. It looks slightly more interesting strategy to fast charge battery when you can and then work from the battery, than struggle to charge the battery in the lowest possible conditions and hence limit charging speed. Please also note, it is usually easier to build high-voltage panels rather high-current ones.

    Anyhow, there are too many influential factors so a practical test is required. I think I have ot try two competitive configurations placed in exactly the same environment:

    • 2 x KXOB25-02X8F panels (5.53V, 6.3 mA) and the buck-boost board
    • 2 x KXOB25-05X3F panels (2.07V, 19.5 mA) and boost only board

  • Hero Member

    @Mishka said in 💬 The Harvester: ultimate power supply for the Raybeacon DK:

    But a 2032 size supercapacitor could also make it.

    Maybe, though I'mskeptical of capacitors that don't list ESR in their datasheet.

    This one is kinda interesting: https://www.digikey.com/product-detail/en/UMAL201421A012TA01/490-13963-ND/6152301/?itemSeq=317110112 I found it in the supercap category of digikey as a 50F capacitor, but it's actually a small surface mount rechargeable battery with what is described as a long cycle life (still has 90% of its capacity after 5K charge cycles). Looks as though it has been discontinued, but there are still a few left in inventory. If used as a backup of last resort in combination with a supercapacitor, maybe it would last a very long time. Looks as though its self discharge rate is pretty good at normal ambient temperatures, so that might be possible. If you averaged only one charge cycle per week, then it would effectively last 100 years and still have 90% of its capacity remaining. Sounds like it could be a really good way to avoid and/or manage the cold-boot phase of whatever energy harvester you might end up using.


  • Hero Member

    @Mishka said in 💬 The Harvester: ultimate power supply for the Raybeacon DK:

    So far the Raybeacon was finally assembled and sent to Nordic for tuning - you may have noticed updated pics on its page.

    What sort of tuning is it that Nordic does? This is the first that I've heard of Nordic doing it.


  • @NeverDie They do review schematic and layout of their SoC and then can do antennas tuning. For the tuning two fully assembled devices (including housing) are required.


  • Hero Member

    @Mishka Without modifications and under dreadful low light conditions, all of the fancy pants commercially available ultra low voltage energy harvesters I've tried for solar seem to be much more current limited than voltage limited. And by limited, I mean the difference between working and not working. For that reason I wonder (?) if maybe for the boost-only configuration you'd be better off with a 0.5v cell of the same dimensions. I haven't made up my mind on the matter yet, but that's where my thinking is starting to trend.


  • @NeverDie Yeah, perhaps at low light a weak PV battery simply can't sustain forward current for all the semiconductors to make them work properly. I think the 0.5V cells may be interesting to try too. My only concern is that the SPV1050 requires at least 0.15V to work which is roughly at 15% threshold of the log-alike illuminance-voltage chart - the 2V panels will have it at about 4% and look most promising. Please note, 2.6V buck-boost requirement is at 29% for two 4.5V panels.

    I want to give a try to all three kinds of panels, but little bit later using newer PCBs where I hope it should be easier to switch harvester into the boost mode. For now going to fix found issues and release v1.0 as buck-boost only.


  • Hero Member

    @Mishka I ordered a 0.5v sunpower solar cell to play around with. About 22% efficiency. It's different from typical solar panels in that all the wiring is on the back of it. No metal tape on the front of it, which is at least partly how it gets the higher efficiency (by using 100% of the surface that's facing the sun). It's also slightly flexible. I'm unsure, but it may possibly (?) be cut to size. All I know at present is that if you cut it in half with scissors, both halves continue to work (this was demonstrated on a youtube video).

    Also, on a different topic, I found this solar bluetooth beacon that cypress semiconductor had been selling for a while, but which is now discontinued:
    alt text

    Similar form factor to what you are attempting with the Nordic, except that in their case they crammed everything onto a single PCB, because all they needed was a Bluetooth beacon and nothing more.

    For its energy harvesting chips, Cypress went the route of requiring a minimum 2v for their energy harvesting to work, but their harvester can operate with just around 1uWatt of power, which if I'm not mistaken, means it can operate on about 500na, which is far less than the Linear Technology energy harvesting chips that I have so far tried.

    Lastly, but largely off topic, I found it interesting that Cypress's new generation of ARM mcu's (called PSOC 64), and due to be released sometime soon, will have dual processors (akin to the ESP32), but one operating on as little as 0.9v and the other on as little as 1.1v. And those will have integrated bluetooth and wi-fi as part of them to make for a single chip solution. That will surely help dim lighting scenarios for solar harvesting. Exciting times we live in.


  • @NeverDie Cutting panels should just work. I'm unsure how do you attach wires to it though. I'll be grateful if you will share your findings.

    This Cypress BLE sensor looks very sexy. It's definitely not so flexible as the Raybeacon, but it no doubt sets the tone and is ahead in both design and technology. I'm now thinking should I switch my nRF52 board from simple two-layers to high density interconnect and WLCSP - the aQFN-73 still not too easy to solder anyway, but it imposes serious space constraints.

    I like the size and shape (still considering rounded square though) - it's about what I expect from a battery operated embedded development board. Also, I found the board area is enough to build a custom DIY module using 0603 components. But routing and component placement on the main board is somewhat tight. Maybe issue a "pro" version - with all features of a development board, but integration level of a BLE module? At least it will allow place the buttons symmetrically 🙂


  • @NeverDie said in 💬 The Harvester: ultimate power supply for the Raybeacon DK:

    I found it interesting that Cypress's new generation of ARM mcu's (called PSOC 64)

    Yeah I remember how I played Doom on $1500 386-based personal computer, and now I can play it on $5 SoC powered by a coin cell. Awesome!


  • Hero Member

    @Mishka said in 💬 The Harvester: ultimate power supply for the Raybeacon DK:

    I'll be grateful if you will share your findings.

    Yes, of course. I ordered it just today, so I'll update you after it arrives if I learn anything from it. I suspect the wiring issue you flagged may allow the width to be reduced but prevent the length from being shortened. Anyhow, if not this one, then probably some other solar cell exists that can be trimmed to fit after-the-fact--hopefully one with good efficiency!

    As for the cypress solar beacon, it actually does a little more than just that: it broadcasts the temperature and humidity from a couple of onboard sensors. Nonetheless, Cypress describes it this way: "The Solar BLE Sensor is ultra-low power and works with just solar energy." ... and yet, isn't that a small battery I see on it? Maybe it's rechargeable, and cypress opted for that so as to save space as compared to a supercap? I haven't looked into it, but that's my guess.

    I'd say they did a good job of squeezing it down to the size of quarter. It makes me wonder just how much smaller it could be made. Interestingly, even though the solar panel takes up a lot of board real estate, it's not much worse than a coin cell battery. So, if it could still run on a solar panel that's even smaller, then the whole thing could be shrunk even more, and then solar would be an even more tangible bonus than merely not needing to change batteries.


  • Hero Member

    @Mishka said in 💬 The Harvester: ultimate power supply for the Raybeacon DK:

    still considering rounded square though

    I think one can argue that for a solar node a square/rectangular PCB (with or without rounded corners) is perfectly valid. I think the circular designs were primarily just trying to match the minimum footprint of a CR2032 or similar battery, since without solar that's what limits the smallest PCB size possible.


  • @NeverDie Well, round shape has property of manhole cover - it can't fall through 🙂

    Another thing I'm thinking about is to get rid of CR2032 and build it on a 3rd party module and a supercapacitor. This way It can be much smaller, but number of other drawbacks may come. Smaller size usually means worse radio performance. Also, the smaller the board, the higher integration required thus severely impacting production cost. This especially may affect expansion modules which are usually a DIY thing.


  • Hero Member

    @Mishka If you do decide to try for a smaller design, there exists a tiny (3.2mm x 2.5mm) 11mF supercap that's rated for 10,000+ charge cycles and that might perhaps be just barely enough capacity to do some minimum amount of work:

    https://www.sii.co.jp/en/me/datasheets/micro-battery-2/cpm3225a/

    or possibly one of the variants that the same company makes.


  • Hi, i am actually building a similar PCB for Energy Harvesting with SPV1050. What about the 196 HVC ENYCAP™ from Vishay like MAL219691262E3? Seems for me as a good Super Cap with acceptable dimension...


  • Hero Member

    @Sebastian-Walther said in 💬 The Harvester: ultimate power supply for the Raybeacon DK:

    Hi, i am actually building a similar PCB for Energy Harvesting with SPV1050. What about the 196 HVC ENYCAP™ from Vishay like MAL219691262E3? Seems for me as a good Super Cap with acceptable dimension...

    Dividing this into pro's and con's, one pro would be, as noted in the datasheet, "No cell balancing necessary."

    Although you could work around the issue, one con would be that the ESR's look rather high, which could bite you especially hard if doing high power radio Tx's.


  • Hero Member

    @Mishka said in 💬 The Harvester: ultimate power supply for the Raybeacon DK:

    Well, looks like that is the space mission panel

    I found a place that sells these more exotic cells in quantity 1: https://www.solarmade.com/store/category/solar-cells

    BTW, according to the news, the company that makes the highest efficiency solar cells (>30% efficiency) laid off its workforce in December, so who knows if those cells will ever be manufactured again.


  • Hero Member

    @NeverDie said in 💬 The Harvester: ultimate power supply for the Raybeacon DK:

    ... and yet, isn't that a small battery I see on it? Maybe it's rechargeable, and cypress opted for that so as to save space as compared to a supercap? I haven't looked into it, but that's my guess.

    I think I may have found the part: https://www.digikey.com/product-detail/en/elna-america/DCK-3R3E224U-E/604-1007-ND/970168
    The picture seems to match. So, not a battery after all, but rather a supercap (one with rather high ESR). Likely 220mF, or thereabouts.


  • Hero Member

    Powerfilm makes a thin film solar cell which they say is good for energy harvesting at 200 lux and less. According to their flyer, at 200 lux it says the expected power is 220uW for the panel included in their Nordic nRF52832 solar development kit. However, at 100 lux the expected power is not 110uW (which would have been my guess), but instead only "1,430uW"! (Even though it's a USA based company, I'm assuming they're using the European convention of a comma instead of a period for decimal notation)

    https://www.powerfilmsolar.com/media/cms/Indoor_Solar_Development_Kit_with_N_A90DF4062ABC1.pdf

    Since they're "official" datapoints, I thought it worth reporting, not for the absolute magnitudes (which presumably should be a function of panel size) but for the relative magnitudes. I'd be curious if other types of solar cells also degrade as quickly when going from 200 lux down to 100 lux or whether some manage to do a lot better in terms of energy made available for harvesting. If not, then without resorting to larger panels it sounds as though somewhere around 100 lux or higher is the practical limit for small footprint sensors.


  • Looks good, I am wondering about the high power, cannot imagine 🤔 because meanwhile I tested the ECS300, used in Enocean products, also designed for low light (200 Lux) with amorphous crystalline cells. But the MPP is only about 160µW @ 1000(!) Lux.

    ECS300.png


  • @iiibelst
    ok, seems to be possible, because it is 10x the area of ECS300...


  • Hero Member

    @iiibelst said in 💬 The Harvester: ultimate power supply for the Raybeacon DK:

    I am wondering about the high power, cannot imagine because meanwhile I tested the ECS300, used in Enocean products, also designed for low light (200 Lux) with amorphous crystalline cells. But the MPP is only about 160µW @ 1000(!) Lux.

    I suspect it's primarily a size thing. The ECS300 is lower power at least in part because it's comparatively tiny: just 35mmx12.8mm and with a short-circuit current of 6.5ua at 200 lux.
    https://media.digikey.com/PDF/Data Sheets/Enocean PDFs/ECS300_310.pdf
    If only we knew the actual size of the PowerFilm panel used in the demo, then we'd be able to directly compare the relative efficiencies of the ECS300 against the powerfilm. Even so, there's likely to be a lot of slop in these numbers, because they are each probably doing their 200 lux measurements using different light spectra (i.e. whatever shows off their product in the most favorable light, so to speak).


  • Regarding capacitor selection for the SPV1050 and nRF52. The undervoltage protection for the SPV1050 is 2.2V. At the same time, nRF52 works starting from 1.8V. The maximum allowed voltage drop should be no more than:

    U_drop = 2.2V - 1.8V = 0.4V

    Taking in account, that the nRF52840 can draw up to 25.8mA at 1.8V when transmitting at 8dBm, it means that supercap ESR should be no more than this value:

    ESR = U_drop / I = 0.4V / 25.8mA ≈ 15.5 Ω

    On the other hand, the online power profiler states that a single BLE advertisement event charge is 38.22 µC at 1.8V and 25.53 µC at 3.6V which roughly equals to max energy consumed:

    E = q * V
    E_3.6 = 25.53µC * 3.6V = 81.11 µJ
    E_1.8 = 38.22µC * 1.8V = 68.8 µJ

    And, for the worst case, assuming the energy as derived above and 0.4V as acceptable voltage drop, the minimum required capacity must be:

    E = 1/2 * C * (Vh^2 - Vl^2)
    C = 2 * E / (Vh^2 - Vl^2)
    C = 2 * 81.11µJ / (2.2V^2 - 1.8V^2) = 102 µF

    Of course, it's required that the solar cell must be able to charge the supercapacitor between BLE events.

    Also, I've noticed that in buck-boost mode the SPV1050 tends to charge the store and hence the battery to higher voltages. Such, the Harvester board has limited the U_eoc to 3.2V, but on the sun I can often observe it up to 3.5V. For this reason I'd recommend to slightly lower the U_eoc and ensure that the connected battery or the supercap can handle the voltage.


  • @NeverDie Yeah, you're very close. Cypress has mentioned it in the datasheet. The PV panel is AM-1606C and the supercap is DCK-3R3E204T614-E.

    It's also interesting to see that they have installed a second pool of ceramic capacitors to workaround high ESR of the supercap.


  • Hero Member

    I'm looking now at the ADP5091 boost chip by Analog Devices. It doesn't have a buck mode, but its boost mode is maybe just a tad more compelling than the spv1050's. It cold boots at 0.38v with 16ua of current, and after cold boot completes it can run on as little as 80mv. The pin pitch on its chip is 0.5mm as compared to 0.4mm for the SPV1050. Comparing it to the SPV1050 is perhaps splitting knits, but comparing it to every other chip on the market it does seem to require the least amount of power of any chip that I'm aware of.

    https://www.analog.com/media/en/technical-documentation/data-sheets/ADP5091-5092.pdf

    Analog Devices claims that its efficiency is 80%, so if running in buck mode is an option, I'm guessing that a buck converter would beat it. On the other hand, if there's enough light to provide the voltages for a buck converter to run on, then I'd wadge there's plenty of energy to be had regardless. At least, that's how I'm starting to look at it. I think the justification for a boost architecture is that it's preparation for the worst-case scenario, in the event that it ever occurs. I haven't yet decided whether it's like preparing for a once in 10,000 years flood or not. Perhaps it's just not practical. It's probably not a bad idea to have at least one to experiment with though.


  • Hero Member

    @Mishka said in 💬 The Harvester: ultimate power supply for the Raybeacon DK:

    @NeverDie Cutting panels should just work. I'm unsure how do you attach wires to it though. I'll be grateful if you will share your findings.

    Closing the loop on your question, it looks as though they can be cut:
    https://www.ebay.com/itm/0-5W-0-5V-High-Efficiency-Back-Contact-DIY-1-6-Cut-Sunpower-Solar-Cell-36pcs-lot/291858971298?hash=item43f4267aa2:g:hsAAAOSwxp9W5tui
    I've read that cutting them with a laser is the recommended method. I only just came across this, and I haven't yet found a vendor selling just one solarpower solar cell lasercut into six pieces like that yet, although the above ebay auction demonstrates that you can buy them in bulk that way.


  • Hero Member

    @NeverDie said in 💬 The Harvester: ultimate power supply for the Raybeacon DK:

    somewhere around 100 lux or higher is the practical limit for small footprint sensors.

    I'm realizing now that this is hogwash because today after getting my lux meter out of mothballs I'm noticing that my solar calculator works just fine down to around 15 lux, which is when its LCD starts to fade out. It suggests that powerfilm probably just isn't one of the better performing solar cells out there.


  • @NeverDie Wow! Are you sure the lux meter is working properly? 15 lux is about as low as 25 cm from a candle fire which is awfully low.

    So, since the ADP5091 is also on the list now, I think it becomes necessary to put all the mentioned power harvesters side by side so we can compare at least basic parameters. Please take a look to the Google Spreadsheet listing some of the tiny harvesters. Please note, The Analog Devices has about ten harvesters which may be described as "tiny", but so far the sheet is covering only ADP509x series. I'm going to add the LTC series later.

    From brief analysis, it looks like the Startup Input Voltage and the Startup Input Power are placing the major constraint on PV panel. Of course, the panel should be also able to supply voltage required to cold-boot the harvester. Such, under the low-light conditions (50 lx to 100 lx in a dim room) power capabilities of both of my panels are simply not sufficient to bootstrap the SPV1050: the IXYS is too weak and works starting from 150 lx, and the SCNE is good for boost, but still require 150 lx to reach 2.6V at STORE (the data is for the charts I've posted earlier):

    scne-ixys-data.png

    Therefore any panel which can reach required voltage and provide enough power should make the harvesting IC work. Please also note, that after cold-boot almost any harvester can work on a lower power (usually 1.5 - 3 times lower than it was required to start).

    Also, in the table there is a class of super-tiny harvesters, namely the Cypress S6AE102(3)A and Ricoh R1800K. They can charge a store by harvesting source with less than 1µW capability. At the same time, the EM8500 looks like the most sophisticated embedded solution with lots of features. The rest of harvesters are quite nice ICs for a modular system.


  • Hero Member

    @Mishka said in 💬 The Harvester: ultimate power supply for the Raybeacon DK:

    Wow! Are you sure the lux meter is working properly? 15 lux is about as low as 25 cm from a candle fire which is awfully low.

    I used a cheap consumer grade lux meter to take the measurement, but it's consistent with what Dave Jones reported for the same solar calculator. He did a youtube video on it, and he showed it worked at around 20lux at a coarse level and probably a bit less.


  • Hero Member

    @Mishka This is probably worth adding to the list: https://e-peas.com/products/energy-harvesting/photovoltaic/aem10941/

    If we add that, I think we have a pretty complete list for a first pass. The e-peas is pretty expensive though, so we could drop it for that reason.

    Since covering the worst case seems to be a relevant concern, I think it's important to identify which one can start-up and begin harvesting at the lowest lux level.

    15 lux doesn't seem all that dim to the eye. Setting aside the explanation that our eyes have great dynamic range, I still think we should be able to harvest from less than that. I mean, people are able to harvest from fairly weak radio waves, which have far less power.


  • @NeverDie Added, thanks! Quite interesting the IC implements some kind of Cuk converter. On the bad side it seems stocked nowhere, but the e-peas only.

    Looking for reasons why the Cypress BLE sensor has chosen a Panasonic cell I found the catalogue which also contains number of interesting charts. Such, the chart on page 3 explains why a calculator cell is more efficient in artificial light than the IXYS thing (BTW the IXYS datasheet has it pretty flat on the range from 400 nm to 1100nm).

    This all makes me think that there are basically two combos to choose from:

    • an amorphous cell and 3µW harvester
    • a monocrystalline cell and 15µW harvester with voltage adjusted to panel assembly

    But to be honest I'm quite surprised how well performs the SCNE cell I have extracted from the noname calculator.


  • @Mishka said in 💬 The Harvester: ultimate power supply for the Raybeacon DK:

    This all makes me think that there are basically two combos to choose from:

    Not quite. After closer look I've found the AM-5610 outdoor panel of suitable size - only 25x20mm. The panel is capable to produce up to 18mW.

    Other interesting panels are: AM-1606 as used on the Cypress BLE, 15x15mm, AM-1456 which is close to SolarBit by size, 25x10mm, and AM-1312 which is exactly of the same size the SCNE I have.


  • Hero Member

    @Mishka I suppose the SC-3722-9 may be too big for your project, but it's worth mentioning because it performs pretty decently under indoor lighting, and you can extract them for cheap from $1 solar keychains, which are widely available. That's all subjective though. I'm not sure how they compare by the numbers.

    https://www.aliexpress.com/item/32774648368.html?aff_request_id=d8e42a07ed7f4345b1133c9f4f249fed-1581813033932-00280-_rIgCIO&aff_platform=api&cpt=1581813033932&sk=_rIgCIO&aff_trace_key=d8e42a07ed7f4345b1133c9f4f249fed-1581813033932-00280-_rIgCIO&terminal_id=abc87087a3a64790a6abd96b2333811b


  • Hero Member

    This diode is a bit expensive and too large for your project, but for experimental purposes it seems like the cat's meow as a blocking diode when collecting currents at tiny voltages: http://www.ti.com/lit/ds/symlink/sm74611.pdf

    Just 26mv forward voltage drop at an 8a current, and just 0.3ua reverse leakage current at a voltage of 28v. Obviously, those numbers would be far less for the currents and voltages that we're dealing with. It seems to be very nearly an ideal diode, or at least the closest I've ever seen to that.


  • Summarizing the work on the SPV1050 (irrelevant to other ICs mentioned in this topic) please let me publish revision 0.9 of the Harvester board. It addresses some issues found on the previous boards, and introduces number of important changes.

    The most noticeable one is that the board now supports both boost and buck-boost DC-DC configurations of the SPV1050. After reviewing some tiny PV panels it was indetified that the maximum working voltage for a tiny panel is about 3V which means the boost mode is more suitable to do the job. Also, tiny high voltage panels (like some SolarBIT models) have very limited current capabilities and in low light conditions simply can't supply enough power in order to make the harvester chip work. It's also important to note that the cold-boot voltage for boost DC-DC is 0.55V which is only about 20% of maximum 3V voltage a panel can gain - please compare that with 2.6V and 4.4V respectively for some most advanced cells. Finally, if in the boost mode the SPV1050 supports TEG modules.

    Therefore the BOM was adjusted to the boost configuration with the following thresholds:

    Symbol Parameter Value
    V_uvp Battery under voltage protection threshold 2.4V
    V_eoc Battery end of charge voltage 3.1V
    V_oc Source open circuit maximum voltage 4.7V
    V_mp Maximum power point voltage 78% * V_oc

    Please note, in the boost mode the SPV1050 will effectively set V_eoc = V_in for all V_in values greater than 3.1V which may cause damage to the battery or the nRF52 SoC. To prevent the negative impact please carefully consider the source.

    If the only source you have is a high voltage solar panel, it's possible to adjust the R1-R3 resistors ladder (please refer to the SPV1050 datasheet) and switch the Harvester board to buck-boost mode as follows:

    Harvester DCDC config

    Hint: If the solar panel is really big (like 2W / 12V or so) and you don't need MPPT, it's possible to close the USB Charge jumper and connect the panel to VBUS and GND solder pads in order to employ the 3.2V USB LDO.

    The MPPT fixed voltage ratio is set to 78% with resistors R2=2.2M and R3=8.06M. For a TEG module with MPPT ratio at about 50% just replace both R2 and R3 with 5.2M resistors.

    Other notable changes included into this release are:

    • Fixed some silk layer errors
    • The MIC5205-3.2 LDO got missing input filtering capacitor
    • The current limiting resistor between the SPV1050 and the tantalum capacitor has been removed
    • Connection to the ground plane in some isolated areas was improved

    And last, but not least, I'd like to thank the MySensors forum and in particular @NeverDie for his tremendous contributions. It's pure fun to discuss tiny boards with tiny harvesters working from tiny power sources 🤙


  • Hero Member

    @Mishka Looks like a winner. 👍 Once you put it together I'll be interested to hear what the lowest light levels are that you're able to run it at and which solar panels/cells you end up liking the best.

    I think there's a good chance it will outperform the eval kits from enOcean, Cypress Semiconductor, Cymbet, and others that rely on a high cold start voltage. In order for them to win they would need to harvest at a lower power than what your chip can manage but somehow also at the higher voltages and with enough power that their chips require, and I'm not sure whether or not those two conditions can be generated simultaneously by real world solar panels.


  • @NeverDie Well, the SPV1050 has a nice set of features I need and offers impressive flexibility in a small package. However, when speaking about efficiency the AEM10941 seem outperforms it in every single bit.

    The current design reached some level of stability so I think the AEM10941 is what I should try next.


  • @Mishka said in 💬 The Harvester: ultimate power supply for the Raybeacon DK:

    The current limiting resistor between the SPV1050 and the tantalum capacitor has been removed

    Why removing the resistor? Why not placing it after the (optional) Tantal to protect a downstreamed Batt or Cap?


  • @iiibelst There is one. The R7=549Ω is limiting current between the tantalum capacitor and the extension socket. Its purpose is to keep it under 2mA for ML2032. You can bypass it with relevant solder jumper on the board bottom.

    The dropped 50Ω resistor was previously located between SPV1050 and the tantalum capacitor.


  • Hero Member

    @Mishka said in 💬 The Harvester: ultimate power supply for the Raybeacon DK:

    The current design reached some level of stability so I think the AEM10941 is what I should try next.

    Yes, at a 3 microwatt minimum, that chip may be very tough to beat. It has the same 380mv cold start voltage as the ADP5091, but it requires only half the energy. With these tiny solar panels that extra margin might really make a difference under dim indoor lighting conditions.

    I guess it's no accident that the AEM10941 is the newest chip. Perhaps it's the constant improvements in cmos technology that it leverages. In which case.... we can probably look forward to even better chips in the future! For sure solar cells and panels continue to improve their efficiency. The markets are finally big enough to support the required R&D for continual improvement. And the mcu's and radios are constantly improving their efficiency so less power is required. It's great to be in the nexus riding a few waves like this, where we can get the benefit of multiplying the improvements together.


  • @NeverDie That's all true.

    Please also note the AEM10941 can regulate up to 5V of input when ADP5091 upper limit is 3.3V.

    Again, when speaking about BLE, a beacon (as a low-power application example) has to advertise at least once every 1000ms to be generally usable. For nRF52840 it approximates to about 50µW of power consumption. By adding up some microwatts of the harvester itself it may be safe to expect a panel should be able to produce 60-70µW of energy in average. In turn, this means that those 3µW or 15µW are rather an edge scenario, and there is must be a timeframe when the system can collect all the required electricity. Such, when running from a daylight it should be expected that in February the harvesting will be efficient for at most 8 hours a day. The system must be able to offer minimum (24h/8h)*70µW = 210µW during the light period of time. For the reference, a couple of my IXYS panels can provide only about 150µW when located in 1m from window on the north side.

    From the experiments, to me it currently looks more not about possible minimums, but rather about higher efficiency at nominal values. But I admit the difference between 3µW and 50µW doesn't look big either. The sleeping current of the nRF52 is already less than 3µW, so perhaps some time the source and the load can converge.


  • Hero Member

    @Mishka said in 💬 The Harvester: ultimate power supply for the Raybeacon DK:

    Again, when speaking about BLE, a beacon (as a low-power application example) has to advertise at least once every 1000ms to be generally usable.

    I read in a couple different places that the maximum bluetooth advertising interval is 10.24 seconds (i.e. 10x your assumption) so if the rest of your math is right that should provide ample headroom for being bluetooth compliant.


  • @NeverDie Yeah, there are also scenarios when a beacon advertises only when it was charged enough - it may wait for several hours before send a packet. But that's rather uncommon application. A typical beacon usually advertises every 100 ms to 1000 ms - this way it can be located quick enough.


  • Hero Member

    Closing the loop: today I finally received the sunpower solar cell, so I was able to take a closer look at it. Basically, the traces on the back are interdigitated. So, it looks as though it could be cut along the horizontal axis (if, say, the connection pads are on the left and right) almost as narrow as whatever you might want to. However, it would be ruined if you were to cut along the vertical axis: one pad would remain fine, but all the traces to the other pad would be severed. Maybe in theory they could be re-attached to a new pad with a lot of careful soldering, but that doesn't seem very practical, as the pitch between traces is quite narrow. On the other hand, if one were to use a custom flex film pcb with connection traces that aligned to the severed traces, it might be possible, but still a nontrivial amount of work.

    Looked at from the point of view where large surface area is OK: one of the nice things about these cells is that they are reasonably inexpensive considering their 5"x5" width and height, and yet they are quite thin and still easy to connect. However, I suppose they maybe should be coated with something to protect them. A 2K automotive epoxy spray would probably be ideal, but perhaps even a hard automotive acrylic lacquer would be sufficient, as either should be both non-yellowing and moisture proof. Unfortunately, not much seems to be written about what types of coatings work best. Obviously, the commonly used chinese epoxy solar cell coating would be a poor choice, as that stuff degrades under uv and yellows/browns and clouds up quite rapidly.


  • @NeverDie Interesting. I think the cell may be carefully cut with laser and then properly remetallized. Perhaps can be done with a typical tin based solder paste with some proper flux (I don't know, originally some kind of silver paste is used). Fixing the cell itself into epoxy should be easy.

    The nice thing about the process is that it should be virtually possible to create cells of arbitrary shape. However, in order to get usable voltage it might require to build a panel.


  • Hero Member

    @Mishka On second thought, if you were cutting it to a small size then there wouldn't be many traces remaining to be reconnected, so from that point of view it might actually be practical.

    For me it's academic because I don't own a laser cutter, and I have no idea what kind of power would be required to cleanly cut one of these cells even if I were to buy one for that purpose. I'd be interested to know though. Even 20 watt lasers are pretty cheap these days. Hooking a laser up to a CNC, which I do have, to execute the cut would be fairly easy.


  • @NeverDie My nearest laser service costs about 3-4 dollars for one running meter, can cut 2 mm steel, so never thought about that. On the other hand, with enough number of passes it virtually should be possible even on a DIY CD-ROM laser engraver, especially if mounted on a CNC which is usually more precise than lasers.

    I'm expecting that at least three crystals will be required to gain 1.5-2V. For a circle, it sounds reasonable to cut three or four sectors of equal shape. Maybe a 3D printed pallet can be used with top layer protected by epoxy. But I think for the best result additional metallization will be required anyway.


  • Hero Member

    @Mishka Since you could convert one large cell into lots of tiny cells, it might actually be cost effective.

    I once looked into directly etching the copper on pcb's using a laser mounted cnc, but apparently that requires a much higher power and more expensive laser than what's commonly used by hobbyists. AFAIK, simply running a low power laser over the same isolation traces over and over with just a low power laser won't get you anywhere. I'm guessing that's because of both the copper's reflectivity as well as pretty excellent heat dissipation to the surrounding copper. It may be that a solar cell wouldn't be as difficult, but I couldn't say. For sure your cutting service's laser should be able to handle it though. Please do post how it goes if you decide to pursue it.

    For POC you could cut the cell using just a box cutter or something like that. What happens is that the cell shatters near the cut mark, but enough is left over that the cell still works. So, it's not really the proper way to do it, but it could be done, at least for larger cells. It's hard to know a priori how far the shattering/cracking might travel in a small cell. Maybe not much useable area would be left. Or maybe there would be. I guess that would require experimentation to find out. I only know what I saw in this youtube video:
    Cutting Supower Maxeon Solar Cells? - Mikes Inventions – 06:37
    — Mikes Inventions

    His was just a rough and ready test to see what would happen. Perhaps cutting it on a circular saw with a suitable tile cutting blade, tightly sandwiched between lots of rigid support might cause less shattering/cracking. Or perhaps borrow techniques used for cutting thin glass. Perhaps multiple passes with a diamond drag bit on a CNC could do it with minimal shattering/cracking: https://www.amazon.com/Diamond-Spring-Loaded-Engraving-Degree/dp/B07F9L62C3/ref=sr_1_6?keywords=diamond+drag+bit&qid=1582661720&sr=8-6
    I think that might stand a decent chance of working. However, aside from a POC, it's easy to see why a laser would avoid these problems altogether, and without producing dust.


  • Hero Member

    Art Resin tested a large number of different epoxies, and it seems that all of them yellowed to some degree over time, but some a lot more than others:
    Epoxy Resin Yellowing Third Party Testing from ATLAS Labs – 01:46
    — ArtResin

    Of course, since it was a test designed to make Art Resin look good, perhaps they omitted epoxies that really do never yellow. I just don't know which ones those would be. Eight weeks, which was the limit of their study, doesn't seem like a particularly long time.


  • @NeverDie Wow, nice collection! How do you think, may it be reasonable to glue cut cells to a quartz or glass base? Would it compromise effectiveness?

    IMHO the right way to cut them is either laser or high speed CNC. Also, CNC cut crystals may require extra polishing.

    Just asked a couple of local vendors for a single cell, waiting for their reply. BTW those cells are usually of 18-19% energy efficiency, so the only way to beat Amorton or IXYS is to cover larger areas.


  • Hero Member

    @Mishka said in 💬 The Harvester: ultimate power supply for the Raybeacon DK:

    Also, CNC cut crystals may require extra polishing.

    I think polishing would probably damage them. These cells are different than generic monocrystaline cells. Allegedly, at a microscopic level, they are built using tiny pyramids to increase their surface area. I can believe it, because when taken out of the package they look a bit like velvet. For that reason they apparently scratch extremely easily. The two that I received were in their raw form and totally unprotected, so I am right now in the middle of applying layers of an acrylic lacquer to them as a guard against scratching the active surfaces.

    A water clear urethane coating might have been a better choice, as it's probably harder, but acrylic lacquer is all that I had on hand. I hope to handle differences in co-efficients of thermal expansion by coating both the front and the back equally. Otherwise, it will probably warp.

    I soldered the dog-bones to them. I used rosin core solder, because that's all I have on hand, but next time I think I would use pure solder without the rosin, because I'm not sure whether the resin will interfere with a protective coating. I'll have a better idea about that when I finish coating this batch. Because of the cell's fragile nature and tendency toward scratching, I don't have the guts to clean off the resin with IPA without a protective layer in place. Perhaps I should, though, after the coating on the front finishes curing, and before coating the back of it.


  • Hero Member

    @Mishka said in 💬 The Harvester: ultimate power supply for the Raybeacon DK:

    BTW those cells are usually of 18-19% energy efficiency, so the only way to beat Amorton or IXYS is to cover larger areas.

    The C-60, gen3 solar cells I received supposedly have a higher efficiency than that: https://us.sunpower.com/sites/default/files/media-library/spec-sheets/sp-sunpower-maxeon-solar-cells-gen3.pdf

    That's the main reason why I ordered them.


  • Hero Member

    @Mishka said in 💬 The Harvester: ultimate power supply for the Raybeacon DK:

    How do you think, may it be reasonable to glue cut cells to a quartz or glass base?

    Yes, totally reasonable. It would protect them from breaking.


  • @NeverDie No no, by polishing I mean only the edge after cutting. I'd prefer to have it nice and clean just to avoid possible impact of cell layers which might cause shortenings. It's also very interesting to know that the cell has 3D surface - cool.

    How easy it was to solder anything to the cell? Have you tried to solder anything to crystal raw surface? My concerns is that after the cell will be cut it will lose interconnection of conductors so it would be nice to restore the metallization layer.


  • Hero Member

    @Mishka said in 💬 The Harvester: ultimate power supply for the Raybeacon DK:

    How easy it was to solder anything to the cell? Have you tried to solder anything to crystal raw surface?

    I soldered on the dog bones (a kind of bus connector) to the edges and gave each cell a brief test before applying a protective coating. They each work. That's about all I know. What's a bit confusing is that the solder pads look as if they they are made out of solder mask, but clearly they must be some kind of white conductive material that doesn't look like metal. I'm not exactly sure what's going on with that. I haven't yet found a "how-to" guide for this type of cell that explains anything in any detail. Its construction is completely different from any other kind of solar cell I've tried.

    I don't know what country you're in, but in the US the ebay sellers fullbattery and theHeartOfTheSun sell them at reasonable prices. Do an ebay search for C60.


  • @NeverDie The pads are usually made of silver. If thin enough it may look like the crystal. But the crystal itself may also be light enough - they produced with painting added for better light absorption.


  • Hero Member

    Not really surprising: they do much better with sunlight than with LED or fluorescent light.


  • Hero Member

    At 28lux of really lousy LED lighting, a C60 cell produces 0.66ma short circuit current and 96mv open circuit voltage. So, maybe not so terrible after all.


  • @NeverDie My thought was that amorphous silicon (a-Si) cells have better spectral response to artificial light than crystalline cells (c-Si). However, after investigating this a little bit I've found that this doesn't seem to be true. Instead, it's shown everywhere that c-Si cells have better response to every wavelength:

    spec-response.png

    Moreover, when the light source has wide spectrum (like the sun or an incandescent bulb), c-Si panels take the advantage and produce significantly more energy from the same source, and this all explains why a-Si cells are almost two times less effective than c-Si (roughly 8% vs 20%). Please note, because of narrow spectrum a LED lamp will be obviously inefficient for a PV panel.

    But at the same time, there are reports of a-Si cells being 4x more effective in low light than crystalline. Indeed, both crystalline and poly-crystalline cells may degrade a lot:

    cell-eff.png

    The seem happens due to low parallel resistance of c-Si type cells. Shunt resistance of amorphous cells is naturally higher which results to less degradation of Vmpp and hence higher efficiency in low light conditions. Some paper show the shunt resistance rather low, when other mentions it relatively high, but at extremely low power conditions even 20 kOhm may be too much.

    In short, a-Si cells are tend to produce fairly better results in very low light environments. But they can't leverage from wide spectrum sources, yet are subject to the Staebler-Wronski effect when exposed to direct sun (which can be reversed to some extent by heating the panel). In case if the light source is bright enough (around 1000 lx and above) a c-Si pannel should be preferred.

    Finally, there are some other kind of solar cells, in particular those made from III-V semiconductors compound and promising even better low light performance.


  • Hero Member

    @Mishka Have you found a good candidate for an amorphous cell to try? I see a lot of cells/panels advertised as amorphous, but without a datasheet showing performance under low light conditions, selecting one seems a bit like throwing darts at a map.

    I've seen some flexible amorphous panels that claim to stack materials with different light sensitivities to get a better spectral response:
    alt text
    But are they any good, or is it just puffery?

    I've seen articles claiming that CIGS have efficiencies of 20% to other articles saying that CIGS are barely better than amorphous. Some also make claims that CIGS perform well under "low light," but without the detailed datasheet, there's just not much to hang one's hat on when it comes to selecting one to try....

    And then there's powerfilm, which I had linked to earlier above, which claims to be optimized for 200 lux and below. At least they were selected by TI for TI's BLE demo kit, so presumably they were a good choice, at least at the time the choice was made....

    Is amorphous better than these other choices at low light, and if so, which amorphous solution has the best efficiency under low light?

    NREL seems to be an objective independent source for testing, but for high brightness conditions (according to wikipedia, the standard test conditions for solar cells are "the AM1.5 spectrum as the reference. This air mass (AM) corresponds to a fixed position of the sun in the sky of 48° and a fixed power of 833 W/m2. "):
    https://www.nrel.gov/pv/assets/pdfs/best-research-cell-efficiencies.20200218.pdf
    https://www.nrel.gov/pv/cell-efficiency.html
    At least on paper, the multi-junction cell efficiency looks really quite amazing. There are some for sale on ebay in the $20-$35 dollar range, depending on quantity. So, if you absolutely had to have one to meet your size requirements, there they are. No datasheets though, so again, just a cat in a bag. One claims 35% efficiency. No indication at all as to low light efficiency.


  • @NeverDie Right, the good thing about thin-film solar cells that they can be relatively easily stacked up to gain better efficiency. Don't know about CIGS, but some III-V compounds like GaAs are known to be very effective in low light environment (please see the last paper in my previous post). Such, some manufacturers are making tripple-junction GaAs cells with power effectiveness up to 15 μW/cm² at 200 lx - just compare it to Amorton which have it at about 6 to 8 μW/cm² under the same conditions. Sounds like a huge difference, especially taking in account the Panasonic offers rather high quality cells. Unfortunately, the cost is as high as the satellites carrying these cells.


  • Hero Member

    Last night I hooked up the keychain solar cell to my simple solar circuit, and at 5 lux it could still charge a 100uF capacitor to 2.7v and blink a red led without any boosting. It looks like it's probably amorphous. So, pretty good performance considering its low cost, but perhaps not as small as what you're looking for.


  • @NeverDie Well, 5 lux is ridiculously low. It's about the same illuminance you may have at 45 cm from a candle. Are you sure your lux meter is working? 🙂

    Interesting to measure Voc and Isc at that light. What's dimension of the cell?


  • Hero Member

    @Mishka said in 💬 The Harvester: ultimate power supply for the Raybeacon DK:

    Are you sure your lux meter is working?

    I'm not at all sure that it's accurate, but that's what the lux meter said. It's one of these: https://www.amazon.com/Dr-Meter-LX1330B-Digital-Illuminance-Light/dp/B005A0ETXY/ref=sr_1_3?keywords=lux+meter&qid=1582903100&sr=8-3

    I've misplaced the manual, but someone posted this on amazon as to its specs:
    The specifications in the instruction manual reflect the following:
    Light-measuring level from .1Lux to 200,000Lux
    Accuracy +- (3%rdg+10dgt) <=20,000Lux/2,000FC
    +- (5%rdg+10dgt) >= 20,000Lux/2,000FC
    Repeatability +-2%
    Photo detector lead length ~150cm
    Spectral Sensitivity- curve shows mostly betweeen 500nm and 650nm

    Perhaps I should get something better, or else maybe find some way to calibrate it. What is it that you're using?

    I assume that for "Accuracy +- (3%rdg+10dgt)" it means plus or minus 3% of the reading, which is fine. Not sure what the 10dgt means though. If that means it could be plus or minus 10 lux, then I guess it's useless for measuring 5 lux.


  • Hero Member

    @Mishka said in 💬 The Harvester: ultimate power supply for the Raybeacon DK:

    What's dimension of the cell?

    37mm x 22mm

    alt text


  • @NeverDie said in 💬 The Harvester: ultimate power supply for the Raybeacon DK:

    I'm not at all sure that it's accurate, but that's what the lux meter said.

    Wow, relatively to my built into the smartphone Sensortek STK3x1x ambient light sensor this one looks very serious.

    The cell has surprisingly high voltage (2.7V) at so low light. My amorphous cell has Voc = 1.8V at 50 lux (2 m from a fluorescent lamp). Maybe yours has many more cells in series. I'm going to order some Amorton panels of suitable size (less than 25x25), it will be interesting to compare them with my other amorphous cell.

    I'm also wondering would it be good o bad to connect two cells of different types - one amorphous and one crystalline.


  • Hero Member

    @NeverDie said in 💬 The Harvester: ultimate power supply for the Raybeacon DK:

    If that means it could be plus or minus 10 lux, then I guess it's useless for measuring 5 lux.

    Well, maybe not completely useless. If the specs are valid, then it's surely less than 20 lux, assuming I'm giving the right interpretation to "10dgts".


  • Hero Member

    @Mishka said in 💬 The Harvester: ultimate power supply for the Raybeacon DK:

    I'm going to order some Amorton panels of suitable size (less than 25x25), it will be interesting to compare them with my other amorphous cell.

    I'm thinking of ordering the AM-1816CA, which AFAIK is the largest one rated for indoor and low lux. https://www.mouser.com/datasheet/2/315/panasonic_AM-1816CA-1196985.pdf
    My only reason for ordering the largest would be to see what the limit is on how dim things can get in that series and still have something that can function. Maybe ordering smaller panels would make more sense, though, as they could always be added together in parallel or series. Yeah, that would make more sense I think.

    In addition, if you let me know what models you order, I may order one of the same too just so we can have something in common to compare results.

    At very dim levels I notice that my Fluke 87v multimeter actually draws too much current off the solar cell to get an accurate open circuit voltage measurement. So, I'll have to rig up some kind of voltage following op amp buffer as an aid to doing these measurements.


  • Hero Member

    @Mishka said in 💬 The Harvester: ultimate power supply for the Raybeacon DK:

    I'm also wondering would it be good o bad to connect two cells of different types - one amorphous and one crystalline.

    Only one way to know for sure, but I would guess that the crystalline one would drain off the current produced by the amorphous one (based partly on your theory as to why amorphous is better in low light). Worth a shot though: maybe as a compromise solution you can have the best of both worlds.

    Thinking out loud here, I have read about some research solar harvesters where they use a separate "pilot" solar cell to power the control electronics past the cold boot threshold. These days, with nanoamp current drains from control components, it would mostly need to produce adequate voltage and not much current, so a simple approach would be optimize the pilot configuration for exactly that--perhaps putting a few tiny cells in series. Perhaps any extra current could then spill over into the main accumulating capacitor. That would be yet another way to use more than one type of panel.

    The ideal solution would be if there were some way to re-configure multiple cells in series or parallel depending on the lighting conditions. It could default to series to push past the cold start and then switch to parallel (or some appropriate combination of series and parallel) for the energy harvesting. I haven't seen much on that topic, but I'd be keen to know if there are ways to do reconfiguring that consume very little power in overhead.


  • Hero Member

    @Mishka said in 💬 The Harvester: ultimate power supply for the Raybeacon DK:

    less than 25x25

    That probably limits you to a couple of AM-1456 (25mm x 10mm) or a single AM-1606 (15mm x 15mm) as your only choices.


  • @NeverDie said in 💬 The Harvester: ultimate power supply for the Raybeacon DK:

    Only one way to know for sure, but I would guess that the crystalline one would drain off the current produced by the amorphous one (based partly on your theory as to why amorphous is better in low light). Worth a shot though: maybe as a compromise solution you can have the best of both worlds.

    I mean connect them in series with bypass diodes so the amorphous cell can be used to bootstrap the harvester, and then crystalline cell will be workhorse during the day. Unfortunately, can't check it right now - left all my cells in the office.

    Thinking out loud here, I have read about some research solar harvesters where they use a separate "pilot" solar cell to power the control electronics past the cold boot threshold.

    That's a smart idea. Perhaps connect a dedicated tiny charge pump and an amorphous panel parallel to the buck-boost harvester storage capacitors?

    The ideal solution would be if there were some way to re-configure multiple cells in series or parallel depending on the lighting conditions. It could default to series to push past the cold start and then switch to parallel.

    A mechanical device? 🙂


  • @NeverDie Going to order 1 x AM-1606, 2 x AM-1456, 1 x AM-5610, and 2 x KXOB25-05X3F.


  • @NeverDie said in 💬 The Harvester: ultimate power supply for the Raybeacon DK:

    At very dim levels I notice that my Fluke 87v multimeter actually draws too much current off the solar cell to get an accurate open circuit voltage measurement. So, I'll have to rig up some kind of voltage following op amp buffer as an aid to doing these measurements.

    Heh, we seem dived below 1 µA / µW level here 🐟 🙂


  • Hero Member

    @Mishka said in 💬 The Harvester: ultimate power supply for the Raybeacon DK:

    Heh, we seem dived below 1 µA / µW level here

    Looking at the datasheets for the op amps I have on hand, I'm guessing that the LTC2063 will allow an accurate measurement: https://www.analog.com/media/en/technical-documentation/data-sheets/LTC2063-2064.pdf I'll try it after my uv glue arrives.


  • Hero Member

    @Mishka said in 💬 The Harvester: ultimate power supply for the Raybeacon DK:

    Perhaps connect a dedicated tiny charge pump and an amorphous panel parallel to the buck-boost harvester storage capacitors?

    Maybe, but which one? I would have suggested this one, but it's no longer available: https://media.digikey.com/pdf/Data Sheets/Seiko Instruments PDFs/S-882Z.pdf


  • Hero Member

    @Mishka said in 💬 The Harvester: ultimate power supply for the Raybeacon DK:

    Wow, relatively to my built into the smartphone Sensortek STK3x1x ambient light sensor this one looks very serious.

    Looks as though you can get a fairly inexpensive digital light sensor from adafruit that will tell you the lux level: https://www.adafruit.com/product/4162
    https://www.amazon.com/Adafruit-4162-VEML7700-Lux-Sensor/dp/B07S9TD2W1/ref=sr_1_1?keywords=Adafruit+VEML7700&qid=1583129068&sr=8-1

    It doesn't have the little translucent plastic dome on it though that one typically finds on lux meters. Not sure how important that is or isn't. Seems like such domes would shade the light and skew low light level readings, so maybe you'd be better off without it.

    I may get one myself as a check on my lux meter.

    There's also this one, a little cheaper: https://www.amazon.com/Adafruit-TSL2591-Dynamic-Digital-ADA1980/dp/B00XW2OFWW/ref=sr_1_1?keywords=Adafruit+lux+sensor&qid=1583129190&sr=8-1
    I checked the adafruit library, and it prints sensor readings in lux.

    Not sure which one is more accurate.


  • Hero Member

    I built the op-amp circuit, and now the open circuit readings on a solar cell are much higher than when I was taking the readings with a regular multimeter. As long as I can keep the control logic current at just a couple hundred nanoamps or so, I think I'll probably have enough voltage under even very dim lighting that I doubt cold start will be an issue.


Suggested Topics

0
Online

11.2k
Users

11.1k
Topics

112.5k
Posts