Skip to content
  • OpenHardware.io
  • Categories
  • Recent
  • Tags
  • Popular
Skins
  • Light
  • Brite
  • Cerulean
  • Cosmo
  • Flatly
  • Journal
  • Litera
  • Lumen
  • Lux
  • Materia
  • Minty
  • Morph
  • Pulse
  • Sandstone
  • Simplex
  • Sketchy
  • Spacelab
  • United
  • Yeti
  • Zephyr
  • Dark
  • Cyborg
  • Darkly
  • Quartz
  • Slate
  • Solar
  • Superhero
  • Vapor

  • Default (No Skin)
  • No Skin
Collapse
Brand Logo
JoeridemanJ

Joerideman

@Joerideman
  • Getting Started
  • Controller
  • Build
  • Hardware
  • Download/API
  • Forum
  • Store
About
Posts
55
Topics
6
Shares
0
Groups
0
Followers
0
Following
0

Posts

Recent Best Controversial

  • What did you build today (Pictures) ?
    JoeridemanJ Joerideman

    The milling topic got my interest and I have been working on getting a machine for myself.
    So far I have just assembled the machine and realised milling is a bit more difficult to start then 3d printing.
    anyway, I would like to share my progress. I am building video's now :)

    No circuitsboards yet, but here is a introduction of my way to victory.

    https://www.youtube.com/watch?v=45tTuHpgH1c&feature=youtu.be

    General Discussion

  • CNC PCB milling
    JoeridemanJ Joerideman

    @NeverDie their tools are also $115+ voor 10 engraving bits.

    Presicion comes with a heavy price.

    General Discussion

  • CNC PCB milling
    JoeridemanJ Joerideman

    @NeverDie yes.

    General Discussion

  • CNC PCB milling
    JoeridemanJ Joerideman

    @NeverDie however.... The material sticks a bit to the paint.

    General Discussion

  • CNC PCB milling
    JoeridemanJ Joerideman

    @NeverDie inkjet printing on semi transparent sheets.

    General Discussion

  • CNC PCB milling
    JoeridemanJ Joerideman

    @NeverDie I saw an YouTube video screenprinting. That guy noticed that semi transparent sheets work better than transparent sheets. Ink holds better or something.

    I can actually try this one out. Because afteral. We want that 0.4mm pitch right?

    I just need to find something to put the paint on.

    General Discussion

  • CNC PCB milling
    JoeridemanJ Joerideman

    @NeverDie I just read back around 2017.

    Have you ever managed to get Andrews result? He claimed 6mil back then.

    General Discussion

  • CNC PCB milling
    JoeridemanJ Joerideman

    @NeverDie

    Years ago I bought a face tanning device. They still sell these things second hand. And I expect like a lot of convenient but time consuming beauty devices, they are hardly used.

    Cost you 5-10 euros here in the Netherlands. You might have something similar.

    Anyway 30 seconds with this thing and it's cured.

    General Discussion

  • CNC PCB milling
    JoeridemanJ Joerideman

    @executivul good luck.

    I noticed that I really have to hold the board and the plastic together, otherwise the rolls will pull the foil off the board.

    So that might make aligning the artwork a bit difficult. Perhaps some form of holder for the PCB could prevent the shifting.

    General Discussion

  • CNC PCB milling
    JoeridemanJ Joerideman

    @NeverDie oh btw, I have not seen air bubbles.

    General Discussion

  • CNC PCB milling
    JoeridemanJ Joerideman

    @NeverDie you might as well buy those specialized springloaded engraving bits from Wegstr. If you are willing to invest this money.

    These hot/cold laminators cost 15 euro here.

    General Discussion

  • CNC PCB milling
    JoeridemanJ Joerideman

    @executivul

    I use the same kind of plastic folder. They are dirt cheap. And yesterday I used the same one twice.

    @NeverDie it was late in the night already. I meant 2 mils :-).

    Yes the laminator is only rolling, there is no heat involved.

    General Discussion

  • CNC PCB milling
    JoeridemanJ Joerideman

    @NeverDie
    Ah yes the artwork comes on top of that.

    I measured the paint thickness with a topcraft caliper. It shows 0,05mm or around 2 mils.

    Even if you do manage to get that perfect layer thickness. There might still be the problem of the paint sticking to the artwork more than to the PCB.

    This might be different though if the layer is thinner.

    I think I can live with how fuzzy it is.

    https://youtu.be/T56wuO43lW4
    The linked video shows how to make a rod.

    General Discussion

  • CNC PCB milling
    JoeridemanJ Joerideman

    @NeverDie

    You know I was just considering if it was worth it to film the process. But I think this will be a bit to much work. I will have to at least clear my desk for it to be presentable :-).

    I but the PCB in a polypropylene A4 sized folder. It is thin material and the paint does not really want to stick on it.

    The transparent sheets I use for printing the design on are made for inkjet printers. The paint sticks very well to this so the Polypropylene is very important.

    Than only once I let it go trough the laminator. I have to make sure that it actually goes through it does not really want to on it's own.

    General Discussion

  • CNC PCB milling
    JoeridemanJ Joerideman

    @NeverDie for lack of such a roll I have tried another idea I found on YouTube.

    I used my laminator to spread out the paint. It gives not that perfect result that you see on factory prints but I was able to expose it for 30s and then a minute of cleaning and then another 2 minutes of exposing.

    It is a very solid and well formed layer. Very scratch resistant. IMG_20200826_005709.jpg

    I will have another go on the other side to see if this is repeatable.

    Edit:

    This is very repeatable. I tried scrubbing with alcohol first but aceton might be a bit better.

    The letters are less than 0,4mm wide.

    After scrubbing I exposed everything for another 3 minutes and than it seems to be scratch resistant.

    IMG_20200826_012901.jpg

    So while I have not yet tested laser exposure or laser engraving, I have now tested a potential reliable way of applying the paint.

    General Discussion

  • CNC PCB milling
    JoeridemanJ Joerideman

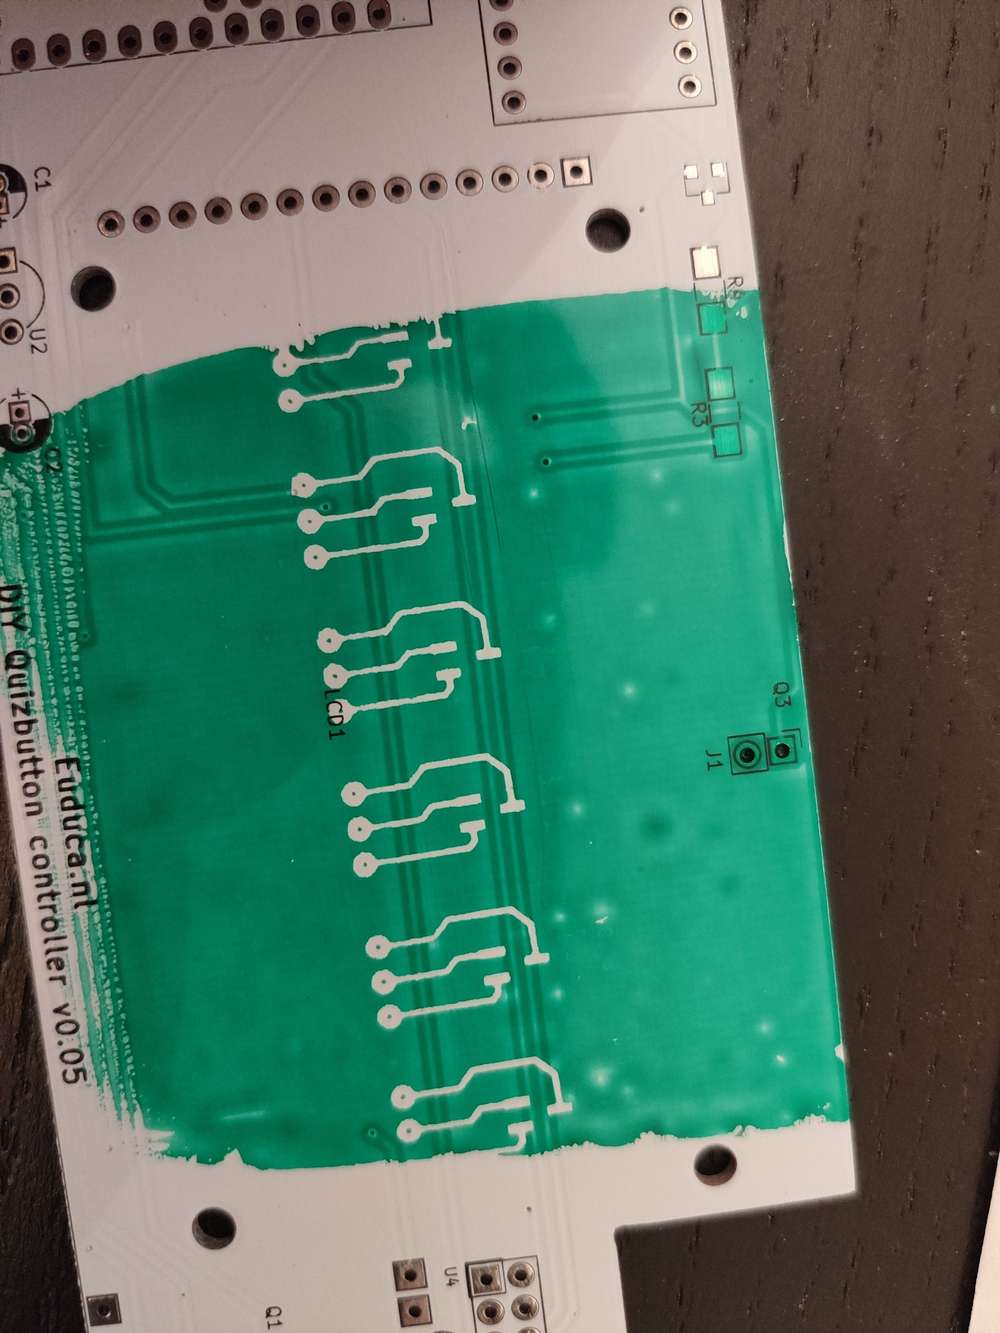
    I just started with my first UV mask experience.

    Following a YouTube video about how to apply the paint. I use a transparent sheet anyway to put the paint on. If I had printed the pads on there before exposing than my only task would have been to rinse it after a minute.

    Either way, first test to apply it failed. Better cleaning next time.

    So far... I find it difficult to apply the paint. And I find it difficult to expose the paint and then remove it again.

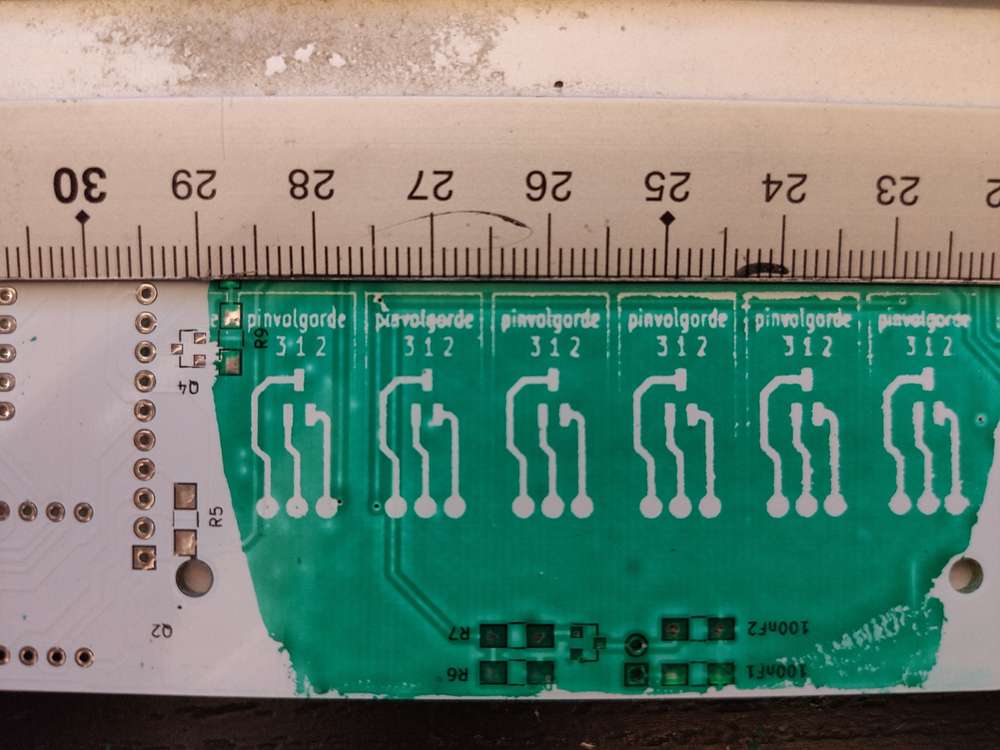
    Edit: I have already reached the tenth test. So I am starting to root for the laser. although aligning will be very difficult.

    Edit again: Exposing uv paint is problematic. It worked a bit, but I think I will have to experiment with curing times. It is far less forgiving than exposing pcb's. On the other hand... I now understand why they use there mill for this.

    I am a bit out of material to put the paint on, and out of patience. The laser will have to come later. I am not so experienced yet using that thing. It takes a bit of time to set it up.

    General Discussion

  • CNC PCB milling
    JoeridemanJ Joerideman

    @NeverDie I could actually try this out.

    I recently received solder mask paint, both white and green.

    And I have a cheap 3 Chinese Watts uv laser engraver.

    I was thinking that using transparent sheets is the easiest way to go since you have to expose it anyway, but ofcourse that also means more material use.

    General Discussion

  • CNC PCB milling
    JoeridemanJ Joerideman

    @NeverDie

    I shared a link to this channel before.

    https://youtu.be/fm5bsq7XD2g

    I am waiting for their next video. I am told it will show us a bit more about the limits of the machine.

    It doesn't actually show an atmege328 I am not sure where or if have actually seen this.

    The Wegstr, has only a Z axis for the spindle. And from what I read they use a brushless motor for this. I guess that by only moving it up and down, this part becomes very rigid.

    General Discussion

  • CNC PCB milling
    JoeridemanJ Joerideman

    So, I have seen that with a popular 3018 CNC a atmega328p-au can be milled.

    0.2mm traces with 0.2mm clearance can be routed.

    What specs are you going for?

    General Discussion

  • CNC PCB milling
    JoeridemanJ Joerideman

    Hey, I have trouble understanding the last 10 posts.

    It sounds like this go's beyond the PCB milling?

    What are you aiming to achieve?

    General Discussion
  • Login

  • Don't have an account? Register

  • Login or register to search.
  • First post
    Last post
0
  • OpenHardware.io
  • Categories
  • Recent
  • Tags
  • Popular