Have you restart luup after you connected both usb-ports?
miro
@miro
Posts
-
"Choose the Serial Port" error with MySensors and RFXtrx433? -
"Choose the Serial Port" error with MySensors and RFXtrx433?I bought this one: https://www.kjell.com/se/sortiment/dator-natverk/datortillbehor/usb-tillbehor/usb-hubbar/plexgear-usb-hubb-7-vags-med-stromforsorjning-p68616
Now all is working fine for me.
-
💬 Motion SensorDoes anyone know why my sensor only reacts when I move my hand just in front of it. From a distance it does not work. Has tested with different HC-SR501 PIR and adjusted also and various radio but all gave the same result.
/** * The MySensors Arduino library handles the wireless radio link and protocol * between your home built sensors/actuators and HA controller of choice. * The sensors forms a self healing radio network with optional repeaters. Each * repeater and gateway builds a routing tables in EEPROM which keeps track of the * network topology allowing messages to be routed to nodes. * * Created by Henrik Ekblad <henrik.ekblad@mysensors.org> * Copyright (C) 2013-2015 Sensnology AB * Full contributor list: https://github.com/mysensors/Arduino/graphs/contributors * * Documentation: http://www.mysensors.org * Support Forum: http://forum.mysensors.org * * This program is free software; you can redistribute it and/or * modify it under the terms of the GNU General Public License * version 2 as published by the Free Software Foundation. * ******************************* * * REVISION HISTORY * Version 1.0 - Henrik Ekblad * * DESCRIPTION * Motion Sensor example using HC-SR501 * http://www.mysensors.org/build/motion * */ // Enable debug prints // #define MY_DEBUG // Enable and select radio type attached #define MY_RADIO_NRF24 //#define MY_RADIO_RFM69 #include <SPI.h> #include <MySensors.h> unsigned long SLEEP_TIME = 120000; // Sleep time between reports (in milliseconds) #define DIGITAL_INPUT_SENSOR 3 // The digital input you attached your motion sensor. (Only 2 and 3 generates interrupt!) #define CHILD_ID 1 // Id of the sensor child // Initialize motion message MyMessage msg(CHILD_ID, V_TRIPPED); void setup() { pinMode(DIGITAL_INPUT_SENSOR, INPUT); // sets the motion sensor digital pin as input } void presentation() { // Send the sketch version information to the gateway and Controller sendSketchInfo("Motion Sensor", "1.0"); // Register all sensors to gw (they will be created as child devices) present(CHILD_ID, S_MOTION); } void loop() { // Read digital motion value boolean tripped = digitalRead(DIGITAL_INPUT_SENSOR) == HIGH; Serial.println(tripped); send(msg.set(tripped?"1":"0")); // Send tripped value to gw // Sleep until interrupt comes in on motion sensor. Send update every two minute. sleep(digitalPinToInterrupt(DIGITAL_INPUT_SENSOR), CHANGE, SLEEP_TIME); } -
"Choose the Serial Port" error with MySensors and RFXtrx433?Do you have this one?
I don`t have a second hub to try with so I need to buy a new one...
-
"Choose the Serial Port" error with MySensors and RFXtrx433?I borrow this thread...
When I plug in my (mysensor Gateway) direct into vera edge it works perfect.
When I plug in my (RFXtrx) direct into vera edge it works perfect.When I connect them to my usb hub that I bought, no one of them will work?
Mysensors GW are not changing when I click on start and stop for inclusion mode.
RFXtrx are not sending commands to the lamps. I click on one lamp that is off, and nothing happends.It is a 4-ports 3.0 USB hub with separate power suply, brand new.
Could someone help me?
-
💬 RFID Lock SensorHas anyone got this http://www.ebay.com/itm/271316626820?rmvSB=true to work with NFC and Android phone?
-
💬 RFID Lock SensorIt was just that easy as a broken radio. Thank you for your help to get me think in other ways :)
-
💬 RFID Lock Sensor@mfalkvidd I`m using nano as serial GW. I didn´t have any trouble with GW for a long time now.
0;255;3;0;9;Starting gateway (RNNGA-, 2.0.0)
0;255;3;0;9;TSM:INIT
0;255;3;0;9;TSM:RADIO:OK
0;255;3;0;9;TSM:GW MODE
0;255;3;0;9;TSM:READY
0;255;3;0;14;Gateway startup complete.
0;255;0;0;18;2.0.0
0;255;3;0;9;No registration required
0;255;3;0;9;Init complete, id=0, parent=0, distance=0, registration=1
Should I install some XML in my vera edge to get this sensor to work?
If I read the guide for this I will take it as GW has nothing to do with RFID until I have set the key code for the tags in the scetch and after that I implement the sensor to my vera? -
💬 RFID Lock SensorI have followed the guide here (https://www.mysensors.org/build/rfid) to the letter. Yes, it could be me that have problems but this isn´t so hard project. Feels like something is missing?
In the description it says:
"To find out the unique ID of your tag just run the example while looking at serial monitor. Hold tag in front of reader and your identifier should pop up."
This I did, but the monitor don`t show anything, just this
Starting sensor (RNNNA-, 2.0.0)
TSM:INIT
TSM:RADIO:OK
TSM:FPAR
TSP:MSG:SEND 255-255-255-255 s=255,c=3,t=7,pt=0,l=0,sg=0,ft=0,st=bc:
TSM:FPAR
TSP:MSG:SEND 255-255-255-255 s=255,c=3,t=7,pt=0,l=0,sg=0,ft=0,st=bc:
TSM:FPAR
TSP:MSG:SEND 255-255-255-255 s=255,c=3,t=7,pt=0,l=0,sg=0,ft=0,st=bc:
TSM:FPAR
TSP:MSG:SEND 255-255-255-255 s=255,c=3,t=7,pt=0,l=0,sg=0,ft=0,st=bc:
!TSM:FPAR:FAIL
!TSM:FAILURE
TSM:PDT
... And yes, I have switched the little pin to I2C on my PN532 RFID reader.
-
💬 RFID Lock Sensor -
RFID Lock Sensor/Actuator (1.4)I have problem with this.
Nothing happends when tag is over the reader? I can´t see anything special in serial monitor.
Starting sensor (RNNNA-, 2.0.0)
TSM:INIT
TSM:RADIO:OK
TSM:FPAR
TSP:MSG:SEND 255-255-255-255 s=255,c=3,t=7,pt=0,l=0,sg=0,ft=0,st=bc:
TSM:FPAR
TSP:MSG:SEND 255-255-255-255 s=255,c=3,t=7,pt=0,l=0,sg=0,ft=0,st=bc:
TSM:FPAR
TSP:MSG:SEND 255-255-255-255 s=255,c=3,t=7,pt=0,l=0,sg=0,ft=0,st=bc:
TSM:FPAR
TSP:MSG:SEND 255-255-255-255 s=255,c=3,t=7,pt=0,l=0,sg=0,ft=0,st=bc:
!TSM:FPAR:FAIL
!TSM:FAILURE
TSM:PDT
Please help me someone.
-
RFID Garage door openerPlease, I would also like to see your code if it possible.
-
Battery status in scetch?Hmm, not really.
On my fibaro sensors I have battery status on the sensors. Why is it like that?
Don`t they have nodes?
-
Battery status in scetch?I think I have fixed this by my own without any coding knowledge. LOL
But one thing I don`t understand.
Why is the battery status symbol showed on the node and not the sensor?
-
Battery status in scetch?I want to have the oportunity to see battery status in my controller for my BinarySwitchSleepSensor.
Therefore I wounder if someone could help me to take does needed parts from this one:
/**
 * The MySensors Arduino library handles the wireless radio link and protocol
 * between your home built sensors/actuators and HA controller of choice.
 * The sensors forms a self healing radio network with optional repeaters. Each
 * repeater and gateway builds a routing tables in EEPROM which keeps track of the
 * network topology allowing messages to be routed to nodes.
 *
 * Created by Henrik Ekblad <henrik.ekblad@mysensors.org>
 * Copyright (C) 2013-2015 Sensnology AB
 * Full contributor list: https://github.com/mysensors/Arduino/graphs/contributors
 *
 * Documentation: http://www.mysensors.org
 * Support Forum: http://forum.mysensors.org
 *
 * This program is free software; you can redistribute it and/or
 * modify it under the terms of the GNU General Public License
 * version 2 as published by the Free Software Foundation.
 *
 *******************************
 *
 * DESCRIPTION
 *
 * This is an example that demonstrates how to report the battery level for a sensor
 * Instructions for measuring battery capacity on A0 are available here:
 * http://www.mysensors.org/build/battery
 *
 */


// Enable debug prints to serial monitor
#define MY_DEBUG

// Enable and select radio type attached
#define MY_RADIO_NRF24
//#define MY_RADIO_RFM69

#include <SPI.h>
#include <MySensors.h>

int BATTERY_SENSE_PIN = A0;  // select the input pin for the battery sense point

unsigned long SLEEP_TIME = 900000;  // sleep time between reads (seconds * 1000 milliseconds)
int oldBatteryPcnt = 0;

void setup()
{
   // use the 1.1 V internal reference
#if defined(__AVR_ATmega2560__)
   analogReference(INTERNAL1V1);
#else
   analogReference(INTERNAL);
#endif
}

void presentation() {
   // Send the sketch version information to the gateway and Controller
   sendSketchInfo("Battery Meter", "1.0");
}

void loop()
{
   // get the battery Voltage
   int sensorValue = analogRead(BATTERY_SENSE_PIN);
   #ifdef MY_DEBUG
   Serial.println(sensorValue);
   #endif

   // 1M, 470K divider across battery and using internal ADC ref of 1.1V
   // Sense point is bypassed with 0.1 uF cap to reduce noise at that point
   // ((1e6+470e3)/470e3)*1.1 = Vmax = 3.44 Volts
   // 3.44/1023 = Volts per bit = 0.003363075

   int batteryPcnt = sensorValue / 10;

   #ifdef MY_DEBUG
   float batteryV  = sensorValue * 0.003363075;
   Serial.print("Battery Voltage: ");
   Serial.print(batteryV);
   Serial.println(" V");

   Serial.print("Battery percent: ");
   Serial.print(batteryPcnt);
   Serial.println(" %");
   #endif

   if (oldBatteryPcnt != batteryPcnt) {
     // Power up radio after sleep
     sendBatteryLevel(batteryPcnt);
     oldBatteryPcnt = batteryPcnt;
   }
   sleep(SLEEP_TIME);
}
To this one...
/**
 * The MySensors Arduino library handles the wireless radio link and protocol
 * between your home built sensors/actuators and HA controller of choice.
 * The sensors forms a self healing radio network with optional repeaters. Each
 * repeater and gateway builds a routing tables in EEPROM which keeps track of the
 * network topology allowing messages to be routed to nodes.
 *
 * Created by Henrik Ekblad <henrik.ekblad@mysensors.org>
 * Copyright (C) 2013-2015 Sensnology AB
 * Full contributor list: https://github.com/mysensors/Arduino/graphs/contributors
 *
 * Documentation: http://www.mysensors.org
 * Support Forum: http://forum.mysensors.org
 *
 * This program is free software; you can redistribute it and/or
 * modify it under the terms of the GNU General Public License
 * version 2 as published by the Free Software Foundation.
 *
 *******************************
 *
 * DESCRIPTION
 *
 * Interrupt driven binary switch example with dual interrupts
 * Author: Patrick 'Anticimex' Fallberg
 * Connect one button or door/window reed switch between
 * digitial I/O pin 3 (BUTTON_PIN below) and GND and the other
 * one in similar fashion on digital I/O pin 2.
 * This example is designed to fit Arduino Nano/Pro Mini
 *
 */


// Enable debug prints to serial monitor
#define MY_DEBUG

// Enable and select radio type attached
#define MY_RADIO_NRF24
//#define MY_RADIO_RFM69

#include <SPI.h>
#include <MySensors.h>

#define SKETCH_NAME "Binary Sensor"
#define SKETCH_MAJOR_VER "1"
#define SKETCH_MINOR_VER "0"

#define PRIMARY_CHILD_ID 3
#define SECONDARY_CHILD_ID 4

#define PRIMARY_BUTTON_PIN 2   // Arduino Digital I/O pin for button/reed switch
#define SECONDARY_BUTTON_PIN 3 // Arduino Digital I/O pin for button/reed switch

#if (PRIMARY_BUTTON_PIN < 2 || PRIMARY_BUTTON_PIN > 3)
#error PRIMARY_BUTTON_PIN must be either 2 or 3 for interrupts to work
#endif
#if (SECONDARY_BUTTON_PIN < 2 || SECONDARY_BUTTON_PIN > 3)
#error SECONDARY_BUTTON_PIN must be either 2 or 3 for interrupts to work
#endif
#if (PRIMARY_BUTTON_PIN == SECONDARY_BUTTON_PIN)
#error PRIMARY_BUTTON_PIN and BUTTON_PIN2 cannot be the same
#endif
#if (PRIMARY_CHILD_ID == SECONDARY_CHILD_ID)
#error PRIMARY_CHILD_ID and SECONDARY_CHILD_ID cannot be the same
#endif


// Change to V_LIGHT if you use S_LIGHT in presentation below
MyMessage msg(PRIMARY_CHILD_ID, V_TRIPPED);
MyMessage msg2(SECONDARY_CHILD_ID, V_TRIPPED);

void setup()
{
  // Setup the buttons
  pinMode(PRIMARY_BUTTON_PIN, INPUT);
  pinMode(SECONDARY_BUTTON_PIN, INPUT);

  // Activate internal pull-ups
  digitalWrite(PRIMARY_BUTTON_PIN, HIGH);
  digitalWrite(SECONDARY_BUTTON_PIN, HIGH);
}

void presentation() {
  // Send the sketch version information to the gateway and Controller
  sendSketchInfo(SKETCH_NAME, SKETCH_MAJOR_VER "." SKETCH_MINOR_VER);

  // Register binary input sensor to sensor_node (they will be created as child devices)
  // You can use S_DOOR, S_MOTION or S_LIGHT here depending on your usage.
  // If S_LIGHT is used, remember to update variable type you send in. See "msg" above.
  present(PRIMARY_CHILD_ID, S_DOOR);
  present(SECONDARY_CHILD_ID, S_DOOR);
}

// Loop will iterate on changes on the BUTTON_PINs
void loop()
{
  uint8_t value;
  static uint8_t sentValue=2;
  static uint8_t sentValue2=2;

  // Short delay to allow buttons to properly settle
  sleep(5);

  value = digitalRead(PRIMARY_BUTTON_PIN);

  if (value != sentValue) {
     // Value has changed from last transmission, send the updated value
     send(msg.set(value==HIGH ? 1 : 0));
     sentValue = value;
  }

  value = digitalRead(SECONDARY_BUTTON_PIN);

  if (value != sentValue2) {
     // Value has changed from last transmission, send the updated value
     send(msg2.set(value==HIGH ? 1 : 0));
     sentValue2 = value;
  }

  // Sleep until something happens with the sensor
  sleep(PRIMARY_BUTTON_PIN-2, CHANGE, SECONDARY_BUTTON_PIN-2, CHANGE, 0);
}
Regards
Mikael
-
Vera - Can't create GW device with UI7 files@korttoma said:
"Can´t Detect Device"
This was fixed for me when I changed all three CommFailure.
CommFailure = 0
CommFailureTime = 0
CommFailureAlarm= 0Thanks a lot!
-
Sensbender Micro BinaryDoorSensorI´m tired of my regular pro mini with an binarydoorsensor scetch that just take to much of batteries.
So now have the sensbender micro cards came home and I`m just finished the first one and trying to program it with no luck.
This error message I get when trying to upload the standard scetch for sensbender from Arduino.
Someone have any idea?
And I also wounder if I just can upload the mysensors scetches (binaryswitchsleepsensor) to sensbender board?
Arduino:1.6.13 (Windows 10), Kort:"Sensebender Micro, Atmega328 1Mhz" java.io.IOException: Access is denied at java.io.WinNTFileSystem.createFileExclusively(Native Method) at java.io.File.createTempFile(File.java:2024) at processing.app.BaseNoGui.saveFile(BaseNoGui.java:1067) at processing.app.SketchFile.save(SketchFile.java:287) at processing.app.Sketch.save(Sketch.java:138) at processing.app.SketchController.save(SketchController.java:344) at processing.app.Editor.handleSave2(Editor.java:2044) at processing.app.Editor.handleSave(Editor.java:2024) at processing.app.Editor.handleExport(Editor.java:2163) at processing.app.EditorToolbar.mousePressed(EditorToolbar.java:378) at java.awt.Component.processMouseEvent(Component.java:6530) at javax.swing.JComponent.processMouseEvent(JComponent.java:3324) at java.awt.Component.processEvent(Component.java:6298) at java.awt.Container.processEvent(Container.java:2236) at java.awt.Component.dispatchEventImpl(Component.java:4889) at java.awt.Container.dispatchEventImpl(Container.java:2294) at java.awt.Component.dispatchEvent(Component.java:4711) at java.awt.LightweightDispatcher.retargetMouseEvent(Container.java:4888) at java.awt.LightweightDispatcher.processMouseEvent(Container.java:4522) at java.awt.LightweightDispatcher.dispatchEvent(Container.java:4466) at java.awt.Container.dispatchEventImpl(Container.java:2280) at java.awt.Window.dispatchEventImpl(Window.java:2746) at java.awt.Component.dispatchEvent(Component.java:4711) at java.awt.EventQueue.dispatchEventImpl(EventQueue.java:758) at java.awt.EventQueue.access$500(EventQueue.java:97) at java.awt.EventQueue$3.run(EventQueue.java:709) at java.awt.EventQueue$3.run(EventQueue.java:703) at java.security.AccessController.doPrivileged(Native Method) at java.security.ProtectionDomain$JavaSecurityAccessImpl.doIntersectionPrivilege(ProtectionDomain.java:76) at java.security.ProtectionDomain$JavaSecurityAccessImpl.doIntersectionPrivilege(ProtectionDomain.java:86) at java.awt.EventQueue$4.run(EventQueue.java:731) at java.awt.EventQueue$4.run(EventQueue.java:729) at java.security.AccessController.doPrivileged(Native Method) at java.security.ProtectionDomain$JavaSecurityAccessImpl.doIntersectionPrivilege(ProtectionDomain.java:76) at java.awt.EventQueue.dispatchEvent(EventQueue.java:728) at java.awt.EventDispatchThread.pumpOneEventForFilters(EventDispatchThread.java:201) at java.awt.EventDispatchThread.pumpEventsForFilter(EventDispatchThread.java:116) at java.awt.EventDispatchThread.pumpEventsForHierarchy(EventDispatchThread.java:105) at java.awt.EventDispatchThread.pumpEvents(EventDispatchThread.java:101) at java.awt.EventDispatchThread.pumpEvents(EventDispatchThread.java:93) at java.awt.EventDispatchThread.run(EventDispatchThread.java:82) Access is denied C:\Program Files (x86)\Arduino\arduino-builder -dump-prefs -logger=machine -hardware C:\Program Files (x86)\Arduino\hardware -hardware C:\Users\mronn\AppData\Local\Arduino15\packages -tools C:\Program Files (x86)\Arduino\tools-builder -tools C:\Program Files (x86)\Arduino\hardware\tools\avr -tools C:\Users\mronn\AppData\Local\Arduino15\packages -built-in-libraries C:\Program Files (x86)\Arduino\libraries -libraries C:\Users\mronn\Documents\Arduino\libraries -fqbn=MySensors:avr:MysensorsMicro:cpu=1Mhz -ide-version=10613 -build-path C:\Users\mronn\AppData\Local\Temp\arduino_build_377711 -warnings=all -prefs=build.warn_data_percentage=75 -prefs=runtime.tools.avr-gcc.path=C:\Program Files (x86)\Arduino\hardware\tools\avr -prefs=runtime.tools.avrdude.path=C:\Program Files (x86)\Arduino\hardware\tools\avr -verbose C:\Users\mronn\AppData\Local\Temp\arduino_modified_sketch_459628\SensbenderMicro.ino C:\Program Files (x86)\Arduino\arduino-builder -compile -logger=machine -hardware C:\Program Files (x86)\Arduino\hardware -hardware C:\Users\mronn\AppData\Local\Arduino15\packages -tools C:\Program Files (x86)\Arduino\tools-builder -tools C:\Program Files (x86)\Arduino\hardware\tools\avr -tools C:\Users\mronn\AppData\Local\Arduino15\packages -built-in-libraries C:\Program Files (x86)\Arduino\libraries -libraries C:\Users\mronn\Documents\Arduino\libraries -fqbn=MySensors:avr:MysensorsMicro:cpu=1Mhz -ide-version=10613 -build-path C:\Users\mronn\AppData\Local\Temp\arduino_build_377711 -warnings=all -prefs=build.warn_data_percentage=75 -prefs=runtime.tools.avr-gcc.path=C:\Program Files (x86)\Arduino\hardware\tools\avr -prefs=runtime.tools.avrdude.path=C:\Program Files (x86)\Arduino\hardware\tools\avr -verbose C:\Users\mronn\AppData\Local\Temp\arduino_modified_sketch_459628\SensbenderMicro.ino Using board 'MysensorsMicro' from platform in folder: C:\Users\mronn\AppData\Local\Arduino15\packages\MySensors\hardware\avr\1.0.1 Using core 'arduino' from platform in folder: C:\Program Files (x86)\Arduino\hardware\arduino\avr Detecting libraries used... "C:\Program Files (x86)\Arduino\hardware\tools\avr/bin/avr-g++" -c -g -Os -w -std=gnu++11 -fno-exceptions -ffunction-sections -fdata-sections -fno-threadsafe-statics -w -x c++ -E -CC -mmcu=atmega328p -DF_CPU=1000000L -DARDUINO=10613 -DARDUINO_AVR_MICRO8 -DARDUINO_ARCH_AVR "-IC:\Program Files (x86)\Arduino\hardware\arduino\avr\cores\arduino" "-IC:\Users\mronn\AppData\Local\Arduino15\packages\MySensors\hardware\avr\1.0.1\variants\micro" "C:\Users\mronn\AppData\Local\Temp\arduino_build_377711\sketch\SensbenderMicro.ino.cpp" -o "nul" "C:\Program Files (x86)\Arduino\hardware\tools\avr/bin/avr-g++" -c -g -Os -w -std=gnu++11 -fno-exceptions -ffunction-sections -fdata-sections -fno-threadsafe-statics -w -x c++ -E -CC -mmcu=atmega328p -DF_CPU=1000000L -DARDUINO=10613 -DARDUINO_AVR_MICRO8 -DARDUINO_ARCH_AVR "-IC:\Program Files (x86)\Arduino\hardware\arduino\avr\cores\arduino" "-IC:\Users\mronn\AppData\Local\Arduino15\packages\MySensors\hardware\avr\1.0.1\variants\micro" "-IC:\Program Files (x86)\Arduino\hardware\arduino\avr\libraries\SPI\src" "C:\Users\mronn\AppData\Local\Temp\arduino_build_377711\sketch\SensbenderMicro.ino.cpp" -o "nul" "C:\Program Files (x86)\Arduino\hardware\tools\avr/bin/avr-g++" -c -g -Os -w -std=gnu++11 -fno-exceptions -ffunction-sections -fdata-sections -fno-threadsafe-statics -w -x c++ -E -CC -mmcu=atmega328p -DF_CPU=1000000L -DARDUINO=10613 -DARDUINO_AVR_MICRO8 -DARDUINO_ARCH_AVR "-IC:\Program Files (x86)\Arduino\hardware\arduino\avr\cores\arduino" "-IC:\Users\mronn\AppData\Local\Arduino15\packages\MySensors\hardware\avr\1.0.1\variants\micro" "-IC:\Program Files (x86)\Arduino\hardware\arduino\avr\libraries\SPI\src" "-IC:\Users\mronn\Documents\Arduino\libraries\MySensors" "C:\Users\mronn\AppData\Local\Temp\arduino_build_377711\sketch\SensbenderMicro.ino.cpp" -o "nul" "C:\Program Files (x86)\Arduino\hardware\tools\avr/bin/avr-g++" -c -g -Os -w -std=gnu++11 -fno-exceptions -ffunction-sections -fdata-sections -fno-threadsafe-statics -w -x c++ -E -CC -mmcu=atmega328p -DF_CPU=1000000L -DARDUINO=10613 -DARDUINO_AVR_MICRO8 -DARDUINO_ARCH_AVR "-IC:\Program Files (x86)\Arduino\hardware\arduino\avr\cores\arduino" "-IC:\Users\mronn\AppData\Local\Arduino15\packages\MySensors\hardware\avr\1.0.1\variants\micro" "-IC:\Program Files (x86)\Arduino\hardware\arduino\avr\libraries\SPI\src" "-IC:\Users\mronn\Documents\Arduino\libraries\MySensors" "-IC:\Program Files (x86)\Arduino\hardware\arduino\avr\libraries\Wire\src" "C:\Users\mronn\AppData\Local\Temp\arduino_build_377711\sketch\SensbenderMicro.ino.cpp" -o "nul" "C:\Program Files (x86)\Arduino\hardware\tools\avr/bin/avr-g++" -c -g -Os -w -std=gnu++11 -fno-exceptions -ffunction-sections -fdata-sections -fno-threadsafe-statics -w -x c++ -E -CC -mmcu=atmega328p -DF_CPU=1000000L -DARDUINO=10613 -DARDUINO_AVR_MICRO8 -DARDUINO_ARCH_AVR "-IC:\Program Files (x86)\Arduino\hardware\arduino\avr\cores\arduino" "-IC:\Users\mronn\AppData\Local\Arduino15\packages\MySensors\hardware\avr\1.0.1\variants\micro" "-IC:\Program Files (x86)\Arduino\hardware\arduino\avr\libraries\SPI\src" "-IC:\Users\mronn\Documents\Arduino\libraries\MySensors" "-IC:\Program Files (x86)\Arduino\hardware\arduino\avr\libraries\Wire\src" "C:\Users\mronn\AppData\Local\Temp\arduino_build_377711\sketch\SensbenderMicro.ino.cpp" -o "C:\Users\mronn\AppData\Local\Temp\arduino_build_377711\preproc\ctags_target_for_gcc_minus_e.cpp" C:\Users\mronn\AppData\Local\Temp\arduino_modified_sketch_459628\SensbenderMicro.ino:61:20: fatal error: SI7021.h: No such file or directory #include <SI7021.h> ^ compilation terminated. Using library SPI at version 1.0 in folder: C:\Program Files (x86)\Arduino\hardware\arduino\avr\libraries\SPI Using library MySensors at version 2.0.0 in folder: C:\Users\mronn\Documents\Arduino\libraries\MySensors Using library Wire at version 1.0 in folder: C:\Program Files (x86)\Arduino\hardware\arduino\avr\libraries\Wire exit status 1 Error compiling for board Sensebender Micro. Invalid library found in C:\Program Files (x86)\Arduino\libraries\SensbenderMicro: C:\Program Files (x86)\Arduino\libraries\SensbenderMicro Invalid library found in C:\Program Files (x86)\Arduino\libraries\SensbenderMicro: C:\Program Files (x86)\Arduino\libraries\SensbenderMicro``` -
Vera - Can't create GW device with UI7 files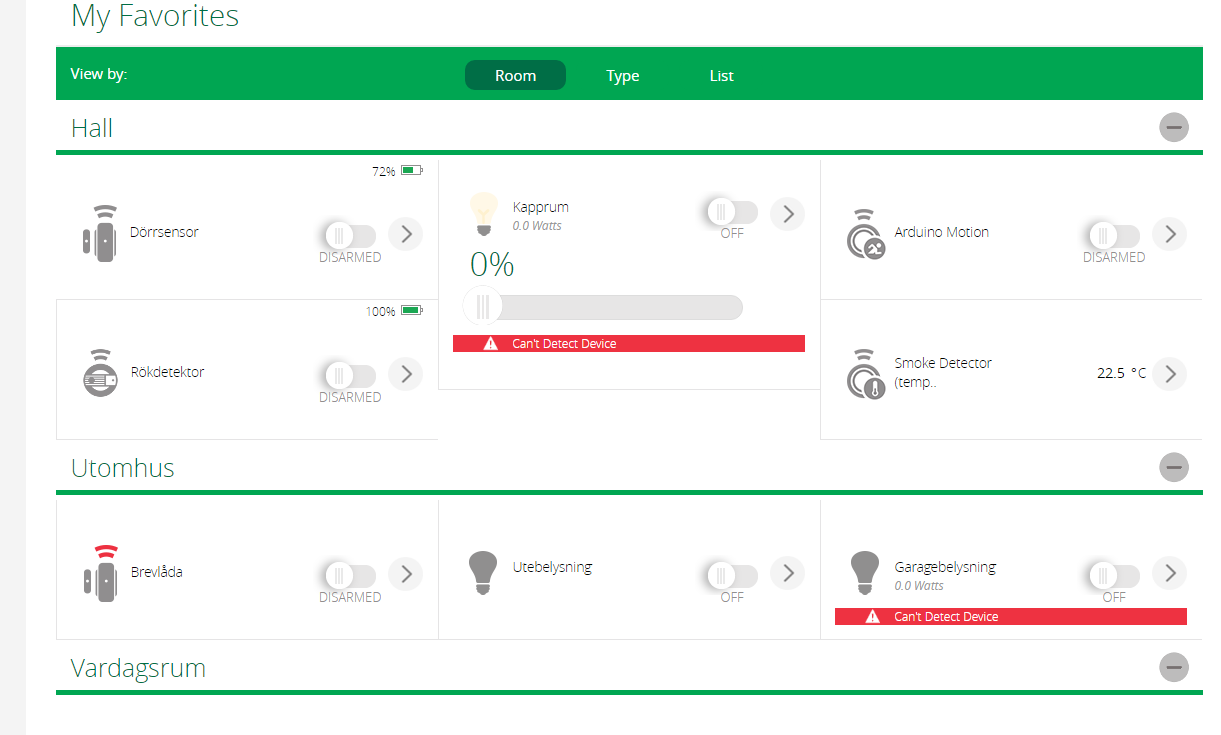
So, to get rid of my error messages "Can´t Detect Device" I have to build a Ethernet gateway instead of having the serial gateway?
-
Including new sensor problemThe only thing I changed in parts is that I use a NRF24L01+ with antenna. But I don`t think I need to change anything in the code for that?
And I use a Arduino Pro mini 3.3V with two AA Batteries.